
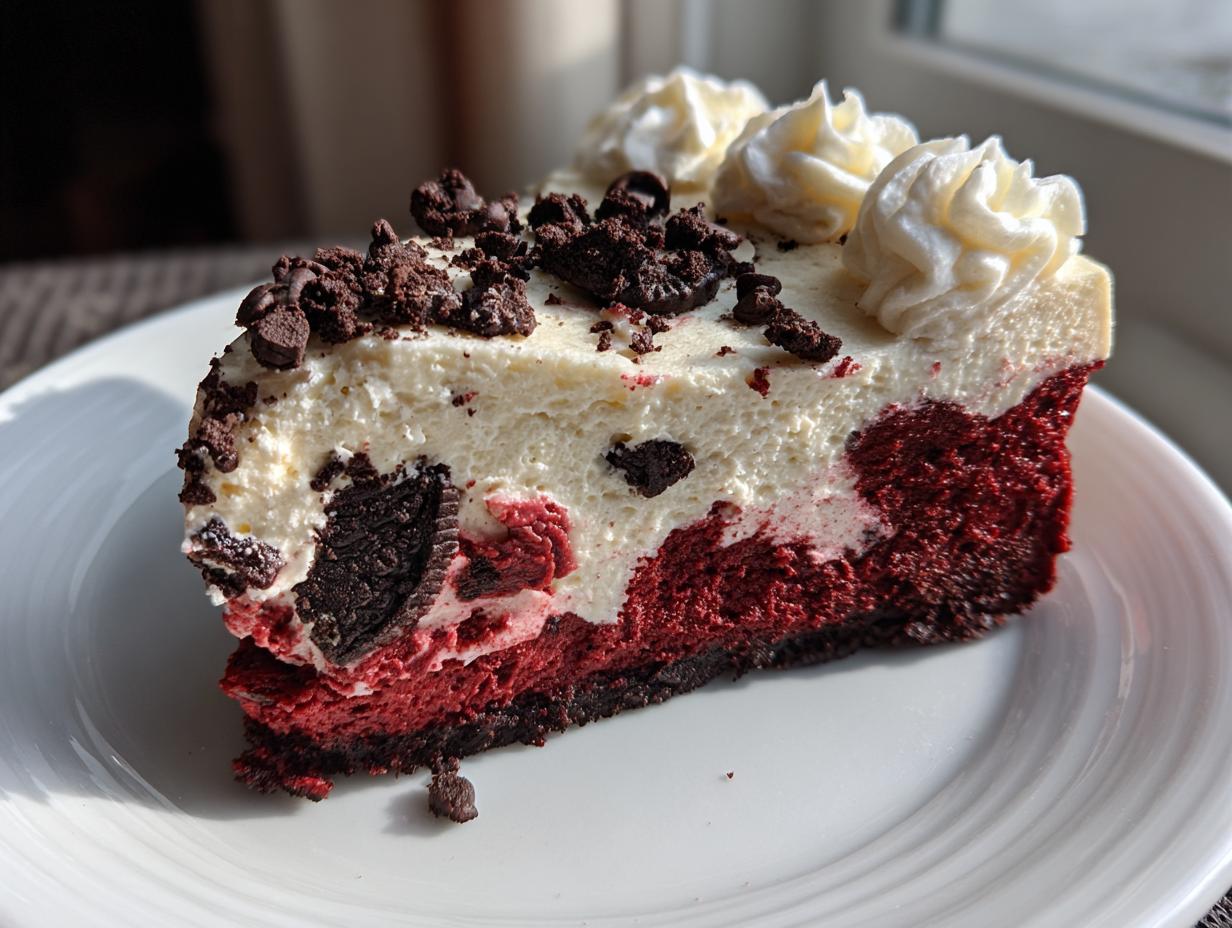
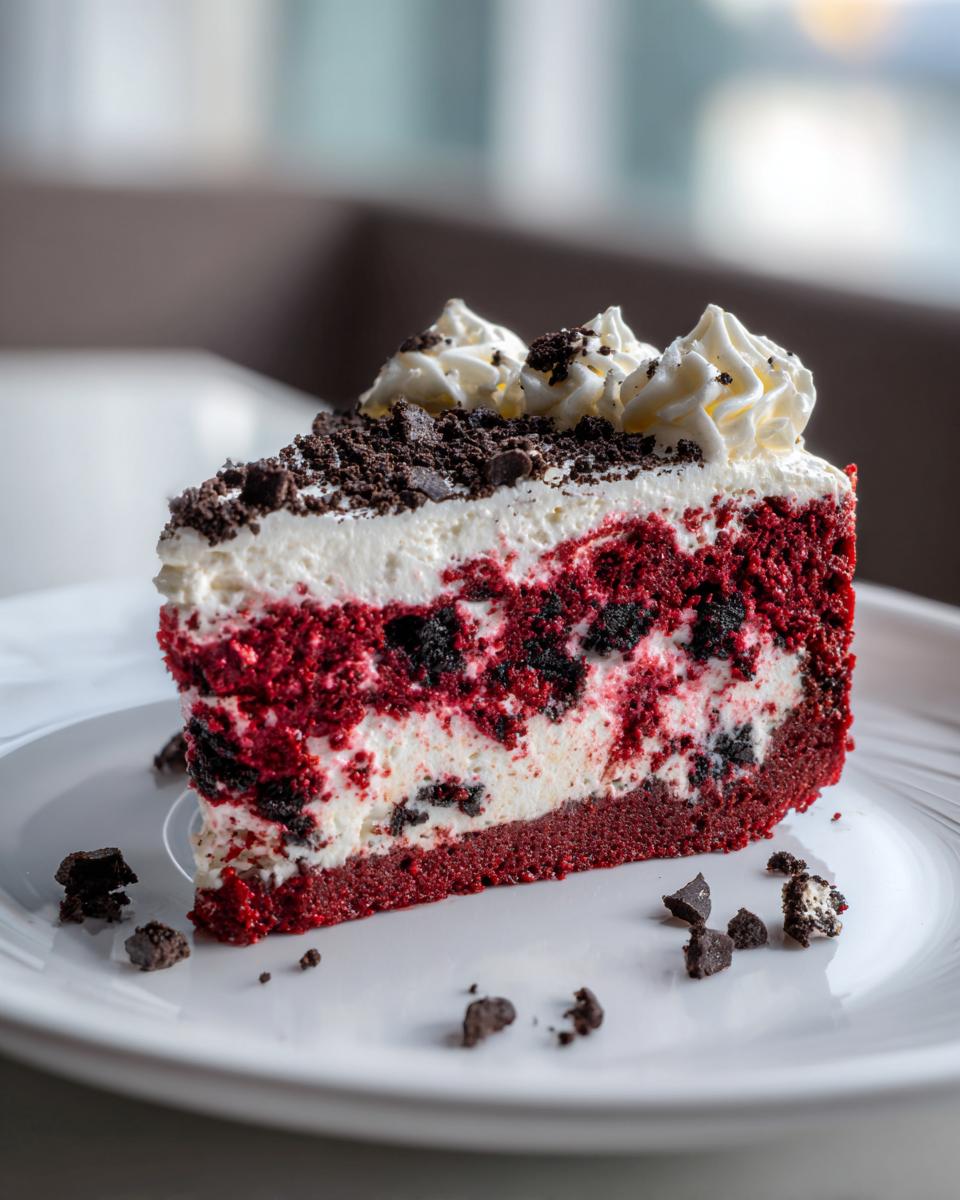
When I think about truly decadent desserts, the ones that make you pause before taking that first bite, it’s always something layered, something impressive. That’s exactly what we have here today! This red velvet oreo cheesecake isn’t just dessert; it’s a showstopper that manages to deliver on two absolute favorites—that deep, slightly tangy red velvet flavor and the satisfying crunch of an Oreo in every bite. Believe me, baking this might look complicated, but remember what I always tell my students: with patience and clear steps, even the fanciest bakes are achievable. I’ve broken down every confusing part of cream cheese baking into simple pieces so you can bring this ultimate combination dessert right into your own kitchen and serve something truly memorable. If you love this flavor profile, you definitely need to check out my recipe for Red Velvet Bundt Cake sometime soon!
- Why This Ultimate Red Velvet Oreo Cheesecake Recipe Works
- Equipment Needed for Your Amazing Cheesecake
- Gathering Ingredients for the red velvet oreo cheesecake
- Step-by-Step Instructions for the Baked Red Velvet Oreo Cheesecake
- Tips for a Crack-Free Red Velvet Oreo Cheesecake
- Variations for Your Layered Red Velvet Oreo Dessert
- Storage and Serving Suggestions for this Ultimate Celebration Cheesecake
- Frequently Asked Questions about the red velvet oreo cheesecake Recipe
- Nutritional Estimates for this Decadent Layered Dessert
Why This Ultimate Red Velvet Oreo Cheesecake Recipe Works
I know, I know—cheesecakes can be scary! But this recipe is tried and true. I spent years teaching patience in my third-grade classroom, and that translates right here: take your time, follow the steps, and you end up with perfection. This dessert is reliable because we focus on technique, not guesswork, ensuring you get that incredible result every single time. You’ll love how balanced this dessert truly is!
- The texture is unbelievably smooth and creamy, never grainy.
- The color is a rich, deep red velvet shade—not pink!
- The balance of chocolate, tanginess, and cookie crunch is just right.
If you’ve ever worried about a collapsed or cracked top, take a peek at my guide on making creamy cheesecake; it has all the insider secrets for success, and many of those principles are used here!
Achieving the Perfect Creamy Texture
The single most important tool to keep your cheesecake smooth is that water bath we use during baking. It sounds fussy, I promise it’s not! Essentially, the steam surrounding your pan gently cooks the filling rather than blasting it with direct heat. This even, moist cooking environment is what guarantees you won’t get those awful cracks across the top. It keeps the ingredients happy and results in that melt-in-your-mouth texture we all dream about when making a rich cream cheese dessert.
Tips for the Best Red Velvet Oreo Cheesecake Color and Flavor
For the best appearance in this layered dessert, we use gel food coloring specifically. It gives you that gorgeous, vibrant red color without adding unnecessary liquid that could thin out your rich cheesecake batter. The cocoa powder isn’t just for show, either! It’s essential because it enhances the chocolate flavor, pushing that taste closer to a true, classic red velvet profile. Trust me, this combination makes the red pop against the dark Oreo pieces beautifully!
Equipment Needed for Your Amazing Cheesecake
Now, let’s talk gear! Making layered, decadent desserts like this means we need a few specific tools ready on the counter before we even think about turning on the mixer. The good news is most of this is probably already tucked away in your cabinets. We aren’t using any fancy molds or weird gadgets here—just dependable kitchen workhorses.
First and most importantly, you absolutely must have a 9-inch springform pan. This pan is what lets us beautifully release the sides when the cheesecake is fully chilled, saving you a lot of heartache trying to get a clean slice. Don’t worry if you don’t have one; they aren’t expensive, and once you start baking cheesecakes, you’ll wonder how you lived without it!
The next thing you need is a large roasting pan that is significantly bigger than your 9-inch springform pan. This is crucial because we are going to use the water bath method to ensure our filling bakes perfectly evenly. You need enough space around the springform pan to comfortably pour hot water in without washing half of it over the side. Finally, make sure you have good, strong, heavy-duty aluminum foil. You’ll need several sheets to wrap that springform pan up tight—we don’t want a drop of water seeping in while it bakes, do we?
Gathering Ingredients for the red velvet oreo cheesecake
Baking is all about preparation, and for a showstopper like this, having everything ready makes the process flow beautifully. When you’re working with dairy products like cream cheese, room temperature is your best friend—it’s non-negotiable if you want that smooth, bakery-style finish! I’ve broken down the list by section so you can gather things logically. Remember to grab your favorite Oreos; we’re using them both for the solid chocolate base and mixed into the filling for extra crunch inside that creamy body.
Pay close attention to the notes on *softening* the cream cheese for both the filling and the topping. If it’s cold, you’ll get lumps, and we certainly don’t want that in our rich cream cheese desserts! If you need a recipe that shows you exactly how to get frosting base smooth, check out my guide on the best cream cheese frosting for tips on texture.
For the Oreo Crust
- 1 3/4 cups Oreo cookie crumbs
- 1/2 cup unsalted butter, melted
For the red velvet oreo cheesecake Filling
- 4 (8 ounce) packages cream cheese, softened
- 1 1/2 cups granulated sugar
- 1/4 cup all-purpose flour
- 1 teaspoon vanilla extract
- 1/2 cup sour cream
- 2 large eggs
- 1 teaspoon white vinegar
- 1 tablespoon red food coloring (gel preferred)
- 1 tablespoon unsweetened cocoa powder
- 1 cup crushed Oreo cookies (for filling)
See how that one cup of crushed Oreos is separate from the crumbs for the crust? That’s important! This amount goes right into the batter to give you those lovely, crunchy surprises throughout the cheesecake itself.
For the Cream Cheese Topping
- 1/2 cup heavy cream
- 4 ounces cream cheese (make sure this is fully softened!)
- 1/2 cup powdered sugar
- 1/2 teaspoon vanilla extract
- 1/2 cup mini chocolate chips (for garnish)
Step-by-Step Instructions for the Baked Red Velvet Oreo Cheesecake
Alright, here is where the magic really happens! You’ve got your pans ready, your ingredients measured, and your oven waiting. I’ve made this cheesecake so many times I could probably mix it in my sleep, but that’s only because I learned the right order of operations. This process takes time, especially the chilling part, but trust me, every minute waiting is worth it for that perfect slice of layered dessert!
We need to respect the baking times here. Cheesecakes demand patience! Don’t rush the initial crust bake, and definitely listen to me about turning the oven off and just letting it sit inside for an hour before it even sees the counter. We’ll look at my recipe for the ultimate chocolate cheesecake for more ideas, but the cooling process is the same for all great cheesecakes.
Preparing the Crust and Pan
First things first: get your oven humming at 325 degrees F so it’s perfectly heated when you’re ready. Now, wrap that 9-inch springform pan! You need heavy-duty aluminum foil—use at least two good layers wrapping around the outside bottom and up the sides. This seal is the only defense we have against the water bath leaking in, so make sure it’s tight. Once wrapped, mix your Oreo crumbs and melted butter and press that mixture down firmly into the bottom of the pan. You want a nice, compact base. Pop that into the preheated oven to bake for exactly 10 minutes. After the 10 minutes are up, pull it out and let that crust cool completely while you get the filling ready. Don’t rush this cooling step!
Mixing the Creamy Red Velvet Filling
When we mix the filling base, the goal is smoothness. Start by beating your softened cream cheese, then add the sugar and flour until it’s completely lump-free. After that, mix in the sour cream and vanilla. Now, for the color! In a separate bowl, quickly whisk your eggs, vinegar, cocoa powder, and that lovely red food coloring until the color is uniform—no streaks allowed! When you combine these two bowls, be gentle! Add the red mixture to the cream cheese base and mix only until it’s just combined. Overmixing at this stage brings in too much air, which leads to cracking later. Once it’s uniform in color, carefully fold in that measured cup of crushed Oreos. You just want those cookie bits distributed evenly throughout the red batter.
Baking the Red Velvet Oreo Cheesecake with a Water Bath
Time for the water bath, which I swear by! Place your foil-wrapped springform pan inside a much larger roasting pan. Carefully pour hot tap water into the roasting pan until it comes about halfway up the side of the springform pan. This creates steam insulation. Carefully slide the whole setup into the oven. You’ll bake this for 60 to 75 minutes. You’re looking for the edges to be set—solid when you nudge the pan—but the center should still have a tiny, delicate jiggle, like Jell-O. When the time is up, do not pull the cake out! Turn the oven off completely, prop the door open just a crack with a wooden spoon, and let it cool slowly inside the oven for a full hour. This gradual temperature drop is essential for preventing cracks.
Chilling and Applying the Cream Cheese Frosting
After that hour in the warm oven, take the cheesecake out, remove the foil wrapping and toweling, and let it sit on the counter until it reaches room temperature—maybe another hour. Then, it goes into the fridge, covered lightly, for a minimum of 6 hours. Honestly, overnight is always best for truly setting up this decadent layered dessert. When you’re ready to serve, make the frosting! Whip that heavy cream, the 4 ounces of softened cream cheese, powdered sugar, and vanilla until you get nice, fluffy peaks. Spread that gorgeous, tangy topping evenly over the completely chilled cheesecake, and finally, sprinkle those mini chocolate chips right on top for the perfect finish. You are ready to wow everyone!
Tips for a Crack-Free Red Velvet Oreo Cheesecake
If there’s one thing that makes a gorgeous cheesecake look sad, it’s a crack right down the middle! I want you to have confidence when you bake this spectacular dessert, so let’s talk about preventing those fissures. It all comes down to slow, gentle management of temperature. First, remember what I said about softening your ingredients; cold lumps cause uneven baking, which leads to cracks. Second, the water bath is your non-negotiable insurance policy—that steam keeps the edges from setting faster than the middle!
But the biggest trick? The cool-down period. Don’t shock it by rushing this beauty straight from the hot oven to the cold counter. Letting it hang out inside the slowly cooling oven for that full hour is key. I walk through every detail of keeping cheesecakes perfect over at my guide on easy homemade crack-free cheesecake, but following these three points—room temp ingredients, water bath, and slow cooling—will give you pristine results every time!
Variations for Your Layered Red Velvet Oreo Dessert
Once you master this base recipe for the red velvet oreo cheesecake, the sky’s the limit! If you wanted to switch things up for another special occasion, you could totally experiment with the cookie! Maybe you aren’t feeling Oreos one day? Swap them out for Nutter Butters for a peanut butter kick or use a chocolate wafer cookie for the crust. That really changes the overall flavor profile of your Layered Red Velvet Oreo Dessert.
Another fun thing I love to do sometimes is add a thin layer of chocolate ganache right on top of the chilled cheesecake, just under the cream cheese layer. It deepens that beautiful chocolate note beautifully. If you love red velvet flavor but want something a little different than a cheesecake, you have to try dipping into my wonderful red velvet cake mix cookies!
Storage and Serving Suggestions for this Ultimate Celebration Cheesecake
This gorgeous dessert is best served perfectly chilled. Since it has that lovely cream cheese topping, you must keep any leftovers covered tightly in the refrigerator. It’s actually better the next day, so don’t worry if you have it ready ahead of time! I truly don’t recommend trying to reheat cheesecake; it just messes up that beautiful creamy texture we worked so hard for. For serving this Ultimate Celebration Cheesecake, a steaming hot cup of black coffee or a bright fruit plate cuts through the richness perfectly. If you’re having a party, you might want to whip up a pitcher of my holiday sangria to go alongside!
Frequently Asked Questions about the red velvet oreo cheesecake Recipe
I know folks sometimes have questions when tackling a bigger bake like this one. It’s totally normal! Since we are layering flavors and relying on a water bath, I wanted to clear up a few things to boost your confidence before you dive in. Don’t worry about those technical details; we’re going to tackle them one by one!
Can I make a No Bake Oreo Cheesecake Red Velvet version?
Oh, that’s a great question! While I do have a fantastic no-bake Oreo cheesecake recipe that sets up beautifully in the fridge, this particular red velvet oreo cheesecake relies on the eggs and the slow baking process to fully develop that classic, slightly tangy red velvet flavor and achieve the perfect structure. A no-bake version just won’t give you that deep richness we are shooting for here. Stick with the baking method for this one!
How far in advance can I prepare this red velvet oreo cheesecake?
Because cheesecakes benefit so much from setting time, this is actually a wonderful make-ahead dessert! The entire baked cheesecake, cooled and unwrapped, is best kept covered in the fridge for up to two days. But here’s my personal cadence for the Ultimate Celebration Cheesecake experience: I bake and chill the cheesecake completely. Then, on the morning you plan to serve it, that’s when you whip up the cream cheese topping and spread it over the top before garnishing. That keeps the topping fresh and fluffy!
What is the secret to a Rich Cream Cheese Desserts texture?
If you want that luxurious texture, it boils down to two things we talked about earlier, and they are non-negotiable for truly rich cream cheese desserts! First, your cream cheese must be fully softened to room temperature—no cheating! Second, you must utilize that water bath during baking. The gentle steam cooks the filling evenly from all sides, preventing the edges from setting too quickly and pulling away from the center. That slow, moist heat is the key to creamy perfection!

Nutritional Estimates for this Decadent Layered Dessert
Now, I know that when we make an Ultimate Celebration Cheesecake like this, we aren’t exactly counting every single calorie—we are celebrating! But for those who like to keep track, I’ve pulled together the estimates for a single slice based on the ingredients listed. I always tell folks that home baking can vary wildly depending on the exact brand of cream cheese or how thick you lovingly slather on that topping.
Since this recipe is quite rich due to the multiple layers of cream cheese, butter, and Oreos, these are just helpful starting points. Use these numbers as a general guideline. The real reward here is the joy it brings to the table, not stressing over the macros over one slice!
- Serving Size: 1 slice
- Calories: 550
- Sugar: 45g
- Sodium: 350mg
- Fat: 38g
- Saturated Fat: 22g
- Carbohydrates: 50g
- Protein: 8g
Remember, this is an estimate for one generous serving sliced from the whole dessert. Enjoy every bite!
PrintUltimate Red Velvet Oreo Cheesecake
Make this decadent, layered cheesecake that combines rich red velvet flavor with crunchy Oreo cookie pieces for a memorable dessert.
- Prep Time: 30 min
- Cook Time: 75 min
- Total Time: 9 hours 45 min
- Yield: 12 servings 1x
- Category: Dessert
- Method: Baking
- Cuisine: American
- Diet: Vegetarian
Ingredients
- 1 3/4 cups Oreo cookie crumbs
- 1/2 cup unsalted butter, melted
- 4 (8 ounce) packages cream cheese, softened
- 1 1/2 cups granulated sugar
- 1/4 cup all-purpose flour
- 1 teaspoon vanilla extract
- 1/2 cup sour cream
- 2 large eggs
- 1 teaspoon white vinegar
- 1 tablespoon red food coloring (gel preferred)
- 1 tablespoon unsweetened cocoa powder
- 1 cup crushed Oreo cookies (for filling)
- 1/2 cup heavy cream (for topping)
- 4 ounces cream cheese (for topping)
- 1/2 cup powdered sugar (for topping)
- 1/2 teaspoon vanilla extract (for topping)
- 1/2 cup mini chocolate chips (for garnish)
Instructions
- Preheat your oven to 325 degrees F. Wrap the outside of a 9-inch springform pan tightly with heavy-duty aluminum foil.
- Combine the Oreo cookie crumbs and melted butter. Press this mixture firmly into the bottom of the prepared springform pan to form the crust. Bake for 10 minutes. Let the crust cool completely.
- In a large bowl, beat the softened cream cheese, granulated sugar, and flour until smooth. Mix in the vanilla extract and sour cream.
- In a separate small bowl, whisk together the eggs, vinegar, red food coloring, and cocoa powder until the color is uniform. Gently mix this red mixture into the cream cheese base until just combined. Do not overmix.
- Fold in the 1 cup of crushed Oreo cookies gently. Pour the filling over the cooled crust.
- Place the springform pan inside a larger roasting pan. Carefully pour hot water into the roasting pan until the water reaches halfway up the sides of the springform pan (this is a water bath).
- Bake for 60 to 75 minutes, or until the edges are set but the center still has a slight jiggle.
- Turn off the oven, crack the door open slightly, and let the cheesecake cool inside the oven for 1 hour. This prevents cracking.
- Remove the cheesecake from the water bath and let it cool completely on a wire rack. Once cool, cover and refrigerate for at least 6 hours, or preferably overnight.
- To make the topping, beat the heavy cream, 4 ounces of cream cheese, powdered sugar, and vanilla extract until light and fluffy. Spread this cream cheese frosting over the chilled cheesecake.
- Garnish the top with mini chocolate chips before slicing and serving.
Notes
- Using gel food coloring gives you a deeper, more vibrant red velvet color without thinning the batter.
- A water bath is key for a creamy, crack-free cheesecake texture.
- Make sure all dairy ingredients, especially the cream cheese, are fully softened to avoid lumps in your filling.
Nutrition
- Serving Size: 1 slice
- Calories: 550
- Sugar: 45
- Sodium: 350
- Fat: 38
- Saturated Fat: 22
- Unsaturated Fat: 16
- Trans Fat: 0
- Carbohydrates: 50
- Fiber: 2
- Protein: 8
- Cholesterol: 110