
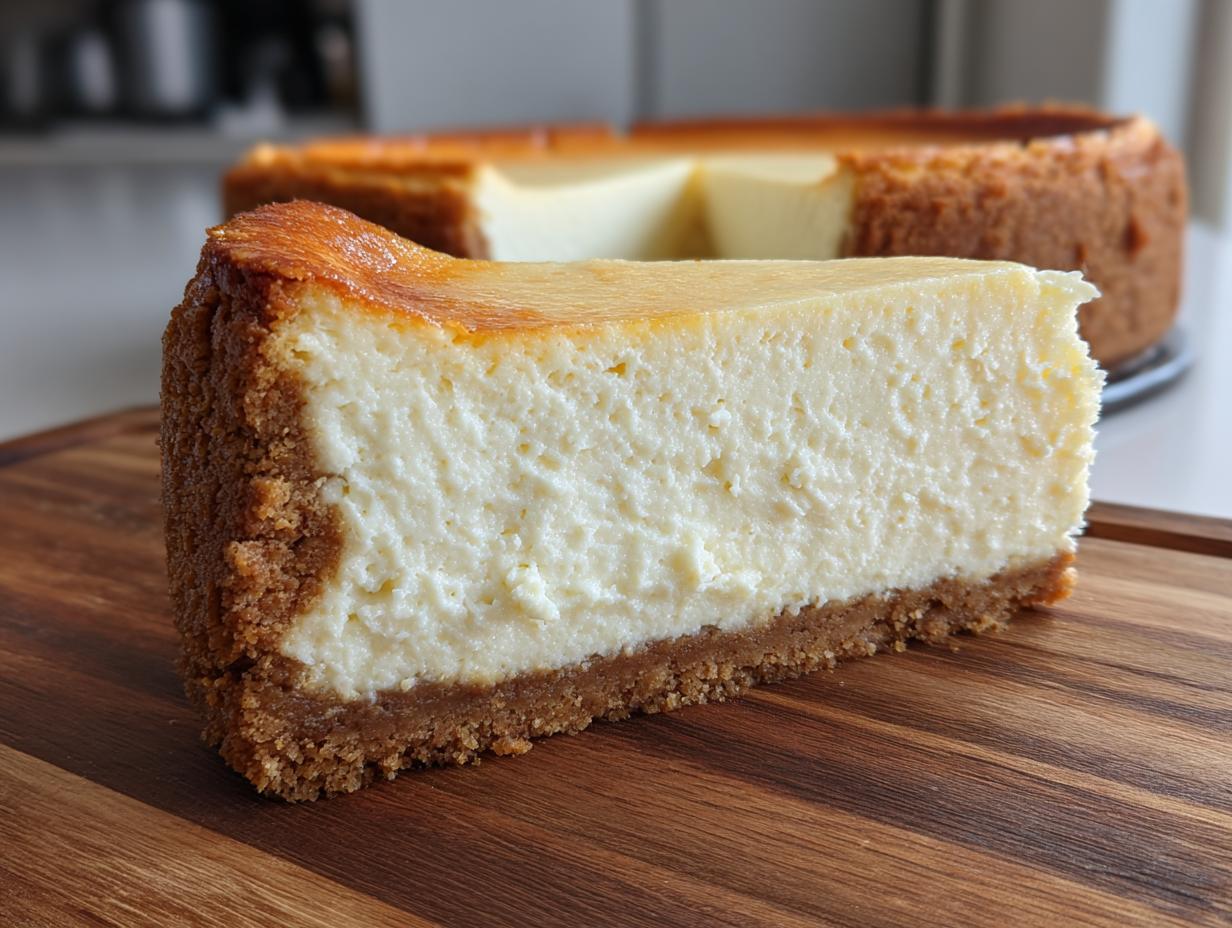
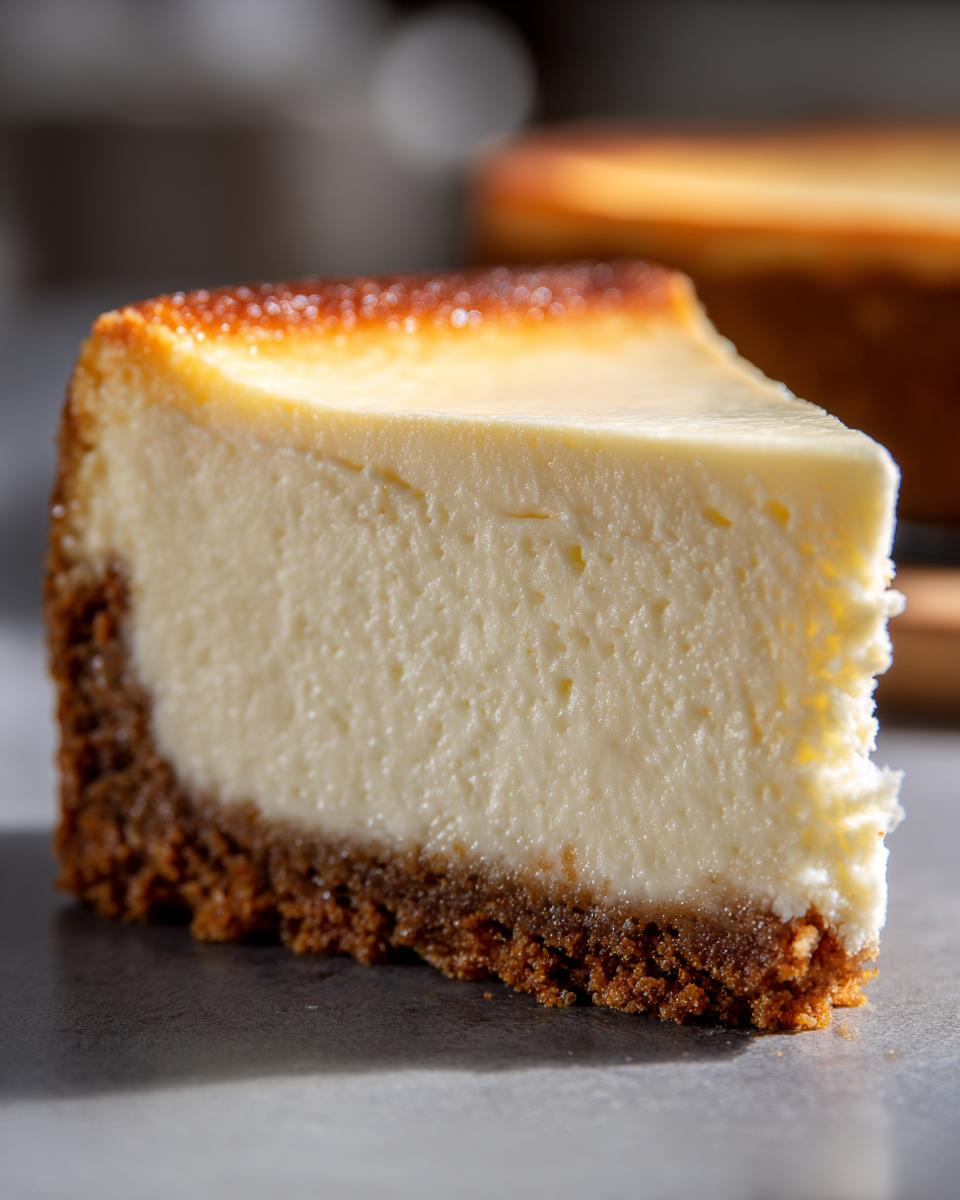
Oh, my dears, if you’ve ever stared at a perfect, pristine dessert in a bakery window and sighed, thinking, “I could never make that at home,” I’m here to tell you that sigh ends today! We are making a truly spectacular New York Style Cheesecake. Forget worrying about that dreaded water bath; this is the easiest homemade cheesecake recipe you’ll find that reliably delivers that rich, dense, and utterly creamy texture—and yes, it is totally crack-free. When I was teaching, I learned that the best things in life are dependable, and that goes for baking too! This definitive cheesecake recipe is destined to become your go-to for holidays and those quiet evenings when only something truly indulgent will do.
- Why This New York Style Cheesecake Recipe Delivers the Best Results
- Gathering Ingredients for Your Classic Cheesecake Dessert
- Step by Step Guide to This Easy Homemade Cheesecake
- Tips for Success with Your Cheesecake Recipe
- Serving Suggestions for This Indulgent Dessert Recipes
- Storage and Reheating Instructions for Leftover Cheesecake Recipe
- Frequently Asked Questions About Making a Cheesecake Recipe
- Estimated Nutritional Data for This Cheesecake Recipe
- Share Your Homemade Dessert Ideas
Why This New York Style Cheesecake Recipe Delivers the Best Results
Now, you might be wondering why you should trust my straightforward approach to this classic dessert. Well, I’ve spent years trying to get that perfect, dense New York texture without hauling out a big roasting pan for a fussy water bath. This recipe works because we respect the ingredients and the temperature! It’s designed to be an easy homemade cheesecake that rivals years of professional work. We focus on technique over complexity, which is why this truly stands out as one of the best cheesecake recipes you’ll try. Many bakers get concerned about cracking, but if you follow my cooling steps, you’ll see this creation holds up beautifully. I have put everything I know about baking into these steps, hoping you find the same confidence I found when I finally mastered this recipe.
Achieving that Velvety Cheesecake Filling Texture
For that stunningly velvety cheesecake filling, we have two non-negotiables. First, every dairy item—the cream cheese, the eggs, and the sour cream—must be at room temperature. Seriously! Cold ingredients are what create lumps, and we are skipping any lumps today! Second, once those eggs are in, you mix gently. Over-beating adds too much air, and air is the enemy of a smooth, creamy cheesecake recipe.
The Secret to a Crack Free Cheesecake Recipe
This is where we defeat the dreaded crack. You see, cracks happen when the temperature changes too fast! So, once that timer goes off and the edges look set but the center still shimmies gently, you do *not* pull it out. You turn the oven off, prop the door open just a smidge, and leave it inside for a full hour. This slow transition is the magic trick that gives you that gorgeous, smooth, crack free cheesecake top. Trust me, after you’ve followed this simple cooling method, you’ll never look back.
Gathering Ingredients for Your Classic Cheesecake Dessert
Now that we’ve talked about *why* this method works so beautifully, let’s gather up our supplies! When baking something as magnificent as a classic cheesecake dessert, you can’t cut corners on the main players. Remember what I stressed before? Temperature matters! Make sure your cream cheese, eggs, and sour cream have been sitting out for at least an hour before you even think about turning on the mixer. I insist on full-fat cream cheese, too; that’s where all the richness comes from that makes this the best cheesecake recipe on your rotation. Let’s see what we need for the base and the creamy body of this beauty.
Ingredients for the Graham Cracker Crust Recipe
The foundation has to be sturdy enough to hold that luxurious filling, and this simple graham cracker crust recipe does the trick every time. Don’t skimp on pressing it down firmly!
- 1 1/2 cups graham cracker crumbs
- 1/4 cup granulated sugar (yes, a little for the crust!)
- 6 tablespoons unsalted butter, melted
Components for the Rich Cheesecake Dessert Filling
This is the heart of your cheesecake recipe. When you measure these out, take care to ensure your dairy items are nice and soft—it impacts the final smoothness, remember?
- 4 (8 ounce) packages full-fat cream cheese, softened to room temperature
- 1 1/2 cups granulated sugar (for filling)
- 1/4 cup all-purpose flour
- 1 teaspoon vanilla extract
- 1/4 teaspoon salt
- 4 large eggs, room temperature
- 1/2 cup sour cream, room temperature
Step by Step Guide to This Easy Homemade Cheesecake
Alright, let’s put on our aprons! This is where the fun truly begins. Don’t be intimidated; we are taking this magnificent cheesecake recipe one simple step at a time. Since we are aiming for that perfectly set, never-cracked dessert, following the sequence here is just as important as using those room-temperature ingredients we talked about. I put these instructions together to make sure even if you’re having toast for breakfast, you can nail this dessert! Grab your 9-inch springform pan, and let’s get this show on the road.
Preparing and Pre-Baking the Graham Cracker Crust Recipe
First up is that delicious base! Preheat your oven to 350 degrees F. Take your crumbs, your little bit of sugar, and that melted butter, and toss them together until everything looks evenly damp. Press that mixture firmly, using the bottom of a glass if you have one, right into the bottom of your springform pan. Pop that into the oven for about 10 minutes just to set it up nice. Once that’s done, pull it out, and immediately turn your oven down to 325 degrees F for the main bake.
Mixing the Velvety Cheesecake Filling
This mixing order is crucial for that creamy cheesecake recipe texture. Start with the cream cheese alone in a big bowl, and beat it until it’s absolutely lump-free—I mean smooth as silk! Then, gently add your dry items—the flour, sugar, vanilla, and salt. Mix low and slow until just combined. Now for the eggs: add them one at a time, and I mean *one at a time*. Stop mixing the second the yolk disappears before adding the next one. This prevents over-aeration! Finally, fold in that sour cream until the entire batter looks uniform and gorgeously thick.
Baking and Slow Cooling for a Perfect Cheesecake Recipe
Pour that beautiful filling right over your cooled crust, smooth the top gently, and slide it onto a baking sheet. Bake this at 325 degrees F for 60 to 75 minutes. You’ll know it’s ready when the edges look solid, but the very center, about two inches across, still has a little wiggle to it when you nudge the pan. This is the key for a crack free cheesecake! When it hits that point, turn the oven OFF and prop the door open about two inches. Leave it undisturbed inside for a full hour so it can cool down gently. This step saves us from disaster!
Tips for Success with Your Cheesecake Recipe
Baking a rich cheesecake dessert like this one is mostly about temperature management, my friends. If there’s one thing my mom hammered into me, it’s that baking is science, but we use love to sweeten it up! So, let’s review the tricks that guarantee success for this cheesecake recipe.
First, those room-temperature items we obsessed over? They are everything for that creamy cheesecake recipe folks rave about. If your cream cheese is cold, it fights the sugar, creating lumps that you can’t beat out later. Make sure those eggs have sat on the counter with the dairy for at least an hour.
Second, while it bakes, don’t you dare peek during those first 45 minutes! Opening the oven door lets a blast of cool air hit the top, which is a guaranteed way to shock its structure and encourage cracks. Keep that oven door shut tight, and let my slow cooling process do the heavy lifting for a beautiful finish. For even more insight into my baking philosophy, feel free to check out my About Page!
Serving Suggestions for This Indulgent Dessert Recipes
When you finally pull that gorgeous, perfectly set cheesecake from the fridge, the presentation is the last little flourish! Honestly, this New York Style Cheesecake is divine just on its own—its richness speaks for itself. If you want to dress it up a bit for your homemade dessert ideas gathering, keep it simple so you don’t overpower that fantastic, tangy flavor.
A light scattering of fresh berries—raspberries or bright strawberries work wonders—adds a lovely pop of color. Or, if you’re feeling a bit more decadent, a very thin drizzle of salted caramel is heavenly. For those who love chocolate, try making a quick, simple ganache. You can find my recipe for an amazing easy homemade chocolate pudding recipe that can be thinned out just a bit for a beautiful, glossy topping. Remember, this masterpiece deserves a showcase!
Storage and Reheating Instructions for Leftover Cheesecake Recipe
Luckily, this rich cheesecake dessert tastes even better the next day once all those flavors have really settled in. The texture firms up beautifully after a good chill! You must let it cool completely on the counter—which takes hours, so hang in there—before it even thinks about going into the refrigerator. Aim for a minimum of six hours, but truly, overnight is the magic number for the best slice.
For storage, if the cake is whole, cover it loosely with plastic wrap right in the springform pan base. If you’ve already sliced it, cover the entire pan tightly with plastic wrap, or transfer individual slices to an airtight container. It keeps wonderfully for about five days in the fridge. As for reheating? Oh, honey, don’t even try it! Cheesecake is meant to be enjoyed cold and creamy; warming it up just makes it weep and lose that perfect texture we worked so hard to achieve!
Frequently Asked Questions About Making a Cheesecake Recipe
I know putting something this important in the oven can be nerve-wracking! I get so many wonderful questions when folks start baking this recipe for the first time. It’s exciting! Making the best cheesecake recipe is really about nailing a few key techniques, and once you know the answers, you’ll feel like a pro. Don’t hesitate to reach out on my Contact Page if you have a question that isn’t covered here!
Can I substitute the sour cream in this creamy cheesecake recipe?
That’s a fair question! The sour cream really helps give this creamy cheesecake recipe that signature slight tang and moisture. If you absolutely must substitute, you can use an equal amount of heavy cream mixed with a teaspoon of lemon juice, or use full-fat plain Greek yogurt. Just know that if you use Greek yogurt, the final texture might be slightly firmer than the true, velvety smoothness this recipe is known for.
What is the best way to tell if my cheesecake recipe is done baking?
This is the key to avoiding dryness! You are looking for that gentle wobble. The edges of your New York cheesecake recipe should always look set and firm, a little drier maybe. But, the center, that inner two-inch circle, should still have a slight jiggle, like thick gelatin, when you gently tap the side of the pan. If the whole thing is firm, you’ve already overbaked it slightly, and it will deflate too much upon cooling.
Estimated Nutritional Data for This Cheesecake Recipe
Now, I always tell folks here at Cooking by Carla that while we chase deliciousness and comfort, it’s helpful to know the basics. Here is the general nutritional breakdown for one slice of this magnificent cheesecake recipe. Remember too, these numbers are estimates based totally on the standard amounts of full-fat ingredients we used in developing the recipe, so your exact nutrition might shift a touch based on brand differences.
- Serving Size: 1 slice
- Calories: 450
- Fat: 30g
- Carbohydrates: 40g
- Protein: 8g
- Sugar: 35g
So, yes, it’s an indulgent dessert recipe, but oh, is it worth every single bite! Treat yourself, you deserve this classic cheesecake dessert!
Share Your Homemade Dessert Ideas
Now that you’ve baked, chilled, and tasted this incredible creation, I truly want to hear all about it! Did you manage that smooth top everyone’s after? Please, leave a comment down below and let me know how your first crack free cheesecake turned out. Sharing your success helps all the other new bakers feel brave enough to try! I adore seeing your beautiful creations, so if you share pictures of your homemade dessert ideas on social media, tag me so I can swoon over them. If you loved this guide, please take a peek at my Privacy Policy for general site information!
PrintThe Best Easy Homemade New York Style Cheesecake Recipe (Crack-Free)
Follow this straightforward guide to make a rich, creamy, and velvety New York Style Cheesecake at home. This recipe focuses on achieving a perfect, crack-free finish without needing a water bath, making it an easy, indulgent dessert for any special occasion.
- Prep Time: 20 min
- Cook Time: 75 min
- Total Time: 95 min
- Yield: 12 servings 1x
- Category: Dessert
- Method: Baking
- Cuisine: American
- Diet: Vegetarian
Ingredients
- 1 1/2 cups graham cracker crumbs
- 1/4 cup granulated sugar (for crust)
- 6 tablespoons unsalted butter, melted
- 4 (8 ounce) packages full-fat cream cheese, softened to room temperature
- 1 1/2 cups granulated sugar (for filling)
- 1/4 cup all-purpose flour
- 1 teaspoon vanilla extract
- 1/4 teaspoon salt
- 4 large eggs, room temperature
- 1/2 cup sour cream, room temperature
Instructions
- Prepare the crust: Preheat your oven to 350 degrees F. In a medium bowl, mix the graham cracker crumbs, 1/4 cup sugar, and melted butter until combined. Press the mixture firmly into the bottom of a 9-inch springform pan. Bake for 10 minutes. Remove from the oven and let it cool while you prepare the filling. Reduce the oven temperature to 325 degrees F.
- Make the filling: In a large bowl using an electric mixer, beat the softened cream cheese until it is completely smooth and there are no lumps. This step is key for a creamy texture.
- Add the flour, 1 1/2 cups sugar, vanilla extract, and salt to the cream cheese mixture. Beat on low speed until just combined. Scrape down the sides of the bowl.
- Beat in the eggs one at a time, mixing only until each egg is incorporated. Do not overmix the batter once the eggs are added.
- Gently mix in the sour cream until the batter is uniform.
- Pour the filling over the cooled crust in the springform pan. Smooth the top with a spatula.
- Bake: Place the pan on a baking sheet. Bake at 325 degrees F for 60 to 75 minutes. The edges should look set, but the center 2 inches should still jiggle slightly when gently shaken.
- Cool slowly to prevent cracks: Turn off the oven, but leave the cheesecake inside with the oven door propped open slightly (about 2 inches) for 1 hour. This slow cooling process helps prevent cracking.
- Remove the cheesecake from the oven and let it cool completely on a wire rack. Once cool, cover loosely with plastic wrap and refrigerate for at least 6 hours, or preferably overnight, before serving.
- To serve, run a thin knife around the edge of the pan before releasing the springform side. Slice and enjoy your rich cheesecake dessert.
Notes
- Use room temperature ingredients for the cream cheese, eggs, and sour cream; this prevents lumps and ensures a velvety filling.
- Do not open the oven door during the first 45 minutes of baking.
- For the best results, chill the cheesecake for a full 12 hours before slicing.
Nutrition
- Serving Size: 1 slice
- Calories: 450
- Sugar: 35g
- Sodium: 300mg
- Fat: 30g
- Saturated Fat: 18g
- Unsaturated Fat: 12g
- Trans Fat: 0g
- Carbohydrates: 40g
- Fiber: 1g
- Protein: 8g
- Cholesterol: 120mg