
Sometimes, you just need a dessert that shouts “special occasion” from the rooftops, right? Forget those light, airy things for a minute. We’re talking about pure, unadulterated indulgence! This Ultimate Triple Chocolate Cheesecake is my response when someone asks for the best, most decadent chocolate dessert imaginable. It’s rich, it’s so creamy you’ll swear it shouldn’t be legal, and believe me, it delivers on that deep chocolate flavor everyone craves in a homemade chocolate cheesecake. Don’t you worry; while it looks fancy, I’ve made sure the steps are straightforward. That’s my promise here at Cooking by Carla—reliable recipes that make you look like a culinary superstar without all the fuss!
- Why This Triple Chocolate Cheesecake Recipe is a Show Stopper
- Gathering Ingredients for Your Decadent Chocolate Cheesecake
- Step by Step Cheesecake Instructions for a Perfect Chocolate Cheesecake
- Tips for the Best Chocolate Cheesecake Success
- Variations on This Rich Chocolate Dessert
- Serving Suggestions for Your Show Stopping Dessert
- Storage and Reheating Instructions for Homemade Cheesecake
- Frequently Asked Questions About Baked Chocolate Cheesecake
- Estimated Nutritional Data for This Indulgent Cheesecake
- Share Your Ultimate Chocolate Dessert Experience
Why This Triple Chocolate Cheesecake Recipe is a Show Stopper
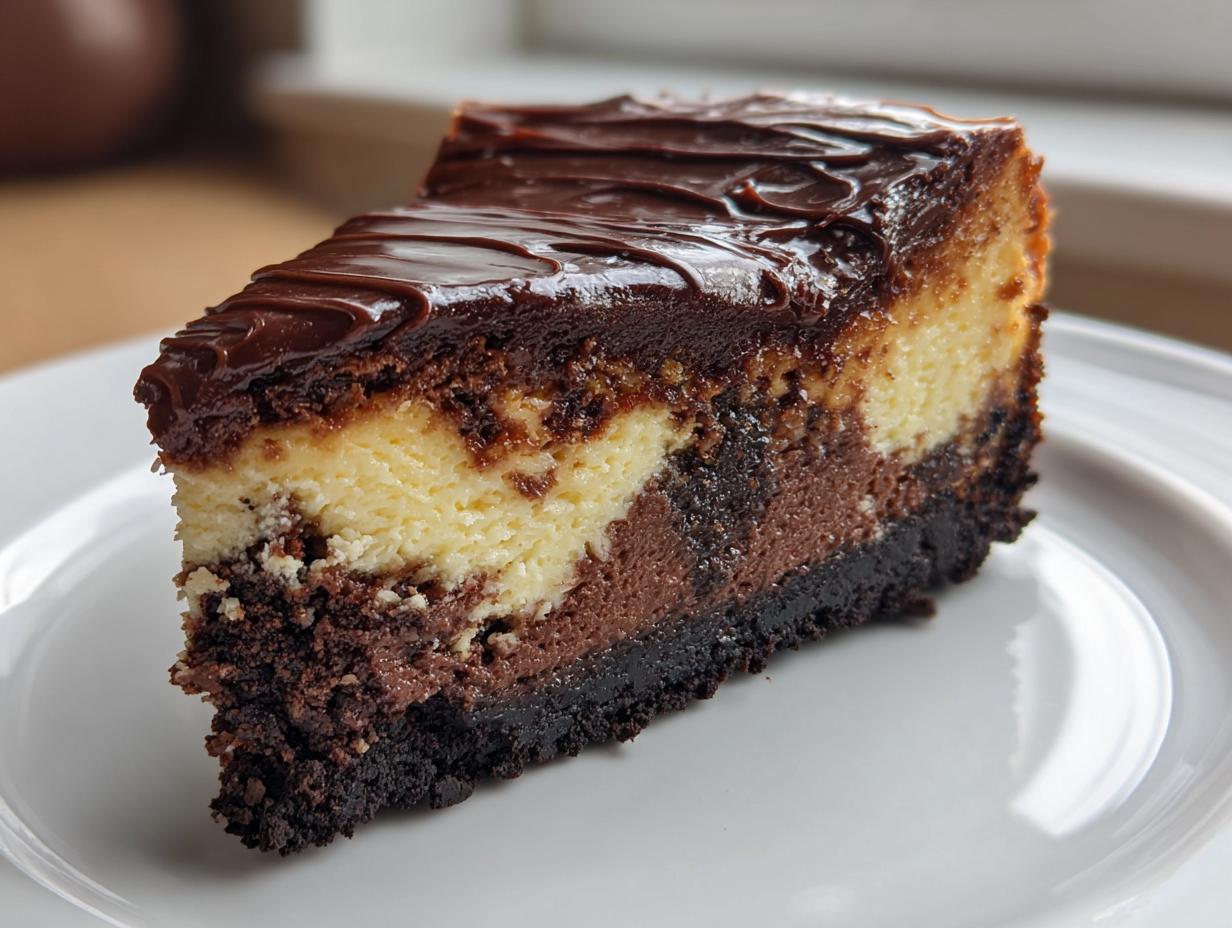
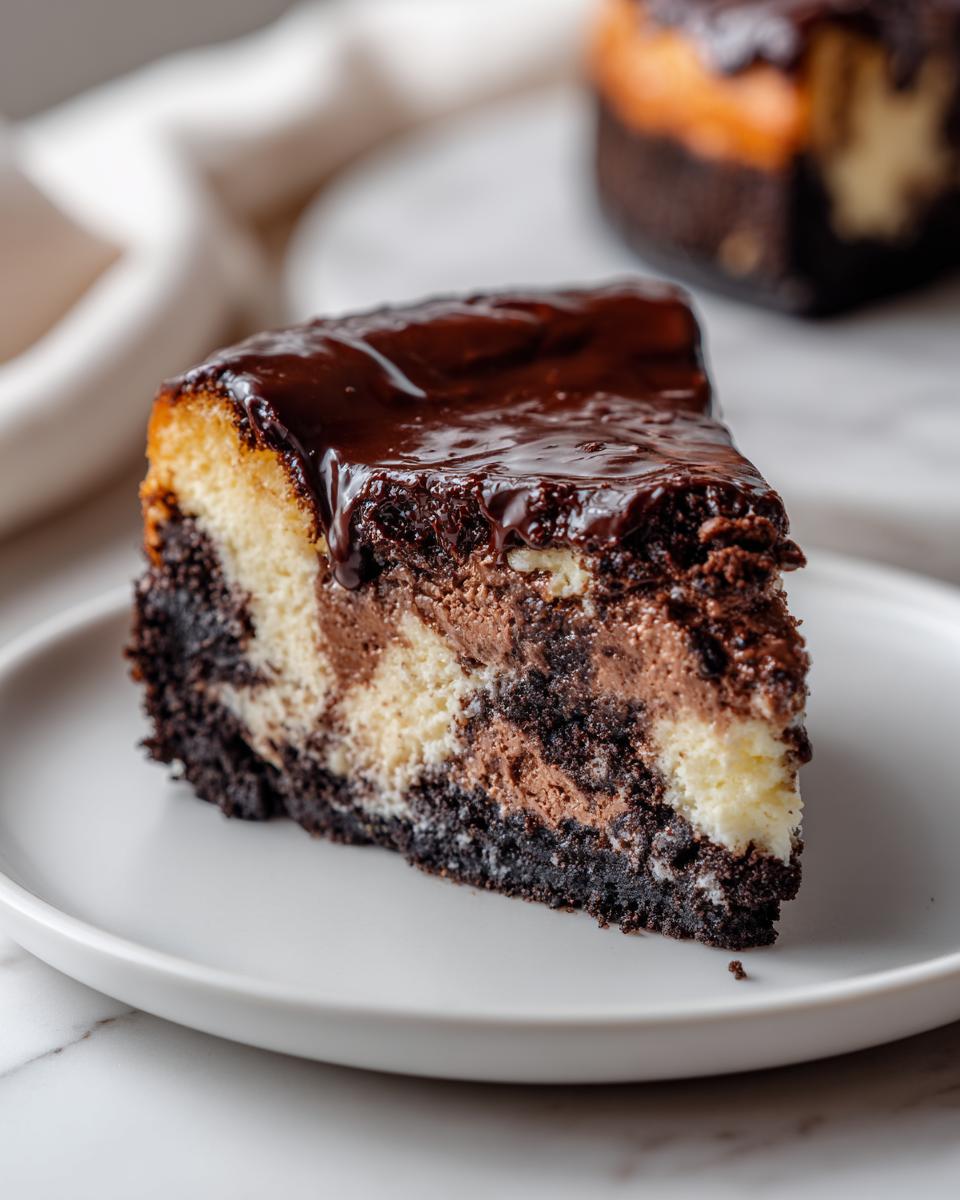
When I set out to perfect this chocolate cheesecake, I knew it couldn’t just be good; it had to be legendary. This recipe layering three types of chocolate—from the crust to the filling to that glorious top—is what elevates it. It’s such a stunner, much like my Turtle Cheesecake when the holidays roll around!
- The crunch factor is built right in with a buttery, easy Oreo crust cheesecake base.
- It features distinct layers of flavor within the filling itself for that true “triple chocolate dessert” experience.
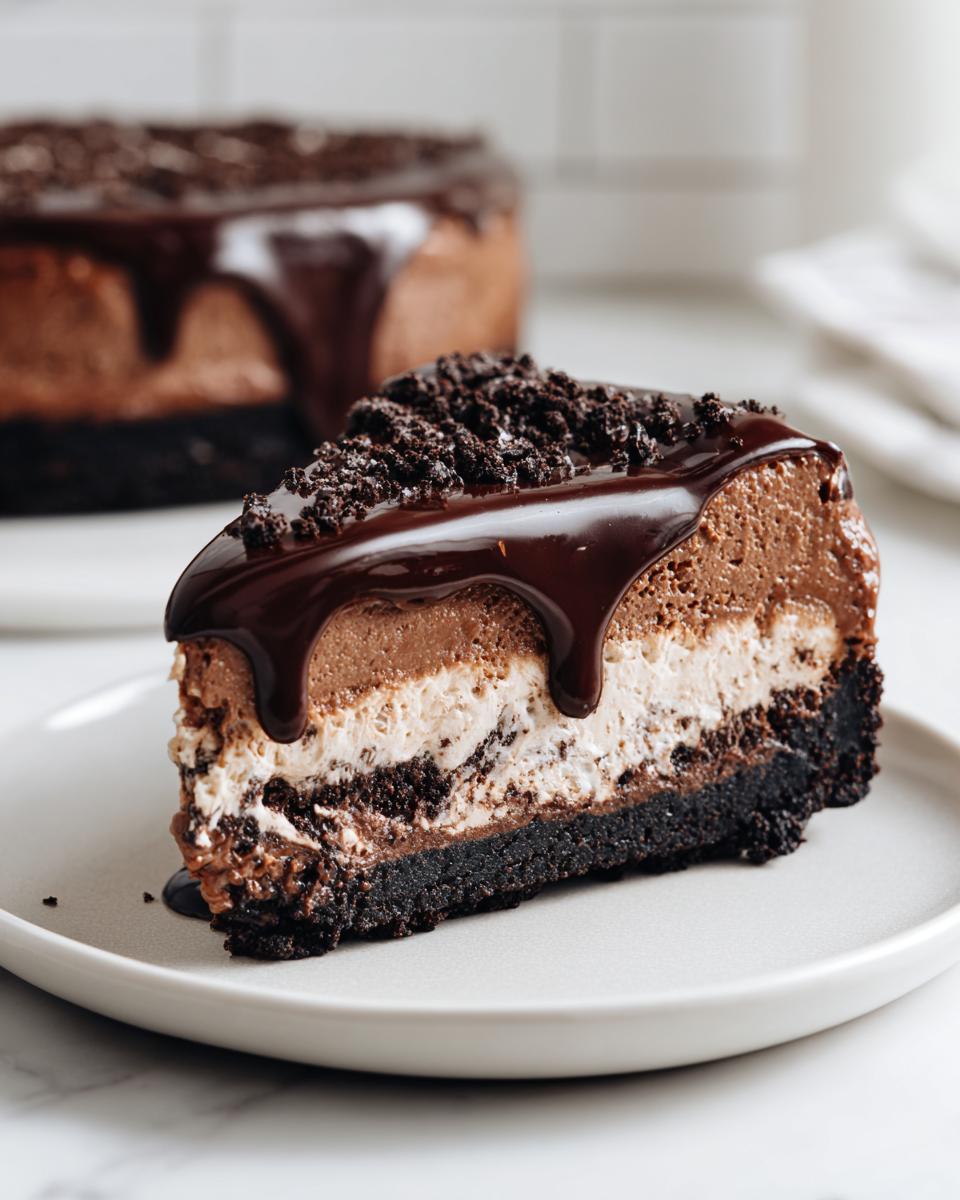
- The glossy, mirror-like chocolate ganache topping makes every slice look like it came from a fancy bakery case.
It’s truly a show stopping dessert, and you’ll feel like a master baker, I promise!
Achieving the Perfect Creamy Cheesecake Texture
If you’re chasing that silky, melt-in-your-mouth feel, listen close. The secret to a genuinely creamy cheesecake starts before you even turn on the mixer. Your cream cheese absolutely *must* be room temperature—soft like butter that’s sat out for an hour. If it’s cold, you’ll get lumps, and that ruins everything!
Also, once those eggs go in, I mean it: mix *just* until they disappear. Overmixing is how you force air in, and that air escapes during baking, causing those dreaded cracks. Keep it slow and gentle for the best texture.
Gathering Ingredients for Your Decadent Chocolate Cheesecake
Now, let’s talk supplies! Getting your ingredients organized before you start is half the battle won, especially with a showpiece like this Ultimate Triple Chocolate Cheesecake. When you’re building layers of intense flavor, you can’t cut corners on quality. I’ve listed everything out below, neatly separated by what it’s for. And trust me, making sure that cream cheese is perfectly softened and your chocolate is melted just right makes such a difference in achieving that beautiful, smooth finish. If you want to peek at how I handle chocolate in other recipes, check out my German Chocolate Cheesecake guide!
For the Oreo Crust Cheesecake Base
This crust is quick, crunchy, and holds up perfectly under all that creamy filling. You only need four things here:
- 1 3/4 cups crushed Oreo cookies (that’s about 25 cookies, crushed fine!)
- 1/4 cup granulated sugar
- 6 tablespoons unsalted butter, melted until smooth
For the Rich Chocolate Cheesecake Filling
Here’s where the triple magic happens! See how we use different chocolates? It builds depth, making this the best chocolate cheesecake!
- 3 (8 ounce) packages cream cheese, softened (remember what I said about room temp?)
- 1 1/2 cups granulated sugar
- 1/4 cup all-purpose flour
- 1 teaspoon vanilla extract
- 1/4 teaspoon salt
- 3 large eggs, added one at a time
- 4 ounces bittersweet chocolate, melted and completely cooled
- 1/2 cup heavy cream (for the filling layer)
- 4 ounces semi-sweet chocolate, melted and completely cooled
For the Glossy Chocolate Ganache Topping
This topping is what seals the deal and gives you that gorgeous, glossy finish. Your chocolate ganache topping needs just two simple items:
- 8 ounces milk chocolate, chopped finely
- 1/2 cup heavy cream
Step by Step Cheesecake Instructions for a Perfect Chocolate Cheesecake
Okay, deep breath! This is where the magic happens, but don’t let the steps scare you. We are making the ultimate chocolate cheesecake here, and a showstopper like this just requires a little organization. Remember, patience is key, especially when we get to the cooling part. I’ve broken this down into manageable chunks so you can follow along easily. If you ever need a refresher on getting that crisp edge, my guide on the Oreo Crust Cheesecake is super helpful!
Preparing the Oreo Crust and Pan Setup
First things first: get that oven preheated to 350°F (175°C). Now, for the springform pan—this is vital if you plan on using a water bath to keep things creamy cheesecake perfect. Wrap the entire outside of your 9-inch springform pan tightly with heavy-duty aluminum foil. Seriously, wrap it twice! You don’t want a single drop of water getting in there.
Mix up your crust ingredients—the cookie crumbs, sugar, and melted butter—and press that mixture down firmly into the bottom of your prepared pan. Pop it into the oven for a quick 10 minutes to set up, then pull it out and let it cool off just a touch while we tackle the batter.
Mixing the Creamy Cheesecake Batter
In a big bowl, beat that softened cream cheese with the sugar, flour, vanilla, and salt until it’s looking beautifully smooth. Now, add those eggs, but listen to Mama Carla: add them ONE at a time! Mix gently after each egg, just until you see it disappear into the batter. Remember what I said about not overmixing?
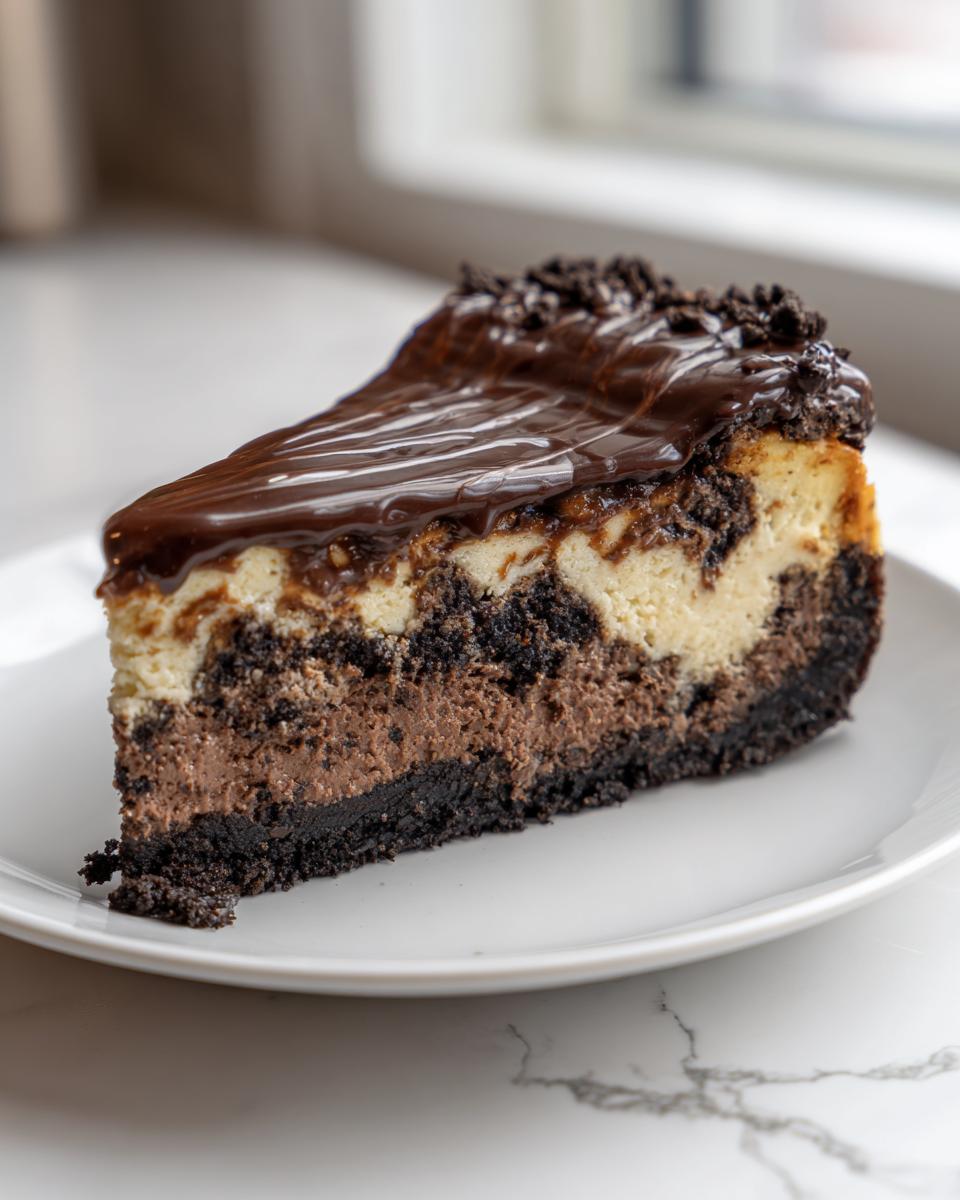
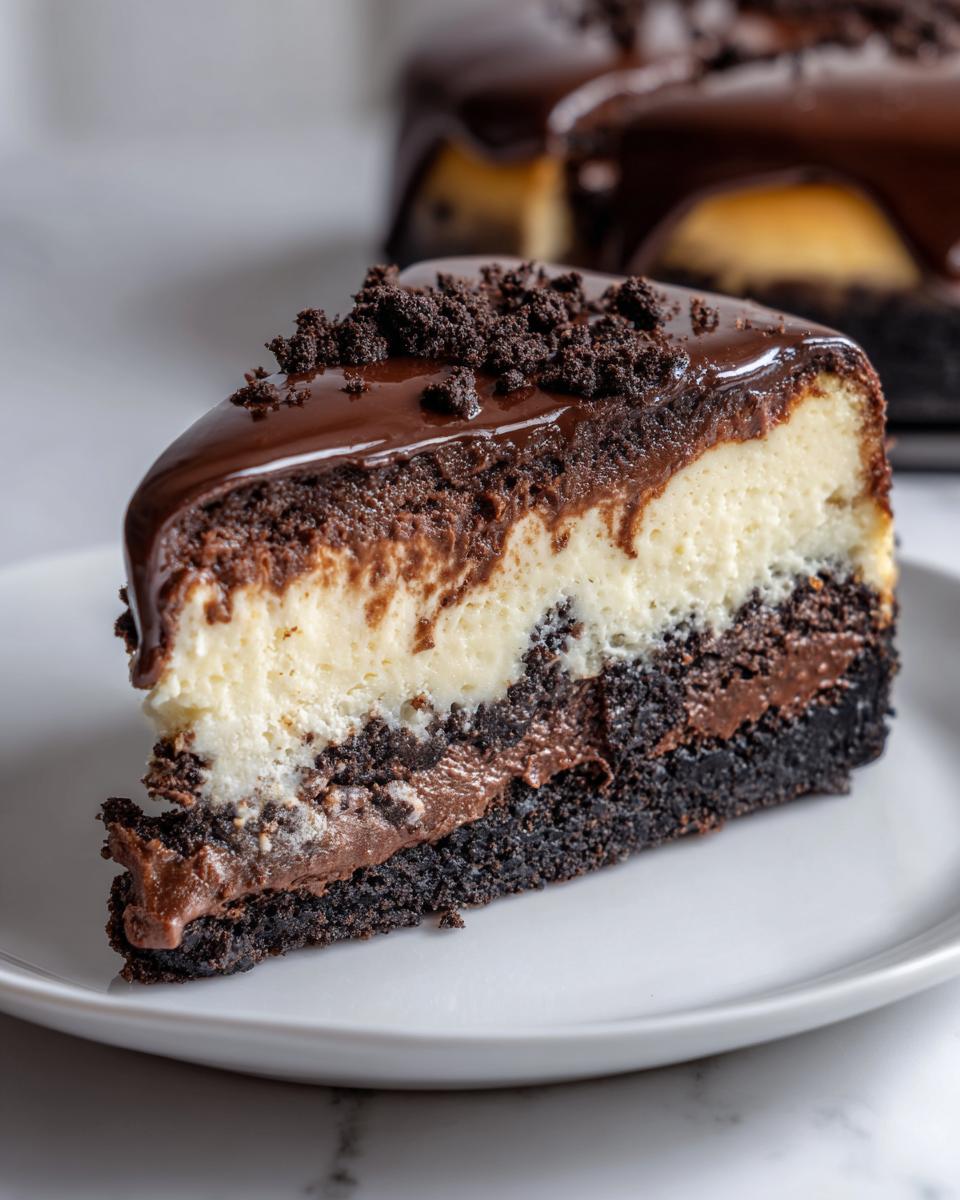
Pour about two-thirds of that light batter right over your cooled crust. Take the remaining batter, and mix in your cooled, melted bittersweet chocolate until it’s a uniform darker shade. Gently pour that dark mixture over the light layer. For the swirl? Mix the remaining heavy cream and the semi-sweet chocolate, drizzle that over the top, and use a knife to gently marble the layers together. Don’t over-swirl; we want distinct layers!
Baking the Chocolate Cheesecake Using a Water Bath
Now we bake! Place that foil-wrapped springform pan inside a larger roasting pan. Carefully pour hot water into the outer roasting pan until it comes about halfway up the sides of your cheesecake pan—that’s your water bath, or bain-marie. Bake this whole setup for 55 to 65 minutes. You’re looking for edges that look set, but the very center should still have a tiny wobble when you jiggle the pan gently.
This next step prevents cracks more than anything else. Turn the oven OFF completely. Crack the oven door open just a tiny bit—a wooden spoon works great here to wedge it open—and let the cheesecake hang out inside that warm environment for a full hour. After that hour, carefully remove it from the water bath, take the foil off, and let it cool the rest of the way on a wire rack before chilling.
Making and Applying the Chocolate Ganache Topping
Don’t even think about making the ganache until the cheesecake has chilled for at least six hours—overnight is best for this rich chocolate dessert. Once it’s rock solid and cold: heat that half cup of heavy cream until it just starts to bubble around the edges, then immediately pour it over your finely chopped milk chocolate. Let it sit quietly for five whole minutes—that’s important! Then, just whisk it gently until it melts into a smooth, glossy sauce. Pour that beautiful chocolate ganache topping right over your chilled cheesecake and spread it smooth. Pop it back into the fridge until the ganache sets up nicely before you slice into this amazing step by step cheesecake!
Tips for the Best Chocolate Cheesecake Success
You’ve got the recipe, but let me give you a little coaching, just like I did for my third graders! Baking here at home isn’t just about following steps; it’s about knowing *why* we do those steps. Those little details are what separate a good homemade chocolate cheesecake from a truly spectacular one. Trust me, learning a few tricks makes sure you get that picture-perfect, sliceable dessert every single time.
Ingredient Temperature and Mixing for Smooth Chocolate Cheesecake
I can’t stress this enough: room temperature cream cheese is your best friend! If it’s cold, you’re going to beat and beat that mixer trying to break up the lumps, and guess what happens? You incorporate too much air. Then, during that slow, gentle bake, all that trapped air tries to escape, leading to cracks or maybe a little weepiness on top.
So, please, let that cream cheese sit out for at least an hour, maybe two if your kitchen is cool. When you mix, be careful once those eggs are in the bowl. Add them slowly, only mixing until they vanish into the batter. That gentle hand keeps the air bubbles small, resulting in a creamy cheesecake texture that’s dense but velvety soft. If you want more tips on keeping things perfect, check out my guide on making a crack-free homemade cheesecake!
Variations on This Rich Chocolate Dessert
While I truly think this Triple Chocolate recipe is the pinnacle—the absolute ultimate chocolate dessert—I know home cooks love to tinker! That’s the beauty of reliable recipes; they are fantastic foundations for your own creativity. If you’re feeling adventurous or just have different pantry staples on hand, you can certainly tweak this to make it even more your own style of indulgent cheesecake. For more ideas on customizing rich desserts, you can always look through my German Chocolate Cake recipes for inspiration!
Making a Dark Chocolate Cheesecake Version
If you find yourself grabbing the bittersweet bars more often than the semi-sweet, we can easily ramp up the intensity here. To get a true dark chocolate cheesecake experience, you can swap out the 4 ounces of bittersweet chocolate in the filling for a higher percentage cocoa bar, like 70% or even 80%. Just make sure you cool it fully before mixing!
What I often do when I want it deeper, richer, and almost moody, is add about a teaspoon of very finely ground instant espresso powder right into the melted bittersweet chocolate before folding it into that portion of the batter. It doesn’t make it taste like coffee, mind you! It just brings out the natural bitterness of the cocoa. It’s a trick I learned years ago, and it really makes the chocolate flavor sing!
Easy Cheesecake Recipe Swaps for the Crust
The Oreo crust is iconic for a reason—it’s got that perfect dark, salty crunch that balances the sweet filling. But don’t feel locked into just one cookie! If you are looking for an easy cheesecake recipe variation, you can absolutely substitute! Graham crackers are a classic swap and let the chocolate flavor shine a bit more purely.
You can use plain graham cracker crumbs or even shortbread cookies, crushed fine, of course. The main thing to remember is that the binding agent is the butter. So, whatever cookie you choose—whether it’s vanilla wafers or Oreos—you need the same total volume of crumbs and the exact same amount of melted butter (that’s the 6 tablespoons we listed). Press it in the same way, bake it for the same 10 minutes, and you’ll have a fantastic, slightly different base for your next homemade cheesecake.
Serving Suggestions for Your Show Stopping Dessert
Once this masterpiece has chilled properly—and I mean *properly*—it’s time for the grand reveal! Bringing out this chocolate cheesecake is the best part of the entire process. It’s a show stopping dessert, so we need to treat the presentation with the respect it deserves. This is where we turn a great dessert into a truly memorable moment for folks around the table.
The most common mistake people make when cutting cheesecake is using a warm, dull knife. Don’t do it! You’ll end up dragging that beautiful ganache right off the top and making a total mess of those gorgeous layers. Here’s my trick, which I use for every homemade cheesecake:
- Fill a tall glass with very hot water.
- Dip a long, thin knife into the hot water for about 30 seconds to heat the blade thoroughly.
- Wipe the knife completely dry with a clean cloth (steam is your enemy!).
- Make one clean, swift cut straight down into the cheesecake.
- Dip the knife back into the hot water, wipe it dry, and cut the next slice.
Repeat this for every single slice. I promise you, it makes serving so much easier and keeps your slices looking perfect!
When it comes to finishing touches, a simple dusting of unsweetened cocoa powder or a few dark chocolate shavings sprinkled lightly over the top looks elegant. If you really want to go over the top—and why wouldn’t you for this decadent chocolate dessert—a dollop of unsweetened whipped cream cuts through the richness beautifully. Save that recipe for my French Silk Pie whipped cream for when you serve this!
For pairing, this rich dark profile holds up wonderfully to strong flavors. A good, bold cup of black coffee is my first choice. If you’re serving it after a lighter meal, a small glass of good quality port wine or a hearty Cabernet Sauvignon is just divine alongside this rich chocolate dessert.
Storage and Reheating Instructions for Homemade Cheesecake
Alright, you’ve made this spectacular chocolate cheesecake, and there are leftovers—which, let’s be honest, feels like hitting the jackpot! Now, we need to treat this beautiful thing right so it stays just as creamy and decadent for the next day. Unlike a regular cake, cheesecake needs a little more strategy when it comes to keeping it fresh. You want to make sure that delicate filling and that glossy ganache topping stay perfect.
The key here is wrapping it well and keeping it cold. If you have leftovers from a party and only half a cake remains, take the knife you used to show off and cut neat slices before storing. No one likes a crumbly mess after the first cut!
For refrigerator storage, this cake is surprisingly sturdy. Keep it well-covered—I usually use a cake dome if I have one, or I gently press plastic wrap directly onto the surface of the cheesecake before covering the whole dish tightly with foil. This guards against drying out and stops it from picking up any funny smells from the fridge.
- How long does it last? In the refrigerator, this homemade cheesecake should keep beautifully for 4 to 5 days. The longer it chills, the more developed that chocolate flavor gets, so don’t be shy about eating it the next day!
- Can I freeze it? Yes, you absolutely can! Freezing is a great option if you know you won’t get to it within five days. But you must prepare it properly first.
Freezing and Thawing Your Decadent Chocolate Dessert
If you decide to freeze, you need to wrap it like a precious gift. First, chill it completely until the ganache is firm. Then, wrap the entire chilled cheesecake tightly in two layers of plastic wrap, followed by a good layer of aluminum foil. This double barrier keeps freezer burn away from that lush texture.
When you’re ready to enjoy it—maybe next month for a cozy night in—the thawing process is non-negotiable. You must thaw it slowly in the refrigerator. Take it out of the freezer and let it sit, still wrapped, in the fridge for a full 24 hours. It thaws slowly, which keeps the cream cheese texture from getting grainy or weeping water.
Once thawed, let it sit on the counter for about 20 minutes before slicing. It’s ready to enjoy, no reheating necessary! Actually, if you’re looking for a fudgy treat that *can* be reheated, you should check out my recipe for easy fudge—it’s fantastic warm!
Frequently Asked Questions About Baked Chocolate Cheesecake
I know you might have a few lingering thoughts after seeing all those layers and that shiny ganache! That’s perfectly normal when tackling a truly indulgent cheesecake. I’ve gathered up the questions I hear most often from folks making this recipe for the first time. Getting these little details sorted out means you end up with the textbook creamy cheesecake that you’re hoping for!
Can I make this an easy no bake chocolate cheesecake recipe?
That’s a great question, especially if you’re short on oven space or time! This specific recipe—the Triple Chocolate—is designed to be baked because of the eggs and the deep, dense layering we achieve, which sets beautifully in the oven with that water bath. If you really need an oven-free treat, you’ll want to look for a dedicated easy no bake chocolate cheesecake recipe. Those use stabilizers like gelatin or just a lot more whipped cream to set up in the fridge, giving you a lighter, mousse-like texture rather than the classic dense bake we have here. If you’re interested in the no-bake options I’ve tested, you might check out my guide on easy creamy dessert ideas!
What is the best way to get a smooth, crack-free baked chocolate cheesecake?
Oh, the eternal question! If you want that flawless top, remember my three main commandments for a perfect baked chocolate cheesecake. First: everything must be room temperature for a smooth batter. Cold lumps mean overmixing! Second: once the eggs are in, mix minimally—just until they vanish. We are not whipping air in unnecessarily. And third, which is the protector from cracking: the water bath and the slow cool-down. Baking it gently in the gentle steam of the water bath, and then letting it cool *inside* the turned-off oven for an hour, eases the transition from hot to cold slowly. Follow those three steps, and you’ll hardly see a sign of an issue!
How long does the chocolate cheesecake need to chill?
This part takes the most patience, but it’s absolutely crucial for the structure and flavor to mature. You need a minimum of six hours, but I tell everyone to aim for overnight chilling. When you sample this rich chocolate dessert the next day, you’ll understand why! Chilling allows the melted chocolates to set properly within the creamy base, firming up the entire slice perfectly. Plus, the flavors meld together beautifully when they sit overnight, making it taste even more complex and decadent!
Estimated Nutritional Data for This Indulgent Cheesecake
Now, I always include this little chart because, while we are diving headfirst into a truly indulgent cheesecake here, knowing the general details is just good practice! Remember, cooking at home means your measurements might tweak things just a little bit here and there, so please see these figures as a very close guide rather than an absolute guarantee. This is based on the recipe yielding 12 generous slices.
This is a rich dessert, so you are getting intense flavor in every slice, but a good quality treat is always worth it now and then, don’t you think?
- Serving Size: 1 slice
- Calories: Approximately 550
- Fat: 38g (with 22g of that being Saturated Fat)
- Carbohydrates: 50g
- Sugar: 45g
- Protein: 9g
- Cholesterol: 120mg
- Sodium: 350mg
Think of this as your special occasion treat! It’s meant to be savored slowly, maybe with a cup of coffee after a lovely meal. Don’t let numbers stress you out; just enjoy the magnificent chocolate cheesecake you created!
Share Your Ultimate Chocolate Dessert Experience
Well, we did it! We navigated the water bath, we conquered the layering, and we drizzled that perfect, mirror-like chocolate ganache topping. Now that you have tasted this masterpiece—this incredible, decadent chocolate dessert that truly lives up to the hype—I just have one favor to ask.
I absolutely live for hearing about your baking adventures! Did it come out as creamy as you hoped? Did your family even leave any leftovers for you? When you make this ultimate chocolate cheesecake, please come back here and let me know how it went in the comments below. Tell me what you served it with, or if you tried any of those variations!
If you snap a picture before diving in—and you should, because it’s gorgeous!—feel free to tag me on social media. Seeing your beautiful bakes is truly the best reward for all the recipe testing I do here in my kitchen. If you have a question or want to send me a specific note about the process, you can always reach out through my contact page. Happy baking, friends, and thank you for sharing your kitchen space with me!
PrintUltimate Triple Chocolate Cheesecake with Oreo Crust and Ganache

Make this rich, creamy, and decadent triple chocolate cheesecake featuring a crunchy Oreo crust and a glossy chocolate ganache topping. This show-stopping dessert is perfect for holidays or any special occasion.
- Prep Time: 30 min
- Cook Time: 65 min
- Total Time: 7 hours 35 min
- Yield: 12 servings 1x
- Category: Dessert
- Method: Baking
- Cuisine: American
- Diet: Vegetarian
Ingredients
- 1 3/4 cups crushed Oreo cookies (about 25 cookies)
- 1/4 cup granulated sugar
- 6 tablespoons unsalted butter, melted
- 3 (8 ounce) packages cream cheese, softened
- 1 1/2 cups granulated sugar
- 1/4 cup all-purpose flour
- 1 teaspoon vanilla extract
- 1/4 teaspoon salt
- 3 large eggs
- 4 ounces bittersweet chocolate, melted and cooled
- 1/2 cup heavy cream (for filling)
- 4 ounces semi-sweet chocolate, melted and cooled (for filling)
- 8 ounces milk chocolate, chopped (for ganache)
- 1/2 cup heavy cream (for ganache)
Instructions
- Preheat your oven to 350°F (175°C). Wrap the outside of a 9-inch springform pan tightly with heavy-duty aluminum foil.
- Prepare the crust: In a medium bowl, combine the crushed Oreo cookies, 1/4 cup sugar, and melted butter. Press the mixture firmly into the bottom of the prepared springform pan. Bake for 10 minutes. Remove from the oven and let cool slightly.
- Prepare the cheesecake filling: In a large bowl, beat the softened cream cheese, 1 1/2 cups sugar, flour, vanilla extract, and salt until smooth. Beat in the eggs one at a time, mixing just until combined after each addition.
- Divide the batter: Pour two-thirds of the batter over the cooled crust. Mix the melted bittersweet chocolate into the remaining one-third of the batter. Gently pour this darker chocolate mixture over the lighter batter in the pan.
- Create the swirl: Pour the 1/2 cup heavy cream and 4 ounces of melted semi-sweet chocolate into a small bowl. Drizzle this mixture over the top of the cheesecake batter. Use a knife or skewer to gently swirl the layers together for a marbled effect.
- Bake the cheesecake: Place the foil-wrapped springform pan into a larger roasting pan. Carefully pour hot water into the roasting pan until it reaches halfway up the sides of the springform pan (this is a water bath). Bake for 55 to 65 minutes, or until the edges are set but the center still has a slight jiggle.
- Cool the cheesecake: Turn off the oven, crack the door open slightly, and let the cheesecake cool inside the oven for 1 hour. Remove from the water bath, remove the foil, and let it cool completely on a wire rack.
- Chill: Refrigerate the cheesecake, covered, for at least 6 hours, or preferably overnight.
- Make the ganache topping: In a small saucepan, heat the 1/2 cup heavy cream until it just simmers. Remove from heat and pour over the chopped milk chocolate in a heatproof bowl. Let stand for 5 minutes, then whisk until smooth and glossy.
- Top and serve: Pour the warm ganache over the chilled cheesecake. Spread evenly or allow it to drip down the sides. Return the cheesecake to the refrigerator until the ganache is set before slicing and serving.
Notes
- For the best creamy texture, ensure your cream cheese is fully softened to room temperature before mixing.
- Do not overmix the batter once the eggs are added; this prevents cracks.
- If you prefer a simpler finish, skip the water bath, but watch the baking time closely to prevent overbaking.
Nutrition
- Serving Size: 1 slice
- Calories: 550
- Sugar: 45g
- Sodium: 350mg
- Fat: 38g
- Saturated Fat: 22g
- Unsaturated Fat: 16g
- Trans Fat: 0.5g
- Carbohydrates: 50g
- Fiber: 2g
- Protein: 9g
- Cholesterol: 120mg