
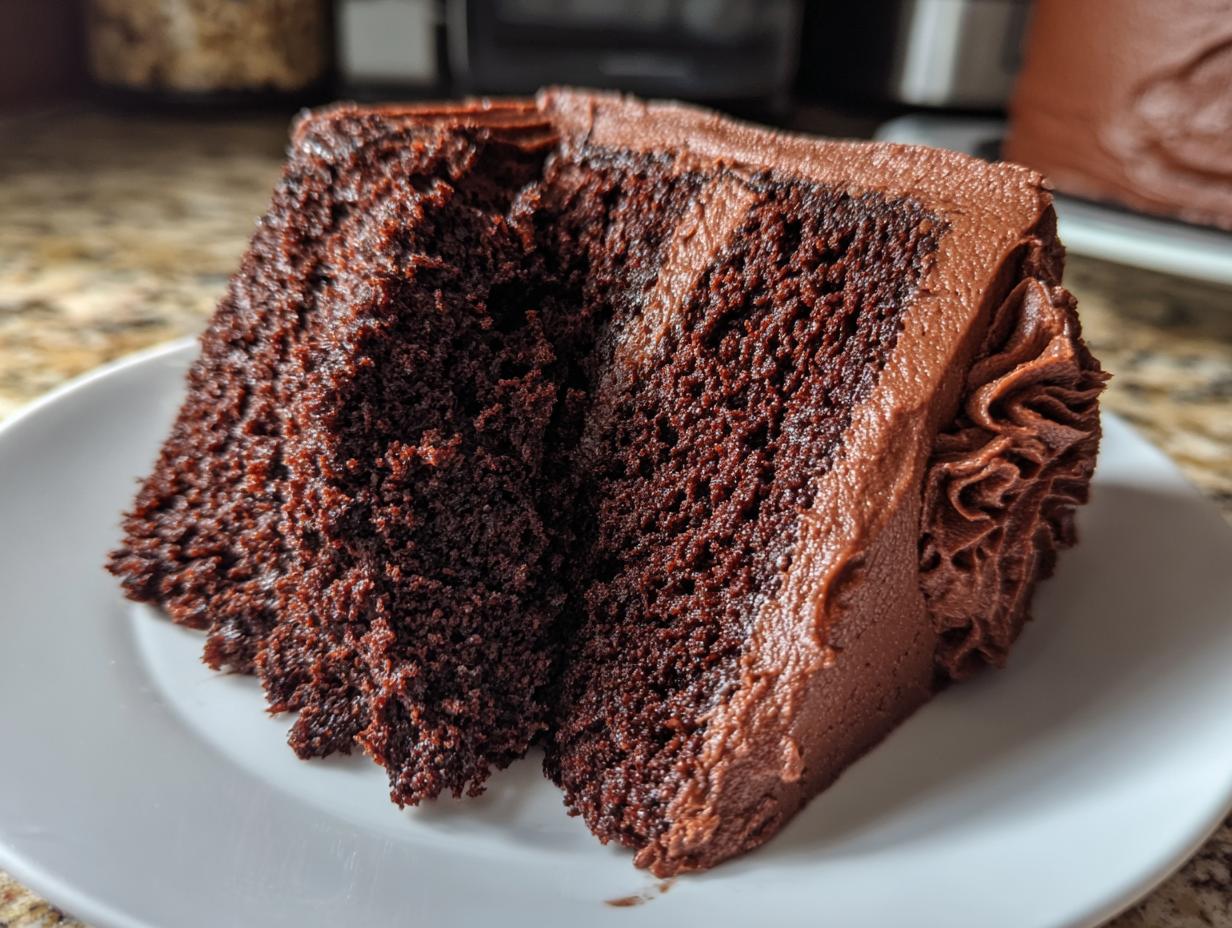
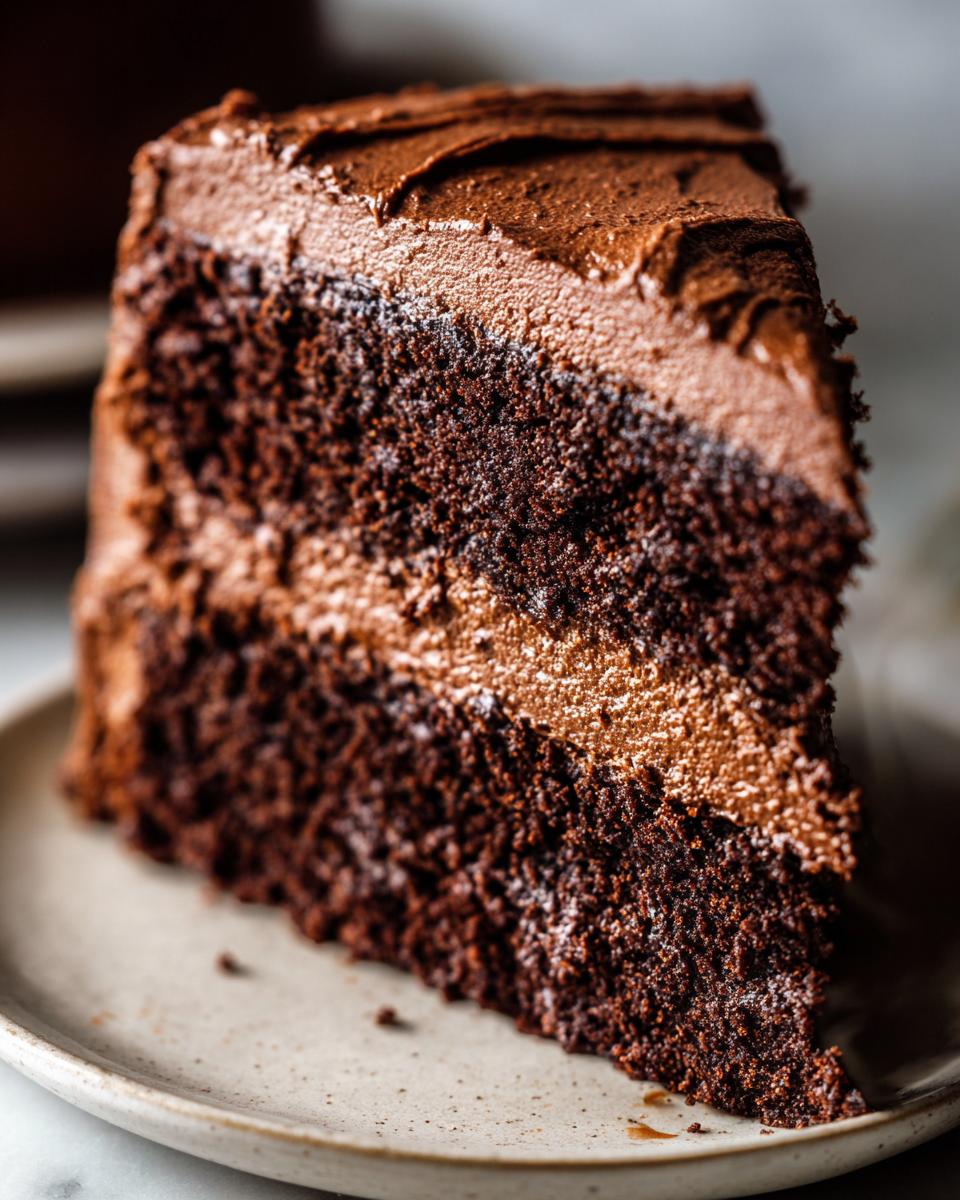
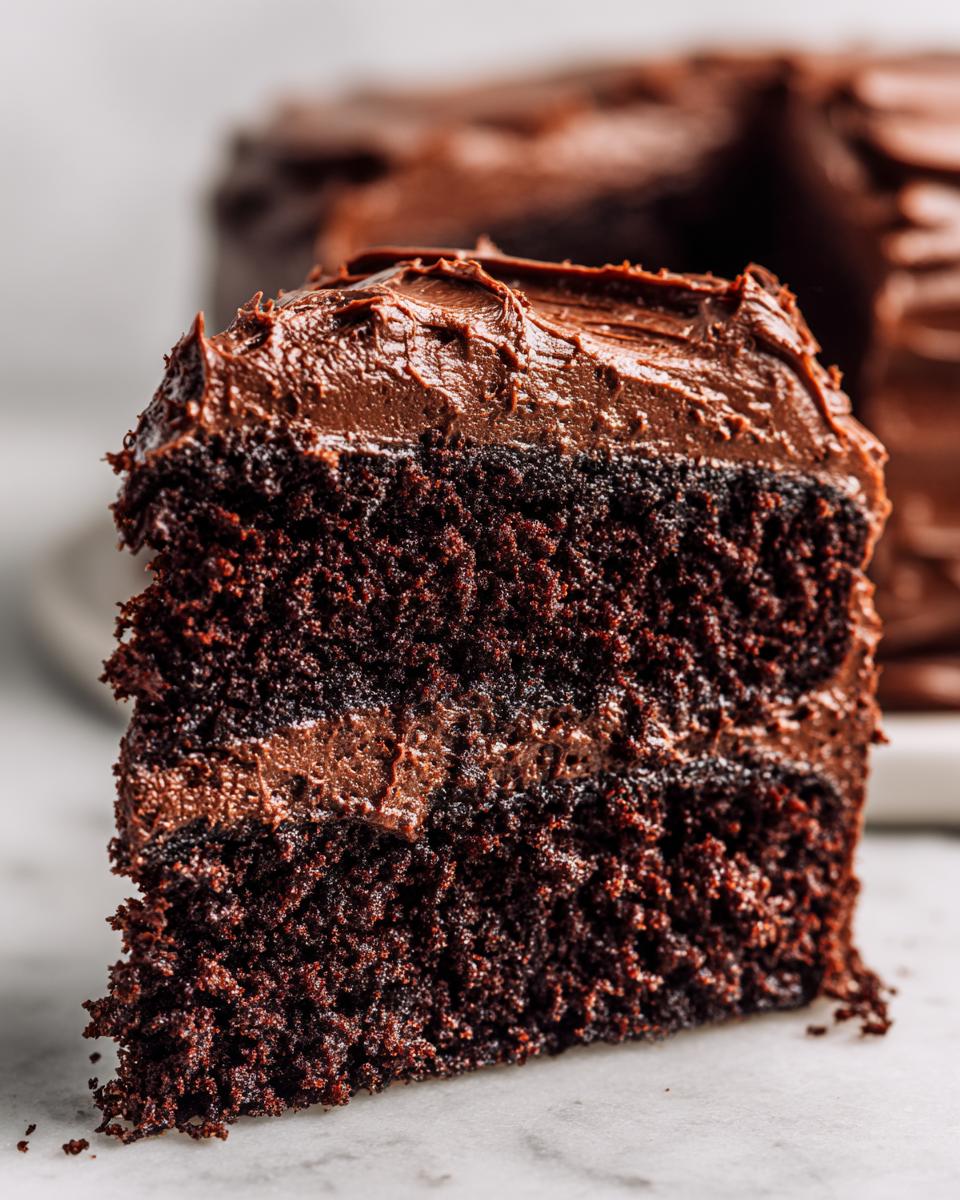
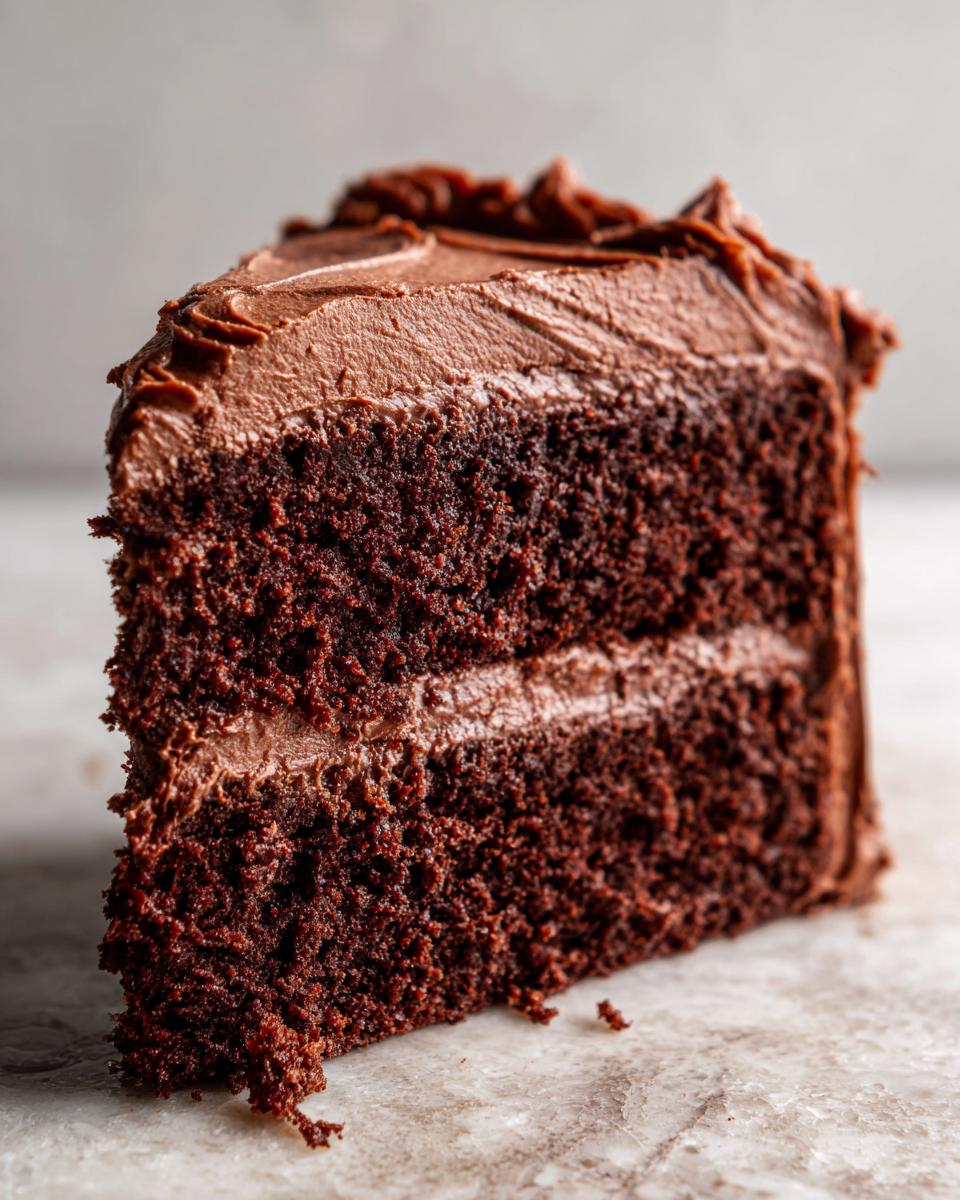
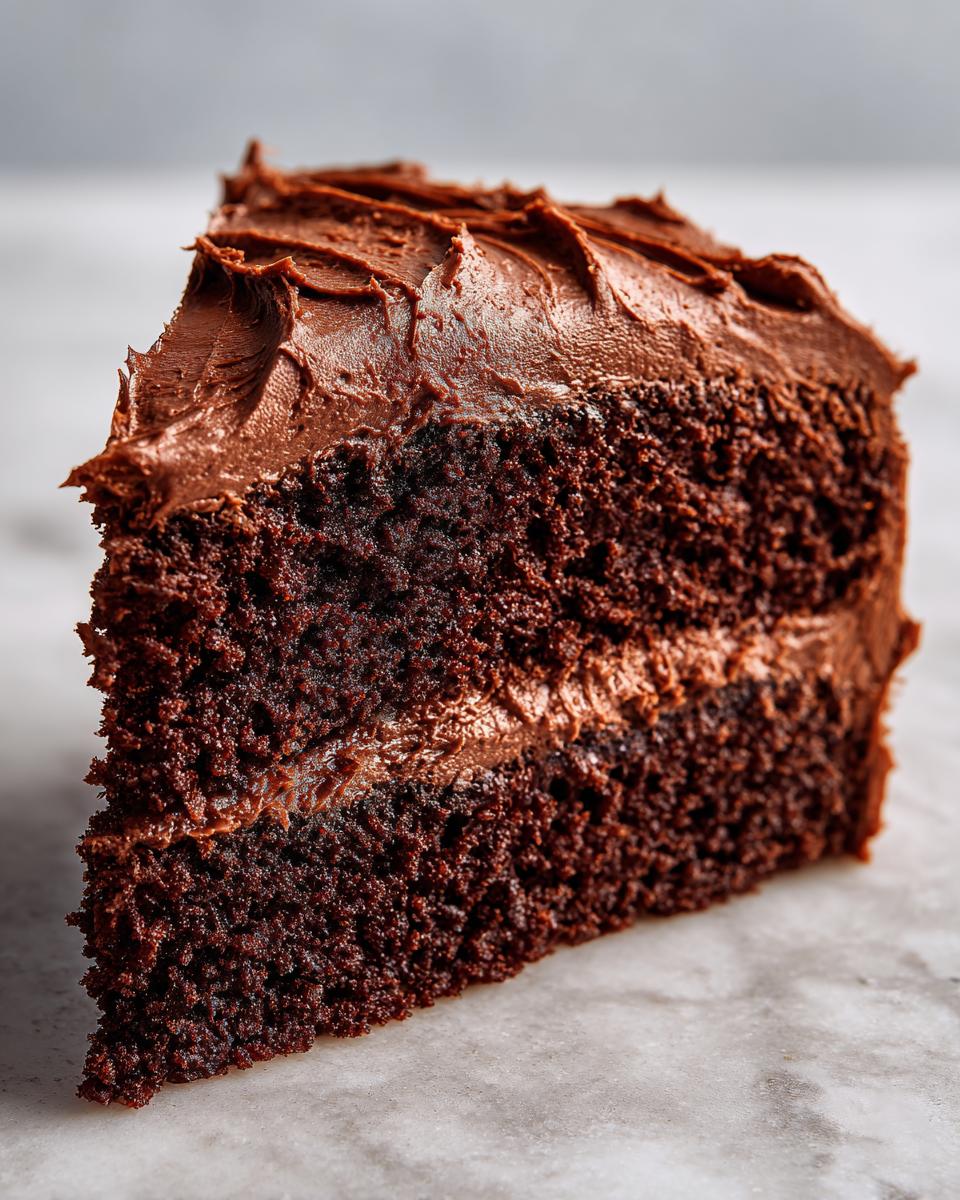
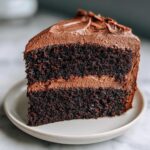
Oh, how many times have I heard from folks who just wanted a beautiful, rich topping for their birthday cake but ended up with a runny mess? It happens to the best of us! Home baking thrives on trust, and you need a frosting that performs every single time. That’s why I’m sharing my absolute best secret today: how to master **chocolate ganache frosting**. This isn’t just a thin glaze you pour over a Bundt; we are making a thick, creamy, spreadable triumph that holds its shape perfectly on a layer cake. Learning this simple, two-ingredient technique is going to change how you frost desserts forever! Trust me on this one, it’s far easier than any fussy butter icing. If you’ve struggled with stiff icings before, this might be the perfect alternative for you. You can find my guide for a lovely vanilla buttercream frosting recipe if you ever need a contrast, but today is all about that dark, decadent chocolate!
- Why This Chocolate Ganache Frosting Recipe Works So Well (The Carla Difference)
- Gathering Your Ingredients for the Creamy Chocolate Ganache Recipe
- Step-by-Step How to Make Chocolate Ganache for Cake
- Tips for Perfect Chocolate Ganache Frosting Application
- Variations on Your Easy Chocolate Ganache Frosting Recipe
- Storage and Handling of Thick Chocolate Ganache Icing
- Troubleshooting Common Chocolate Ganache Frosting Issues
- Frequently Asked Questions About Using Ganache as Cake Frosting
- Sharing Your Rich Chocolate Topping for Desserts
Why This Chocolate Ganache Frosting Recipe Works So Well (The Carla Difference)
When you look at a simple recipe with only two ingredients, you might think, “How hard can that be?” But the magic of this **chocolate ganache frosting** isn’t in the number of steps; it’s all about the relationship between the cream and the chocolate. If you use too much cream, you get that gorgeous, shiny glaze that won’t stay put on the side of a tall cake. Too much chocolate, and it turns into a hard, crumbly mess!
We’re aiming for that perfect happy medium, which we achieve almost entirely through patience while cooling and then a little bit of air incorporation later on.
Achieving the Right Ratio for Thick Chocolate Ganache Icing
For a simple ganache dip, a 1-to-1 ratio (equal parts by weight) is perfect. But to get a lovely, workable **thick chocolate ganache icing** that you can actually spread nicely, we lean a little heavier on the chocolate side, or, as we do here, we rely on that chilling and whipping step later to give us structure. Using quality semi-sweet or dark chocolate is important too. The higher cocoa solids help the mixture set up nicely when cooled, giving your frosting the stability it needs to stand up tall on your layers.
Gathering Your Ingredients for the Creamy Chocolate Ganache Recipe
When you’re working with just two main ingredients, the quality of what you buy really shines through. I tell my grandkids all the time: you can’t hide bad ingredients in a simple recipe! For this rich **chocolate ganache frosting**, treat your chocolate like the superstar it is. Don’t grab those old chocolate chips from the back of the pantry; they have stabilizers that will fight you when you try to whip this into a fluffy frosting.
We need smooth, good melting chocolate and the heaviest cream you can find. This ensures we get that incredibly smooth gloss before we even start the cooling process. If you are making this for a big family gathering, maybe try swapping this out for a big swirl in my homemade chocolate babka sometime!
Ingredient List for Chocolate Ganache Frosting
- 12 ounces semi-sweet or dark chocolate, finely chopped
- 1 cup heavy whipping cream
See? Wasn’t that easy? Just two things! But the chopping is important—the smaller the pieces, the quicker and more evenly everything melts together later. That means less time fussing and more time enjoying that wonderful chocolate smell filling your kitchen.
Step-by-Step How to Make Chocolate Ganache for Cake
Now for the fun part! This is where we take simple ingredients and transform them into something truly luxurious. Don’t rush these steps, especially the cooling phase. If you’re aiming to cover a beautiful layer cake, the patience we use right now will pay off when you pipe those neat edges. This process shows you exactly how to make chocolate ganache for cake that tastes incredibly rich but handles like a dream. We start by making a pourable ganache, and then the real work—the patient waiting—begins.
Melting the Chocolate and Cream Base
First things first: make sure that 12 ounces of chocolate is chopped up finely. That little bit of effort saves you so much headache later when you are trying to gently incorporate that hot cream. Place all those lovely chocolate bits into a bowl that can handle some heat. Now, take your cup of heavy cream and put it on the stove over medium heat. You’re watching for just a little bit of action—some tiny bubbles forming around the edges of the saucepan. That’s your cue! It needs to be hot, but we absolutely do not want a rolling boil; that can scorch the cream and ruin the texture of our final topping.
As soon as you see those edges bubbling, take the cream right off the stove. Pour that hot cream directly over your chopped chocolate all at once. Now, walk away! Seriously, set a timer for five full minutes. This waiting period is crucial because it lets the heat penetrate the chocolate evenly until it’s ready to melt without being stirred. After five minutes, you can gently start whisking. Start slow, right in the center of the bowl, and work your way outward in slow circles until everything comes together into one smooth, glossy pool of chocolate. Beautiful! That’s our basic ganache, ready for its makeover. Before we can frost with it, we need it to be stiff, so keep reading!
Chilling and Preparing the Whipped Chocolate Ganache Frosting Guide
This next step is what separates the glaze makers from the frosting masters! To get that perfect spreadable texture, we have to chill this mixture down significantly. Cover your bowl—a clean plastic wrap laid right on the surface keeps any little skin from forming—and pop it into the refrigerator. This chilling takes time. You’ll need about two to four hours total. The most important part of this chilling? You must stir the mixture every half hour! If you just leave it, the edges will turn rock-hard while the middle stays soupy. Stirring every 30 minutes keeps everything cooling evenly. You want it to get to the consistency of soft peanut butter—it should hold a peak when you lift your spoon.
Once it hits that perfect chilled, soft stage, pull out your hand mixer or stand mixer. We are starting the final transformation into a true **chocolate ganache frosting**. Beat it on medium speed for just a minute or two. You’ll watch it lighten in color and fluff up slightly! This whipping process is what makes it light enough to use as a general cake frosting. Be gentle; remember what I said about over-whipping? It can start to seize up on you. Stop as soon as it looks fluffy and holds a soft peak. Now it’s ready for that triple chocolate cheesecake you’ve been dreaming about!
Tips for Perfect Chocolate Ganache Frosting Application
You’ve done the patience work—you’ve melted it, you’ve chilled it, and you’ve whipped it until it’s gorgeous and fluffy. Now comes the moment of truth: applying this wonderful, **rich chocolate topping for desserts** to your baked masterpiece. This is where home bakers sometimes get jumpy because they’re afraid of messing up all that hard work! Honestly, the temperature of your cake and the temperature of the frosting are the two things you need to keep an eye on.
I’ve found that if you’re nervous about decorating, it’s much easier to frost a room-temperature cake than a cold one. Chill the cake until it’s firm, but let it sit out on the counter for about 20 minutes before you start applying the frosting. This prevents the cake from tearing when your spatula hits it.
**How to Frost a Cake with Ganache** Smoothly
The ideal time to use your whipped **chocolate ganache frosting** is right when it feels like soft, creamy peanut butter, as I mentioned before. If it’s too warm, it will slide right off the sides of your cake before you can even try to smooth it out. If it’s too cold—like, straight out of the fridge cold—it will drag crumbs right out of your cake layers.
When you apply it, start with a generous dollop right in the center of the bottom layer. Use an offset spatula or the back of a large spoon to gently push that frosting toward the edges, making sure it meets the center of the next layer. For a really smooth professional look, I like to do a very thin crumb coat first. Just smear a thin layer over the whole cake and then chill it for 15 minutes. This locks in those loose crumbs. Once that thin coat is firm, come back in with the rest of your perfectly whipped ganache and frost it beautifully. You can find my full breakdown on the technique over at my guide on how to frost a cake with ganache if you want every single secret!
Variations on Your Easy Chocolate Ganache Frosting Recipe
Now that you have this foolproof method down for a standard dark or semi-sweet topping, you might be wondering if you can change things up. The beautiful flexibility of ganache means you absolutely can! We usually stick to the darker chocolates here because they set up better for frosting, but if you’re craving something sweeter, like a milk chocolate version, or even something bright like white chocolate, you just need to tinker with the ratio just a little bit.
For **milk chocolate ganache frosting**, you have to be extra careful with the heat and the chilling time. Milk chocolate has more sugar and milk solids, so it melts faster and can seize up more easily. I usually reduce the cream slightly—maybe use 3/4 cup of cream for that same cup and a quarter of chocolate—just to give it a bit more backbone before we whip it.
If you are dreaming of that bright, beautiful coating, trying to make a **white chocolate ganache frosting** using this exact recipe can be tricky because white chocolate is very high in cocoa butter and doesn’t have the same structure. For white chocolate, I find it works best as a glaze or a very soft filling. But for a spreadable frosting, you might need to substitute some of that chocolate with a higher ratio of butter cream for structure, or you could look over my white chocolate cheesecake recipe for inspiration on handling those flavors!
Remember, no matter what type of chocolate you use, the chilling and whipping is what locks in that frosting texture. Don’t skip that important waiting period!
Storage and Handling of Thick Chocolate Ganache Icing
One of the best things about making a batch of **chocolate ganache frosting** is that it holds up beautifully, which is perfect for busy home cooks like us! Unlike cream cheese frosting that needs constant chilling, ganache is quite sturdy once it sets. If you’ve made more than you need for a single cake, or if you’re planning way ahead, storage is a breeze.
For the best results, if you made your ganache but decided not to whip it yet, cover that bowl tightly and keep it in the refrigerator for up to a week. It will turn very hard, like a block of solid chocolate. That’s perfectly fine! When you’re ready to use it, you just need to let it sit on the counter for an hour or two until it softens up enough to scoop. If you’re in a real rush to soften it, cut it into smaller chunks and microwave it in 10-second bursts, stirring well in between each one.
Now, once you’ve whipped your **thick chocolate ganache icing** and frosted your cake—oh, that beautiful, glossy creation!—you want to handle the storage carefully. If your kitchen is cool (under 70°F), the frosted cake can sit out safely at room temperature for a day or two, loosely covered with a cake dome or lightly tented with foil. Those high ratios of chocolate and fat act as natural preservatives, which is one reason I love using this topping so much!
If your kitchen is warm, or you need to keep it longer than two days, the refrigerator is your friend. Just remember this one crucial step: always let a refrigerated, frosted cake come back up toward room temperature before serving. When it warms up, the frosting softens to that perfect, creamy texture again. If you serve it ice cold, the **chocolate ganache frosting** will seem brittle and stiff when you slice into it. Speaking of hard textures, if you ever want to make an extra-thick, non-whipped version without a mixer, check out my easy fudge recipe; it uses a similar principle of cooling to set!
Troubleshooting Common Chocolate Ganache Frosting Issues
After all that care we took learning how to make chocolate ganache for cake, the last thing anyone wants is for it to misbehave right before you frost the layers! Don’t you worry for one minute if things don’t go exactly as planned. Chocolate and cream are temperamental friends sometimes, and we just need to coax them back into line. Most problems come down to temperature or timing. I’ve scribbled notes on the back of my recipe card about every mistake I’ve made over the years while aiming for that perfect **chocolate ganache frosting**.
If you find things are looking off, the first thing I always suggest is checking the temperature. Is it too warm? Too cold? We can almost always fix it with just a little bit of gentle help.
What if my ganache is too runny after chilling?
This usually means it just hasn’t chilled long enough to reach that soft peanut butter stage, or perhaps you used a slightly more liquid cream than intended. If it’s looking soupy after four hours in the fridge, don’t panic! Put it back in there, but resist the urge to leave it unattended. Check it every twenty minutes and give it a good stir each time.
If it’s still resisting the chill, you can try adding a little extra structure. As the recipe notes suggested, sometimes you need more backbone! If you have extra chocolate handy—say, two extra ounces of finely chopped dark chocolate—you can gently melt that chocolate separately in the microwave (15 seconds at a time!) and whisk it into the runny ganache. This extra solid will help it firm up once it cools down again. This might make it a bit dark, but hey, who doesn’t love a super dark, intense **rich chocolate topping for desserts**?
My perfectly whipped frosting has seized up!
Oh, this is the classic whippers’ dilemma! You whip it just a bit too long, trying to get it fluffier, and suddenly it turns grainy and stiff—like dry sand. This happens because over-whipping incorporates too much air too quickly, splitting the fat and solids. It looks scary, but the fix is almost always just warming it up a tiny bit!
Take that stiff bowl of frosting and set it on the counter for about 15 minutes to warm up slightly—just enough so the edges look a little softer. Then, very briefly, whip it again on the lowest speed. Just 15 or 20 seconds! That slight warmth, combined with the gentle mixing, should bring that beautiful emulsion back together, making it smooth and spreadable again. If it seems really resistant, a teaspoon of fresh heavy cream whisked in by hand can sometimes smooth things over beautifully, transforming it back into the **creamy chocolate ganache recipe** you wanted.
My ganache is hardening too fast when I try to spread it
If you find that the part you’ve already whipped is getting hard and difficult to spread while you are still working on the rest of the cake, it means your kitchen might be too cold, or you just let it sit too long between applying layers. If the frosting gets too stiff while you’re in the middle of decorating, just take the whole bowl and let it sit on the counter near the stove for about ten minutes, then give it a quick 5-second buzz with the mixer. This brings it back to that perfect, pliable temperature so you can get those smooth sides on your layers before it gets difficult to work with the **chocolate ganache frosting**.
Frequently Asked Questions About Using Ganache as Cake Frosting
I’ve gathered some of the questions I hear most often in the comment section when folks are first learning the ropes with this wonderful topping. Honestly, once you get the hang of the cooling process, you’ll be looking for excuses to use this **chocolate ganache frosting** on everything!
Can I use this recipe for a Chocolate Ganache Filling Recipe?
You absolutely can use this base for a filling! The main difference is in the final whipping stage. If you want a firm filling—say, between layers of a sturdy cake or bundled inside a chocolate tart shell—you can let the ganache chill until it’s quite stiff, maybe even slightly firmer than soft peanut butter, and skip the final whipping step entirely. It will be dense, rich, and hold up beautifully when sliced. If you’re making something delicate, you might want to whip it just a little bit less than the full two minutes prescribed for a light frosting, giving you something perfectly in between for your chocolate raspberry cake!
Can I make this a **Two Ingredient Chocolate Frosting** that doesn’t need whipping?
If you skip the whipping step entirely, you won’t end up with what most bakers consider a light frosting. What you will have, after chilling it for about four hours, is a very firm, dense, almost fudgy layer of chocolate. This works wonderfully as a thick, no-bake topping for bars or brownies, or as a sturdy filling as we mentioned above. But for spreading easily over the sides of a cake without tearing the crumbs, the whipping is what incorporates that air to make it light and spreadable—it really loosens up that texture and turns it into a true **easy chocolate ganache frosting recipe**.
What is the best chocolate to use for the **best chocolate ganache topping**?
This is an excellent question, and it goes right back to my note about ingredient quality. For the absolute **best chocolate ganache topping**, skip the convenience of chocolate chips, every time. Chocolate chips are designed to hold their shape under high heat, which is the opposite of what we want when we’re trying to melt them into a smooth liquid! I strongly recommend using good quality baking bars, like those labeled “baking chocolate” or quality dark chocolate bars that are around 55% to 70% cacao. When you chop them finely, they melt down into the smoothest, creamiest texture possible, which is the very foundation of great **using ganache as cake frosting**.
Sharing Your Rich Chocolate Topping for Desserts
Well, that’s it, friend! You’ve conquered the waiting game and learned the tricks to turn two simple ingredients into a crowning jewel for any dessert project. I truly hope that making this **chocolate ganache frosting** felt empowering—because it should! It’s one of those foundational techniques that opens up a whole new world of decorating possibilities without needing a whole pantry full of shortening and powdered sugar.
I always feel twice as proud when someone successfully recreates one of my family-tried recipes. Did you find that chilling process as nerve-wracking as I used to? Did your whipped topping hold its shape beautifully when you did the final spread? I’d absolutely love to hear about it!
Take a minute to leave a comment below telling me what you frosted with your lovely batch. Was it worth the wait? If you took a picture of your finished cake, please consider sharing it with me via my contact page—I love seeing those beautiful homemade creations!
Happy baking, and remember: good food shared makes the very best memories!
PrintRich Chocolate Ganache Frosting for Layer Cakes
Learn how to make a thick, spreadable chocolate ganache frosting perfect for covering layer cakes and cupcakes. This two-ingredient recipe yields a creamy, rich topping that sets up beautifully.
- Prep Time: 10 min
- Cook Time: 5 min
- Total Time: 255 min
- Yield: Enough to frost one 8-inch two-layer cake
- Category: Dessert
- Method: Mixing and Chilling
- Cuisine: American
- Diet: Vegetarian
Ingredients
- 12 ounces semi-sweet or dark chocolate, finely chopped
- 1 cup heavy whipping cream
Instructions
- Place the finely chopped chocolate into a medium, heatproof bowl.
- Pour the heavy whipping cream into a small saucepan. Heat the cream over medium heat until it just begins to simmer around the edges. Do not let it boil rapidly.
- Remove the hot cream from the heat and immediately pour it over the chopped chocolate.
- Let the mixture sit undisturbed for 5 minutes to allow the heat to melt the chocolate completely.
- Gently whisk the mixture starting from the center and working outward until the ganache is completely smooth and glossy. This is your pourable ganache.
- For a frosting consistency, you must cool the ganache. Cover the bowl and chill the ganache in the refrigerator for 2 to 4 hours, stirring every 30 minutes, until it is thick and holds soft peaks when lifted with a spoon. It should feel like soft peanut butter.
- Once cooled to a spreadable texture, use an electric mixer on medium speed to whip the ganache for 1 to 2 minutes until it lightens slightly in color and becomes fluffy enough to use as a cake frosting. Do not over-whip.
- Use the whipped chocolate ganache frosting immediately to cover your cooled cake or cupcakes.
Notes
- For a firmer frosting, use a higher ratio of chocolate to cream, such as 1.5 parts chocolate to 1 part cream.
- If your ganache becomes too stiff after chilling, let it sit at room temperature for 15 minutes and then whip it again briefly.
- This recipe works best with good quality chocolate bars rather than chocolate chips, as chips contain stabilizers that can affect the texture.
- Store frosted cakes loosely covered at cool room temperature for up to 2 days, or refrigerate and bring to room temperature before serving.
Nutrition
- Serving Size: 1/12 of recipe
- Calories: 350
- Sugar: 25
- Sodium: 15
- Fat: 28
- Saturated Fat: 17
- Unsaturated Fat: 11
- Trans Fat: 0.5
- Carbohydrates: 28
- Fiber: 3
- Protein: 5
- Cholesterol: 90