
Oh, friends, let’s talk about the pure joy of a truly decadent, melt-in-your-mouth treat that doesn’t require standing over a hot stove babysitting a fussy candy thermometer. That’s what we’re doing today! I’m sharing my absolute favorite, no-fail method for making reliable homemade chocolate fudge. As a former teacher, I believe good food shouldn’t be complicated, and this super easy, 5-ingredient fudge proves it. If you want the best, creamiest squares without the fuss, trust Carla on this one.
- Why This Easy Fudge Recipe is a Go-To Classic
- Gathering Ingredients for Your Marshmallow Fluff Fudge
- Step-by-Step Instructions for Quick Dessert Recipes
- Tips for Success with No Fail Fudge
- Storage and Reheating Instructions for Your Fudge
- Serving Suggestions for This Simple Dessert Squares
- Frequently Asked Questions About Homemade Chocolate Fudge
- Estimated Nutritional Data for This Classic Homemade Sweets
- Share Your Homemade Fudge Creations
Why This Easy Fudge Recipe is a Go-To Classic
When I taught third grade, the first thing I learned was how to make lessons dependable—and the same goes for my dessert recipes! This isn’t some tricky, temperamental confection. This is truly a creamy fudge no bake option that works even if the weather is humid or if you’re new to making candy. My goal is always to give you a recipe you can turn to again and again without worrying.
- It’s remarkably quick; you stir maybe five minutes total.
- It’s 100% reliable—we’re talking a complete no candy thermometer fudge experience.
- The cleanup is minimal, which I know every home cook appreciates!
Achieving Melt In Your Mouth Candy Texture
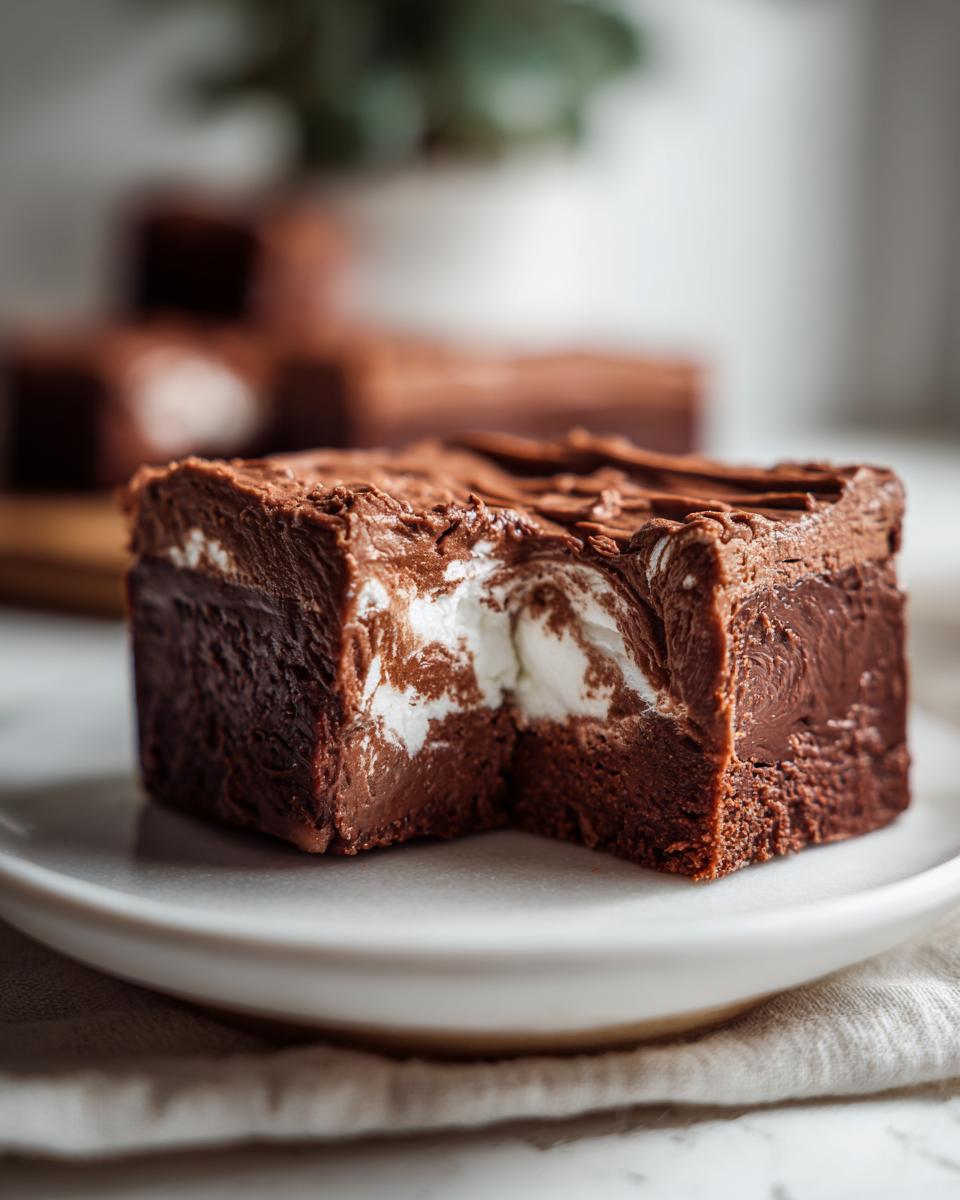
The secret weapon here is that jar of marshmallow fluff. Honestly, that’s what separates the stress of traditional candy making from the joy of this simple dessert. When you melt the chocolate and milk together, the fluff dissolves right in, acting as our stabilizer. It prevents those pesky sugar crystals that turn smooth fudge into something gritty. That fluff guarantees that rich, velvety texture you want in your melt in your mouth candy every single time.
Perfect for Gifting and Holiday Candy Ideas
Because this recipe is so straightforward, it’s become one of my favorite holiday candy ideas. You make a big batch, chill it, and cut neat little squares. They look so elegant wrapped up in cellophane, and nobody ever believes how fast they came together. When you make a treat this easy and this rich, it feels like cheating! It’s perfect for plate sharing at parties.
Gathering Ingredients for Your Marshmallow Fluff Fudge
When I teach a recipe, I always stress knowing your players before you start the game. For this wonderfully easy fudge recipe, we only need five core items, and you probably have most of them sitting in your pantry right now. This list keeps things simple, which is key for a successful easy fudge recipe.
Here is exactly what you’ll need to gather up:
- 1 (14 ounce) can sweetened condensed milk — Make sure it’s the condensed milk, not the evaporated kind!
- 1 (12 ounce) package semi-sweet chocolate chips — Use good quality chips; they really do make a difference in your homemade chocolate fudge.
- 1 (7 ounce) jar marshmallow fluff — This is the magic binder!
- 1 teaspoon vanilla extract
- 1 cup chopped pecans or walnuts (optional) — Feel free to leave these out if you’re making a plain chocolate batch.
Ingredient Notes and Substitutions for Rich and Decadent Sweets
Because there are so few ingredients, the quality of what goes in really shines through. Since we aren’t boiling sugar, the flavor relies entirely on the chocolate and the milk. Don’t skimp on those chips!
Now, I know some of you want to get creative! If you are looking to branch out from our standard chocolate squares, you can easily adapt this to make a lovely peanut butter fudge. My notes show that you can substitute half the semi-sweet chips with peanut butter chips—and then, when you stir in your fluff, add about a half cup of creamy peanut butter, too. It makes the texture slightly different but oh-so-deliciously decadent.
Remember, using good vanilla here really boosts those flavors, helping you achieve those rich and decadent sweets without adding extra steps to the process.
Step-by-Step Instructions for Quick Dessert Recipes
As much as I preach simplicity, there are a few places in this process where you just need to pay attention. Think of me standing right next to you in the kitchen! These steps are what guarantee you end up with a tray of smooth easy fudge recipe squares instead of a disappointing chocolate mess. It moves fast, so get your things measured out first!
Preparing the Pan and Melting the Base
First things first: get your 8×8 inch pan ready. I highly recommend lining it with parchment paper, but here’s the trick my students always missed: leave an overhang on the sides. This creates little handles so you can lift the whole set fudge out later like a big candy block. Lightly grease that parchment paper, just to be safe.
Next, take your medium saucepan and set the heat low. Combine the sweetened condensed milk and your chocolate chips. Now, this is crucial: stir constantly until everything is melted and silky smooth. You are mixing them, not scrambling them! Keep an eye on the edges—we need this hot, but never, ever let it boil! High heat is the enemy of smooth candy.
Incorporating Marshmallow Fluff for Perfect Fudge
Once that chocolate base is looking gorgeous and liquid, pull the whole pan right off the hot burner. If you try to stir the marshmallow fluff in while it’s still on the heat, you risk making things too stiff or even breaking the chocolate emulsion—we don’t want that!
Stir in your vanilla extract right away. Then, gently fold in that jar of marshmallow fluff. Keep mixing until you can’t see any white streaks anymore. If you opted for nuts, this is when you toss them in and mix until they’re evenly distributed throughout the batter.
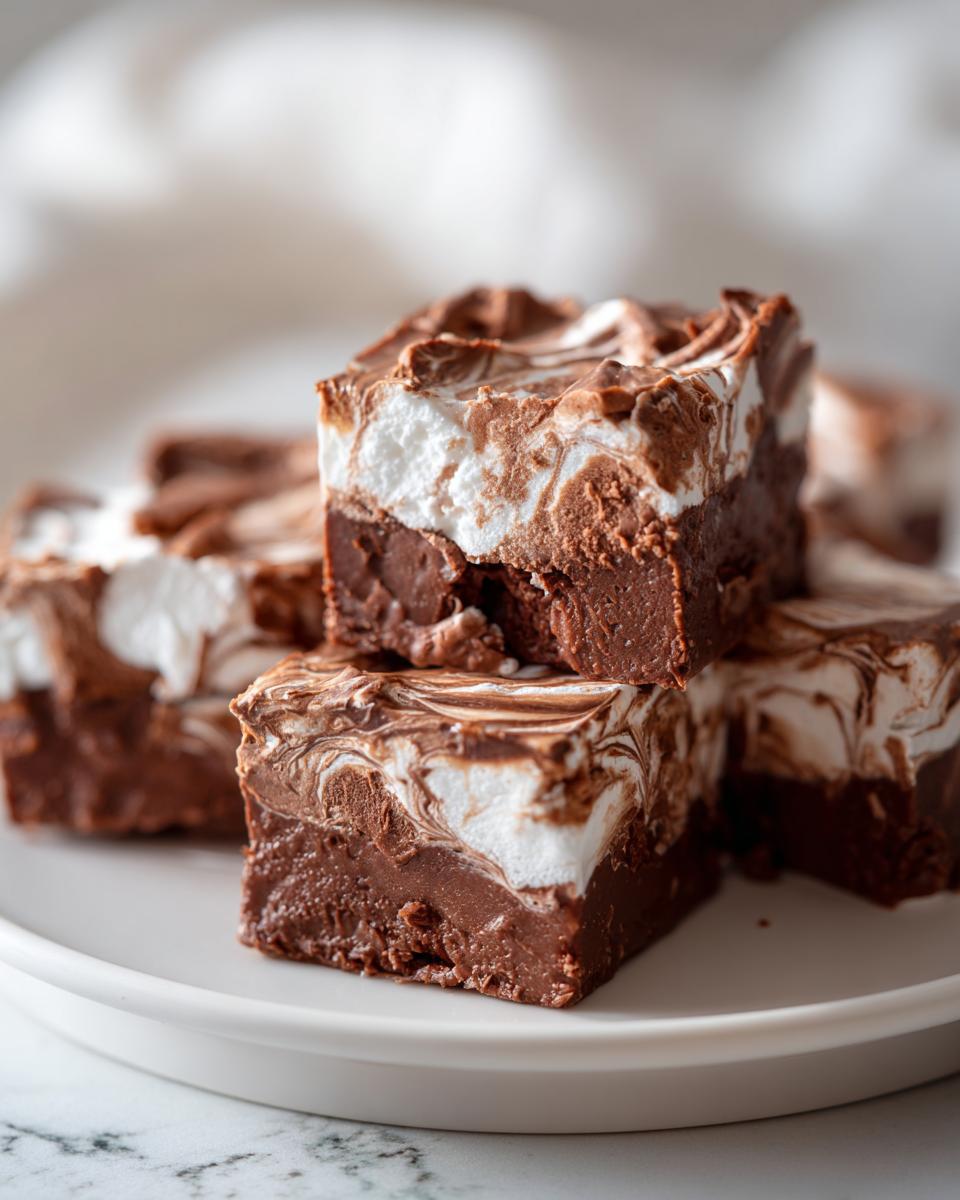
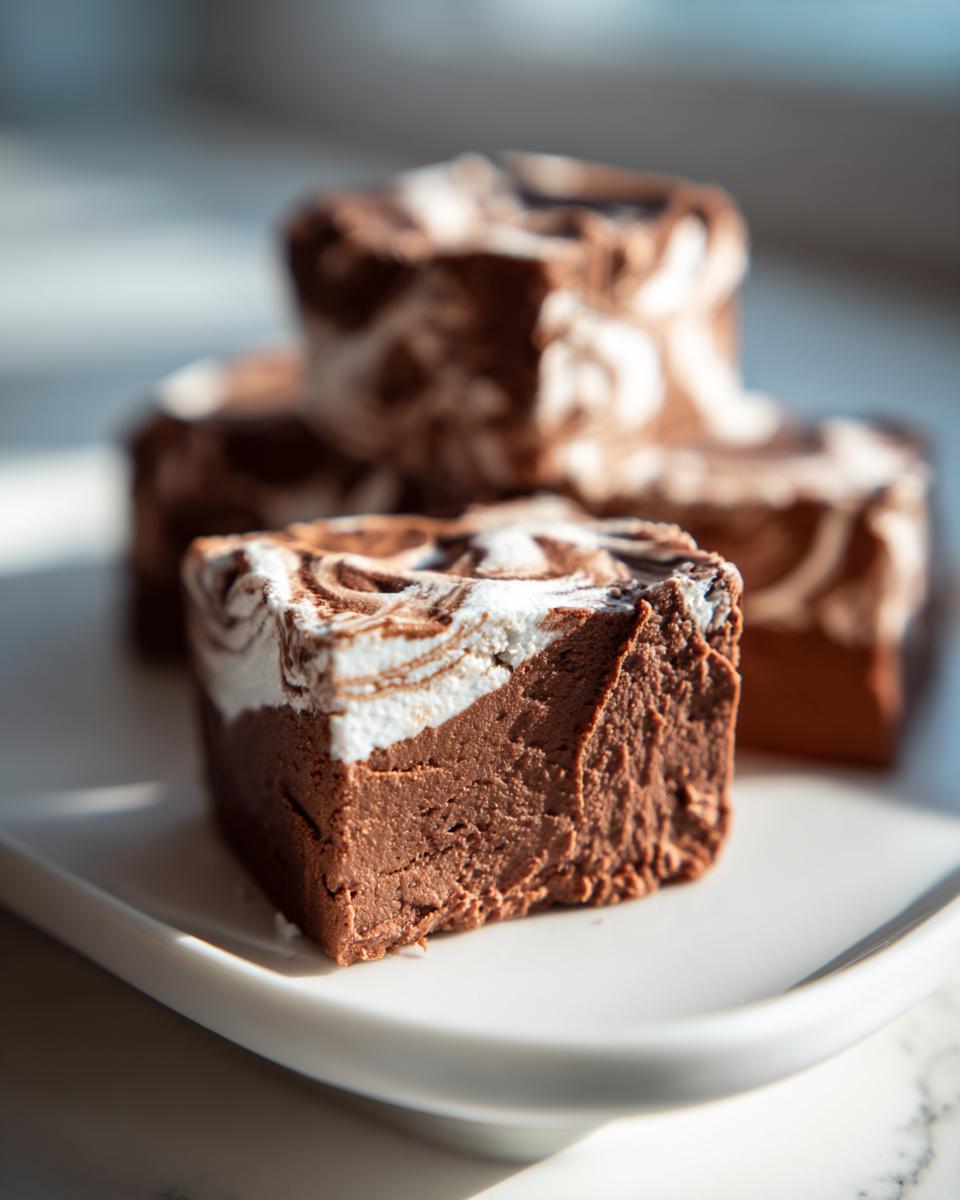
Scrape that lovely, thick mixture into your prepared pan and spread it around evenly—a small offset spatula works wonders here. Then, you just pop it into the fridge. Patience, dear friend! Let it chill for at least two hours until it’s nice and firm. Once it’s set, use those parchment handles to lift it out and slice it up into your perfect simple dessert squares.
Tips for Success with No Fail Fudge
Now that you have the structure down, I want to share a few little secrets that take this from a good dessert to what I honestly think is the best fudge recipe ever. Because we aren’t stirring and praying over a candy thermometer, we focus on the chilling and the finishing touches. These little bits of experience from my kitchen ensure you always get that professional-looking, satisfyingly dense result.
When you go to cut the fudge after chilling, the trick is to use a long, sharp knife that you wipe clean between each slice. This keeps the chocolate from dragging and leaves you with those beautiful, neat edges you want for easy holiday treats. You can even warm the knife slightly under hot water, wipe it totally dry, and then slice. It glides right through!
Making Fantasy Fudge Recipe Variations
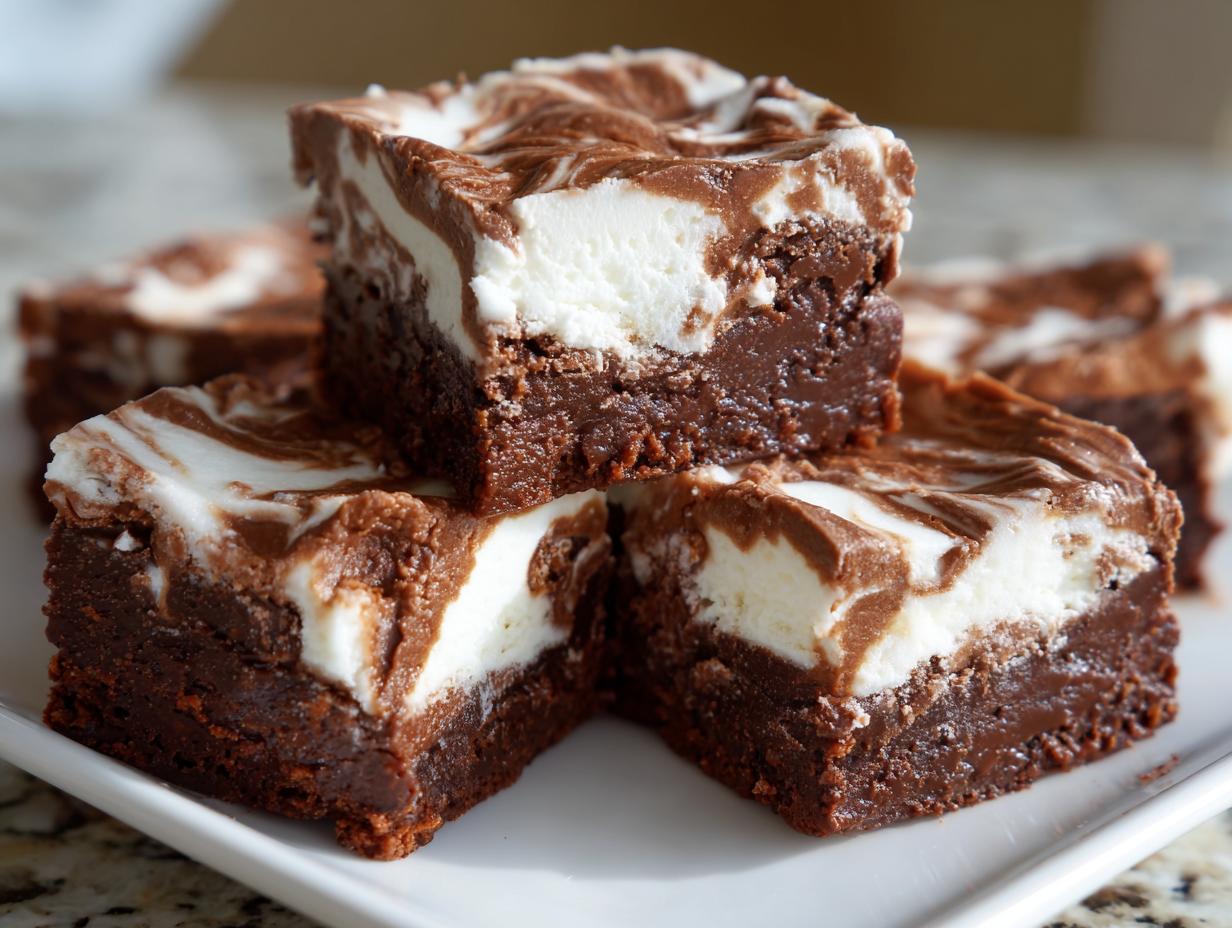
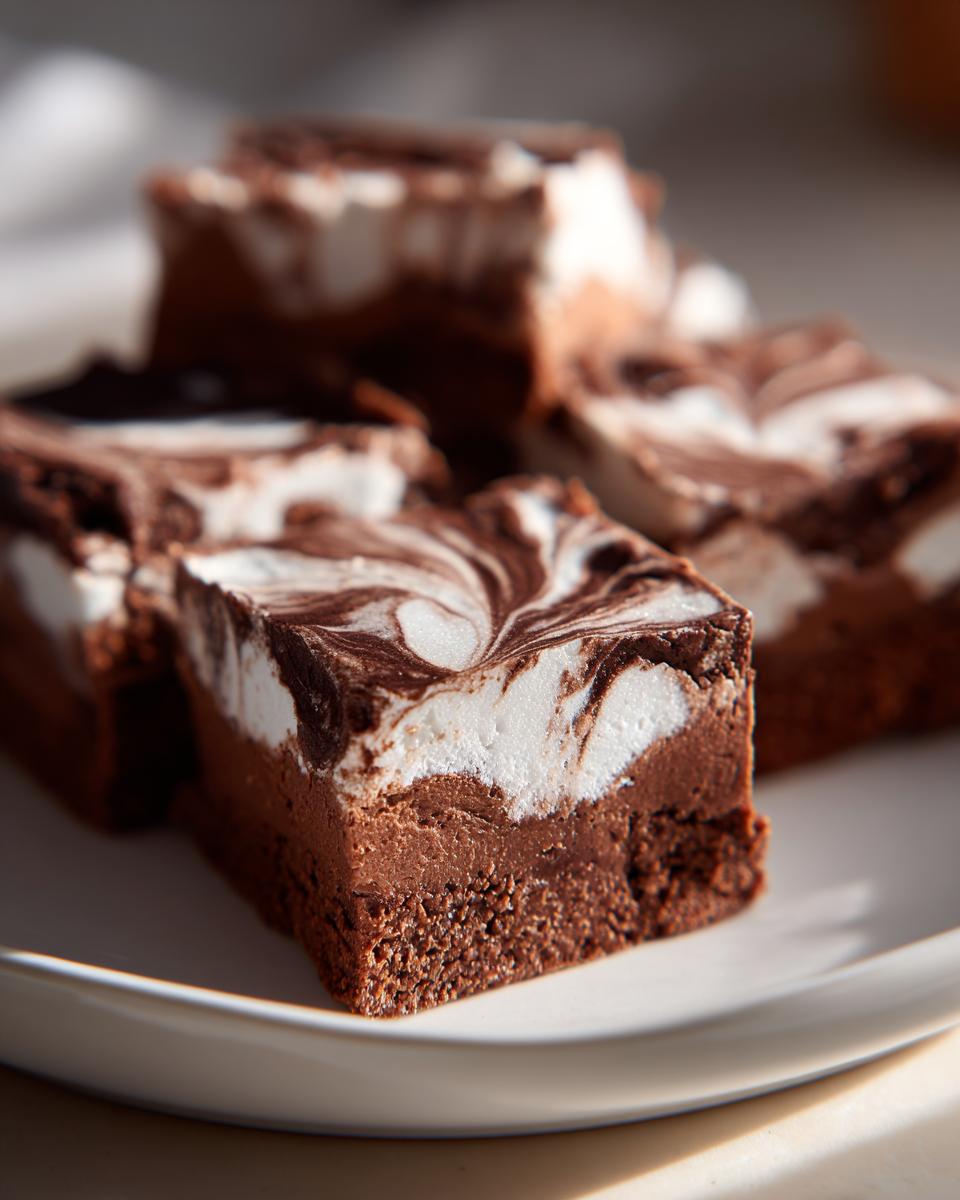
You might have heard of ‘Fantasy Fudge’—and honestly, this recipe is based on that wonderful concept, but I just made it even *easier* for you! If you want to elevate the look of your homemade chocolate fudge and create that beautiful marbled look, the swirl technique is your friend. Remember how we held back a bit of that marshmallow fluff?
Go ahead and take about a quarter cup of that reserved fluff and dollop it right onto the surface of the fudge after you’ve poured the main mixture into the pan. Don’t be too fussy! Just take a butter knife or a thin offset spatula and gently drag it through the top layer once or twice, creating gorgeous swoops of white against the dark chocolate. Don’t overmix, or it all blends together. This small effort creates this stunning presentation that makes people think you worked on it all day long!
Storage and Reheating Instructions for Your Fudge
One of the great things about this wonderful no fail fudge recipe, beyond how easy it is to make, is how well it keeps. Since we aren’t using any eggs or cream like in traditional candies, it stays fresh for quite a while! This is so helpful when you are making your easy holiday treats ahead of time.
You must store this fudge in an airtight container. I prefer glass containers because they don’t hold onto smells, but any heavy-duty container will do the trick. Keep the container in the refrigerator. When stored properly, these little squares stay beautifully soft and creamy for up to two weeks! That’s why this is so perfect for fudge for gifting—you can make it well in advance.
Now, you might wonder about reheating, but frankly, you don’t need to! This fudge is designed to be eaten chilled or at cool room temperature. If it gets too warm, it might get a little gooey on you, especially if you had a warm kitchen day. If you happen to leave a piece out for an hour, it should soften up just enough to give you that perfect, gooey pull, but never put it in the microwave. That will just melt it down into a sugary puddle, and we surely don’t want that!
Serving Suggestions for This Simple Dessert Squares
Even the easiest treats deserve the perfect pairing, don’t you think? This chocolate fudge is incredibly rich—it’s just chocolate, condensed milk, and fluff swirling together. What it really needs is something on the side to cut through that decadence. When I serve a platter of these at family get-togethers, I like to put something bright and tart next to them.
A tiny bowl of fresh raspberries or sliced strawberries works like a charm. That little burst of fruit cleanses the palate after a bite of the rich sweet, making that next square taste just as good as the first! If you’re pairing it with a beverage, strong black coffee is truly the best companion. The bitterness of the coffee balances the sugar perfectly.
If you’re looking to serve this alongside another simple dessert that’s just as easy but perhaps brighter in flavor, consider making my lemon sheet cake! Serving a small square of fudge alongside a tiny slice of that bright lemon cake makes for an unexpectedly wonderful dessert spread.
Frequently Asked Questions About Homemade Chocolate Fudge
I always get so many wonderful questions after sharing a beloved recipe like this quick fudge! When you’re making something that’s supposed to be foolproof, you naturally want double-checking answers. Don’t hesitate to ask if something isn’t clear! Here are a few things folks often wonder about when trying this tried-and-true method for making homemade chocolate fudge.
Can I make this fudge without marshmallow fluff?
This is where I have to be honest with you, friends: the marshmallow fluff is the whole backbone of why this recipe works so well! It’s what gives you that super smooth, soft texture that qualifies as no candy thermometer fudge. If you try to substitute it entirely, you’re essentially making a different kind of candy, probably one that requires constant stirring and tempering. If you absolutely cannot find fluff, you could try replacing it with an equal amount of evaporated milk mixed with a little extra butter, but be prepared—it won’t set up quite the same way. You might end up with something closer to a soft chocolate ganache or fudge sauce rather than firm simple dessert squares.
How do I make peanut butter fudge using this base?
Oh, you absolutely can, and I highly recommend it! This is one of my favorite ways to switch things up when I need something different for the holidays. Remember that note I shared earlier? It’s very clear: to transform this into a stunning peanut butter fudge, you need to swap out half of your chocolate chips for peanut butter chips—use about 6 ounces of each type of chip when melting them down with the condensed milk. Then, when you’re stirring in the marshmallow fluff off the heat, add an extra half cup of creamy peanut butter right then and there. It blends beautifully and creates a dense, nutty treat that makes for wonderful easy fudge recipe batches!
Estimated Nutritional Data for This Classic Homemade Sweets
Now, I always tell my grandchildren that when you’re baking from scratch, especially with simple ingredients like these, the final counts can always shift a little based on the brand of chocolate chips you grab or if you decide to add those extra nuts! These numbers are what we calculated based on the recipe using semi-sweet chips and yielding exactly 36 squares.
Think of this as a solid guideline for enjoying your rich and decadent sweets, not a strict diet requirement!
- Serving Size: 1 square
- Calories: 150
- Sugar: 18g
- Sodium: 35mg
- Fat: 8g
- Saturated Fat: 4g
- Unsaturated Fat: 4g
- Trans Fat: 0g
- Carbohydrates: 19g
- Fiber: 1g
- Protein: 2g
- Cholesterol: 10mg
If you add those optional nuts, of course, your fat and protein counts will go up slightly, but that’s a worthy trade-off, if you ask me! This incredible homemade chocolate fudge tastes wonderful, and the numbers reflect a satisfying, simple treat.
Share Your Homemade Fudge Creations
Well, that’s it! We’ve made the easiest, creamiest, no-fuss batch of chocolate fudge you could ever dream up. I truly hope this recipe has made your kitchen a little warmer and sweeter. I absolutely love hearing from you all!
When you make this easy fudge recipe, please take a moment to leave a star rating right below this post. It helps other home cooks know that this is a tried-and-true favorite. And if you tried one of the customizations—maybe you went for the peanut butter swirl or added caramel mixed with pecans—tell me about it in the comments!
I want to see what you come up with! Knowing that you’re enjoying these simple, rich treats with your family and friends is the whole reason I share these lessons. Did you take your homemade chocolate fudge to a holiday party? Did it disappear first? Let me know!
PrintEasy 5-Ingredient Marshmallow Fluff Fudge

Make rich, creamy chocolate fudge without a candy thermometer. This simple recipe yields melt-in-your-mouth squares perfect for gifting or holiday treats.
- Prep Time: 10 min
- Cook Time: 5 min
- Total Time: 2 hours 15 min
- Yield: 36 small squares 1x
- Category: Dessert
- Method: No Bake
- Cuisine: American
- Diet: Vegetarian
Ingredients
- 1 (14 ounce) can sweetened condensed milk
- 1 (12 ounce) package semi-sweet chocolate chips
- 1 (7 ounce) jar marshmallow fluff
- 1 teaspoon vanilla extract
- 1 cup chopped pecans or walnuts (optional)
Instructions
- Line an 8×8 inch baking pan with parchment paper, leaving an overhang on the sides for easy removal. Lightly grease the paper.
- In a medium saucepan over low heat, combine the sweetened condensed milk and chocolate chips. Stir constantly until the chocolate is completely melted and the mixture is smooth. Do not let it boil.
- Remove the pan from the heat. Stir in the marshmallow fluff and vanilla extract until fully incorporated.
- If using nuts, fold them in now.
- Pour the fudge mixture into the prepared pan and spread evenly.
- Chill in the refrigerator for at least 2 hours, or until firm enough to cut.
- Use the parchment overhang to lift the fudge from the pan. Cut into 1-inch squares.
Notes
- For a peanut butter fudge variation, substitute half the chocolate chips with peanut butter chips and add 1/2 cup of creamy peanut butter with the chocolate.
- If you want a swirl effect, reserve 1/4 cup of marshmallow fluff and gently swirl it into the top layer before chilling.
- This recipe makes excellent edible gifts when wrapped individually.
Nutrition
- Serving Size: 1 square
- Calories: 150
- Sugar: 18g
- Sodium: 35mg
- Fat: 8g
- Saturated Fat: 4g
- Unsaturated Fat: 4g
- Trans Fat: 0g
- Carbohydrates: 19g
- Fiber: 1g
- Protein: 2g
- Cholesterol: 10mg