
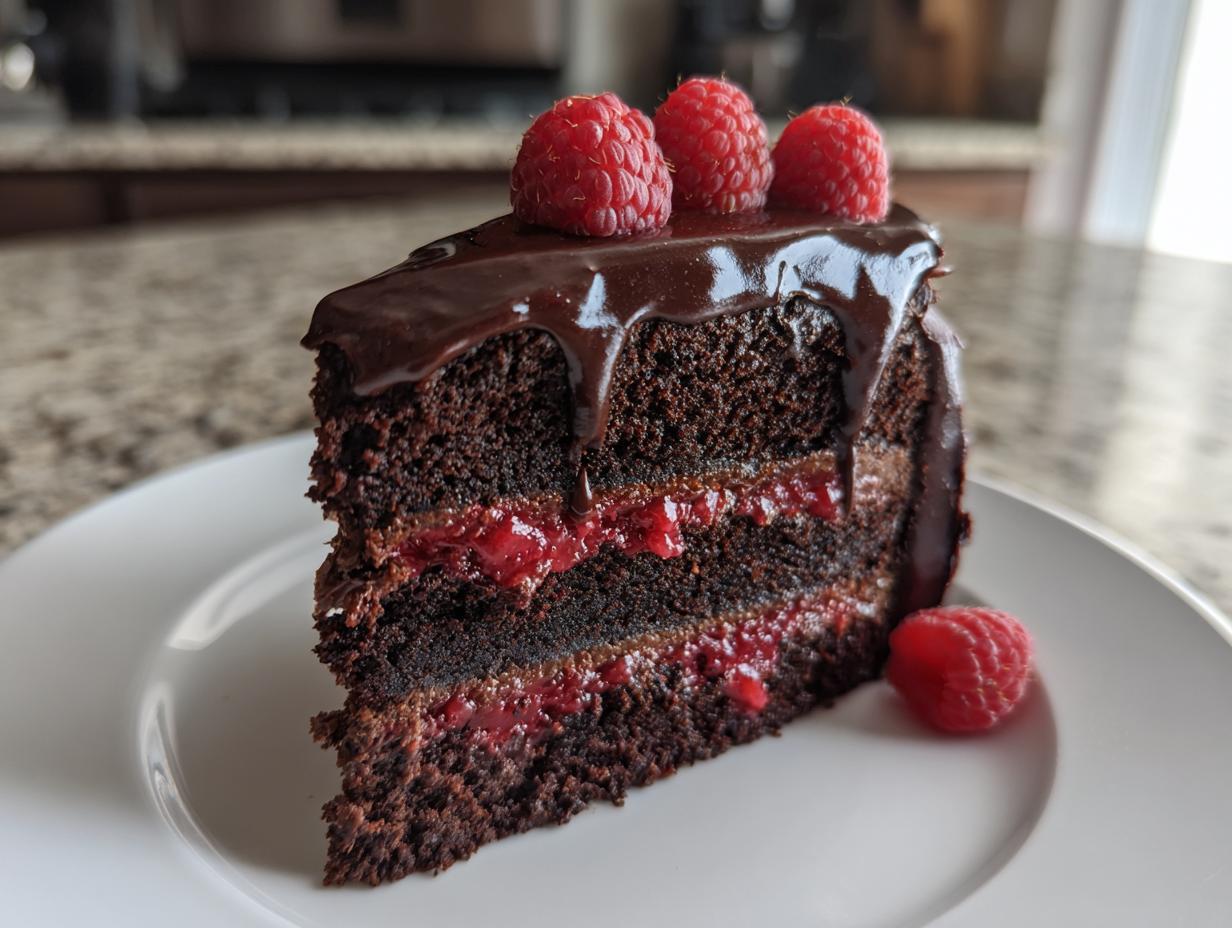
There is simply nothing that says “celebration” quite like a show-stopping layer cake, is there? When I think about making something truly memorable, something that will have everyone reaching for a second slice, my mind immediately goes to pairing deep, dark chocolate with that bright, tangy burst of raspberry. That’s precisely what we are doing today with this truly decadent chocolate raspberry cake.
As a former teacher, I’ve always believed that the key to success in the kitchen—especially with a fancy cake—is crystal clear instructions. You shouldn’t need a culinary degree to make something beautiful! This recipe has become my go-to for birthdays and anniversaries because the rich, moist chocolate layers perfectly counter the vibrant, tart raspberry filling. Trust me, after fifty years of baking, I’ve perfected the steps to ensure this cake turns out perfect every single time you make it.
This combination isn’t just delicious; it’s elegant, and I promise it’s easier than it looks!
- Why This Chocolate Raspberry Cake Recipe is a Showstopper
- Gathering Ingredients for Your Chocolate Raspberry Cake
- Step-by-Step Instructions for the Ultimate Raspberry Chocolate Cake
- Tips for Success Making the Best Chocolate Raspberry Cake
- Making This Chocolate Cake with Fruit Filling Ahead of Time
- Serving Suggestions for Your Decadent Dessert Recipes
- Frequently Asked Questions About the Chocolate Raspberry Cake
- Sharing Your Chocolate Raspberry Cake Creations
- Estimated Nutritional Data for This Rich Chocolate Cake Idea
Why This Chocolate Raspberry Cake Recipe is a Showstopper
When you’re aiming for a dessert that truly wows people, this chocolate raspberry cake is the one that always delivers. It’s not just a pretty face, though! It’s genuinely balanced in flavor, which is what separates a good cake from a great one. People often stop by my kitchen just to ask what smells so good when this is baking. Baking something this elegant always reminds me of the care I put into teaching others, like when I showed my grandkids how to make chocolate covered cherries—it’s all about precision and joy.
Here’s what makes this recipe my absolute favorite for any special occasion:
- The layers are unbelievably rich and tender—we hit that perfect texture every time.
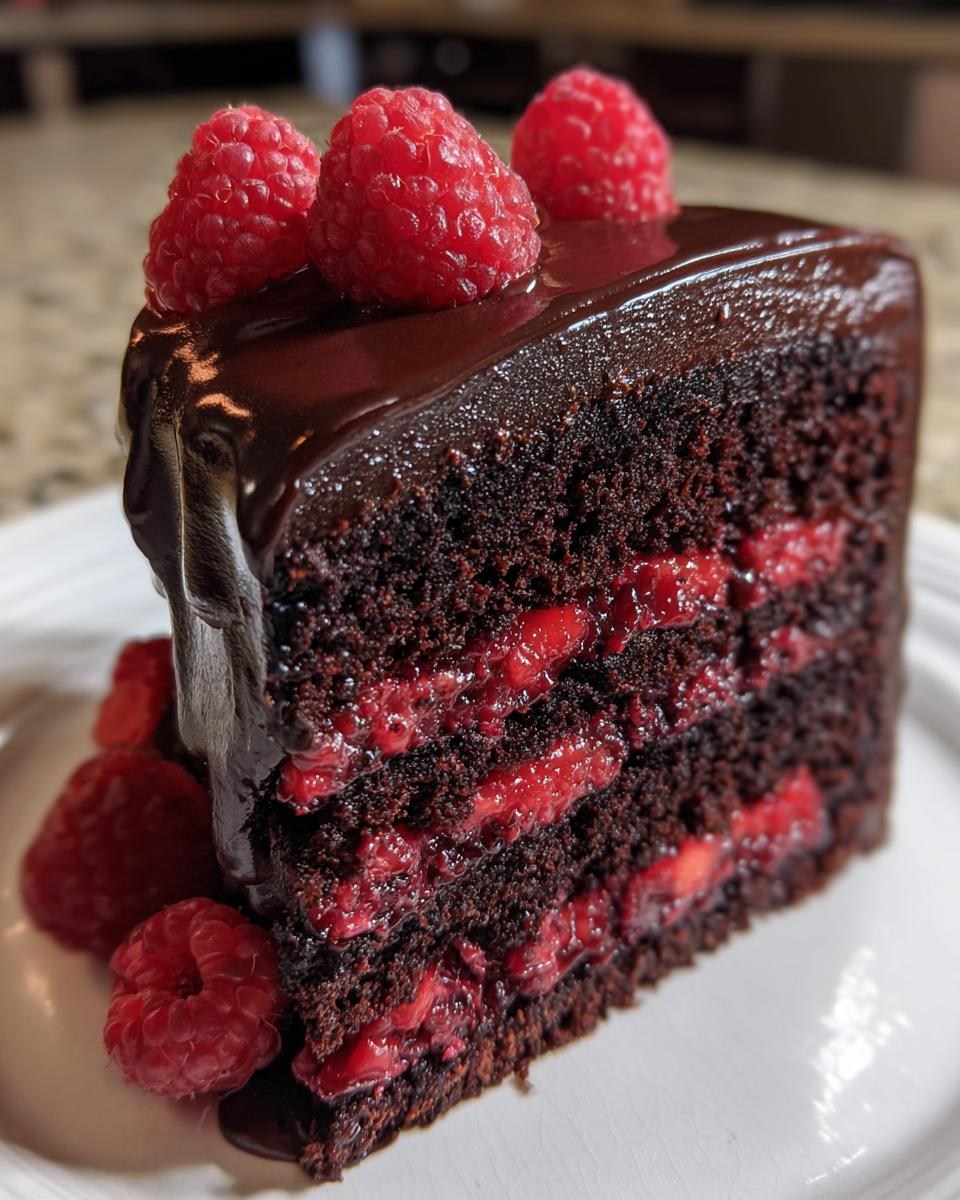
- You get that fantastic tension between the deep, dark chocolate and the bright, tart fruitiness of the raspberries. It keeps you wanting another bite!
- The silky chocolate ganache provides that gorgeous, elegant look, especially if you let it drip just a little down the sides.
Achieving the Perfect Moist Chocolate Cake Recipe
You asked for the key to the moist chocolate cake recipe part, and I can tell you right now, it’s that secret ingredient we add at the very end: boiling water. Don’t panic when the batter gets thin; that’s exactly what you want! Pouring in that hot water “blooms” the cocoa powder, making the chocolate flavor deeper and richer than you can imagine, all while guaranteeing the softest crumb you’ve ever felt.
The Bright Raspberry Filling for Cake
For the raspberry filling for cake, I always go with a high-quality preserve rather than just fresh berries alone in the filling. Preserves bring intense, concentrated flavor and the necessary stickiness to hold those layers together. We scatter some fresh berries in there too, but the jam does the heavy lifting of balancing that rich chocolate in the final chocolate raspberry cake.
Gathering Ingredients for Your Chocolate Raspberry Cake
Now that we’ve talked about why this cake is worth the effort—and believe me, it is—let’s get our ingredients lined up. When you bake something like this chocolate raspberry cake, having everything measured and ready before you start mixing makes the whole process so much smoother. I always say, the prep work is half the battle done! You’ll notice I like things bundled together, just like my recipe for vanilla buttercream frosting; it keeps things organized.
For the Moist Chocolate Cake Layers
For the cake itself, the quality of your cocoa powder really pays off here. Don’t skimp! We need a good, deep, dark unsweetened cocoa powder to give us that intense chocolate base. Here is what you’ll need for those two lovely layers:
- 1 3/4 cups all-purpose flour
- 1 3/4 cups granulated sugar
- 3/4 cup unsweetened cocoa powder (The good stuff!)
- 1 1/2 teaspoons baking powder
- 1 1/2 teaspoons baking soda
- 1 teaspoon salt
- 2 large eggs
- 1 cup whole milk
- 1/2 cup vegetable oil
- 2 teaspoons vanilla extract
- 1 cup boiling water (Don’t forget this crucial step!)
For the Raspberry Filling for Cake
The filling should be bright and tangy to cut through that richness. I prefer using a higher-end preserve because the flavor is just superior. If you want a little extra freshness and texture, grab some fresh berries too.
- 1 cup raspberry preserves (Aim for the best you can find.)
- 1 cup fresh raspberries (Optional, but I love adding them for that extra pop.)
For the Silky Chocolate Ganache Drip Cake Frosting
This ganache is what makes the cake look so elegant and professional—it sets up beautifully for a stunning presentation. We’re adding a tiny bit of butter at the end. It’s totally optional, but trust me, that little bit of fat just makes the shine on your finished chocolate ganache drip cake unforgettable!
- 12 ounces semi-sweet or dark chocolate, finely chopped (Chopping it small ensures it melts evenly!)
- 1 1/2 cups heavy cream
- 1 tablespoon unsalted butter (Optional, for that glossy finish.)
And of course, grab a pint of the freshest raspberries you can find for decoration when we get to the assembly step!
Step-by-Step Instructions for the Ultimate Raspberry Chocolate Cake
Alright, we have our ingredients lined up, which is wonderful! Now comes the hands-on part. When I was teaching third grade, explaining things step-by-step was the only way anyone ever understood long division, and the same goes for baking a gorgeous layer cake. We’ll tackle this in three chunks: getting those moist layers baked perfectly, whipping up the ganache while they cool, and then putting everything together to create this stunning chocolate raspberry cake centerpiece. Baking something this elegant always reminds me of the care I put into teaching others, like when I showed my grandkids how to make chocolate crinkle cookies—it’s all about precision and joy.
Baking the Moist Chocolate Cake Recipe Layers
First thing’s first: let’s get that oven heated up! Preheat your oven to 350°F (175°C). Then, grab those two 8-inch cake pans. You need to grease and flour them well. I always run a quick smudge of butter around, dust with flour, and tap out the excess. Nobody wants a beautiful cake stuck in the pan!
In your biggest bowl, whisk together all the dry things—flour, sugar, cocoa, baking powder, soda, and salt. Make sure they are really well married together before moving on.
Next, add your eggs, milk, vegetable oil, and vanilla right into that dry mix. Get your electric mixer and beat it on a medium speed for exactly two minutes. This gets the batter nice and smooth. Now for the magic trick that makes this the moist chocolate cake recipe everyone raves about: carefully stir in that cup of boiling water. Don’t worry, the batter will look super thin, almost like soup—that’s exactly right! That hot liquid blooms the cocoa.
Divide that thin batter evenly between your prepared pans. Bake them for about 30 to 35 minutes. You’ll know they are done when a wooden pick inserted right into the center comes out clean. Let them cool in those pans for just 10 minutes. Seriously, don’t rush this part! After 10 minutes, flip them out onto a wire rack to cool completely before we even think about frosting.
Creating the Silky Chocolate Ganache Frosting
While your cake layers are cooling off—and they need to be *completely* cool, remember that rule!—we can make our fabulous frosting. For the silky chocolate ganache frosting, first, you are going to finely chop all 12 ounces of your chocolate. The smaller the pieces, the smoother the melt.
Put that chopped chocolate into a sturdy, heatproof bowl. Now, take your heavy cream and heat it up in a little saucepan. You only want it to *just* start simmering around the edges. Don’t let it get wild and boil over! When you see those tiny bubbles forming along the side, take it off the heat immediately.
Pour that hot cream right over the chocolate waiting in the bowl. Now, Carla’s patience lesson: leave it alone for five full minutes! Don’t touch it! After the rest period, whisk it gently, starting from the center, until it’s totally glossy and smooth. If you want that extra special sheen, whisk in that tablespoon of butter now.
This ganache won’t be ready for frosting right away. You need to let it cool on the counter, stirring every so often, until it thickens up nicely to a spreadable consistency—usually about an hour or two. We want it thick enough for our chocolate raspberry cake to hold its shape, but soft enough to spread.
Assembling Your Elegant Chocolate Berry Dessert
This is where the fun happens! Lay down your first cooled cake layer on your serving plate. If the top is too domed, take a serrated knife and gently level it off; we want flat surfaces for stacking.
Spread that beautiful raspberry preserve evenly across the first layer. If you decided to use those fresh raspberries, scatter them lightly right over the top of the jam now.
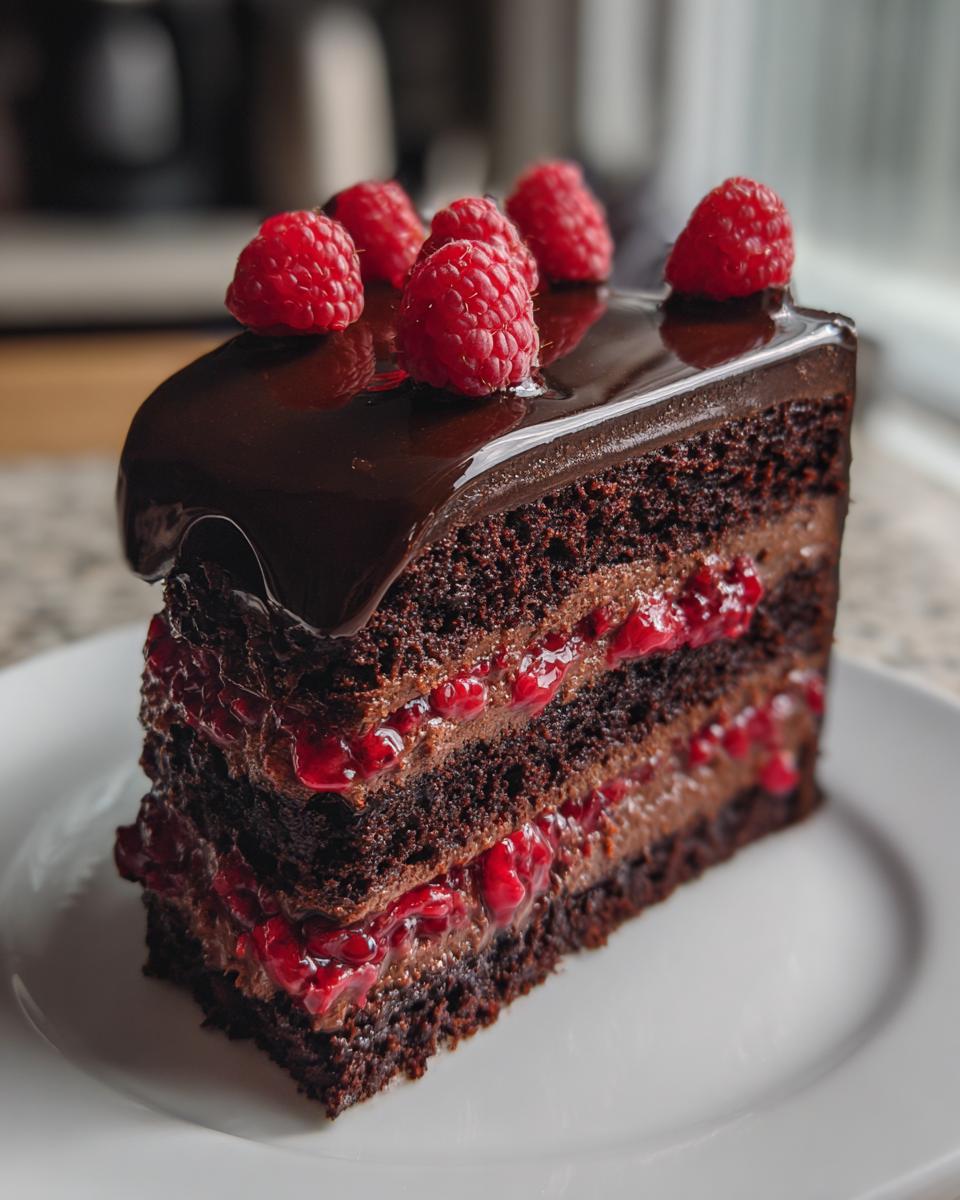
Carefully place your second cake layer on top. Now, grab that thickened ganache. You can frost the whole cake just to cover it, giving it a nice, rustic look. But if you want that impressive chocolate ganache drip cake look, here’s the trick:
- Take a couple of spoonfuls of the ganache and warm it up again *very briefly*—just until it’s pourable, not hot.
- Use a small spoon or piping bag to drizzle it over the top edge of the cake, letting gravity pull it down the sides in lovely drips.
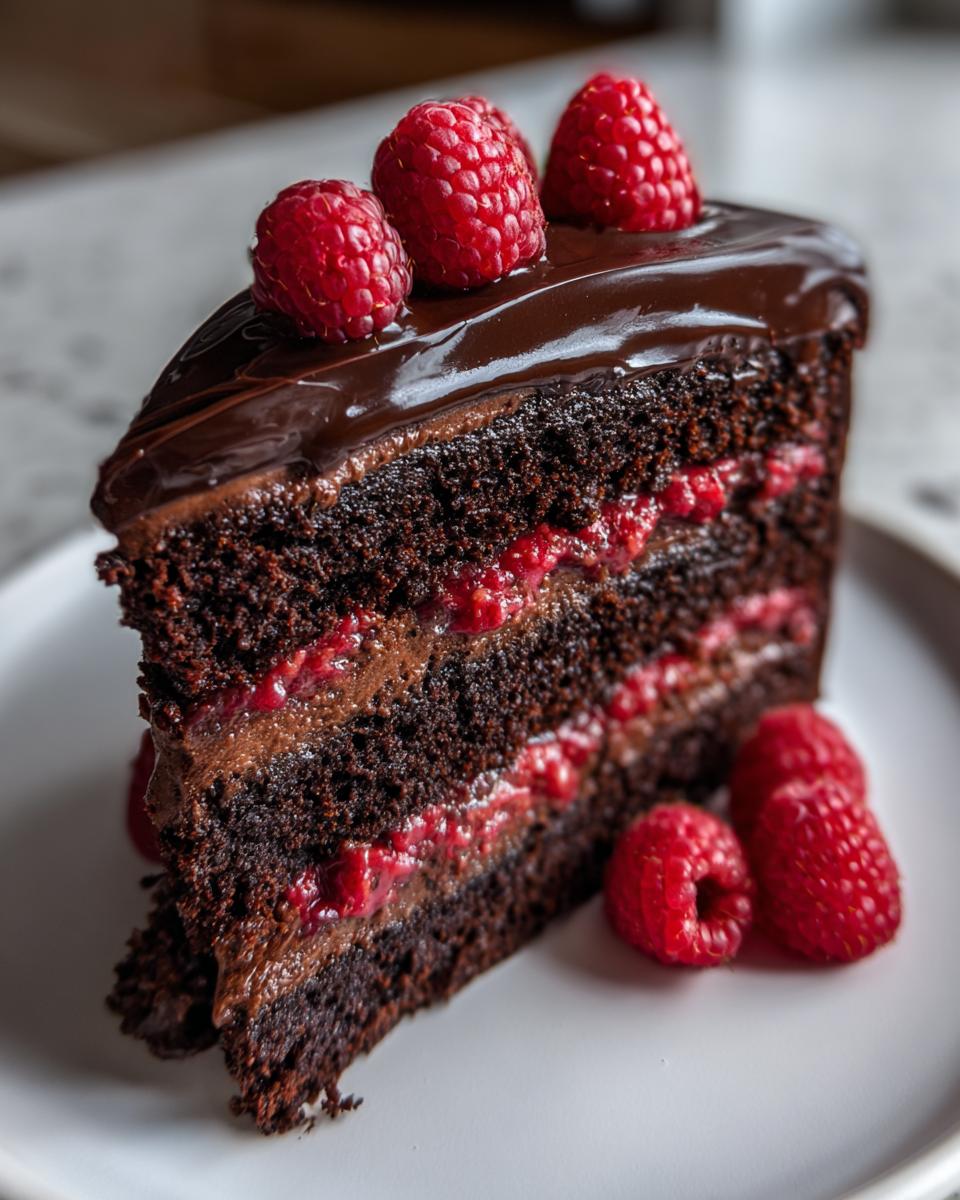
Once you’ve covered the top and sides with the rest of the ganache, you’re ready to decorate the very top with a scattering of fresh raspberries. It looks amazing and shows off that gorgeous filling waiting inside!
Tips for Success Making the Best Chocolate Raspberry Cake
You’ve done the hard work of baking and assembling this gorgeous dessert, so let’s make sure everything sets up perfectly before you serve it! Even with a dependable recipe like this chocolate raspberry cake, little tweaks can make a huge difference between a good presentation and an unforgettable one. When I teach my grandkids, I always tell them that a recipe is a map, but your own experience helps you navigate the tricky turns. If you’ve ever made my sour cream coffee cake, you know that humidity can change everything!
Ingredient Adjustments for the Chocolate Raspberry Cake
I always try to offer a few little swaps for my readers based on what you might have on hand. If you happen to be out of whole milk for the cake batter, swapping in buttermilk is a wonderful idea. Buttermilk adds a touch of necessary acidity that works beautifully with the cocoa, making the crumb even more tender. Keep in mind you might need just a splash less liquid overall, since buttermilk is sometimes thicker.
For that vibrant raspberry filling for cake, if you find your preserves are just a tad too sweet for your taste, try stirring in about one teaspoon of fresh lemon juice. That little bit of tartness really brightens up the whole pairing with the rich chocolate. It’s amazing how a tiny adjustment like that can elevate the flavor profile of the entire chocolate raspberry cake.
Setting the Ganache for Clean Slices
This is perhaps the most important tip for presentation, especially since we want that gorgeous frosting to hug the cake nicely. If you try to slice this cake right after you finish frosting it, the ganache will likely smear everywhere, and you’ll lose some of that wonderful filling. You absolutely must chill your finished chocolate raspberry cake for at least 30 minutes before slicing.
Putting it in the refrigerator firms up that chocolate ganache coating perfectly. When it’s chilled, the ganache becomes solid enough to allow your knife to glide cleanly right through the layers without dragging the raspberry filling out. Just let the slice sit on your plate for five minutes before eating so the cake layer itself softens up just a touch. It’s worth the wait, I promise!
Making This Chocolate Cake with Fruit Filling Ahead of Time
If you are making this chocolate raspberry cake for a big party or celebration—which, let’s face it, anything this decadent deserves a party!—you might not want to wake up at the crack of dawn the day of to frost it. Don’t you worry one bit! This recipe, being a fantastic example of a chocolate cake with fruit filling, actually benefits from a little advance planning.
The layers of this moist chocolate cake are sturdy enough, especially after cooling completely, that you can bake them up two days ahead of time. Once they are completely cool, wrap each layer tightly in plastic wrap—and I mean tightly! You want to seal in every bit of that moisture we worked so hard to bake in. Store them on the counter if your kitchen isn’t too warm, or pop them in the fridge if it is. They travel beautifully this way.
Now, for the filling and frosting: I highly recommend you wait until the very day you plan to serve it to put the cake all together. The jam filling is fine, but if you are using fresh raspberries, waiting keeps them from weeping and turning your lovely cake layers a bit soggy. Also, the ganache frosting is best when freshly spread and allowed to set up just before serving.
If you need to get ahead of things even further, you can certainly make the ganache the day before! Just leave it covered at cool room temperature. It will likely set up quite hard overnight, which is fine. When you are ready to frost, just set the bowl of hardened ganache on the counter near a warm spot (but not *in* the sun!) and let it soften slowly, stirring occasionally until it returns to that beautifully spreadable consistency we talked about. While you’re planning ahead, maybe you can even whip up a batch of my easy homemade applesauce for a simple side on a different night!
Serving Suggestions for Your Decadent Dessert Recipes
You deserve a standing ovation for making this gorgeous chocolate raspberry cake! When you put this much love into creating one of the most decadent dessert recipes imaginable, you definitely need the perfect accompaniment to go with it. This cake is rich enough to stand on its own, but a thoughtful pairing can really elevate the whole experience, turning a simple dessert moment into a real treat.
Because the flavors are already so bold—that deep cocoa playing against the sharp raspberry—we don’t want to overwhelm it. I always lean towards things that are either creamy and cooling or something warm and spirited to cut through that richness.
For a sophisticated evening treat, you simply must try serving a slice alongside a warm, fragrant coffee-based drink. If you’re looking for something with a little kick that complements the dark chocolate beautifully, I often mix up a batch of my peppermint espresso martini recipe. The mint and coffee notes are divine next to the raspberry!
If you’re serving this as something lighter after a big holiday meal, consider keeping the sides very simple. A small scoop of high-quality vanilla bean ice cream is unbeatable—the cold creaminess acts as a perfect foil to the dense cake and chocolate ganache. If you want to keep it fruit-forward without adding too much sugar, sometimes just a tiny drizzle of good, dark balsamic glaze over the plate (far away from the cake, mind you!) can really highlight the tartness of the raspberries. It sounds wild, but trust your baker on this one!
Honestly, though, if you’ve made this ultimate raspberry chocolate cake correctly, all you really need is a fork, a beverage, and perhaps some quiet time to enjoy every single, rich bite.
Frequently Asked Questions About the Chocolate Raspberry Cake
I always expect questions after sharing a big recipe like this! When I was teaching, the best part was seeing the lightbulb go on when a student finally understood a tricky concept, and I want that feeling for you in the kitchen. Whether you’re making this for a simple treat or as one of those picture-perfect celebration cake recipes, these answers should help smooth out the final steps. If you need more inspiration on rich chocolate recipes, you can always check out my guide to making easy chocolate mousse.
Can I use fresh raspberries instead of preserves in this chocolate raspberry layer cake recipe?
Oh, absolutely you can, and I encourage it when the berries are in season! That’s part of the fun of baking with fresh raspberries. However, fresh raspberries release a lot of juice when they bake or sit, and we absolutely do not want a watery filling soaking into our beautiful cake layers. If you’re switching out all the jam for fresh berries, you’ll want to cook them down a bit first.
Here’s my fix: Mix 1 cup of fresh raspberries with about 1/4 cup of granulated sugar and a teaspoon of cornstarch right on the stove. Cook it gently until it thickens slightly, looking almost jammy. Let that cool completely before spreading it on your layers. This gives you the fresh flavor without sacrificing the structure of your lovely chocolate raspberry layer cake recipe.
What is the best way to get a perfect chocolate ganache drip cake finish?
Getting that perfect drip effect on your chocolate ganache drip cake is all about temperature management! Remember, we let the ganache cool down until it was spreadable for frosting the sides, but for a drip, it needs to be looser.
The absolute best trick here is twofold. First, make sure the cake itself is chilled solid—I recommend that 30-minute chill time we discussed earlier. A cold cake stops the warm ganache from melting the frosting underneath it, which creates cleaner drips. Second, when you warm up a small amount for drizzling, it should be just warm enough to pour in a controlled stream off a spoon. If it runs everywhere too fast, it’s too hot! If it plops, it’s too cold. Practice running a little ribbon of it on a plate first to check consistency before you do the edges of the whole cake.
Is this considered one of the best chocolate raspberry cakes for a large celebration cake?
In my opinion? Without a doubt! This chocolate raspberry cake is a real showstopper. It has the height, the deep color, and that gorgeous contrast between the dark chocolate and the bright red berry peeking out. It definitely fits the bill for any major event. If you need to make a larger cake than the two 8-inch round this recipe yields, you can easily split this batter between two 9-inch round pans. Just be aware that the baking time might increase slightly because the cake is shallower, so keep a close eye on that wooden pick test!
For an even bigger wow factor, you can check out some more ideas over at Taste by Kylie for inspiration on presentation. But the flavor structure of this recipe is what really makes it one of the best chocolate raspberry cakes around.
Sharing Your Chocolate Raspberry Cake Creations
Now that you have successfully conquered this gorgeous ultimate raspberry chocolate cake, I just have one final request for you, dear baker! After all that time spent carefully whisking, baking, and getting that ganache just right, the very best part for me is hearing about your success. When I was teaching, I always wanted to see the final project, and I feel the same way about these recipes!
If you made this recipe, please hop down to the comments section below and leave me a rating. Tell me how the layers turned out, whether you opted for the full ganache drip, or if you tried that little trick with the lemon juice in the filling. Your honest feedback helps everyone else who is looking to make a show-stopping dessert feel confident in trying it out!
And if you took a picture—and I sincerely hope you did, because this cake is stunning!—please share it on social media and tag me. Seeing your beautiful presentation alongside all that rich chocolate and bright raspberry is the biggest joy for me. It proves that anyone can create something magical in their own kitchen!
If you’re looking for other ways to use that chocolate skill set, you might want to try my recipe for the best homemade cocktail sauce recipe—though perhaps not served with the cake itself! Happy baking, everyone!
Estimated Nutritional Data for This Rich Chocolate Cake Idea
Now, before we wrap up, I always feel it’s responsible to give you a little heads-up about what’s in the wonderful creation you just made. Remember, when you are looking for rich chocolate cake ideas, decadence often comes with a little richness in the numbers, too! I want to be clear, though: my kitchen background is teaching third grade, not nutritional science, so these figures are just good estimates based on the ingredients listed in the recipe above.
They help give you an idea of what you are serving, especially if you are planning this for a special dinner party or holiday spread. I always tell people that if you follow my instruction on chilling the cake before slicing, you’ll probably end up eating less anyway because the slices will be so clean and defined!
Here is the estimated nutritional breakdown based on a standard serving size from this recipe:
- Serving Size: 1 slice
- Calories: 450
- Sugar: 45g (That rich dark chocolate and preserves add up!)
- Sodium: 250mg
- Fat: 25g
- Saturated Fat: 14g
- Unsaturated Fat: 11g
- Trans Fat: 0.5g
- Carbohydrates: 55g
- Fiber: 4g
- Protein: 6g
- Cholesterol: 70mg
If you’re looking to lighten things up a touch—though frankly, a cake this good shouldn’t be lightened too much—you could always look at making some of my easy high-protein egg bites for breakfast the next morning! Enjoy every bite of this glorious chocolate raspberry cake!
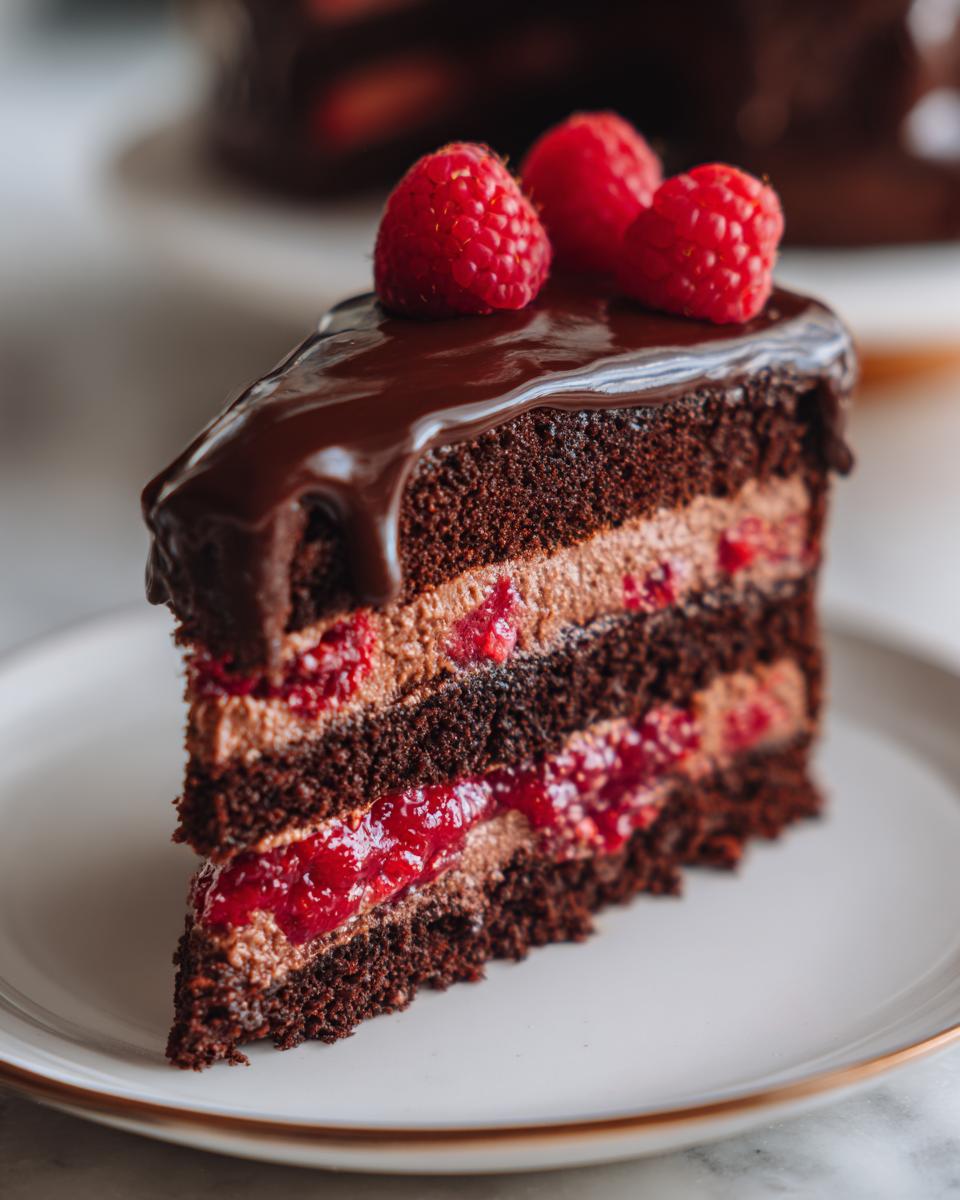
PrintDecadent Chocolate Raspberry Layer Cake with Silky Chocolate Ganache

You will make this rich, moist chocolate layer cake featuring a bright raspberry filling and a velvety chocolate ganache. This recipe creates a showstopper dessert perfect for any special celebration.
- Prep Time: 35 min
- Cook Time: 35 min
- Total Time: 140 min
- Yield: 10 servings 1x
- Category: Dessert
- Method: Baking
- Cuisine: American
- Diet: Vegetarian
Ingredients
- For the Moist Chocolate Cake:
- 1 3/4 cups all-purpose flour
- 1 3/4 cups granulated sugar
- 3/4 cup unsweetened cocoa powder
- 1 1/2 teaspoons baking powder
- 1 1/2 teaspoons baking soda
- 1 teaspoon salt
- 2 large eggs
- 1 cup whole milk
- 1/2 cup vegetable oil
- 2 teaspoons vanilla extract
- 1 cup boiling water
- For the Raspberry Filling:
- 1 cup raspberry preserves (high quality recommended)
- 1 cup fresh raspberries (optional, for texture)
- For the Silky Chocolate Ganache Frosting:
- 12 ounces semi-sweet or dark chocolate, finely chopped
- 1 1/2 cups heavy cream
- 1 tablespoon unsalted butter (optional, for shine)
- For Assembly:
- Fresh raspberries for topping
Instructions
- Prepare the Chocolate Cake Layers: Preheat your oven to 350°F (175°C). Grease and flour two 8-inch round cake pans.
- In a large bowl, whisk together the flour, sugar, cocoa powder, baking powder, baking soda, and salt.
- Add the eggs, milk, vegetable oil, and vanilla extract to the dry ingredients. Beat with an electric mixer on medium speed for two minutes.
- Carefully stir in the boiling water (the batter will be thin).
- Divide the batter evenly between the prepared cake pans. Bake for 30 to 35 minutes, or until a wooden pick inserted into the center comes out clean.
- Let the cakes cool in the pans for 10 minutes before inverting them onto a wire rack to cool completely.
- Make the Chocolate Ganache: Place the chopped chocolate in a heatproof bowl.
- Heat the heavy cream in a small saucepan until it just begins to simmer around the edges. Do not let it boil rapidly.
- Pour the hot cream over the chopped chocolate. Let it sit undisturbed for 5 minutes.
- Whisk the mixture gently until smooth and glossy. Stir in the butter, if using. Let the ganache cool at room temperature until it thickens to a spreadable consistency, about 1 to 2 hours. Stir occasionally.
- Assemble the Cake: Once the cake layers are completely cool, level the tops if necessary. Place one layer on your serving plate.
- Spread the raspberry preserves evenly over the first layer. If you are using fresh raspberries, scatter them lightly over the preserves.
- Place the second cake layer on top.
- Frost the entire cake with the thickened chocolate ganache, covering the top and sides. Use an offset spatula to create a smooth finish or a rustic look.
- If you want a drip effect, warm a small amount of the ganache slightly until it is pourable and drizzle it over the top edge of the cake.
- Decorate the top with fresh raspberries before serving.
Notes
- For an extra moist cake, you can substitute buttermilk for the whole milk in the cake batter.
- If you prefer a tangier filling, mix the raspberry preserves with 1 teaspoon of lemon juice before spreading.
- Chill the assembled cake for at least 30 minutes before slicing to help the ganache set firmly.
Nutrition
- Serving Size: 1 slice
- Calories: 450
- Sugar: 45g
- Sodium: 250mg
- Fat: 25g
- Saturated Fat: 14g
- Unsaturated Fat: 11g
- Trans Fat: 0.5g
- Carbohydrates: 55g
- Fiber: 4g
- Protein: 6g
- Cholesterol: 70mg