
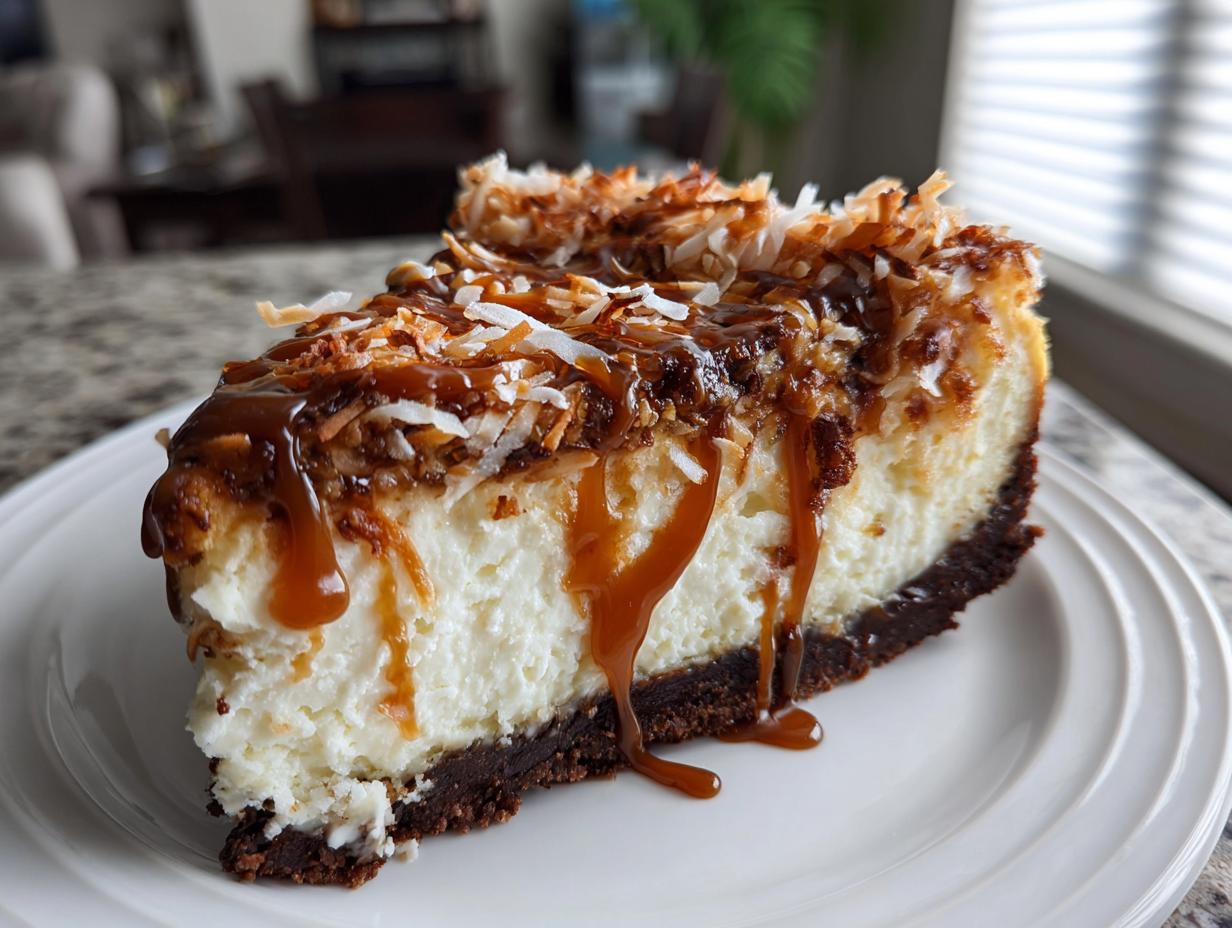
Oh, how I just love taking two wonderful things and smashing them together to create something even better! Desserts that pull double duty, like combining a classic cookie with a creamy, dreamy baked treat? That’s pure magic, isn’t it? I promise you, this baked Samoa Cheesecake is everything you dream about when you grab those beloved Girl Scout cookies. When my littlest ones come over, they always ask for something truly special—a showstopper! This recipe delivers that elegant look without demanding you spend hours fussing in the kitchen. It always gets rave reviews at our family reunions, trust me.
- Why This Baked Samoa Cheesecake is Your Next Showstopper Dessert
- Gathering Ingredients for Your Samoa Cheesecake
- The Step-by-Step Guide to Your Decadent Samoa Cheesecake
- Finishing Touches: Caramel, Coconut, and Chocolate for Your Samoa Cheesecake
- Making a No Bake Cheesecake Variations of the Samoa Cheesecake
- Tips for the Best Caramel Coconut Cheesecake Experience
- Storing and Serving Your Samoa Cheesecake
- Frequently Asked Questions About Samoa Cheesecake
- Sharing Your Rich Creamy Dessert Creations
Why This Baked Samoa Cheesecake is Your Next Showstopper Dessert
When you’re aiming for a truly Decadent Dessert Recipe, this is the one to pull out. People expect cookie cheesecakes to be good, but the way this one comes together is just spectacular. You get all those nostalgic flavors hitting you at once!
- It boasts the most Creamy Cheesecake Filling you’ll ever make—so smooth, barely even jiggles when it’s done!
- The base is a sturdy, rich Chocolate Crust Dessert that holds up beautifully to all the toppings.
- That signature blend of Caramel Coconut Desserts flavor comes through perfectly in the swirl and topping.
- Honestly, making a Homemade Cookie Inspired Dessert that tastes better than the original is just satisfying, isn’t it?
If you want a dessert that makes people stop talking when you bring it out, this Samoa Cheesecake is it. If you loved the creaminess when we made that white chocolate one, you’ll adore this one even more. Check out my guide on the ultimate creamy recipe if you want more tricks on texture, too!
Gathering Ingredients for Your Samoa Cheesecake
Now that you know this is going to be the Best Cheesecake Ever, let’s talk about what we need to get together! Having everything ready before you start mixing is key to keeping that batter smooth and preventing any lumps. We use chocolate wafers for the crust here, which gives it that deep, unmistakable flavor that sets it apart from a standard graham cracker base.
Don’t forget, for the absolute best, Creamy Cheesecake Filling, your cream cheese and eggs absolutely must be at room temperature. Trust me on this one; trying to beat cold cream cheese is how you introduce lumps, and nobody wants a lumpy dessert!
Ingredient Clarity and Preparation Notes
Before you even turn the mixer on, take a moment to prep those specific components. Our recipe calls for a beautiful Toasted Coconut Topping, and we can’t just buy that!
- Toasted Coconut: Spread your shredded coconut onto a clean baking sheet. I pop it into a 350-degree oven for just 5 to 8 minutes. Keep your eye on it, though—it goes from perfect to scorched in a blink! This step really boosts the flavor of the coconut for those layers.
- Cream Cheese & Eggs: As I mentioned, let these sit out on the counter for at least an hour before you start. Room temperature ingredients incorporate so much better.
- Caramel Sauce: Use your favorite store-bought caramel sauce, or if you’re feeling ambitious, try making your own! For this recipe, we use half stirred *in* and half drizzled *on top*.
The Step-by-Step Guide to Your Decadent Samoa Cheesecake
Okay, here is where the magic really happens! We’re walking through this together, step by step, so you end up with that beautiful, non-cracked, deeply flavorful cheesecake. Remember, patience during the cooling stage is the secret to keeping that wonderful surface pristine. If you want to learn more about getting a flawless look, I have a whole guide on the crack-free cheesecake method that really applies here!
Creating the Chocolate Crust Dessert Base
First things first, get your oven preheated to 325 degrees F, and wrap that 9-inch springform pan really snugly in heavy-duty foil. We don’t want any water seepage later, do we? Mix up your chocolate crumbs, sugar, and melted butter until it looks like damp sand. Then, press it firmly into the bottom of the pan. I use the base of a drinking glass myself—it makes it so even! Pop that into the oven for just 10 minutes. This sets the crust and makes sure it doesn’t get soggy later underneath all that filling.
Achieving a Perfectly Creamy Cheesecake Filling
This step separates the good cheesecakes from the great ones. Beat your softened cream cheese, sugar, vanilla, and salt until it is flawlessly smooth—I mean absolutely velvet smooth. Scrape down the sides! Only after it’s perfect do you introduce the eggs. Add them one at a time, and only mix until they *just* disappear. Seriously, stop the mixer right there. Overmixing the eggs whips in too much air, and that’s what causes those horrible cracks when it cools down.
Baking the Samoa Cheesecake with a Water Bath
To get that even, Rich Creamy Dessert texture, we absolutely must use a water bath, or *bain-marie*. Place your foil-wrapped pan inside a larger roasting pan. Carefully pour hot water into that big pan until it comes halfway up the side of the springform. Bake for about 60 to 75 minutes. You’re looking for the edges to be set, but the very center should still have a tiny wobble, like soft Jell-O. When it’s time, turn the oven off completely, prop the door open a bit with a wooden spoon, and let it cool down slowly inside the oven for a whole hour. This gradual change in temperature is the ultimate trick to beat those cracks!
Finishing Touches: Caramel, Coconut, and Chocolate for Your Samoa Cheesecake
After all that careful baking and cooling—which I know feels everlasting—it’s time to make this dessert look just like those cookies we love! The absolute minimum chilling time you need is about six hours, but honestly, chilling this Samoa Cheesecake overnight is the best way to ensure it sets up perfectly firm.
Once it’s thoroughly chilled, release the springform sides. Now for heaven! Spread that beautiful Toasted Coconut Topping layer evenly across the top. Remember how we saved half that caramel sauce? Drizzle it liberally over the coconut. It’s going to look absolutely irresistible!
For the final flourish that really brings in that dark chocolate ribbon from the cookie, we’ll melt some chocolate chips with a touch of heavy cream until it’s glossy. If you’re looking for tips on making a rich drizzle, my guide on homemade chocolate syrup will help! Drizzle that dark chocolate on top of the caramel. Slice it cold, and enjoy this total indulgence.
Making a No Bake Cheesecake Variations of the Samoa Cheesecake
I know baking can sometimes feel like too much work, especially when the weather is miserable! If you’re looking for that same incredible flavor profile without turning on the oven, good news! You can absolutely make No Bake Cheesecake Variations of this dessert. The crust preparation is the same—just skip the 10-minute bake time and press it firmly into the pan to chill instead.
For the filling, you’ll still need your cream cheese beaten until smooth, but you’ll need a stabilizer. Usually, I dissolve a little gelatin according to its package directions and mix that in right before chilling. Or, for a lighter texture, you can whip heavy cream until stiff peaks form and gently fold that into the cream cheese mixture. It won’t be quite as dense as the baked version, but it’s still wonderfully satisfying and dreamy! You absolutely must check out my tips for easy no-bake mini cheesecakes if you want to see how I generally handle stabilizing these cold treats.
Chill your no-bake creation for at least 8 hours, or until it holds its shape when you wiggle the pan. Then, you just add all those gorgeous caramel, coconut, and chocolate toppings!
Tips for the Best Caramel Coconut Cheesecake Experience
You’ve done the hard work, and now we want to make sure those final moments deliver maximum pleasure! Achieving the Best Cheesecake Ever sometimes comes down to those few little finishing details, especially when we’re dealing with sticky toppings like caramel and chocolate.
Here are a few things I always check right before serving this incredible Caramel Coconut Cheesecake:
- Quality Caramel is Non-Negotiable: If you use a jarred caramel sauce that seems too firm, I always warm it up briefly in a saucepan first. You want it pourable, not chunky, so it beautifully melts into the coconut topping rather than sitting stiffly on top.
- Chocolate Drizzle Setting: After you drizzle that melted chocolate mixture, let the cheesecake chill for about 30 minutes before slicing. This lets the chocolate firm up just enough so it doesn’t smear everywhere when you cut into it—we want clean lines!
- Knife Prep for Slicing: This is vital for any cheesecake, but especially one this loaded! Before every single cut, dip a long, sharp knife into a tall glass of very hot water, wipe it completely dry, and then slice. This keeps the knife clean and warm, giving you perfect slices every time.
These little steps just guarantee that slice looks as decadent as it tastes. If you’re struggling with getting toppings smooth in the first place, check out my guide on the best cream cheese frosting recipe—those principles of smooth consistency apply even when you’re just drizzling chocolate!
Storing and Serving Your Samoa Cheesecake
Because this is such a rich and decadent dessert, I find that it actually tastes even better the second day! That’s great news for planning, right? Think of this as a fantastic Holiday Cheesecake Idea you can tackle the day before guests arrive.
Once the toppings are set, you need to cover the whole thing well—plastic wrap pressed lightly against the toppings often works best to keep things from sticking—and keep it chilled. It really needs to stay cold for the best texture. It holds up beautifully in the fridge for about four or five days. When I serve it, I always pull it out about 30 minutes before slicing. Letting it warm up just slightly makes that caramel and chocolate topping a little gooey again, which feels wonderfully indulgent.
We often make sheet pan desserts for big gatherings, but nothing beats the look of this one. If you’re planning big dinners and need prep-ahead inspiration, you should definitely peek at my recipe for the easy Christmas poke cake; making desserts ahead is a lifesaver!
Frequently Asked Questions About Samoa Cheesecake
I always love getting your questions after you’ve made something truly special like this Samoa Cheesecake! It’s such a layered dessert, so it’s normal to have a few things pop up during the process. Here are some of the questions I get most often about creating this Ultimate Dessert Bar experience.
What is the best way to slice this Samoa Cheesecake cleanly?
This is a big one, isn’t it? Because we have that lovely, soft, Creamy Cheesecake Filling underneath all those gooey toppings, slicing requires a little finesse so it doesn’t turn into a mess on the plate. My trick for clean cuts on any cheesecake is this: get a tall glass of very hot water. Dip your long, sharp knife into the water, wipe the blade completely dry with a clean cloth, and then make your cut. You just repeat that process—hot water, wipe, slice—for every cut! It lets the knife glide right through the caramel without sticking.
Can I substitute the chocolate wafer crumbs in the Chocolate Crust Dessert?
You certainly can change things up if you don’t have chocolate wafers handy! This is your kitchen, after all. If you use plain graham crackers instead of chocolate wafers, you’ll obviously lose that deep chocolate flavor in the crust, but it will still be delicious! It will just taste a little more like a traditional caramel cheesecake than our Homemade Cookie Inspired Dessert. If you use Oreos? Well, that’s fantastic, too! Just crush them up—filling and cookie—and use the same amount of butter. It becomes an even richer chocolate base, which I never complain about!
Many folks ask if they can skip the bake cycle entirely; you can absolutely try a No Bake Cheesecake Variation, but remember you need something to help it set up firm since the eggs won’t do the work. For that, I usually direct people to look at a trusted no-bake recipe guide, like the one over at Gimme Some Oven, which does a wonderful job walking through stabilization when you skip the oven heat entirely!
Sharing Your Rich Creamy Dessert Creations
Now that you’ve gone through the whole process—from making that perfectly crisp Chocolate Crust Dessert to drizzling that final bit of shiny chocolate over your Samoa Cheesecake—I would just love to hear how it turned out for you!
This recipe is one of those labor-of-love treats that just tastes better when shared, physically or just by telling someone about it. Did you serve it for a special birthday, or did it make an appearance at your book club meeting?
Please, don’t be shy! I really rely on hearing back from all of you home cooks. If you gave this a try, won’t you take a moment to leave a star rating right here on the recipe card? It helps other cooks know they can trust this method just like they trust my old family favorites.
And if you snapped a lovely photo of your beautiful slice—especially if you got a perfect cross-section shot showing off that caramel swirl—I would be thrilled if you shared it with me! You can send pictures or ask any lingering questions you might have over on my Contact page. I truly enjoy seeing your successes and learning how you made this Rich Creamy Dessert your own in your kitchen. Happy baking, everyone!
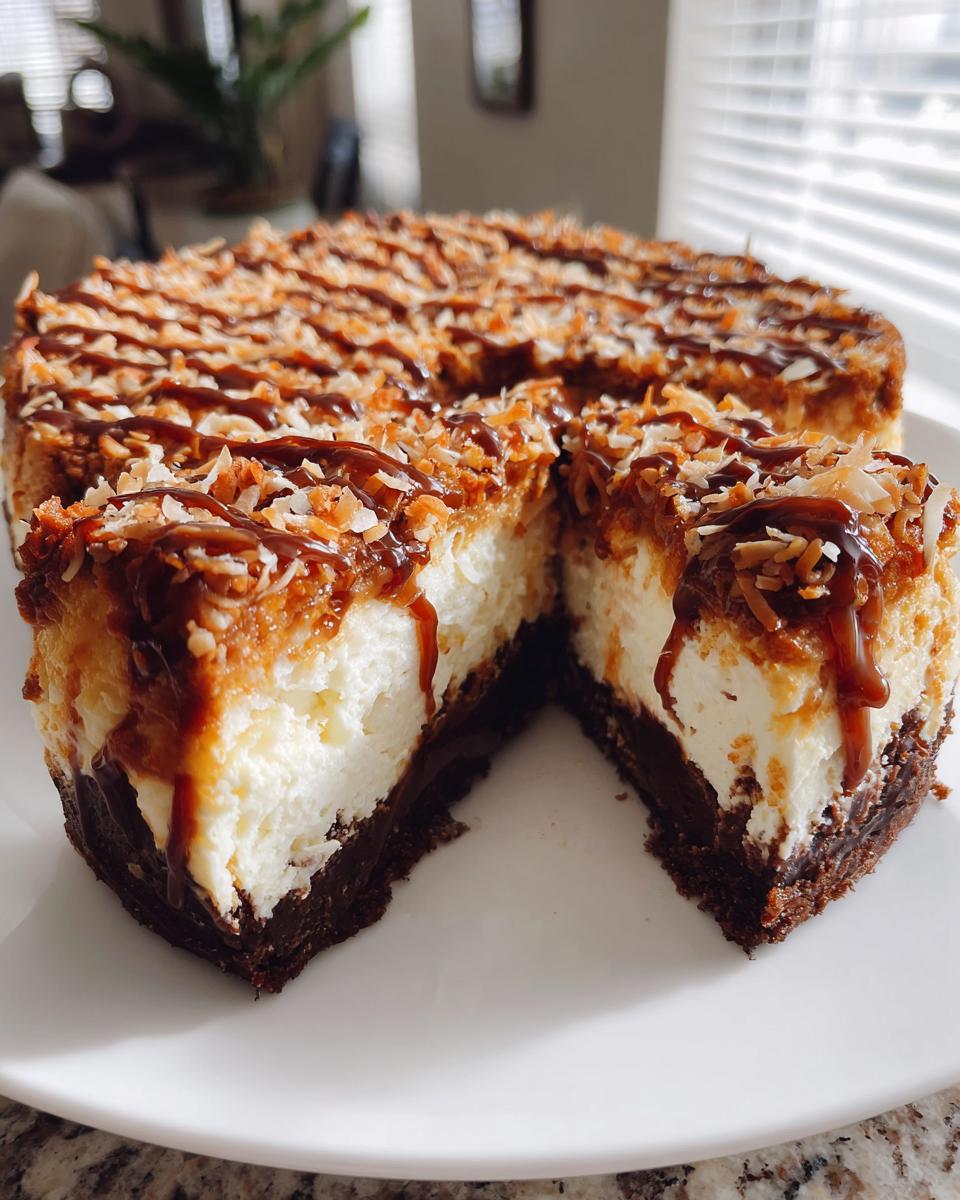
PrintDecadent Baked Samoa Cheesecake with Chocolate Crust and Toasted Coconut-Caramel Swirl
Make this showstopper Samoa Cheesecake inspired by Girl Scout cookies. It features a rich chocolate crust, creamy filling, caramel swirl, and toasted coconut topping for ultimate sweet tooth satisfaction.
- Prep Time: 30 min
- Cook Time: 75 min
- Total Time: 105 min
- Yield: 12 servings 1x
- Category: Dessert
- Method: Baking
- Cuisine: American
- Diet: Vegetarian
Ingredients
- 1 3/4 cups chocolate wafer cookie crumbs (about 30 cookies)
- 1/4 cup granulated sugar
- 6 tablespoons unsalted butter, melted
- 3 (8 ounce) packages cream cheese, softened
- 1 1/2 cups granulated sugar
- 1 teaspoon vanilla extract
- 1/4 teaspoon salt
- 3 large eggs
- 1/2 cup caramel sauce, divided
- 1 cup sweetened shredded coconut, toasted
- 1/2 cup semi-sweet chocolate chips
- 2 tablespoons heavy cream
Instructions
- Preheat your oven to 325 degrees F. Wrap the outside of a 9-inch springform pan tightly with heavy-duty aluminum foil.
- Prepare the crust: In a medium bowl, combine the chocolate wafer crumbs and 1/4 cup sugar. Pour in the melted butter and mix until the crumbs are evenly moistened. Press the mixture firmly into the bottom of the prepared springform pan. Bake for 10 minutes. Let the crust cool while you prepare the filling.
- Prepare the cheesecake filling: In a large bowl, use an electric mixer to beat the softened cream cheese, 1 1/2 cups sugar, vanilla extract, and salt until the mixture is smooth and creamy. Scrape down the sides of the bowl as needed.
- Beat in the eggs one at a time, mixing just until each egg is incorporated. Do not overmix the batter.
- Pour half of the cheesecake batter over the cooled crust. Drizzle 1/4 cup of the caramel sauce over the batter. Gently pour the remaining batter over the top. Drizzle the remaining 1/4 cup caramel sauce over the top layer. Use a knife to gently swirl the caramel into the batter.
- Place the foil-wrapped springform pan into a larger roasting pan. Carefully pour hot water into the roasting pan until the water reaches halfway up the sides of the springform pan (this creates a water bath for even baking).
- Bake for 60 to 75 minutes, or until the edges are set but the center still has a slight jiggle.
- Turn off the oven, prop the door open slightly, and let the cheesecake cool in the oven for 1 hour. This helps prevent cracking.
- Remove the cheesecake from the water bath and let it cool completely on a wire rack. Once cool, cover and refrigerate for at least 6 hours, or preferably overnight.
- Prepare the topping: In a small saucepan over low heat, melt the chocolate chips with the heavy cream, stirring until smooth. Let cool slightly.
- Spread the toasted coconut evenly over the chilled cheesecake surface. Drizzle the melted chocolate mixture over the coconut layer.
- Release the sides of the springform pan before slicing and serving your rich creamy dessert.
Notes
- To toast the coconut, spread it on a baking sheet and bake at 350 degrees F for 5 to 8 minutes, watching closely to prevent burning.
- For a foolproof, crack-free filling, make sure your cream cheese and eggs are at room temperature before starting.
- If you prefer a no-bake cheesecake variation, chill the filling mixture for at least 8 hours instead of baking.
Nutrition
- Serving Size: 1 slice
- Calories: 550
- Sugar: 45g
- Sodium: 350mg
- Fat: 35g
- Saturated Fat: 20g
- Unsaturated Fat: 15g
- Trans Fat: 0g
- Carbohydrates: 55g
- Fiber: 2g
- Protein: 8g
- Cholesterol: 100mg