
Oh, I know that feeling! You have a deep, undeniable craving for something chocolatey, rich, and drizzly, and you reach for that jar of store-bought stuff only to realize it tastes thin and suspiciously like sugar water. Stop right there! That’s why I developed this unbelievably simple recipe for homemade chocolate syrup. Forget those lengthy processes; this is the key to a superior, velvety smooth topping in under ten minutes, made entirely from ingredients you already have in your pantry. My goal, as always, is to give you reliable results using basics, and this decadent chocolate sauce is proof that the best things in life truly are easy.
- Why This Homemade Chocolate Syrup Recipe Beats Store-Bought
- Ingredients for Your Quick Dessert Topping
- How to Make Chocolate Syrup in Under 10 Minutes
- Cooling and Storing Your Homemade Chocolate Syrup Recipe
- Creative Ways to Use Your Rich Chocolate Topping
- Troubleshooting Common Issues with Homemade Chocolate Syrup
- Variations for Healthier Chocolate Sauce Options
- Frequently Asked Questions About Chocolate Syrup
- Share Your Best Chocolate Drizzle Creations
Why This Homemade Chocolate Syrup Recipe Beats Store-Bought
Honestly, once you try this recipe, you’ll toss those bottled syrups into the recycling bin, I promise! We aren’t messing around with fillers or artificial colors here. This recipe nails the trifecta: unbelievably good flavor, lightning speed, and it keeps all those processed ingredients out of your kitchen. It’s what I turn to when I need a quick dessert topping that actually tastes like real chocolate.
- It’s ready faster than a run to the grocery store—we’re talking 10 minutes total!
- We skip the high-fructose corn syrup entirely. You get clean, pure flavor in every drop.
- The resulting texture is always luxurious and smooth, much better than what you usually find.
- It’s the perfect base if you ever decide to dip into making chocolate-covered cherries or other dipped treats!
Achieving That Rich Chocolate Topping Flavor
The real secret to that deep, decadent flavor is using good quality unsweetened cocoa powder. When you cook cocoa powder with sugar and water, you actually *bloom* the cocoa, which really deepens that rich chocolate note. See, melted chocolate bars carry a lot of fat, but cocoa powder lets the sugar and the pure chocolate essence shine through. That’s exactly what gives you that incredible, classic, yet somehow superior, homemade chocolate syrup taste.
Ingredients for Your Quick Dessert Topping
The beauty of making this chocolate syrup from scratch is that everything listed below is likely already waiting for you in the pantry! No fancy stops needed. You get about 1 1/2 cups of fantastic sauce from this batch.
- 1 cup granulated sugar
- 2/3 cup unsweetened cocoa powder
- 1 cup water
- 1 teaspoon vanilla extract
- 1/4 teaspoon salt
Ingredient Notes and Substitutions
A few quick notes from my kitchen to yours: I always recommend using filtered water when I make sauces like this. It sounds minor, but it really helps keep that final flavor crystal clear, which is important when you want a truly rich chocolate topping. Since this particular base recipe uses standard sugar, it works beautifully for most folks. If you’re aiming for a strict vegan chocolate syrup, just double-check your vanilla extract—most are vegan, but it’s always good to look!
How to Make Chocolate Syrup in Under 10 Minutes
This is where the magic happens, and trust me, it’s faster than making a good cup of coffee! We’re aiming for 5 minutes of prep and 5 minutes of cooking time for this amazing homemade chocolate syrup recipe. First, get your sugar, cocoa powder, water, and salt into a medium saucepan. Now for my teacher tip: grab your whisk and stand right there! You need to whisk constantly while this heats up over medium heat. I learned early on that if you stop whisking even for a second, you risk clumps, and nobody wants a grainy sauce. Keep whisking until the sugar dissolves—the mixture will start to look smooth and glossy.
- Combine the sugar, cocoa powder, water, and salt in a medium saucepan.
- Place the saucepan over medium heat. Whisk the mixture constantly until the sugar dissolves and the mixture begins to simmer.
- Reduce the heat to low and let it simmer gently for 1 minute, stirring occasionally. Do not boil rapidly.
- Remove the saucepan from the heat. Stir in the vanilla extract.
- Allow the syrup to cool completely. It will thicken as it cools.
- Pour the finished chocolate syrup into a clean, airtight jar. Store it in the refrigerator.
Don’t forget that next time you need a quick fix, this simple technique beats bottled versions every single time. If you happen to love making homemade applesauce, you’ll appreciate the simple stovetop mechanics here!
The Simmering Stage for Smooth Chocolate Topping
That one minute after it starts simmering? That’s the moment to protect right there. We only let it simmer gently on low heat for exactly 60 seconds. Why? That brief, gentle cook time is absolutely crucial for two reasons. First, it ensures every single grain of sugar fully dissolves, setting you up for that signature smooth chocolate topping we want. Second, it sets the structure of the chocolate syrup just right so it thickens gorgeously when it cools down. As soon as that minute is up, pull that pan right off the burner! It’s important to take it off the heat *before* stirring in your vanilla extract to keep that flavor bright and fresh.
Cooling and Storing Your Homemade Chocolate Syrup Recipe
Now for the hardest part, which is waiting! You’ll notice that when the chocolate syrup is hot, it seems a touch thin—almost like thin hot fudge. Don’t panic and don’t try to cook it longer! That’s exactly how it should be. This mixture thickens significantly once it hits refrigerator temperature. So, let it cool down on the counter completely before sealing it up. Transfer the cooled syrup into a clean, airtight jar—I love using my old canning jars for this. It keeps beautifully in the fridge for weeks, meaning you always have this fantastic pantry staple on hand for emergency dessert needs, like when you’re making chocolate crinkle cookies!
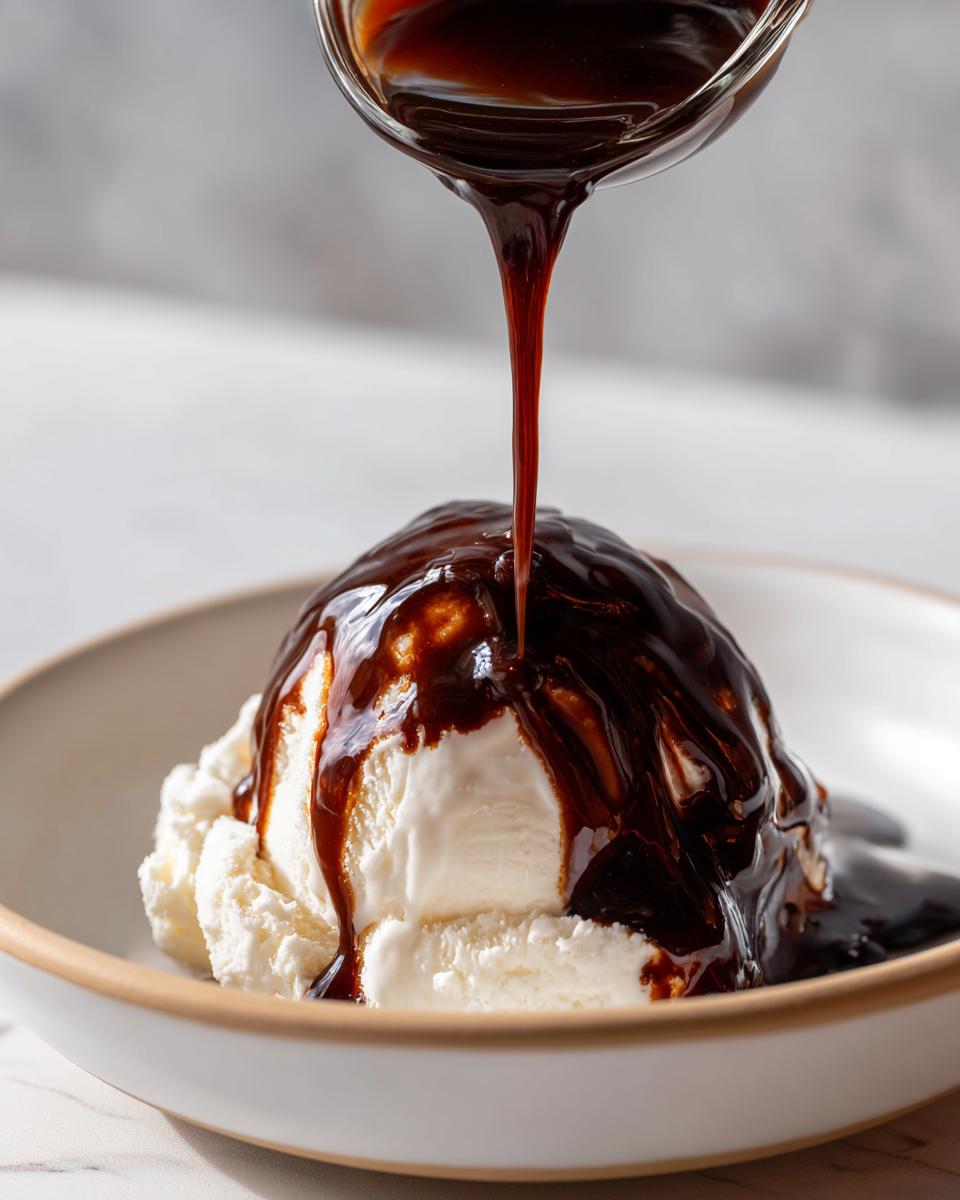
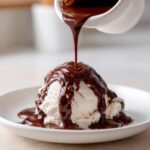
Creative Ways to Use Your Rich Chocolate Topping
Now that you have this gorgeous, thick chocolate syrup, the world is your oyster! We’ve made the greatest pancake syrup recipe you’ll ever need, but please don’t stop there. This goes way beyond breakfast. My personal favorite way to use this is in my midday coffee—just a spoonful turns a regular cup into a mocha that tastes like a café treat. Forget those skimpy store-bought bottles; this stuff holds up to heat and freezing temperatures!
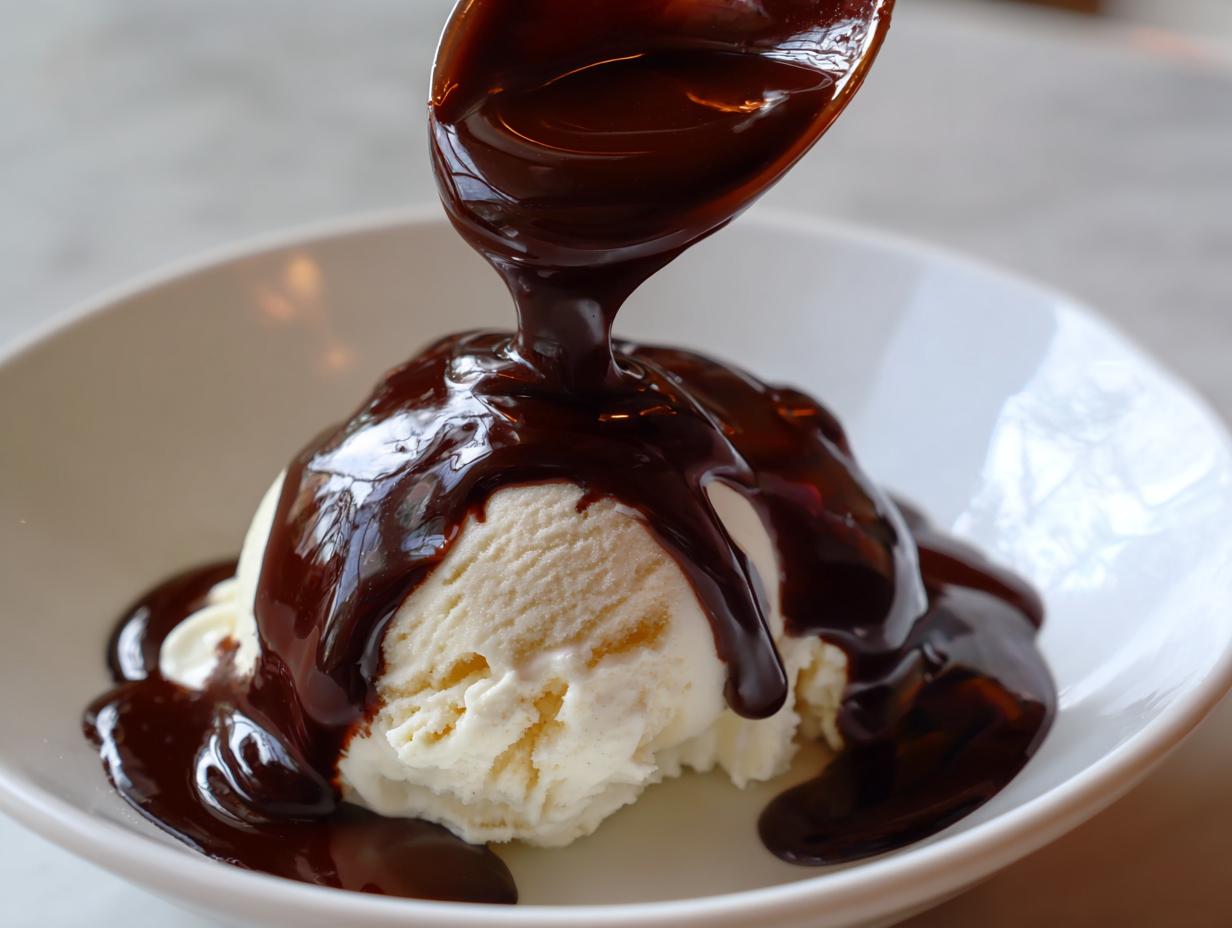
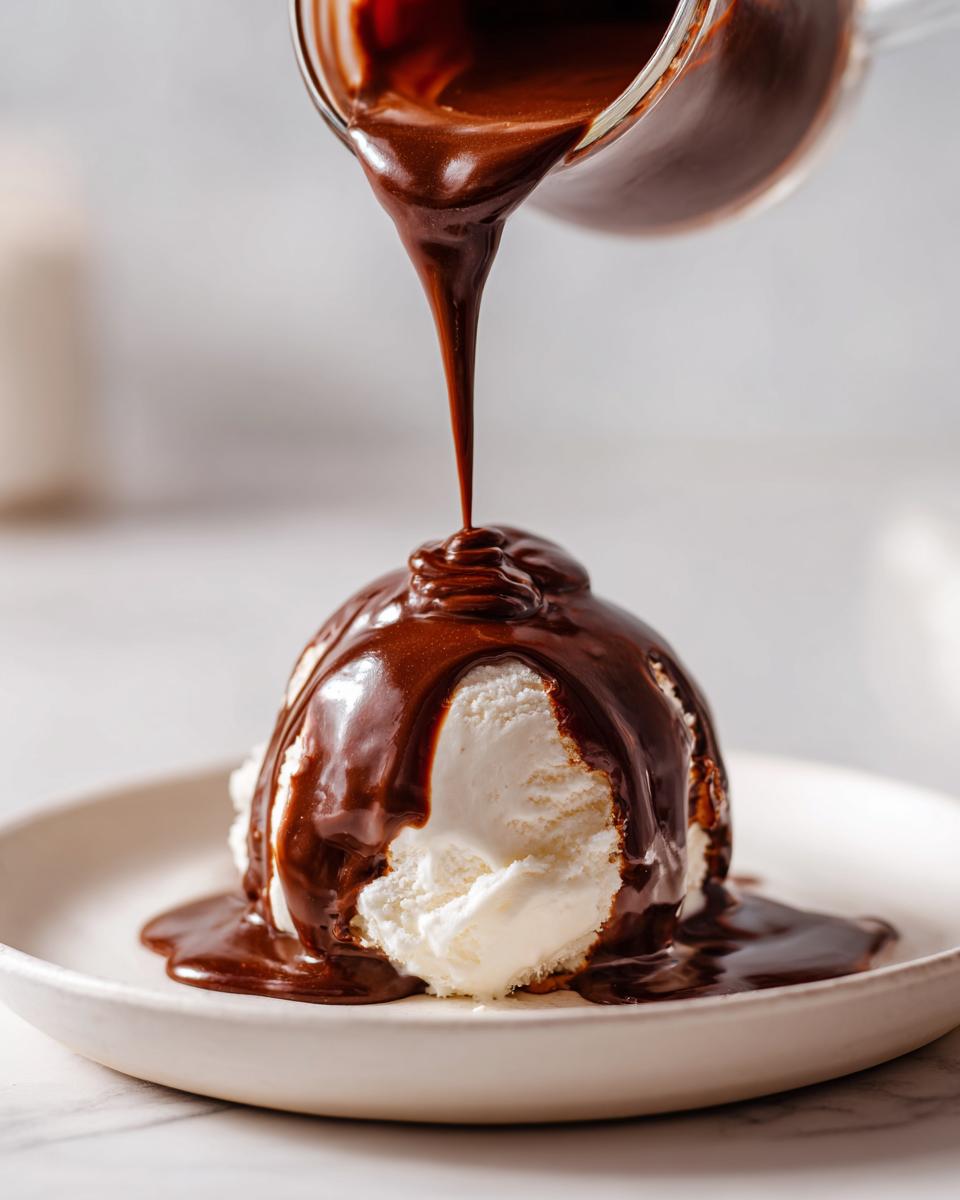
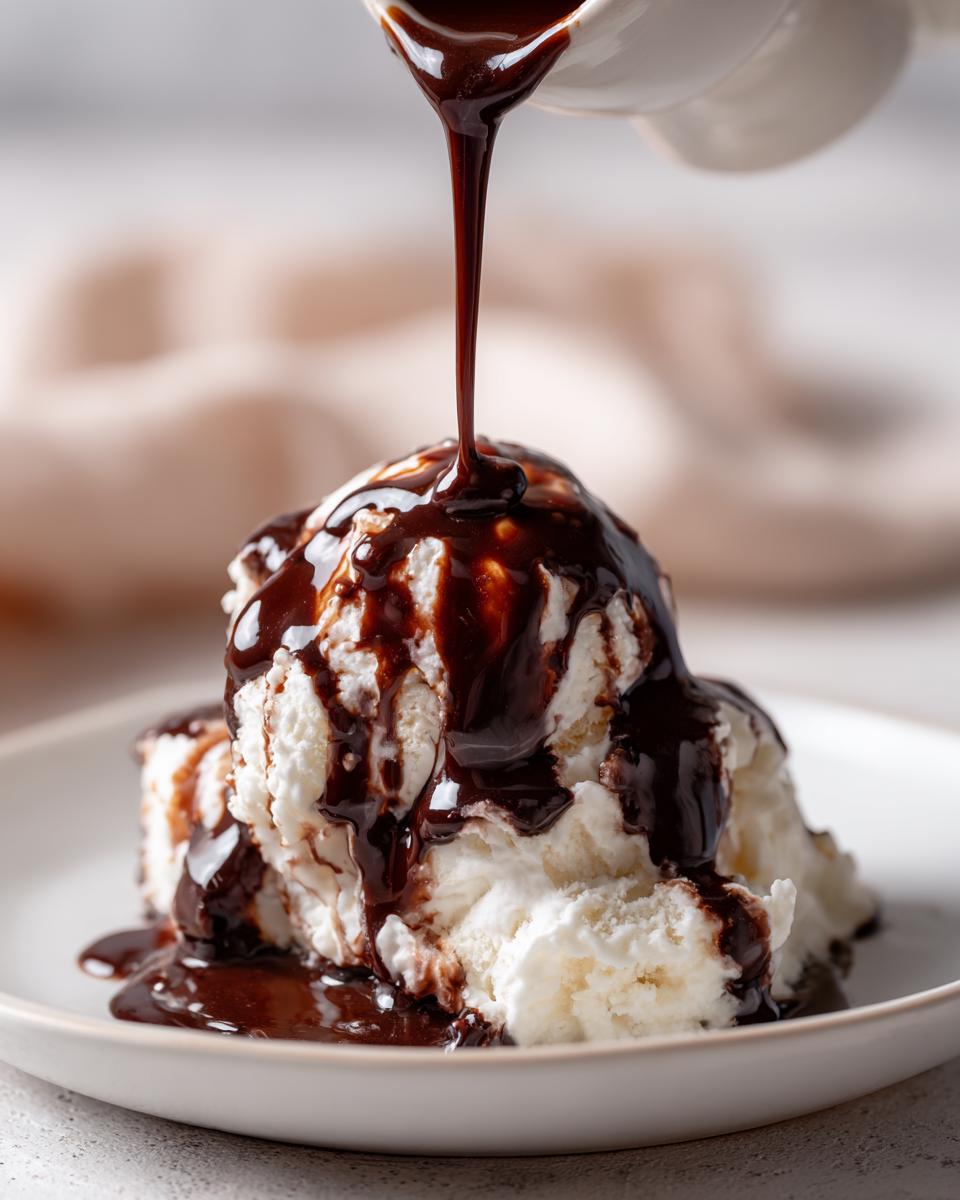
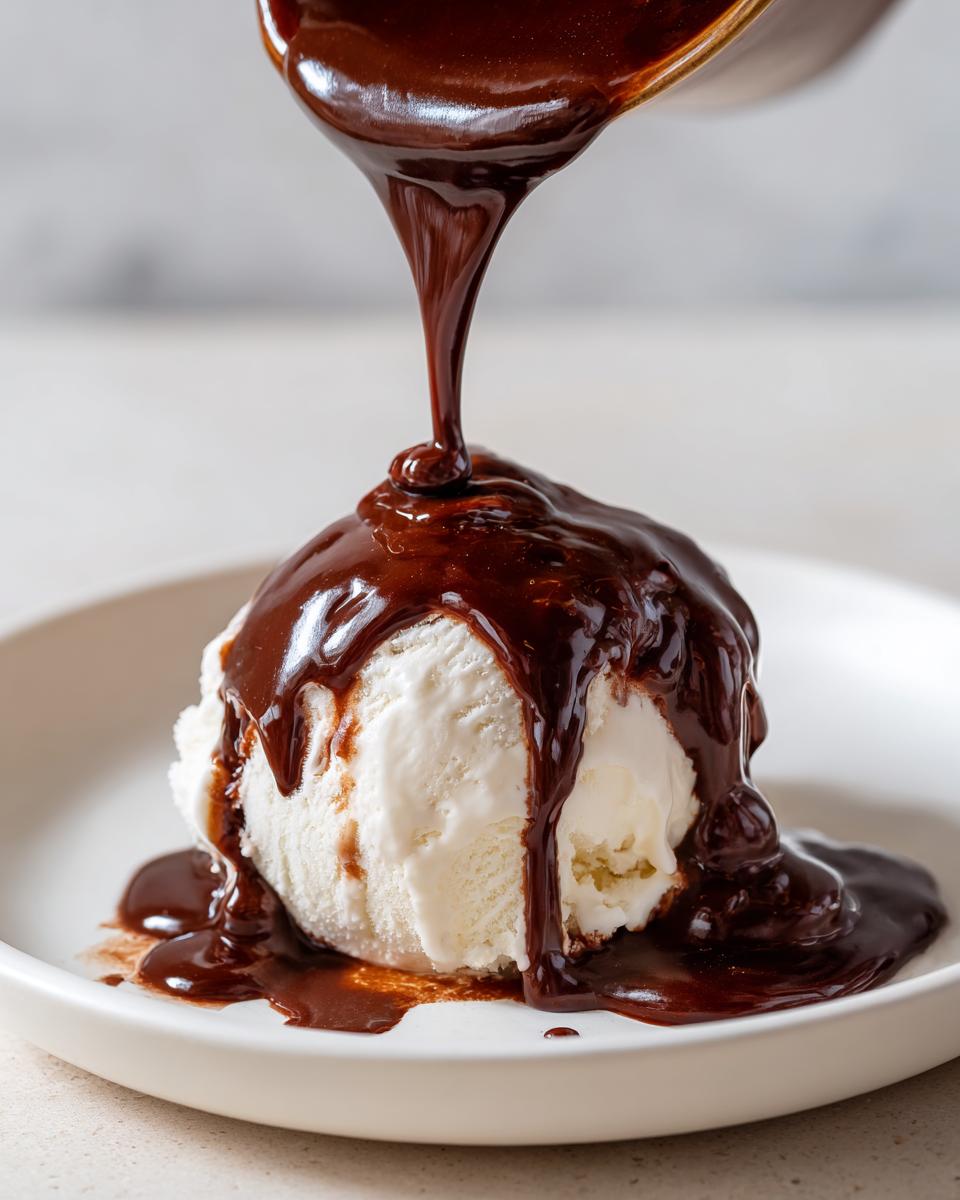
It’s truly fantastic for all your basic ice cream topping ideas. Think about drizzling it over pancakes—especially my fluffy pumpkin waffles! Or, if you’re feeling fancy, it makes the base for the best chocolate drizzle on brownies or fruit.
Making Homemade Chocolate Milk Mix Instantly
When the kids come running because they want chocolate milk, this recipe saves the day. It’s so easy to mix up a quick glass of chocolate milk using this homemade chocolate syrup recipe. You don’t need to worry about measuring powders or waiting for things to dissolve. Just take about 2 tablespoons of this cooled syrup and stir it right into 1 cup of cold milk. That’s it! It mixes instantly and gives you such a deep flavor. It’s also great if you are trying to whip up a special drink like my peppermint espresso if you skip the peppermint!
Troubleshooting Common Issues with Homemade Chocolate Syrup
Sometimes, even with the best recipe, things don’t look quite right when you first pull the pan off the heat. Don’t fret! That’s why experienced cooks always have a few tricks up their sleeves. The most common hiccup when making chocolate syrup is graininess—that means the sugar didn’t fully dissolve on the stovetop. If yours feels a little gritty after cooling, give it a short, slow reheat on the stove and whisk it gently for another minute, making sure you see that brilliant sheen again.
If your rich chocolate topping turned out too thin when hot, remember it will thicken significantly in the fridge! But, if it sets up like pudding after chilling and you want to use it for drizzling on cinnamon roll apple pie, just stir in a teaspoon of hot water at a time until you reach that perfect consistency. That’s the trick to keeping this recipe flexible for milk or thick topping needs!
Variations for Healthier Chocolate Sauce Options
Now, sometimes folks ask me, “Carla, can I make this chocolate syrup a little lighter?” And the answer is always yes! While my standard recipe is so simple—just sugar, cocoa, water, salt, and vanilla—it’s super easy to pivot if you prefer a healthier chocolate sauce or need a specific adaptation for your family.
If you are aiming to swap the sugar, you’ll want to look at a granular, zero-calorie sweetener. Maple syrup or honey can work, but know this: since those options are liquids, you’ll need to reduce the water in the recipe by about a quarter cup, or your final smooth chocolate topping might end up far too thin. You need that sugar there to thicken everything up when it cools!
For those needing a vegan chocolate syrup, you’re in luck! This base recipe is already vegetarian, and as long as you ensure your vanilla extract doesn’t contain hidden dairy (which is rare, but worth checking!), you’re good to go. My advice is to try this basic recipe first; it’s so pantry-friendly, you might find you don’t need any complicated swaps right away. If you’re doing low-carb baking, you may want to check out how others have adapted recipes like this one—I saw a great post about it over at Sunny Plates.
Remember, even if you keep the sugar, using real cocoa powder instead of high-fructose corn syrup is already a huge step up! If you enjoyed the simplicity here, you’ll also love how straightforward my zucchini pizza bites are when you need a quick weeknight fix.
Frequently Asked Questions About Chocolate Syrup
How long does homemade chocolate syrup last?
Because we aren’t using preservatives, this fantastic chocolate syrup should be stored in a clean, airtight jar right in the refrigerator. If you keep it sealed tightly, it stays fresh and delicious for about 3 to 4 weeks. I know, I know, it’s so good you might finish it sooner! Seriously, I’ve never had it last that long in my house because we use it on everything from pancakes to just dipping spoons into it.
Can I use powdered sugar instead of granulated sugar for this chocolate syrup recipe?
That’s a great question about making an easy chocolate sauce! I strongly advise against substituting powdered sugar for the granulated sugar in this specific recipe. Powdered sugar has cornstarch added to keep it from clumping, and that starch will make your final dessert sauce from scratch go cloudy or gummy instead of giving you that silky mouthfeel. For the best results in this stovetop method, stick to granulated sugar.
Is this recipe suitable for making chocolate ice cream topping?
Absolutely! In fact, I consider this the absolute best chocolate drizzle for ice cream. Remember what I mentioned about it thickening when it cools? That’s its superpower for cold desserts! When you pull it out of the fridge, it’s already thick enough to create those lovely ribbons over vanilla ice cream. If you’re making hot fudge sundaes, you might want to warm this specific homemade chocolate syrup recipe just slightly, but for cold toppings, straight from the fridge is perfect.
Is this chocolate syrup recipe suitable for making homemade chocolate milk mix?
Yes, this is actually my preferred base for creating a wonderful homemade chocolate milk mix! Since this syrup is already fully dissolved and smooth, you don’t get that gritty sediment you sometimes find with cocoa powder mixes. Just stir 2 tablespoons of the syrup into one cup of cold milk, like I explained earlier, and you’ve got a perfect glass. It’s much richer than the store-bought stuff, which is why it’s so satisfying.
If you’re looking for incredibly reliable, satisfying meals that use simple components like this, my guide to creamy one-pot tuna pasta is another pantry favorite!
Share Your Best Chocolate Drizzle Creations
Now you have the full rundown on how to make the richest, smoothest chocolate syrup right on your stovetop in minutes. I truly believe once you taste this, you won’t go back to the shelf stuff again. It’s just that much better!
I hope you’ll give this recipe a try the next time that chocolate craving hits hard. Whether you’re drizzling it over my famous pumpkin waffles or whipping up a super quick mocha, I want to hear about it!
Please come back here after you’ve made a batch and leave me a star rating and a comment telling me what you used your homemade chocolate syrup for. Hearing from you encourages me so much to keep sharing these simple, dependable recipes that make home cooking joyful. Did you use it for a special occasion, or maybe you tried a fun variation? I can’t wait to see what you all create—maybe I’ll even feature your idea next time I need a new hot chicken salad topping!
PrintRich Homemade Chocolate Syrup: Better Than Store-Bought
Make this rich, smooth homemade chocolate syrup using simple cocoa powder. It is ready in minutes and tastes better than any store-bought version. Use it for milk, ice cream, or pancakes.
- Prep Time: 5 min
- Cook Time: 5 min
- Total Time: 10 min
- Yield: About 1 1/2 cups 1x
- Category: Dessert Sauce
- Method: Stovetop Cooking
- Cuisine: American
- Diet: Vegetarian
Ingredients
- 1 cup granulated sugar
- 2/3 cup unsweetened cocoa powder
- 1 cup water
- 1 teaspoon vanilla extract
- 1/4 teaspoon salt
Instructions
- Combine the sugar, cocoa powder, water, and salt in a medium saucepan.
- Place the saucepan over medium heat. Whisk the mixture constantly until the sugar dissolves and the mixture begins to simmer.
- Reduce the heat to low and let it simmer gently for 1 minute, stirring occasionally. Do not boil rapidly.
- Remove the saucepan from the heat. Stir in the vanilla extract.
- Allow the syrup to cool completely. It will thicken as it cools.
- Pour the finished chocolate syrup into a clean, airtight jar. Store it in the refrigerator.
Notes
- This recipe makes a decadent chocolate sauce that is perfect for a quick dessert topping.
- For chocolate milk, mix 2 tablespoons of this syrup into 1 cup of cold milk.
- This recipe does not use corn syrup, giving you a cleaner flavor profile.
- The syrup thickens significantly after refrigeration; thin with a little hot water if needed before serving warm drinks.
Nutrition
- Serving Size: 2 tablespoons
- Calories: 95
- Sugar: 18
- Sodium: 15
- Fat: 0.5
- Saturated Fat: 0.3
- Unsaturated Fat: 0.2
- Trans Fat: 0
- Carbohydrates: 24
- Fiber: 1
- Protein: 0.5
- Cholesterol: 0