
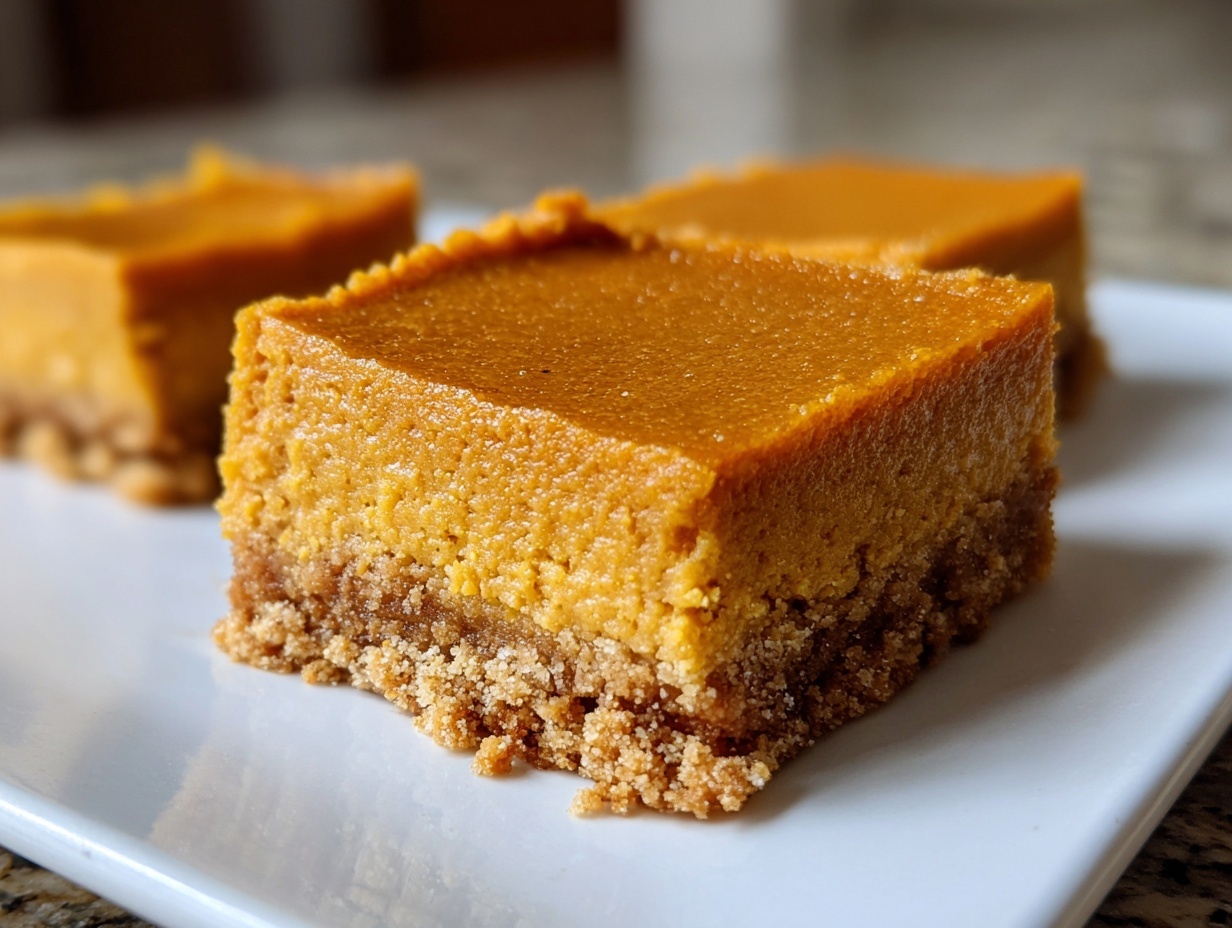
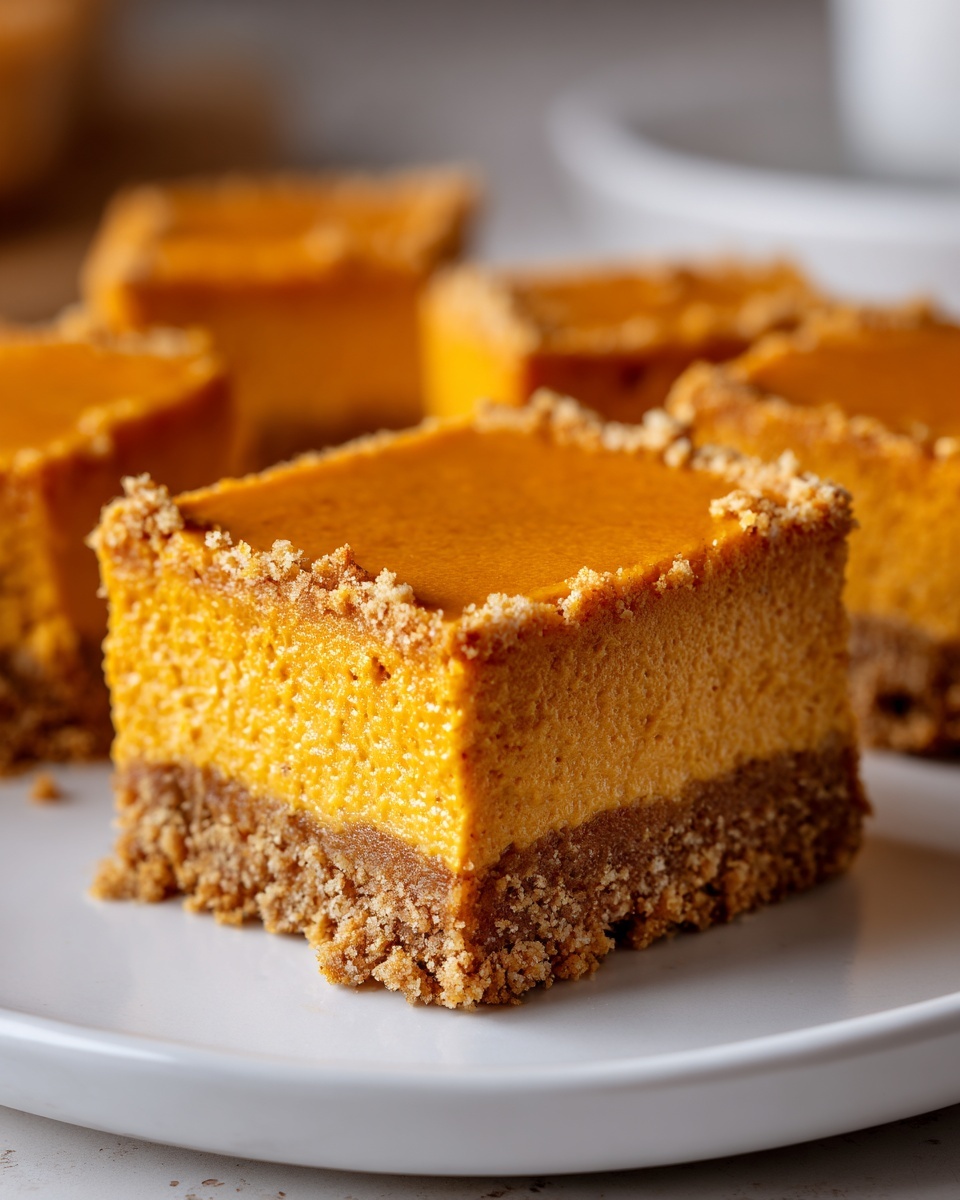
Oh, the smell of fall just wraps right around you like a favorite worn sweater, doesn’t it? That blend of sweet pumpkin and warm spice is just magic in the kitchen. When Thanksgiving rolls around, I always need something special for an easy-to-serve finish, and that’s where these pumpkin cheesecake bars become my absolute go-to. Forget wrestling with a springform pan and hoping your full-sized cheesecake doesn’t crack! These bars give you that deep, rich, creamy flavor—the absolute best of a pumpkin pie married to a perfect cheesecake—but in a simple, neat square format.
I’ve been perfecting these for years, tweaking the crust just so, because for me, these squares are more than just a dessert. They’re what my grandchildren always ask for when the leaves start turning. They represent a comfortable, reliable harvest season treat that I know will come out perfectly every single time. Trust me, once you try this recipe, you’ll see why they’ve become the talk of every fall gathering in the neighborhood.
If you’re already deep into your seasonal baking, you’ll want to see how I handle the layers to get that incredible texture. You can check out my technique for other wonderful pumpkin treats while you gather your baking supplies for these bars!
- Why These Are the Best Pumpkin Cheesecake Bars Ever (E-E-A-T Focus)
- Gathering Ingredients for Your Pumpkin Cheesecake Bars
- Step-by-Step Instructions to Make Perfect Pumpkin Cheesecake Bars
- Tips for Making the Most Delicious Pumpkin Cheesecake Bars
- Storage and Reheating Instructions for Pumpkin Cheesecake Bars
- Variations on Classic Pumpkin Cheesecake Bars
- Serving Suggestions for Your Rich Pumpkin Dessert
- Frequently Asked Questions About Pumpkin Cheesecake Bars
- Estimated Nutritional Profile for These Pumpkin Cheesecake Bars
Why These Are the Best Pumpkin Cheesecake Bars Ever (E-E-A-T Focus)
I’ve taught elementary school for thirty years, and like teaching fractions, a good recipe needs clear, dependable steps so everyone gets the right answer! What sets these pumpkin cheesecake bars apart is how remarkably reliable they are. We focus on texture first. You get that beautiful, dense, buttery crust—the foundation of any great cheesecake bar recipe—and then the filling is just luxurious.
Home cooks often worry about watery fillings, but my experience tells me it’s all about the balance of sugars and slow baking. That’s why I know these are the best pumpkin bars ever. They deliver exactly what you want: the warm, comforting flavor profile of classic pumpkin spice treats mixed with that incredible tang of cheesecake. These aren’t just desserts; they are foolproof fall happiness, made to look beautiful on any Thanksgiving table.
Achieving the Perfect Creamy Pumpkin Bars Texture
The number one thing that makes these the creamy pumpkin bars everyone raves about is how we treat them after they come out of the oven. We bake them gently, but cooling them is the real secret. Never pull them straight out when they are piping hot! I make sure to turn the oven off, prop the door open just a crack, and let them sit in that residual warmth for a good 30 minutes. It’s a slow transition, and it’s absolutely essential if you want that smooth, crack-free top layer. It keeps the cream cheese structure happy and prevents any sinking or weeping. If you’re interested in other reliable creamy desserts, I share my process for getting ultra-smooth results in my guide to white chocolate cheesecake, too!
Gathering Ingredients for Your Pumpkin Cheesecake Bars
Now that we know these pumpkin cheesecake bars are dependable, let’s talk about what goes into them. Just like teaching, where using the right textbook makes all the difference, using the right ingredients here is key to success. Gathering everything before you start mixing is part of what makes this an easy fall baking process, rather than a stressful one. I like to pull out my butter and cream cheese about an hour ahead of time so they get nice and soft—this seriously helps with achieving that silky smooth texture we’re aiming for.
We have three distinct parts to build our dessert, so I’ve broken the list down so you can check off what you have. Remember, for cheesecake layers, the temperature of that cream cheese is non-negotiable if you want a smooth result! If you ever need tips on working with cream cheese for other favorites, my guide to the best cream cheese frosting has some great foundational tips for getting that perfect, silky consistency.
For the Buttery Graham Cracker Crust
This is the base, the sturdy, buttery crust dessert layer that holds everything together when you slice into those perfect squares. It only takes a couple of minutes to mix up!
- 1 1/2 cups graham cracker crumbs
- 1/4 cup granulated sugar
- 6 tablespoons unsalted butter, melted
For the Base Cheesecake Filling
This is the main body of the cheesecake—the lighter layer that sets up the beautiful canvas for the pumpkin swirl. Make sure your spices are fresh for the best flavor!
- 16 ounces cream cheese, softened (that’s two standard blocks!)
- 1 cup granulated sugar
- 1/2 cup packed light brown sugar
- 1 teaspoon vanilla extract
- 1 teaspoon pumpkin pie spice
- 1/4 teaspoon salt
- 2 large eggs
- 15 ounces pure pumpkin puree (and please, make sure it’s puree, not canned pie filling!)
For the Swirled Pumpkin Layer
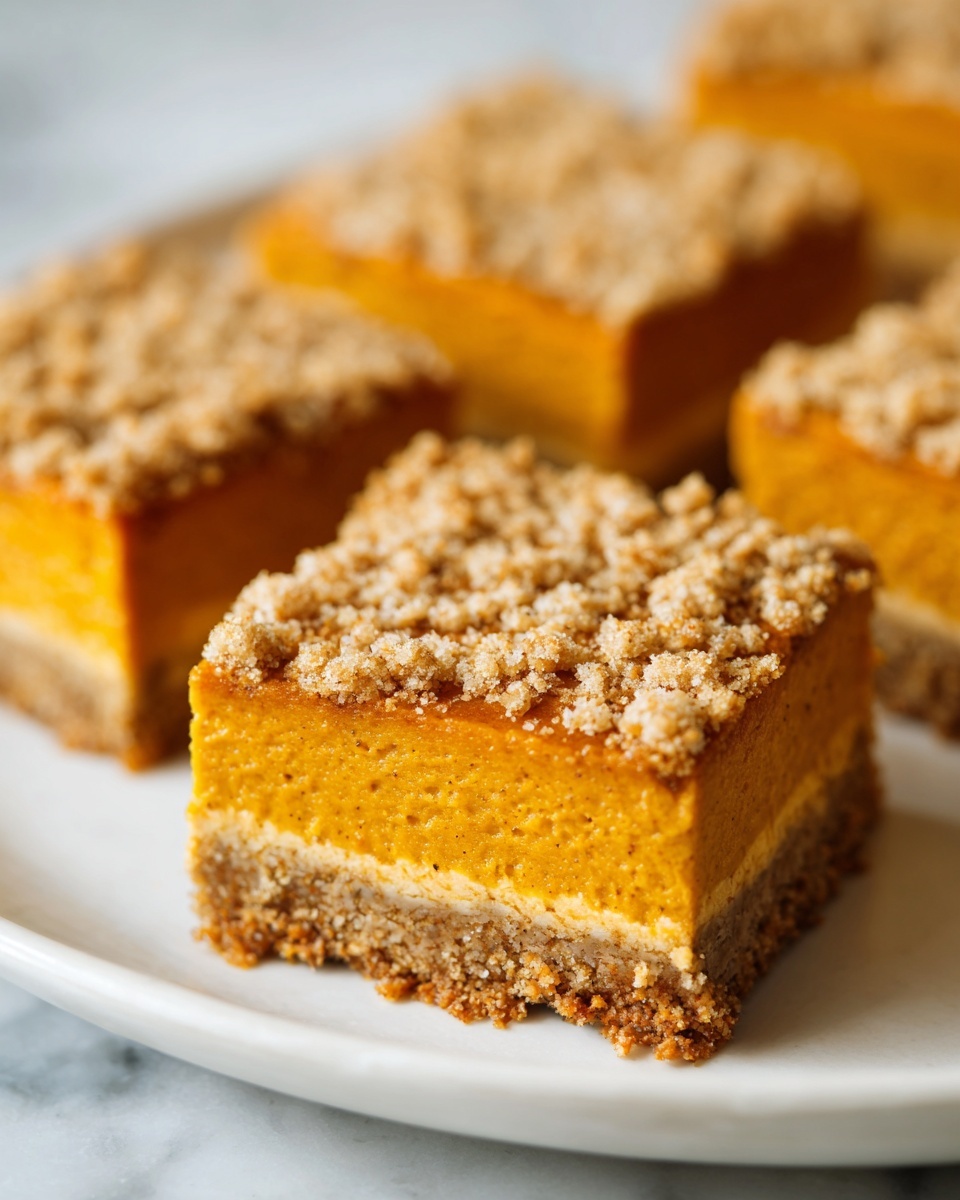
This layer is what gives us that gorgeous color and the classic autumnal flavor that screams “fall!” This is the component that makes people assume you spent hours on this, even though it’s one of the simplest parts of this easy pumpkin dessert bars recipe.
- 8 ounces cream cheese, softened
- 1/2 cup granulated sugar
- 1/4 cup packed light brown sugar
- 1/2 teaspoon vanilla extract
- 1/2 teaspoon pumpkin pie spice
- 1/8 teaspoon salt
- 1 large egg
- 1 cup pumpkin puree (again, pure pumpkin, no substitutes here!)
Step-by-Step Instructions to Make Perfect Pumpkin Cheesecake Bars
Alright, let’s get baking! Since these are easy pumpkin dessert bars, we need to keep our rhythm moving, but slow down when it comes to mixing the cream cheese—that’s the patience part of the process. I like to have my 9×13 pan ready before the oven even hits temperature. Remember to line it with parchment paper, making sure you leave a nice overhang on the sides. That overhang is your built-in handle for lifting these beauties out later without any drama!
Preparing the Crust and Initial Bake
First things first, preheat that oven to 350 degrees F. While it’s warming up, grab your crust ingredients. Mix those graham cracker crumbs, the small bit of sugar, and that melted butter together until it looks like damp sand. You want it crumbly but ready to stick when you squeeze it. Press it down firmly and evenly into the bottom of your prepared pan. We don’t want any weak spots in our graham cracker crust cheesecake base! Pop that into the oven for just 10 minutes. Once it’s done that little bake, pull it out and let it cool down a touch while you tackle the fillings.
Mixing the Cheesecake and Pumpkin Layers Separately
We need rich filling, so focus here. In a big bowl, beat that softened cream cheese with both sugars until it is perfectly smooth—no lumps allowed! Then, mix in your vanilla, spice, and salt. Add those two eggs one by one, mixing just until they disappear after each addition. Finally, gently stir in the 15 ounces of pumpkin puree. Set that beautiful base filling aside. Now, repeat that basic process in a separate clean bowl for the final cup of pumpkin puree and the remaining cream cheese mixture. See? So straightforward!
Assembling and Swirling Your Pumpkin Cheesecake Bars
Time for the fun layering! Pour that big batch of plain cheesecake filling right over your slightly cooled crust. Smooth it out gently. Then, take spoonfuls of that spiced pumpkin mixture and drop them randomly all over the top of the cheesecake layer. Don’t crowd them! Now take a knife or a thin skewer and gently drag it through the dollops to create that lovely marble look—this is how you get those fantastic swirled pumpkin cheesecake effects. But stop there! Resist the urge to stir too much, or you’ll just end up with one uniform color.
Baking and Essential Cooling for Texture
Now, pop the whole pan back into the 350-degree oven and bake for about 35 to 40 minutes. You’re looking for the edges to look set, but give that center a gentle nudge—it should only jiggle a tiny bit, like a very firm pudding. This is where we build trust, as I always say! When that time is up, turn the oven completely off. This is my favorite teaching trick: prop the oven door open slightly with a wooden spoon. Let the bars hang out in that warm dying heat for a full 30 minutes. This slow gradual cooling is non-negotiable for preventing cracks and achieving that melt-in-your-mouth finish on these rich pumpkin dessert bars.
After the oven cool-down, take them out completely and let them cool to room temperature on the counter. The absolute final step before you can dig in is chilling! You must let them chill for at least four hours, but I promise you, they are worlds better if you let them set in the fridge overnight. You can find my instructions for baking other make-ahead favorites, like my Christmas sugar cookie bars, which also benefit from a good chill!
Tips for Making the Most Delicious Pumpkin Cheesecake Bars
You know, just like in the classroom, sometimes you learn the most important rules through a little mistake. When I first started making these pumpkin cheesecake bars, I was in a rush one crisp October morning. I thought, “Surely, beating room-temperature cream cheese for an extra minute will make up for it being slightly cold!” Oh, honey, no. I ended up with small, stubborn lumps in my cheesecake layer that never smoothed out, even after baking. It looked fine, but when I took the first bite, it just reminded me of what happens when you rush the prep work. That day, I learned that patience with ingredient temperature is the real secret to keeping things a no fuss fall dessert.
These bars are fantastic as a make ahead dessert, which is why they are perfect for hosting. I always plan to make them the day before my fall gatherings.
Ingredient Temperature Matters for Creamy Pumpkin Bars
I can’t stress this enough: your cream cheese for both layers must be truly soft. Not slightly cool, not barely yielding—soft, like good butter you left out for an hour. This is foundational for achieving those genuinely creamy pumpkin bars. When the cream cheese is cold, it fights the sugar and the eggs, and you end up incorporating air unevenly, which leads to a slightly grainy texture in your final rich pumpkin dessert. Just set it out earlier in the day. It’s worth the wait!
Making Ahead: Your Best Thanksgiving Cheesecake Bars Strategy
If you are planning a big meal, these Thanksgiving cheesecake bars are your best friend! They absolutely must chill, and frankly, they taste even better the second day. When you chill them overnight, the flavors of the sweet pumpkin blend deeply with the tangy cheese layer. More importantly for a hostess: they cut so much cleaner after a proper overnight chill.
When you take them out of the fridge, let them sit on the counter for maybe 20 minutes before slicing. This takes the chill off just enough that you can use a hot knife technique to get those wonderful perfect edges without tearing the crust. Honestly, these are the ultimate stress-free holiday item!
If you enjoyed learning these tricks for perfect texture, you might also love my method for getting flawless results when making other simple desserts that hold their shape beautifully.
Storage and Reheating Instructions for Pumpkin Cheesecake Bars
One of the best parts about making these pumpkin cheesecake bars is that they genuinely improve with a little patience! They are the definition of a make-ahead treat, which is wonderful when you’re running around preparing for a big holiday meal. You really don’t want to serve these warm; they need that time to firm up.
Remember how I stressed letting them cool slowly in the oven and then on the counter? That sets the structure. The crucial next step is refrigeration. You simply cannot cut these into neat, beautiful squares right away. They need a good, long set time in the fridge.
I always recommend a minimum of four hours, but honestly, if you can manage to wait until the next day—overnight is best! That chilling time allows the sugars to fully settle and the creamy layers to become firm enough to slice without squishing. When they are perfectly chilled, you get those clean lines that look so professional.
If you’re looking for other recipes designed to be made ahead of time, I have a whole collection of easy make-ahead dessert bars that will simplify your holiday planning, too!
Now, what if you have leftovers? Don’t you worry! These bars freeze beautifully. Once they are completely chilled and cut into squares, layer them between slices of wax paper in an airtight container. They hold up really well in the freezer for up to two months. When you decide you need a sudden, rich pumpkin dessert treat, just pull out a square or two and let it thaw slowly in the refrigerator for a few hours. It tastes almost as good as fresh—truly a no-fuss way to keep some fall flavor around long after Thanksgiving has passed!
Variations on Classic Pumpkin Cheesecake Bars
While I truly believe our standard recipe for these pumpkin cheesecake bars is wonderfully balanced, I know you home bakers love to put your own spin on things! That’s the joy of cooking—it’s personal. Since we’ve already nailed the creamy texture and the buttery crust, it’s easy to introduce some fun little twists here and there. We aren’t changing the heart of the dessert, just adding some extra sprinkles of excitement!
Adding Chocolate Chips to Your Pumpkin Cheesecake Bars
If you have a chocolate lover at your house—and who doesn’t?—this variation is quick and pays off big time. I only recommend adding them to the top pumpkin layer, right before you swirl. Remember that second, smaller batch of pumpkin filling we made? Right before you drop those spoonfuls onto the cheesecake base, gently fold in about a half cup of mini chocolate chips. Those little bursts of melted chocolate mingling with the spice make for such a rich pumpkin dessert experience.
You don’t want to put too many in, or they can weigh down the swirl pattern, but just enough adds a lovely surprise. This is similar to how I handle chocolate in my chocolate raspberry cake, where the balance of fruit and chocolate is key. If you add them, just make sure you don’t over-mix them into the layer—we want them distributed, not dissolved!
Alternative Crust Ideas for These Easy Fall Baking Desserts
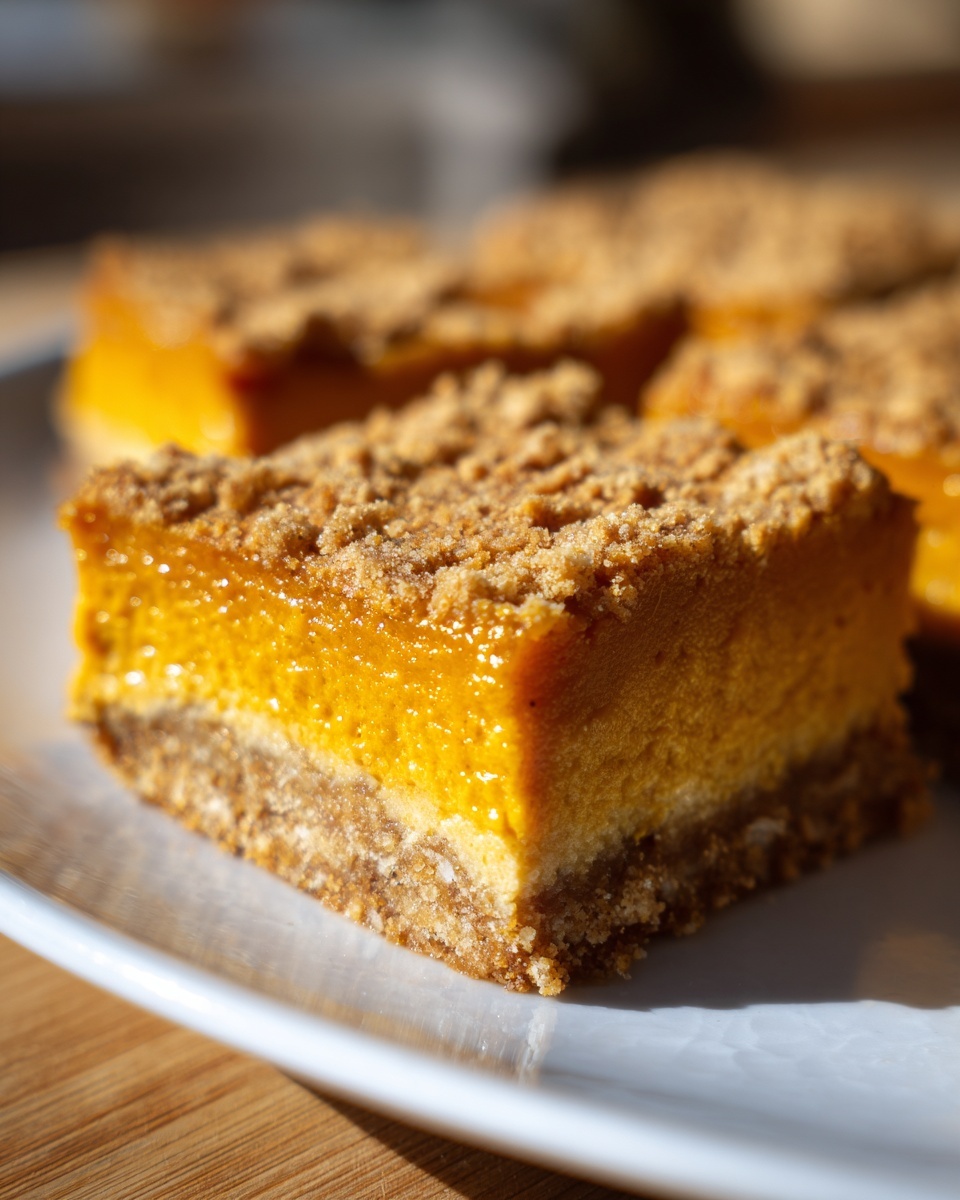
The graham cracker crust is classic and it works perfectly, but you absolutely can swap that out to give these easy fall baking desserts a whole new personality. My favorite swap, especially around Christmas time or when I’m craving something stronger than just sweet, is using ground gingersnap cookies instead of grahams.
If you use gingersnaps, you cut the sugar in the crust by half, maybe even two-thirds, because the cookies are already famously sweet and spicy! You’ll get this wonderful, sharp, slightly spicy base that cuts through the richness of the cheesecake layer beautifully. Just use the same amount of crumbs and melted butter. It’s a simple switch that makes these pumpkin cheesecake squares feel completely customized for your event. It really elevates them from a simple bar to something truly special!
Serving Suggestions for Your Rich Pumpkin Dessert
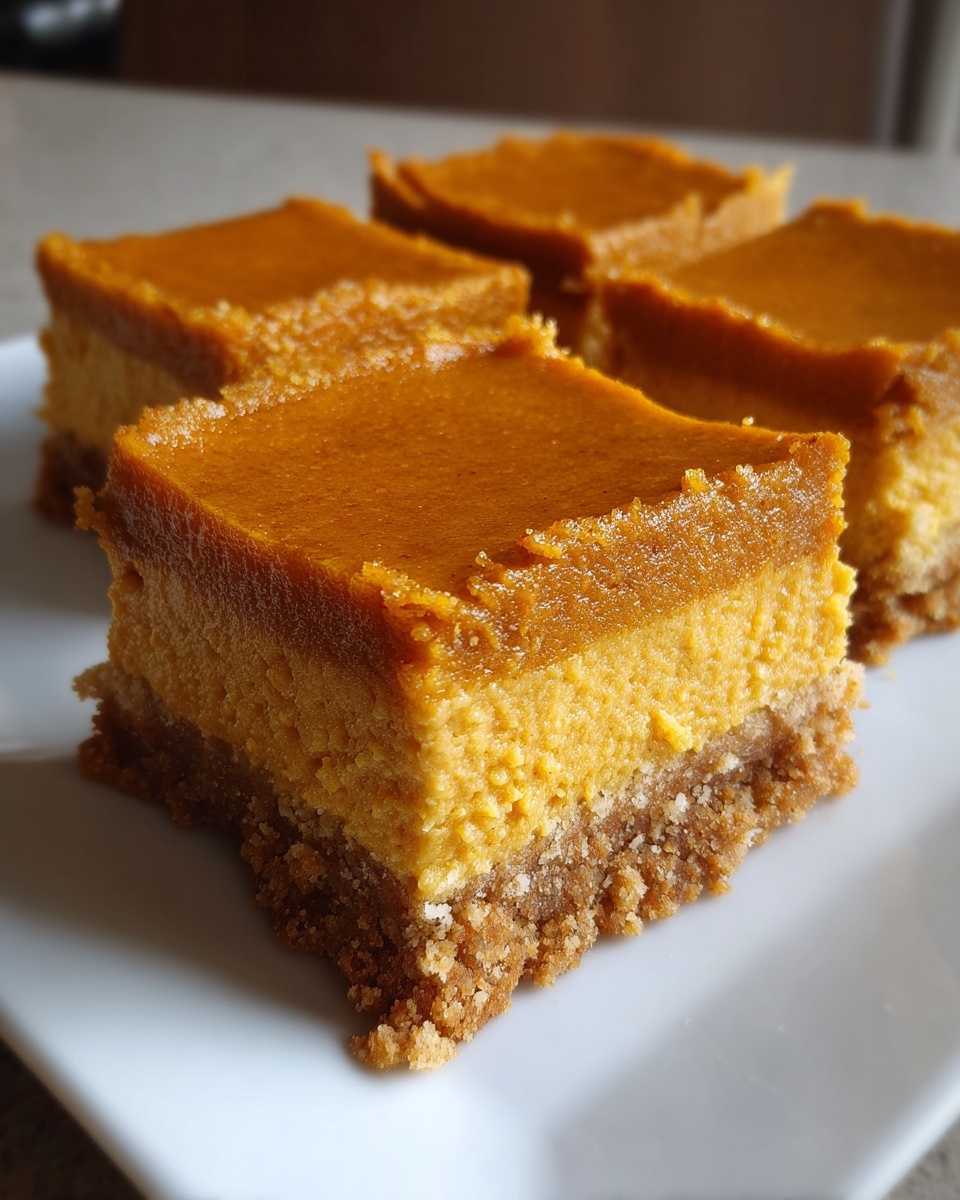
Once you have perfectly chilled and sliced these heavenly pumpkin cheesecake bars, the final presentation is what really ties the room together, especially when hosting for the holidays. Since these are such a rich pumpkin dessert, you don’t want to overwhelm them with too many heavy toppings. I always go for light, bright additions that complement the pumpkin spice without hiding that perfect, creamy texture we worked so hard to achieve.
In my house, presentation is almost as important as taste—it shows your guests you put love into the table setting! When I serve these holiday dessert bars, I like to make sure every square gets a little something special, even if it’s just a simple finish.
For a truly beautiful spread, try pairing them with something festive. If you’re looking for a lovely beverage to pass around alongside these flavorful bars, I always recommend making a big batch of my holiday sangria; it cuts through the richness perfectly!
- A Dollop of Whipped Cream: Nothing beats fresh whipped cream. Don’t grab the aerosol can if you can help it! Just whip heavy cream with a tiny bit of powdered sugar and vanilla until soft peaks form. It melts slightly into the cool cheesecake layer beautifully.
- Light Caramel Drizzle: A thin drizzle of warmed caramel sauce is divine here. Since the cheesecake is tangy, the sweetness of the caramel really pops. Make sure you warm it up until it’s almost runny so it spreads thinly over the square.
- A Sprinkle of Cinnamon or Nutmeg: For when you want zero extra moisture or sweetness, just dust the tops of your sliced squares lightly with extra cinnamon or freshly grated nutmeg right before serving. It brightens the aroma immensely.
- Candied Pecans: If you like a little crunch, topping these with store-bought or homemade candied pecans adds a wonderful textural contrast to the creamy layers. They look so elegant scattered on the serving platter, too!
These cheesecake squares are rich enough to stand on their own, but these little garnishes just elevate them from a simple baked good to a truly special dessert worthy of any gathering.
Frequently Asked Questions About Pumpkin Cheesecake Bars
When developing a recipe I plan to share widely, I always picture myself teaching it to a classroom full of eager bakers. That means anticipating every little question that might pop up! These pumpkin cheesecake bars are wonderfully straightforward, but a few details can make the difference between good and absolutely phenomenal. Here are the things folks ask me about most often when they are planning their fall baking desserts menu.
Can I skip swirling the layers in my pumpkin cheesecake bars?
You certainly can! If you are really pressed for time, or if you simply prefer one uniform flavor profile, you can skip the swirling step entirely. Just pour the cheesecake base in first, then evenly spread the lighter pumpkin layer on top. It will bake up beautifully, and you’ll still get a wonderfully rich pumpkin dessert. However, if you skip the swirl, you miss out on the fun! The goal of the swirl is to give you pockets of intense spiced pumpkin flavor right next to the tangier, lighter cream cheese layer. It provides wonderful variety in every bite, so I strongly encourage you to try at least a gentle swirl.
What is the best way to cut clean cheesecake squares?
Ah, the presentation issue! This is true for any good cheesecake bar recipe. If you try to cut them when they are only slightly chilled, everything squishes together and those beautiful layers smear. First, you must chill them until they are rock solid—preferably overnight. When it’s time to cut your perfect cheesecake squares, grab a large, sharp chef’s knife. The trick is to dip the knife into a tall glass of very hot water, wipe the blade completely dry, and then make *one* clean cut. You repeat that hot water dip and wipe for every single cut you make. That hot blade glides right through the creamy filling and the crust without dragging any crumbs or smearing the layers.
Can I use pumpkin pie filling instead of puree for these pumpkin cheesecake bars?
Absolutely not, and I say this with all the firmness of a teacher whose student turned in a mismatched worksheet! You must use pure pumpkin puree. Pumpkin pie filling is already sweetened and heavily spiced with cinnamon, nutmeg, and cloves. If you substitute it for the puree in this recipe, your layers will be far too sweet, the texture will be strange because of the added starches in the filling, and you will completely throw off the delicate balance of sugar we set up for these creamy pumpkin bars. Stick to the plain, canned puree—it lets you control all the spice yourself!
If you’re looking for more advice on making sure your holiday baking goes smoothly, be sure to check out my tips for mixing up an easy festive champagne punch to serve alongside these treats!
Estimated Nutritional Profile for These Pumpkin Cheesecake Bars
Now, as a former teacher, I always want to provide full disclosure, and that includes the numbers! When we talk about these pumpkin cheesecake bars, we need to remember they are a decadent, rich treat perfect for a holiday gathering. Because we’re using cream cheese, brown sugar, and a buttery crust, they are definitely on the richer side compared to a light fruit dessert. Please know that these figures are just estimates!
I ran the numbers through a standard calculator based on the exact amounts listed in the ingredients section. Nutrition facts can always vary slightly based on the brand of cream cheese or the exact size of eggs you use, but this gives you a very good idea of what you are enjoying when you take one of these magnificent squares. Think of this as the baseline for our wonderful, creamy pumpkin bars.
Here is a general breakdown for one serving (one bar), assuming the recipe yields 24 perfect slices:
- Serving Size: 1 bar
- Calories: 280
- Fat: 17g
- Carbohydrates: 28g
- Protein: 4g
- Sugar: 25g
- Saturated Fat: 10g
- Cholesterol: 65mg
They certainly pack a satisfying punch, don’t they? They are designed to be rich! That’s why just one of these Thanksgiving cheesecake bars is usually enough to satisfy that craving for a wonderful fall baking dessert. They are meant to be an indulgence, a real treat to share with family and friends as you celebrate the season.
PrintThe Ultimate Creamy Pumpkin Cheesecake Bars with Buttery Graham Cracker Crust
Make these rich and creamy pumpkin cheesecake bars featuring a buttery graham cracker crust. This recipe delivers classic fall flavors in an easy-to-serve square format, perfect for Thanksgiving or any gathering.
- Prep Time: 25 min
- Cook Time: 40 min
- Total Time: 4 hours 5 minutes
- Yield: 24 servings 1x
- Category: Dessert
- Method: Baking
- Cuisine: American
- Diet: Vegetarian
Ingredients
- For the Crust: 1 1/2 cups graham cracker crumbs
- 1/4 cup granulated sugar
- 6 tablespoons unsalted butter, melted
- For the Cheesecake Filling: 16 ounces cream cheese, softened
- 1 cup granulated sugar
- 1/2 cup packed light brown sugar
- 1 teaspoon vanilla extract
- 1 teaspoon pumpkin pie spice
- 1/4 teaspoon salt
- 2 large eggs
- 15 ounces pumpkin puree (not pumpkin pie filling)
- For the Pumpkin Layer: 8 ounces cream cheese, softened
- 1/2 cup granulated sugar
- 1/4 cup packed light brown sugar
- 1/2 teaspoon vanilla extract
- 1/2 teaspoon pumpkin pie spice
- 1/8 teaspoon salt
- 1 large egg
- 1 cup pumpkin puree (not pumpkin pie filling)
Instructions
- Preheat your oven to 350 degrees F. Line a 9×13 inch baking pan with parchment paper, leaving an overhang on the sides for easy removal.
- Prepare the crust: In a medium bowl, mix the graham cracker crumbs, 1/4 cup sugar, and melted butter until the mixture resembles wet sand. Press this mixture firmly and evenly into the bottom of the prepared pan. Bake for 10 minutes. Remove from the oven and let cool slightly.
- Prepare the cheesecake filling: In a large bowl, beat the softened cream cheese, 1 cup sugar, and brown sugar until smooth. Beat in the vanilla, pumpkin pie spice, and salt. Add the eggs one at a time, mixing just until combined after each addition. Mix in the 15 ounces of pumpkin puree until smooth.
- Pour the cheesecake filling evenly over the cooled crust. Set aside while you prepare the pumpkin layer.
- Prepare the pumpkin layer: In a separate bowl, beat the remaining 8 ounces of softened cream cheese with the remaining sugar, brown sugar, vanilla, pumpkin pie spice, and salt until smooth. Beat in the remaining egg and 1 cup of pumpkin puree until fully combined.
- Drop spoonfuls of the pumpkin layer mixture over the cheesecake layer. Use a knife or skewer to gently swirl the two layers together to create a marbled effect. Do not over-mix.
- Bake for 35 to 40 minutes, or until the edges are set and the center has only a slight jiggle.
- Turn off the oven, prop the door open slightly, and let the bars cool in the oven for 30 minutes. This slow cooling helps prevent cracking.
- Remove the bars from the oven and let them cool completely on a wire rack. Once cool, chill the bars in the refrigerator for at least 4 hours, or preferably overnight, before cutting into squares.
Notes
- For the best texture, ensure your cream cheese is fully softened to room temperature before mixing.
- If you want a truly rich pumpkin dessert, you can add 1/2 cup of mini chocolate chips to the pumpkin layer before swirling.
- These make-ahead dessert bars freeze well for future enjoyment.
Nutrition
- Serving Size: 1 bar
- Calories: 280
- Sugar: 25g
- Sodium: 180mg
- Fat: 17g
- Saturated Fat: 10g
- Unsaturated Fat: 7g
- Trans Fat: 0.2g
- Carbohydrates: 28g
- Fiber: 1g
- Protein: 4g
- Cholesterol: 65mg