
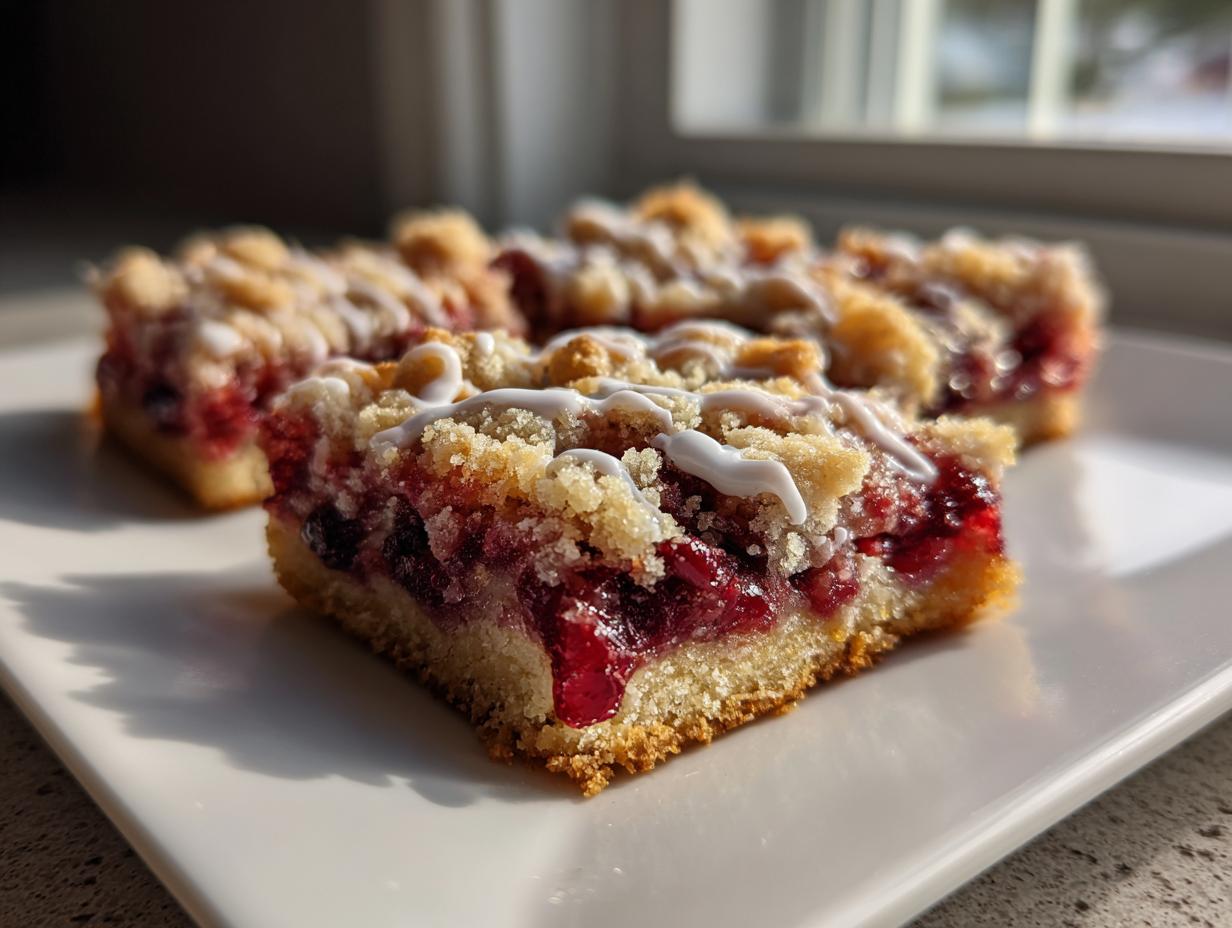
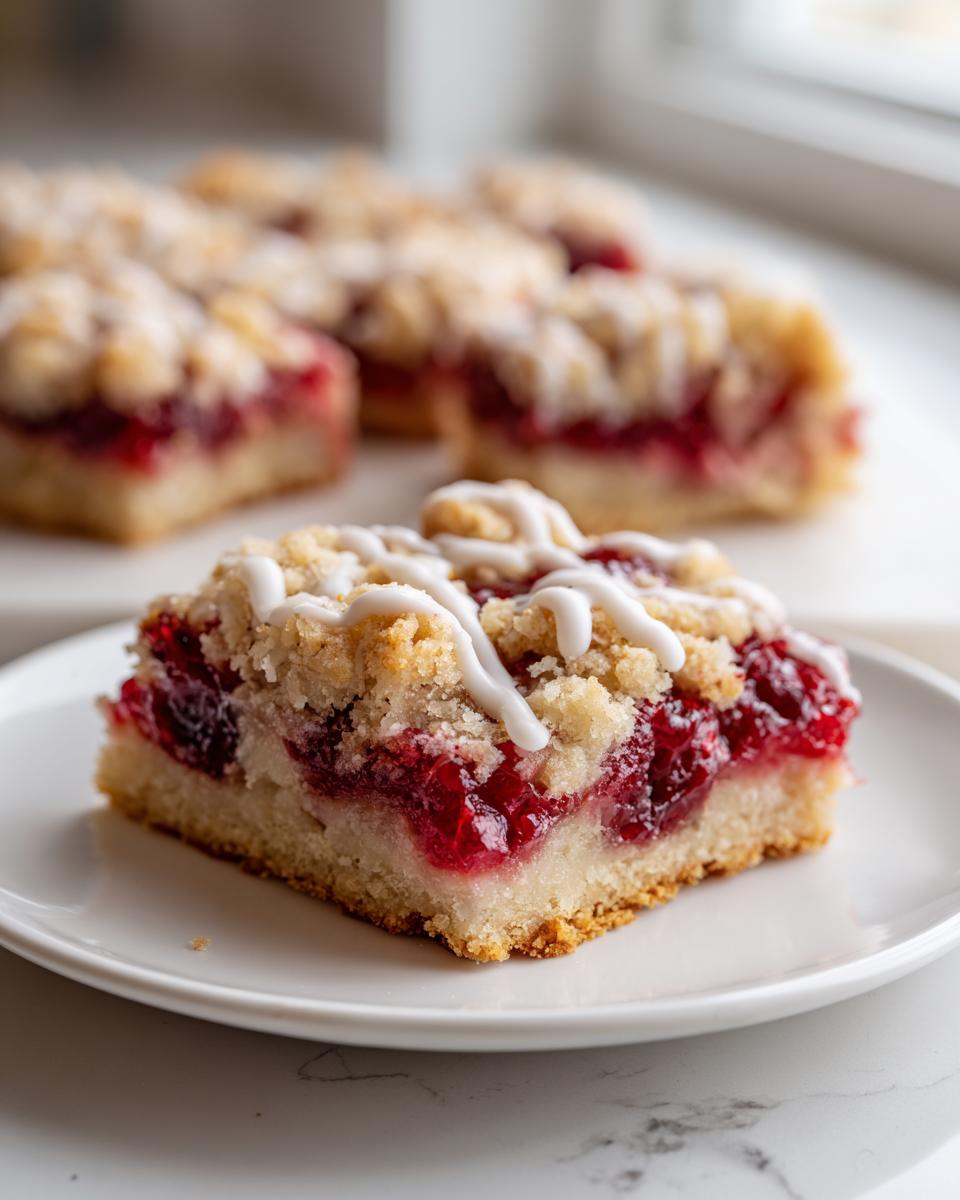
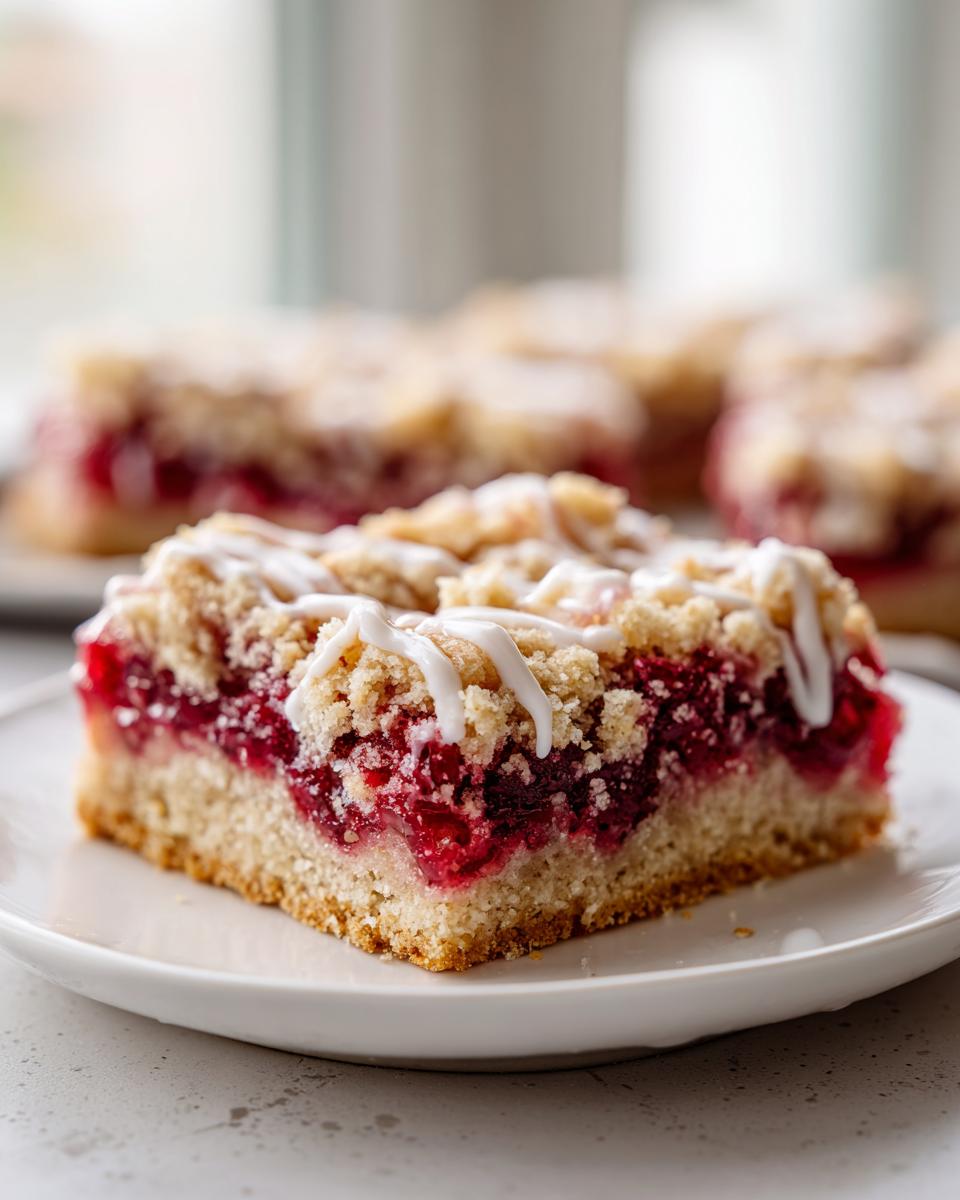
Sometimes, you just crave that perfect slice of pie—the flaky crust, the vibrant, sweet-tart filling—but you don’t want the fuss of rolling dough or dealing with messy lattice work. I hear you! As a grandmother who always needs to make something delicious for a crowd without spending all day in the kitchen, I turned to bar desserts. And let me tell you, these **easy homemade cherry pie bars** are a game-changer. We’re talking about layering that incredibly rich, buttery shortbread crust right into a sheet pan, topping it with that familiar, jewel-toned cherry filling, and crumbling more crust over the top.
When my bridge club or the grandkids visit, these bars are my go-to. They travel beautifully, they slice neatly, and everyone gets that satisfying taste of homemade cherry pie without needing a fork and plate. These simple cherry dessert bars truly taste like they took hours, but I promise, they are my absolute shortcut favorite for feeding a crowd!
If you are looking for more incredibly simple snacks and appetizers to round out your potluck spread, you should definitely check out my guide to easy appetizers and snacks. It’s full of reliable recipes perfect for sharing!
- Why These Are the Best Cherry Pie Bars Recipe
- Gathering Ingredients for Your Homemade Cherry Pie Bars
- How to Make Cherry Pie Bars Step-by-Step
- Tips for Success Making Perfect Cherry Pie Bars
- Storage and Make-Ahead Tips for Cherry Pie Bars
- Variations on Classic Cherry Pie Bars
- Frequently Asked Questions About Easy Cherry Pie Bars
- Estimated Nutrition for These Simple Cherry Dessert Bars
- Share Your Homemade Cherry Pie Bars Creations
Why These Are the Best Cherry Pie Bars Recipe
I’ve tested countless dessert bars, and these rise to the top because they manage to be utterly comforting without demanding hours of work. They are consistently my favorite option when I need best dessert recipes that look impressive. The secret? It’s all about that sturdy, rich base and the very simple way we put them together contrasted with the amazing flavor you get. You get all the joy of a classic fruit pie, just in a much neater, less fussy package.
Quick Cherry Bars Recipe for Potlucks
If you’re figuring out what to bring to the next church supper or neighborhood BBQ, stop right here. These are the ultimate dessert bars for a crowd. Because we rely on a quality can of cherry pie filling—yes, I said canned!—the prep time is incredibly short. They bake up beautifully golden and sturdy enough to stack in Tupperware containers. These truly are a simple cherry dessert that nobody ever turns down.
The Buttery Crust Cherry Bars Secret
The key satisfying feeling comes right from that bottom layer—it’s not just a cookie base; it’s a true old-fashioned shortbread texture. We use plenty of softened butter and a little trick I learned from my mother: a splash of almond extract along with the vanilla. That tiny hint of nuttiness just elevates the buttery crust cherry bars from good to unforgettable. Give it a try; you won’t regret that beautiful depth of flavor!
Gathering Ingredients for Your Homemade Cherry Pie Bars
Before we even think about mixing anything, we need our players on the countertop! Gathering everything first is the secret to stress-free baking, especially when making these crowd-pleasing **homemade cherry pie bars**. I’ve broken the list down into two parts so you can see exactly what goes into that amazing crust and our shortcut filling versus what we need for that pretty finishing touch.
Crust and Filling Components for Easy Cherry Pie Bars
Pay close attention to that butter—it *must* be softened, not melted! That’s the key to that lovely buttery crust texture we are aiming for. And yes, we are using a standard can of cherry pie filling, which saves a mountain of time while still delivering that classic tartness.
- 1 cup unsalted butter, softened
- 1 cup granulated sugar
- 1/4 teaspoon salt
- 2 large eggs
- 1 teaspoon vanilla extract
- 1/2 teaspoon almond extract (If you really dislike almond, you can use 1 1/2 teaspoons of vanilla total, but trust me, try the almond first!)
- 2 1/2 cups all-purpose flour
- 1 (21-ounce) can cherry pie filling
Simple Vanilla Glaze Ingredients
For the glaze, we just need simple pantry staples. The goal here is a drizzle, so we always start with less milk than you think you need. You can always add more liquid, but you certainly can’t take it out once it’s in there!
- 1 cup powdered sugar
- 1-2 tablespoons milk (start with one!)
- 1/2 teaspoon vanilla extract
How to Make Cherry Pie Bars Step-by-Step
Now for the fun part! Making these **cherry pie bars** is much easier than wrestling with a double-crust pie, I promise. We are really just making one fantastic dough and using it two ways: once as the base and once as the topping. Make sure your oven is ready and your trusty 9×13 pan is lined—we want easy cleanup, after all! While you are getting set up with the pans, thinking about these amazing bars reminds me of my simple sheet pan meals, like my recipe for easy sheet pan mini meatloaf muffins, which also cuts down on cleanup time!
Preparing the Buttery Crust Cherry Bars Base
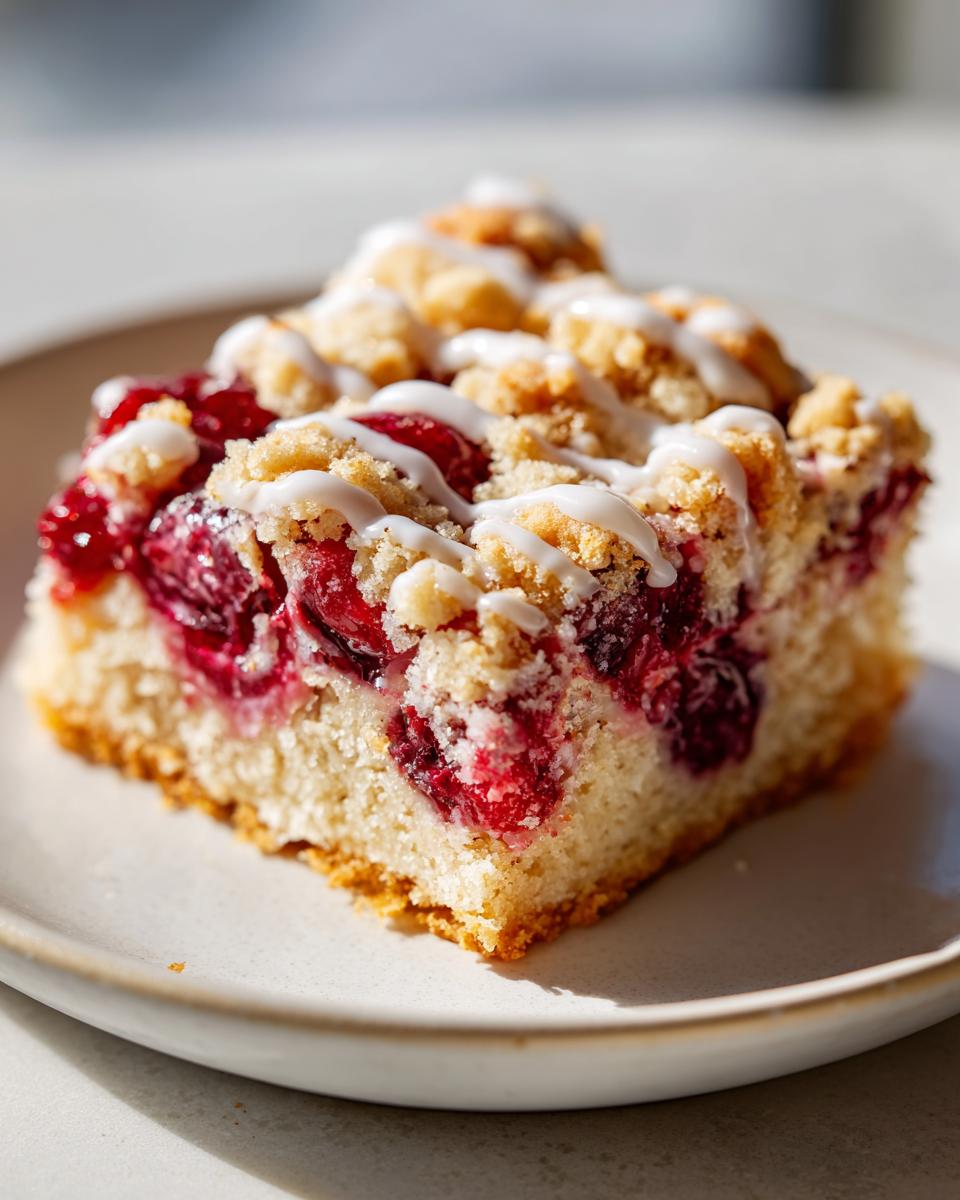
First things first, have your oven set to 350°F (175°C). You need to line that 9×13 pan with parchment paper first, letting the ends hang over the side—that’s your built-in handle later! Now grab your mixing bowl. We cream that softened butter with the cup of sugar until it’s light and fluffy. Beat in those two eggs, one at a time, followed by your vanilla and that secret almond extract. Once combined, we add the flour and salt slowly. Mix until it just comes together into a thick, wonderful dough. Take two-thirds of this dough and press it firmly and evenly into the bottom of your prepared pan. That’s our solid **buttery crust cherry bars** foundation!
Assembling and Baking the Cherry Pie Bars
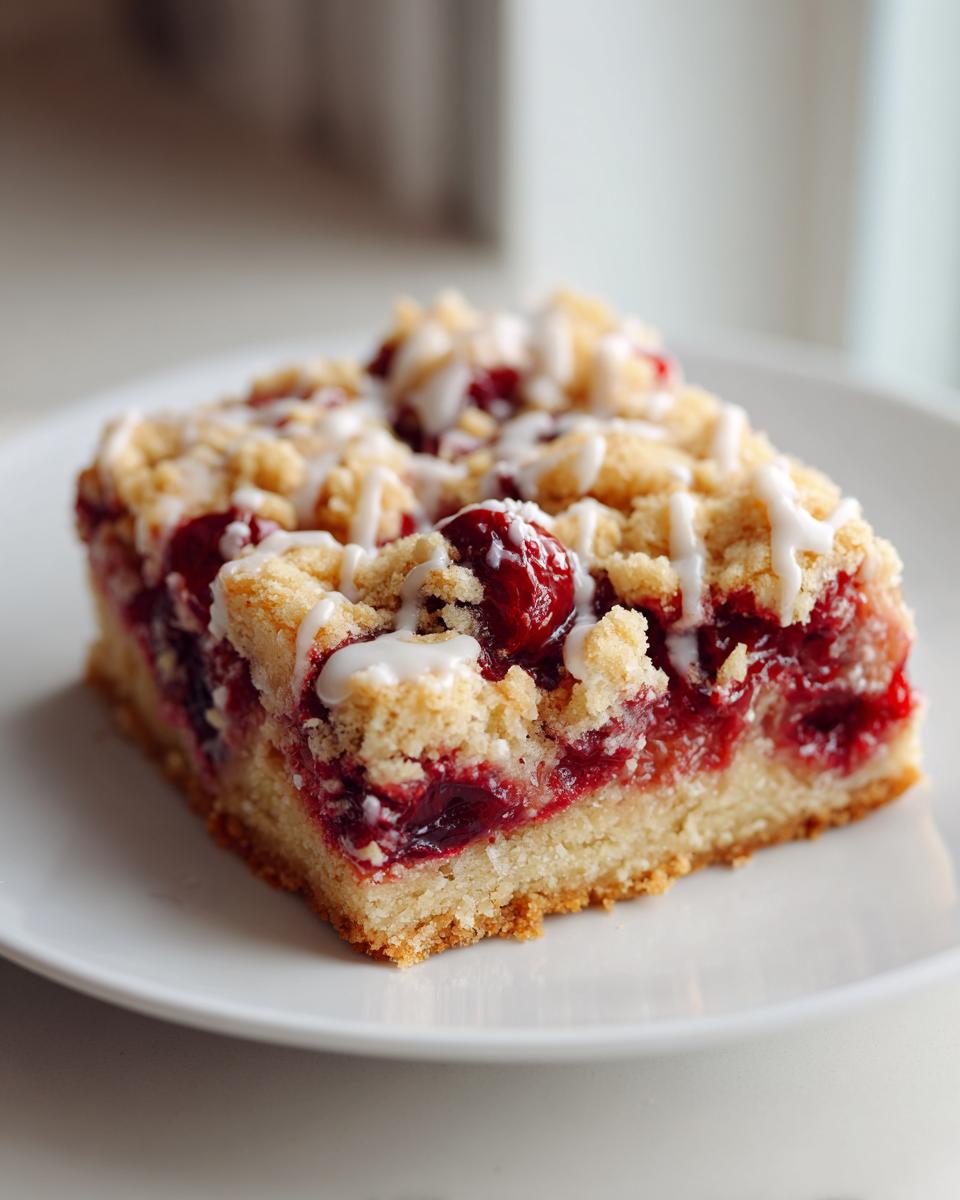
This assembly is so quick, it’s wonderful! Just grab that can of cherry pie filling and try to spread it out as evenly as you can over the crust layer. Don’t worry about getting it right to the very edges; a little space helps keep things tidy. Now, take that remaining one-third of the dough. The best way is to crumble it right over the top of the cherry filling. It should look a little rustic. Pop the whole thing into the oven and bake it for about 35 to 40 minutes. You’re looking for that topping to turn a beautiful, light golden brown. Then, pull them out and let the cooling process begin!
Glazing and Finishing Your Sweet Cherry Treats
Here is my biggest piece of advice: these bars must be totally cool before you even *think* about glazing them. If you try to drizzle that glaze over a warm bar, it just melts into nothingness. Prepare your glaze by whisking the powdered sugar, vanilla, and starting with just one tablespoon of milk. Keep adding milk slowly—a tiny splash at a time—until you get a thick, pourable consistency perfect for drizzling. Once cool, drizzle that sweet vanilla glaze over everything. Let the glaze set for about 15 minutes, and then—the best part—use those parchment paper handles to lift the whole slab out before cutting them into perfect squares for your guests. Enjoy those lovely **sweet cherry treats**!
Tips for Success Making Perfect Cherry Pie Bars
You’ve got the recipe, but having a few little Carla-approved tricks in your back pocket guarantees success, especially when you need those easy dessert recipes no fuss. Baking is chemistry, but it’s also knowing when to trust your hands over the timer.
Handling the Dough for Shortbread Cherry Bars
When you add that flour to the butter-sugar mix, you must stop mixing the second you see no more streaks of dry flour. Overmixing the dough for these **shortbread cherry bars** is how you end up with a tough, cakey texture instead of that perfect shortbread crumb. You want tenderness! Also, remember I said you could crumble the top? If you want something slightly different—maybe a less rustic look—try pressing that remaining one-third of the dough down right over the filling instead of sprinkling it. It bakes up flatter, almost like a second, thinner crust layer, which is equally delicious!
Storage and Make-Ahead Tips for Cherry Pie Bars
One of the best things about any good bar dessert is that you can almost always make them ahead of time, right? These are absolute champions for planning ahead for big parties or family weekends. If I’m making these for a gathering, I usually bake them the day before. They hold up so beautifully once they are completely cooled.
You do not need to worry about refrigerating these bars unless your kitchen is extremely hot. In fact, I think they are better left out! Once they are completely cooled down and the glaze is set, just store them in an airtight container right on the counter. You can typically leave them at room temperature for up to three days, and they stay moist and delicious. They are one of those easy Christmas poke cake alternatives because they travel and sit out so well!
If you do need to stack them in the container, I always place small squares of parchment paper between the layers, especially if the glaze is soft. This stops any sticky mess and ensures every bar stays perfect until you serve them up!
Variations on Classic Cherry Pie Bars
Just because this recipe for **cherry pie bars** is simple doesn’t mean we can’t play with it a little when the mood strikes! When fresh cherries are available at the market here in the late spring, I sometimes skip the can. If you do that, you’ll need to toss about three cups of pitted cherries with a quarter cup of sugar and two tablespoons of cornstarch before spreading them on the crust. It’s a bit more work, but oh, the flavor of peak-season fruit is worth it!
If you ever want to try mixing up the flavors even more, check out my instructions for great Christmas sugar cookie bars; the base technique is surprisingly similar!
Making Cherry Crumble Bars Instead
Another fun switch is turning this into one of those lovely **cherry crumble bars**. It’s super easy! Instead of reserving one-third of the dough to crumble on top later, you just use all of the dough for the base. Once the cherry filling is spread across the bottom crust, you want to crumble 100% of that remaining dough over the filling. It bakes up just a bit crunchier on top, like a buttery, sweet oat topping, but without any oats involved! It’s a satisfying textural change for a familiar flavor.
Frequently Asked Questions About Easy Cherry Pie Bars
I know how frustrating it can be when a recipe doesn’t turn out just right, especially when you’re making something for a group event. I gathered some of the most common questions I get about these **easy dessert recipes no fuss** bars right here. If you followed the directions, you should be golden, but here are a few extra assurances! You can always find more straightforward baking ideas over at my guide to easy dessert recipes no fuss.
Can I use fresh cherries instead of pie filling in my cherry pie bars?
Oh, if you have beautiful, ripe fresh cherries, absolutely use them! But you must treat them a little differently than the canned filling. If you use fresh, you’ll need to pit about three cups of them, and then you must sweeten them up since they are often tarter. I suggest tossing them with about a quarter cup of sugar and thickening them with two tablespoons of cornstarch right before you spread them over that shortbread base. If you skip the thickener, you end up with soupy **cherry pie bars**!
How do I prevent the crust from getting soggy?
That’s a great question—nobody wants a wet bottom crust! The recipe is designed for a slightly firm base, but if you are worried, you can give your bottom crust a little pre-bake. After you press two-thirds of the dough into the pan (Step 5), pop that pan into the 350°F oven by itself for about 10 minutes until it just starts to look pale gold. Let it cool for just a few minutes, *then* spread your filling over it, and proceed with crumbling the top and baking the rest of the way. That little head-start helps seal off the butter beneath.
What is the best way to cut these dessert bars for a crowd?
Cutting neatly is key when you’re serving a crowd of people! The trick is patience, especially after that gorgeous vanilla glaze goes on. Make sure the bars are fully cooled, and the glaze has had time to set—at least 30 minutes after it goes on. Then, use a large, sharp chef’s knife. Wipe the blade clean between cuts; seriously, wiping between slicing helps keep your squares looking sharp and prevents the glaze from dragging. You want clean lines for those perfect **dessert bars for a crowd**!
Estimated Nutrition for These Simple Cherry Dessert Bars
Now, I always tell folks that when you’re digging into something this delicious, made with butter and sugar, you shouldn’t worry too much about the label. But for those of you who like to keep track, I’ve done my best to estimate the nutrition information for you. Remember, since we are using a canned filling and homemade crust, this is just an educated guess! This information is based on serving the recipe as written, cut into 16 squares. This is an estimate only, of course, but it gives you a general idea of these **simple cherry dessert bars**.
- Serving Size: 1 bar
- Calories: 320
- Sugar: 30g
- Sodium: 110mg
- Fat: 16g
- Saturated Fat: 10g
- Carbohydrates: 42g
- Protein: 3g
See? Not too shabby for a homemade treat that tastes like it came straight from a bakery case! It’s that wonderful balance of sweet and tart that makes these bars so satisfying.
Share Your Homemade Cherry Pie Bars Creations
Well, that’s it! You’ve made yourself a fantastic batch of these **cherry pie bars**, and I truly hope you are just as proud of them as I am of mine. When you get a chance, please come back and leave a rating for the recipe—it helps other home cooks know they are in good hands here at Cooking by Carla. I absolutely love seeing how you share these treats!
If you snap a picture of your finished bars, especially if they’re headed out to a gathering, please send it over through my contact page! I love building this community one delicious, easy dessert at a time. Happy baking, friends!
PrintEasy Homemade Cherry Pie Bars with Buttery Shortbread Crust
Make these simple cherry pie bars featuring a rich, buttery shortbread crust and a sweet cherry filling. This recipe is perfect for feeding a crowd at potlucks or gatherings.
- Prep Time: 20 min
- Cook Time: 40 min
- Total Time: 60 min
- Yield: 16 servings 1x
- Category: Dessert
- Method: Baking
- Cuisine: American
- Diet: Vegetarian
Ingredients
- 1 cup unsalted butter, softened
- 1 cup granulated sugar
- 1/4 teaspoon salt
- 2 large eggs
- 1 teaspoon vanilla extract
- 1/2 teaspoon almond extract
- 2 1/2 cups all-purpose flour
- 1 (21-ounce) can cherry pie filling
- 1 cup powdered sugar (for glaze)
- 1–2 tablespoons milk (for glaze)
- 1/2 teaspoon vanilla extract (for glaze)
Instructions
- Preheat your oven to 350°F (175°C). Line a 9×13 inch baking pan with parchment paper, leaving an overhang for easy removal.
- In a large bowl, cream together the softened butter and granulated sugar until light and fluffy.
- Beat in the eggs one at a time, mixing well after each addition. Stir in the 1 teaspoon vanilla extract and the almond extract.
- Gradually add the all-purpose flour and salt to the wet ingredients. Mix on low speed until just combined, forming a thick dough.
- Press two-thirds of the dough evenly into the bottom of the prepared baking pan to form the shortbread crust.
- Spread the entire can of cherry pie filling evenly over the crust layer.
- Crumble the remaining one-third of the dough over the cherry filling layer.
- Bake for 35 to 40 minutes, or until the topping is lightly golden brown.
- Let the bars cool completely in the pan on a wire rack.
- Prepare the glaze: Whisk together the powdered sugar, milk, and 1/2 teaspoon vanilla extract until smooth. Add milk slowly to reach your desired drizzling consistency.
- Once cooled, drizzle the vanilla glaze over the bars.
- Once the glaze sets, lift the bars out using the parchment paper overhang and cut them into squares.
Notes
- You can substitute the almond extract with an extra 1/2 teaspoon of vanilla extract if you prefer a pure vanilla flavor.
- For a slightly crispier topping, you can press the remaining dough instead of crumbling it.
- These buttery crust cherry bars store well in an airtight container at room temperature for up to three days.
Nutrition
- Serving Size: 1 bar
- Calories: 320
- Sugar: 30
- Sodium: 110
- Fat: 16
- Saturated Fat: 10
- Unsaturated Fat: 6
- Trans Fat: 0
- Carbohydrates: 42
- Fiber: 1
- Protein: 3
- Cholesterol: 55