
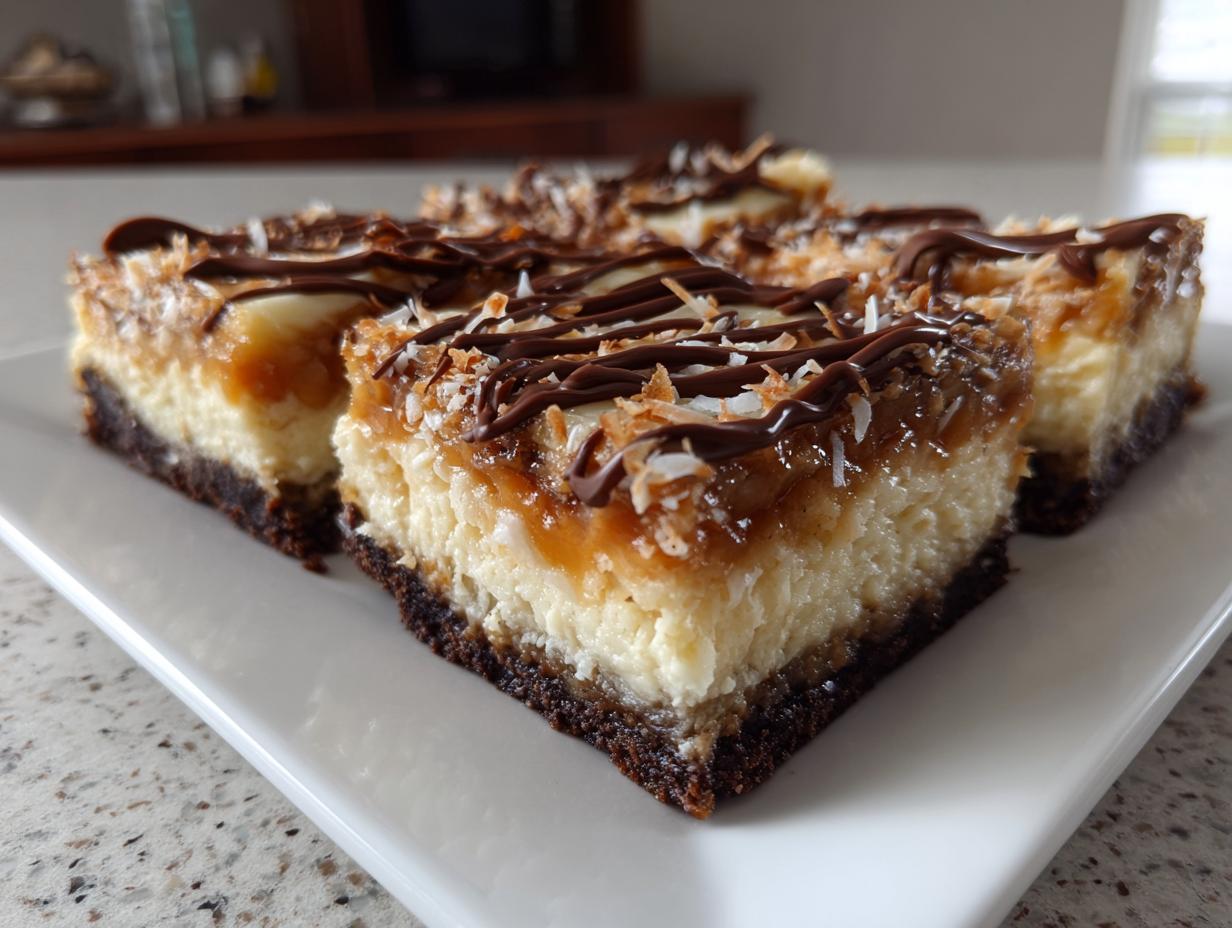
Oh, my goodness, if you love a truly decadent dessert experience, get ready to meet your match! Sometimes you just need a treat that hits every single sweet spot—chocolate, creamy, chewy, and sweet coconut all in one bite. That’s exactly what we have here today. These samoa cheesecake bars are absolutely divine. They are my homemade take on that world-famous candy bar flavor, layered perfectly in a rich, easy-to-handle bar form. I love making these for the holidays because everyone always asks for the recipe. Honestly, I think they disappear faster than I can cut them! If you enjoy rich fillings, you might also want to peek at my recipe for the ultimate creamy white chocolate cheesecake.
- Why You Will Bake These Samoa Cheesecake Bars
- Gathering Ingredients for Your Samoa Cheesecake Bars
- Step-by-Step Instructions for Perfect Samoa Cheesecake Bars
- Tips for Success When Making Samoa Cheesecake Bars
- Storage and Make-Ahead Options for Your Samoa Cheesecake Bars
- Variations on the Classic Samoa Cheesecake Bars
- Frequently Asked Questions About Samoa Inspired Bars
- Serving Suggestions for This Decadent Chocolate Caramel Dessert
- Estimated Nutritional Snapshot for Samoa Cheesecake Bars
- Share Your Homemade Samoa Cheesecake Tutorial
- Serving Suggestions for This Decadent Chocolate Caramel Dessert
- Estimated Nutritional Snapshot for Samoa Cheesecake Bars
- Share Your Homemade Samoa Cheesecake Tutorial
Why You Will Bake These Samoa Cheesecake Bars
You need a recipe that delivers on its promise, especially when dealing with multiple delicious layers. Trust me, this one is a keeper. When you bake these **samoa cheesecake bars**, here’s what you can expect to love:
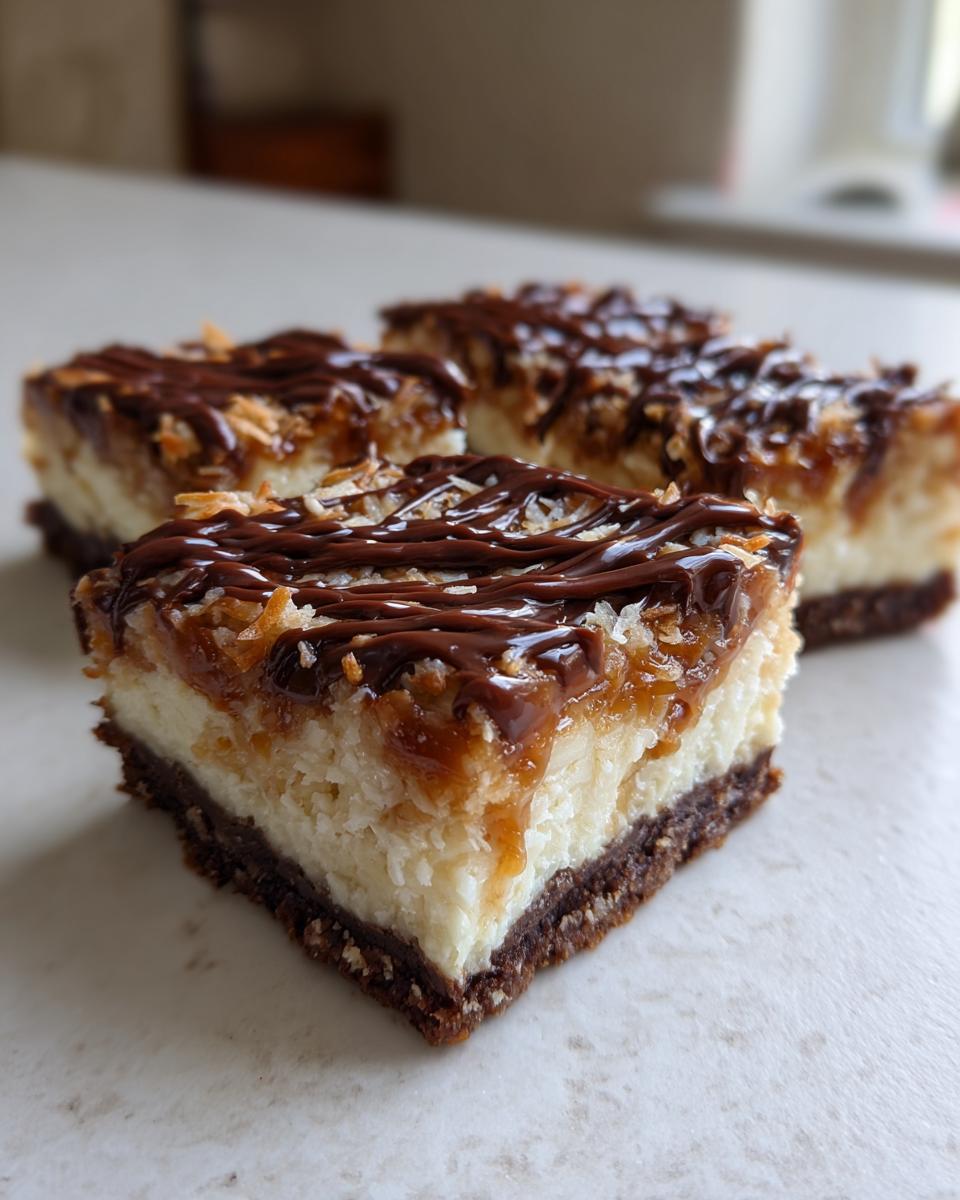
- The crust is perfectly fudgy and firm, giving you a nice chocolate base that holds up to the other layers. No soggy bottoms here!
- The cheesecake filling is beautifully balanced—creamy, tangy, but never overly sweet, letting the caramel flavor really shine through.
- That toasted coconut caramel topping is just heaven; it’s gooey without running everywhere once cooled.
- They’re fantastic for making ahead! I often prepare them the day before a big gathering, which saves me so much stress. Speaking of making things ahead, don’t forget to try my recipe for easy Christmas poke cake when the holidays roll around.
- They slice into beautiful, clear layers, making them look incredibly impressive on any party platter.
Gathering Ingredients for Your Samoa Cheesecake Bars
Alright, listen up! Whenever we’re making something this rich and layered, like these **samoa cheesecake bars**, the foundation is always the quality of what goes into it. You don’t need a million fancy things, but you do need precision. Getting the cream cheese soft and the brown sugar properly packed are the small steps that make a huge difference between an okay bar and a show-stopping dessert. Remember my advice on frosting? Good ingredients make all the difference, and that holds true here too. If you’re worried about your cream cheese holding up, check out my tips for the best cream cheese frosting—it’s about technique!
Here is everything you need separated by component. Make sure your cream cheese is truly softened, or your filling will be lumpy, and we certainly don’t want that!
For the Fudgy Chocolate Crust
- 1 1/2 cups all-purpose flour
- 1/2 cup unsweetened cocoa powder
- 1/2 cup granulated sugar
- 1/2 teaspoon salt
- 1/2 cup (1 stick) unsalted butter, melted
For the Creamy Cheesecake Filling
This is where the magic happens! Make sure your cream cheese is out on the counter for at least an hour before you plan to mix this part, okay?
- 2 (8 ounce) packages cream cheese, softened
- 1 cup granulated sugar
- 2 large eggs
- 1 teaspoon vanilla extract
- 1/4 cup sour cream
For the Toasted Coconut Caramel Topping
This is the showstopper! We are putting the most flavor into this top layer.
- 1 cup packed light brown sugar
- 1/2 cup (1 stick) unsalted butter
- 1/2 cup heavy cream
- 1 teaspoon vanilla extract
- 1 1/2 cups sweetened flaked coconut, toasted
- 1/2 cup semi-sweet chocolate chips
Step-by-Step Instructions for Perfect Samoa Cheesecake Bars
We are building layers here, so take your time! It’s not hard, but rushing it means you won’t get those gorgeous, defined layers that make these bars so special. Remember, the secret to any good chocolate cheesecake creation is patience between the steps. Make sure your oven is preheated to 350 degrees F before you start mixing anything.
Preparing and Baking the Crust
First things first: we need a sturdy chocolate foundation. Take a 9×13 inch baking pan and line it with parchment paper. I always leave a big overhang on the two long sides—that’s how we’ll lift the entire thing out later! In a bowl, whisk together your flour, cocoa powder, sugar, and salt. Pour in that melted butter and stir until it looks like wet, dark sand. Press that mixture down firmly and evenly into the bottom of your prepared pan. Pop it into the oven and bake it for just 10 minutes. Once it’s done, pull it out and let it cool down a little while you tackle the creamy part.
Mixing and Baking the Cheesecake Filling
Now for the luxurious middle layer! Get your mixer out and beat the softened cream cheese and granulated sugar together until it’s completely smooth—no lumps allowed! Beat in your two eggs one at a time, waiting a moment after each addition to make sure it incorporates well. Finally, stir in your vanilla and sour cream until it’s just combined. Please, don’t overmix once the eggs are in, or you’ll add too much air and get cracks! Pour this lovely filling right over that slightly cooled crust. Bake it for about 25 to 30 minutes. You’ll know it’s done when the edges look set, but the very center still has a tiny bit of jiggle—that ensures it’s not dry.
Creating the Gooey Caramel Coconut Topping for Your Samoa Cheesecake Bars
While the cheesecake cools down completely on the counter, we’ll tackle the best part! In a saucepan over medium heat, mix your brown sugar, butter, and heavy cream. Stir it constantly until the sugar dissolves, and it comes to a nice boil. Then, drop that heat to low and let it simmer gently for about 5 minutes, just stirring every so often. Take it off the heat and stir in your vanilla. While that’s cooling for about five minutes, quickly toast your coconut in a dry skillet until it’s golden brown. Pour that warm caramel evenly over the cooled cheesecake, and then sprinkle all that wonderful toasted coconut over the top.
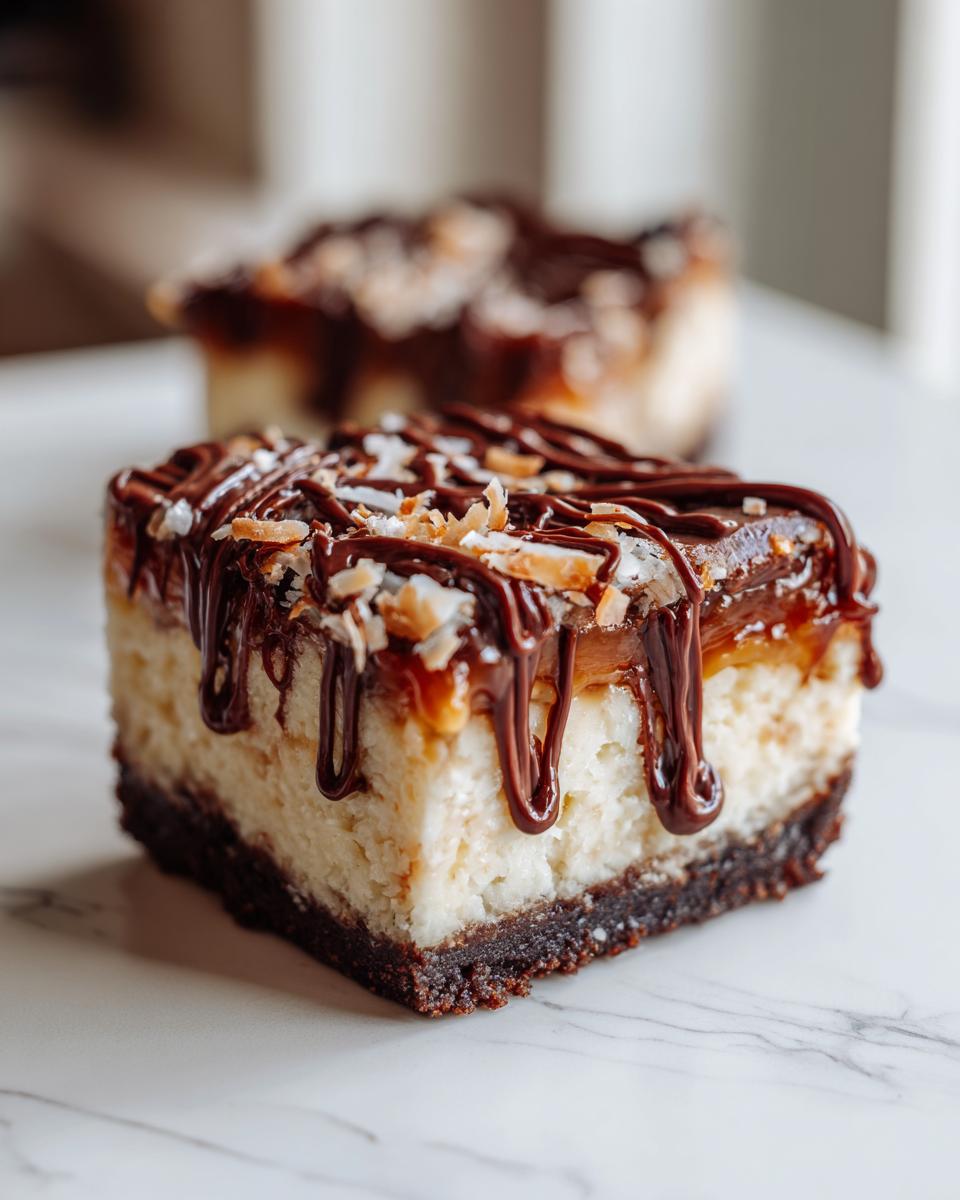
Adding the Chocolate Swirl and Chilling
This step is so easy! Sprinkle your semi-sweet chocolate chips right over the warm caramel layer. Let it sit untouched for about ten minutes. That residual heat is powerful enough to melt them perfectly! Now, take a butter knife or a thin offset spatula and gently swirl the melted chocolate around to create those pretty lines. The most important part for presentation is chilling. You must refrigerate these **samoa cheesecake bars** for a minimum of 4 hours, but honestly, overnight is always better. That chilling time firms up all the layers so you can lift them out and get those clean, perfect squares.
Tips for Success When Making Samoa Cheesecake Bars
We’ve built these beautiful samoa cheesecake bars layer by layer, so let’s make sure they come out looking and tasting exactly the way they should! Getting that perfect combination of fudgy crust, creamy center, and gooey topping takes just a few little pointers. Remember what my mom used to say? It’s the little things that separate a good batch from a great one. If you’re looking for other simple treats, you might enjoy checking out my other easy cheesecake bar combinations for inspiration.
Achieving the Best Texture in Your Samoa Cheesecake Bars
Texture is everything in this recipe; we need that gorgeous contrast! For the cheesecake layer, please, please ensure your cream cheese is actually *softened*. If it’s cold, it won’t combine smoothly with the sugar, and you’ll end up with little lumps throughout your filling, which ruins that creamy mouthfeel. You’ll have to mix it forever to get it smooth, and then you risk over-aerating it.
When you are making the caramel, keep that heat steady! Medium heat to dissolve the sugar is fine, but once it boils, you must turn it down to low for that 5-minute simmer. If you let it get too hot or cook it too long, that caramel stiffens up like candy when it cools, and we want gooey, not concrete! A gentle simmer keeps that lovely, flowy texture.
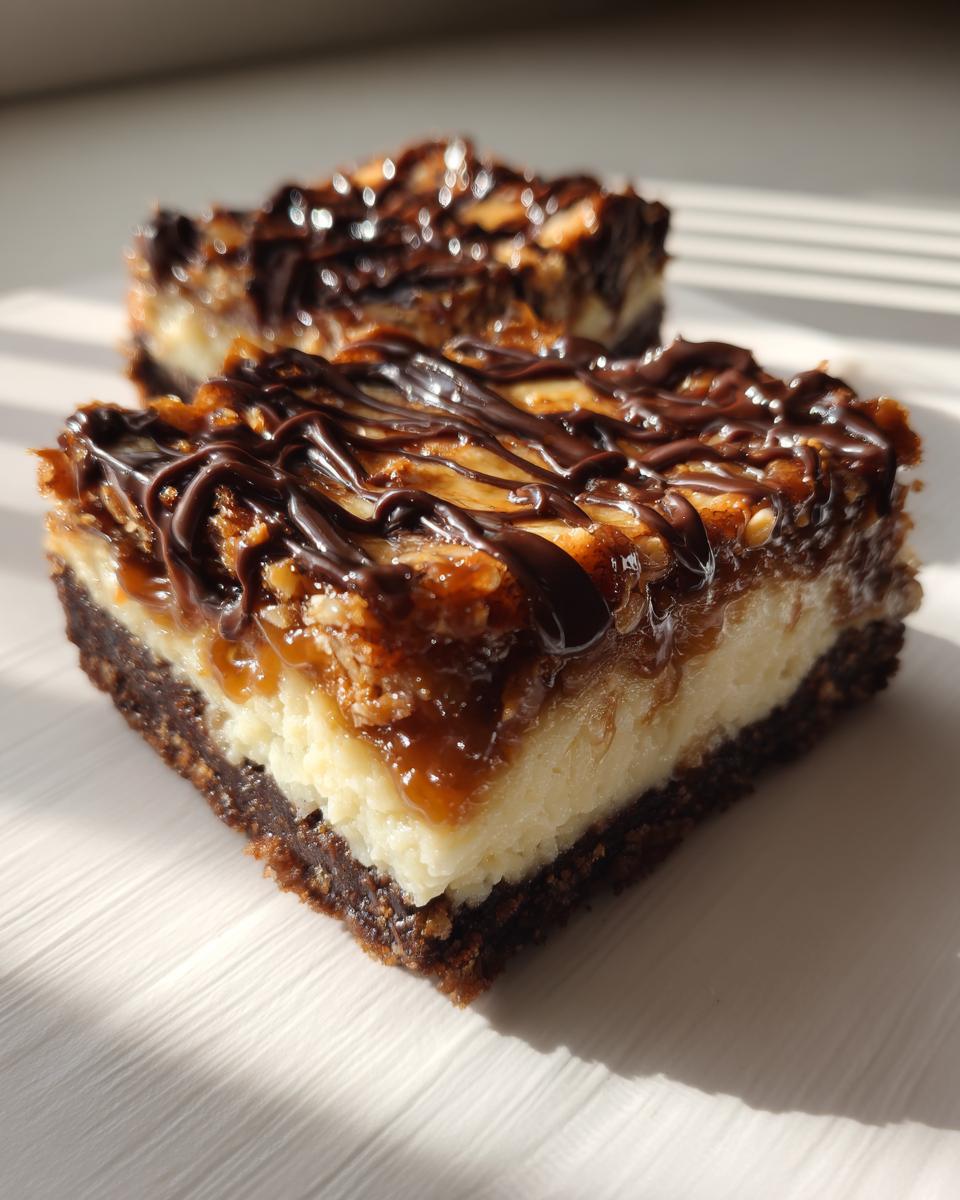
Mastering the Clean Cut on Layered Cheesecake Dessert Bars
This is my biggest, best secret when cutting any layered bar, especially these rich **samoa cheesecake bars**. If you just try to slice them cold, they drag, the caramel smears, and your cross-sections look messy. To get those beautifully clean squares that look professional, you need heat!
Once the bars are completely chilled (like, rock solid from the fridge!), take a nice, sharp, long, thin knife—a chef’s knife works best—and dip the blade into a tall glass of very hot water. Wipe the knife completely dry on a towel. Now, press down firmly and slice through one bar. Don’t saw! Just one solid pass. Before you cut the next piece, dip the knife in hot water *again* and wipe it dry again. It sounds fussy, but it keeps the cutting edge clean on the chocolate crust and keeps the caramel from sticking to the blade between cuts. This technique makes all the difference if you plan to serve these at a party!
Storage and Make-Ahead Options for Your Samoa Cheesecake Bars
I know you won’t want to wait to dig into these babies, but trust me, chilling them is key to getting those perfect slices. Because these **samoa cheesecake bars** are so rich with cream cheese and thick caramel, they actually last quite well if stored correctly. That means you can absolutely bake them a day or two ahead of time—which is a lifesaver when you’re getting ready for company!
Once you’ve cut your cooled, chilled bars, the best way to store them is in an airtight container. I like layering mine lightly with wax paper or parchment between the layers so the sticky caramel doesn’t fight the chocolate crust of the bar above it. Keep them right there in the refrigerator. They should stay perfectly fresh and gooey for about four to five days. I find the flavor actually deepens slightly after the first 24 hours, just like a good fruitcake!
Now, thinking about freezing them? Yes, you can! Freezing works wonderfully for **layered cheesecake dessert bars** like this, especially if you’re prepping for a busy holiday season. You should freeze them *before* you top them with the caramel and chocolate swirl if you can, or certainly before you cut them. If you freeze them already cut, wrap each square tight in plastic wrap, and then put those wrapped squares into a freezer-safe, airtight bag or container. They’ll be fantastic for up to two months.
When it’s time to eat them straight from the freezer, just pull out what you need and let them thaw on the counter for an hour or two. If you froze them whole, let them thaw slowly in the fridge overnight before cutting and topping them. It’s so nice knowing you have future treats tucked away!
If you ever need a main dish that can also be prepped way ahead of time, I highly recommend checking out my recipe for overnight French toast casserole. It’s wonderful to have desserts and breakfasts ready to go!
Variations on the Classic Samoa Cheesecake Bars
While I truly believe this recipe provides the ultimate **copycat Samoa cheesecake bars**, I know home cooks like to put their own spin on things! That’s the fun of being in your own kitchen, isn’t it? These bars are sturdy enough to handle a few tweaks without losing that essential flavor we’re aiming for—that wonderful combination of chocolate, caramel, and coconut.

Here are a couple of ways you can play around with the layers and flavors in these layered cheesecake dessert bars:
- A Darker Chocolate Punch: If you find yourself leaning toward dark chocolate rather than semi-sweet, go for it! Swapping the semi-sweet chocolate chips for dark chocolate chips (60% cacao or higher) gives the final swirl a beautiful, slightly bitter edge that balances the intense sweetness of the homemade caramel beautifully. It makes for a more grown-up treat!
- Crust Substitutions: The fudgy cocoa crust is divine, but sometimes you just need a shortcut, or maybe you want a different texture. Instead of making the scratch crust, you can press about two cups of crushed chocolate wafer cookies (like Oreos, filling removed) mixed with 4 tablespoons of melted butter right into the pan. It saves you about 15 minutes of mixing time, though I still think my flour, cocoa, and butter mix bakes up a little sturdier.
- Nutty Addition: My mother used to love adding chopped pecans to things whenever she could! For a lovely crunch in these caramel coconut cheesecake squares, try folding about 1/2 cup of finely chopped pecans into the caramel right before you pour it over the cheesecake layer. They toast up nicely in the residual heat of the warm caramel. Just be mindful if you are serving anyone with nut allergies!
Whatever you decide, the combination of those three elements—the chocolate base, the creamy filling, and that sticky topping—is always going to sing. If you’re looking for other simple bar recipes for your next gathering, you definitely need to save my Christmas sugar cookie bars recipe!
Frequently Asked Questions About Samoa Inspired Bars
It’s wonderful that you’re diving into making these beautiful bars! When people write to me about their baking adventures, usually the questions center around texture or when they can safely store them. I’m happy to clear up any confusion about achieving those perfect samoa inspired bars. We want reliability in the kitchen above all else, and answering your common questions just helps us all get closer to that goal!
Can I make No Bake Samoa Cheesecake Bars using this recipe?
That’s a great question, especially when you’re short on oven time! For this specific recipe, though, I strongly recommend against trying to make **No Bake Samoa Cheesecake Bars**. The reason is the structure! My cheesecake filling relies on those two large eggs and that 25-minute bake time to set up correctly. Baking changes the proteins in the cream cheese and eggs, allowing it to become firm and sliceable once chilled. If you skip the bake, you’ll just end up with a sweet, loose cream cheese puddle under your caramel, which completely changes the texture profile we are looking for.
If you absolutely need a no-bake version, you usually have to substitute gelatin or a whipping agent to stabilize the cheese, which completely changes the flavor of the cheesecake layer. I’m always tinkering, but for this specific flavor combination, the baked version is definitely the way to go to get that creamy center.
What kind of chocolate works best for the Chocolate Swirl Cheesecake Bars?
Deciding on the chocolate—that final touch on your chocolate swirl cheesecake bars—really depends on how sweet you like your decadence! In the recipe, I called for semi-sweet chocolate chips. I find that semi-sweet is the perfect middle ground. It’s rich enough when melted to provide that deep chocolate note, but it doesn’t overpower the intense sweetness coming from that luscious caramel topping we made.
If you are someone who prefers an extra-sweet dessert, you could certainly swap in milk chocolate chips. Just be aware that milk chocolate melts a bit softer, so you might need to chill the bars an extra hour before cutting if you use milk chocolate chips for the swirl. On the flip side, if you are serving this **decadent chocolate caramel dessert** to folks who don’t like things overly sweet, using bittersweet chips (around 70%) adds a lovely depth that contrasts beautifully with the coconut.
I also have a fun recipe for cookie butter cheesecake cups that plays with different chocolate ratios, if you enjoy experimenting!
Serving Suggestions for This Decadent Chocolate Caramel Dessert
These **samoa cheesecake bars** are truly a showstopper on their own. They are so rich—the chocolate crust, the creamy tang, and that gooey caramel topping—that they don’t need much intervention! However, if you are serving them after a big meal, sometimes a little something plain alongside helps cut through the richness.
My favorite way to enjoy a slice of this decadent chocolate caramel dessert is simply with a fresh cup of coffee or a strong espresso. The bitterness of the coffee is an absolute delight against the sweetness. If you are serving them warm (which I don’t usually recommend for clean cutting, but sometimes you just can’t wait!), a tiny dollop of freshly whipped, unsweetened cream on the side is just perfect. It adds a lovely, light texture contrast.
If you happen to have leftovers, I adore dipping them slightly into a warm pot of my homemade hot fudge pie sauce. Yes, it’s extra rich, and yes, you absolutely should try it once in a while!
Estimated Nutritional Snapshot for Samoa Cheesecake Bars
Now, I always tell folks not to worry too much about the numbers when a dessert is this good—balance is the key in life, and that includes dessert! Everything in moderation, right? But for those of you who like to keep an eye on things, here is a rough estimate for one serving square of these wonderful **samoa cheesecake bars**. Remember, this is an estimate calculated based on the ingredients used, yielding 24 bars.
For the best results in your daily eating, remember to look at my section on easy appetizers and snacks for lighter fare!
- Serving Size: 1 bar (Yields 24)
- Calories: Approaching 350
- Fat: Around 22 grams
- Protein: About 5 grams
- Total Carbohydrates: Roughly 35 grams
Share Your Homemade Samoa Cheesecake Tutorial
I truly hope you enjoyed bringing this recipe to life! There is nothing I love more than hearing from you all about how my recipes turned out in your own kitchens. Did you manage to get those perfect, clean layers? Did your family fight over the end pieces? I want to hear all the details!
When you make these **samoa cheesecake bars**, please take a moment to leave a rating right here on the page. If you ran into a tricky spot or discovered a wonderful substitution—like using dark chocolate instead—please share your experience in the comments so we can all learn from it. Your feedback helps me make sure this is the best homemade Samoa cheesecake tutorial available!
If you have any special requests or questions about troubleshooting, you can always reach out to me directly through the contact page here. Happy baking, and enjoy every single gooey, chocolatey bite!
Serving Suggestions for This Decadent Chocolate Caramel Dessert
These samoa cheesecake bars are truly a showstopper on their own. They are so rich—the chocolate crust, the creamy tang, and that gooey caramel topping—that they don’t need much intervention! However, if you are serving them after a big meal, sometimes a little something plain alongside helps cut through the richness.
My favorite way to enjoy a slice of this decadent chocolate caramel dessert is simply with a fresh cup of coffee or a strong espresso. The bitterness of the coffee is an absolute delight against the sweetness. If you are serving them warm (which I don’t usually recommend for clean cutting, but sometimes you just can’t wait!), a tiny dollop of freshly whipped, unsweetened cream on the side is just perfect. It adds a lovely, light texture contrast.
If you happen to have leftovers, I adore dipping them slightly into a warm pot of my homemade hot fudge pie sauce. Yes, it’s extra rich, and yes, you absolutely should try it once in a while!
Estimated Nutritional Snapshot for Samoa Cheesecake Bars
Now, I always tell folks not to worry too much about the numbers when a dessert is this good—balance is the key in life, and that includes dessert! Everything in moderation, right? But for those of you who like to keep an eye on things, here is a rough estimate for one serving square of these wonderful **samoa cheesecake bars**. Remember, this is an estimate calculated based on the ingredients used, yielding 24 bars.
For the best results in your daily eating, remember to look at my section on easy appetizers and snacks for lighter fare!
- Serving Size: 1 bar (Yields 24)
- Calories: Approaching 350
- Fat: Around 22 grams
- Protein: About 5 grams
- Total Carbohydrates: Roughly 35 grams
Share Your Homemade Samoa Cheesecake Tutorial
I truly hope you enjoyed bringing this recipe to life! There is nothing I love more than hearing from you all about how my recipes turned out in your own kitchens. Did you manage to get those perfect, clean layers? Did your family fight over the end pieces? I want to hear all the details!
When you make these **samoa cheesecake bars**, please take a moment to leave a rating right here on the page. If you ran into a tricky spot or discovered a wonderful substitution—like using dark chocolate instead—please share your experience in the comments so we can all learn from it. Your feedback helps me make sure this is the best homemade Samoa cheesecake tutorial available!
If you have any special requests or questions about troubleshooting, you can always reach out to me directly through the contact page here. Happy baking, and enjoy every single gooey, chocolatey bite!
PrintSamoa Cheesecake Bars
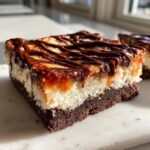
Make these layered cheesecake bars featuring a fudgy chocolate crust, creamy cheesecake filling, and a gooey toasted coconut caramel topping for a decadent dessert.
- Prep Time: 20 min
- Cook Time: 35 min
- Total Time: 4 hours 55 min
- Yield: 24 servings 1x
- Category: Dessert
- Method: Baking
- Cuisine: American
- Diet: Vegetarian
Ingredients
- For the Crust: 1 1/2 cups all-purpose flour
- 1/2 cup unsweetened cocoa powder
- 1/2 cup granulated sugar
- 1/2 teaspoon salt
- 1/2 cup (1 stick) unsalted butter, melted
- For the Cheesecake Filling: 2 (8 ounce) packages cream cheese, softened
- 1 cup granulated sugar
- 2 large eggs
- 1 teaspoon vanilla extract
- 1/4 cup sour cream
- For the Topping: 1 cup packed light brown sugar
- 1/2 cup (1 stick) unsalted butter
- 1/2 cup heavy cream
- 1 teaspoon vanilla extract
- 1 1/2 cups sweetened flaked coconut, toasted
- 1/2 cup semi-sweet chocolate chips
Instructions
- Preheat your oven to 350 degrees F. Line a 9×13 inch baking pan with parchment paper, leaving an overhang on the sides for easy removal.
- Make the crust: In a medium bowl, whisk together the flour, cocoa powder, sugar, and salt. Pour in the melted butter and mix until the mixture resembles wet sand. Press the mixture firmly and evenly into the bottom of the prepared pan. Bake for 10 minutes. Set aside to cool slightly.
- Make the cheesecake filling: In a large bowl, beat the softened cream cheese and sugar with an electric mixer until smooth. Beat in the eggs one at a time, mixing well after each addition. Stir in the vanilla extract and sour cream until just combined. Do not overmix.
- Pour the cheesecake filling evenly over the slightly cooled crust. Bake for 25 to 30 minutes, or until the edges are set and the center has only a slight jiggle. Let the cheesecake cool completely on a wire rack.
- Make the caramel topping: In a medium saucepan, combine the brown sugar, butter, and heavy cream. Cook over medium heat, stirring constantly, until the sugar dissolves and the mixture comes to a boil. Reduce heat to low and simmer for 5 minutes, stirring occasionally. Remove from heat and stir in the vanilla extract.
- While the caramel cools slightly (about 5 minutes), toast the coconut in a dry skillet over medium heat, stirring frequently until golden brown.
- Pour the warm caramel evenly over the cooled cheesecake layer. Sprinkle the toasted coconut evenly over the caramel.
- Place the chocolate chips over the caramel and coconut layer. Let the bars sit for 10 minutes so the residual heat melts the chocolate chips. Gently spread the melted chocolate into swirls or thin lines across the top.
- Chill the bars in the refrigerator for at least 4 hours, or preferably overnight, before lifting them out using the parchment paper overhang and cutting into squares.
Notes
- To toast coconut quickly, spread it on a baking sheet and bake at 350 degrees F for 5 to 8 minutes, watching carefully to prevent burning.
- For clean cuts, run your knife under hot water and wipe it dry between each slice.
- You can substitute milk chocolate chips for semi-sweet if you prefer a sweeter topping.
Nutrition
- Serving Size: 1 bar
- Calories: 350
- Sugar: 35
- Sodium: 150
- Fat: 22
- Saturated Fat: 14
- Unsaturated Fat: 8
- Trans Fat: 0.5
- Carbohydrates: 35
- Fiber: 1
- Protein: 5
- Cholesterol: 65