
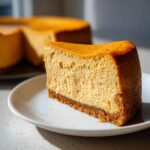
Oh, friends, there is just nothing that smells quite like home quite like that mix of pumpkin spice hitting the oven on a cool autumn day. It signals that gathering time is here! If you’re like me, you want a showstopper for Thanksgiving, but you absolutely cannot risk a cracked top. That’s why I’m sharing what I truly believe is the Best EVER Ultra Creamy Baked Pumpkin Cheesecake recipe with you today. After years of testing and tweaking—because holiday traditions deserve dependable baking—this method delivers that velvety smooth filling and that gorgeous, crack-free surface every single time. Trust me on this pumpkin cheesecake; it’s the centerpiece your fall table is waiting for. If you’ve ever worried about cheesecake texture, you’ll want to check out my secrets for my white chocolate cheesecake; those tips apply right here too!
- Why This Baked Pumpkin Cheesecake is the Best Pumpkin Cheesecake Recipe
- Gathering Ingredients for Your Pumpkin Cheesecake
- How to Make the Best Pumpkin Cheesecake: Step-by-Step Instructions
- Tips for the Ultimate Creamy Pumpkin Cheesecake Success
- Variations on the Classic Pumpkin Cheesecake
- Serving Suggestions for Your Fall Cheesecake Dessert
- Storing and Keeping Your Pumpkin Cheesecake Fresh
- Frequently Asked Questions About Pumpkin Cheesecake
- Estimated Nutritional Data for This Rich Pumpkin Cream Cheese Dessert
- Share Your Holiday Baking Ideas
Why This Baked Pumpkin Cheesecake is the Best Pumpkin Cheesecake Recipe
When I set out to perfect this recipe, I wasn’t just aiming for ‘good’; I wanted the absolute best pumpkin cheesecake out there. This isn’t some flimsy, quick-fix you whip up the day before Thanksgiving, though it is surprisingly straightforward! This baked version guarantees that gorgeous, dense, and perfectly spiced consistency.
- It delivers an unbelievably creamy pumpkin cheesecake texture that melts in your mouth.
- We use a very specific approach to spices for that warm, fall flavor that isn’t too heavy.
- The combination of the water bath and slow cooling ensures a beautifully crack-free top every time.
- This reliable method ensures a fantastic base for your holiday table! You can even find inspiration for my cheesecake cups using similar tricks!
Achieving Ultra Creamy Dessert Texture
The secret to that velvety cheesecake filling everyone flips over is really about temperature control and moisture protection. We insist on room temperature ingredients because cold cream cheese just won’t blend smoothly—we don’t want lumps! And of course, my tried-and-true water bath isn’t just fancy; it surrounds the cake in gentle, steamy heat. This keeps the edges from baking faster than the middle, which is exactly how we avoid dry spots and achieve that pure, ultra creamy dessert texture.
Gathering Ingredients for Your Pumpkin Cheesecake
Now that you know this pumpkin cheesecake is worth the effort, let’s make sure you have everything ready before you turn the mixer on. Baking success starts right here in the pantry! I learned years ago that fussing over measurements is half the battle won. For this recipe, especially because we need that smooth texture, paying attention to temperatures is key. Having these items prepped means the mixing process will be fast and frustration-free. Speaking of cream cheese, if you ever need a fantastic frosting recipe that just never fails, check out my guide on how to make cream cheese frosting that holds its shape!
For the Graham Cracker Crust Cheesecake Base
This sturdy base is what makes our finished product a true Graham Cracker Crust Cheesecake delight. It gives a perfect crunch against that soft filling.
- 1 1/2 cups graham cracker crumbs (make sure these are finely ground!)
- 1/4 cup granulated sugar (just for the crust, don’t confuse it with the filling sugar!)
- 6 tablespoons unsalted butter, melted until completely liquid
For the Creamy Pumpkin Cheesecake Filling
This is where our richness comes from! Remember, friends, the cream cheese and the eggs need to be completely at room temperature. It’s the simplest step that makes the biggest difference in achieving that luxurious mix.
- 3 (8 ounce) packages full-fat cream cheese, softened (truly soft!)
- 1 1/2 cups granulated sugar (for the filling of this creamy pumpkin cheesecake)
- 1 (15 ounce) can pure pumpkin puree (not pumpkin pie mix, please!)
- 1 teaspoon vanilla extract
- 1 teaspoon ground cinnamon
- 1/2 teaspoon ground nutmeg
- 1/4 teaspoon ground ginger
- 1/4 teaspoon salt
- 4 large eggs, room temperature (set these out an hour before you start mixing!)
How to Make the Best Pumpkin Cheesecake: Step-by-Step Instructions
It looks fancy, but I promise you, this is an easy pumpkin cheesecake recipe when you break it down. My teaching background really comes in handy here because clear steps prevent panicked mid-bake decisions! We move slowly through the preparation, especially when mixing, because that’s where 90% of cheesecake problems happen. Have your oven ready, your water simmering, and let’s put this beautiful Thanksgiving cheesecake together. If you need a little more practice with gentle mixing, my steps for my Christmas poke cake also focus on not over-developing texture!
Preparing the Crust and Oven Setup for Your Pumpkin Cheesecake
First things first, get that oven preheated to 325 degrees F. While it’s warming up, take a 9-inch springform pan and wrap the outside bottom and sides tightly, really tightly, with heavy-duty aluminum foil. You want to create a waterproof shell because this pan is going into a water bath! Also, that water needs to be simmering, so get a kettle going now. Next up is the crust: just combine your crumbs, the crust sugar, and melted butter, then press it down firmly in the base of the pan. Pop that crust in to bake for about 10 minutes while you start prepping the filling.
Mixing the Ultra Creamy Dessert Filling
This step requires patience, dear ones! In a large bowl, you’ll beat the softened cream cheese and the filling sugar together until they look perfectly smooth—no lumps allowed! Scrape the bowl down really well here. Now, gently mix in your pumpkin puree, vanilla, and all those wonderful spices: cinnamon, nutmeg, ginger, and salt. Just mix until they disappear. The most crucial part comes now: add your room-temperature eggs in one at a time. Mix only until the yellow stripe is gone after each addition. If you beat the eggs too hard or too fast, you whip air in, and that air will cause the cake to rise too fast and crack later. We want slow and steady here for that ultra creamy dessert.
Baking the Pumpkin Cheesecake Using a Water Bath
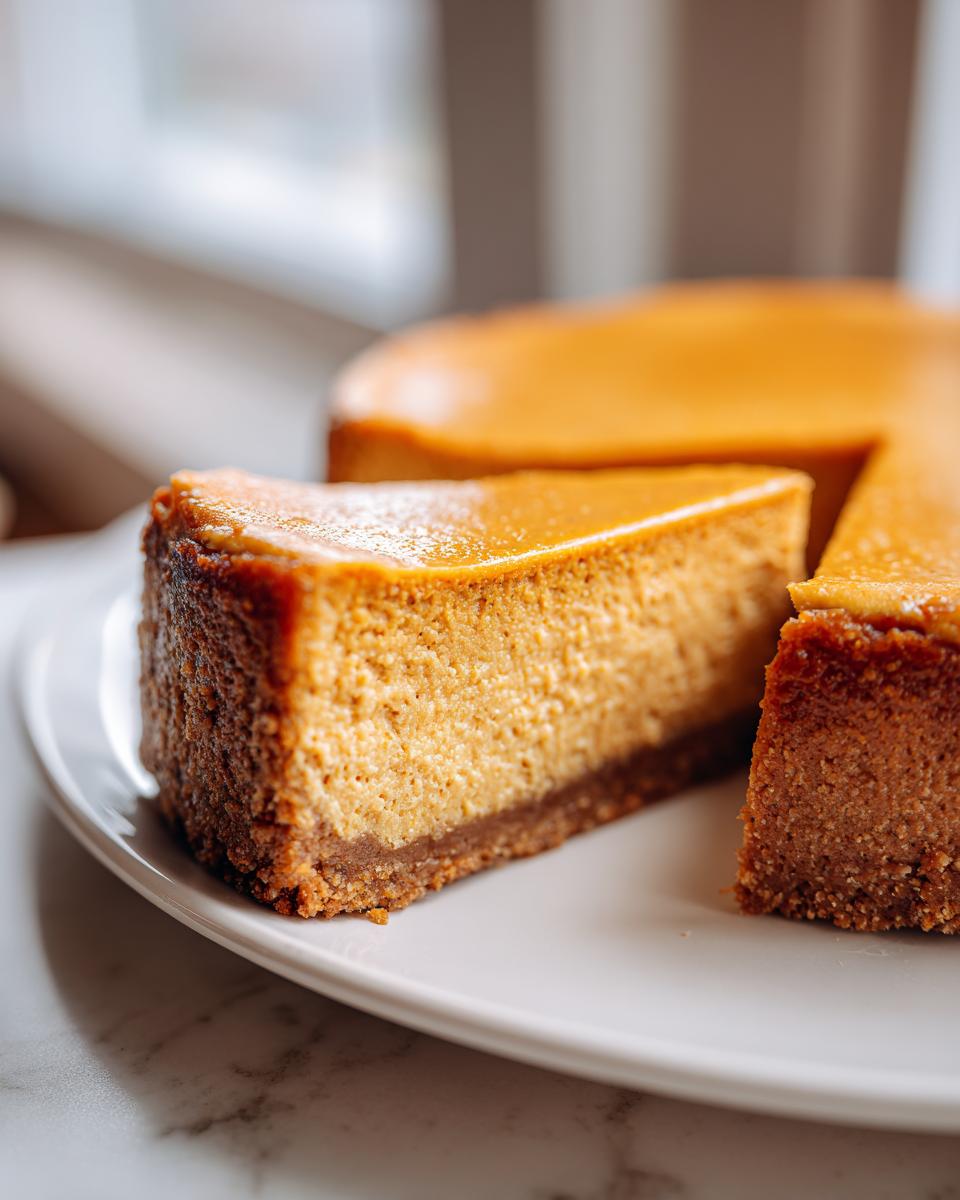
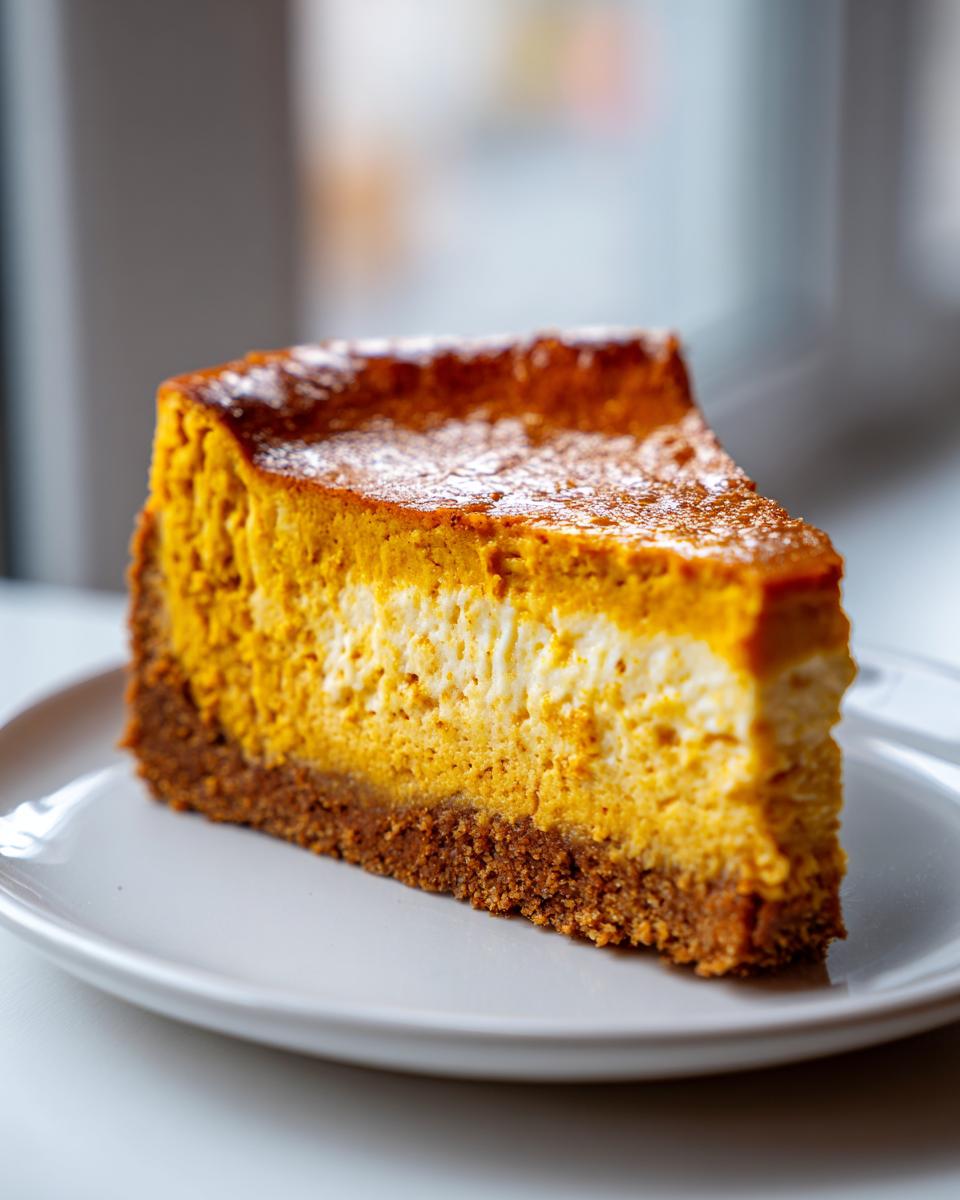
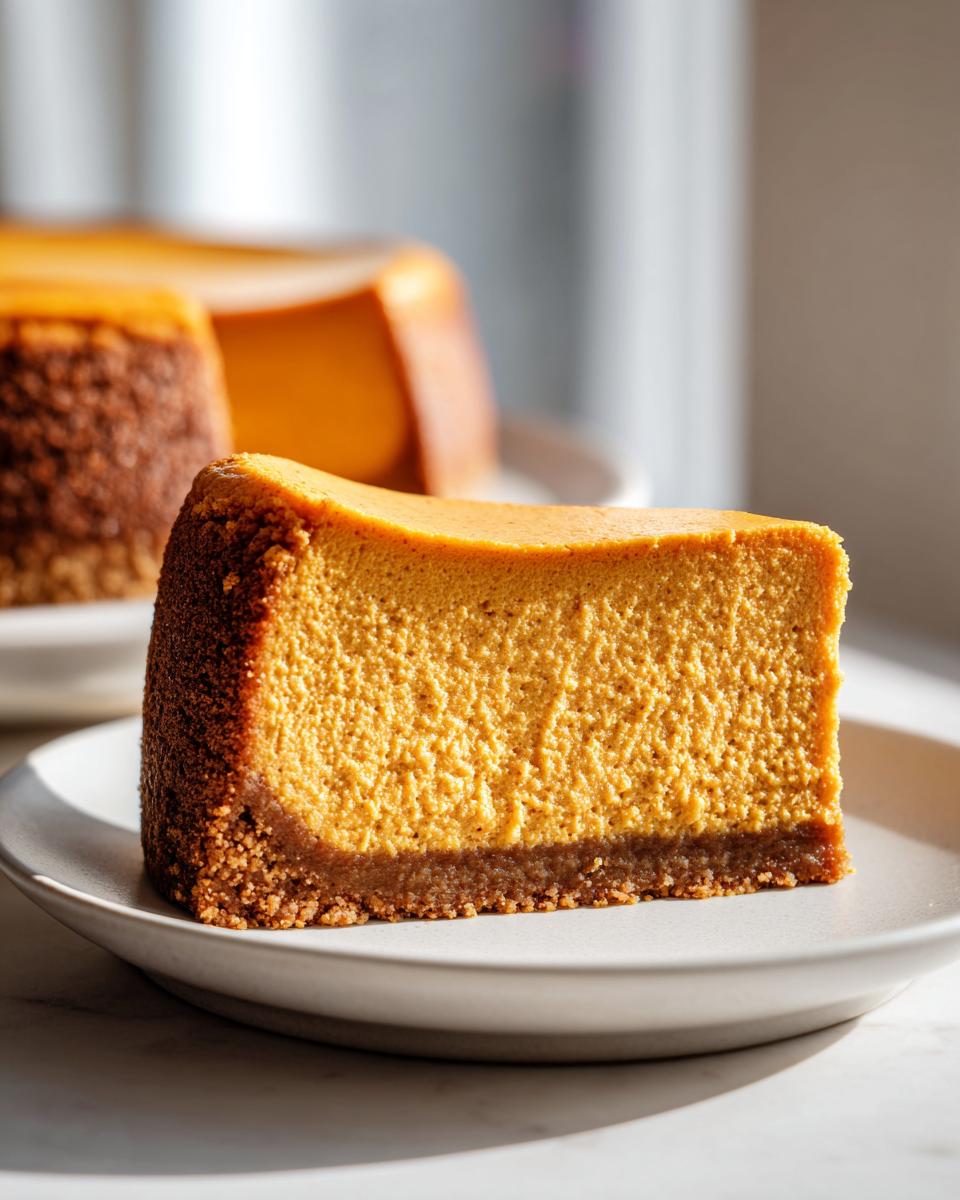
Pour that smooth filling over your cooled crust. Place the foil-wrapped springform pan inside a much larger roasting pan. Now, using caution, pour that simmering water—your water bath—into the larger pan until it comes up about halfway on the sides of the cheesecake pan. This steam protection is non-negotiable for a crack-free pumpkin cheesecake! Bake it for 60 to 75 minutes. You’ll know it’s ready when you gently nudge the pan and the center 2 inches still wobble just a little bit, like soft gelatin. The edges should look decidedly set.

The Gradual Cooling Method for Crack-Free Pumpkin Cheesecake
Don’t touch that oven door yet! When the baking time is up, turn the oven off completely. Prop the door open just a crack—I use the handle of a wooden spoon—and let the cheesecake sit inside that warm environment for a full hour. This gentle transition keeps the cheesecake from shrinking too fast. After that hour, pull it out of the water bath, remove the foil wrapping, and let it cool completely on a wire rack. Don’t even think about slicing it yet! Cover it once fully cooled and move it to the fridge for at least six hours, though overnight is truly best for this rich pumpkin cream cheese dessert.
Tips for the Ultimate Creamy Pumpkin Cheesecake Success
Baking is all about understanding the ‘why’ behind the steps, and that’s doubly true for any cheesecake, especially one as beloved as this Spiced Pumpkin Cheesecake. You’ve already got the perfect recipe, but these little bits of expertise will ensure you never have a disappointing slice. I always tell folks that you get out of a recipe exactly what you put into the prep work—physical energy and attention both!
You simply must remember two main things if you want that brag-worthy plate, year after year. First, temperature matters more than anything else. Cold eggs and cold cream cheese will fight each other in the bowl, creating uneven pockets and eventually leading to cracks when they bake. Make sure those main dairy and egg ingredients have softened up on the counter for at least an hour before you even think about turning the mixer on.
Second, resist the urge to scrape and mix after the eggs go in! I know, I know, it goes against every baking instinct to leave visible streaks, but for cheesecake, it’s gospel. Overmixing the eggs means incorporating too much air, and that air expands in the 325-degree heat, causing the center to puff up before it sets. When it cools, the unsupported puff collapses, right? Crack city! We want a slow, gentle set. This is why I advise against scraping down the bowl once that first egg is in—we are keeping the air to a minimum.
And finally, patience during the waiting game is key. Cheesecake is never good straight out of the fridge; it hasn’t had time to fully set up and let those flavors bloom. Once it’s completely cooled, cover it tightly and let it chill for at least six hours, though overnight lets that wonderful pumpkin spice really sing through. Serve this creamy pumpkin dessert nicely chilled with maybe a dollop of my pumpkin poke cake topping if you’re feeling adventurous!
If you’re interested in some very different, but equally easy, creamy applications, you might enjoy reading about how I use soft cheese in my ricotta egg toast—it’s all about proper blending!
Variations on the Classic Pumpkin Cheesecake
Oh, I love hearing from you all about what you want to try next! While this baked version is my gold standard for that rich, true pumpkin cheesecake texture, I know sometimes you need something even quicker, or maybe you want to change up the format. It’s all about making the recipe work for your gathering, whether it’s a quiet evening or a huge crowd!
If you’re looking to spread the love around or just want portions that are easy to grab without that pesky slicing, think about turning this into bars. My Pumpkin Cheesecake Bars are fantastic because they use the same creamy filling but bake up beautifully in a square pan, making serving at a potluck a breeze. If you’re interested in a similar bar format but with a different flavor profile, you might enjoy the easy cleanup on my Christmas sugar cookie bars; the principle of baking in a sheet pan is the same!
Another fun adaptation I’ve played with is leaning toward a Pumpkin Pie Cheesecake hybrid. To do that, you might amp up the spices just a touch more—maybe add a pinch of cloves!—and instead of serving it plain, swirl a thin layer of store-bought or homemade pie filling right on top before you bake it. It just gives that extra nod to the traditional pie flavor everyone loves while keeping that unmistakable rich body of a cheesecake.
Making No Bake Pumpkin Cheesecake Alternatives
Now, I have to be honest: this recipe relies on the oven and that gentle water bath for that specific ultra creamy dessert melt-in-your-mouth texture we worked so hard for. But I know sometimes the oven is simply busy, or maybe you have a warm kitchen and don’t want to turn the heat on! Many readers ask about No Bake Pumpkin Cheesecake options, and there are wonderful, speedy recipes out there for those days when you need that cool, creamy dessert fast. While I stick to baking for the richest flavor, if you’re seeking that quick fix, you might have luck checking out the simplified options other cooks have developed just for that purpose. For example, I hear good things about the recipe over at The Cookie Rookie for that style of dessert.
Serving Suggestions for Your Fall Cheesecake Dessert
Once you have successfully navigated the chilling process—and believe me, waiting those 6+ hours is the hardest part—it’s time for the fun stage: dressing up your gorgeous Thanksgiving Cheesecake! Since this dessert is so rich and perfectly spiced on its own, I believe the best toppings are simple ones that enhance the pumpkin flavor, not overpower it. We always strive for homemade goodness here at Cooking by Carla, so skip the artificial toppings and let’s dress this up the right way.
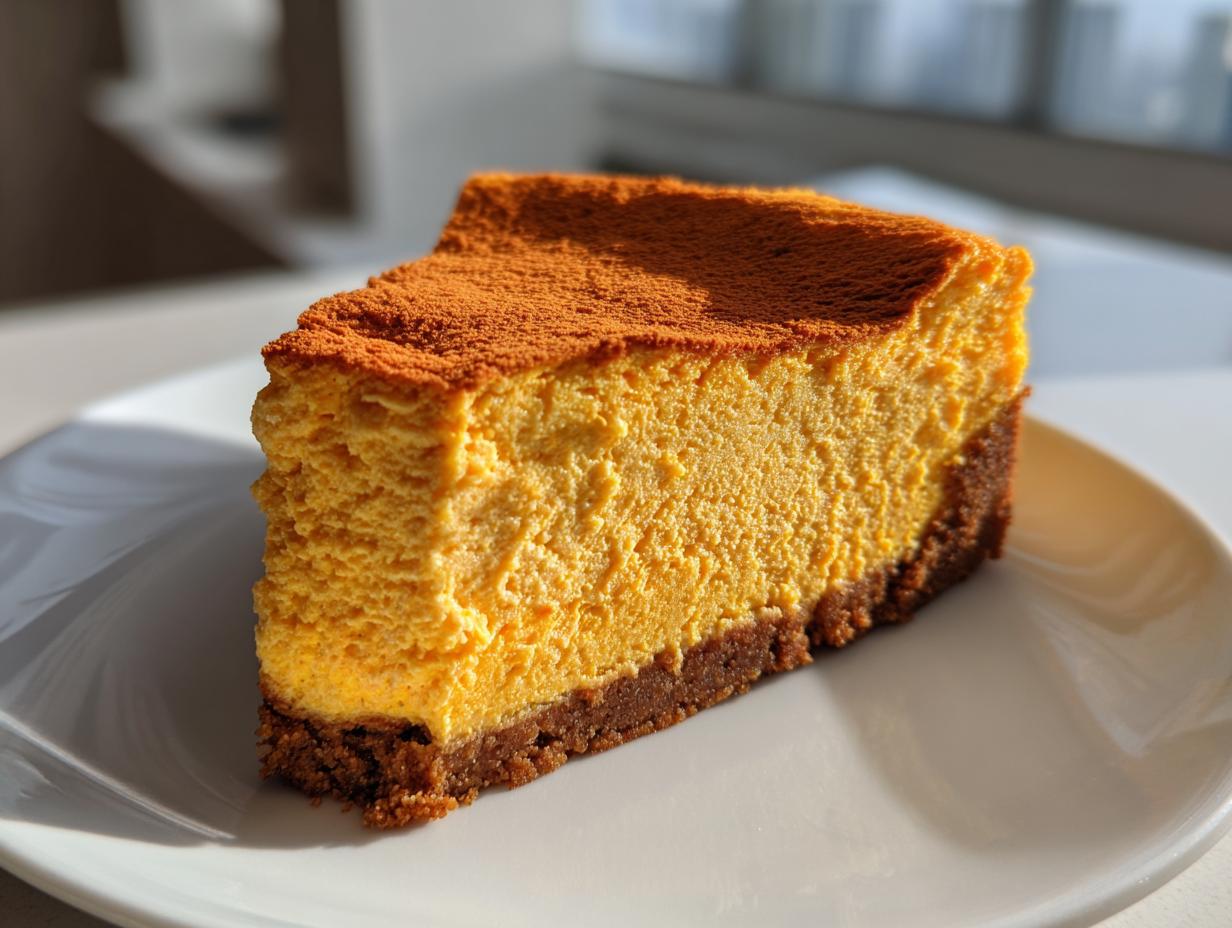
The simplest, most elegant presentation is just a light dusting across the top with a fine-mesh sieve. A little extra cinnamon, maybe a tiny whisper of nutmeg—that’s all you need to make it beautiful before it hits the table. This looks incredibly professional and lets that perfect orange color shine through.
If you are feeling slightly more ambitious, or perhaps if you’re serving this after a lighter meal, a dollop of homemade whipped cream is just the ticket. Forget the aerosol cans! Making fresh whipped cream is ridiculously easy and tastes infinitely better. You just need heavy whipping cream, a touch of powdered sugar, and a drop of vanilla. If you need a foolproof guide, I’ve got one for my classic vanilla buttercream frosting, and the initial whipping steps for cream are nearly identical!
For an extra special touch, especially if you’ve got family who love texture, try caramelizing some pecans or walnuts with a little maple syrup and butter and sprinkling those crunchy jewels right over the whipped cream just before serving. That sweet, salty crunch paired with the smooth, cool, rich pumpkin cream cheese filling? Oh my goodness, it’s heaven on a slice!
Storing and Keeping Your Pumpkin Cheesecake Fresh
Congratulations! You’ve managed the whole baking and cooling process, and now you have this glorious, perfect pumpkin cheesecake sitting in your fridge. But we don’t want to let all that hard work go to waste, do we? The storing part is actually quite simple, but there are a couple of tricks to ensure that beautiful, ultra creamy dessert stays just as good on Day Two as it did on Day One.
First and foremost, whether you plan to eat this tomorrow or next week, it must stay chilled. Cheesecakes are high-moisture dairy products, so they need refrigerator security. Once it’s fully chilled—and I mean *fully* chilled after that overnight rest—you need to cover it properly. I usually use plastic wrap, but here’s my little trick: just place a piece of plastic wrap directly onto the surface of the cheesecake first. This prevents that plastic from sticking to your beautiful top if condensation forms, which is a common issue! After the first layer, loosely cover the whole springform pan or transfer the cake onto a serving platter and cover the whole thing with a large cake dome or a tented piece of foil.
How long does it keep? Honestly, if kept covered and cold, this rich pumpkin cream cheese dessert tastes fantastic for up to four or five days. Any longer than that, and I find the crust starts to soften up a bit too much for my liking, though it’s still safe to eat. I’ve never had one last a week in my house, I can tell you that much!
Now, a note on serving temperature, because this matters for the texture you worked so hard to create. You must serve this chilled. Don’t let it sit out on the counter for more than an hour trying to ‘warm up.’ As cheesecake warms up too much, it loses that wonderful, dense structure. If you want it slightly less cold—perhaps you’re serving it as the last course before bed—just pull it out of the fridge about 20 minutes before you plan to slice it. That small window softens the filling just enough to enhance those spices without compromising the structure. Enjoy every single bite of your perfect fall cheesecake dessert!
Frequently Asked Questions About Pumpkin Cheesecake
Oh, I always love seeing what questions pop up after folks try this recipe! It means you’re getting into the kitchen, and that makes my heart so happy. Cheesecakes can feel intimidating, but once you understand the few essential tricks—like that water bath—they are truly no problem at all. If you’ve got specific queries, I’ve gathered a few of the most common ones right here because I want everyone to succeed at making this fantastic pumpkin cheesecake.
For more easy recipe ideas that don’t require quite this level of fiddling, you might enjoy browsing my collection of easy appetizers and snacks!
Can I skip the water bath when making this pumpkin cheesecake?
Oh, honey, please don’t try it! I wish I could tell you it was optional because I know the water bath setup seems like an extra chore, especially when you’re pressed for time before a holiday dinner. But for this Baked Pumpkin Cheesecake, the water bath is the entire reason we achieve that signature smooth, ultra creamy dessert texture without any ugly cracks. The steam creates an incredibly gentle, humid environment in the oven, keeping the filling consistently moist and slow-baking everywhere at once. If you skip it, the edges cook too fast, shrink away from the filling, and you end up with a cracked top. For a guaranteed flawless result, the water bath stays!
How long does this creamy pumpkin cheesecake need to chill?
This is perhaps the hardest part of the whole process for everyone who is eager to taste it! You simply must let this creamy pumpkin cheesecake set completely. The minimum time I advise is six hours in the refrigerator after it has completely cooled down on the counter. Six hours will give you a good, firm slice. However, if you want the absolute best flavor development and the firmest, most luxurious texture—that truly stand-up slice—you absolutely need to chill it overnight. When you slice it the next day, the knife glides right through it, and the flavor has deepened beautifully. It’s worth the extra wait, I promise!
What is the difference between pumpkin pie and pumpkin cheesecake?
That’s a wonderful question that gets right to the heart of what makes this recipe great! A traditional pumpkin pie is essentially a custard filling—it’s lighter, sometimes a bit jiggly, and relies on a flaky pastry crust. It’s delicious, but it doesn’t have that sturdy, rich mouthfeel.
Our Homemade Pumpkin Dessert, the cheesecake, is a whole other animal! We use a much higher ratio of cream cheese and eggs than a standard pie would. This makes the final product dense, incredibly rich, and wonderfully smooth rather than just fluffy. Think of it this way: the pie is light and custardy; this cheesecake is decadent, velvety, and sits proudly on the plate. It’s the ultimate upgrade for your fall cheesecake dessert plate!
Estimated Nutritional Data for This Rich Pumpkin Cream Cheese Dessert
Now, I know many of you are tracking things for your family gatherings, and while I truly focus on bringing delicious, homemade flavor to the table, I do keep track of what goes into our food here at Cooking by Carla. Since every brand of cream cheese or type of sugar can make a tiny difference, please keep in mind that the numbers listed below are just an estimate for one slice of this glorious Rich Pumpkin Cream Cheese dessert.
When I ran the numbers based on the recipe provided, here is roughly what you can expect for one serving:
- Calories: 420
- Sugar: 35 grams
- Fat: 28 grams
- Protein: 7 grams
- Carbohydrates: 38 grams
It certainly is a rich dessert—it’s cheesecake, after all! But remember, these figures are based on the recipe as written, including the buttery graham cracker crust. If you use low-fat cream cheese or cut back on sugar, those numbers will certainly shift. I highly recommend this recipe as a celebration treat, something to really savor during your holiday baking festivities!
Share Your Holiday Baking Ideas
Well, there you have it, my friends! My very best, ultra-creamy, absolutely crack-free recipe for Baked Pumpkin Cheesecake. I truly hope you bring this decadent dessert into your kitchen this season. I’ve poured years of baking wisdom into these steps, from wrapping that springform pan just right to making sure those eggs are room temperature, all to ensure you have a show-stopping slice for your family.
When you make this, I absolutely insist you come back and tell me how it went! Did you try adding a swirl of caramel? Did it set up perfectly after its overnight chill? Your feedback helps me, and it helps others who are nervous about tackling their first big holiday bake. Please, leave a rating—a big 5 stars for the Best Pumpkin Cheesecake would make my day!
If this recipe was your first foray into my baking world, welcome! I have so many more simple, reliable dishes waiting for you, especially if you’re planning a full meal. You can browse all the tried-and-true favorites over in my complete collection of best dessert recipes. And if you’re still hunting around for other great fall inspiration, I know folks who have had wonderful luck with the ideas shared over at Easy Food Flash too.
Baking is about sharing love, and there is no better way to show it than with a rich, spiced slice of homemade cheesecake. Happy baking, and may your holidays be sweet!
PrintThe Best Ultra Creamy Baked Pumpkin Cheesecake
Create an ultra creamy, crack-free pumpkin cheesecake with a buttery graham cracker crust. This recipe delivers the rich, spiced flavor perfect for your Thanksgiving or fall gatherings.
- Prep Time: 25 min
- Cook Time: 75 min
- Total Time: 9 hours 40 min
- Yield: 12 servings 1x
- Category: Dessert
- Method: Baking
- Cuisine: American
- Diet: Vegetarian
Ingredients
- 1 1/2 cups graham cracker crumbs
- 1/4 cup granulated sugar (for crust)
- 6 tablespoons unsalted butter, melted
- 3 (8 ounce) packages full-fat cream cheese, softened
- 1 1/2 cups granulated sugar (for filling)
- 1 (15 ounce) can pure pumpkin puree
- 1 teaspoon vanilla extract
- 1 teaspoon ground cinnamon
- 1/2 teaspoon ground nutmeg
- 1/4 teaspoon ground ginger
- 1/4 teaspoon salt
- 4 large eggs, room temperature
Instructions
- Preheat your oven to 325 degrees F. Wrap the outside of a 9-inch springform pan tightly with heavy-duty aluminum foil. Bring a large pot of water to a simmer for the water bath.
- Prepare the crust: Mix graham cracker crumbs, 1/4 cup sugar, and melted butter until combined. Press the mixture firmly into the bottom of the prepared springform pan. Bake for 10 minutes. Let the crust cool while you prepare the filling.
- Prepare the filling: In a large bowl, beat the softened cream cheese and 1 1/2 cups sugar with an electric mixer until smooth. Scrape down the sides of the bowl.
- Add the pumpkin puree, vanilla extract, cinnamon, nutmeg, ginger, and salt. Mix until just combined. Do not overmix.
- Beat in the eggs one at a time, mixing only until each egg is incorporated. Overmixing the eggs introduces air, which causes cracks.
- Pour the filling over the cooled crust. Place the springform pan inside a larger roasting pan. Carefully pour the simmering water into the roasting pan until it reaches about halfway up the sides of the springform pan. This water bath helps create a creamy texture.
- Bake for 60 to 75 minutes. The edges should look set, but the center 2 inches should still jiggle slightly when gently nudged.
- Turn off the oven, prop the door open slightly, and let the cheesecake cool inside the oven for 1 hour. This gradual cooling prevents cracking.
- Remove the cheesecake from the water bath and let it cool completely on a wire rack. Once cool, cover and refrigerate for at least 6 hours, or preferably overnight, before serving.
Notes
- Use room temperature ingredients for the cream cheese and eggs to ensure a smooth, lump-free filling.
- For the best crack-free result, avoid scraping down the sides of the bowl after adding the eggs.
- Serve this rich pumpkin cream cheese dessert chilled, topped with homemade whipped cream.
Nutrition
- Serving Size: 1 slice
- Calories: 420
- Sugar: 35
- Sodium: 280
- Fat: 28
- Saturated Fat: 17
- Unsaturated Fat: 11
- Trans Fat: 0.5
- Carbohydrates: 38
- Fiber: 1
- Protein: 7
- Cholesterol: 110