
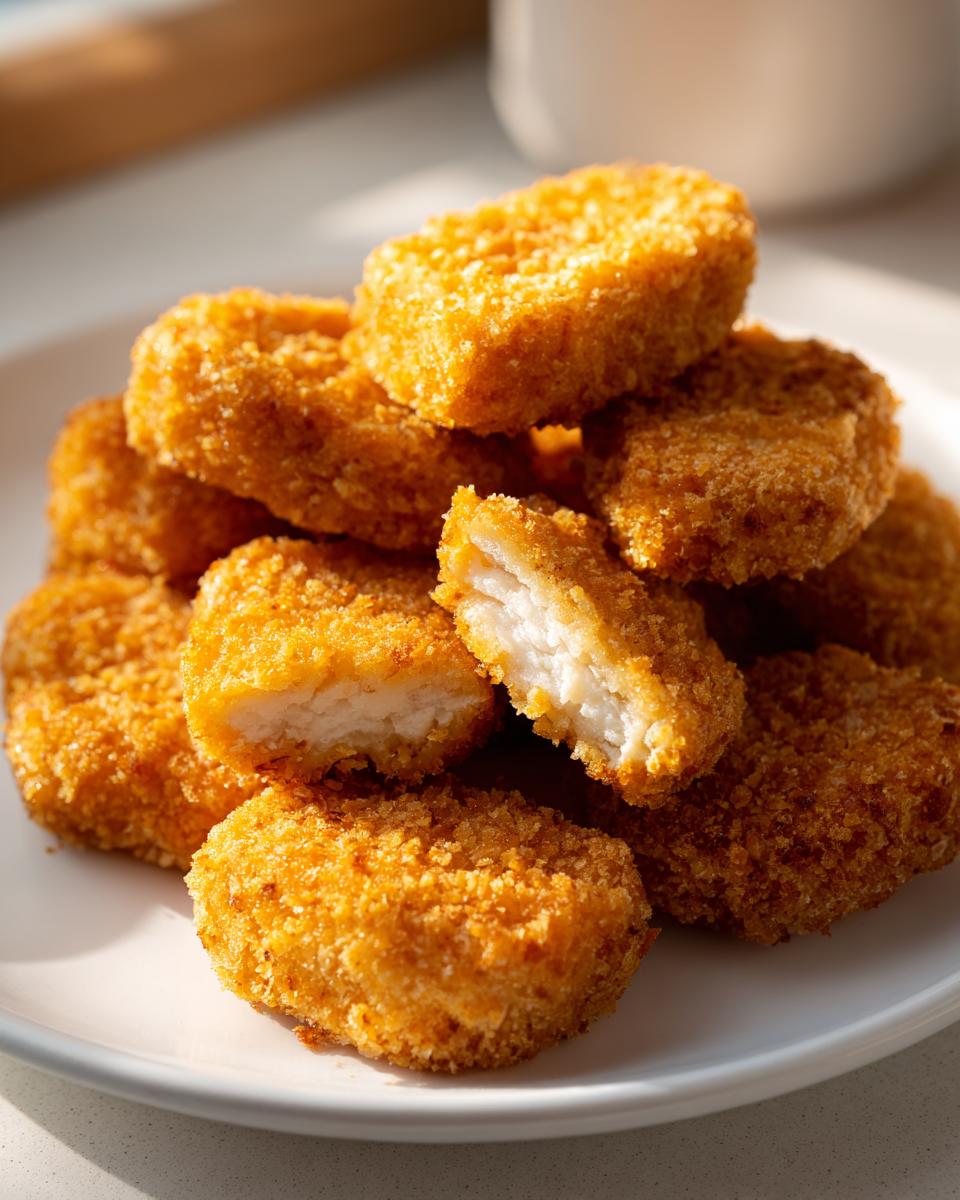
Oh, the humble chicken nugget! If you’re like me, those little golden bites bring back such fond memories of childhood dinners and quick snacks. But let’s be honest, the fast-food versions just don’t cut it when you want real flavor and quality ingredients. That’s why I spent so much time perfecting the very best homemade chicken nuggets for my own table. As a former teacher, I pride myself on making instructions so clear that anyone can succeed, and for families, dependable recipes are everything. Trust me, between the crisp coating and the juicy interior, this baked version proves you don’t need deep frying to achieve that satisfying crunch. If you ever need a fantastic, easy side dish for these, you should definitely check out my recipe for easy chicken gravy!
- Why These Are the Best Homemade Chicken Nuggets
- Gathering Ingredients for Your Homemade Chicken Nuggets
- The Step-by-Step Method for Perfect Homemade Chicken Nuggets
- Air Fryer Chicken Nuggets: A Faster Way to Make Homemade Chicken Nuggets
- Tips for Success Making From Scratch Chicken Nuggets
- Serving Suggestions for Your Homemade Chicken Nuggets
- Storage and Reheating Instructions for Homemade Chicken Nuggets
- Frequently Asked Questions About Homemade Chicken Nuggets
- Share Your Family Favorite Chicken Recipe Experience
Why These Are the Best Homemade Chicken Nuggets
I know, everyone claims their nugget recipe is the best, but these truly stack up against anything you can grab at a drive-thru. When I developed this method, my main goal was packing maximum flavor and crunch into something quick enough for a busy Tuesday night. We’ve managed to create the most satisfying homemade chicken nuggets without ever touching a deep fryer. Take a look at why they earn a permanent spot on our family rotation:
- They stay wonderfully crispy, even when cooled down slightly.
- The entire process, start to finish, takes under 30 minutes. That’s a weeknight win!
- They taste like real chicken, just the way my grandkids like it!
If you’re looking for something different but equally comforting for dinner soon, you might also love my easy chicken cobbler.
Achieving Crispy Homemade Chicken Nuggets Without Frying
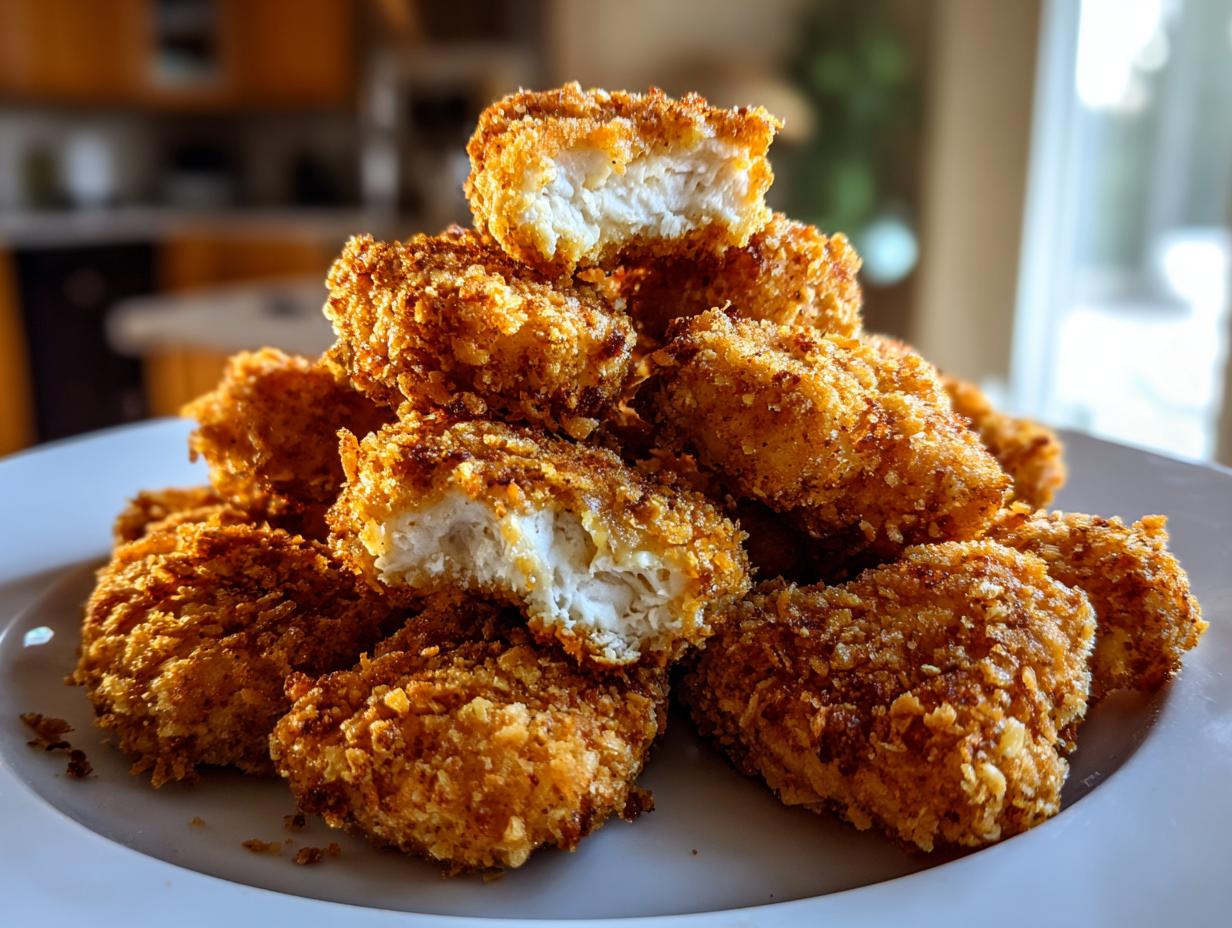
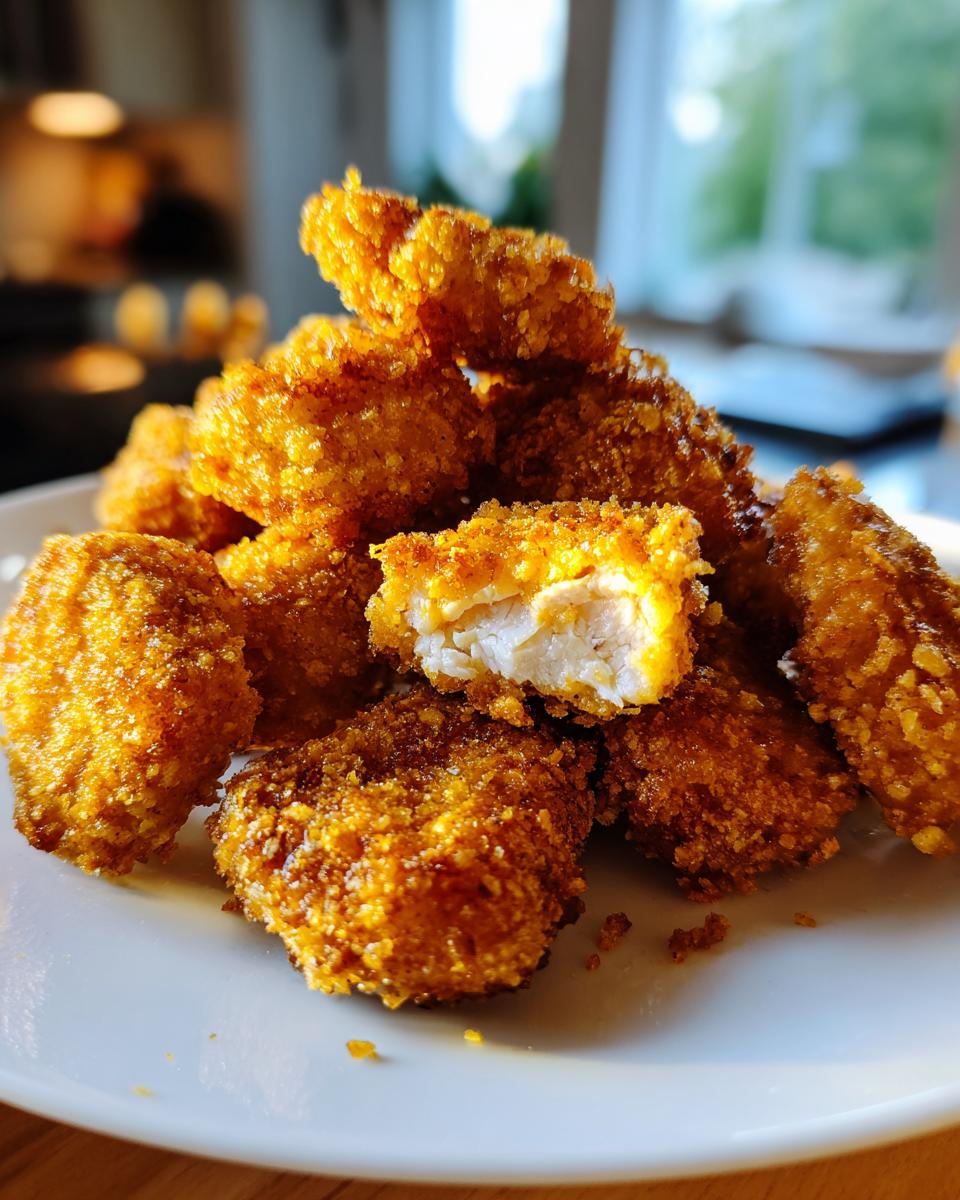
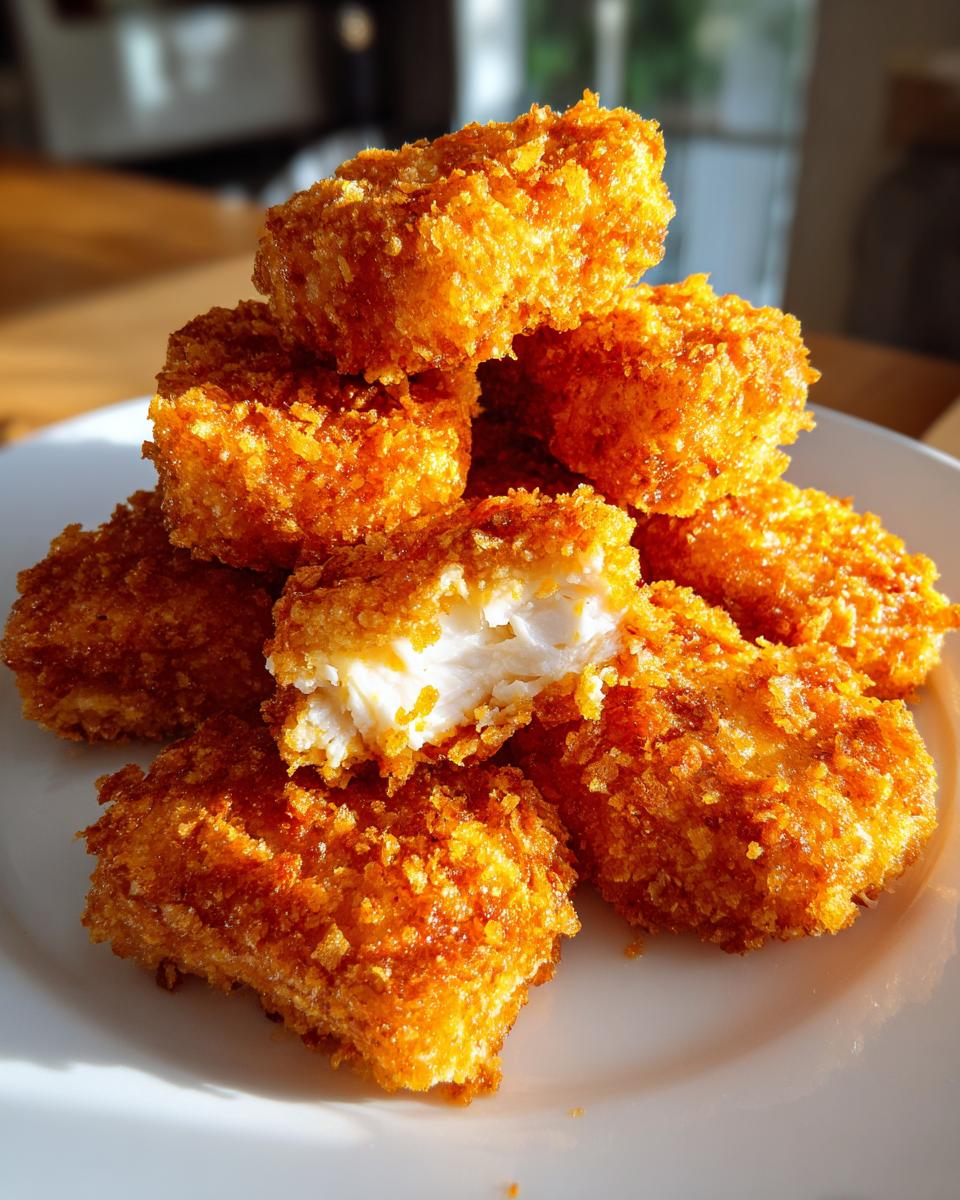
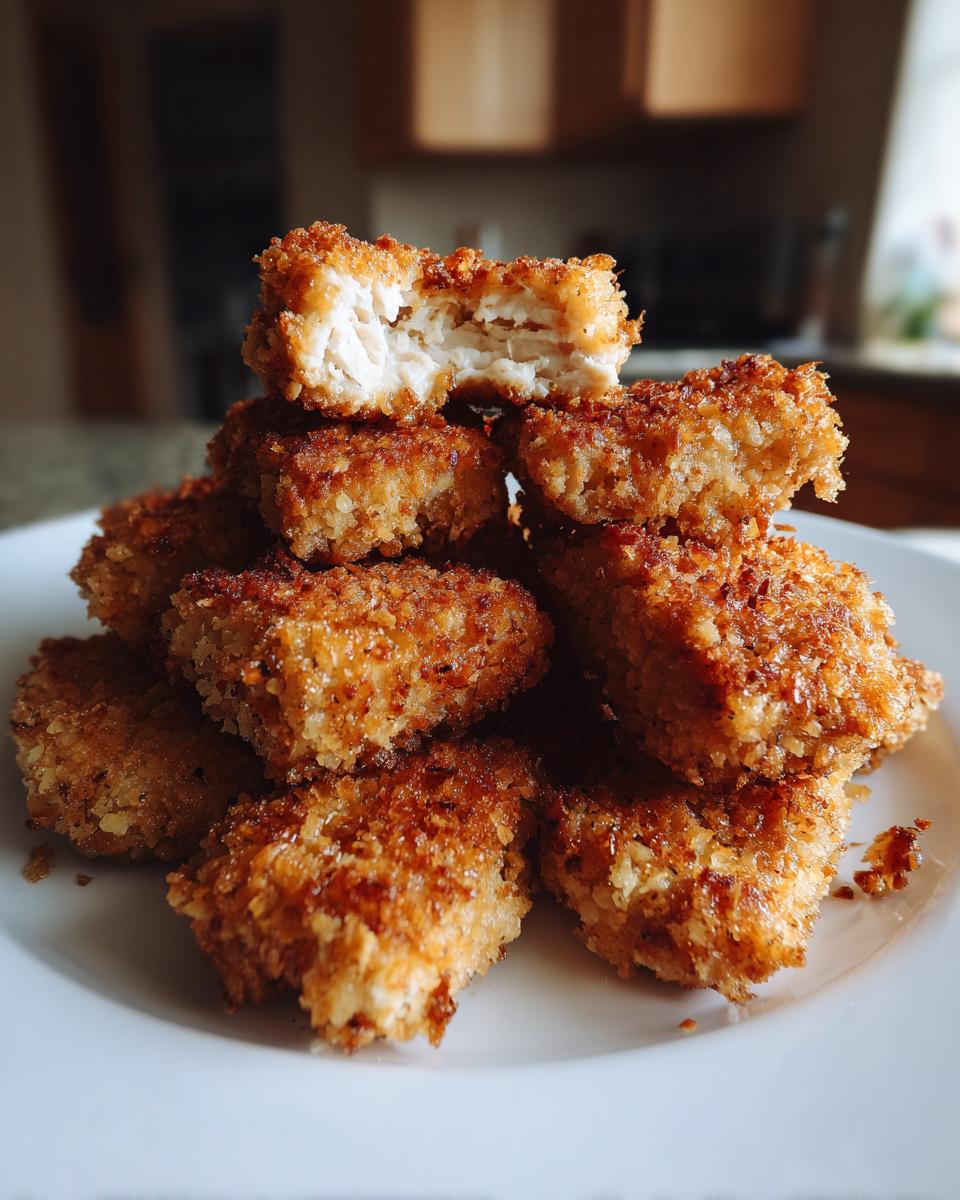
That satisfying crunch is essential! The secret here is twofold: we insist on Panko breadcrumbs because they are flakier than regular ones, and we give the top a blanket of cooking spray right before they bake. This coating acts just like the oil would in a frying pan, locking in the juices while giving you those gorgeous golden edges. Honestly, these are the Crispy Homemade Chicken Nuggets you’ll keep coming back to bake.
Quick Preparation for a Kid Friendly Chicken Dinner
I hear you—sometimes you need dinner on the table yesterday. These whole-breast nuggets are cut small, so they cook fast! From prepping the three breading dishes to pulling the golden morsels out of the oven, we are talking 30 minutes total. That makes them a perfect Kid Friendly Chicken Dinner option when you’re short on time. No long marinades, no fussy steps!
Gathering Ingredients for Your Homemade Chicken Nuggets
Alright, let’s get our station ready. Since these homemade chicken nuggets are so straightforward, you probably have most of what you need already! Remember, clarity is key, which is why I write things down just how they need to be done. You’ll need about a pound and a half of boneless, skinless chicken breast specifically cut into nice, manageable 1-inch pieces—don’t cut them too big or they won’t cook evenly. Then, grab two eggs, and make sure you just lightly beat them; we don’t want too much air in that egg wash!
For the coating, we stick to the basics: flour, salt, pepper, garlic powder, and onion powder, all mixed into 1.5 cups of Panko breadcrumbs. Don’t forget the cooking spray—that’s our crisp-maker!
Ingredient Notes and Substitutions for Homemade Chicken Nuggets
If you are absolutely in a pinch, you *can* use ground chicken instead of cutting up the breast pieces. If you go that route, just form the ground chicken into small, nugget shapes before you start the breading process. They might be slightly softer, but still good! Also, make certain you are using Panko breadcrumbs here, not the fine, standard breadcrumbs. Panko gives you that airy, shatteringly crisp exterior that makes these the Best Homemade Nuggets. If you are out of mayo for dipping later, try whipping up a batch of my easy homemade mayonnaise!
The Step-by-Step Method for Perfect Homemade Chicken Nuggets
Now for the fun part—the assembly line! Before you even touch the chicken, you need that oven hot and ready. Preheat that oven to 400°F (200°C). A hot oven is essential for getting that crispy exterior without drying out the inside of your homemade chicken nuggets. Have your baking sheet ready and lightly sprayed or lined with parchment paper. Remember what I always say: a little prep saves a lot of scrubbing later!
Setting Up Your Breading Station for Crispy Homemade Chicken Nuggets
We are building a little three-stage assembly line here, just like we did for fried chicken decades ago, but adapted for the oven! In the first shallow dish goes the simple flour. The next dish is for your lightly beaten eggs. And the final dish? That’s where your seasoned Panko breadcrumbs live. Take one piece of chicken, dust it in the flour first—shake off the excess! Then dip it in the egg, making sure it’s coated, and finally, press that piece firmly into the seasoned Panko. I mean firmly, almost patting it down. You want that full layer of coating because that’s what gives you those incredible Crispy Homemade Chicken Nuggets.
Baking Tips for Juicy Chicken Nuggets
Once all your nuggets are lined up on the sheet, here’s the trick the pros use: grab that cooking spray and give the tops a generous, even coating of oil. This step is what guarantees that beautiful golden-brown color without having to flip every single one constantly! Pop them into the 400°F oven for about 12 to 15 minutes. You must flip them halfway through. The most important part, especially when cooking for kids, is checking that internal temperature—make sure they hit 165°F (74°C) so they are perfectly cooked and wonderfully Juicy Chicken Nuggets. If you’re looking for another great oven recipe that’s perfect alongside these, try my easy baked ranch chicken!
Air Fryer Chicken Nuggets: A Faster Way to Make Homemade Chicken Nuggets
I know lots of you have jumped on the air fryer bandwagon—and for good reason! If you’re making these homemade chicken nuggets on a super rushed evening, the air fryer is your best friend. The baking method above works wonderfully, but the air fryer gives you a slightly faster crisp. You’ll want to keep the temperature a little lower than the oven, though, setting it to 380°F (195°C).
Pop them in for about 10 to 12 minutes total, but make sure you shake the basket halfway through! This ensures all sides get that beautiful golden crunch we are aiming for. It’s another fantastic way to make healthy chicken nuggets that really taste like a treat. And speaking of air fryers, you absolutely must try my recipe for air fryer potato chips sometime!
Tips for Success Making From Scratch Chicken Nuggets
Since I spent years teaching classes where following instructions meant the difference between success and a bubbling mess, I want to give you a few pro tips now that you’re making your From Scratch Chicken Nuggets. The two biggest hurdles people face right away are dry chicken and coatings that fall off in the oven. We want that crust to stick tight from the prep table right to the baking sheet!
Getting these simple things right ensures that every batch of homemade chicken nuggets tastes like you’ve been making them for years. If you’re making a whole bunch that you plan to freeze for later, a little extra love during the breading stage is worth it. Also, if you end up with extra gravy from another meal, my recipe for easy chicken gravy is perfect for dipping!
Keeping Your Chicken Moist for the Best Homemade Nuggets
The best way to guarantee juicy chicken is simply by keeping your pieces uniform in size. If you have tiny pieces next to huge chunks, the tiny ones are going to dry out before the big ones are even cooked through. If you happen to have an extra 15 minutes, you can soak your chicken pieces in a little buttermilk—any buttermilk works. The mild acid tenderizes the meat slightly before it even hits the breading, which really boosts moisture retention for the Best Homemade Nuggets.
Serving Suggestions for Your Homemade Chicken Nuggets
Once you pull those golden beauties out of the oven, the real fun begins: picking your sauce! For the little ones, you absolutely can’t go wrong with classic ketchup or maybe a little jar of honey mustard. If you’re aiming for something a bit more grown-up or want to jazz up dinner, I highly recommend a good batch of BBQ sauce. Trust me, nothing beats dipping these homemade chicken nuggets into something flavorful!
If you want to go the full restaurant route, try pairing them with a side of seasoned fries or some simple, steamed broccoli to sneak in some veggies. And if you’re looking for the ultimate dipping component, I have a recipe for the best burger sauce recipe—it works like a charm on nuggets too! This meal is always a hit.
Storage and Reheating Instructions for Homemade Chicken Nuggets
One of the greatest perks about making these homemade chicken nuggets from scratch is knowing you can make a huge batch and save the rest for later. That’s just smart cooking, especially when you’re aiming for a Quick Weeknight Chicken Meal!
If you have leftovers that have cooled down, you can store them in an airtight container in the fridge for about three or four days. They will still be good, but they won’t have that perfect fresh-out-of-the-oven crunch.
Now, if you want to freeze them for future emergencies—and trust me, you should—the key is to freeze them before you bake them! Let the breaded nuggets cool completely on the tray after coating, then slide that whole tray into the freezer until they are solid little rocks. Then, transfer them to a freezer-safe bag. This freezing technique avoids that unfortunate clump you get when you try to freeze them fresh!
When you are ready to eat those frozen nuggets, you want to reheat them in a way that brings back that glorious crispiness we worked so hard to achieve. You MUST avoid the microwave, or they turn rubbery instantly! The best method for reviving these is actually in the air fryer or a conventional oven. You are essentially just re-crisping them, creating the most satisfying No Fry Chicken Nuggets reheat possible.
For the oven, preheat to 375°F and bake for about 15 minutes, flipping halfway. If you use the air fryer, try 370°F for about 8 to 10 minutes. Either way, they come out tasting nearly as good as fresh! If you are planning ahead, remember to check out my recipe for easy no-bake protein bars for those busy days when you need a grab-and-go option!
Frequently Asked Questions About Homemade Chicken Nuggets
When you’re cooking from scratch, you naturally have more questions, and I love that you’re being thoughtful about the ingredients! I’ve pulled together some common things folks ask me about making these homemade chicken nuggets so you can feel completely confident in the kitchen. If you’re looking for more meal ideas that save time, you should look at my collection of quick, healthy lunch ideas!
Can I use ground chicken instead of breast meat for these homemade chicken nuggets?
Yes, you absolutely can! As noted above, if you use ground chicken, the process just shifts slightly. Instead of cutting the meat, you’ll mix up your ground chicken with a little seasoning, and then shape it by hand into your preferred nugget size and thickness before you start the breading. They will have a slightly softer texture than the breast pieces, but they are delicious!
How do I make these chicken nuggets taste like a fast-food copycat recipe?
That savory, slightly tangy flavor from the drive-thru takes a little trickery! If you want to lean into that Chicken Nuggets Copycat Recipe feel, try soaking your pieces of chicken breast in regular buttermilk for about 30 minutes before you start the breading process. It helps tenderize the meat and adds an underlying flavor note that mimics those famous versions. A little extra garlic powder in your panko mix helps, too!
Are these baked chicken nuggets truly healthy?
They are definitely a much healthier choice than the deep-fried alternatives, yes! Since we are baking the homemade chicken nuggets and just using a little spray oil for crispiness instead of submerging them, we cut way down on unnecessary fat. That’s why I call these the Healthy Chicken Nuggets you can feel good about serving your family regularly for dinner.
Share Your Family Favorite Chicken Recipe Experience
That’s really all there is to it! We took simple chicken breast and turned it into a batch of golden, crispy, and surprisingly healthy homemade chicken nuggets that your family will cheer for. You should feel so proud making something wonderful like this right in your own kitchen.
Now that you’ve made them, I truly want to hear from you! Did you stick to the baking method, or did you try the air fryer trick? Did your kids have a favorite dipping sauce? Please tell me in the comments below how this recipe turned out for your clan. If you loved the ease of this recipe, be sure to browse my full collection of easy weeknight dinners for more quick wins!
Don’t forget to give this recipe a star rating right at the top of the page. Hearing from you helps other home cooks feel confident about giving these homemade chicken nuggets a try! Happy cooking, and I hope these become a treasured family favorite chicken recipe in your house, just like they are in mine!
PrintCrispy Baked Homemade Chicken Nuggets
Make irresistible, crispy homemade chicken nuggets using simple ingredients. This recipe uses chicken breast and baking to achieve a satisfying crunch, making it a healthier, family-friendly weeknight meal.
- Prep Time: 15 min
- Cook Time: 15 min
- Total Time: 30 min
- Yield: 4 servings 1x
- Category: Dinner
- Method: Baking
- Cuisine: American
- Diet: Low Fat
Ingredients
- 1.5 lbs boneless, skinless chicken breast, cut into 1-inch pieces
- 1 cup all-purpose flour
- 2 large eggs, lightly beaten
- 1.5 cups panko breadcrumbs
- 1 teaspoon salt
- 0.5 teaspoon black pepper
- 0.5 teaspoon garlic powder
- 0.5 teaspoon onion powder
- Cooking spray
Instructions
- Preheat your oven to 400°F (200°C). Lightly grease a baking sheet or line it with parchment paper.
- Set up a standard breading station with three shallow dishes. Place the flour in the first dish.
- Whisk the eggs in the second dish.
- Combine the panko breadcrumbs, salt, pepper, garlic powder, and onion powder in the third dish. Mix these dry ingredients well.
- Take one piece of chicken and dredge it thoroughly in the flour, shaking off any excess.
- Dip the floured chicken piece into the beaten egg, allowing excess to drip off.
- Press the chicken piece firmly into the seasoned panko mixture until it is completely coated.
- Place the coated nugget onto the prepared baking sheet. Repeat this process for all chicken pieces.
- Lightly spray the tops of the coated nuggets generously with cooking spray to help them crisp up.
- Bake for 12-15 minutes, flipping the nuggets halfway through the cooking time.
- Continue baking until the nuggets are golden brown and the internal temperature reaches 165°F (74°C).
- Serve your crispy homemade chicken nuggets immediately with your favorite dipping sauce.
Notes
- For an air fryer method, cook at 380°F (195°C) for 10-12 minutes, shaking the basket halfway through.
- You can substitute ground chicken for breast pieces; shape the mixture into nugget forms before breading.
- To make these nuggets freezer-friendly, place the uncooked, breaded nuggets on a tray in the freezer until solid, then transfer them to a freezer bag for later use.
Nutrition
- Serving Size: 4 nuggets
- Calories: 280
- Sugar: 1
- Sodium: 350
- Fat: 7
- Saturated Fat: 1.5
- Unsaturated Fat: 5.5
- Trans Fat: 0
- Carbohydrates: 15
- Fiber: 1
- Protein: 38
- Cholesterol: 95