
There is just nothing quite like the cozy feeling of pulling homemade bread from the oven, but today, we’re not using the oven! We are bringing that classic bakery experience right to your stovetop. My goal with this breakfast bread is simple: I want you to achieve those signature, melt-in-your-mouth English muffins nooks and crannies that trap butter perfectly. As a former teacher, I break down the dough handling so you can master the technique for the best homemade English muffins!
- Why This Is The Best English Muffin Recipe From Scratch
- Gathering Ingredients for Homemade English Muffins
- Step-by-Step Instructions for Skillet English Muffins
- Tips for Perfect English Muffins Texture and Flavor
- Creative Ways to Serve Your Homemade English Muffins
- Storage and Make Ahead Breakfast Options
- Frequently Asked Questions About English Muffins
- Nutritional Information for this Easy English Muffin Recipe
- Share Your Freshly Baked English Muffins
Why This Is The Best English Muffin Recipe From Scratch
When you’re looking for the best English muffin recipe, you need reliability, and that’s what skillet cooking gives you! So many recipes rely on the regular oven, but when you cook these English muffins from scratch right on the stovetop, you gain total control over the browning. Trust me, this control is essential for those famous holes inside. This isn’t about trying to make a perfect copycat store bought muffin; this is about making something genuinely better.
We aren’t developing tough gluten here; we are nurturing soft, fluffy dough that develops gas slowly on gentle heat. This slow development is the secret to those soft fluffy English muffins. If you follow my steps for the rise and the heat, you’ll find these are foolproof for your homemade English muffins.
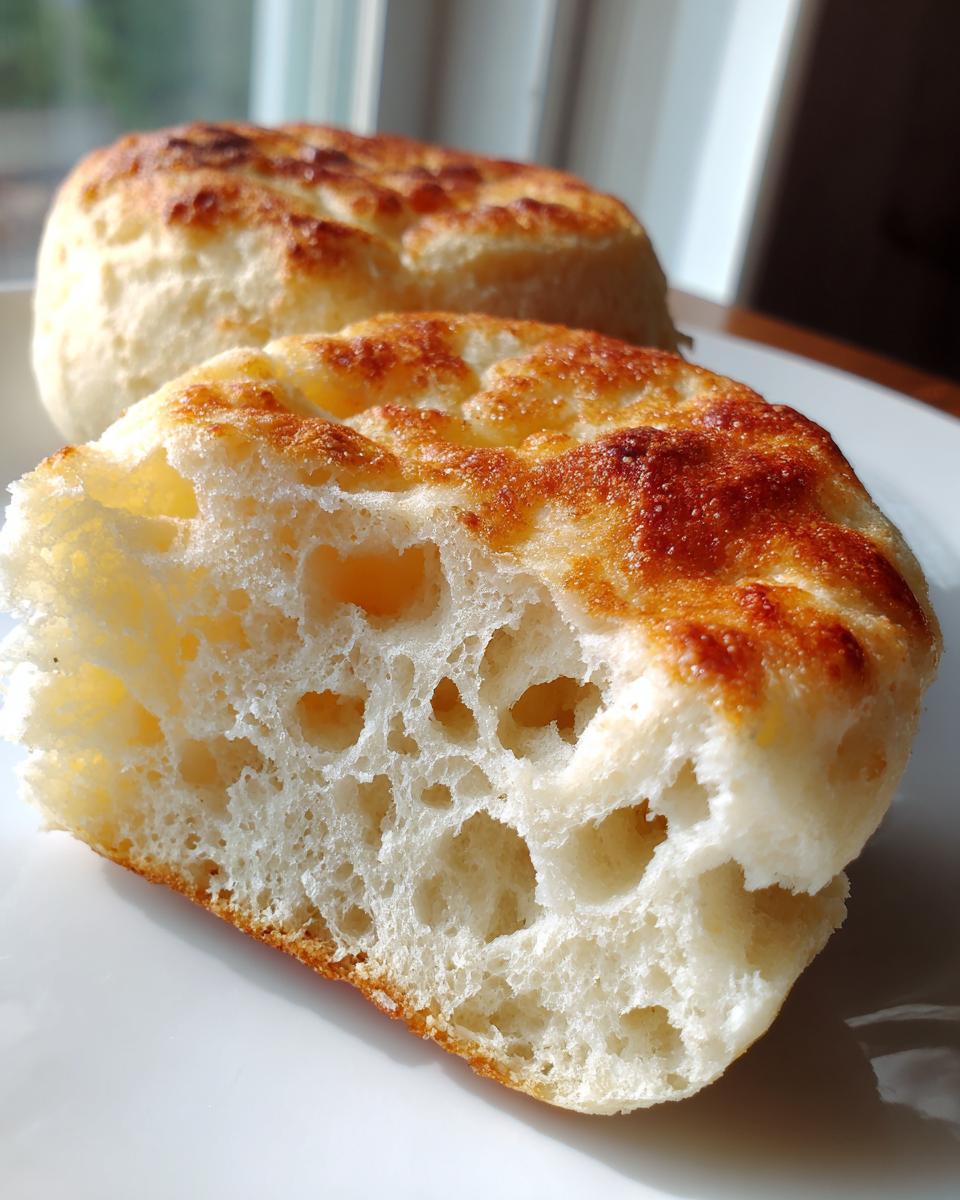
Achieving Authentic English Muffins Nooks and Crannies
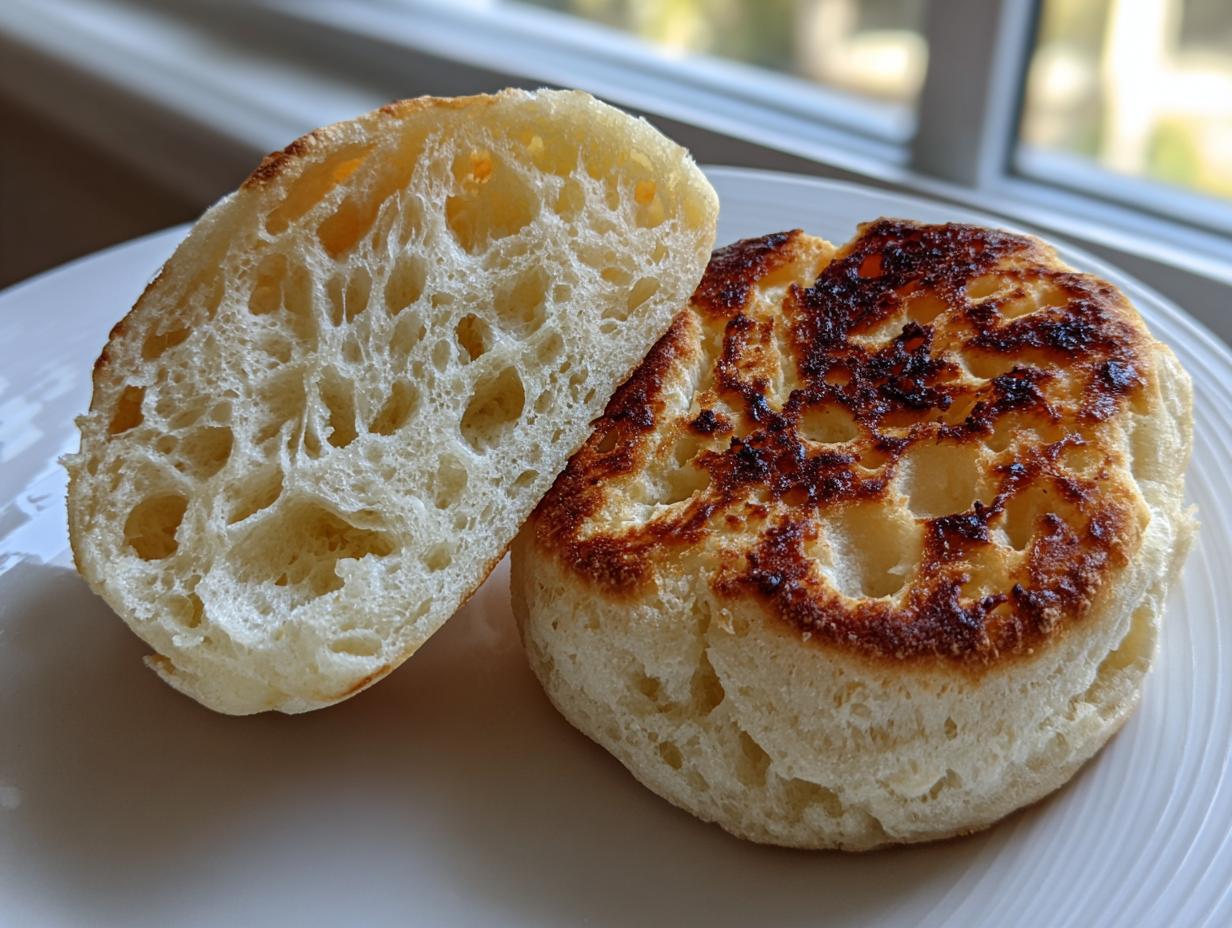
The magic pores—the nooks and crannies—happen when the dough is kept slightly sticky and handled gently. We let the yeast do the heavy lifting so the internal structure stays open. Cooking low and slow on the griddle lets the inside steam and puff up beautifully before the outside sets. We save the final step of forcing those tunnels open until they are completely cool, which is a trick I’ll share later alongside the fork-splitting method!
Gathering Ingredients for Homemade English Muffins
Baking these classic English muffins is surprisingly easy because the ingredient list is so short. You probably have most of this stuff in your pantry right now! Remember, though, even with simple ingredients, quality matters. When you’re working toward that perfect texture, the temperature of your milk is genuinely the most important starting point. That yeast is picky, so let’s treat it right from the beginning.
Here is exactly what you need in your bowl for this batch:
- 1 cup warm milk (It needs to hit about 110°F—too hot and you kill the yeast; too cool, and they won’t wake up!)
- 2 teaspoons active dry yeast
- 1 tablespoon granulated sugar (This feeds our hungry yeast friends!)
- 2 1/2 cups all-purpose flour, plus more for dusting (We need extra flour on the counter later for rolling them out.)
- 1 teaspoon salt
- 1/2 teaspoon baking soda
- 2 tablespoons unsalted butter, melted (This adds just a hint of richness.)
- Cornmeal, for dusting (Don’t skip this! It gives the bottom that authentic griddle texture.)
That’s it! I always get everything measured out before I even touch the milk and yeast. It keeps things moving smoothly once the rising process starts. Now let’s get that initial foam going!
Step-by-Step Instructions for Skillet English Muffins
Alright, this is where we put everything together! Making these English muffins from scratch isn’t hard, but timing is everything. I think of this like any good teaching moment—follow the sequence, and you get a great result. We are using our list of ingredients to build a dough that is meant to be sticky, not perfectly smooth like a dinner roll. Resist the urge to add a cup of extra flour to make it easy to handle; that stickiness is what guarantees those fantastic holes later on. We’ll be working carefully through the rise, cut, second rest, and finally, the all-important cooking phase right here on the stovetop. If you have lots of leftovers that you want to use for quick, healthy lunch ideas later on, just make sure you freeze them correctly!
Activating Yeast and Mixing the Dough for Soft Fluffy English Muffins
First things first: that yeast bath! Pour your warmed milk into the bowl, sprinkle the sugar over it, and then gently rain the yeast on top. Let it relax for about ten minutes until it gets foamy—if it doesn’t foam, toss it and start over because your yeast is dead. Once foamy, stir in that melted butter. Then, in goes the dry mixture, all at once, mixing only until everything is just combined into a shaggy dough. Remember what I said? Stop mixing! We want those air pockets; we are aiming for soft fluffy English muffins.
Cooking Your English Muffins on the Griddle
This is the secret sauce for skillet English muffins. Get your cast iron skillet warmed up over medium-low heat. Seriously, medium-low! If the heat is too high, you end up with dark brown exteriors and raw, doughy centers, which is a disaster. Once the pan is ready, gently place your cut dough rounds onto the dry surface. They need 8 to 12 minutes per side—don’t peek too often! And this is vital: never, ever press down on them with your spatula. That’s what closes up the nooks you’ve worked so hard to create. We want them to puff right up as they cook through.
Once they look perfectly golden, flip them and cook the other side. After they come off the heat, let them cool completely on a wire rack before doing anything else. If you try to cut them warm, they will just tear messily, and we lose those beautiful internal tunnels. For things like quick, healthy meals, you can always use these for small snacks later. For now, focus on cooling them down properly before we unleash their full glory!
Tips for Perfect English Muffins Texture and Flavor
I know baking anything from scratch—especially making English muffins—can feel intimidating, but I promise, the small details make all the difference between a good muffin and one that tastes like it came straight from that famous bakery down the street. Remember, my whole teaching career was about showing people the easy path to a great outcome! If you follow my steps for the cooking temperature and focus on gentle handling, you’ll nail that authentic English muffin texture every single time. You can always peek at other tried-and-true methods online if you need reassurance, like this one from Amelia’s Kitchen for guiding your way!
Don’t worry if your first batch doesn’t look perfect; sometimes the dough fights back a little! But focusing on a gentle hand during cutting and cooling is key to success. These little pointers are what turned my early attempts into the dependable recipe I share with you now for your simple weeknight dinners or weekend brunches.
The Essential Fork-Splitting Technique
Once your homemade English muffins are cooled—and they must be totally cool, or you’ll just get mush—never, ever reach for a serrated knife! A knife compresses the internal structure and seals up those beautiful tunnels we worked so hard to create. Instead, take a good sturdy fork, press it into the edge of the muffin about halfway down, and gently work your way around until it splits apart. That gentle tearing action opens up the crumb and exposes every single nook and cranny for your butter to melt into!
Creative Ways to Serve Your Homemade English Muffins
Now that you have these incredible, hole-filled English muffins cooling, the fun really begins! We all know they are fantastic just toasted with jam, but part of the joy of making them from scratch is seeing how versatile they are. Since they are so sturdy and flavorful, they hold up beautifully to wet toppings and heavy fillings. I love prepping a big batch on Sunday so we can have quick, elevated breakfasts all week long. For great ideas involving eggs, you absolutely have to check out my Eggs Benedict Casserole if you’re looking for next-level brunch!
Ideas for English Muffin Pizza Recipes
When dinner needs to be fast, reaching for a split muffin is a lifesaver. Just top your split, toasted muffin half with pizza sauce, cheese, and whatever veggies you have on hand. Pop them under the broiler for about five minutes until the cheese is bubbly. It’s such a fast way to get something satisfying on the table!
Making Quick Homemade Breakfast Sandwiches
Forget those pre-made patties! These homemade rounds are sturdy enough for a proper breakfast sandwich. Just fry up an egg—maybe a little sausage or bacon if you’re feeling decadent—and pile it high on your split muffin. The nooks catch all the smoky drippings perfectly. These make such a wonderful snack or appetizer if you cut them small for a party, too!
Storage and Make Ahead Breakfast Options
One of my absolute favorite things about perfecting this easy English muffin recipe is knowing that I don’t have to use them all at once! Baking is much more satisfying when you know you’ve prepared for the week ahead. These are wonderful for a make ahead breakfast situation, whether you are stocking up for busy weekday mornings or preparing for holiday brunch guests. Since we cooked them on the stove and didn’t use harsh oven heat, they stay nicely soft, which really helps with storage.
If you plan to eat them within a couple of days, just let them cool completely on the rack. Once they are totally room temperature—and this is important, don’t wrap them warm!—you can store them in an airtight container on the counter. They usually stay soft and lovely for about three days. I find that if I store them split, they dry out faster, so keep them whole!
For long-term storage, we rely on the freezer, making these truly freezer friendly muffins. They freeze beautifully, which is a lifesaver when you have a big batch of dough yield from one recipe. You can keep your cooled, unsplit English muffins packed tightly in a heavy-duty freezer bag—you might want to slip a piece of parchment paper between them first so they don’t stick together. They stay perfect in the freezer for up to three months. When you’re ready for one, just pull it out the night before and let it thaw on the counter. Then, toast it up, split it, and you’re ready for the best breakfast ever. You can learn more about other make-ahead strategies from Tastes Better From Scratch here: freezer tips.
Frequently Asked Questions About English Muffins
Can I make English Muffins From Scratch without a Griddle?
You certainly can bake them in the oven, but I’m going to be honest with you—it just changes the whole experience! Baking them in the oven tends to give you a softer, more bread-like texture, and you miss out on that slightly crisp, golden exterior you get from direct contact with the hot metal. For the true, authentic feel of homemade English muffins, stick to the skillet or griddle. That contact heat is what helps set that structure just right.
Why are my Homemade English Muffins flat?
Oh, I see this happen sometimes, and usually, it comes down to one of three things. First, check your yeast activation; if it didn’t foam up in the beginning, the dough didn’t have any lift to begin with. Second, did you handle the dough too much when you cut them out? When you pat it down, you need to be gentle, just enough to flatten it to 3/4-inch—if you press all the gas out, they stay flat. Finally, if your rising spot was too cold, the yeast just won’t get active enough to create the volume we need. A warm spot is key!
How long does the dough need for the second rise?
The second rise is important because it lets the cut circles relax a bit before they hit the heat. We let them rest, covered loosely, for a solid 30 minutes. That’s usually plenty of time. Keep an eye on them; if your kitchen is very warm, they might puff up a little sooner, but don’t let them sit for much longer than 35 minutes, or they might start to deflate before cooking.
Nutritional Information for this Easy English Muffin Recipe
Now, I know that when we’re baking treats like these wonderful English muffins, we aren’t usually reaching for the recipe because we are counting calories! But I always feel it’s good practice to give you an idea of what’s in the food we are sharing on our kitchen tables. Remember, since this is a homemade recipe, the exact values can change based on the brand of flour or butter you use, so please treat this as a general guideline for what’s in one of these soft, fluffy rounds.
I made these calculations based on dividing the total recipe into an average of 9 muffins. It’s pretty standard stuff for a wholesome breakfast bread!
Here’s a look at what’s cooking nutritionally:
- Serving Size: 1 muffin
- Calories: 180
- Sugar: 2g
- Sodium: 250mg
- Fat: 4g
- Saturated Fat: 2g
- Unsaturated Fat: 2g
- Trans Fat: 0g
- Carbohydrates: 32g
- Fiber: 1g
- Protein: 5g
- Cholesterol: 10mg
See? Not bad at all for a delicious, homemade staple that beats anything you grab off the shelf! They are great for portion control since they are naturally portioned by the cutter, making it easy to keep track if you are watching certain numbers.
Share Your Freshly Baked English Muffins
Well, friend, that’s my entire rundown on creating the absolute best English muffins you’ll ever have. From waking up that yeast to that final, glorious fork split, I hope you feel encouraged to get these on your stovetop soon!
Baking is truly a shared experience here at Cooking by Carla, and I just love seeing the wonderful things you all create in your own kitchens. When you pull those golden rounds off the skillet—and I know you will nail those nooks and crannies!—I really want to see them!
Please, leave a recipe rating right below this section. Your feedback tells me what’s working and helps other home cooks feel confident trying this recipe. And if you snap a picture of your beautiful batch, maybe sitting next to some melted butter or piled up for a sandwich, share it! You can always reach out to me directly through my contact page if you have any special questions. Happy baking, and enjoy that amazing homemade breakfast!
PrintThe Best Homemade English Muffins with Signature Nooks and Crannies

Make soft, fluffy English muffins from scratch on your stovetop. This easy recipe produces classic nooks and crannies perfect for holding melted butter or making breakfast sandwiches.
- Prep Time: 20 min
- Cook Time: 25 min
- Total Time: 1 hour 55 min
- Yield: 8 to 10 muffins 1x
- Category: Breakfast
- Method: Skillet Cooking
- Cuisine: American
- Diet: Vegetarian
Ingredients
- 1 cup warm milk (about 110°F)
- 2 teaspoons active dry yeast
- 1 tablespoon granulated sugar
- 2 1/2 cups all-purpose flour, plus more for dusting
- 1 teaspoon salt
- 1/2 teaspoon baking soda
- 2 tablespoons unsalted butter, melted
- Cornmeal, for dusting
Instructions
- Combine the warm milk, yeast, and sugar in a large bowl. Let this mixture sit for 5 to 10 minutes until it becomes foamy. This shows the yeast is active.
- In a separate bowl, whisk together the flour, salt, and baking soda.
- Add the melted butter to the yeast mixture. Gradually add the dry ingredients to the wet ingredients, mixing until just combined into a shaggy dough. Do not overmix; this dough will be sticky.
- Cover the bowl with plastic wrap or a clean towel and let the dough rise in a warm place for 1 to 1.5 hours, or until it has doubled in size.
- Lightly dust a clean surface with flour. Gently turn the dough out onto the surface. Pat the dough down to about 3/4-inch thickness. Avoid punching the air out completely.
- Use a 3-inch round biscuit or cookie cutter to cut out the English muffins. You should get about 8 to 10 muffins. Rework the scraps gently and cut out any remaining pieces.
- Generously dust a baking sheet or large tray with cornmeal. Place the cut dough rounds on the prepared sheet, leaving space between them.
- Cover the muffins loosely and let them rest for a second rise for 30 minutes.
- Heat a large, dry cast-iron skillet or griddle over medium-low heat. The temperature is important; too high and they will brown before cooking through.
- Carefully place the muffins onto the warm skillet, working in batches if necessary. Cook for 8 to 12 minutes per side, until they are golden brown and sound hollow when tapped. Do not press them down with a spatula.
- Remove the cooked English muffins and let them cool completely on a wire rack.
- To achieve the classic texture, split the cooled muffins using a fork around the edges, rather than slicing with a knife. Toast before serving.
Notes
- For the best ‘nooks and crannies,’ avoid kneading the dough too much during the first rise. You want to keep some of the air bubbles intact.
- If you want to make these ahead, store cooled, unsplit muffins in an airtight container at room temperature for up to 3 days, or freeze them for up to 3 months. Thaw overnight and toast.
- These are excellent for making homemade breakfast sandwiches or English muffin pizzas.
Nutrition
- Serving Size: 1 muffin
- Calories: 180
- Sugar: 2
- Sodium: 250
- Fat: 4
- Saturated Fat: 2
- Unsaturated Fat: 2
- Trans Fat: 0
- Carbohydrates: 32
- Fiber: 1
- Protein: 5
- Cholesterol: 10