
When that first crisp chill hits the air, I know it’s time to pull out my baking pans for something truly comforting and spectacular. Forget simple cookies; this season calls for layers of flavor! If you’re looking for the ultimate treat that captures everything wonderful about autumn, these rich, layered salted caramel apple cheesecake bars are it. They combine that perfect tartness from the apples with creamy cheesecake and my favorite decadent drizzle. As a teacher for so many years, I’ve worked hard to make sure every step here is crystal clear so you can master these gourmet bar cookies without any drama. These are the special things I always brought to school events or family potlucks—they never last long!
- Why You Will Bake These Salted Caramel Apple Cheesecake Bars
- Essential Ingredients for Perfect Salted Caramel Apple Cheesecake Bars
- Step-by-Step: How to Make Salted Caramel Apple Cheesecake Bars
- Mastering the Homemade Salted Caramel Topping
- Assembling and Finishing Your Salted Caramel Apple Cheesecake Bars
- Tips for Perfect Slicing and Storing Your Salted Caramel Apple Cheesecake Bars
- Variations for Your Apple Cheesecake Bars
- Frequently Asked Questions About Making Salted Caramel Apple Cheesecake Bars
- Estimated Nutritional Snapshot for Salted Caramel Apple Cheesecake Bars
Why You Will Bake These Salted Caramel Apple Cheesecake Bars
I know what you’re thinking: Three layers? That sounds like work! But trust me, this recipe is truly organized for success. Every part builds upon the last to create something amazing, and you’ll end up with some of the best layered dessert bars you’ve ever tasted.
- They balance everything perfectly: that wonderful tart apple, the smooth cheesecake filling, and that salty-sweet caramel finish.
- Baking them in a 9×13 pan means you get lots of bars, making them perfect for holiday dessert trays or office parties.
- Despite looking fancy, the assembly is straightforward once you see how the layers stack up.
Essential Ingredients for Perfect Salted Caramel Apple Cheesecake Bars
Gathering your ingredients beforehand is half the battle won, especially when you’re dealing with this many tasty components! Don’t skimp here; the quality of these items truly makes all the difference in these layered delights. This isn’t just any crust, for instance—we’re starting with a truly special base.
For the Brown Butter Crust:
- 1 1/2 cups all-purpose flour
- 1/2 cup packed light brown sugar
- 1/4 teaspoon salt
- 1/2 cup (1 stick) unsalted butter, browned and cooled slightly (This nuttiness is worth the extra step!)
For the Apple Layer:
- 2 medium Granny Smith apples, peeled, cored, and diced (We need that tart bite!)
- 1 tablespoon granulated sugar
- 1/2 teaspoon ground cinnamon
- 1 tablespoon lemon juice
For the Cheesecake Filling:
- 16 ounces cream cheese, softened (Make sure it’s fully softened so your filling stays smooth.)
- 1/2 cup granulated sugar
- 2 large eggs
- 1 teaspoon vanilla extract
For the Salted Caramel Topping:
- 1 cup granulated sugar
- 1/4 cup water
- 1/2 cup heavy cream, warmed
- 4 tablespoons unsalted butter, cut into pieces
- 1/2 teaspoon sea salt
Once you have everything measured out, check out my tips for making incredible gourmet bar cookies that truly shine!
Step-by-Step: How to Make Salted Caramel Apple Cheesecake Bars
Now for the fun part—layering all these gorgeous flavors together to create those incredible salted caramel apple cheesecake bars! Don’t let the number of steps worry you; we are just building flavor, one component at a time. We’ll start with that nutty base, quickly cook the apples, and then finish with the creamy topping.
Creating the Brown Butter Crust and Initial Bake
This is where the magic starts, honestly! You want to melt your butter slowly in a light-colored pan until those milk solids toast up and smell wonderfully nutty—that’s brown butter, folks. Once it’s cooled just enough so it won’t burn your sugar, mix it with the flour and brown sugar until it looks like damp sand. Press that into your 9×13 pan, and bake it for just 10 minutes at 350 degrees F. We just need it set so it doesn’t get soggy under the layers.
Preparing the Spiced Apple Layer
We’re using Granny Smiths here because they hold their shape beautifully and give us the tartness we need to cut through all that richness. Toss your diced apple pieces with the cinnamon and sugar, and cook them in a small saucepan. Shake the pan gently—don’t stir too much! You only want them slightly tender, not mushy. If they are cooked too much now, they’ll turn to applesauce under the cheesecake, and we definitely don’t want that.
Mixing and Baking the Cheesecake Filling
When mixing this filling, remember my teacher’s mantra: Stop when it’s just combined! Overmixing eggs into cream cheese adds too much air, and that’s how you get cracks when they cool down. Mix the softened cream cheese and sugar until smooth, then gently beat in the eggs one by one, followed by the vanilla. Pour this liquid gold right over those warm apples, and pop it in the oven for about 30 to 35 minutes. Look for the edges to be set, but that middle part must still have a tiny little wobble—that’s how you know it’ll be creamy later!
Mastering the Homemade Salted Caramel Topping
Now that our bars are baked and cooling, we tackle the star of the show: the rich, gorgeous drizzle on top! Making your own homemade salted caramel sauce is so rewarding, and it’s much easier than people think. Just be patient when you’re melting that sugar down to a beautiful amber color. Do not stir it while it’s cooking, or it might crystallize on you!
Once you pull that deeply colored sugar off the heat, the next step requires respect—add your warm heavy cream slowly! I mean it, add it in small splashes while whisking constantly. It will bubble up like a volcano, and trust me, you don’t want to get burned by that hot syrup! After the bubbles calm down, whisk in your butter until it melts right in, and finish with a good pinch of sea salt. Let it cool down a bit until it’s thick enough to hold a ribbon when you drizzle it. That’s the perfect consistency for these incredible bars.
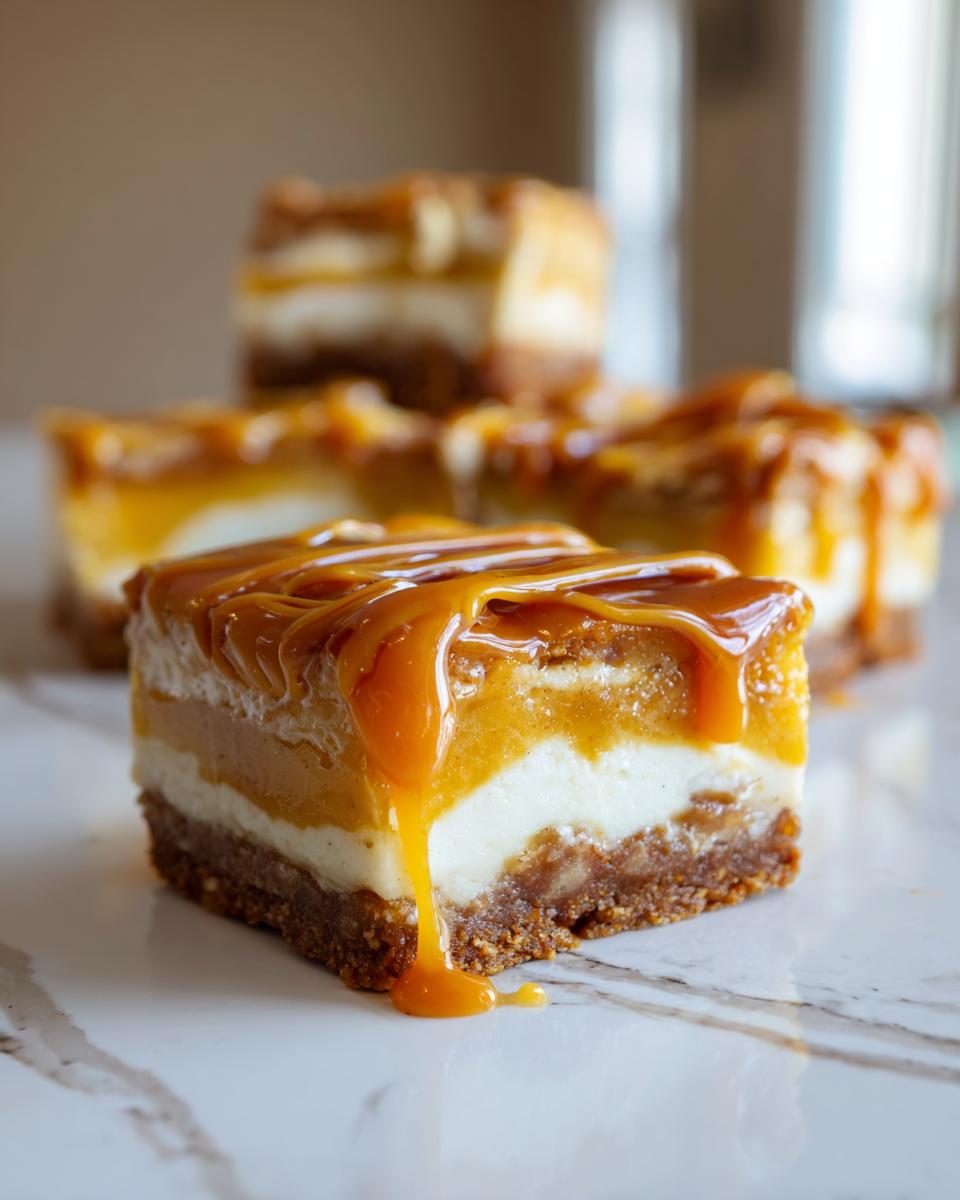
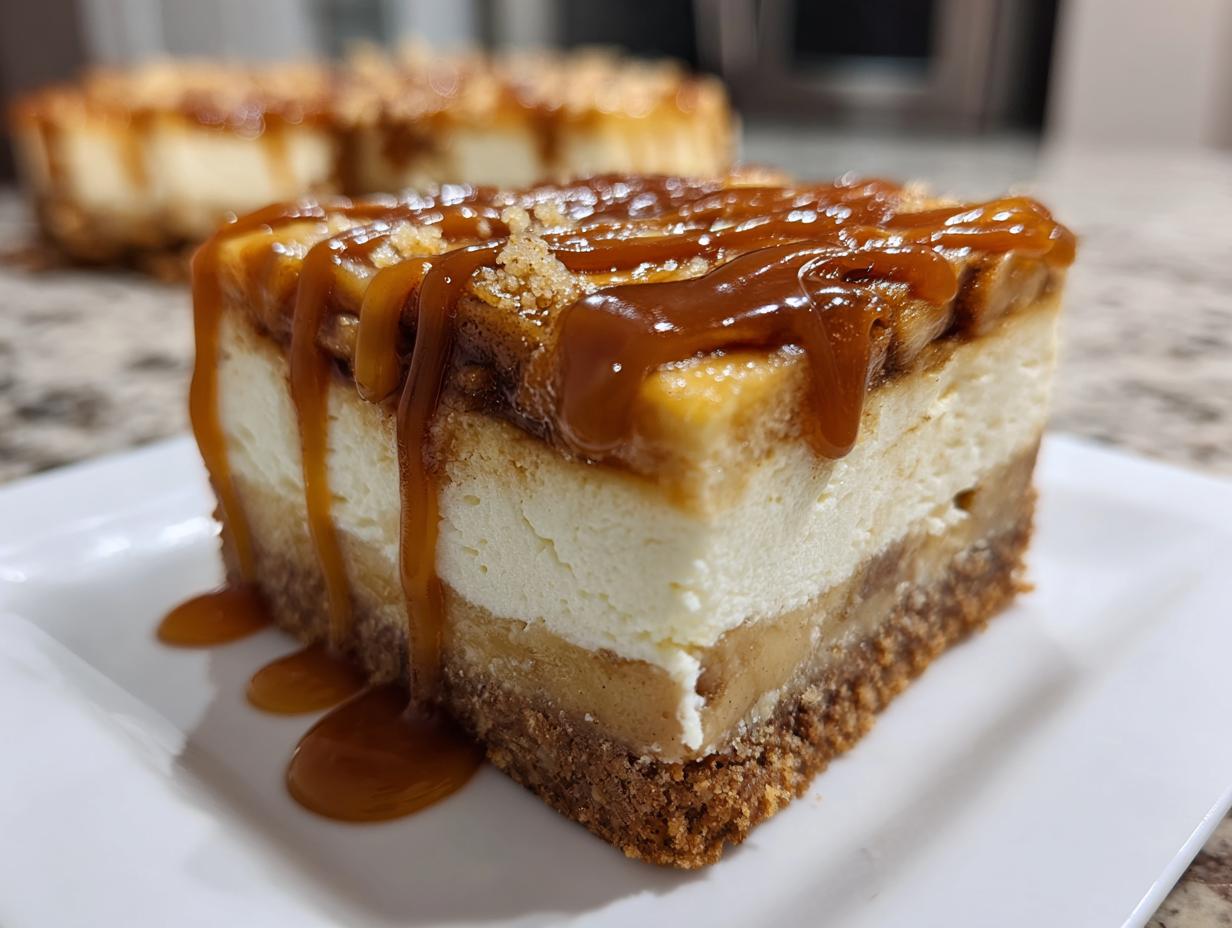
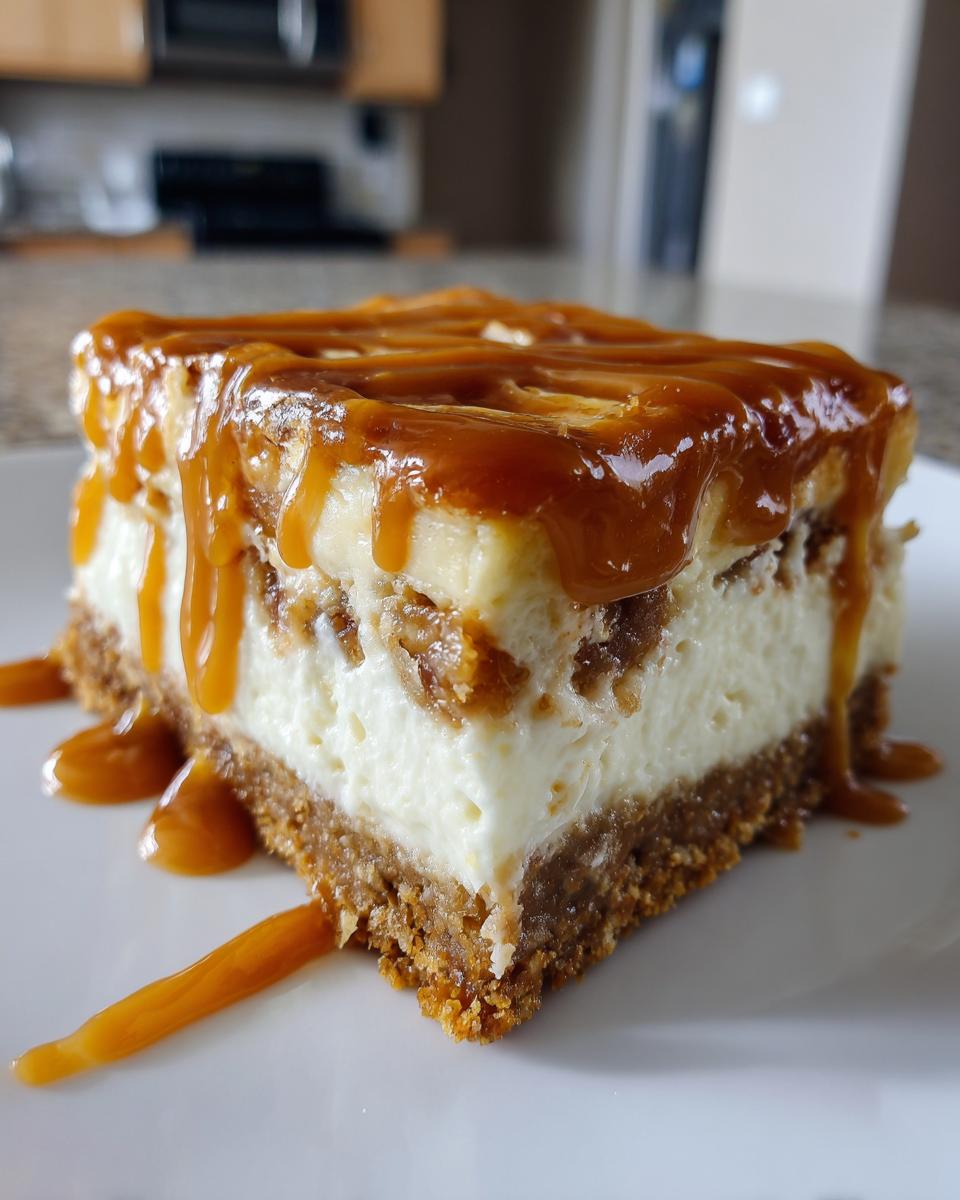
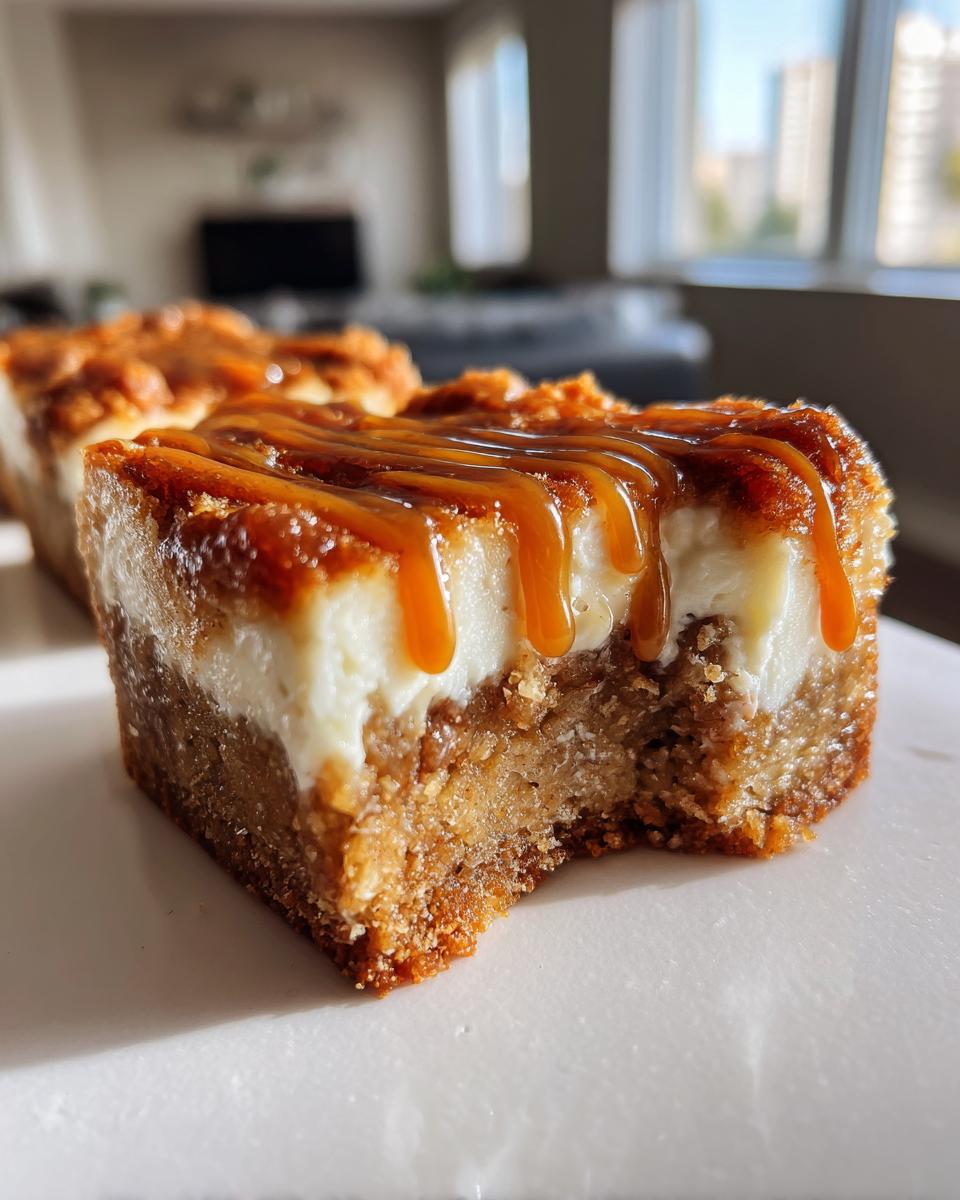
Assembling and Finishing Your Salted Caramel Apple Cheesecake Bars
We’re so close to digging in! After your crust has its little pre-bake and your apples are cooked down slightly, you gently spread those cooked apples over the warm crust. Next, pour that smooth, beautiful cheesecake batter right over the top of the apples. Trust me, letting the warm crust sit for a moment helps keep the apple layer separate. After baking, the hardest part—and I mean the absolute hardest—is letting these cool completely on the rack. Then, you must chill them for at least two hours before you think about drizzling anything. That chilling time is non-negotiable if you want that perfectly dense and creamy cheesecake texture we’re aiming for!
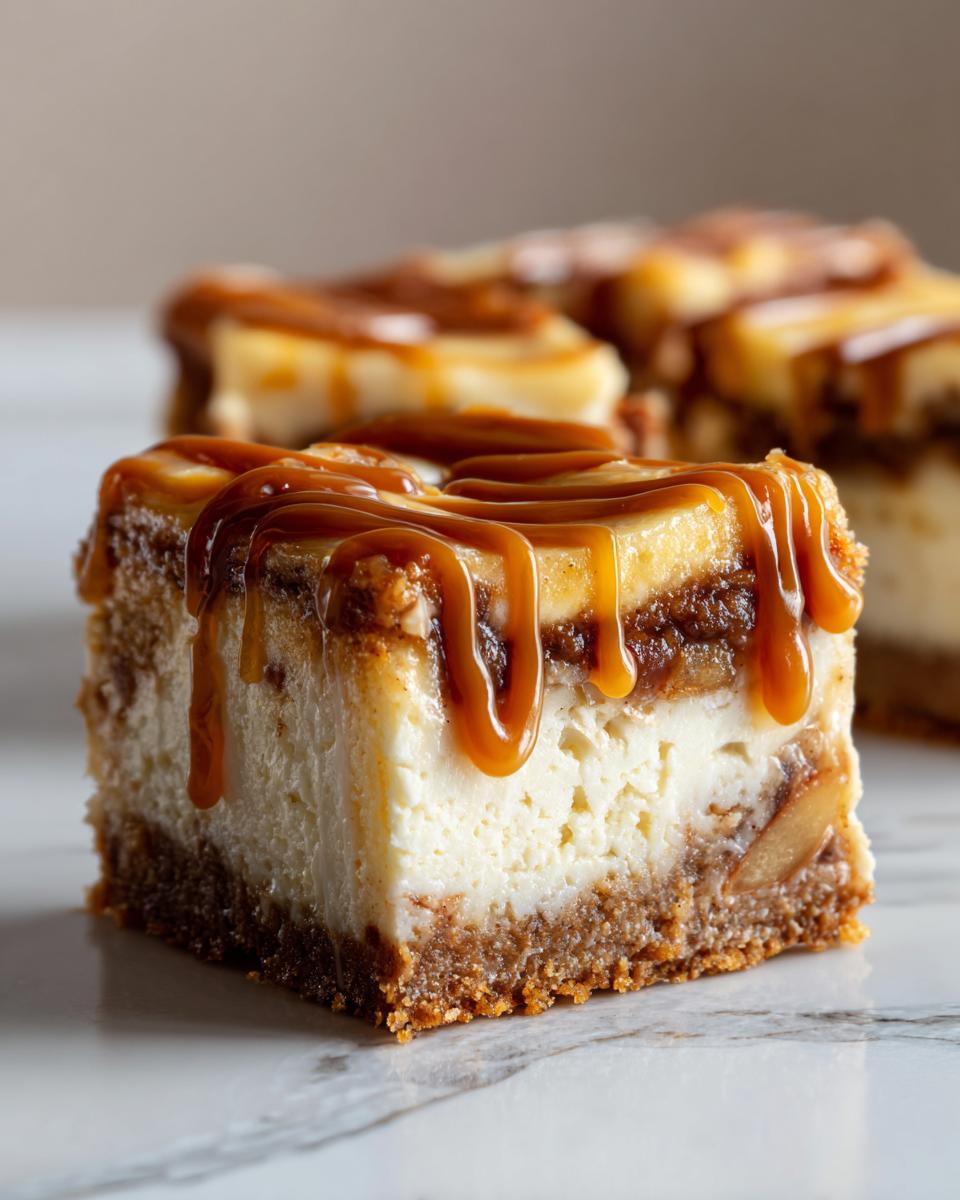
Tips for Perfect Slicing and Storing Your Salted Caramel Apple Cheesecake Bars
Once you’ve waited patiently for these beauties to chill—which helps them set up just right—the final hurdle is slicing them without turning them into a messy pile of deliciousness! This is where a simple trick I use for all my bar cookies comes in handy. Before you cut, grab a sharp, thin knife and dip it in a glass of very hot water. Wipe the blade completely dry, and then make your cut. It helps the creamy cheesecake layer slice cleanly through that sticky caramel.
Repeat that hot-knife dip between every single cut, wipe, and slice. It makes all the difference in presentation!
For storage, since these are cheesecake bars with a fruity filling, they definitely need the refrigerator. Keep any leftovers sealed tightly in an airtight container, perhaps layered with parchment paper if they’re stacked. They stay wonderfully fresh for about four days, which is great because they are perfect for making ahead of time for any party. You can find more ideas for make-ahead desserts like these cheesecake bar recipes for parties!
Variations for Your Apple Cheesecake Bars
I know most of you will stick to this classic recipe—and you should! It’s truly dependable. But sometimes, you want to switch things up, right? If you want a bit more crunch in your crust, try stirring in a half cup of finely chopped pecans or walnuts before pressing it into the pan. It adds a lovely toasted flavor that pairs amazingly with the brown butter!
Also, if you happen to find some sweet Honeycrisp apples instead of tart Granny Smiths, go ahead and use them, but definitely add an extra teaspoon of lemon juice to keep that necessary tang. You could even take these into the realm of a toffee apple cheesecake by tossing in a handful of crushed toffee bits with the apples before baking. See? The base recipe is so sturdy, it handles fun additions so well! For more ways to mix up your favorites, take a look at these holiday dessert bar ideas.
Frequently Asked Questions About Making Salted Caramel Apple Cheesecake Bars
When you’re blending this many delicious flavors, naturally, questions pop up! I’ve gathered a few things people often ask me about perfecting these layered treats. Don’t worry if you’re unsure about any step; that’s why I explain things clearly!
Can I skip browning the butter in the crust?
Oh, I really wouldn’t recommend it, dear. Browning the butter is essential for giving your crust that deep, toasted, and nutty flavor that really complements the apples. White butter yields a fine crust, but brown butter elevates these bars into true gourmet bar cookies. Just take the time to do it slowly; it’s worth the aroma alone!
How do I keep the homemade salted caramel sauce from getting too hard?
That happens if you overcook the sugar, or sometimes if you use too little cream. The key is to let the caramel cool only to a nice drizzling consistency before putting it on the bars, and don’t forget that final tablespoon of butter—fat keeps things soft! If it does seize up when cooling, gently reheat it over very low heat on the stove with a tiny splash of hot water until it loosens back up for drizzling.
Can I make these dessert bars ahead of time?
Yes, you absolutely can! In fact, I think they are even better if you do. After baking and cooling, the key is chilling them completely before adding the caramel and slicing. I often bake these the day before a gathering and keep them chilled overnight. Just wait to drizzle the caramel until an hour or two before serving so it looks its prettiest. They are fantastic for your fall baking recipes rotation!
Why do the apples need to be cooked slightly beforehand?
We cook the apples just until they are tender so that they don’t release too much water while baking underneath the cheesecake layer. If they are raw, they release moisture slowly in the oven, which can sometimes thin out your creamy cheesecake filling. We want that firm, spiced apple texture contrasted against the soft filling!
Estimated Nutritional Snapshot for Salted Caramel Apple Cheesecake Bars
Now, when you’re sharing something this delicious, you might wonder about the numbers. Here is what you can generally expect from one of these lovely treats. Please remember that since these are homemade with generous amounts of butter and cream cheese, these figures are estimates based on the quantities listed in the recipe. They’re certainly for sharing at special occasions!
- Calories: 380
- Sugar: 35g
- Fat: 24g
- Protein: 5g
- Sodium: 210mg
Salted Caramel Apple Cheesecake Bars
Make these layered dessert bars featuring a brown butter crust, spiced apples, creamy cheesecake filling, and a homemade salted caramel drizzle. This recipe creates decadent apple cheesecake bars perfect for fall baking.
- Prep Time: 30 min
- Cook Time: 45 min
- Total Time: 75 min
- Yield: 18 bars 1x
- Category: Dessert
- Method: Baking
- Cuisine: American
- Diet: Vegetarian
Ingredients
- For the Brown Butter Crust: 1 1/2 cups all-purpose flour
- 1/2 cup packed light brown sugar
- 1/4 teaspoon salt
- 1/2 cup (1 stick) unsalted butter, browned and cooled slightly
- For the Apple Layer: 2 medium Granny Smith apples, peeled, cored, and diced
- 1 tablespoon granulated sugar
- 1/2 teaspoon ground cinnamon
- 1 tablespoon lemon juice
- For the Cheesecake Filling: 16 ounces cream cheese, softened
- 1/2 cup granulated sugar
- 2 large eggs
- 1 teaspoon vanilla extract
- For the Salted Caramel Topping: 1 cup granulated sugar
- 1/4 cup water
- 1/2 cup heavy cream, warmed
- 4 tablespoons unsalted butter, cut into pieces
- 1/2 teaspoon sea salt
Instructions
- Preheat your oven to 350 degrees F. Line a 9×13 inch baking pan with parchment paper, leaving an overhang on the sides for easy removal.
- Prepare the crust: In a medium bowl, whisk together the flour and brown sugar. Pour in the cooled brown butter and mix until the mixture resembles coarse crumbs. Press this mixture evenly into the bottom of the prepared pan. Bake the crust for 10 minutes.
- Prepare the apples: While the crust bakes, toss the diced apples with 1 tablespoon sugar, cinnamon, and lemon juice in a small saucepan. Cook over medium heat for 5 to 7 minutes until the apples are slightly tender but still hold their shape. Set aside.
- Prepare the cheesecake filling: In a large bowl, beat the softened cream cheese and 1/2 cup sugar with an electric mixer until smooth. Beat in the eggs one at a time, mixing just until combined after each addition. Mix in the vanilla extract. Do not overmix.
- Assemble the bars: Spread the cooked apple mixture evenly over the warm crust. Pour the cheesecake batter carefully over the apples.
- Bake for 30 to 35 minutes, or until the edges are set and the center has only a slight jiggle. Let the bars cool completely on a wire rack.
- Prepare the salted caramel sauce: In a heavy-bottomed saucepan, combine 1 cup sugar and water. Cook over medium heat without stirring until the sugar dissolves and turns a deep amber color. Remove from heat. Carefully whisk in the warm heavy cream (it will bubble vigorously). Whisk in the butter pieces until melted, then stir in the sea salt. Let the caramel cool slightly until it thickens to a drizzling consistency.
- Once the cheesecake bars are completely cool, drizzle the salted caramel sauce over the top. Chill the bars for at least 2 hours before slicing into squares for the best texture.
Notes
- For the best presentation, use a sharp knife dipped in hot water to cut clean slices after the bars are fully chilled.
- Store leftover salted caramel apple cheesecake bars in an airtight container in the refrigerator for up to 4 days.
- If you prefer a chewier crust, bake it for an additional 3 minutes before adding the apples.
Nutrition
- Serving Size: 1 bar
- Calories: 380
- Sugar: 35
- Sodium: 210
- Fat: 24
- Saturated Fat: 15
- Unsaturated Fat: 9
- Trans Fat: 0.5
- Carbohydrates: 38
- Fiber: 1
- Protein: 5
- Cholesterol: 85