

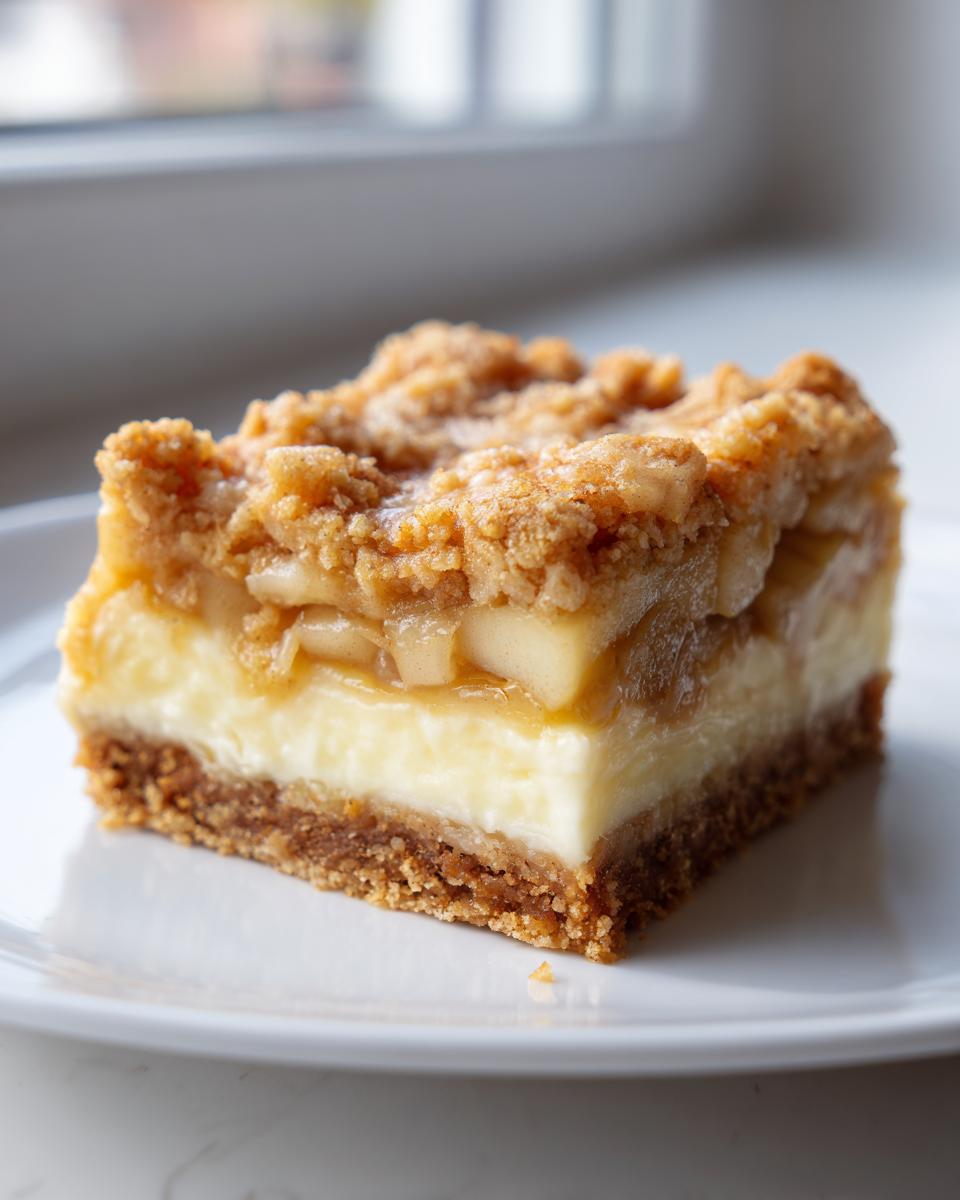
Oh, when the autumn air starts getting crisp, my mind immediately drifts toward all those comforting, warm spices, right? But who says you need gluten to enjoy those amazing fall flavors? I’ve spent years teaching and baking for my family, and I know how tricky gluten-free baking can be, but trust me, these gluten free apple cheesecake bars are nothing short of magic. They give you that luxurious, creamy filling you crave, the perfect little pockets of spiced apple, and a crumbly crust all wrapped up in an easy-to-serve square. This recipe proves that making something truly special and delicious doesn’t have to be complicated—it just needs patience and good, reliable ingredients, which is what my kitchen is all about. We’re making memories here, one perfect bar at a time! If you’re looking for other party favorites to serve alongside these goodies, check out my tips for the best holiday sangria recipe.
- Why You Will Make These Gluten Free Apple Cheesecake Bars Repeatedly
- Essential Ingredients for Perfect Gluten Free Apple Cheesecake Bars
- Step-by-Step Instructions to Make Gluten Free Apple Cheesecake Bars
- Tips for Success When Making Gluten Free Apple Cheesecake Bars
- Ingredient Notes and Substitutions for Gluten Free Dessert Bars
- Storage and Make Ahead Apple Dessert Tips
- Serving Suggestions for Apple Cinnamon Dessert Squares
- Frequently Asked Questions About Gluten Free Apple Cheesecake Bars
- Appreciating Your Homemade Gluten Free Apple Cheesecake Bars
- Appreciating Your Homemade Gluten Free Apple Cheesecake Bars
Why You Will Make These Gluten Free Apple Cheesecake Bars Repeatedly
There are a lot of dessert bars out there, but these truly stand out, especially when you’re trying to stick to a gluten-free plan. Forget wrestling with a tricky springform pan; these are sturdy, simple, and frankly, irresistible. Here’s what makes them a winner in my cookbook:
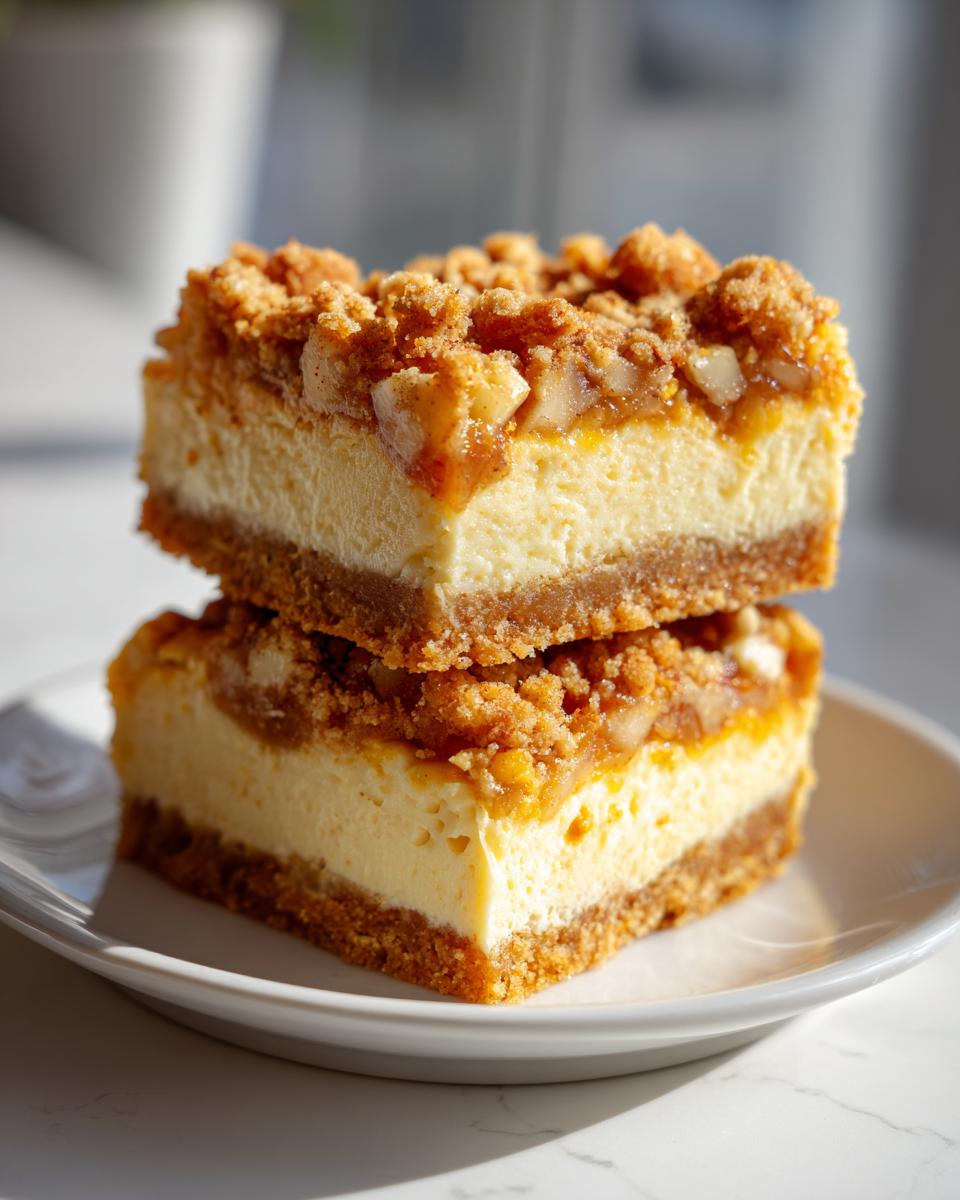
- No Springform Pan Required: We bake these right in an 8×8 pan lined with parchment. That means less fuss when it comes time to get them out, giving you beautifully straight edges every time!
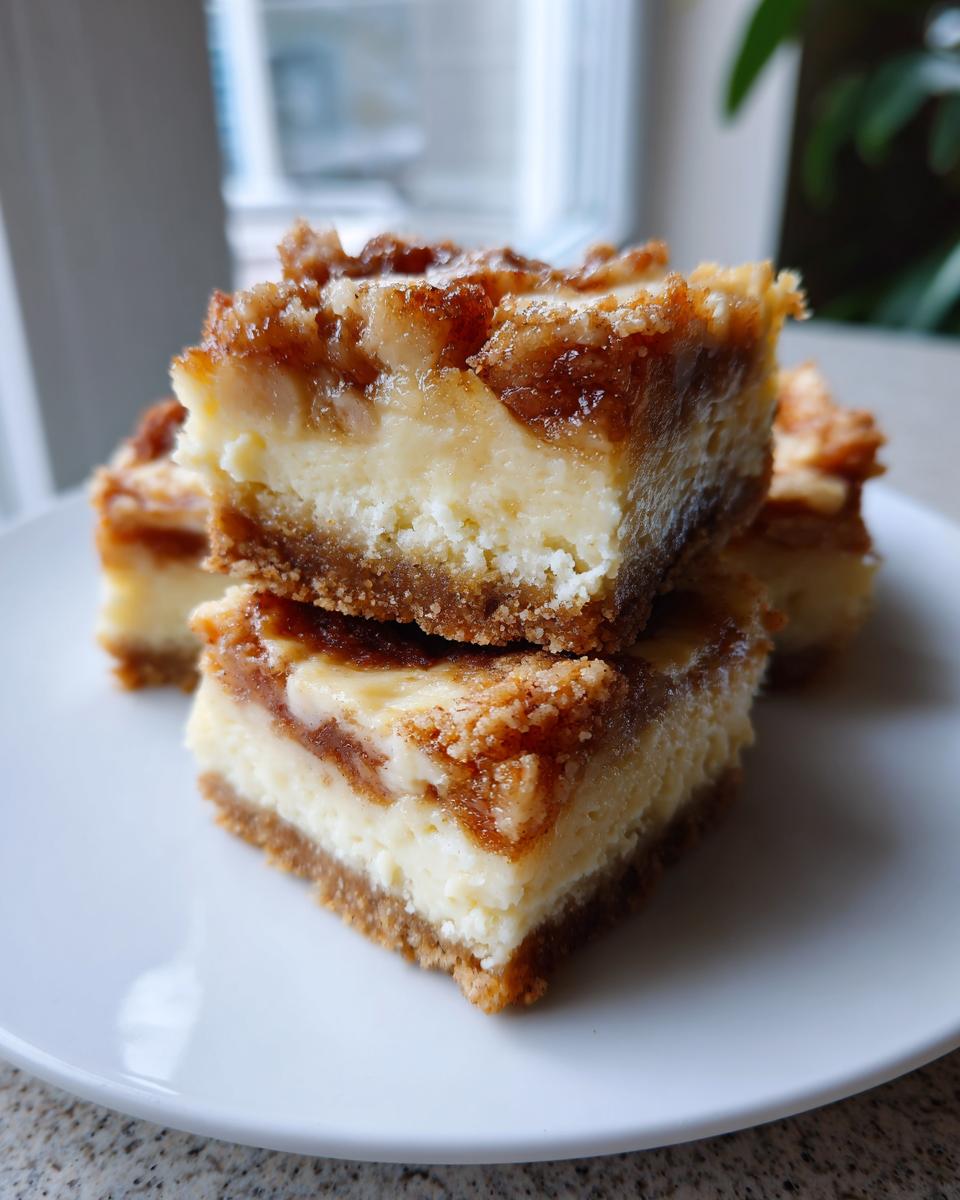
- Guaranteed Creamy Texture: That rich, tangy cheesecake layer sets up perfectly. It’s smooth, dense, and won’t crack like some traditional cheesecakes if you follow the chilling instructions.
- Amazing Apple Cinnamon Flavor: The little chunks of spiced apple nestled beneath the cream cheese give you that cozy fall dessert vibe we all love, without overpowering the cheesecake itself.
- Super Sturdy Crust: Because we use a blend of all-purpose and almond flour, the crust holds up beautifully. It won’t crumble into a million pieces when you pick it up.
- Perfect for Make-Ahead: Truly, these are better the next day after a long chill, making them one of my favorite simple weeknight dinners companions for dessert prep!
- Inherently Gluten Free: You don’t have to make any complicated substitutions; this recipe is designed from the ground up using reliable GF flours so everyone at the table can enjoy them.
Essential Ingredients for Perfect Gluten Free Apple Cheesecake Bars
Now that you know these bars are worth the effort, let’s talk about what goes into them! When you’re baking gluten free, the quality and type of flour you choose is absolutely vital. I always rely on a good, balanced gluten-free all-purpose flour blend that contains xanthan gum for structure, but I enhance it with almond flour to keep the crust tender. The whole point of these decadent squares is that creamy texture, so the filling ingredients need to be top-notch, too. My experience in the kitchen tells me that using room-temperature cream cheese is the biggest secret to avoiding lumps. Let’s break down exactly what you need for the three distinct layers.
For more insight into making sure your GF flours cooperate, I wrote a whole piece on baking with gluten free flour blend.
For the Sturdy Gluten Free Crust
This crust is buttery and just crumbly enough—the perfect base for something rich like cheesecake.
- 1 1/2 cups gluten free all-purpose flour blend (with xanthan gum)
- 1/2 cup almond flour
- 1/4 cup granulated sugar
- 1/4 teaspoon salt
- 1/2 cup (1 stick) cold unsalted butter, cut into pieces
Carla’s Note: If your specific GF blend doesn’t already have xanthan gum listed in the ingredients, please add about 1/2 teaspoon here. That’s the little bit of glue we need to keep this crust from falling apart on you!
For the Spiced Apple Layer
We want the apples to soften but not dissolve into total mush. Firm apples are your friends here!
- 2 medium apples (I love Honeycrisp or Granny Smith for tartness)
- 1 tablespoon lemon juice
- 2 tablespoons brown sugar
- 1/2 teaspoon ground cinnamon
- 1/4 teaspoon ground nutmeg
For the Creamy Cheesecake Filling
This is where the “cheesecake” magic happens. Remember, we are avoiding lumps!
- 16 ounces cream cheese (fully softened—I mean fully, leave it out for hours!)
- 1/2 cup granulated sugar
- 1/4 cup sour cream
- 2 large eggs
- 1 teaspoon vanilla extract
Make sure that cream cheese is genuinely soft. If it looks firm in the middle, your electric mixer will fight you, and you risk lumps in your final bar. We want smooth, not stressed!
Step-by-Step Instructions to Make Gluten Free Apple Cheesecake Bars
Putting these wonderful gluten free apple cheesecake bars together is always my favorite part of the process. It moves quickly once you have your ingredients lined up, which is why I always tell folks to get their prep work done before turning on the oven! We move through three main stages here: getting that crust ready, mixing the layers, and then the bake. Remember, taking your time with the chilling phase later is just as important as the baking itself for achieving that signature, creamy texture we love.
Preparing the Pan and Baking the Crust
First things first, we need to get that oven warmed up to 350 degrees F. Don’t skip lining your 8×8 inch baking pan with parchment paper! This is critical for removal later. I like to let the paper hang over two sides like little handles—that’s how you’ll lift the whole thing out cleanly once it’s set. Now, take your crumb mixture for the crust and press it down firmly and evenly across the bottom of the parchment-lined pan. We only give this a quick head start in the oven—about 12 minutes—just enough to set it before we add the apples. Pull it out when that time is up and let it cool just a touch while you work on the next steps.
Mixing the Apple Filling and Cheesecake Batter
See those apple pieces tossed with sugar and cinnamon? Sprinkle those evenly right over that still-warm crust. They don’t need to be perfect, just a nice, consistent layer. Now for the main event! In a separate large bowl, beat that softened cream cheese until it’s silky smooth. Then, slowly add your sugar, followed by the sour cream, eggs, and vanilla. This is where you need to listen to your mixer! If you’re interested in deeper insights on the technique for the filling, check out my guide on how to make gluten-free cheesecake. Mix it just until everything disappears! Seriously, if you beat this cheesecake batter too long, you introduce too much air, and that’s how you end up with cracks later. We want smooth, not fluffy!
Assembling and Baking Your Gluten Free Apple Cheesecake Bars
Once your apples are evenly distributed on the crust, very gently pour that smooth cheesecake batter right over the top. Use a spatula to spread it out so it just kisses the edges of the pan without disturbing the apples underneath too much. Pop the pan into the preheated oven. You’re looking for the edges to be totally set, golden just a little bit, and the center should still have a tiny quiver when you lightly nudge the pan—that slight jiggle is your sign of doneness, usually around 35 to 40 minutes. Don’t wait until the center is absolutely solid, or you’ll overbake it!
Cooling and Chilling for Clean Cuts
You might be tempted to slice these right away because they smell divine, but hold your horses! First, let them cool completely on a wire rack until they hit room temperature. This lets the residual heat dissipate safely. Once cooled, cover the pan tightly with plastic wrap and move them straight into the refrigerator. This chilling time is non-negotiable if you want those beautiful squares. You need a minimum of 4 hours, but I swear by letting them chill overnight. That extended chill is what guarantees the Perfect Texture Cheesecake Bars and makes slicing them into neat portions so easy.
Tips for Success When Making Gluten Free Apple Cheesecake Bars
Baking gluten-free items, especially delicate things like cheesecake, takes a little extra know-how, but I’ve learned a few tricks over the years that make things just foolproof. The biggest tip I can give you is to manage your chilling time—seriously, don’t rush it! That long, cold rest is what helps those flavors marry and firms up the creamy layer so you get those wonderfully clean squares when you use the parchment handles to lift them out. Also, remember that moisture is key in GF baking, which is why we happily include almond flour in that crust; it keeps things from getting dry.
If you find your kitchen is just too warm, or you’re worried about the cream cheese getting too soft while you’re mixing, try chilling the cream cheese bowl in the freezer for about 10 minutes beforehand. A little preventative cooling goes a long way toward achieving that smooth, lump-free fillling. For more insights into these tricky doughs, read my guide on baking with gluten free flour blend.
Ingredient Notes and Substitutions for Gluten Free Dessert Bars
I often get questions about tweaking recipes, especially when dealing with specialty flours or dairy-free needs. This recipe is built to be highly dependable for us gluten-free bakers, but I know we all have different pantries! Don’t feel locked in, but please use these substitutions cautiously, because they can change the final texture of your gluten free dessert bars.
When it comes to the crust flour, if you don’t have a specific GF blend, you can usually swap it out for a 1:1 mix, but remember to add that xanthan gum we talked about—about 1/2 teaspoon per full cup of flour needed. Almond flour is there for richness and helping that crust stay tender, so if you need to skip it entirely (maybe due to a nut allergy), you can try replacing that 1/2 cup volume with more of your main GF blend, but expect the crust to be slightly firmer.
For the cheesecake filling, sometimes sour cream is just not on hand! You can absolutely substitute it with plain Greek yogurt. Since Greek yogurt tends to be a bit thicker, I recommend thinning it slightly with about a teaspoon of milk or water until it has a similar drop consistency to your sour cream before mixing it in. This keeps the essential tang without messing up the water ratio too much, ensuring we still get that lovely, creamy finish.
Storage and Make Ahead Apple Dessert Tips
One of the beauties of baking cheesecake bars, especially ones as satisfying as these gluten free apple cheesecake bars, is that they taste even better the next day. You actually *need* to make these ahead to get the best texture, so planning ahead is built right into this recipe! This makes them a fantastic choice when you’re hosting or just want a reliable treat ready for the week.
Once those bars are completely chilled—and remember, I insist on that overnight rest for the cleanest cuts—you can store them covered tightly in the refrigerator. They will stay wonderfully fresh and creamy for about 4 to 5 days. Because they are so moist from the apples and the cream cheese, they don’t dry out quickly at all!
If you need to plan further out, these freeze like a dream. Yes, cheesecake freezes beautifully! I always slice them before I freeze them—it saves so much hassle later. Just wrap each individual square tightly in plastic wrap, and then place a few wrapped bars into a sturdy freezer bag. You can label the bag by simply calling them your Make Ahead Apple Dessert stash! They’ll keep well in the freezer for up to two months. When you’re ready to serve them, just pull out however many you need and let them thaw slowly in the refrigerator overnight. They come out tasting just as rich and creamy as when they went in. I’ve got some other great make-ahead ideas you might enjoy on my post detailing make ahead apple dessert options too!
Serving Suggestions for Apple Cinnamon Dessert Squares
You’ve put in all the hard work, and now it’s time to make these beautiful gluten free apple cheesecake bars look as amazing as they taste! While they are certainly wonderful all on their own after that long, cold chill, a little something extra on top can just make them feel special, especially if you are serving company. Remember, we believe good food should be joyful, and presentation is part of that joy!
Since we have those lovely layers of spiced apple and creamy cheese, you don’t need anything too heavy running over the top. A light drizzle works wonders, or sometimes just a tiny puff of cream on the side is all it takes to elevate these from a casual snack to a true dessert showstopper.

Here are a few simple ways I like to dress up these apple cinnamon dessert squares right before serving:
- The Classic Drizzle: You can never go wrong with a store-bought or homemade caramel sauce! Just warm it slightly so it drizzles nicely—don’t pour it on thick, just a thin zig-zag pattern across the top of each square.
- A Dusting of Warmth: After you slice the bars, use a tiny sieve to gently dust the top of each square with a mix of powdered sugar and just a pinch more cinnamon. It looks elegant and smells incredible.
- Maple Syrup Finish: If you want a more rustic, wholesome topping, a tiny drizzle of pure maple syrup across the top complements the brown sugar in the crust beautifully.
- Whipped Topping: Serve the bars chilled, but offer a dollop of lightly sweetened fresh whipped cream right on the side of the plate. The coolness contrasts wonderfully with the spiced apple notes.
No matter how you serve them, a beautiful garnish makes taking that first bite even sweeter. If you’re looking for more inspiration around those cozy flavors, I have a few other great ideas on my post detailing apple cinnamon dessert squares!
Frequently Asked Questions About Gluten Free Apple Cheesecake Bars
We’ve covered the whole process, from mixing the crust to the final chill, but I know when you venture into new territory, like baking gluten free dessert bars, you might have a few lingering doubts. That’s perfectly normal! I’ve gathered the questions I get most often when readers try this recipe for the first time. Don’t worry if you’re new to baking with gluten free flour blend; we’ll sort it out!
Can I use a different type of apple, or must they be Honeycrisp?
That’s the beauty of flexibility in the kitchen! While I personally love the tartness and firmness of Honeycrisp or Granny Smith apples—they hold their shape so well during baking—you certainly have options for your apple cheesecake recipe no gluten. Braeburn or Fuji apples work wonderfully too. The key here is avoiding apples that turn to complete mush quickly, like McIntosh. If your apple softens too much, it can add extra liquid into the layers, which we really don’t want in a cheesecake bar.
What is the secret to keeping my gluten free crust from crumbling when I cut the bars?
Ah, the crust! That’s often where easy gluten free cheesecake squares can run into trouble. The most important step here is pressing it down firmly and evenly before that initial 12-minute bake. You want it compacted! Also, make sure your butter is genuinely cold when you cut it into the flour mix; warm butter leads to a greasy, loose crust that can’t hold its shape. And, of course, that long, cold chill time after baking is what locks everything together, ensuring you get those beautiful, clean squares when you use the parchment handles to lift them out.
How do I achieve that perfect creamy texture in the filling?
This is the heart of any good cheesecake, GF or not! The main culprits for a poor texture are overmixing the eggs (which adds air and causes cracks) and under-chilling. Make sure your cream cheese is completely softened—it should yield instantly if pressed lightly—and only mix the eggs in until you just see the mixture become uniform. Then, the chilling is non-negotiable. I always recommend refrigerating them for a minimum of four hours, but seriously, easy gluten free cheesecake squares are always superior after an overnight rest. That chill time firms up the dairy structure perfectly.
Can I skip the almond flour in the crust?
You absolutely can skip the almond flour if you have concerns, but you’ll need to adjust the other dry ingredients in the crust. Since almond flour adds richness and a bit of tender fat structure that regular GF flour doesn’t quite replicate, replace that 1/2 cup of almond flour with 1/2 cup of your main GF all-purpose flour blend. Just be aware that the resulting crust might feel slightly less rich or a touch more dense. For the best GF baked goods, I really encourage keeping some form of nut or seed flour in there if possible!
Appreciating Your Homemade Gluten Free Apple Cheesecake Bars
Now that you have these incredible, creamy, spiced bars cooling in the fridge, I’d truly love to hear what you think! Baking is a journey, and sharing the triumphs—and maybe noting what you learned for next time—is what makes our little community so special here at Cooking by Carla. Did the apple spices sing? Did that GF crust hold up just the way you hoped? Please take a moment to leave a rating below; it helps other home bakers feel confident trying out these recipes. And if you snapped a picture while you were admiring your handiwork, feel free to share it with us over on the contact page!
I always find so much joy in knowing one of my family recipes is making its way into your home. If you try these, click around and check out the About page to see more of my story, or reach out using the contact form if you have any questions that bubble up during the process!
PrintGluten Free Apple Cheesecake Bars
Make comforting, creamy gluten free apple cheesecake bars with a simple, sturdy crust. This recipe delivers classic fall flavor in an easy-to-serve square format.
- Prep Time: 25 min
- Cook Time: 40 min
- Total Time: 5 hours 5 minutes
- Yield: 16 bars
- Category: Dessert
- Method: Baking
- Cuisine: American
- Diet: Gluten Free
Ingredients
- For the Crust: 1 1/2 cups gluten free all-purpose flour blend (with xanthan gum), 1/2 cup almond flour, 1/4 cup granulated sugar, 1/4 teaspoon salt, 1/2 cup (1 stick) cold unsalted butter, cut into pieces
- For the Apple Layer: 2 medium apples (like Honeycrisp or Granny Smith), peeled, cored, and diced small, 1 tablespoon lemon juice, 2 tablespoons brown sugar, 1/2 teaspoon ground cinnamon, 1/4 teaspoon ground nutmeg
- For the Cheesecake Filling: 16 ounces cream cheese, softened, 1/2 cup granulated sugar, 1/4 cup sour cream, 2 large eggs, 1 teaspoon vanilla extract
Instructions
- Preheat your oven to 350 degrees F. Line an 8×8 inch baking pan with parchment paper, leaving an overhang on two sides for easy removal.
- Prepare the crust: In a medium bowl, whisk together the gluten free flour blend, almond flour, sugar, and salt. Cut in the cold butter using a pastry blender or your fingers until the mixture resembles coarse crumbs.
- Press the crust mixture evenly into the bottom of the prepared pan. Bake for 12 minutes. Remove from the oven and set aside while you prepare the apples.
- Prepare the apple layer: In a small bowl, toss the diced apples with lemon juice, brown sugar, cinnamon, and nutmeg. Set aside.
- Prepare the cheesecake filling: In a large bowl, beat the softened cream cheese with an electric mixer until smooth. Gradually beat in the sugar until combined. Mix in the sour cream, eggs, and vanilla extract until just smooth. Do not overmix.
- Assemble the bars: Sprinkle the seasoned apple pieces evenly over the warm crust. Gently pour the cheesecake batter over the apples, spreading it carefully to cover the surface.
- Bake for 35 to 40 minutes, or until the edges are set and the center has only a slight jiggle.
- Cool completely on a wire rack. Once cooled to room temperature, cover the pan and refrigerate for at least 4 hours, or preferably overnight, before lifting out using the parchment overhang and cutting into squares.
Notes
- If your gluten free flour blend does not contain xanthan gum, add 1/2 teaspoon to the dry crust ingredients.
- For a crispier crust, you can bake it for 15 minutes instead of 12.
- If you prefer a smoother apple layer, you can cook the apples briefly on the stovetop until slightly tender before layering them onto the crust.
- Chill time is essential for clean cuts; do not rush this step.
Nutrition
- Serving Size: 1 bar
- Calories: 280
- Sugar: 20
- Sodium: 150
- Fat: 19
- Saturated Fat: 11
- Unsaturated Fat: 8
- Trans Fat: 0
- Carbohydrates: 24
- Fiber: 1
- Protein: 5
- Cholesterol: 65