
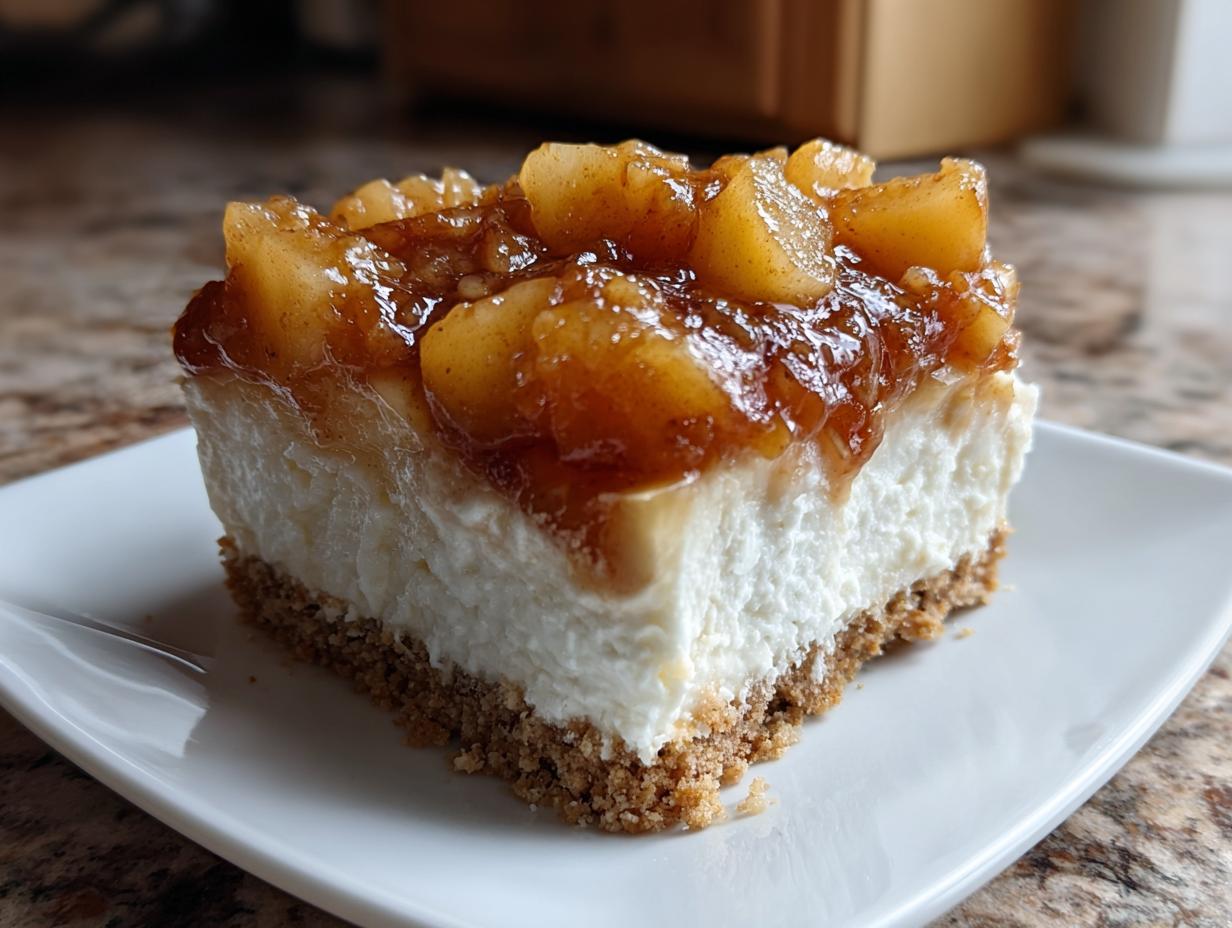
Oh, my heart! When the weather gets warm or I simply don’t want to heat up the kitchen, I crave something cool, comforting, and utterly delicious. That’s why I’m sharing my absolute favorite secret weapon: these incredible no bake apple cheesecake bars. You read that right—zero oven time! Seriously, pulling these beautiful, creamy squares out of the fridge feels like winning the dessert lottery. They have the perfect tangy, sweet cream cheese layer, a buttery graham cracker crust, and a spiced apple topping that just tastes like home. I swear, these are the most reliable no bake dessert bars for last-minute potlucks or just when the grandkids come over unexpectedly. If you need a show-stopping, yet simple, approach to apple cheesecake, this is it.
- Why You Will Make These no bake apple cheesecake bars Again and Again
- Essential Ingredients for Your Simple Apple Cheesecake Slice
- Tips for Success Making Your no bake apple cheesecake bars
- Step-by-Step Instructions for Perfect no bake apple cheesecake bars
- Ingredient Notes and Substitutions for your no bake apple cheesecake bars
- Storage and Make Ahead Apple Cheesecake Tips
- Serving Suggestions for this Quick Apple Cream Cheese Dessert
- Frequently Asked Questions about no bake apple cheesecake bars
- Share Your Experience Making These Apple Topping Cheesecake Bars
Why You Will Make These no bake apple cheesecake bars Again and Again
I know you’re looking for reliability, and that’s exactly what these bars offer. Unlike fussy baked goods, these no bake apple cheesecake bars practically make themselves, and they always impress. Here are a few reasons why I keep coming back to this recipe:
- The Oven Stays Off! This is the biggest win, especially during the summer. You get all the decadent flavor of cheesecake without fighting the heat. It’s truly the best kind of no bake dessert bar when the air conditioning is working overtime.
- Speedy Assembly: Between crushing the crumbs and mixing the filling, you’re looking at maybe 20 minutes of active time. It’s so much faster than traditional baking, making it perfect for when you need a quick apple cream cheese dessert in a pinch.
- Perfect Texture Every Time: Since we skip the oven, there’s no worrying about cracks or uneven baking. The texture combination—crunchy crust, fluffy filling, soft apple topping—is guaranteed foolproof as long as you chill it well.
- Make-Ahead Magic: These bars actually taste better the next day! They hold up beautifully in the fridge, which means you can prepare them entirely the night before a party. That peace of mind is worth everything.
- Pure Comfort Flavor: It’s the taste of apple pie meeting classic cheesecake. It’s comforting, tangy, and sweet all at once. It’s simply the best no bake apple dessert for folks who love familiar, warm spices in a cool format.
Trust me, once you see how simple it is to create such a creamy apple dessert square without breaking a sweat, you’ll be whipping these up all year long.
Essential Ingredients for Your Simple Apple Cheesecake Slice
When you’re making a no bake apple cheesecake bars recipe, the ingredient list needs to be simple, but every item matters because we aren’t relying on the oven to bake out any strange flavors. It’s all about texture and balance here, my friends. I’ve listed out exactly what you need for the crust, the creamy layer, and that beautiful apple topping.
Now, here’s one of Carla’s little secrets for keeping this truly easy: Don’t mess with the apple pie filling! Yes, you could make applesauce from scratch—and I have a wonderful recipe for that if you’re interested, my easy homemade applesauce is famous—but for this specific recipe, that canned filling is what keeps things fast and guarantees a perfect, spiced flavor every single time. Look for a brand you already trust!
Here is exactly what you will need to gather:
- 1 1/2 cups graham cracker crumbs (Make sure they are fine!)
- 1/4 cup granulated sugar (For the crust—this helps it set nicely)
- 6 tablespoons unsalted butter, melted (Make sure it’s melted, not hot!)
- 1 (8 ounce) package cream cheese, softened (This needs to be truly soft, take it out early!)
- 1 cup powdered sugar (Also called confectioners’ sugar)
- 1 teaspoon vanilla extract (Use the real stuff if you can!)
- 1 cup heavy whipping cream, cold (Crucial that this is cold for whipping!)
- 1 (21 ounce) can apple pie filling (See my note above—this is our flavor shortcut!)
With these core ingredients, you have everything you need for your simple apple cheesecake slice. No fancy gelatin or weird stabilizers required, just good old-fashioned creaminess and buttery crust!
Tips for Success Making Your no bake apple cheesecake bars
Since we aren’t using the oven to coax these bars into shape, the success of these no bake apple cheesecake bars rests entirely on your prep work and your patience in the fridge. Don’t worry, it isn’t hard, but paying attention to a few small details will take your dessert from “good” to “the best no bake apple dessert” your friends have ever tasted!
When folks ask me how to make no bake cheesecake bars that don’t turn into a puddle when sliced, here are the three things I always tell them to watch closely. Texture is everything in a chilled dessert!
Make Sure That Cream Cheese is Truly Soft
I cannot stress this enough: your cream cheese needs to be room temperature. If it’s cold, you will end up with tiny, stubborn lumps in your filling, and no amount of mixing will fix them. I usually take mine out about an hour before I plan to start. It should yield easily when you press it gently with your finger. A fully softened cream cheese blends into a silky smooth base, ready to accept the powdered sugar and vanilla like a dream. If it’s lumpy, the whole filling gets slightly gritty, and we want velvety smooth here!
Whip That Cream Properly for Structure
The heavy whipping cream is what gives our filling that airy lift without baking powder. It needs to hold its shape when beaten. Make sure your bowl and your beaters are clean—any speck of fat or grease prevents the cream from whipping up correctly. You are aiming for stiff peaks. When you lift the beater out, the peak should stand straight up without drooping over. If you look at my recipe for creamy white chocolate cheesecake, you’ll see I use this same technique there; it’s the foundation of lightness!
Patience is Required for the Chill Time
This is where most people rush things, and it leads to sloppy refrigerated dessert bars. The recipe calls for at least six hours, but honestly, overnight is always better. That long, slow chill allows the fats in the cream cheese and cream to completely firm up around the air bubbles you created. If you slice them too soon, you’ll just end up with a runny mess when cutting into your squares. Let the refrigeration do the hard work—it’s the replacement for your oven!
The Secret to Clean Slicing
Once those bars are perfectly chilled, you need a clean cut to show off those pretty layers. Use a large, sharp knife. For the neatest lines possible, try this trick: dip the knife into a tall glass of hot water, wipe the blade completely dry with a paper towel, and then make your cut. Wipe and dip between *every single slice*. This prevents the knife from dragging the soft filling and keeps your edges sharp, resulting in beautiful creamy apple dessert squares.

Step-by-Step Instructions for Perfect no bake apple cheesecake bars
I always tell my students—and now you, my friends—that following the steps exactly, especially when we aren’t baking, is the difference between a dessert that holds its shape and one that collapses when you try to serve it! Don’t rush the chill time, because that cold temperature is doing all the heavy lifting here. This process is so straightforward, which is why it holds a permanent spot in my recipe rotation for when I need a reliable make ahead apple cheesecake.
Creating the no bake graham cracker crust desserts Base
First things first, we give our crust the best start possible. This is the foundation that needs to be rock solid!
- Get your 8×8 inch pan ready. I always line mine with parchment paper, making sure two sides have paper hanging over the edges. These flaps act like built-in handles, letting you lift the entire chilled dessert out like a single block, which is the key to clean bar slicing later.
- In a bowl, mix up your graham cracker crumbs and the 1/4 cup of sugar until they look uniform.
- Pour in the 6 tablespoons of melted butter. Stir this vigorously until every crumb looks damp. It should clump nicely when you press a small amount between your fingers.
- Press this mixture firmly and evenly into the bottom of your prepared pan. I use the bottom of a flat measuring cup to really compact it down into a tight layer.
- Pop that pan into the freezer while you whip up the creamy filling. A few minutes in the freezer helps lock that crust in place!
Whipping Up the Creamy Apple Filling for your Chilled Apple Dessert Bars
Now for the star of the show! We need to create a light, airy, yet stable filling that doesn’t shrink or melt once it’s chilled. Remember that the volume comes from the air we beat into the cream, so be gentle when mixing it all together.
- In a big bowl, take your softened cream cheese and beat it until it’s totally smooth—no lumps allowed!
- Slowly work in the powdered sugar and vanilla extract until everything is just combined and looks creamy. Give it a good scrape down the sides of the bowl.
- In a *separate, clean* bowl, take your cold heavy whipping cream and beat it until it forms stiff peaks. This takes a few minutes, but those stiff peaks are what give us the structure in these no bake dessert bars.
- Now, this is important: Gently fold the whipped cream into the cream cheese mixture. Use a big spatula and cut down through the middle and then scoop up from the bottom. Do this only until you see no more white streaks. Stop mixing right there! Overmixing deflates the air we just worked so hard to incorporate.
Assembling and Chilling the simple apple cheesecake slice
We are very close to having these delicious refrigerated dessert bars ready for their long nap in the cold!
- Take your pan from the freezer. Spread that beautiful cream cheese mixture evenly over the chilled crust. Smooth the top gently with your offset spatula.
- Open up that can of apple pie filling. Spoon the entire amount right over the cream cheese layer. Just gently spread it out to cover the surface. Don’t press it down hard; we want it to sit lightly on top.
- Cover the pan loosely with plastic wrap. We don’t want the top to dry out or absorb fridge smells.
- Place it in the refrigerator for a minimum of 6 hours. Honestly, baking this in the fridge overnight means you wake up to the best simple apple cheesecake slice possible! Do not try to slice before the 6-hour mark, or it will just be soup!
Ingredient Notes and Substitutions for your no bake apple cheesecake bars
I always love talking about how we can tweak a good recipe just a little bit to make it our own, but without compromising that wonderful texture we worked so hard to achieve in the filling. Since these are no bake apple cheesecake bars, we have to be mindful of what we switch out, especially since the cold does all the setting!
I want you to feel confident substituting things you have on hand, but let’s talk about flavor and structure first. I put a note in the instructions about using a hot knife for clean slicing, but it really bears repeating here because nobody wants a messy slab when they are serving these beautiful refrigerated dessert bars.
The Secret to Clean Slicing Every Single Time
If you skip the chilling time, you’ll end up with a mess no matter what! But assuming you chilled them long enough, the cutting step is where you show off your work. Grab a long, sharp chef’s knife—the longer the better. Heat that blade up under very hot tap water, then wipe it completely dry with a clean kitchen towel. Slice through the chilled dessert smoothly. Rinse, dry, and repeat for every single cut. It keeps the knife from sticking or dragging through the layers. This simple trick ensures your final presentation looks professional, even though this is such an easy base recipe!
Changing Up the Graham Cracker Crust Base
The graham cracker base is classic and pairs wonderfully with the apple, but you are absolutely free to change it up if you have something else kicking around in the pantry. Believe me, I’ve tested other bases! You can use vanilla wafer crumbs or even well-crushed shortbread cookies instead of graham crackers. If you use shortbread, you might want to cut the added sugar in the crust down to just 2 tablespoons, since shortbread is usually sweeter than plain graham crackers. All of these work beautifully for a no bake graham cracker crust desserts foundation, as long as you still melt that butter in and press it firmly!
Adding a Little Brightness with Lemon Juice
While the canned apple pie filling gives us that familiar, sweet, spiced flavor, sometimes I just want a tiny bit more brightness to cut through the richness of the cream cheese layer. If you find yourself wanting that little zip, especially if your apple filling is on the sweeter side, go ahead and beat 1 tablespoon of fresh lemon juice into the cream cheese mixture along with the vanilla extract. It adds a lovely, subtle tang that really elevates the whole bar. It’s a little trick I learned from making my famous poke cake, which also benefits from a bit of acid! It won’t change the texture, but it sure wakes up the flavor of these creamy apple dessert squares.
Storage and Make Ahead Apple Cheesecake Tips
One of the real glories of making no bake apple cheesecake bars is that they are completely designed for planning ahead. I love when a dessert tells me, “Don’t worry about me today, I’ll be better tomorrow!” If you are entertaining, preparing these the day before is my best piece of advice. It gives the filling that full amount of time it needs to firm up completely, ensuring those clean, gorgeous slices we talked about earlier.
This recipe is fantastic for those busy holiday weeks or just knowing you have a ready-made treat for your family. It qualifies as one of my favorite make ahead apple cheesecake options because you can’t over-chill it!
Here is how you keep these chilled beauties tasting perfect:
- Refrigeration Time: Once you’ve cut them, the bars need to stay right in the refrigerator. Because they are so rich and creamy, they hold up wonderfully for about 3 to 4 days, provided they are covered tightly. I always use the parchment paper handles to lift them onto a plate, then cover the entire serving platter with plastic wrap or foil for storage.
- Freezing Isn’t Recommended (Usually!): While you *could* freeze them, I usually advise against it for this specific recipe. The texture of the heavy cream and cream cheese filling can change slightly when thawed, sometimes becoming a little soft or separating a tiny bit. If you absolutely must freeze them, wrap each individual bar tightly in plastic wrap, then foil, and thaw them very slowly in the refrigerator overnight before serving.
- Serving Straight from the Cold: Unlike baked cakes that benefit from sitting out for 30 minutes to lose their chill, these no bake apple cheesecake bars are best served cold. If you let them sit out much longer than 20 minutes at room temperature, the cream cheese filling will start to get too soft, and you’ll lose that satisfying, firm texture.
Since these need zero cooking, they are perfect for prepping when things are busy. Just focus on keeping them cold, and you’ll have that delicious, comforting apple and cream cheese flavor ready to go whenever you need it!
Serving Suggestions for this Quick Apple Cream Cheese Dessert
Part of the joy of making a simple dessert like these no bake apple cheesecake bars is deciding how to dress them up just before serving. Since the flavor profile is already so rich—that creamy filling with the warm, spiced apple topping—you don’t need to do much! In fact, I prefer keeping it minimal so the beautiful layers still shine through when you slice them up.
Think about what you’d enjoy after a comforting dinner or with an afternoon cup of coffee. These little squares pair wonderfully with just a couple of extra touches. Remember, these are quick apple cream cheese desserts, so we want simple accompaniments!
Here are my favorite ways to present these bars:
- A Dusting of Cinnamon or Nutmeg: This is my absolute go-to. Before slicing, or right before putting them on the platter, lightly tap a fine-mesh sieve filled with ground cinnamon or nutmeg right over the apple topping. It enhances the warm spice notes beautifully.
- Caramel Drizzle: If you want to elevate these just a bit for guests, a thin drizzle of store-bought caramel sauce just before serving adds a gorgeous depth. Think of it like serving a deconstructed apple pie à la mode, but in bar form!
- Coffee or Tea Pairing: Honestly, nothing beats the way this particular dessert pairs with a strong, hot cup of coffee. The acidity and slight bitterness of the coffee just cut right through the richness of the cream cheese layer perfectly. It’s my preferred evening treat!
- Simple Whipped Cream Dollop: If you’re serving them immediately after cutting, a tiny, unsweetened dollop of freshly whipped cream on top of each bar just offers a lovely, airy contrast to the firmness of the cheesecake layer.
For parties, I once served these alongside a big pitcher of my easy festive punch, and everyone loved having a rich, cool bar to balance the bubbly lightness of the drink. Whatever you choose, keep it easy, because you’ve already done the smart work by skipping the oven!
Frequently Asked Questions about no bake apple cheesecake bars
I always get questions when I post a recipe that skips the oven, and that makes perfect sense! If you’re used to baking a cheesecake to set the filling, turning to these no bake apple cheesecake bars can feel a little bit like magic. Let me clear up any confusion so you can serve up these perfect refrigerated dessert bars with total confidence.
Can I use fresh apples instead of pie filling in my no bake apple cheesecake bars?
That’s a great thought, and I love using fresh apples when I’m making a baked pie, but for this recipe? I really advise sticking to the canned pie filling. If you used raw, fresh apples, they wouldn’t soften up properly sitting cold in that creamy layer, and they’d release too much water later. To use fresh apples, you would have to cook them down on the stovetop with sugar and spices until they were thick—and that is officially turning this into a ‘bake’ (or at least ‘cook’) recipe! We are sticking to the easy spirit here, so grab that canned filling for the best results in these creamy apple dessert squares.
How do I ensure my no bake dessert bars set up firmly?
This is the most critical question for any no-bake recipe! The firmness comes from two things working together: the fats in the cream cheese and the structure from the whipped cream, all solidified by the cold. First, you must get those stiff peaks when you whip your heavy cream—if it’s soft, it will just collapse. Second, you have to respect the chill time. Don’t try to slice them after just four hours. Six hours is the absolute minimum, but overnight chilling is my gold standard. That time in the cold allows everything to lock into place perfectly, giving you those sturdy, clean-cutting bars.
Share Your Experience Making These Apple Topping Cheesecake Bars
Now that you have the roadmap to make these absolutely divine no bake apple cheesecake bars, I’d be overjoyed if you’d share how they turned out for you! Cooking is so much better when we share what works and what we enjoyed most.
Did you find that the overnight chill made all the difference? Maybe you tried the vanilla wafer crust swap I mentioned? I truly want to see your results!
Please take a minute to leave a star rating right below the recipe card—that helps other home cooks know this is a dependable recipe they can trust. And if you have any questions, or just want to share a story about serving these cooling treats to your family, please drop a comment below. I read every single one!
If you need to reach out directly, my contact page is always open for you right here on the site. Happy chilling, friends!
PrintNo Bake Apple Cheesecake Bars
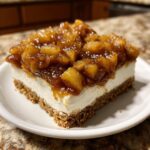
Make these easy apple cheesecake bars without turning on your oven. This simple, chilled dessert uses a graham cracker crust and a creamy filling topped with spiced apple pie filling for a quick, comforting treat.
- Prep Time: 20 min
- Cook Time: 0 min
- Total Time: 6 hr 20 min
- Yield: 16 bars 1x
- Category: Dessert
- Method: Chilling
- Cuisine: American
- Diet: Vegetarian
Ingredients
- 1 1/2 cups graham cracker crumbs
- 1/4 cup granulated sugar
- 6 tablespoons unsalted butter, melted
- 1 (8 ounce) package cream cheese, softened
- 1 cup powdered sugar
- 1 teaspoon vanilla extract
- 1 cup heavy whipping cream, cold
- 1 (21 ounce) can apple pie filling
Instructions
- Prepare the crust: In a medium bowl, mix the graham cracker crumbs and 1/4 cup granulated sugar. Pour in the melted butter and mix until the crumbs are evenly moistened. Press this mixture firmly into the bottom of an 8×8 inch baking pan lined with parchment paper, leaving an overhang on two sides for easy removal. Place the pan in the freezer while you prepare the filling.
- Make the cream cheese layer: In a large bowl, beat the softened cream cheese with an electric mixer until smooth. Gradually beat in the powdered sugar and vanilla extract until fully combined and creamy.
- Whip the cream: In a separate, clean bowl, beat the cold heavy whipping cream until stiff peaks form. Gently fold the whipped cream into the cream cheese mixture until just combined. Do not overmix.
- Assemble the bars: Spread the cream cheese mixture evenly over the chilled crust in the pan. Spoon the entire can of apple pie filling over the cream cheese layer. Gently spread the apple filling to cover the surface.
- Chill: Cover the pan loosely with plastic wrap and refrigerate for at least 6 hours, or preferably overnight, until the filling is firm.
- Slice and serve: Use the parchment paper overhang to lift the cheesecake from the pan. Cut the chilled dessert into 16 squares or bars. Keep refrigerated until ready to serve.
Notes
- For cleaner slicing, run your knife under hot water and wipe it dry between each cut.
- You can substitute the graham cracker crust with crushed vanilla wafers or shortbread cookies for a different flavor base.
- If you prefer a slightly tangier filling, add 1 tablespoon of lemon juice to the cream cheese mixture.
Nutrition
- Serving Size: 1 bar
- Calories: 285
- Sugar: 28
- Sodium: 180
- Fat: 16
- Saturated Fat: 9
- Unsaturated Fat: 7
- Trans Fat: 0
- Carbohydrates: 34
- Fiber: 1
- Protein: 3
- Cholesterol: 45