
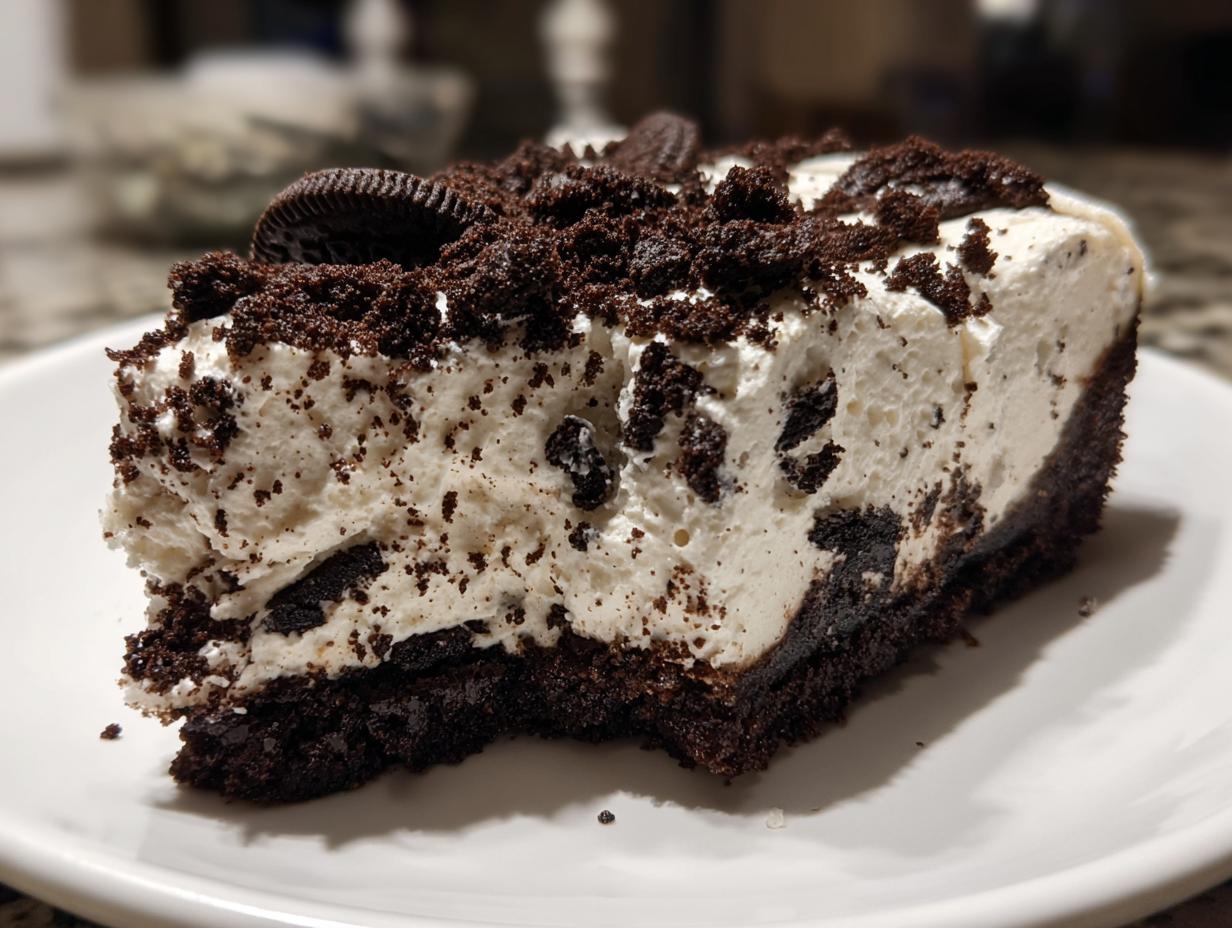
Oh, friends, if there is one dessert that causes an absolute clamor at any family gathering, it’s something involving those delicious, crunchy chocolate sandwich cookies. Between you and me, there’s nothing quite like a creamy, dreamy slice of oreo cheesecake. This recipe right here? It’s what I turn to when I need something truly special but don’t want to turn the oven on. This is, without a doubt, my ultimate, easy, no-bake oreo cheesecake recipe. My grandkids practically demand this every time they come over since it’s one of my top picks from my entire collection of best dessert recipes. It’s simple, requires just a few core ingredients, and it tastes exactly like the best store-bought version—only better because it’s made with love right here in my kitchen. If you’re looking for that classic cookies and cream experience, you’ve found your forever recipe. We make this for birthdays, holidays, and sometimes, just because it’s Tuesday!
- Why This No-Bake Oreo Cheesecake is the Best Cheesecake Recipe
- Gathering Ingredients for Your Oreo Cheesecake
- Step-by-Step Instructions for an Easy Oreo Cheesecake
- Tips for Success: Making the Ultimate Oreo Cheesecake
- Variations on the Classic Oreo Cheesecake
- Storage and Make-Ahead Tips for Your Oreo Cheesecake
- Frequently Asked Questions About Making Oreo Cheesecake
- Nutritional Estimates for This Rich Dessert Recipe
- Share Your Homemade Cheesecake Experience
Why This No-Bake Oreo Cheesecake is the Best Cheesecake Recipe
When I tell people this is my go-to, they sometimes look skeptical. A dessert this rich claiming to be easy cheesecake recipe standard? Yes! The real beauty of this no-bake version is that you skip all the fuss of water baths and oven watching. It sets up beautifully in the fridge, delivering the most incredibly creamy dessert texture you can imagine. It’s truly the ultimate no oven dessert because the chilling does all the hard work for you. It sets up firm enough to hold its shape but melts perfectly in your mouth.
Perfect for Parties and Quick Dessert Needs
This recipe is a lifesaver when company drops in unexpectedly, or when I’m trying to manage too many things for a holiday gathering. Because we aren’t baking it, I can have the crust ready the day before. It always feels like such a treat to tell guests something so impressive was so quick to put together. If you love quick treats, you’ll also want to check out my recipe for no-bake creamy Oreo pie!
Gathering Ingredients for Your Oreo Cheesecake
To make sure this oreo cheesecake sets up perfectly firm and tastes exactly as rich as it should, we need to be precise about our ingredients. Good desserts start with good components, and I always keep these specifics in mind when I’m pulling things from the pantry for this cookies and cream masterpiece. Don’t worry if you don’t have a fancy scale; I’ve made sure the measurements are easy for any home cook!
Ingredient Notes and Substitutions for the Oreo Cheesecake
Here are a few things I want you to note before you start measuring. When the recipe calls for crushed Oreos, I mean the whole cookie, cream filling and all! That crushed-up center is what makes the filling taste authentic. For the crust, you need about 25 cookies for that solid base, so make sure you have enough to spare. If you’re in a pinch and don’t have Oreos, you can certainly use a dark chocolate wafer cookie substitute, but honestly, the flavor won’t be quite the same. Also, make sure that cream cheese is genuinely softened—let it sit on the counter until you can easily press an indent into it, not just slightly soft around the edges. That step is key for avoiding lumps!
Step-by-Step Instructions for an Easy Oreo Cheesecake
You will find that putting this easy to make cheesecake together moves quicker than you think since there’s no waiting around for the oven to preheat! We follow a couple of important steps here to ensure we get that perfect, melt-in-your-mouth experience we’re aiming for with this creamy no bake treat. My method focuses on layering textures—a firm crust, a light body—so pay attention to those mixing techniques, even though we aren’t baking anything. You might want to bookmark my guide on easy homemade chocolate pudding too, as creamy fillings are my specialty!
Building the Chocolate Cookie Crust
First things first, we need a solid foundation! Take that finely crushed Oreo mixture, which you blended with the melted butter until it looks like wet sand, and press it down firmly into the bottom of your 9-inch springform pan. I use the flat bottom of a sturdy glass to really get it packed in tight—we want this layer to hold its shape when we slice it later. Once it’s settled, pop that pan right into the freezer. Fifteen minutes in the freezer is all you need while you get the creamy part ready. This keeps our base ready for the wet filling and forms the perfect start to our cookies and cream dessert.
Achieving the Perfect Creamy Filling for Your Oreo Cheesecake
This is where the magic happens and why we keep the parts separate! In one bowl, beat your softened cream cheese with the powdered sugar and vanilla until it’s perfectly smooth—no gritty bits allowed in my kitchen! In a separate, clean bowl—and I mean clean, fat hates to leave a bowl—whip your heavy cream and granulated sugar until you get stiff, glorious peaks. Now, the most important part for that heavenly, light texture: gently *fold* that gorgeous whipped cream into the cream cheese base. Take your time! Once they are just combined, gently fold in that cup of Oreos reserved for the filling. Stop mixing as soon as you can’t see streaks anymore. This careful folding technique is what keeps air in the batter, making this oreo cheesecake incredibly light.
Chilling and Serving the Indulgent Dessert
Pour that beautiful, thick filling evenly over your chilled crust. Now, resist the urge to cut into it! This is the hardest part, but you must let it rest. Cover it lightly and let it chill in the refrigerator for a minimum of six hours, but honestly, overnight is when it truly solidifies into the indulgent dessert you deserve. When it is fully chilled and firm, carefully run a thin knife around the edge before releasing the springform. Then, shower the top with your final sprinkling of crushed cookies. Slice it up, and enjoy the best no-bake treat!

Tips for Success: Making the Ultimate Oreo Cheesecake
Even though this is a no-bake recipe, success still comes down to a few simple rules I’ve picked up over thirty years of making desserts for my family. If you follow these little pointers, you’ll be amazed at how easily you pull off this oreo cheesecake every single time. Remember, reliability is my whole philosophy here! We want that creamy, perfect texture, not something soupier than we aimed for.
The biggest tip I can give you starts before mixing: make sure that cream cheese is truly softened all the way through. If you try to beat cold cream cheese, you’ll end up spending ten minutes trying to chase lumps around the bowl, and that usually means overmixing the whole thing later. Trust me on this one!
Another thing that trips folks up is the folding step. When you combine your whipped cream with the cream cheese base, you have to be gentle. We worked hard to whip air into that heavy cream to make it fluffy, so grab your spatula and fold slowly until it’s just combined. If you mix too vigorously trying to rush it, you’ll deflate all that air you just created, and your dessert won’t set quite as beautifully. If you love that crisp texture in a different way, you should absolutely look at my recipe for classic butter cookies!
Variations on the Classic Oreo Cheesecake
Half the fun of a perfect recipe like this oreo cheesecake is figuring out how to change it up slightly for different weekends or moods! While I personally adore this chilled, no-bake version—it’s just so simple and reliable—I know some of you might be looking for a baked experience or smaller formats. You’ve got lots of options without straying too far from the core deliciousness.
If you’re feeling ambitious and want a firmer, slightly tangier result, you can certainly bake it. For a baked version, you would mix the cream cheese base, but skip whipping the heavy cream entirely. Instead, you’d often add an extra egg or two for structure, pour it onto your crust, and bake it slowly. However, that is a whole different ballgame requiring an oven, so we’ll stick to the easy route here!
When I want something easier to serve or perfect for a crowd—especially when the grandkids are over—I turn the recipe into two other incredibly popular desserts. First, think about cheesecake bars. This is a lifesaver for big gatherings! Simply pour your filling into a 9×13 inch baking dish instead of the springform pan. Since it’s shallower, it sets up just as beautifully, and you can cut perfect squares for serving. It makes cleanup even easier, too.
Secondly, if you need individual portions or just want something adorable, consider aiming for bite sized cheesecake treats. You can line a standard muffin tin with paper liners and divide the filling evenly among them. They set up fast and are perfect for lunchboxes or little hands. Just watch the chilling time; sometimes these smaller versions set up even quicker!
If you’re feeling creative with flavors, check out the ideas in my peach cobbler cheesecake recipe for inspiration on how to layer different fruit textures into a creamy base. But for this classic, just swapping out a few Oreos for a different cookie in the crust is usually enough excitement for most tables!
Storage and Make-Ahead Tips for Your Oreo Cheesecake
One of the most wonderful things about this no bake dessert is that it truly shines when made ahead of time! This is why it’s one of my favorite party desserts—I can get it completely done the day before hosting, and then all I have to worry about that day is keeping the coffee warm!
Since there’s no egg or baking process involved, storing this safely is just like keeping any other creamy dairy item. Once the oreo cheesecake is completely firm after its required chilling time, cover the top of it loosely with plastic wrap. You want to be sure the plastic doesn’t actually touch the crushed cookies on top, or you might smudge your beautiful garnish!
In the refrigerator, this delicious treat stays fresh and incredibly tasty for about three to four days. I’ve found that the crust firms up just a touch more after day two, which some people prefer! It’s a lovely, dependable dessert to have on hand for those late-night sweet cravings.
What if you need to make it even further ahead? You can absolutely freeze this! Just make sure it’s well-covered with plastic, and then perhaps wrap the whole pan loosely in foil to prevent any freezer smells from creeping in. It freezes like a dream for up to a month. When you’re ready to serve, the best way to thaw it is slow and steady—move it to the refrigerator overnight. By the next morning, it will be perfect again. Frozen, chilled, or freshly made, it is always delicious. Speaking of make-ahead treats, you should really have my recipe for easy peanut butter fudge saved, too!
Frequently Asked Questions About Making Oreo Cheesecake
It’s natural to have questions when you’re trying a new recipe, especially one as beloved as this oreo cheesecake! Over the years, I’ve answered many of these inquiries from readers who want to make sure their dessert turns out just right. I’m happy to share what I’ve learned to ensure this is the most easy to make cheesecake success story you’ve ever had.
Why is my no-bake cheesecake still soft after chilling?
Oh, honey, that usually comes down to one of two things! First, check your heavy cream. It must be very cold when you whip it; room temperature cream just won’t hold its structure. Second, and this is crucial, you must give it the full chilling time. I know waiting is tough, but those minimum six hours, or preferably overnight, are non-negotiable for this recipe. The chilling process is what lets the fats solidify and creates that lovely, firm sliceable texture for your oreo cheesecake. Don’t rush it, or you’ll end up with a delicious bowl of filling instead of a proper slice!
Can I use a springform pan, or should I make it into bars?
You absolutely can use a springform pan! That is the classic presentation for a beautiful round cheesecake, and it truly looks stunning when you release the sides. However, if you’re worried about transport or serving a large, casual crowd, turning it into cheesecake bars in a 9×13 dish is a fantastic, slightly easier alternative. The flavor and texture remain the same, but bars are much simpler to cut and serve quickly at a party.
What kind of Oreos should I use for the best flavor?
Stick with the classic black Oreo cookie! They have that perfect dark chocolate flavor that balances the sweet, tangy filling best. Remember, for the crust and the filling mix-ins, you use the whole cookie—cookie and white cream filling included. Don’t try to scrape the cream out! That cream adds fat which helps bind the crust and adds flavor depth in the filling. If you want to experiment later, you could try Golden Oreos for a lighter cookie base, but for this deeply satisfying, rich dessert recipe, the classic stands strongest.
Can I add chocolate chips or brownies to this Oreo Cheesecake?
You certainly can! This recipe is built to handle extra chocolatey goodness. If you look at my notes, I mention folding in some melted semi-sweet chocolate into the cream cheese base for an even richer experience. If you want to add more texture, feel free to fold in about a cup of coarsely chopped Oreos, or even small, cooled brownie pieces along with the regular crushed cookies. Just remember, the more you add, the slightly softer your final oreo cheesecake might turn out, so balance is key!
If you’ve already made this and want to enhance it further, perhaps you’d like to top it with a bit of homemade chocolate flavor? Check out my recipe for fluffy buttercream frosting—it’s light enough to sit nicely on top of this chilled dessert!
Nutritional Estimates for This Rich Dessert Recipe
Now, I know some of you are watching macros, and others are just curious, so I always like to put in a little disclaimer about the numbers for this rich dessert recipe. Food is meant to be enjoyed, especially something like this spectacular oreo cheesecake, so please take these figures as a general guideline, not a strict promise!
Since we are dealing with cream cheese, heavy cream, and plenty of chocolate cookies, this is certainly an indulgent treat. These estimates are based on dividing the entire recipe into 10 generous slices. If you happen to cut it smaller—like those delicious cheesecake bars we talked about—the numbers will naturally change:
- Calories: Approximately 450 per slice
- Fat: Around 30 grams
- Carbohydrates: About 40 grams
- Protein: Roughly 6 grams
You’ll also notice higher sugar and saturated fat counts, which is just the nature of a classic dessert made with real butter and full-fat dairy. It’s a wonderful dish to share when you know everyone deserves a little something rich and comforting. Enjoy it without worry, because the memory of that first bite is truly calorie-free!
Share Your Homemade Cheesecake Experience
Well, that’s it! You’ve made it to the end of the line for this wonderful, creamy treat. I truly hope you enjoy every single bite as much as my family does. If this easy cheesecake recipe earned a spot in your heart—and your menu—please take a moment to leave me a rating below. Five stars really helps others find this recipe, and I love reading your notes about how it turned out!
If you try out any of those variations we discussed, or if you just want to say hello, please pop a comment down below. I try to read every single one! Knowing that this dish brought some comfort and joy to your table means the world to me. You can also share pictures of your beautiful oreo cheesecake creations over on social media; you can learn more about me over on my About Page!
PrintEasy No-Bake Oreo Cheesecake
Make this rich and creamy no-bake Oreo cheesecake. It uses Oreos in the crust, filling, and topping, making it a perfect cookies and cream dessert for any gathering.
- Prep Time: 20 min
- Cook Time: 0 min
- Total Time: 6 hr 20 min
- Yield: 10 servings 1x
- Category: Dessert
- Method: No Bake
- Cuisine: American
- Diet: Vegetarian
Ingredients
- 1 1/2 cups finely crushed Oreo cookies (about 25 cookies)
- 1/4 cup unsalted butter, melted
- 16 ounces cream cheese, softened
- 1 cup powdered sugar
- 1 teaspoon vanilla extract
- 1 1/2 cups heavy whipping cream, cold
- 1/2 cup granulated sugar
- 1 cup crushed Oreo cookies, for mixing into filling
- 1/2 cup crushed Oreo cookies, for topping
Instructions
- Prepare the crust: Mix the 1 1/2 cups of finely crushed Oreos with the melted butter until fully combined. Press this mixture firmly into the bottom of a 9-inch springform pan. Place the crust in the freezer while you prepare the filling.
- Make the cream cheese base: In a large bowl, beat the softened cream cheese, powdered sugar, and vanilla extract until the mixture is smooth and there are no lumps. Set this aside.
- Whip the cream: In a separate, clean bowl, beat the cold heavy whipping cream and granulated sugar until stiff peaks form. This creates a light, fluffy texture.
- Combine the filling: Gently fold the whipped cream mixture into the cream cheese mixture until just combined. Do not overmix. Fold in the 1 cup of crushed Oreos reserved for the filling.
- Assemble the cheesecake: Pour the filling over the chilled crust and spread it evenly.
- Chill: Cover the pan loosely with plastic wrap and refrigerate for at least 6 hours, or preferably overnight, until the cheesecake is firm. This is a crucial step for a creamy no bake treat.
- Garnish and serve: Before serving, sprinkle the remaining 1/2 cup of crushed Oreos over the top. Carefully release the sides of the springform pan. Slice and serve this indulgent dessert.
Notes
- For an extra rich dessert, you can fold in 4 ounces of softened, melted semi-sweet chocolate into the cream cheese base before adding the whipped cream.
- If you want bite sized cheesecake portions, prepare this recipe in a 9×13 inch baking dish instead of a springform pan, then cut into bars after chilling.
- Use a food processor to crush the cookies quickly for your chocolate cookie crust.
Nutrition
- Serving Size: 1 slice
- Calories: 450
- Sugar: 35g
- Sodium: 320mg
- Fat: 30g
- Saturated Fat: 18g
- Unsaturated Fat: 12g
- Trans Fat: 0.5g
- Carbohydrates: 40g
- Fiber: 1g
- Protein: 6g
- Cholesterol: 95mg