
Sometimes you just need something intensely chocolatey, incredibly rich, and you absolutely do not want to turn on the oven. Trust me, I get it! That’s why I’m sharing what I honestly consider the absolute best oreo pie recipe out there—and yes, it’s completely no-bake. This is the kind of ridiculously easy recipe I developed over years, using the same patience and clarity I used when teaching school. It’s dependable, perfectly creamy, and satisfies that serious cookie craving instantly. You’ll be shocked how rich this simple, chilled dessert tastes!
- Why This No-Bake Oreo Pie is Your New Favorite Easy Oreo Dessert
- Gathering Ingredients for Your Simple Oreo Treats
- Step-by-Step Instructions for the No Bake Oreo Pie
- Tips for Making the Best No Bake Oreo Pie
- Serving Suggestions for Your Party Oreo Dessert
- Storage & Reheating Instructions for Chilled Oreo Dessert
- Frequently Asked Questions About This Oreo Pie
- Estimated Nutritional Data for One Slice of Oreo Pie
- Share Your Experience Making This No Oven Dessert
Why This No-Bake Oreo Pie is Your New Favorite Easy Oreo Dessert
I have taught hundreds of lessons in my life, and the most important one about baking is that it doesn’t have to be hard to be truly special. This recipe proves it!
When you need something fast, decadent, and guaranteed to please everyone from the kids to your neighbors at the block party, this is the one you reach for. Forget complicated steps; we are here for pure, easy satisfaction. This is my reigning champion for a Quick Oreo Dessert.
- Literally zero oven time required! It’s the perfect No Oven Dessert for a hot summer afternoon when you don’t want to heat up the house.
- The prep time is about 20 minutes—that’s less time than it takes to decide what movie to watch!
- It uses tried-and-true pantry staples, making it far less stressful than recipes that call for complicated specialty ingredients.
- It sets up beautifully in the fridge, meaning you can focus on the rest of your dinner and serving a show-stopping dessert later. It’s the definition of an Easy Oreo Dessert.
The Ultimate Creamy Oreo Pie Recipe Experience
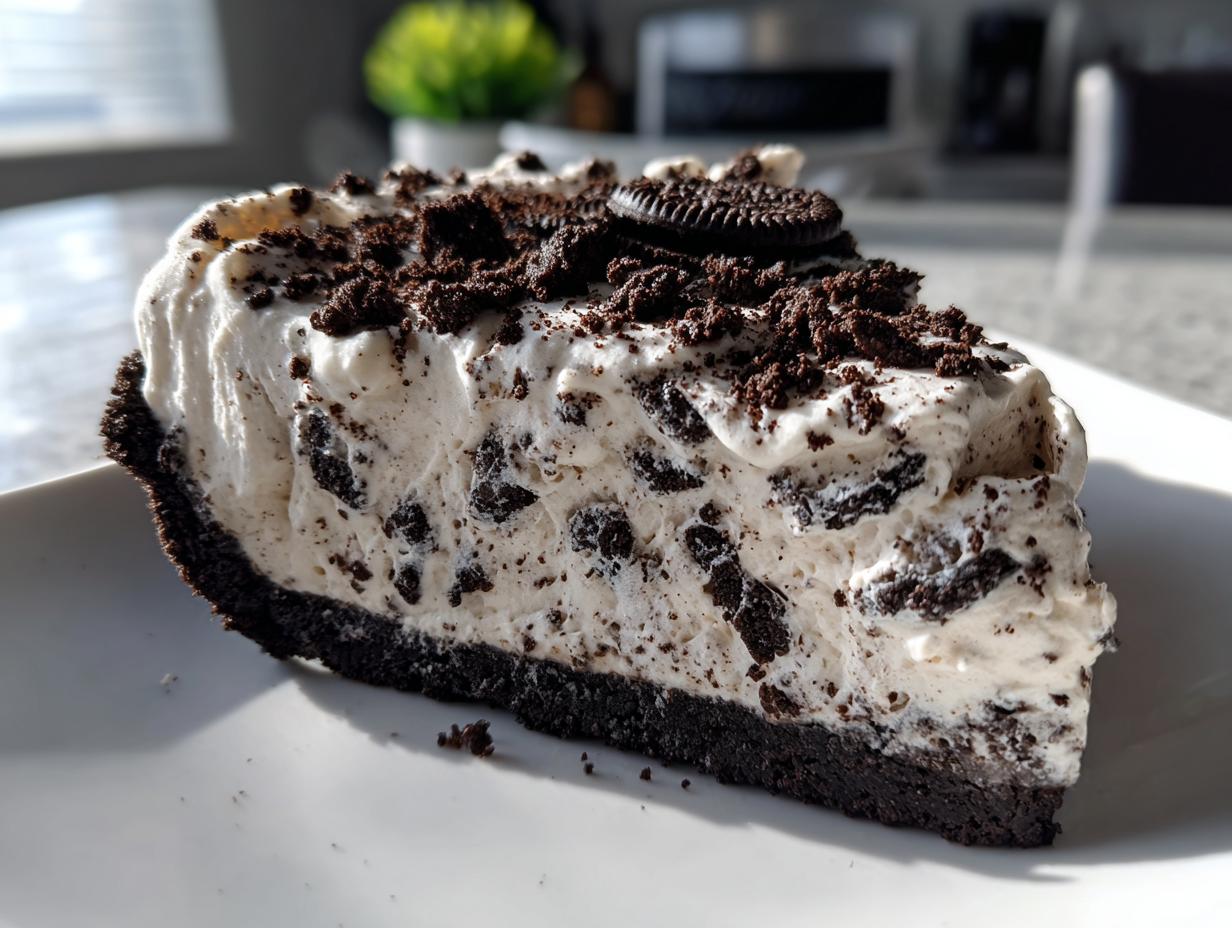
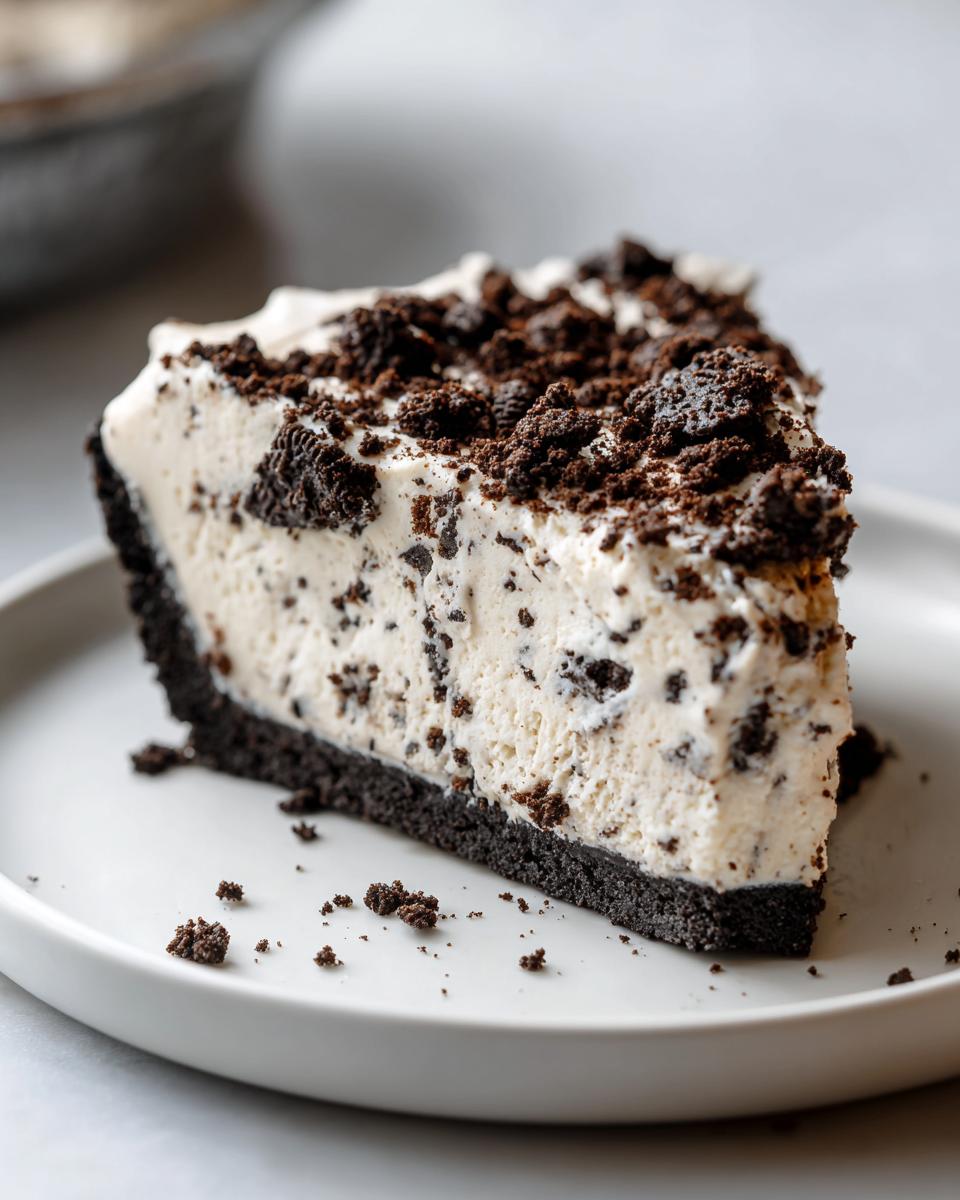
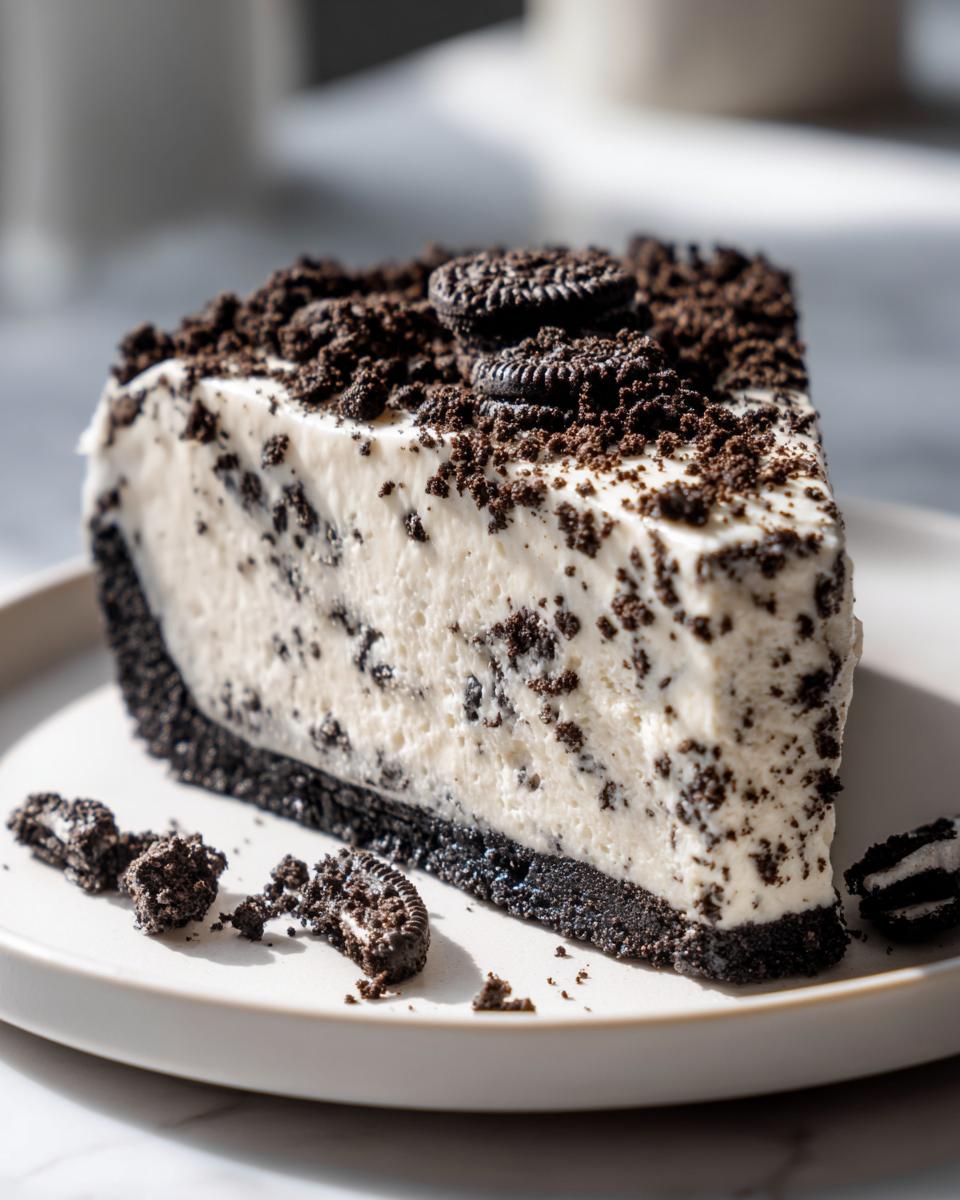
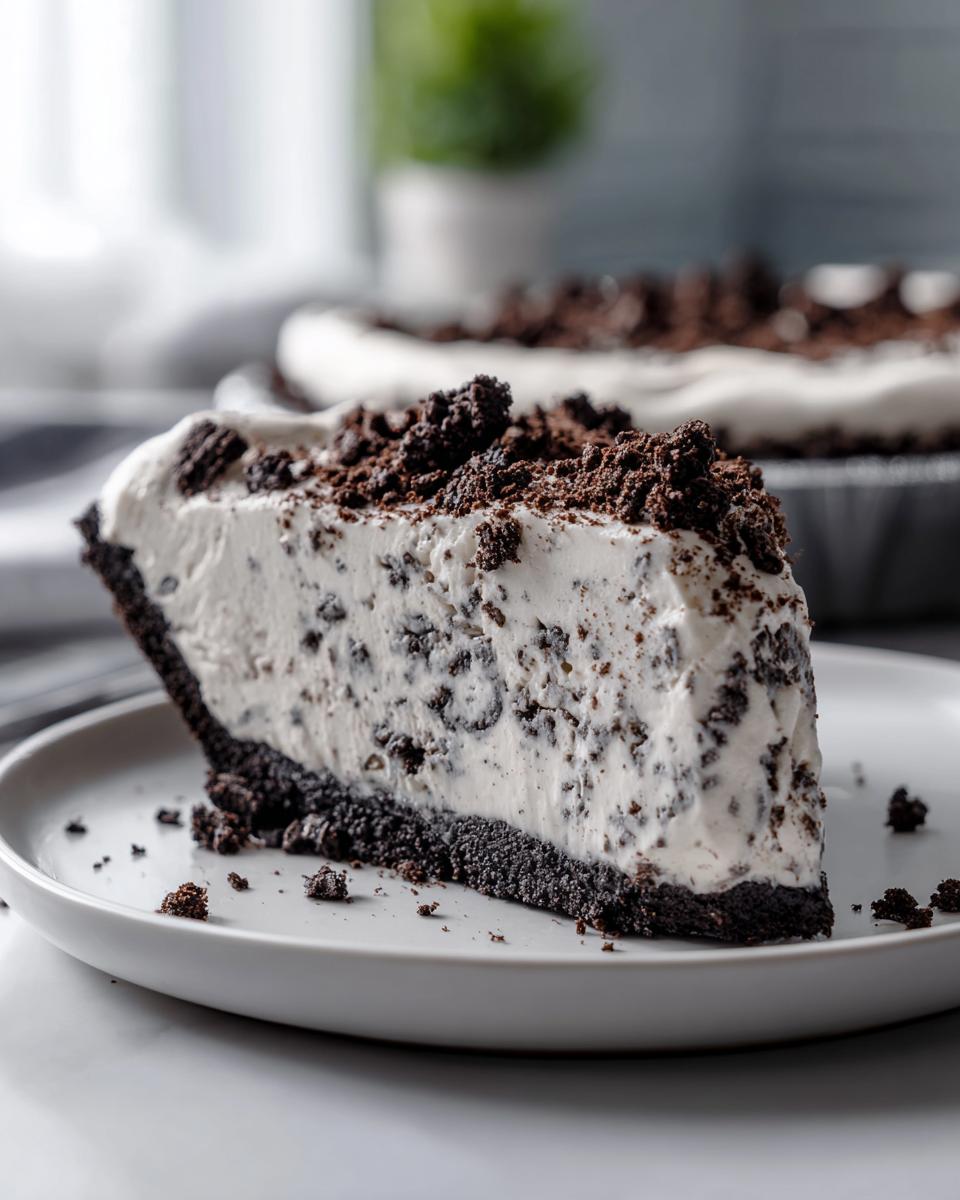
What sets this apart from those simple 3-ingredient versions is the texture. We get that beautiful contrast that makes every bite exciting. You have the firm, buttery crunch of the homemade crust, followed by that unbelievably silky, velvety filling. It’s rich but also wonderfully light once it’s chilled. This truly is the ultimate Chilled Oreo Dessert, perfect for taking to any summer gathering or serving after a big meal!
Gathering Ingredients for Your Simple Oreo Treats
Look, I taught elementary school for thirty years, so I appreciate clear instructions and an organized countertop! This recipe for our Oreo Pie keeps things totally straightforward, which is why it lands squarely in the category of Simple Oreo Treats. We aren’t messing around with complicated chemistry here; we are using wonderful, familiar ingredients to build layers of chocolatey magic. I made sure to list everything you need right here, so you can do a quick inventory before you start blending.
Ingredients for the Homemade Oreo Crust and Filling
Before you start mashing cookies, make sure your cream cheese is actually softened—that’s the biggest rookie mistake! Also, remember that the whipped topping needs to be thawed out, but the milk for the pudding needs to be cold. Just grab these few things, and you are practically already done!
- 1 package (14.3 oz) chocolate sandwich cookies (like Oreos—yes, the whole thing!)
- 6 tablespoons unsalted butter, melted
- 1 package (8 oz) cream cheese, softened (this is important!)
- 1 cup powdered sugar
- 1 teaspoon vanilla extract
- 1 container (8 oz) frozen whipped topping (like Cool Whip), thawed
- 1 package (3.9 oz) instant vanilla pudding mix
- 1 1/2 cups cold milk
- 1 cup crushed chocolate sandwich cookies (these are just for sprinkling on top at the very end)
Step-by-Step Instructions for the No Bake Oreo Pie
Okay, this is where the magic happens, and I promise, it’s so easy it feels like cheating! Since we aren’t dealing with heat, we focus entirely on getting those textures right, which is just an extension of what I always emphasized in my classroom: follow the steps, and you’ll get a predictable, wonderful result every time. Make sure you have a 9-inch pie plate ready to go before you start mixing! If you want the full background on why I insist on such clarity in recipes, you can always check out the story of Cooking by Carla.
Creating the Perfect Oreo Cookie Pie Crust
First things first, we need that crunchy base for this Oreo Pie. If you have a food processor, pulse all but one cup of those cookies until they’re fine crumbs—that’s the fastest way. If you only have a rolling pin, just pop those cookies into a heavy zip-top bag and get to work smashing them! Once you mix those crumbs with the melted butter, grab your 9-inch pie plate. You absolutely must press this mixture down firmly, not just on the bottom, but up the sides too. I always use the flat bottom of a measuring cup to really pack it tight. Then, straight into the freezer it goes!
Building the Velvety Oreo Filling Layers
Now for the dreamy part! In a big bowl, beat your softened cream cheese until it’s perfectly smooth—no lumps allowed! Mix in the powdered sugar and vanilla. Then, take about half of your thawed whipped topping and gently fold it in until it just disappears; we want to keep this layer light! Spread this cream cheese layer carefully over your frozen crust base. In a separate bowl, whisk your instant vanilla pudding mix with the cold milk and the extra cup mix of crushed cookies you saved earlier. Whisk until it starts to thicken up, then delicately fold in the rest of the whipped topping. This helps create that signature Velvety Oreo Filling.

Chilling and Finishing Your Indulgent Oreo Dessert
Time to layer! Spoon that fluffy pudding mixture right on top of the cream cheese layer. Make sure it’s even. Now, here’s the most important part of any No Bake Oreo Pie: patience. Cover it loosely with plastic wrap and get it into the refrigerator. It needs to chill for a minimum of 4 hours—seriously, don’t rush this! If the filling isn’t set, it just turns into a messy puddle, and we want beautiful slices of this Indulgent Oreo Dessert. Once it’s completely firm, sprinkle those last reserved crushed cookies over the top right before you slice into it and enjoy that perfect, Chilled Oreo Dessert.
Tips for Making the Best No Bake Oreo Pie
Even though this is an easy dessert, a few little tricks ensure mine always comes out perfect—that’s the reliability I always strived for when teaching! My biggest tip, which I mentioned briefly, is making sure that cream cheese is truly softened. If it’s cold, you end up with little lumps in your filling, and we certainly don’t want that in a Creamy Oreo Pie Recipe, do we?
If you’re really in a rush, you can absolutely use a store-bought crust, though I do love how much flavor the homemade homemade Oreo crust adds. And remember that rolling pin method I mentioned for crushing the cookies? That is your best friend if the food processor isn’t handy!
Ingredient Swaps for a Fudgy Oreo Pie Variation
While I use vanilla pudding here to get that classic cookies and cream flavor, you can easily pivot this recipe toward something darker and richer. Want an even more intense, Fudgy Oreo Pie? Just swap the instant vanilla pudding mix for chocolate instant pudding mix! It makes the whole pie taste darker and more decadent. Either way you make it, this pie sets up beautifully in that fridge.
Serving Suggestions for Your Party Oreo Dessert
Since this Creamy Oreo Pie Recipe is so intensely chocolatey and rich, sometimes you just need a little something bright on the side to balance it out. I always recommend having a small bowl of fresh, slightly tart raspberries or strawberries nearby—the acidity really cuts through the sweetness perfectly.
If you want to keep it all chocolate, though, try sifting just a tiny whisper of unsweetened cocoa powder over the top instead of relying only on the crushed cookies. That slight bitterness elevates the whole dessert! It makes for a gorgeous presentation when you serve your Party Oreo Dessert.
Storage & Reheating Instructions for Chilled Oreo Dessert
Because this is a lovely, light, No Bake Oreo Pie, we have to be smart about storage. Just cover that pie plate tightly with plastic wrap—I usually press the wrap right onto the surface of the filling to stop it from developing a skin. Keep it tucked away in the refrigerator. It stays perfectly delicious for up to three days, which makes it a fantastic make-ahead option! Please, just don’t even think about freezing or reheating this one; it ruins the fluffy texture of the Oreo Pudding Pie.
Frequently Asked Questions About This Oreo Pie
Whenever I share a recipe, I always get lovely messages asking those last-minute questions, and that’s perfectly fine! I’m happy to clarify anything about this wonderful Oreo Pie. Getting the technique just right means you get that perfect, dreamy slice every single time. If you have more questions after trying it out, please don’t hesitate to reach out through my contact page here at Cooking by Carla.
Can I make this Oreo Cheesecake Pie ahead of time?
Oh, you absolutely should make this ahead of time! That’s one of my favorite things about this recipe. Since it’s a no-bake dessert that needs serious chilling time to firm up that lovely filling, making it the day before your party is ideal. In fact, I think it tastes even better the next day after all those flavors have really settled together in the fridge! It cuts down on stress for any gathering, making it a wonderful, easy Summer Oreo Dessert.
What if I only have 3 Ingredient Oreo Pie ingredients?
That simplified version (usually just crushed cookies, butter, and Cool Whip or cream cheese) is fast, I won’t lie! But honestly, that version often lacks stability and the filling can be a bit too heavy. My recipe is built on layering—the cream cheese base first, then the pudding layer—which gives us that incredible lift and that true, luscious texture of a Creamy Oreo Pie Recipe. You get a superior, more complex texture when you build those two layers instead of mixing everything at once.
Can I use a pre-made Oreo crust?
Yes, you certainly can! If you are in a real morning rush before a potluck, grabbing a store-bought crust will save you about 10 minutes of crushing and packing time. Just make sure it’s a standard 9-inch size. For me, the homemade crust made with melted butter adds just a little extra richness to every bite, turning it into a true Homemade Oreo Crust experience, but please use what works best for your schedule!
How long does it absolutely need to chill?
I know waiting is the hardest part when chocolate is involved! While you might feel it’s set after 2 hours, I highly, highly recommend going a full 4 hours. If you slice it too early, the pudding layer won’t be firm enough and you end up with a runnier dessert, which isn’t the goal for this stable No Bake Oreo Pie. An overnight chill is even better!
Estimated Nutritional Data for One Slice of Oreo Pie
Oh, dear readers, let’s talk numbers for a moment. Since this is an Indulgent Oreo Dessert, we have to acknowledge that it’s a treat! These figures are estimates based on the exact ingredients listed in the recipe above, and they assume you cut the pie into 8 even slices. I’m not a nutritionist, of course—I’m just a grandma sharing lessons—so keep these numbers as a helpful guideline rather than the gospel truth!
- Calories: About 450 per serving
- Total Fat: Around 28g
- Carbohydrates: Roughly 48g
- Protein: Near 5g
This rich, creamy slice is worth every bit of that goodness for your next Easy Oreo Dessert night!
Share Your Experience Making This No Oven Dessert
Well, that’s the end of my grand tour of the best homemade Oreo Pie! I truly hope you have as much fun making this as I have perfecting it over the years. The kitchen is all about sharing, so I really want to know how this creamy dream turned out for you!
Did you chill it overnight? Did you stick to the vanilla pudding, or bravely try the chocolate version? Please leave a rating right here on the page—it helps other home cooks feel confident trying out this recipe!
And if you snapped any pictures of your beautiful, finished, no-bake creation, I would absolutely love to see them! Tag me on social media. There is nothing that makes this old teacher’s heart prouder than seeing my recipes find a happy new home in your kitchen. Thank you so much for cooking with me today. Remember, you can always review our privacy policy here if you have questions!
PrintEasy No-Bake Oreo Pie

Make this simple, creamy Oreo pie without turning on your oven. This recipe uses a crushed cookie crust and a velvety, chilled filling for a quick cookies and cream dessert.
- Prep Time: 20 min
- Cook Time: 0 min
- Total Time: 4 hr 20 min
- Yield: 8 servings 1x
- Category: Dessert
- Method: No Bake
- Cuisine: American
- Diet: Vegetarian
Ingredients
- 1 package (14.3 oz) chocolate sandwich cookies (like Oreos)
- 6 tablespoons unsalted butter, melted
- 1 package (8 oz) cream cheese, softened
- 1 cup powdered sugar
- 1 teaspoon vanilla extract
- 1 container (8 oz) frozen whipped topping (like Cool Whip), thawed
- 1 package (3.9 oz) instant vanilla pudding mix
- 1 1/2 cups cold milk
- 1 cup crushed chocolate sandwich cookies (for topping)
Instructions
- Prepare the crust: Place all but 1 cup of the chocolate sandwich cookies into a food processor and pulse until fine crumbs form. Reserve the remaining 1 cup of cookies for the filling and topping.
- Mix the crust: Combine the cookie crumbs with the melted butter until the mixture resembles wet sand. Press the mixture firmly into the bottom and up the sides of a 9-inch pie plate. Place the crust in the freezer while you prepare the filling.
- Make the cream cheese layer: In a large bowl, beat the softened cream cheese, powdered sugar, and vanilla extract until smooth. Fold in half of the thawed whipped topping until just combined. Spread this mixture evenly over the chilled crust.
- Prepare the pudding layer: In a separate bowl, whisk together the instant vanilla pudding mix, cold milk, and the reserved 1 cup of crushed cookies for about 2 minutes, until the mixture begins to thicken.
- Assemble the pie: Gently fold the remaining half of the thawed whipped topping into the pudding mixture. Spoon this filling over the cream cheese layer in the pie crust.
- Chill: Cover the pie loosely with plastic wrap and refrigerate for at least 4 hours, or until the filling is completely set.
- Serve: Before serving, sprinkle the remaining crushed cookies over the top of the pie. Slice and serve cold.
Notes
- You can use a store-bought Oreo crust to save time.
- For a richer chocolate flavor, substitute the vanilla pudding mix with chocolate instant pudding mix.
- If you do not have a food processor, place the cookies in a large zip-top bag and crush them using a rolling pin.
Nutrition
- Serving Size: 1 slice
- Calories: 450
- Sugar: 35g
- Sodium: 310mg
- Fat: 28g
- Saturated Fat: 15g
- Unsaturated Fat: 13g
- Trans Fat: 0.5g
- Carbohydrates: 48g
- Fiber: 1g
- Protein: 5g
- Cholesterol: 35mg