
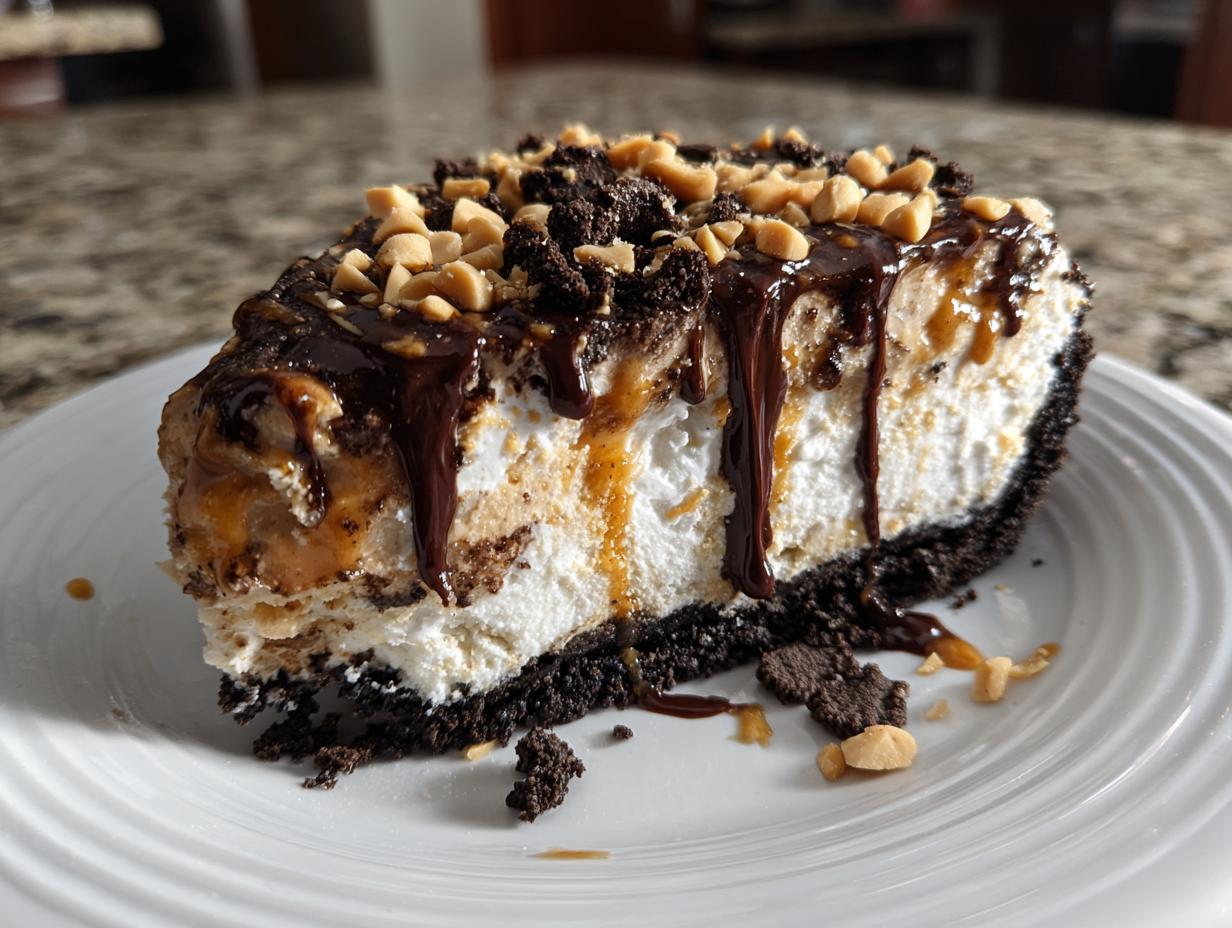
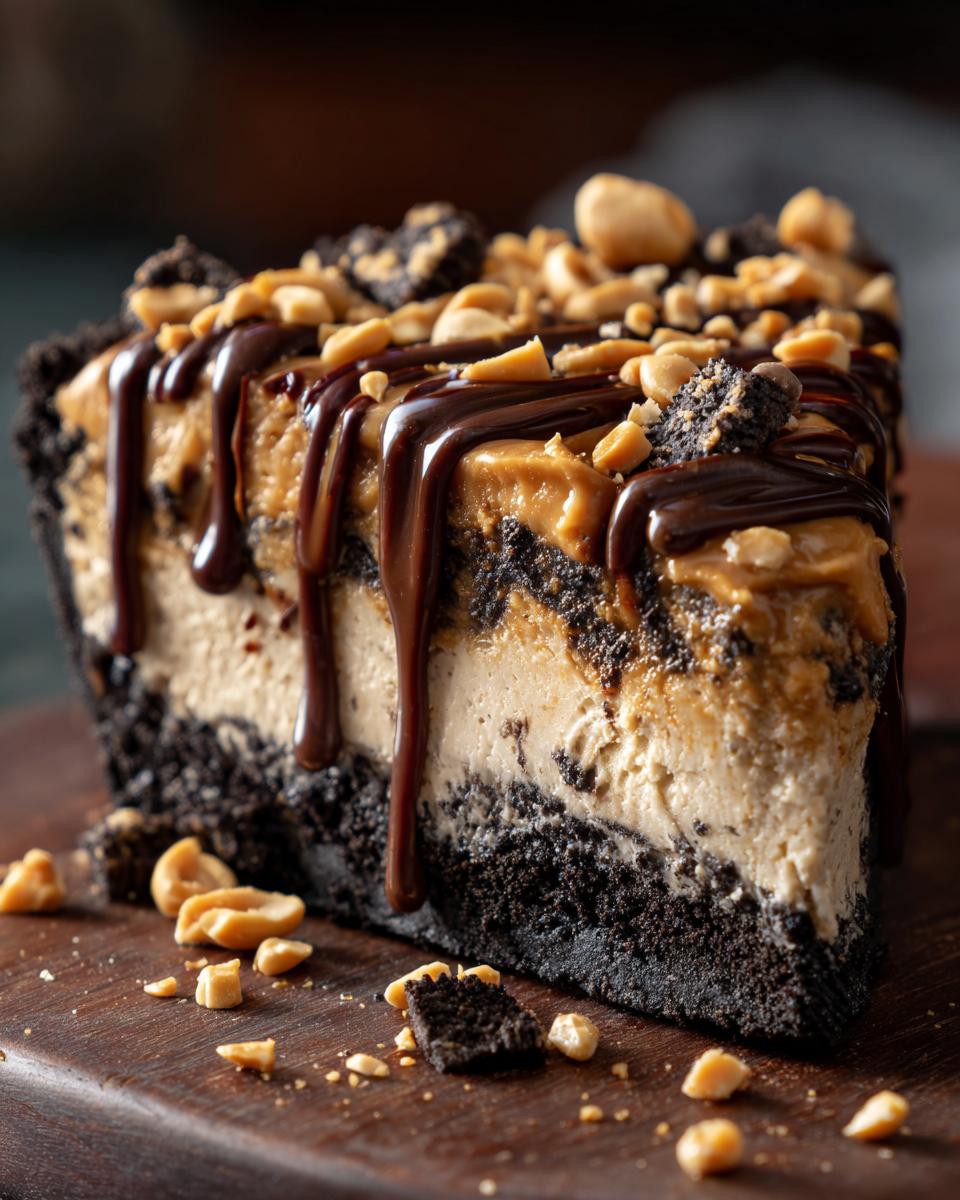
When that summer heat just won’t quit, there’s nothing better than pulling out a big, cold slice of something truly over-the-top delicious. Forget turning on the oven! I’ve perfected this easy, no-bake peanut butter ice cream pie recipe, and trust me, it’s a guaranteed showstopper at any party. It combines a crunchy Oreo crust with layers of creamy filling. This might just be the ice cream pie you turn to again and again when you need a simple, crowd-pleasing dessert that tastes like you spent all day on it.
- Why This No-Bake Peanut Butter Ice Cream Pie is the Ultimate Frozen Treat
- Gathering Ingredients for Your Creamy Ice Cream Pie
- Step-by-Step Instructions to Assemble Your Ice Cream Pie
- Tips for the Best Homemade Ice Cream Pie Success
- Ingredient Notes and Substitutions for Your Ice Cream Pie
- Serving Suggestions for Your Ice Cream Pie for Parties
- Storing and Reheating Your Ice Cream Pie
- Frequently Asked Questions About This Easy Frozen Pie Recipe
- Sharing Your Perfect Ice Cream Pie Experience
Why This No-Bake Peanut Butter Ice Cream Pie is the Ultimate Frozen Treat
Oh, I love showing folks how to get big results with little effort! This recipe truly shines for a few important reasons. It checks all the boxes for a busy home cook like me. I think you’ll quickly make this your go-to easy frozen pie recipe.
- It’s genuinely no-bake! Seriously, just mix and freeze. This is just as simple as my easy no-bake protein bars!
- Who doesn’t love peanut butter and chocolate? This flavor combination always wins over a crowd.
- It’s the perfect make-ahead frozen dessert. You can have it ready days before your party!
Gathering Ingredients for Your Creamy Ice Cream Pie
Now that you know how easy this is, let’s talk about the supplies! For this Oreo crust ice cream dessert, we need just a few simple things from the grocery store, but their condition matters! Remember, since we aren’t baking anything, the quality and temperature of these components really make or break the texture. I always grab my ingredients the day before I plan to assemble, which gives me time to soften the ice cream just right.
Before we start, if you loved the idea of an Oreo base, you absolutely have to check out my recipe for easy no-bake Oreo cheesecake! It uses a similar base technique.
For the Oreo Crust Ice Cream Dessert Base
The crust is the foundation, dear friend, so make sure those cookies are done right. You’ll need them crushed super fine! Think sand, not chunks.
- 1 3/4 cups crushed Oreo cookies (Please, no substitutes here! About 24 cookies total.)
- 6 tablespoons unsalted butter, melted (Make sure it’s fully melted so it binds everything together well.)
For the Peanut Butter Filling and Vanilla Ice Cream Layers
This is where the magic happens—the filling needs to be light, airy, and perfectly peanut butter flavored. And remember, the ice cream needs to be softened, not soup! Just pull it out about 10-15 minutes before you need it for spreading.
- 1 (16 ounce) container frozen whipped topping, thawed (Crucial it’s thawed so you can mix it smoothly.)
- 1 (18 ounce) jar creamy peanut butter (I stick with creamy for the best texture here.)
- 1/2 cup powdered sugar
- 1 teaspoon vanilla extract
- 2 quarts (8 cups) softened vanilla ice cream (This should be scoopable but still hold its shape.)
For the Toppings and Garnish
These are the finishing touches that make it look like it came from a fancy shop! Don’t skip the nuts—they add just the right bit of crunch to counteract all that creaminess.
- 1/2 cup hot fudge topping, warmed (Warm it up just enough so it drizzles beautifully.)
- 1/4 cup chopped peanuts, for garnish
Step-by-Step Instructions to Assemble Your Ice Cream Pie
Making this no bake ice cream pie is all about layering, patience, and making sure each layer has time to set up properly. Don’t rush the freezing steps, or you’ll end up with a soupy mess on your hands instead of pretty slices! Follow these steps, and I promise you’ll have the most gorgeous, creamy ice cream pie.
Creating and Chilling the Oreo Crust
First things first, we build the delicious foundation. In a bowl, mix those crushed Oreos right into the melted butter until everything looks evenly moistened. Now, press that mixture down firmly into the bottom and up the sides of your 9-inch pie plate. I like to use the bottom of a straight drinking glass for pressing—it keeps my fingers clean! Pop this beautiful base into the freezer for a solid 30 minutes. That chilling time keeps the crust from crumbling when we add the weight of the ice cream.
Mixing the Creamy Peanut Butter Filling
While the crust is getting firm, grab a large bowl for the filling. You want this mixture to be as smooth as silk. Beat the thawed whipped topping (it should be soft, not liquid!), the peanut butter, the powdered sugar, and that drop of vanilla extract all together. Keep mixing until there are absolutely no lumps left and the color is uniform and beautiful. This takes a little elbow grease, but it’s so worth having that luxurious texture!
Layering and Freezing the Ice Cream Pie
Time to layer! Take your slightly softened vanilla ice cream and spread it evenly right over that chilled Oreo crust. Be gentle so you don’t mess up the edges. Next, spoon that fluffy peanut butter filling right over the ice cream layer and gently smooth it out to cover everything. Now comes the hardest part: waiting! Cover it loosely with plastic wrap and send it back to the freezer for a minimum of 6 hours. Honestly, letting it set overnight is best, making this an ideal make ahead frozen dessert.
Finishing Touches and Serving the Ice Cream Pie
Just before you slice into this beauty, it’s time to make it shine! Warm up your hot fudge topping slightly so it flows easily off the spoon. Drizzle that warm fudge generously all over the top of the frozen pie. Then, finish it with a sprinkle of those chopped peanuts for that essential salty crunch. Slice it up immediately and enjoy the applause!
If you are looking for other fuss-free frozen delights, you should check out my recipe for my easy no-bake dirt cake—it has a similar ‘set it and forget it’ vibe!
Tips for the Best Homemade Ice Cream Pie Success
Even though this is a no bake ice cream pie, there are a few little tricks I’ve learned over the years that turn a good pie into a spectacular one. When you’re making a homemade ice cream pie, temperature is really everything! You’re layering ingredients that have very different needs—frozen, chilled, and room temp.
My biggest piece of advice, which I mention in the instructions, relates to the ice cream itself. You absolutely have to let your vanilla ice cream soften up a bit before you layer it. If it’s rock hard straight from the freezer, you’ll end up gouging holes in your lovely Oreo crust while trying to spread it around. On the flip side, if you let it melt into soup, you lose the structure we need for freezing!
Aim for that perfect texture where it’s pliable—like very thick mud or soft-serve—but still very cold when you spread that layer over the crust. This lets it meld nicely with the peanut butter filling without melting down into those buttery cookie crumbs and making the crust soggy.
Speaking of that crust, pressing it down firmly is non-negotiable! I pack mine in there tight, making sure it goes all the way up the sides. That sturdy wall is what holds everything—the ice cream and the filling—in place when it’s time to slice. A loose crust means disaster later! If you’re ever looking for tips on making a perfect traditional crust, my recipe for flaky butter pie crust might give you some general baking wisdom about keeping things cold!
Lastly, be generous with the freezer time! That 6-hour minimum isn’t just a suggestion; it’s the blueprint for success here. You need it fully set so the toppings don’t just slide right off when you go to serve it. This dessert truly requires patience, but you get an incredible reward for waiting!
Ingredient Notes and Substitutions for Your Ice Cream Pie
I know we all bake with what we have on hand, and that’s perfectly fine! While this peanut butter ice cream pie recipe is set up beautifully with Oreos and vanilla ice cream, I want you all to feel free to make small, smart tweaks. My goal is always to get you to that incredible, creamy, frozen dessert experience, even if you need to swap a component or two. This recipe offers great flexibility, which is why it ends up on my list of best ice cream pie recipes.
For instance, if you’re allergic to chocolate or just prefer a buttery, crisp texture, you can absolutely switch up that base. Or maybe vanilla just isn’t your favorite ice cream flavor? No problem! Dealing with substitutions is part of learning to trust your own instincts in the kitchen, just like when I work on my chocolate mousse pie.
Here are a couple of common swaps I get asked about, especially when people are looking for different kinds of indulgent frozen treats:
- Changing the Crust: If you don’t want to use Oreos, a classic graham cracker crust ice cream pie base is a wonderful alternative. Just use about 1 3/4 cups of crushed graham crackers instead of the cookies, mixing it with the melted butter just the same. It gives a slightly lighter, sweeter crunch.
- Flavor Swaps for the Ice Cream: If you were reading the notes and thinking, “I really wish this was a chocolate ice cream pie,” go right ahead! Substitute the 2 quarts of vanilla ice cream with your favorite chocolate flavor. Just remember the same rule applies: it needs to be softened, but still firm, before layering.
- Nut-Free Option: If you need to make this nut-free for a party, simply skip the chopped peanuts on top! The pie texture is still wonderful even without them, though you might want to add some extra chocolate chips or crushed cookies on top instead for visual appeal.
The filling ratio—whipped topping to peanut butter—is what keeps things light and airy, so I usually advise against swapping out the whipped topping for something like cream cheese unless you are entirely changing directions on the recipe. That ratio is key to that signature creamy ice cream pie texture!
Serving Suggestions for Your Ice Cream Pie for Parties
Okay, now that we’ve made this stunning ice cream pie for parties, we have to present it right! Because this is such an indulgent frozen treat, I always like to have a few simple accompaniments ready on the side. It’s all about making the dessert table look abundant and exciting, even if the preparation was easy. Remember, presentation is half the fun!
Since our pie has that perfect mix of peanut butter, vanilla, and chocolate from the fudge drizzle, we want flavors that either cut through the richness or lean right into that decadent profile. I always look for ways to serve things with just a little something extra, much like how my hot fudge brownie bread is heavenly on its own but even better with ice cream!
Here are a few of my favorite ways to plate this spectacular summer dessert:
- Fresh Fruit Scatter: Even though this isn’t a cherry ice cream pie recipe, fresh fruit always looks lovely. Scatter some very thinly sliced strawberries or raspberries around the serving plate. The slight tartness cuts through the heavy sweetness of the peanut butter and chocolate beautifully. Keep the fruit away from the actual pie slices, though!
- Extra Crunch on the Side: If you have guests who aren’t thrilled with the chopped peanut garnish, set out a small bowl of extra chopped peanuts or perhaps some crushed graham crackers on the side. People love customizing their plates, and it adds another texture element to the table spread.
- Coffee Pairing: Seriously, a slice of rich, creamy pie like this begs for a hot cup of coffee afterward, or even a little iced coffee served alongside it. The slight bitterness of the coffee really complements the salty peanut butter notes. It’s an elevated touch for your gathering!
- Keep it Simple: If it’s a super casual backyard barbeque, don’t stress too much! Just make sure you have a very sharp, thin knife handy for slicing. Warm your knife under hot water, wipe it dry, and slice quickly. A clean cut makes for a beautiful presentation, even on a paper plate!
When you’re serving this at a gathering, remember that you need to pull it out of the freezer about 10 minutes before you plan to serve those first slices. It firms up very quickly in the cold air, and we want everyone to get a taste of that perfect, creamy texture we worked so hard for!
Storing and Reheating Your Ice Cream Pie
Since this decadent treat is all about being frozen solid, our focus here is entirely on making sure it stays perfect in the freezer until you’re ready to serve it. This is truly the best feature of a make ahead frozen dessert—you can whip it up days ahead of time and forget about it until the minute you need it!
The main thing we fight against in the freezer is freezer burn and absorbing any refrigerator smells. Trust me, you don’t want your lovely peanut butter layer smelling like last night’s leftover broccoli! So, the key here is a tight seal.
Once your ice cream pie has set up completely after those 6 hours (or overnight!), you need to wrap it up like it’s precious cargo. First, plastic wrap should be pressed directly onto the surface of the pie—I mean pressed down firmly so there is zero air touching that lovely fudge and peanut butter topping. Then, cover the whole pie plate loosely with a layer of aluminum foil over the plastic wrap. The plastic wrap keeps ice crystals off the surface, and the foil provides that overall seal.
If you’ve done this right, this pie will keep beautifully in the back of your freezer for up to three weeks! I’ve definitely had one tucked away waiting for an unexpected gathering, and it was just as delicious as the day I made it.
Now, about reheating—we don’t reheat ice cream pies, dear friend! We thaw them just enough so they are sliceable. Pull your wrapped pie out of the freezer about 15 to 20 minutes before you plan to slice. If you need it to be served right away at a party, you can remove the foil and plastic wrap after about 10 minutes, letting the very top layer soften just slightly. This quick thaw is essential for getting those clean, beautiful slices you want to serve your guests.
Frequently Asked Questions About This Easy Frozen Pie Recipe
Every time I put out a recipe here on the blog, I get wonderful questions from folks tuning in from all over! That’s what community is all about—learning together. Since this easy frozen pie recipe is such a favorite for summer gatherings, I thought I’d answer a few of the most common things people ask when they are planning to whip one up. Don’t forget, if you’re looking for other simple snacks to serve alongside this spectacular dessert, check out my thoughts on easy appetizers and snacks!
Can I use a different cookie for the ice cream pie crust?
Absolutely! While I just adore the deep chocolate flavor the Oreos lend to this pie, you are certainly not limited to them. If you’re looking to shift the flavor profile toward something a little sweeter and less chocolate-y, you can easily swap them out. Just use about 1 3/4 cups of crushed graham crackers instead, mixed with that same melted butter. You’ll end up with a beautiful, crisp graham cracker crust ice cream pie that is just as sturdy and delicious!
How far in advance can I make this ice cream pie?
This is one of my favorite things about this recipe—it’s a dream for meal planning! Since the texture relies on being completely frozen and set, this is a perfect make ahead frozen dessert. I usually assemble the entire thing, tightly wrap it as detailed in the storage section, and pop it in the freezer. It will keep wonderfully for up to two weeks! If you let it sit that long, just remember you’ll need to pull it out about 20 minutes before serving so it tempers just slightly for easier slicing.
What if I want a richer peanut butter flavor in my creamy ice cream pie?
Oh, I love that you’re thinking about boosting that bold flavor! If you are a true peanut butter enthusiast, you can definitely dial up the intensity of that middle layer. When you are beating together the whipped topping and the peanut butter, try stirring in about an extra quarter cup of dry-roasted peanut butter chips. You’ll want to mix them in by hand right at the end so they don’t break down too much. Or, a tiny drop of good quality peanut butter extract can really enhance that flavor without changing the consistency of the filling at all. That will make for an even more indulgent, flavorful bite!
For more inspiration on great frozen desserts, sometimes I browse comprehensive lists of amazing recipes, like the ones found over here. It’s fun to see how others approach their frozen treats!
Sharing Your Perfect Ice Cream Pie Experience
Well, my dear friends, we’ve reached the end of the instructions for this fabulous frozen creation! I truly hope this ice cream pie becomes a staple in your home, just like it is here for my family. Honestly, seeing you all enjoy these simple, reliable dishes is the greatest reward for me.
But my cookbook isn’t complete without hearing from you! I absolutely want to know how your pie turned out, especially if you got creative with your layers. Did you try that chocolate swap I mentioned, or perhaps you used a different cookie base? Don’t be shy!
Please, take a moment to leave a star rating right here on the recipe card so others know you trust it. And if you snapped a picture of your beautiful, drippy, frozen masterpiece—especially if you served it up for your neighborhood barbecue or a milestone celebration—I would just love for you to share it! Tagging me lets me see your wonderful work, and it helps build this sweet little community we have here at Cooking by Carla. You can always read more about my philosophy here!
Happy scooping, and enjoy every single cool, creamy bite!
PrintEasy No-Bake Peanut Butter Ice Cream Pie with Oreo Crust
Make this easy, crowd-pleasing peanut butter ice cream pie. It features a simple Oreo crust and creamy peanut butter filling, perfect for summer gatherings or any time you need a make ahead frozen dessert.
- Prep Time: 20 min
- Cook Time: 0 min
- Total Time: 6 hours 20 min
- Yield: 8 servings 1x
- Category: Dessert
- Method: No Bake
- Cuisine: American
- Diet: Vegetarian
Ingredients
- 1 3/4 cups crushed Oreo cookies (about 24 cookies)
- 6 tablespoons unsalted butter, melted
- 1 (16 ounce) container frozen whipped topping, thawed
- 1 (18 ounce) jar creamy peanut butter
- 1/2 cup powdered sugar
- 1 teaspoon vanilla extract
- 2 quarts (8 cups) softened vanilla ice cream
- 1/2 cup hot fudge topping, warmed
- 1/4 cup chopped peanuts, for garnish
Instructions
- Prepare the crust: Mix the crushed Oreo cookies and melted butter in a bowl until combined. Press the mixture firmly into the bottom and up the sides of a 9-inch pie plate. Freeze the crust for 30 minutes while you prepare the filling.
- Make the peanut butter filling: In a large bowl, beat together the thawed whipped topping, peanut butter, powdered sugar, and vanilla extract until smooth and creamy.
- Assemble the pie: Spread the softened vanilla ice cream evenly over the frozen Oreo crust. Top the ice cream layer with the peanut butter filling mixture, spreading it to cover the ice cream completely.
- Freeze: Cover the pie loosely with plastic wrap and freeze for at least 6 hours, or until firm. This makes it a great make ahead frozen dessert.
- Serve: Before serving, drizzle the warm hot fudge topping over the pie. Sprinkle with chopped peanuts. Slice and serve immediately.
Notes
- For a firmer crust, chill the butter before mixing it with the crumbs.
- If you do not have vanilla ice cream, you can substitute with chocolate ice cream for a chocolate ice cream pie variation.
- You can use a graham cracker crust ice cream pie base instead of Oreo cookies if preferred.
Nutrition
- Serving Size: 1 slice
- Calories: 550
- Sugar: 45g
- Sodium: 350mg
- Fat: 35g
- Saturated Fat: 15g
- Unsaturated Fat: 20g
- Trans Fat: 0.5g
- Carbohydrates: 58g
- Fiber: 2g
- Protein: 10g
- Cholesterol: 40mg