

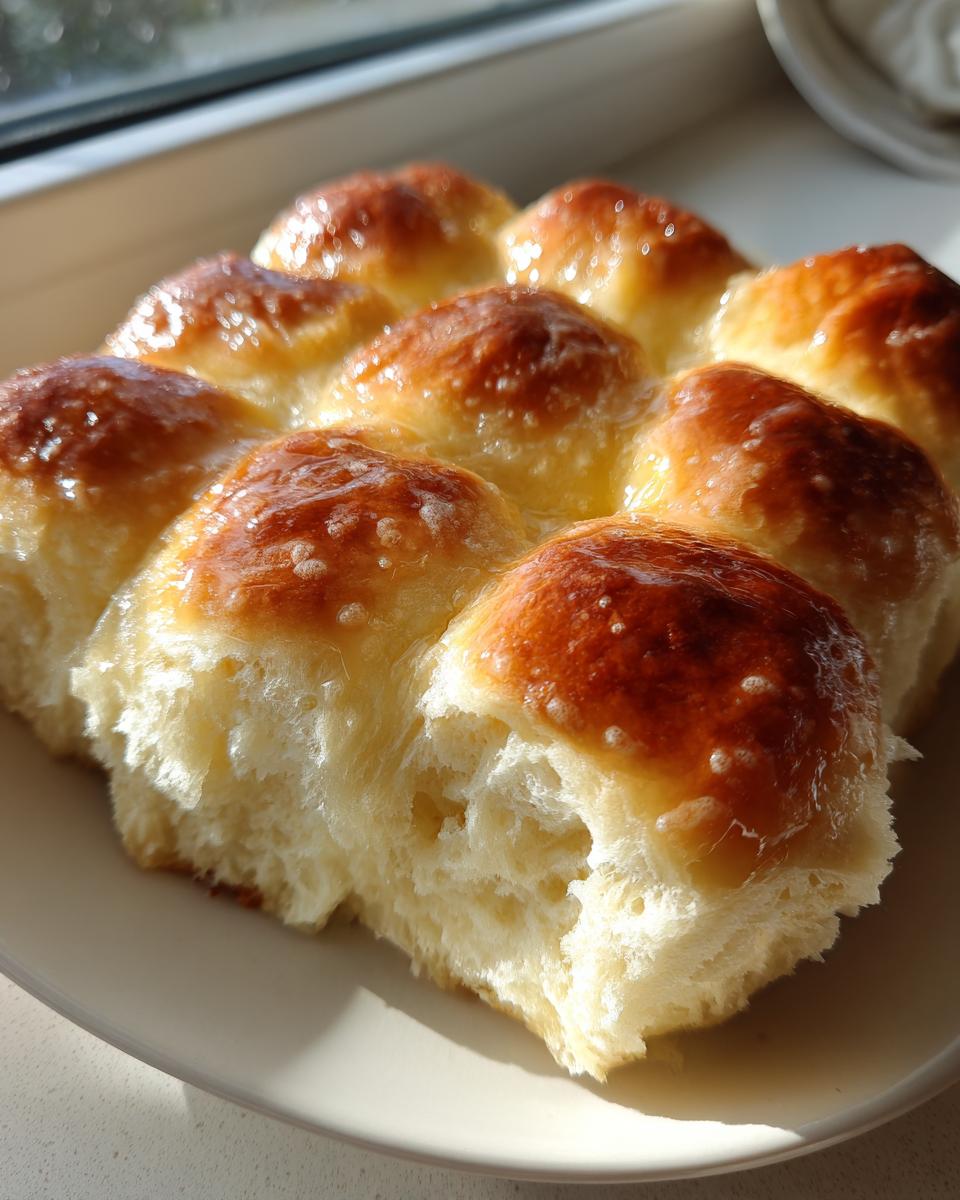
There is nothing quite like that moment when you pull something truly beautiful out of the oven—the scent of yeast and melted butter filling every corner of your house, promising pure comfort. Forget the store-bought stuff; today, we’re making homemade magic! I’m so delighted to share my recipe for Soft, Fluffy, Buttery 1-Hour Dinner Rolls. Growing up in the Midwest, a gathering wasn’t complete without a basket of warm bread on the table, and these dinner rolls always brought everyone closer. Made from scratch, they bake up quickly, giving you that rich, tender texture usually reserved for hours of rising time. If you’re looking for the best way to make quick dinner bread that rivals anything you’ve had before, check out my notes on getting the perfect simple yeast recipe later down the page, especially if you need an alternative to my recipe for homemade bread bowls!
- Why These Are the Best Soft Dinner Rolls You Will Ever Make
- Gathering Ingredients for Your Buttery Bread Rolls
- Step-by-Step Instructions for Soft Dinner Rolls
- Tips for Perfect Dinner Rolls Every Time
- Storage and Reheating Your Homemade Dinner Rolls
- Frequently Asked Questions About Dinner Rolls
- Estimated Nutritional Data for Dinner Rolls
- Share Your Soft Dinner Rolls Experience
Why These Are the Best Soft Dinner Rolls You Will Ever Make
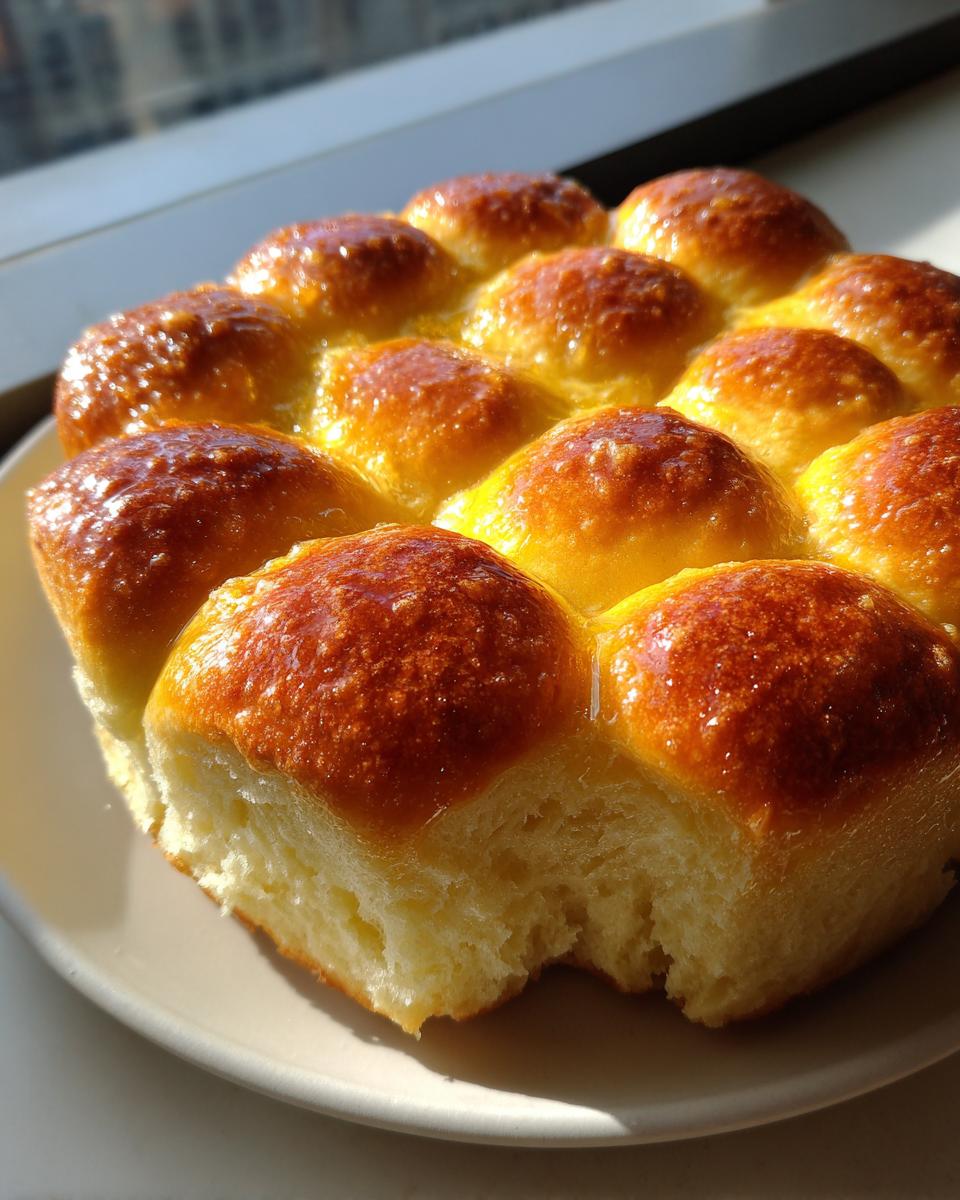
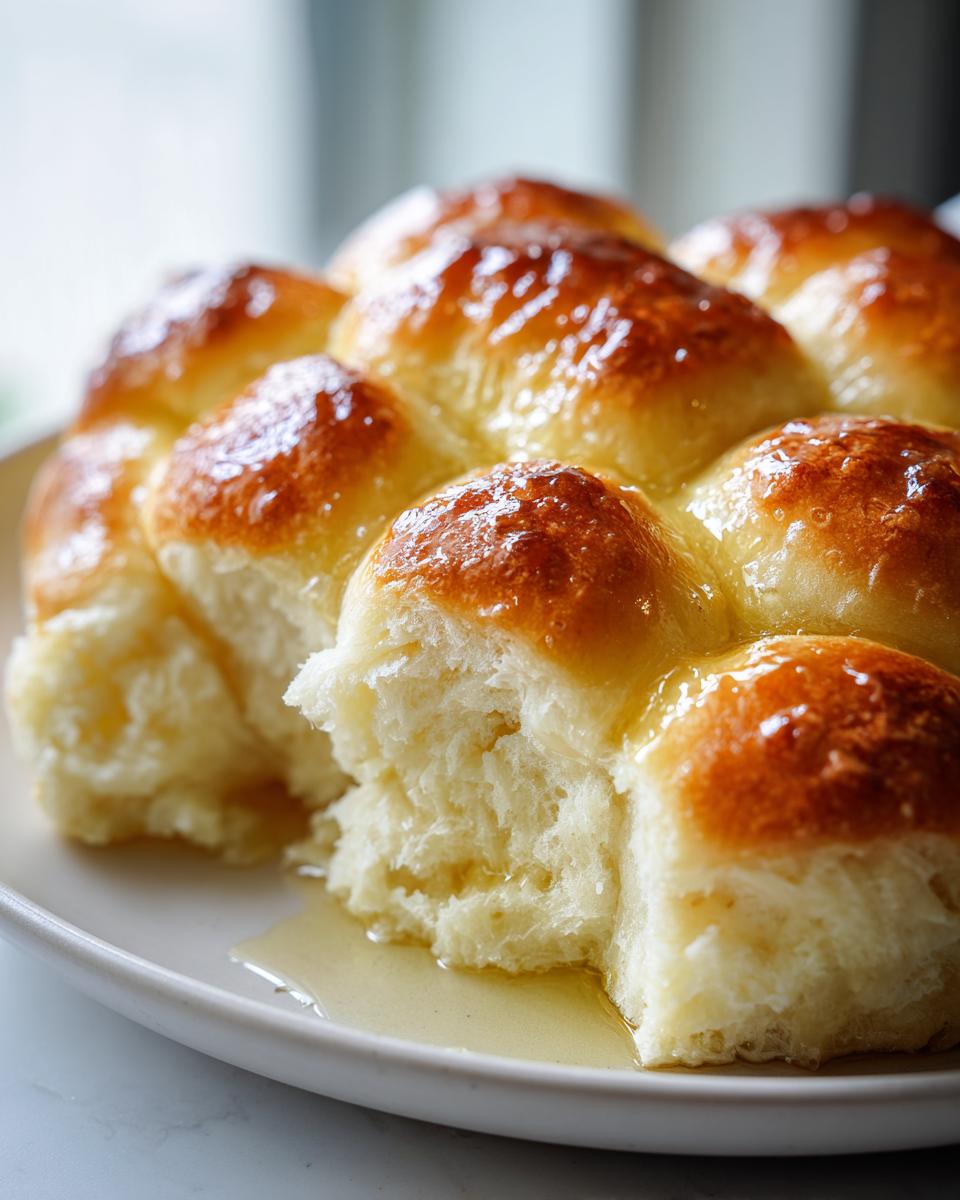
You’re going to love how dependable this recipe is. In just about an hour, you can have these gorgeous, light rolls on your table. I know what it’s like needing warm bread sides in a hurry, especially when guests are coming! These aren’t just any bread; they are incredibly soft dinner rolls that melt in your mouth. Seriously, the texture is heavenly—pillowy soft on the inside with that gorgeous golden top. They create the kind of rich buttery bread that deserves to be slathered with even more butter the second they come out of the oven. If you want to see how other bakers tackle similar delicious rolls, check out this great guide on dinner rolls.
Quick Prep for Homemade Rolls from Scratch
Don’t let the phrase homemade rolls from scratch scare you away for a second! My goal here at the kitchen table is always to make things achievable. We only have about 20 minutes dedicated to active prep time here. That’s it! It’s truly an easy dinner roll recipe because the mixture comes together so quickly. I just grab my big wooden spoon, and before you know it, we’re covering the bowl to let the yeast do its beautiful work. You won’t feel rushed at all!
The Secret to Fluffy Yeast Rolls Texture
If you want those spectacular fluffy yeast rolls, remember two small but mighty things: the milk temperature and the kneading. You need your milk just warm enough—around 110°F—to wake up the yeast properly. If it’s too cold, nothing happens. Too hot, and you kill your yeast! Then, once you add the flour, you must knead until it feels smooth and elastic. That kneading develops the gluten structure, which is what traps the air and gives you that light, fluffy interior. This consistency is what separates true homemade bread from the sad grocery store bags, and I promise, it’s worth the few minutes of work! If you love this kind of fluffy texture, you should also check out my recipe for fluffy Southern biscuits.
Gathering Ingredients for Your Buttery Bread Rolls
Alright, let’s talk about what you need to round up for these scrumptious rolls! Because we are relying on such a simple yeast recipe, the quality of these basic components really shines through. I’ve listed everything below, and I promise, you probably have most of this in your pantry right now. The only special preparation you need is melting some butter before we start, but don’t let it be hot!
- 1 cup warm milk (This needs to be about 110°F—think pleasantly warm bath water, not hot!)
- 2 1/4 teaspoons active dry yeast (That’s just one standard little packet, so easy!)
- 1/4 cup granulated sugar
- 1 large egg, room temperature (This helps everything mix in smoother, trust me.)
- 1/4 cup unsalted butter, melted and slightly cooled
- 1 teaspoon salt
- 3 1/2 cups all-purpose flour, plus more for dusting
- 4 tablespoons unsalted butter, melted (This is for brushing on top later—yes, extra butter!)
- 1 teaspoon coarse salt (Optional, but I use it for a little sparkle and crunch on top.)
Ingredient Notes and Substitutions for Dinner Rolls
I want to stress a couple of things here before you dive in, especially if this is your first time making homemade rolls from scratch. First, that milk temperature: 110°F is the sweet spot for waking up the yeast in your simple yeast recipe. If you don’t have a thermometer, just test it on the inside of your wrist; it should feel quite warm but not burn you at all.
Next, the egg should be at room temperature. Cold ingredients can actually chill your dough down and slow everything down later, and since we are aiming for those magnificent soft dinner rolls in under an hour, we want everything happy and ready to go. Also, if you really want those buttery bread rolls to sing, use whole milk instead of skim. That extra fat makes a noticeable difference in the richness and keeps them tender for days. It’s worth it for the ultimate experience! Once your rolls are baked, you can whip up an amazing spread to go with them, like my recipe for easy cinnamon butter here.
Step-by-Step Instructions for Soft Dinner Rolls
Now that you have all your ingredients ready, let’s get to the fun part! This process moves pretty quickly, which is why these are such fantastic dinner rolls for a busy weeknight. I’ll walk you through exactly how I get these golden beauties out of the oven so fast. We are focusing on delivering that soft, buttery texture in the shortest time possible. If you need a bit more detailed explanation on handling the dough, this guide for perfect dinner rolls has some great visuals, too! For other bread recipes you might love, don’t forget to check out how I make easy homemade bread bowls.
Activating Yeast and Mixing the Dinner Rolls Dough
First things first, we need to confirm that yeast is alive and ready to work its magic for our simple yeast recipe! Take your large bowl and pour in that warm milk—remember, 110°F is the goal. Sprinkle the yeast right over the top and gently stir in just a pinch of that sugar. Give it about five minutes. If you see suds forming on top, like a little layer of foam, you’re good to go! That means happy yeast.
Next, whisk in the rest of the sugar, your room-temperature egg, that first measure of melted butter, and the salt. Once those are mixed in, it’s time for the dry stuff. Gradually add your flour. I start by mixing it with a sturdy wooden spoon. You’ll mix until the dough starts pulling away from the sides of the bowl and it looks a bit shaggy—don’t worry if it seems a little messy at this stage. That’s exactly what we want before we move to the counter.
Kneading and First Rise for Fluffy Yeast Rolls
Turn that shaggy dough out onto a surface lightly dusted with flour. Now comes the actual work, but it’s rewarding work! You need to knead this dough for a good 6 to 8 minutes. You should feel the dough transforming under your hands; it starts sticky and rough, but after a few minutes, it should become noticeably smooth and elastic. If it’s sticking too much, add just a whisper more flour, but try not to add too much, or you’ll lose that soft texture!
Once it’s smooth, lightly oil a clean bowl—just a little bit so it doesn’t stick. Pop your dough ball in and turn it over once to coat. Cover that bowl tightly with plastic wrap or a clean tea towel. Now we wait for the first rise! Place it somewhere warm—maybe near a sunny window or on top of your stove—for exactly 30 minutes. It should double in size. Thirty minutes is usually perfect for these fluffy yeast rolls.
Shaping and Final Proofing of the Dinner Rolls
When the dough has doubled, go ahead and gently punch it down—this just releases some of that built-up gas. Now, divide that dough into 12 equal-sized pieces. I like weighing mine for perfect consistency, but if you don’t have a scale, just eyeball them so they are all roughly the same size.
Roll each piece firmly between your palms until you have a smooth little ball. Arrange these balls in your greased 9×13 inch baking pan. Make sure they touch just slightly—this is how they bake up into wonderful, connected pull apart rolls recipe style! Leave a tiny bit of space between them on the short ends. Cover the pan loosely again and let them rest for a final, quick rise in a warm spot for another 20 minutes. They will look puffy and airy when they are ready for the oven.
Baking and Brushing Your Warm Bread Sides
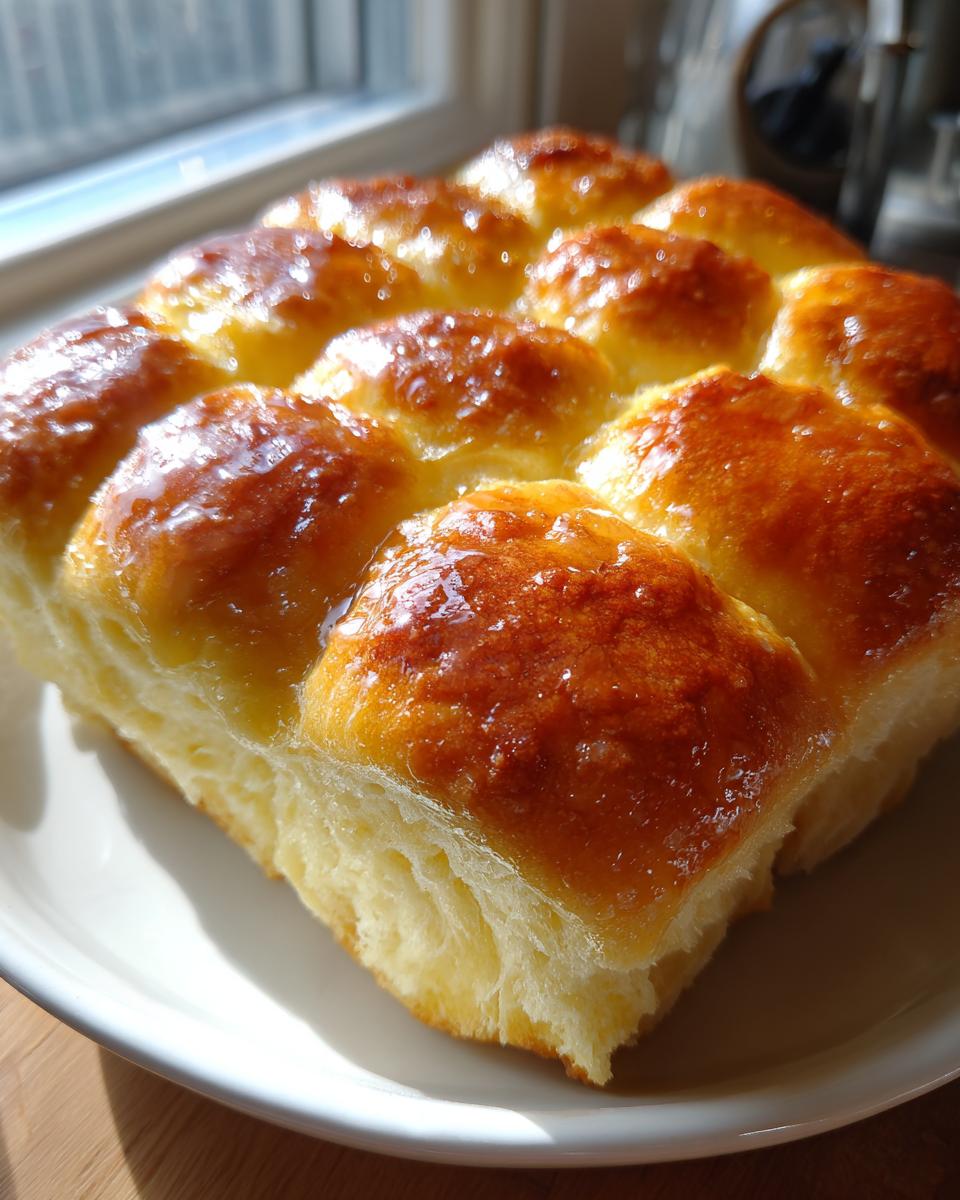
Time to bake! Preheat your oven to 375°F (190°C). This is a slightly higher temperature, which helps them brown nicely on top quickly. Bake the rolls for about 15 to 18 minutes. Keep an eye on them after the 15-minute mark because every oven is different. You’re looking for a beautiful, rich golden brown color across the top.
Here is perhaps the most important step for achieving the best warm bread sides: as soon as they come out of the oven, grab that extra 4 tablespoons of melted butter. Brush it all over the warm tops generously. This step seals in all the moisture and gives them that signature sheen and incredible flavor. If you like, sprinkle a tiny bit of coarse salt over the wet butter right away. Serve them immediately while they are screaming hot!
Tips for Perfect Dinner Rolls Every Time
Even with a recipe this straightforward, sometimes the kitchen environment tries to fight you! As a former teacher, I know that sometimes you just need a little extra encouragement or a hack when things aren’t going exactly by the book. Don’t fret if your dough seems sluggish; we can fix it. This is why I put together these extra pointers to ensure you get reliably beautiful, soft dinner rolls on demand. This is just part of making sure this easy dinner roll recipe works, no matter what the humidity is doing outside.
Handling Dough in a Cool Kitchen
If you live somewhere with chilly winters or you just don’t have a naturally warm spot in your house, the dough rise—especially that first one—can really suffer. Remember how we stressed the importance of 110°F milk? If the room drops below 70°F, that yeast gets sluggish, and waiting an extra hour for your rolls to double is just not what we want in a 1-hour recipe!
Here’s my old teacher trick: Find your oven, turn the light on, and close the door—but do not turn the actual heat on! That little oven light generates just the right amount of gentle warmth to create a perfect little proofing box. Just place your oiled, covered bowl inside for the 30 minutes. It mimics a summer kitchen beautifully. It’s a lifesaver, and it keeps your fluffy yeast rolls on schedule every single time. For other great tips on bread building, you might like to see my notes on making gravy without drippings for serving alongside your rolls!
Variations: Making Sweet Dinner Rolls or Parker House Rolls
These rolls are already a little bit sweet because of the sugar in the dough, but if you want them leaning toward the dessert side—maybe for a holiday get-together—you have a couple of simple options. You can easily double the amount of sugar used in the dough, or once they cool slightly, drizzle them with a thin glaze made from powdered sugar and a splash of milk or cream. That makes them feel extra special, almost like sweet dinner rolls.
Now, if you specifically want those classic Parker House rolls flavor, you’ll need to change the shape slightly. Instead of just rolling them into balls for a pull-apart look, you individually roll each piece into a small oval. Then, brush softened butter quickly on one side, fold that oval in half over itself (like closing a book), and place them seam-side down in your pan. They still bake up heavenly, but the fold creates those distinct buttery layers characteristic of proper Parker House rolls.
Storage and Reheating Your Homemade Dinner Rolls
You’ve made the best homemade bread, and the last thing you want is for those gorgeous, buttery bread rolls to go stale! Luckily, these doughs are rich enough that they stay wonderfully soft for a little while. If you happen to have leftovers—which, let’s be honest, rarely happens at my house—storage is simple.
Once the rolls have cooled completely to room temperature, you must pop them into a truly airtight container. A standard zip-top bag works, but honestly, a sturdy plastic container with a tight-fitting lid works even better to keep the air out. Stored this way on your counter, they should retain their tenderness for up to three full days. That’s longer than most bread lasts, which is a testament to that lovely melted butter we brushed on top!
If you made a giant batch for a holiday gathering and know you won’t eat them all within three days, you need to freeze them. Be sure they are completely cool before you put them in the freezer. Place them in a heavy-duty freezer bag, squeeze out as much air as you can, and they will keep beautifully for up to two months. I love having these ready to go! If you’re planning ahead for an event, you might even look at a make-ahead showstopper like my easy Christmas poke cake.
Reheating for That Fresh-From-the-Oven Taste
The best part about these dinner rolls is how easy they are to revive! You don’t want to microwave them; that just makes them tough, and we worked too hard for tough rolls. Instead, preheat your oven to a low temperature—around 300°F is perfect. Lay the rolls out on a baking sheet. You just want to warm them through very briefly. Five to seven minutes is usually plenty. They will heat right up, the butter inside will soften again, and you’ll get that glorious aroma of warm bread sides filling the kitchen all over again. They’ll be almost as good as when they first came out!
Frequently Asked Questions About Dinner Rolls
It’s common to have a few questions when you try a new bread recipe, especially one promising soft dinner rolls fast! I’ve gathered up some of the things folks ask me most often about getting this recipe just right. When you’re baking, understanding the ‘why’ behind a step is what really builds your confidence for future baking adventures.
Can I make these dinner rolls ahead of time?
Oh yes, absolutely! This is one of the reasons I love this recipe for busy days or big events where you need easy baking solutions, especially for things like holiday yeast rolls. While the recipe is designed to be quick, you can certainly slow it down. After you divide and shape the dough balls (Step 7), instead of letting them proof on the counter for 20 minutes, cover the pan tightly and pop it into the refrigerator. They can cold-proof overnight there! When ready to bake the next day, let them sit at room temperature for about 30 minutes just to take the chill off, then bake as directed. They’ll be wonderfully light!
What makes these rolls different from copycat restaurant rolls?
That’s a fun question! People are often looking for that incredibly soft texture you get at certain chain restaurants, and I’ve heard my rolls compete quite well with copycat restaurant rolls! The main difference is speed. Most copycat versions involve longer, gentle proofing times—sometimes for half a day—to develop deep flavor. My version speeds things up by using slightly more yeast and sugar, combined with that quick 30-minute rise to get that fluffy texture you see in my pull apart rolls recipe. You get 90% of the flavor and texture in about 1/3 of the time!
Why did my yeast not foam when making this simple yeast recipe?
This is the number one troubleshooting question for any simple yeast recipe! If you don’t see that nice foam on top after five minutes, it usually means one of two things: either your milk was too hot and it killed the yeast, or your yeast packet was old. If you suspect the milk temperature, just add a tiny pinch more yeast to the mixture, let it sit another five minutes, and see if anything happens. If it still doesn’t go foamy, the yeast is definitely dead, and you’ll need to start over with a fresh packet. Make sure that milk is just 110°F next time!
If you need more pointers on handling doughs for other recipes on the site, like my tips for making mini meatloaf muffins (which is a great freezer meal!), just let me know in the comments!
Estimated Nutritional Data for Dinner Rolls
Now, I just want to give you a little heads-up before we get into the numbers here. When I developed this recipe for dinner rolls, my focus was 100% on achieving that soft texture and buttery flavor we love so much. I wasn’t aiming for a diet food, that’s for sure! The nutritional breakdown I’m giving you below comes straight from calculating the recipe ratios, but please remember these are estimates.
Any variations you make—like switching to whole milk or using more butter in that final brush—will naturally change these figures. These are just here to give you a general idea of what these wonderful, rich buttery bread sides contain. Like all my recipes here at Cooking by Carla, these are made to be enjoyed with love, not scrutinized too closely!
- Serving Size: 1 roll
- Calories: 195
- Fat: 7g
- Saturated Fat: 4g
- Carbohydrates: 29g
- Sugar: 4g
- Protein: 5g
- Fiber: 1g
- Sodium: 250mg
See? Not bad at all for such a truly satisfying treat! For a lighter side dish—if you ever need a break from all the rich flavor of these buttery bread rolls—you might enjoy my fresh chicken lettuce wraps for comparison. But really, these rolls are best served warm with whatever main dish you have planned!
Share Your Soft Dinner Rolls Experience
Well, that’s all there is to it! We’ve gone from simple flour and milk to a big, beautiful pan of warm, irresistible homemade dinner rolls in just about an hour. I truly hope these find their way onto your family table, because that’s the best part of sharing these recipes.
Now, I can’t wait to hear what you think! Did they turn out perfectly soft? Did you use whole milk like I suggested for that extra buttery goodness? Pop down into the comments section below and let me know how your batch went! Tell me if you drizzled on a little glaze or if you went for my favorite simple layer of melted butter right when they came out of the oven.
If you were able to snap a picture of your gorgeous golden-topped rolls, please send one over! You can reach out to me directly through my contact page here; I absolutely love seeing your results and sharing your successes with the community. Happy baking, friends, and I’ll see you in the next recipe!
PrintSoft, Fluffy, Buttery 1-Hour Dinner Rolls

Make incredibly soft, fluffy, and buttery homemade dinner rolls in about one hour. This easy yeast roll recipe yields warm, rich bread perfect for weeknight dinners or holiday gatherings.
- Prep Time: 20 min
- Cook Time: 18 min
- Total Time: 68 min
- Yield: 12 rolls 1x
- Category: Dinner
- Method: Baking
- Cuisine: American
- Diet: Vegetarian
Ingredients
- 1 cup warm milk (about 110°F)
- 2 1/4 teaspoons active dry yeast (one standard packet)
- 1/4 cup granulated sugar
- 1 large egg, room temperature
- 1/4 cup unsalted butter, melted and slightly cooled
- 1 teaspoon salt
- 3 1/2 cups all-purpose flour, plus more for dusting
- 4 tablespoons unsalted butter, melted (for brushing)
- 1 teaspoon coarse salt (optional, for topping)
Instructions
- In a large bowl, combine the warm milk and yeast. Let it sit for 5 minutes until foamy. This shows the yeast is active.
- Add the sugar, egg, 1/4 cup melted butter, and salt to the yeast mixture. Whisk until combined.
- Gradually add the flour, mixing with a wooden spoon or stand mixer until a shaggy dough forms.
- Turn the dough out onto a lightly floured surface. Knead for 6 to 8 minutes until the dough is smooth and elastic. It should be soft but not sticky.
- Place the dough in a lightly oiled bowl, turning to coat. Cover the bowl with plastic wrap or a clean kitchen towel. Let the dough rise in a warm place for 30 minutes, or until doubled in size.
- Gently punch down the risen dough. Divide it into 12 equal pieces. Roll each piece into a smooth ball.
- Arrange the dough balls in a greased 9×13 inch baking pan, leaving a small space between each roll for them to touch as they bake (for pull-apart rolls).
- Cover the pan loosely and let the rolls rise again in a warm spot for another 20 minutes. They should look puffy.
- Preheat your oven to 375°F (190°C).
- Bake the rolls for 15 to 18 minutes, or until they are golden brown on top.
- Immediately after removing the rolls from the oven, brush the tops generously with the remaining 4 tablespoons of melted butter. Sprinkle lightly with coarse salt if desired.
- Serve the warm bread sides immediately for the best flavor and texture.
Notes
- For extra soft dinner rolls, use whole milk instead of lower-fat milk.
- If your kitchen is cool, place the covered dough in your oven with just the light on to create a warm environment for rising.
- These buttery rolls freeze well after baking; cool completely, place in an airtight container, and reheat briefly in the oven when ready to serve.
Nutrition
- Serving Size: 1 roll
- Calories: 195
- Sugar: 4
- Sodium: 250
- Fat: 7
- Saturated Fat: 4
- Unsaturated Fat: 3
- Trans Fat: 0
- Carbohydrates: 29
- Fiber: 1
- Protein: 5
- Cholesterol: 25