
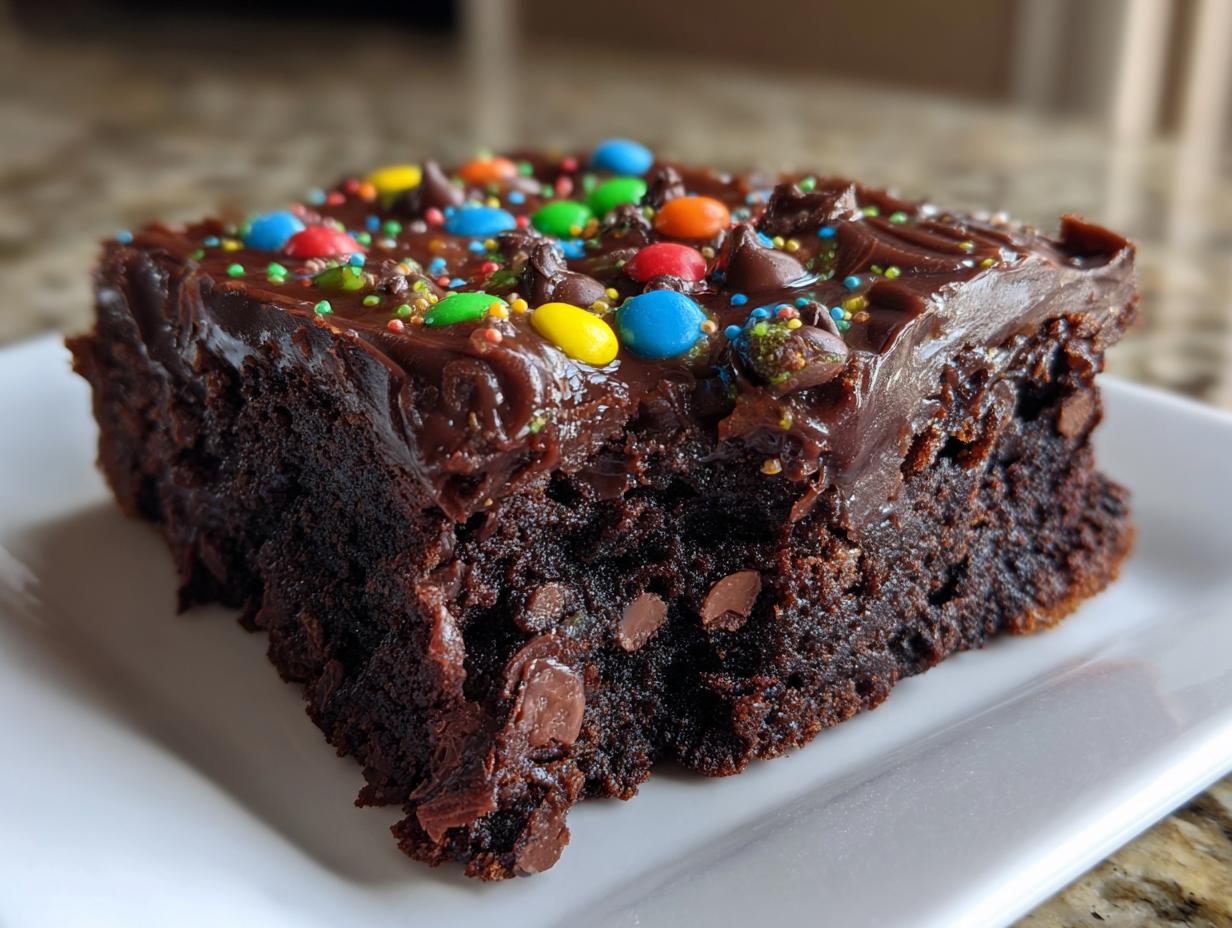
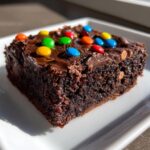
There are some desserts that just smell like childhood, aren’t there? For me, that scent—that deep, rich chocolate paired with the crunch of those little candy dots—immediately takes me back to school lunches and after-school snacks. If you’ve been searching for the ultimate recipe to recreate that nostalgic magic right in your own oven, stop looking right now. I’ve spent years perfecting this, and I can tell you with confidence: this is the best, fudgiest homemade cosmic brownies recipe you will ever find. It perfectly mimics that classic texture. Making these from scratch isn’t just about baking; it’s about bringing a little piece of happy history back to your table. Trust me, you’ll want to add this chocolate masterpiece to your rotation!
- Why You Will Love These Homemade Cosmic Brownies
- Gathering Ingredients for Your Cosmic Brownies
- Step-by-Step Instructions for Perfect Cosmic Brownies
- Tips for Success When Making Your Cosmic Brownies
- Storage and Keeping Your Homemade Cosmic Brownies Fresh
- Frequently Asked Questions About These Little Debbie Brownies Recipe
- Nutritional Estimates for Your Chocolate Treat
- Share Your Nostalgic Chocolate Treats Experience
Why You Will Love These Homemade Cosmic Brownies
I promise you, the minute these come out of the oven and you smell that deep chocolate aroma, you’ll know you’ve struck gold. These aren’t the cakey brownies you sometimes find! These are special. They are loaded with everything you remember enjoying as a kid, but elevated just a little bit because you made them with love.
- They deliver that deeply satisfying, intensely chocolatey flavor without being overly sweet.
- You get that perfect, dense, almost chewy center—the hallmark of an authentic treat.
- Everything needed for the Copycat Cosmic Brownies Recipe is usually already sitting right there in your snack cupboard!
The Ultimate Fudgy Brownie Texture
The secret sauce to getting that wonderful, dense texture that makes cosmic brownies so famous is twofold: we melt the butter instead of creaming it, and we use a mix of both white and brown sugar. Melting the butter coats the flour differently, which cuts down on gluten development straight away. Fewer gluten strands mean less structure, which equals that gorgeous, super fudgy texture we are aiming for. The way the sugars interact with the fat creates that slight chewiness on the edges that I just can’t get enough of.
Simple Ingredients for Copycat Cosmic Brownies Recipe
You don’t need fancy equipment or exotic flours for this one. I developed this recipe because sometimes, you just need a quick chocolate fix that tastes like a special occasion without a trip to the gourmet market. This whole Copycat Cosmic Brownies Recipe relies on pantry basics like cocoa powder, standard flour, and, of course, plenty of chocolate chips. It’s proof that the best nostalgic treats are often the simplest ones to pull together!
Gathering Ingredients for Your Cosmic Brownies
Alright, bakers! Before we dive into the magic of mixing, let’s get organized. Having everything measured out beforehand—what some folks call *mise en place*—is so important here. When dealing with fudgy brownies, you can’t really eyeball things; those sugars and that fat need to meet up in the exact right ratios for that perfect texture.
Remember that list? It looks long, but it’s mostly pantry staples! I actually checked a few places online, like over at this lovely site, just to confirm my ingredient list stacked up to the other favorites out there. Mine holds up beautifully, especially where the fudginess is concerned!
For the Fudgy Brownies Base
This is the heart of the operation! Notice we’re using both granulated and brown sugar? That’s key for that slightly chewy, moisture-rich bite. Don’t try to substitute the brown sugar completely; it brings that beautiful, molasses depth that white sugar just can’t offer here.
- 1 cup (2 sticks) unsalted butter
- 1 1/4 cups granulated sugar
- 1 cup packed light brown sugar
- 4 large eggs (Make sure they are room temperature if you can!)
- 1 tablespoon vanilla extract
- 3/4 cup unsweetened cocoa powder (Good quality makes a difference!)
- 1 teaspoon salt
- 1/2 teaspoon baking powder
- 1 cup all-purpose flour
- 1 cup semi-sweet chocolate chips (These go right into the batter!)
For the Signature Chocolate Ganache Frosting Brownies
This frosting is what sets the “cosmic” apart from the ordinary! It’s a simple, pourable ganache that sets up just enough to hold those colorful chips in place. I always say you can tell the depth of a chocolate treat by the cocoa you use in the frosting, so use one you like the taste of! A richer cocoa really makes these Chocolate Ganache Frosting Brownies sing.
- 1 cup powdered sugar
- 1/4 cup unsweetened cocoa powder
- 1/4 cup milk or heavy cream (I usually reach for the cream for a richer set!)
- 1 teaspoon vanilla extract
Oh, and don’t forget the fun part—the topping! Have about 1/2 cup of those candy-coated chocolate chips ready to go right after the frosting is spread on.
Step-by-Step Instructions for Perfect Cosmic Brownies
Now for the fun part! Baking is so satisfying when you know you are following a proven method. I know a lot of you are looking forward to making these Homemade Cosmic Brownies exactly like the box, and that comes down to careful steps. Timing is everything, especially where fudgy texture is concerned, so follow along closely!
A quick note before we start: Sometimes, readers ask me about testing temperature, and while I have guides for using thermometers, for these brownies, we’re relying on sight and feel because they bake so fast. If you are nervous about the bake time, you can always check out my thoughts on how to test fudge consistency, though the toothpick check here is usually spot on!
Preparing the Pan and Mixing the Cosmic Brownies Batter
First things first, get that oven heating up to 350°F (175°C). Don’t skip the lining step! Use parchment paper in your 9×13 pan and make sure you leave an overhang around the sides. This little sling of paper is your best friend when it’s time to pull the whole thing out later—trust me, you don’t want to wrestle a sticky brownie pan!
- Melt that full cup of butter over low heat in a saucepan. Take it off the heat completely before moving on.
- Whisk in both your sugars until everything looks like wet sand.
- Add those four eggs, one at a time, making sure you beat them in well after each egg goes in. Then, stir in your vanilla.
- In a separate little bowl, whisk your dry stuff together: the cocoa, salt, and baking powder. This keeps the cocoa from clumping.
- Gently add those dry ingredients to the wet mixture. Mix only until you don’t see huge streaks of flour anymore. Seriously, stop mixing early! Overmixing is the enemy of fudgy.
- Finally, fold in that cup of semi-sweet chocolate chips meant for the batter.
Spread that gorgeous, thick batter into your prepared pan and get it ready for the oven. If you want even more reassurance before baking, check out how others approach this famous treat at this link!
Baking and Cooling for Fudgy Brownies from Scratch
Bake the pan for just about 25 to 30 minutes. This is the moment of truth! We are aiming for that perfect middle ground that guarantees you have amazing Fudgy Brownies from Scratch. When you insert a toothpick near the center, you want it to come out with moist crumbs stuck to it—like little damp bits of chocolate cake clinging on. If that toothpick is totally dry, you baked too long, and they will be cakey! If it’s dripping wet batter, give it three more minutes.
But hold on! The second they come out, you must let them cool completely. And I mean *completely*. If you try to frost warm brownies, you’ll end up with a wonderful mess of melted chocolate goo everywhere. Patience, my friend; this cooling step is part of the process!
Making and Applying the Chocolate Ganache Frosting
Once those brownies are cool—and I mean cool enough to touch without hesitation—we whip up the signature topping. This is a surprisingly easy ganache! Just whisk the powdered sugar and the 1/4 cup of cocoa powder together first. This prevents lumps later on, which is always a good thing.
- Gradually whisk in your milk (or cream) and vanilla until you get a smooth, spreadable frosting. If it seems too stiff, splash in just a tiny bit more milk—maybe just a teaspoon at a time. Don’t let it get runny!
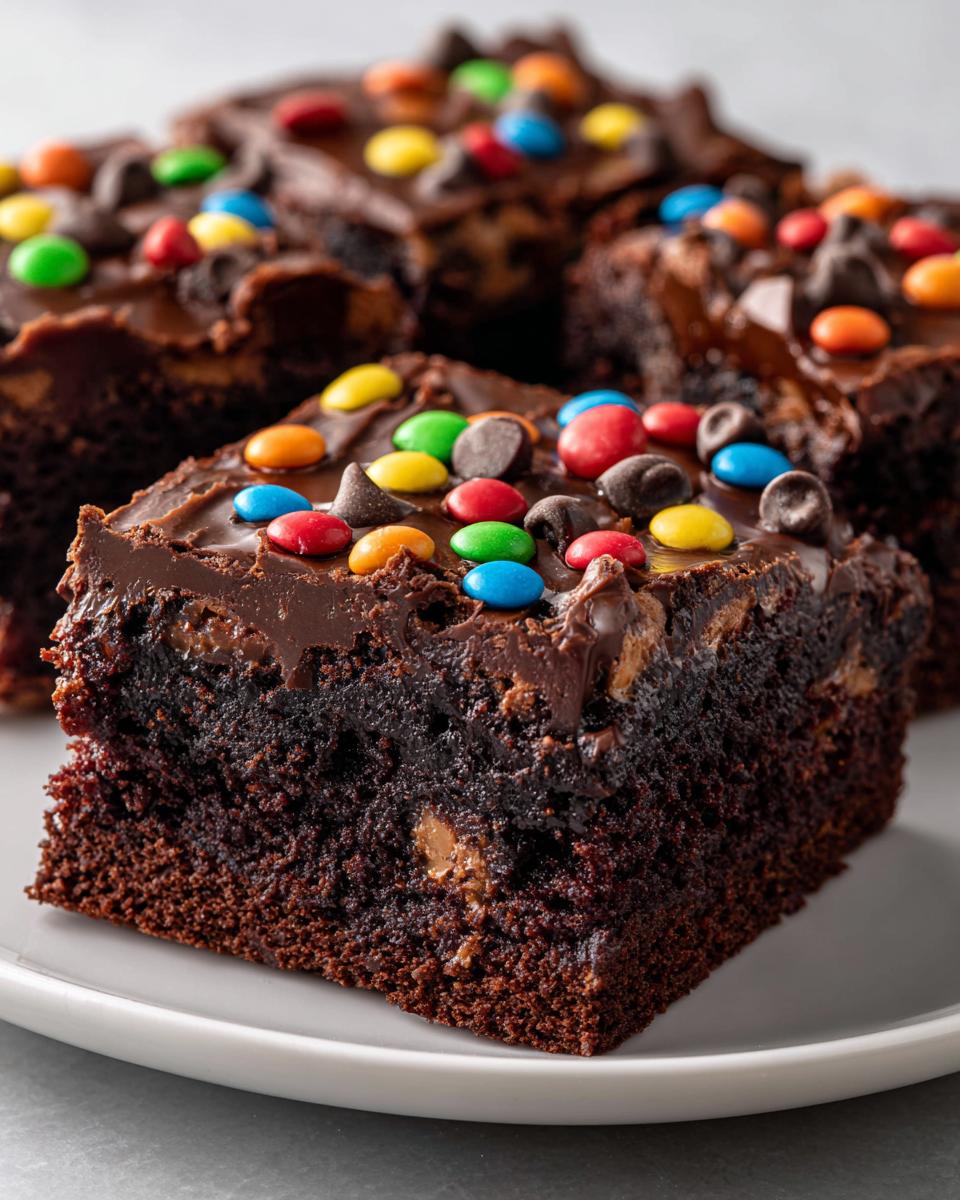
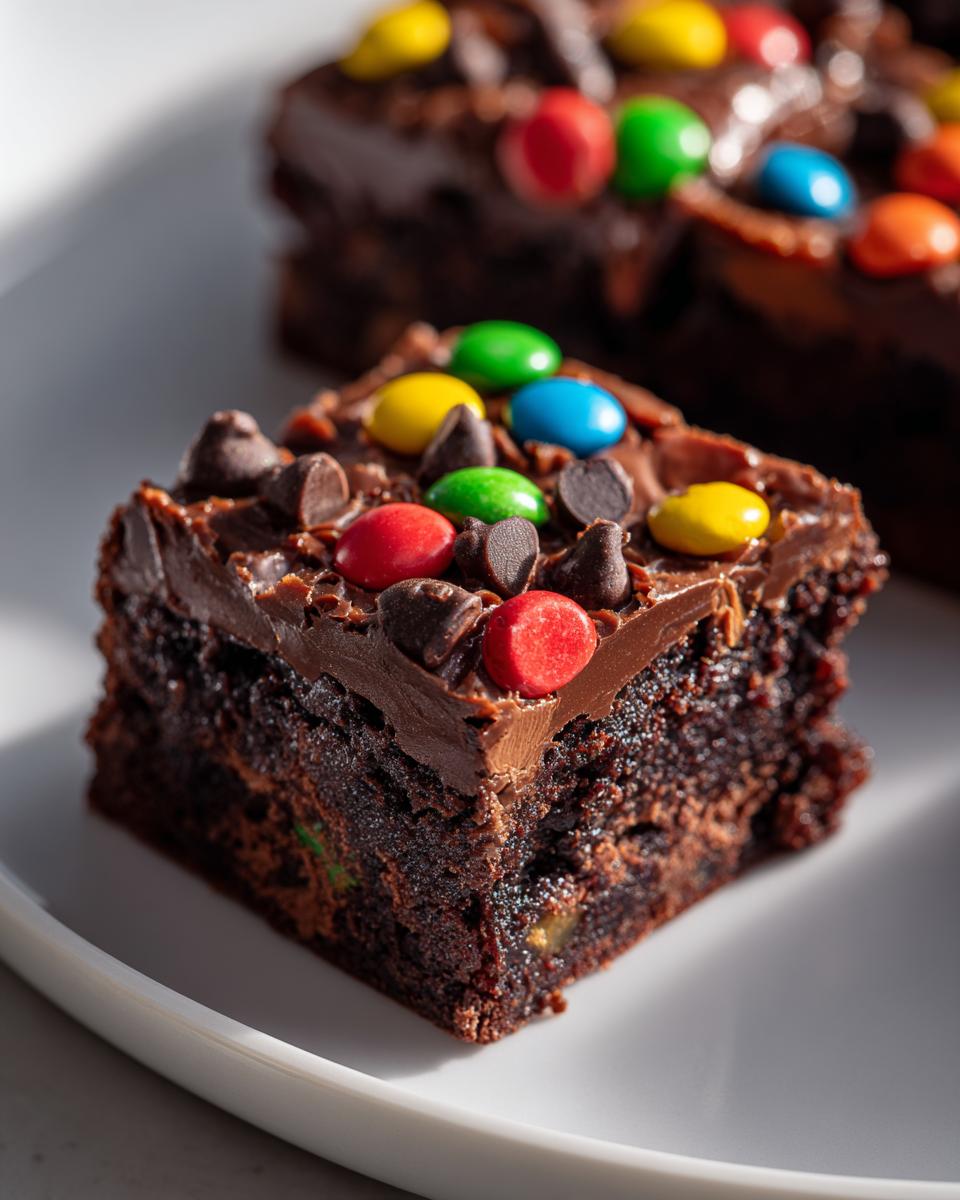
- Spread this glossy layer evenly over the top of the cooled brownie slab. Work quickly but smoothly.
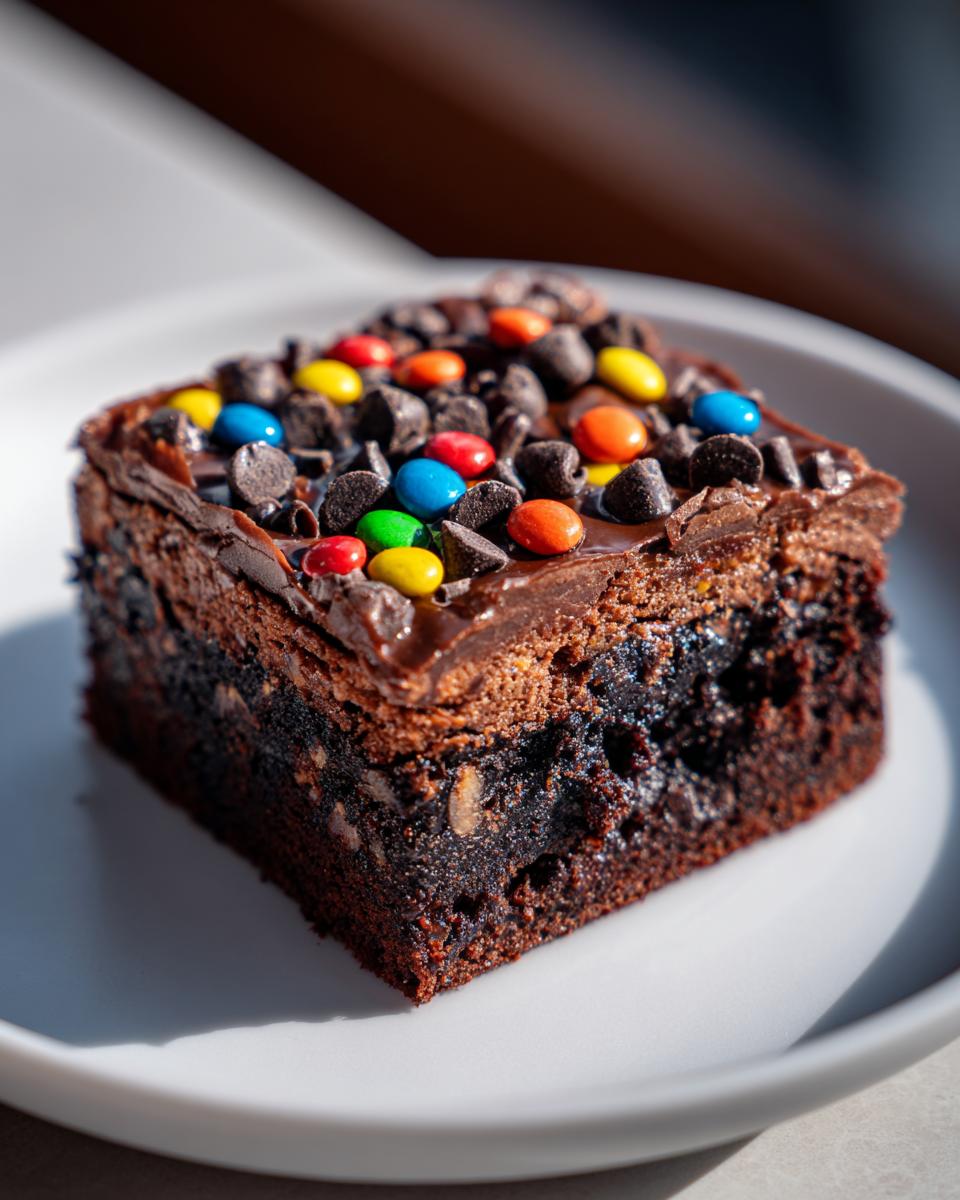
- Right away—and I mean *immediately*—sprinkle those candy-coated chocolate chips over the top. They need that slightly wet surface so they stick fast and look perfect.
- Let it sit on the counter for about 30 minutes for the frosting to firm up a bit before you use the parchment overhang to lift the whole thing out and slice it into squares. Enjoy that satisfying, multi-layered look!
Tips for Success When Making Your Cosmic Brownies
Baking is wonderful because you can always tweak things slightly to make a recipe truly *yours*. Even though this recipe is designed to be a perfect copycat, I’ve learned a few tricks over the years that can save you from a baking disaster or elevate the flavor just a touch more. These little insights are what separate a good batch of brownies from the absolute best batch!
Avoiding Overbaked Cosmic Brownies
I can’t say this enough: Do not overbake these! I know it goes against every instinct you have when baking cakes, but for these fudgy treats, we embrace the slight under-bake. If your toothpick comes out bone dry, you’ve baked them too long, and you’ve made a cakey brownie, not the dense, rich goodness we’re aiming for. I always pull mine out when I see the moist crumbs clinging—that residual heat will cook them just a bit more on the pan as they cool. It leads to that melt-in-your-mouth experience we love about the original Cosmic Brownies.
Cosmic Brownie Topping Ideas and Customization
While the candy-coated chips are non-negotiable for true cosmic authenticity, sometimes it’s fun to play around! If you are just feeling like mixing up the colors, you can absolutely do that. I’ve seen bakers use all blue or all red chips for themed parties. If you want to take these a step further into gourmet territory—though this moves away from the classic Little Debbie style—you could try drizzling a little melted peanut butter or white chocolate over the top of the ganache right before the chips go on. You just have to work super fast, otherwise, the chips won’t stick! If you’re interested in frosting variations in general, I have a great post about how to get my cream cheese frosting to hold its shape perfectly, though for these, we stick to the simple chocolate ganache.
Storage and Keeping Your Homemade Cosmic Brownies Fresh
These Homemade Cosmic Brownies are so rich and dense that they actually stay quite fresh for days—which is great, because I certainly never manage to keep them around that long! Because of the fats in the butter and the chocolate in the ganache, they hold up way better than a standard cakey brownie.
The key really is keeping the air away from them. I always store mine right in the 9×13 pan, but only after the frosting has completely set, naturally. Cover the entire pan tightly with plastic wrap or transfer the squares into an airtight container.
Now, where you keep them depends on how fast you plan to eat them. Because the frosting is a simple ganache (not a buttercream), it’s actually pretty stable. At room temperature, on the counter, they are perfectly fine for about three days. They stay softest this way! If you can manage to keep them around longer than that, or if your kitchen runs really hot in the summer, pop them into the refrigerator. Chilling them firms up that fudge texture even more, and the frosting will get quite firm.
When they come straight out of the fridge, they might be a bit hard for immediate eating, so just let them sit on the counter for about 15 or 20 minutes before serving. Honestly, these Little Debbie Brownies Recipe copies are usually best enjoyed within the first 48 hours—that’s just the reality of a good chocolate bake!
Frequently Asked Questions About These Little Debbie Brownies Recipe
It’s natural to have questions when you’re trying a new recipe, especially one that aims to replicate such a classic treat! I’ve gathered the questions I get most often about achieving that perfect, store-bought texture at home. If you are worried about sizing or structure, this section is for you. If you’re interested in general brownie experimentation, you may also be interested in my take on banana bread brownies!
Can I make a small batch of these Cosmic Brownies?
Oh, absolutely, you can halve this! If you don’t need a full 9×13 pan, just chop every single ingredient in half. If halving the recipe, you could likely use an 8×8 inch pan instead. However, you must watch the baking time very closely. Since the pan will be deeper with half the batter, it might actually take *longer* to bake, not shorter, because the heat has farther to travel to the center. Start checking at the 30-minute mark, but don’t be shocked if it needs an extra five or ten minutes to fully set in the middle.
What makes these the Best Fudge Brownies Recipe?
This is where we circle back to the science of fudgy versus cakey! What pushes this into the “Best Fudge Brownies Recipe” category is what we deliberately leave out and what we include. We use melted butter instead of softened butter that gets creamed with air, which immediately keeps the texture dense. We rely heavily on both sugars for chewiness and moisture, and we use very little baking powder—just enough to give a tiny lift, but certainly not enough to make them rise like a cake. That dense, chocolate-heavy structure is what makes them truly fudgy.
Are these Easy Homemade Brownies suitable for lunchboxes?
In my experience, yes, these make fantastic lunchbox treats because the ganache frosting is so sturdy once it sets! They hold their shape beautifully when cut into neat squares. Just make sure your frosting is completely firm—give it at least an hour at room temperature, or even 20 minutes in the fridge, before you cut them. If you pack them while the frosting is soft, you’ll end up with candy chips stuck everywhere but the brownie surface! For more easy baking ideas, check out this easy copycat recipe online.
Nutritional Estimates for Your Chocolate Treat
Now, as much as these Nostalgic Chocolate Treats taste like pure happiness, I wanted to give you a quick heads-up on the facts. While baking should always be about joy and comfort, knowing what’s in the pan is just good practice. I certainly don’t count calories every day, but it’s helpful information to have tucked away!
Remember, these numbers are just good estimates based on my ingredient percentages. If you use a different brand of cocoa, slightly fattier cream in the frosting, or a different brand of semi-sweet chips, those numbers will shift just a tiny bit. This is just a helpful guideline for your wonderful batch of Candy Coated Chocolate Chip Brownies.

- Serving Size: 1 square
- Calories: 320
- Sugar: 35g (Yes, it’s a treat, so enjoy it!)
- Sodium: 180mg
- Fat: 18g
- Saturated Fat: 10g
- Unsaturated Fat: 8g
- Trans Fat: 0g
- Carbohydrates: 40g
- Fiber: 2g
- Protein: 4g
- Cholesterol: 65mg
This is why we call these a treat and not an everyday staple! But honestly, when you consider how rich and satisfying just one of these fudgy squares is, you realize you don’t need much more. They pack that chocolate punch beautifully.
Share Your Nostalgic Chocolate Treats Experience
Well, friends, that’s my very best attempt at bringing the classic Little Debbie experience right into your home. I truly hope that taking the time to slow down and bake these fudgy squares fills your kitchen with the same amazing scent that fills mine whenever I make them. There’s nothing quite like pulling those colorful chips out of the pantry and sprinkling them over that dark, glossy frosting!
I would be so tickled if you’d share your results with me! When you try this Homemade Cosmic Brownies recipe, please come back here and leave a rating for me at the top of the post. Did they turn out fudgy enough? Were the candy chips perfectly scattered? Let me know in the comments below what you thought!
If you snapped a picture of your finished, stacked squares, tag me on social media! Seeing your family enjoying these moments—whether you’re sharing them with your own kids or just treating yourself to a bite of nostalgia—is the biggest reward for me. It’s why I teach and share these recipes day after day.
If you’re already craving your next chocolate adventure after enjoying these treats, maybe check out my recipe for Hot Chocolate Cupcakes with Whipped Topping next. Happy baking, and thank you for letting me share these cherished memories with you!
PrintThe Best Homemade Copycat Cosmic Brownies Recipe
Make rich, fudgy, and dense brownies topped with chocolate ganache frosting and candy chips, just like the classic Little Debbie treats.
- Prep Time: 15 min
- Cook Time: 30 min
- Total Time: 45 min
- Yield: 16 servings 1x
- Category: Dessert
- Method: Baking
- Cuisine: American
- Diet: Vegetarian
Ingredients
- 1 cup (2 sticks) unsalted butter
- 1 1/4 cups granulated sugar
- 1 cup packed light brown sugar
- 4 large eggs
- 1 tablespoon vanilla extract
- 3/4 cup unsweetened cocoa powder
- 1 teaspoon salt
- 1/2 teaspoon baking powder
- 1 cup all-purpose flour
- 1 cup semi-sweet chocolate chips (for batter)
- 1/2 cup candy-coated chocolate chips (for topping)
- 1 cup powdered sugar (for frosting)
- 1/4 cup unsweetened cocoa powder (for frosting)
- 1/4 cup milk or heavy cream (for frosting)
- 1 teaspoon vanilla extract (for frosting)
Instructions
- Preheat your oven to 350°F (175°C). Grease and line a 9×13 inch baking pan with parchment paper, leaving an overhang for easy removal.
- In a large saucepan over low heat, melt the butter. Remove from heat.
- Whisk the granulated sugar and brown sugar into the melted butter until combined.
- Add the eggs one at a time, beating well after each addition. Stir in the vanilla extract.
- In a separate bowl, whisk together the cocoa powder, salt, and baking powder. Add this dry mixture to the wet ingredients and mix until just combined. Do not overmix.
- Fold in the 1 cup of chocolate chips.
- Spread the batter evenly into the prepared baking pan.
- Bake for 25 to 30 minutes. A toothpick inserted near the center should come out with moist crumbs attached, not wet batter.
- Let the brownies cool completely in the pan on a wire rack. This is important for the frosting.
- Prepare the ganache frosting: In a medium bowl, whisk together the powdered sugar and 1/4 cup cocoa powder.
- Gradually whisk in the milk and vanilla extract until the frosting is smooth and spreadable. Add a tiny bit more milk if the frosting is too thick.
- Spread the chocolate ganache frosting evenly over the cooled brownies.
- Immediately sprinkle the 1/2 cup of candy-coated chocolate chips over the frosting before it sets.
- Let the frosting set for about 30 minutes before cutting into squares. Lift the brownies out of the pan using the parchment paper overhang before slicing.
Notes
- For the fudgiest texture, do not overbake the brownies. They should remain slightly underdone in the center when checked with a toothpick.
- You can use any color combination of candy-coated chocolate chips for the topping.
- If you prefer a thicker layer of frosting, increase the powdered sugar and cocoa powder in the frosting recipe by 1/4 cup each, adding milk slowly until you reach the desired consistency.
Nutrition
- Serving Size: 1 square
- Calories: 320
- Sugar: 35
- Sodium: 180
- Fat: 18
- Saturated Fat: 10
- Unsaturated Fat: 8
- Trans Fat: 0
- Carbohydrates: 40
- Fiber: 2
- Protein: 4
- Cholesterol: 65