
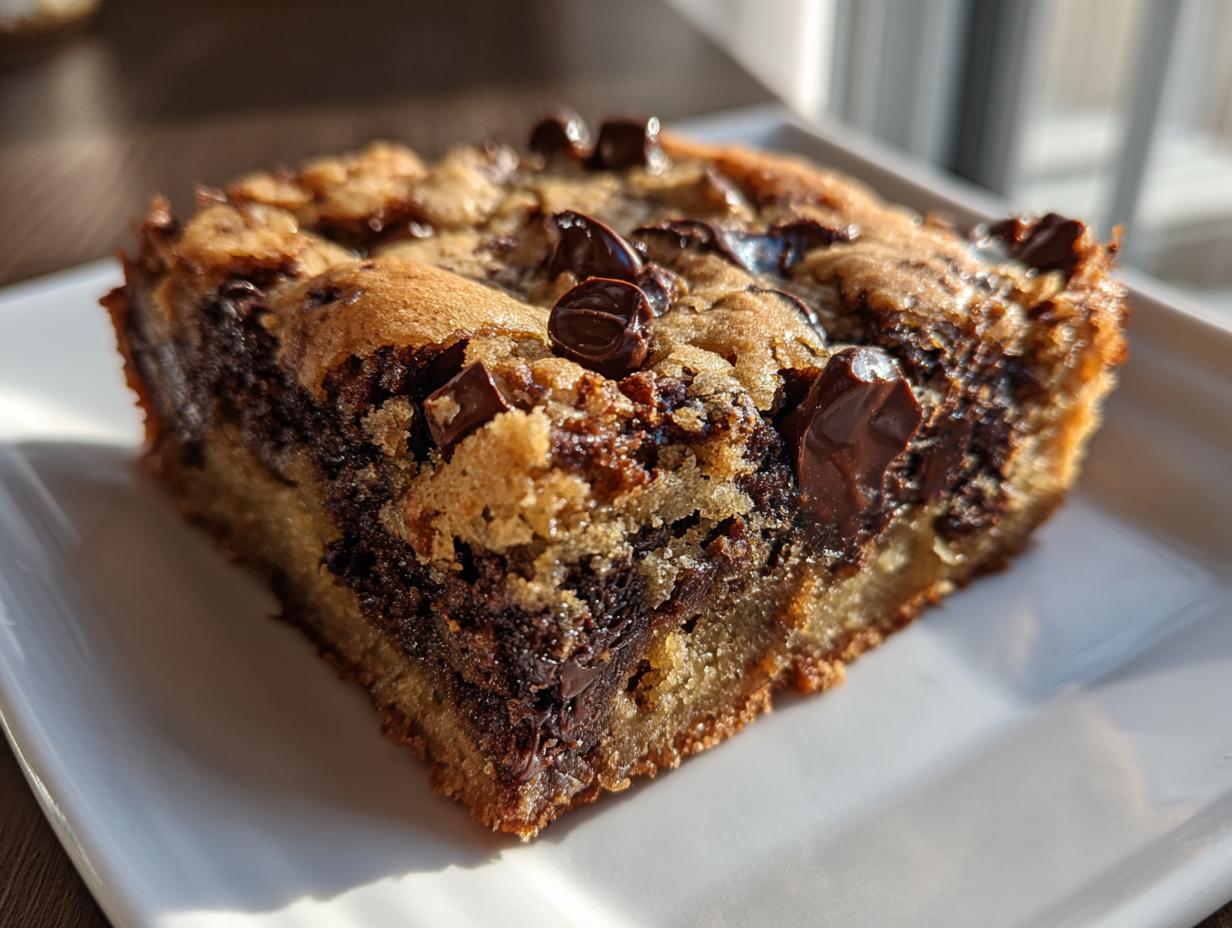
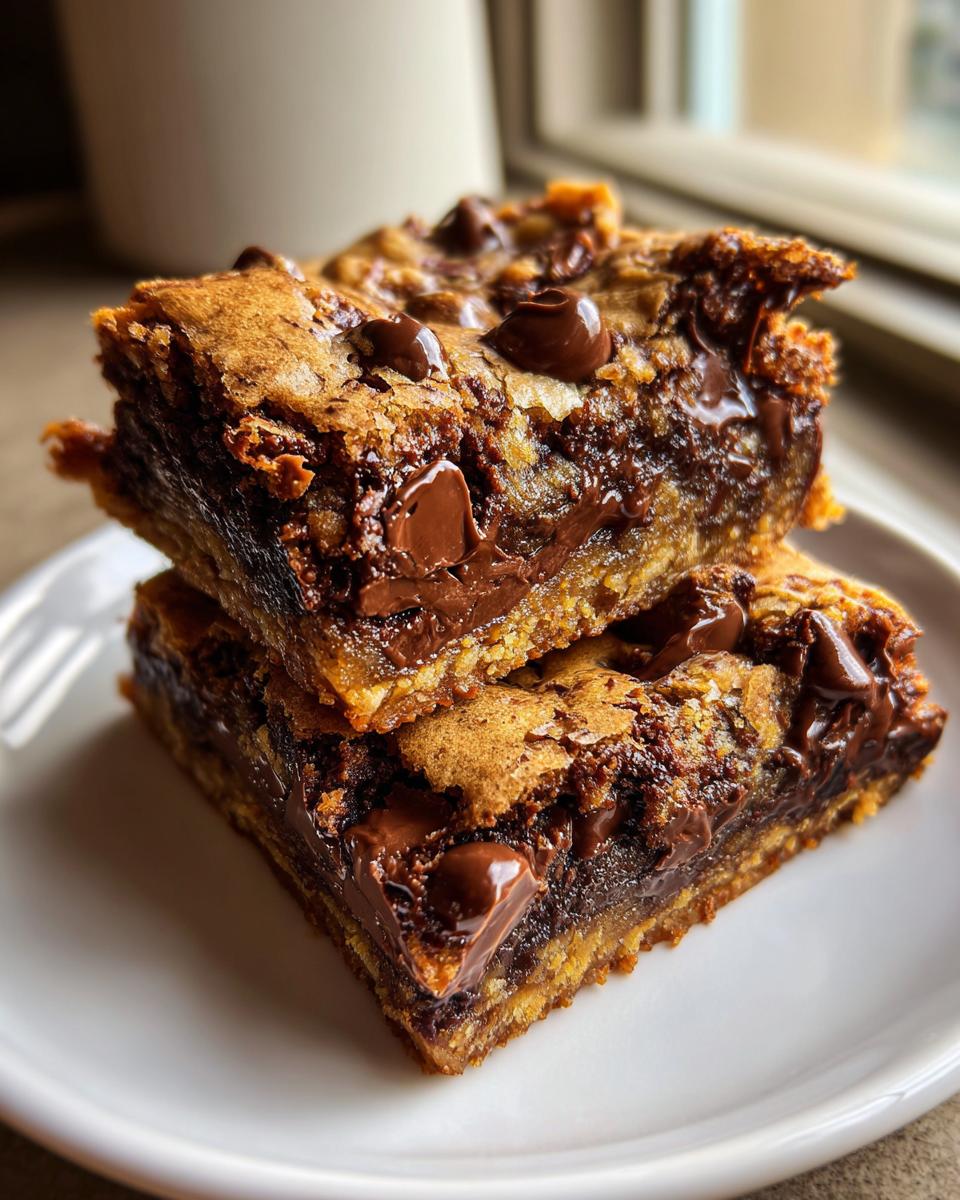
Sometimes, you just don’t have time for scooping, rolling, and waiting for individual cookies to bake just right. That’s when a one-pan dessert saves the day! If you ask me, cookie bars are just superior for feeding a crowd—less fuss, more flavor, and zero worries about mismatched sizes. Today, we are making The Ultimate Chewy Chocolate Chip Cookie Bars with Browned Butter. Trust me, that nutty browned butter elevates these simple chocolate chip cookie bars from good to absolutely unforgettable. It’s about bringing that rich, comforting flavor home without adding extra steps to my day, which is exactly what I always strive for in my kitchen. If you need something truly soft and chewy, check out my peanut butter blossom recipe, but for easy serving, these bars can’t be beat!
- Why This is the Best Chewy Chocolate Chip Cookie Bars Recipe (E-E-A-T)
- Gathering Ingredients for Your Chocolate Chip Cookie Bars
- Step-by-Step Instructions for Easy Chocolate Chip Bar Recipe
- Tips for How to Bake Thick Cookie Bars Perfectly
- Storage and Making Ahead with Chocolate Chip Cookie Bars
- Understanding Blondies vs Cookie Bars
- Serving Suggestions for Your Brown Butter Cookie Bar Recipe
- Frequently Asked Questions About Chocolate Chip Cookie Bars
- Nutritional Estimate for These Perfectly Baked Dessert Bars
Why This is the Best Chewy Chocolate Chip Cookie Bars Recipe (E-E-A-T)
When I teach my grandkids how to bake, I always tell them that good food—even something as simple as a chocolate chip bar—requires a little bit of know-how. This recipe isn’t just tossed together; it’s engineered for the best possible result: a chewy baked bar recipe that melts in your mouth. We use two specific tricks that guarantee you get super moist chocolate chip bars every time. These little secrets mean you don’t have to settle for dry, crumbly squares!
The brilliance of this preparation comes down to knowing how to treat your fats and your sugars. We’re stepping up from just melted butter to something richer and deeper, and we are balancing the sweeteners to keep that perfect, slightly dense chew.
The Secret to Perfect Chocolate Chip Cookie Bars: Browned Butter
I know, I know, browning butter sounds fussy, but trust me, it’s worth the extra minute. When you cook the butter until those milk solids start to toast, you are unlocking a deep, nutty, caramel-like flavor that you just can’t get from simply melting it. Think of it like making your flavor base richer before you even add the sugar! It’s a technique I learned from my mother for pie crusts, and it works wonders here for these thick cookie bars, giving them unbeatable depth.
Achieving the Ultimate Chewy Chocolate Chip Cookie Bars Texture
If you want cakey, use all white sugar. If you want truly chewy chocolate chip cookie bars, you need more brown sugar than white sugar. It’s that simple! Brown sugar is your friend because it brings that molasses content, which keeps things soft and stops them from drying out as they bake. We aren’t going for a light, airy texture here; we want a satisfying, slightly dense, chewy bite that holds up beautifully when you lift it from the pan. That perfect ratio, combined with the richness of the browned butter, is what makes this recipe our family favorite. You can see how I apply similar soft texture rules in my peanut butter blossom recipe, too—it’s all about controlling moisture!
Gathering Ingredients for Your Chocolate Chip Cookie Bars
When I look at these ingredients, I’m happy because almost everything you need is already sitting in your pantry right now! That’s another reason this is such an easy chocolate chip bar recipe. We aren’t asking you to hunt down anything exotic here. We are basically making a really rich cookie dough base that bakes perfectly flat in a single pan, which is what makes these such a simple dessert for any gathering.
The only part you might need to pay a little attention to is that butter—we are using a full cup because that high fat content is essential for that chewy structure we talked about. And please, if you can find it, grab the flaky sea salt for the topping! It truly makes everything pop. If you have any questions about substitutions, you can sometimes look at ingredient swaps in my guide for soft and chewy peanut butter cookies, but for these bars, stick close to the list for the best results.
Here’s what you’ll need:
- 1 cup (2 sticks) unsalted butter (this is our star ingredient for browning!)
- 1 cup packed light brown sugar (packed tight, please!)
- 1/2 cup granulated sugar
- 2 large eggs
- 1 tablespoon vanilla extract
- 2 1/4 cups all-purpose flour
- 1 teaspoon baking soda
- 1/2 teaspoon salt (mixed right into the flour)
- 1 1/2 cups semi-sweet chocolate chips
- 1/2 cup milk chocolate chips (I like the mix of melts!)
- 1 teaspoon flaky sea salt for topping (this is the magic dust!)
Step-by-Step Instructions for Easy Chocolate Chip Bar Recipe
Alright, let’s get baking! Because this is the ultimate one pan chocolate chip dessert, setup is half the battle, and we want to make sure we handle that brown butter correctly. Follow these steps closely, and you’ll have the most delicious, easy chocolate chip bar recipe on your hands. Don’t rush the cooling part at the end; that’s as important as the mixing! Before we start mixing, make sure you’ve got that oven at 350°F (175°C) and your parchment handle is set up on that pan!
Preparing the Pan and Browning the Butter
First thing’s first: set that oven to 350°F (175°C). Now, grab your 9×13 inch pan. I always line mine with parchment paper, making sure the sides come up high above the edges. This overhang is crucial—it’s our handle later! Now for the star: melt that cup of butter over medium heat. Keep swirling the pan gently. Soon, it will foam up, then the foaming will quiet down, and you’ll see little brown bits start to settle at the bottom. When you smell that wonderful, toasted, nutty aroma, pull it right off the heat! Pour that gorgeous brown butter into a large, heat-safe bowl immediately so it stops cooking. We need to let it cool for about 10 minutes before we add the sugars; if it’s too hot, it’ll scramble those eggs later on. If you’re looking for other easy sheet pan meals, I have a great guide on mini meatloaf muffins that walks you through similar quick prep!
Mixing Wet and Dry Components for Chocolate Chip Cookie Bars
Once that browned butter is just warm, whisk in both the brown sugar and the granulated sugar until they are happy and combined. Then, beat in your eggs one at a time—make sure one is fully incorporated before adding the next one. Don’t forget the vanilla! In a separate bowl, marry your flour, baking soda, and salt together. Now, for the most important mixing tip when making chocolate chip cookie bars: add the dry stuff to the wet stuff slowly, and mix on low speed or just use a sturdy wooden spoon. Stop stirring the second you see no more streaks of white flour. Overmixing is the enemy of chewy bars, so don’t do it!
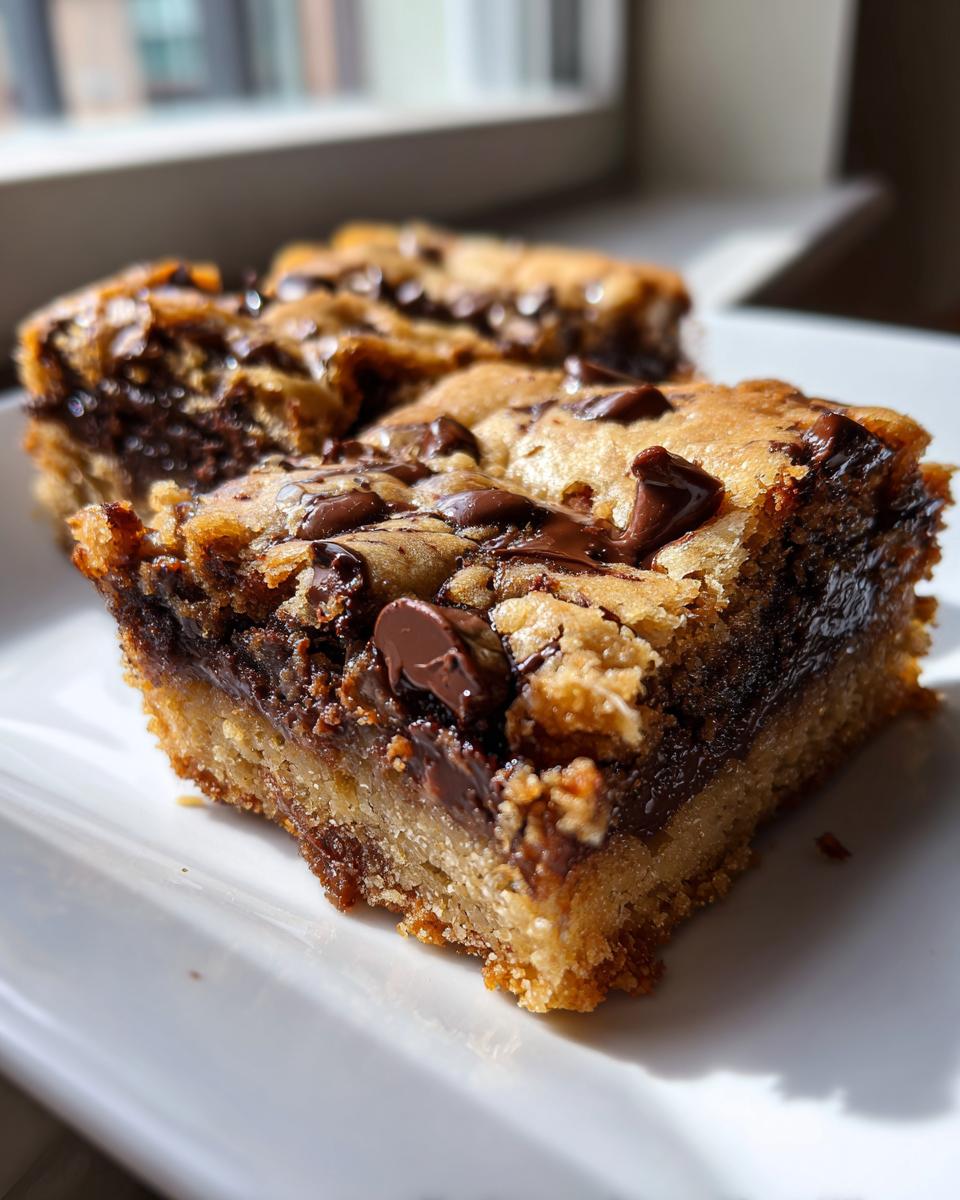
Baking and Cooling Your Gooey Chocolate Chip Squares
Time to fold in all those lovely chocolate chips—I use a mix of semi-sweet and milk for that perfect gooey chocolate chip square effect. Press that dough evenly into your prepared pan. This is optional, but I swear by sprinkling flaky sea salt across the top before it goes in. Bake it for about 28 to 32 minutes at 350°F. I’m looking for edges that look golden-brown and set, but the very center should still look just a tiny bit soft. That’s how you guarantee gooeyness! After you pull it out, you must, absolutely *must*, let these bars cool completely in the pan. If you try to cut them warm, they will fall apart. Use those parchment handles to lift them out when they are totally cool, and slice them up!
Tips for How to Bake Thick Cookie Bars Perfectly
One of the great joys of making these chocolate chip cookie bars is that you can easily adjust the thickness depending on what you’re craving! If you want bars that are genuinely thick and satisfying—more like an over-the-top fudge factor in a square—you simply must adjust your pan size. For dramatically thick cookie bars, I highly recommend cutting your pan size down from the 9×13 to an 8×8 inch pan. This concentrates the dough.
But here’s the caveat: thicker means longer baking time. Check them after the original 30 minutes, but you’ll likely need another 10 to 15 minutes in the oven to get those edges looking set. If you’re troubleshooting and find your edges are getting too dark before the middle is cooked, just tent that pan loosely with a piece of aluminum foil. This simple trick helps control the top browning while the interior finishes up cooking. Follow this guideline, and you’ll have perfectly baked dessert bars every single time!
If you are ever looking for simple tray meals beyond bars, I often share tips on adjusting times over on my guide for mini meatloaf muffins recipes, as pan size adjustments come up there too!
Storage and Making Ahead with Chocolate Chip Cookie Bars
One of the best things about making a big pan of dessert bars is that you usually have leftovers! These chocolate chip cookie bars are fantastic the next day, and honestly, I think they taste even better after they’ve had a night to fully set up. Since this recipe uses browned butter and has a higher sugar content, they keep beautifully at room temperature. Don’t go looking for your refrigerator just yet—unless it’s summer and your kitchen is very hot!
Store them in an airtight container right on the counter. I often cut them into squares first and layer them between sheets of parchment paper or wax paper inside a container. This keeps them from sticking together, and they stay wonderfully chewy for at least three or four days. I never have to worry about them drying out!
Now, if you’re wondering about making the dough ahead of time—the good news is this is one of those joyfully quick recipes where you don’t need to chill the dough! We skip the chilling step entirely. If you are pressed for time, you can mix the dough right up until adding the chips, cover it, and keep it in the fridge overnight, but you’ll need to let it warm up on the counter a bit before pressing it into the pan.
If you like that fresh-out-of-the-oven, melty chocolate situation, I have a great trick. Once they are already cut, pop a single square onto a microwave-safe plate and give it about 12 to 15 seconds. It warms up beautifully and makes the chocolate gooey all over again. It’s like baking them fresh without all the work! If you’re looking back at my holiday recipes, like my guide for the easy Christmas poke cake, you’ll see I always stress the cooling/setting time for layered treats—it’s the same principle here.
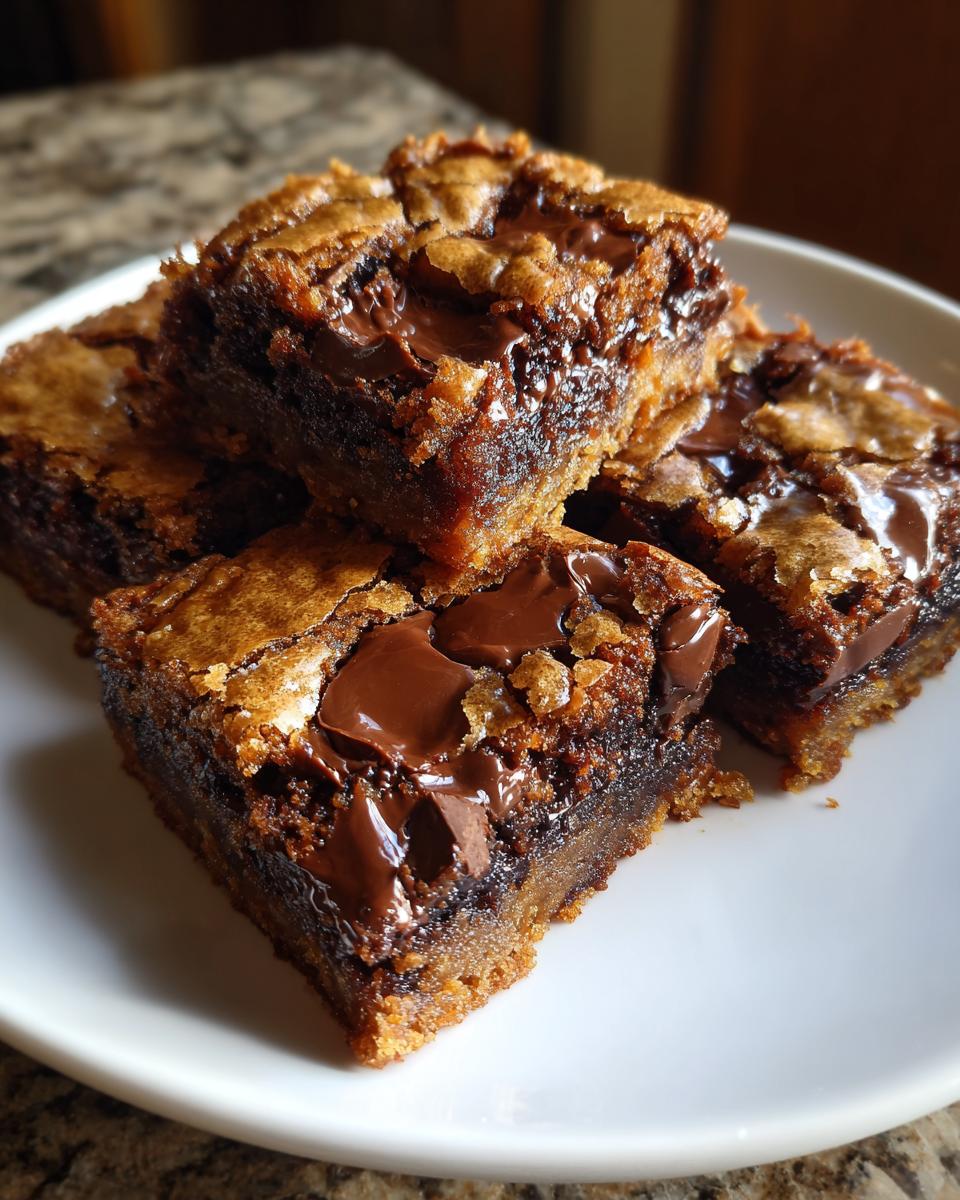
Understanding Blondies vs Cookie Bars
People often ask me about the difference between a classic blondie and a rich chocolate chip cookie bar like the one we just made. It’s a great question because, frankly, they often end up looking quite similar once they’re cut into squares!
The main difference, in my experience, comes down to their DNA. A pure blondie is essentially a vanilla-flavored brownie. They rely heavily on brown sugar and molasses for their deep base flavor, giving them a very intense, fudgy chewiness that is almost caramelized.
Our recipe here, while baked in a pan like a blondie, starts with a traditional cookie dough foundation. We cream the butter and use a specific combination of sugars and leavening agents aimed at creating that recognizable cookie texture, just thicker and baked flat. We’re aiming for that satisfying, slightly soft-set dough that pulls apart like your favorite drop cookie, but in a convenient bar form.
So, while both are delicious one pan chocolate chip desserts, if you’re craving that distinct, dark caramel flavor that screams ‘brownie’ without the cocoa, you want a blondie. If you want the texture and flavor of a classic homemade chocolate chip cookie, just easier to slice for a party, you want these bars! It all comes down to what kind of satisfying chew you’re hoping for at the end of the day.
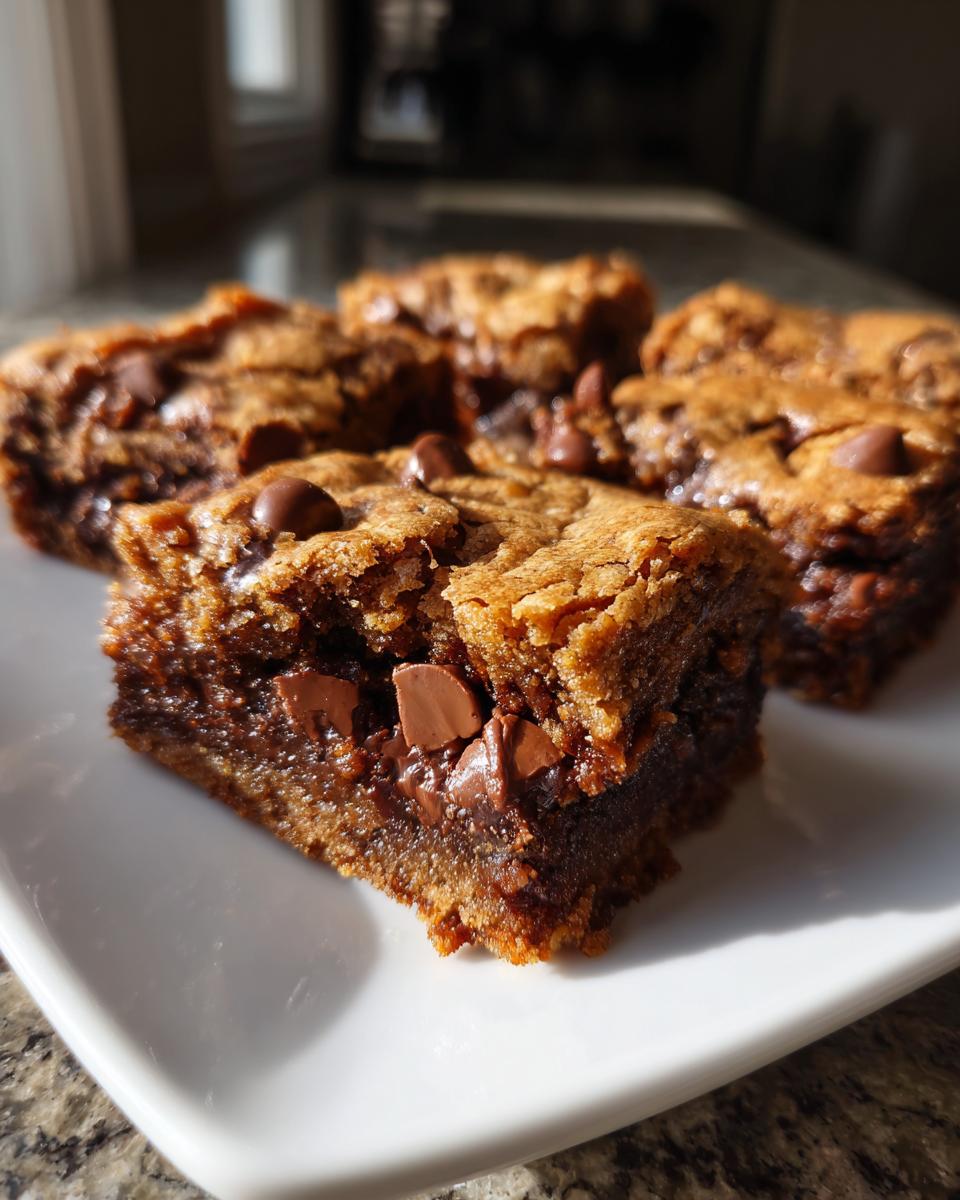
Serving Suggestions for Your Brown Butter Cookie Bar Recipe
These rich brown butter cookie bars are decadent all on their own—just cut them into neat squares for any party and watch them disappear! If you ask me, though, sometimes you need that little something extra. My favorite way to serve these is warm, which brings back that fresh-from-the-oven gooeyness. Pop one in the microwave for about 15 seconds!
They pair beautifully with a scoop of good quality vanilla ice cream or even a scoop of my homemade vanilla cupcakes frosting—if you’re feeling extra indulgent! A nice hot cup of black coffee is also the perfect counterpoint to cut through all that buttery richness. They’re simple, comforting, and always a hit!
Frequently Asked Questions About Chocolate Chip Cookie Bars
I know baking can sometimes bring up a few last-minute jitters, so I always keep a little FAQ section handy. These are the questions I get asked most often when folks are trying my recipe for the very first time. Don’t worry if you need to make a small swap here or there; we can troubleshoot together!
Can I make these chocolate chip cookie bars without browning the butter?
Oh, you certainly can, honey, but you’ll be missing out on the best part! Browning the butter is what gives these chocolate chip cookie bars that deep, toffee-like flavor that makes them taste rich and sophisticated. If you are in a real rush, you can skip that browning step. Just melt the butter fully until it’s liquid, pull it off the heat, and go straight to mixing the sugars. They won’t be quite as flavorful, and you might lose a tiny bit of that super moist texture, but they will still be delicious gooey chocolate chip squares!
What is the difference between a quick chocolate chip squares recipe and this one?
That’s a wonderful question that gets to the heart of great baking! A lot of recipes out there promise quick chocolate chip squares, and while speed is great, you often sacrifice texture. Those quick methods might skip crucial steps like chilling the dough or—in our case—browning the butter. This recipe is specifically designed to maximize chewiness and flavor through ingredient ratios (more brown sugar!) and treating the fat well. We are prioritizing that perfect, satisfyingly thick result over shaving five minutes off the prep time!
Can I use different types of chocolate in my chocolate chip cookie bars?
Yes, please do! While I love the mix of semi-sweet and milk chocolate chips in my recipe for complexity, feel free to mix it up based on what you have or what you like. If you prefer super dark chocolate, go for it—it cuts the sweetness nicely. If you’re feeling fancy, tossing in some white chocolate chunks or some chopped-up dark chocolate bars works beautifully. Just make sure the total amount of chocolate spread across varieties stays around the two cups total we mention in the recipe. Great cookies are all about personalization, even in bar form! For more ideas on chocolate pairings, sometimes I share thoughts over on my post about my white chocolate cheesecake recipe.
Nutritional Estimate for These Perfectly Baked Dessert Bars
Now, I’m going to be crystal clear here: I am a teacher and a home cook, not a registered dietitian! The numbers you see below are just an estimate based on the standard ingredients listed in our recipe for 16 servings. The actual counts for calories, fat, and sugar can change wildly depending on the brand of chocolate chips you choose or exactly how much butter you manage to scrape out of the pan!
This is a delicious dessert, after all, so it’s going to pack a punch! Enjoy these perfectly baked dessert bars for the treat they are, and don’t worry too much about the exact numbers. If you’re looking for lower-sugar swaps in general, you might check out some tips on substitutions in my guide for moist vanilla cupcakes.
Here is a general breakdown per bar:
- Serving Size: 1 bar
- Calories: 280
- Fat: 17g
- Saturated Fat: 10g
- Carbohydrates: 30g
- Sugar: 25g
- Protein: 3g
Remember, these are generous estimates for these rich, chewy beauties. The beauty of a homemade recipe like our chocolate chip cookie bars is that you are in total control over what goes in!
PrintThe Ultimate Chewy Chocolate Chip Cookie Bars with Browned Butter
Make thick, chewy chocolate chip cookie bars using browned butter for a deep, nutty flavor. This easy chocolate chip bar recipe bakes perfectly in one pan for a simple dessert.
- Prep Time: 15 min
- Cook Time: 30 min
- Total Time: 45 min
- Yield: 16 servings 1x
- Category: Dessert
- Method: Baking
- Cuisine: American
- Diet: Vegetarian
Ingredients
- 1 cup (2 sticks) unsalted butter
- 1 cup packed light brown sugar
- 1/2 cup granulated sugar
- 2 large eggs
- 1 tablespoon vanilla extract
- 2 1/4 cups all-purpose flour
- 1 teaspoon baking soda
- 1/2 teaspoon salt
- 1 1/2 cups semi-sweet chocolate chips
- 1/2 cup milk chocolate chips
- 1 teaspoon flaky sea salt for topping (optional)
Instructions
- Preheat your oven to 350°F (175°C). Line a 9×13 inch baking pan with parchment paper, leaving an overhang on the long sides for easy removal.
- Melt the butter in a saucepan over medium heat. Continue cooking, swirling often, until the butter foams, then brown bits form at the bottom and it smells nutty. This is browned butter. Immediately pour the browned butter into a large heatproof bowl and let it cool for 10 minutes.
- Add the brown sugar and granulated sugar to the cooled browned butter. Whisk until well combined.
- Beat in the eggs one at a time, mixing well after each addition. Stir in the vanilla extract.
- In a separate medium bowl, whisk together the flour, baking soda, and salt.
- Gradually add the dry ingredients to the wet ingredients, mixing on low speed or by hand until just combined. Do not overmix.
- Fold in the semi-sweet and milk chocolate chips.
- Press the dough evenly into the prepared 9×13 inch pan. Sprinkle the top evenly with flaky sea salt, if using.
- Bake for 28 to 32 minutes. The edges should look set, and the center should look slightly underbaked. This ensures a gooey chocolate chip square texture.
- Let the bars cool completely in the pan on a wire rack before lifting them out using the parchment paper overhang.
- Cut into squares and serve your perfectly baked dessert bars.
Notes
- Browning the butter adds depth; watch it closely to prevent burning.
- For thicker bars, use an 8×8 inch pan and increase the baking time by about 10 to 15 minutes.
- You can substitute any combination of chocolate chips you prefer for a different flavor profile.
Nutrition
- Serving Size: 1 bar
- Calories: 280
- Sugar: 25
- Sodium: 120
- Fat: 17
- Saturated Fat: 10
- Unsaturated Fat: 7
- Trans Fat: 0
- Carbohydrates: 30
- Fiber: 1
- Protein: 3
- Cholesterol: 55