
When that craving hits—you know, the one that demands rich chocolate and salty peanut butter right now—you don’t want a recipe that requires fiddling with candy thermometers or standing over a hot stove! That’s why I’m so thrilled to share this ultimate chocolate peanut butter fudge fix. This recipe is quick, completely no-bake, and the gentle swirl makes it look like you spent hours in the kitchen when, honestly, it only takes about 25 minutes of prep. Trust me, after thirty years of explaining things clearly as a teacher, I’ve broken this down into steps so straightforward, anyone can achieve these perfect squares. It’s pure, creamy magic!
- Why This Easy No-Bake chocolate peanut butter fudge is a Kitchen Staple
- Gathering Ingredients for Your chocolate peanut butter fudge
- Simple Steps to Make Your No Bake chocolate peanut butter fudge
- Tips for Success Making Perfect chocolate peanut butter fudge
- Storage and Make Ahead Candy Instructions
- Frequently Asked Questions About chocolate peanut butter fudge
- Estimated Nutritional Snapshot for this chocolate peanut butter fudge
- Share Your Homemade Candy Creations
Why This Easy No-Bake chocolate peanut butter fudge is a Kitchen Staple
I developed this particular recipe because, frankly, I don’t always have time for fussy candy-making, and I bet you don’t either! This is the ultimate go-to when you need a decadent treat that doesn’t involve turning on the oven. It’s one of my favorite no-bake treats for a reason. It just works, every single time.
- Quick Chocolate Treats: Ready in Under 30 Minutes Prep
We aren’t joking around with the timing here. You can mix up the layers and get this in the pan in less than 25 minutes of active time. That makes it the perfect last-minute Peanut Butter Dessert when company shows up unexpectedly, or when the kids suddenly need a sweet snack for an afternoon bake sale.
- The Creamy Fudge Texture You Crave
Who wants hard, grainy fudge? Not me! This method bypasses all the tricky temperature steps that can ruin traditional fudge. We rely on sweetened condensed milk and butter to create that unbelievable melt-in-your-mouth feel. You get that pure, smooth, Creamy Fudge experience without any stress.
- Perfect for Gifting and Sharing
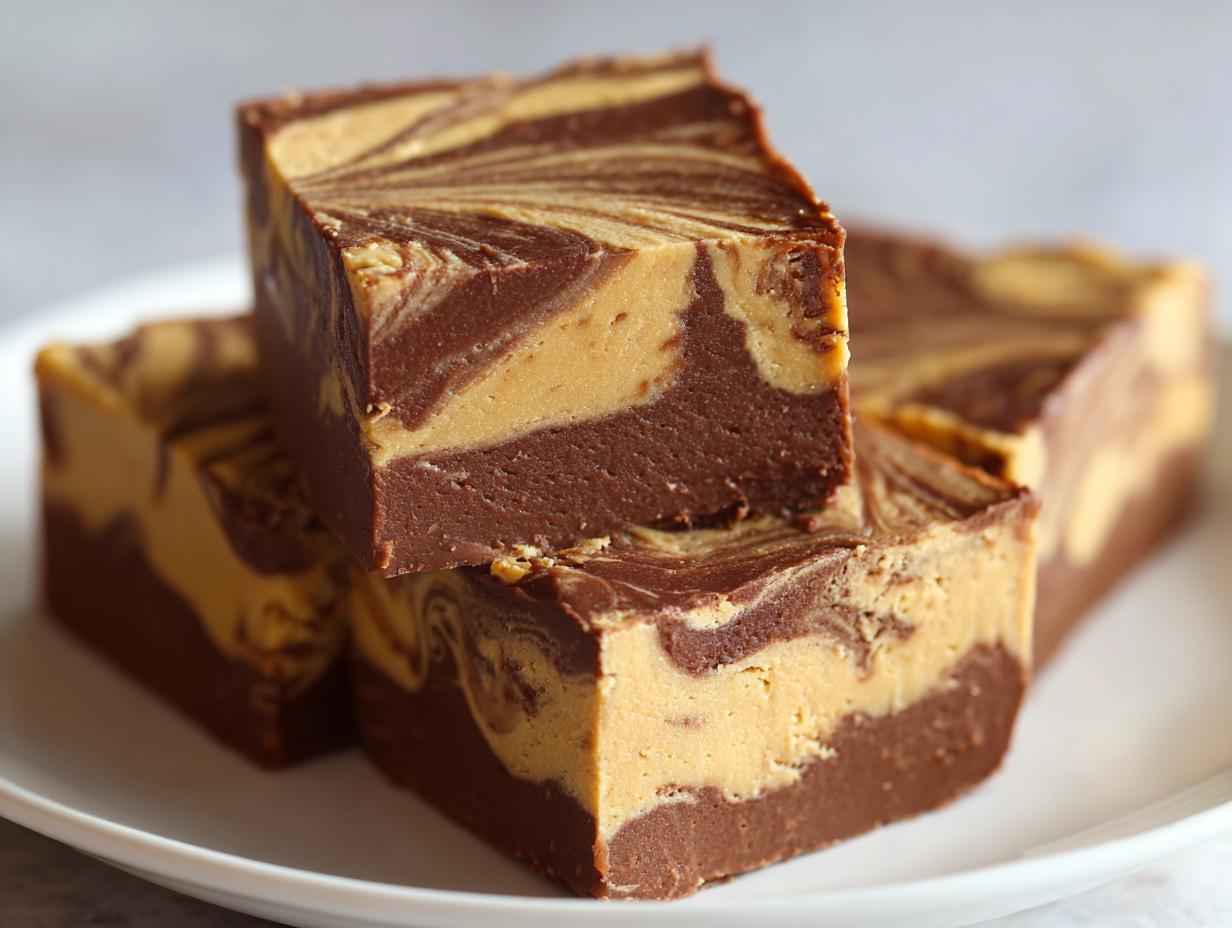
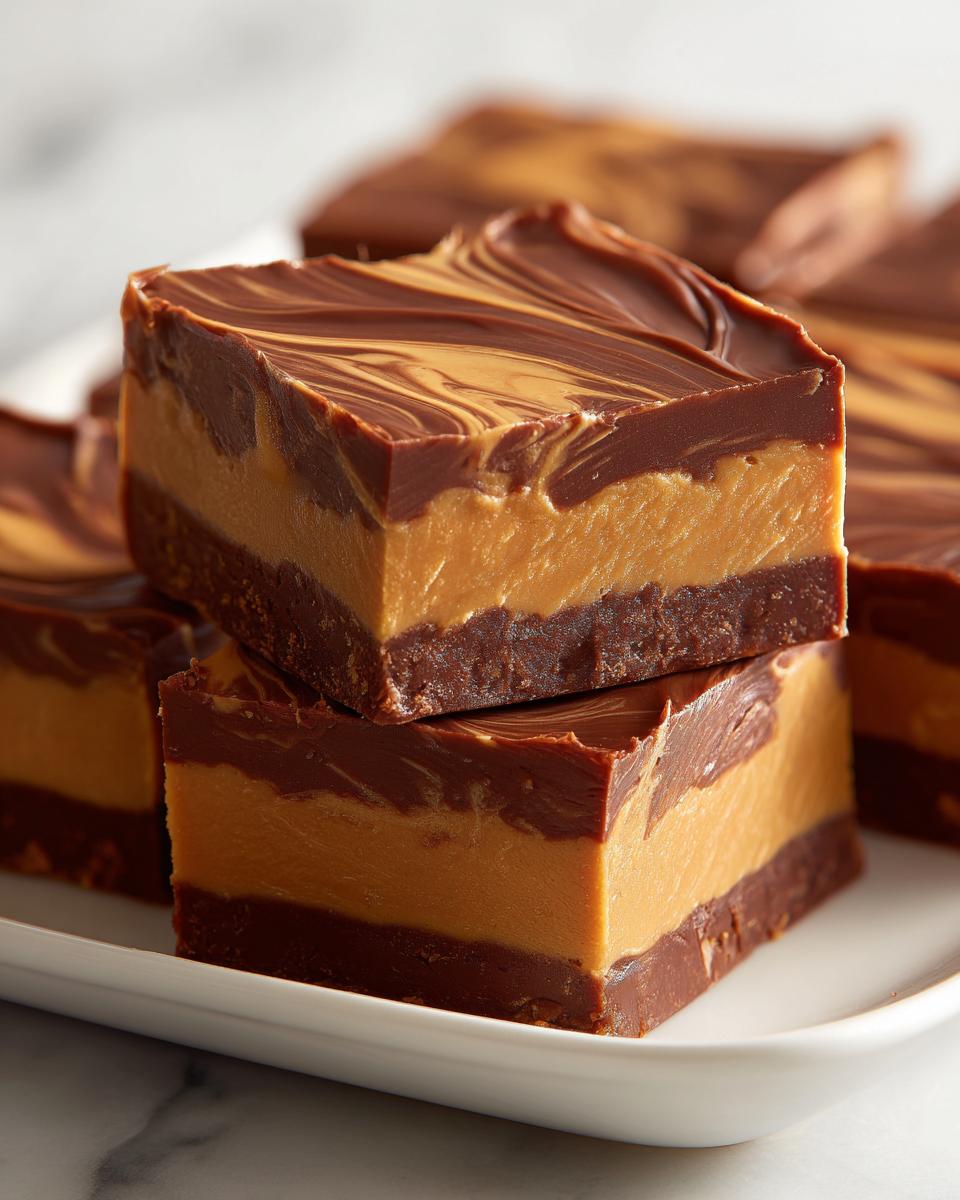
This recipe yields 24 beautiful squares—plenty to share! Since it’s sturdy and holds up well, this Homemade Candy travels beautifully. I always make an extra batch around the holidays!
Gathering Ingredients for Your chocolate peanut butter fudge
Now for the fun part—and I mean that! One of the biggest reasons I love this chocolate peanut butter fudge recipe is that it uses things you probably already have tucked away in your pantry. Forget hunting down specialty ingredients. This is truly an Easy Fudge Recipe, designed for everyday cooking!
We rely on just a handful of simple items to get that rich flavor and those perfect layers. I’ve learned over the years that the quality of these few ingredients really shines through, which is why I always stress getting the right type of each one. This fudge is rich, yes, ma’am, but it’s just so easy to pull together! If you’re ever looking for a simple chocolate element, I have a great homemade chocolate syrup recipe, but here we stick to chips for the best structure.
Ingredient Clarity: Specifics for Perfect chocolate peanut butter fudge
When you gather these items, make sure you’re grabbing what I’ve specified. These little details make all the difference between good fudge and truly fantastic fudge that melts in your mouth.
- 1 (14 ounce) can sweetened condensed milk – Make sure it’s the canned, sweetened stuff, not evaporated milk!
- 1 cup creamy peanut butter – I always use creamy here. Crunchy totally changes the smooth texture we are aiming for in this layered treat!
- 1 teaspoon vanilla extract – Real vanilla, if you have it, brings out the depth of flavor.
- 1/4 teaspoon salt – This is vital to balance the sweetness! Don’t skip it.
- 1 1/2 cups semi-sweet chocolate chips – Feel free to use milk chocolate if you prefer it sweeter, but semi-sweet is my preferred anchor for this treat.
- 1 tablespoon butter or coconut oil – This little bit of fat helps the chocolate chips melt down smoothly into that silky layer you see in the pictures.
Simple Steps to Make Your No Bake chocolate peanut butter fudge
Making this amazing chocolate peanut butter fudge is really just two main cooking events: melting and swirling! No tricky double boilers here; we’re using the microwave because it’s just so dependable, especially when you’re in a hurry. If you’ve ever felt intimidated making candy, remember my goal is clarity, just like when I was teaching third grade. We’re going to keep this super clean and straightforward so you get that perfect creamy base every time.
Preparing the Pan and Peanut Butter Base
First things first, get organized! Line that 8×8 inch pan with parchment paper; make sure you leave plenty hanging over the sides. That overhang is literally your handle later on—don’t skip it because nothing is sadder than trying to dig fudge out of a metal pan! Next, grab a medium microwave-safe bowl. We’re combining the entire can of sweetened condensed milk right in there with your peanut butter, vanilla, and that pinch of salt. Pop that mixture into the microwave for exactly 60 seconds on high. Don’t panic if it looks a little separate right out of the microwave. Just stir it vigorously until it becomes that wonderfully smooth, unified Peanut Butter Dessert base. Pour about two-thirds of that lovely peanut butter filling into your prepared pan and use a little spatula to smooth it out evenly. That’s Layer One knocked out!
Creating the Chocolate Swirl Dessert Layer
Time for the chocolate! In a separate, small bowl, combine your chocolate chips and that tiny tablespoon of butter—the butter is just insurance to keep things silky. Microwave these in short 30-second bursts, stirring well after each one, until it’s totally glossy and smooth. Gently pour all that melted chocolate right over your peanut butter layer. Now, take the remaining one-third portion of your peanut butter mixture (the part you saved) and dollop it evenly over the chocolate layer. It will look chunky, and that’s exactly how we want it to be!
Achieving the Perfect Swirl and Chilling
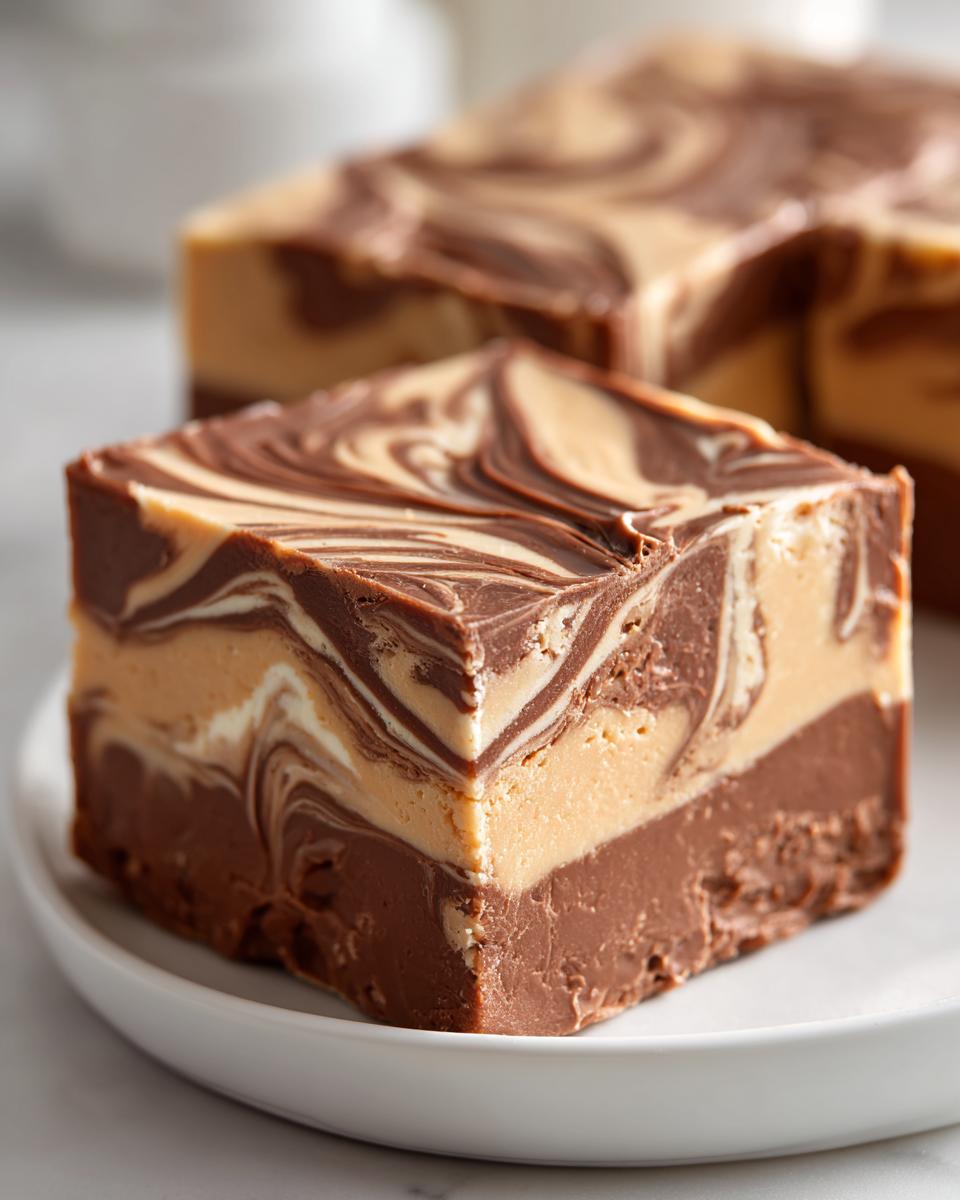
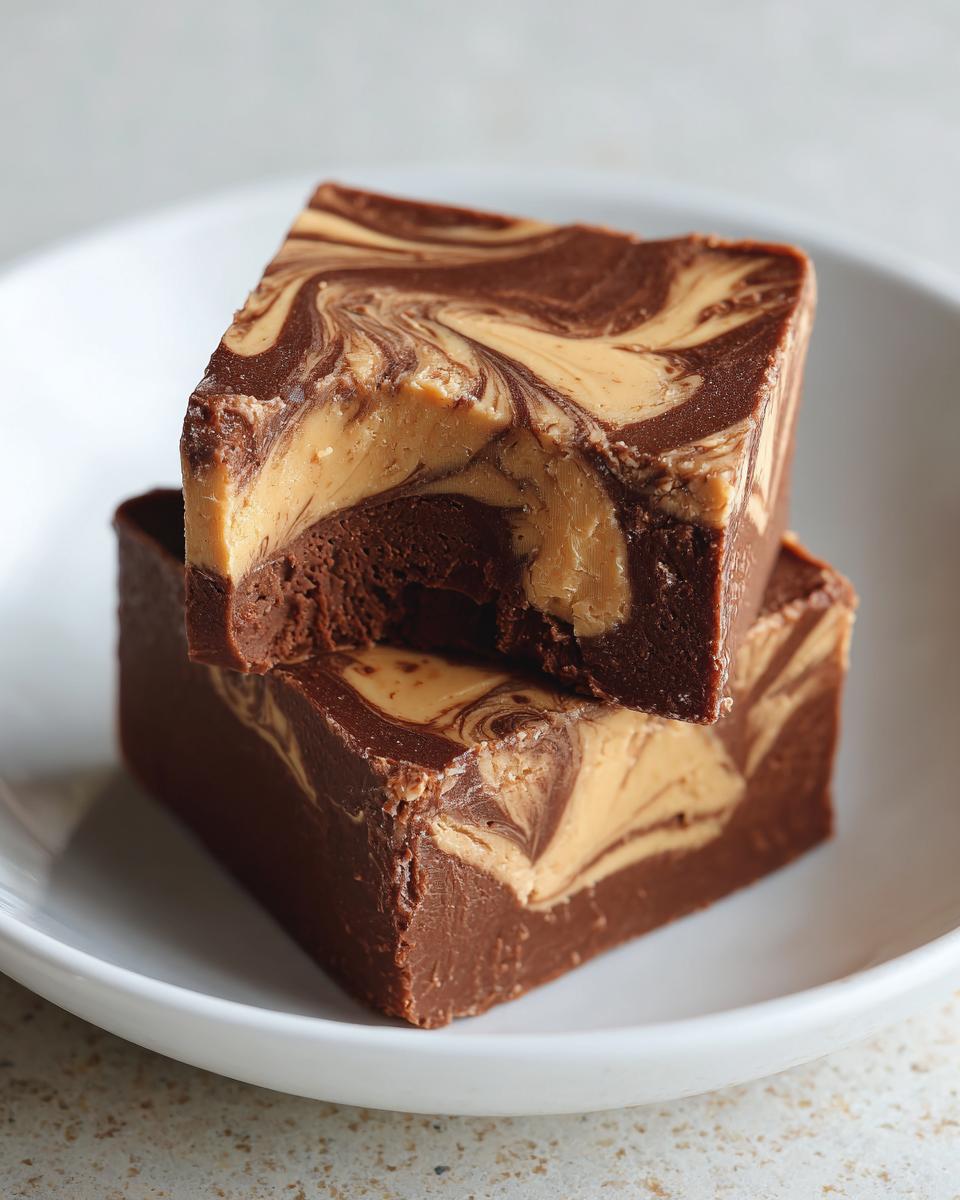
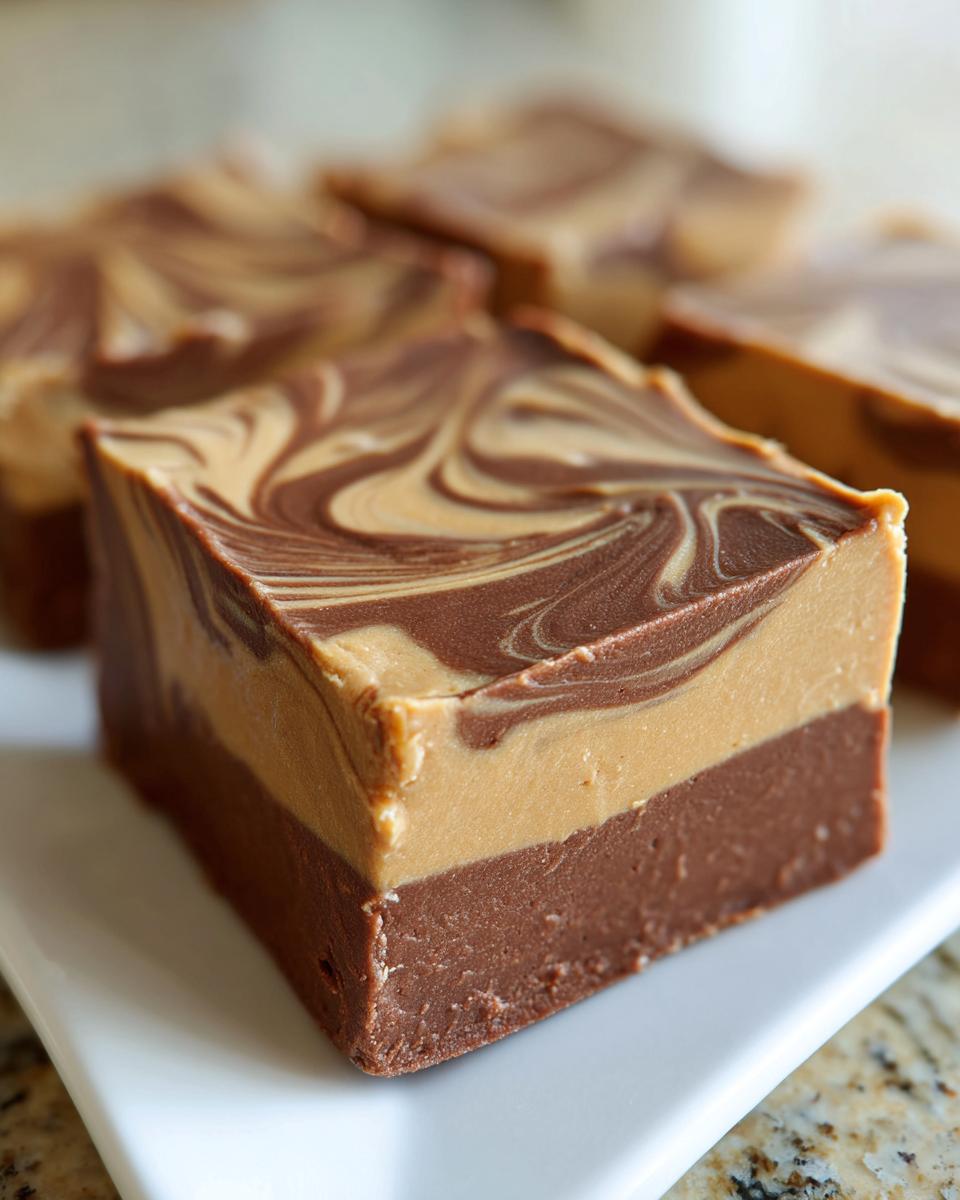
This is where the visual magic happens. Take a knife or even a skewer, and gently drag it through both layers to create that beautiful marble, or swirl. You must be gentle here! If you mix it too much, you end up with one brownish lump instead of a stunning Chocolate Swirl Dessert. Just a few figure-eights or Z-motions will do the trick. Then, into the refrigerator it goes! We need this fudge to set up firmly, so chill it for at least two hours. Once it’s rock solid, use those parchment paper handles to lift the whole slab out and simply slice it into 24 neat squares. See? No sweat, no stove top fuss!
Tips for Success Making Perfect chocolate peanut butter fudge
Even though this is a simple recipe, I always tell my grandkids that even the easiest things benefit from listening to a couple of tips I’ve picked up over the years. Think of these as little guardrails to stop you from having any fudge mishaps! My teaching background means I love when things are clear, so let’s make sure your chocolate peanut butter fudge turns out flawlessly.
Ingredient Notes and Substitutions for this Rich Dessert Squares
Remember how I mentioned those chocolate chips? They melt so quickly in the microwave, but sometimes they can seize up or get a little grainy if they get too hot or mix with even a tiny bit of water. That’s why we add that small bit of butter or coconut oil. It sounds odd, but that extra fat smooths out the melting process, ensuring you get those perfect, glossy ribbons of chocolate, which is key for those beautiful Rich Dessert Squares.
If you want to try milk chocolate instead of semi-sweet, go right ahead! The fudge will be sweeter, which some folks love. Just be aware that using milk chocolate might make the final texture slightly softer when it comes to cutting. On the flip side, if you use dark chocolate, you’ll get a more intense, less sweet finish that really lets that peanut butter flavor shine through! Sometimes when I’m working on something like a frosting that needs to hold its shape perfectly—like my cream cheese frosting—I focus intensely on temperature, and this fudge is similar; controlling that gentle melt matters.
Achieving Clean Cuts on Your chocolate peanut butter fudge
This is the one thing that bugs people the most when they make fudge at home—messy cuts! When the fudge comes straight out of the fridge, it’s often too hard, and when you try to slice it, it cracks or crumbles. We want those beautiful, clean edges, right?
So, here is my secret little trick that works every time: once the fudge is completely firm from chilling (say, after 2 hours in the fridge), just take it out of the pan and set it on the counter for about 10 minutes before you even touch the knife. Letting it warm up just slightly makes the layers pliable enough to slice cleanly without cracking. You’ll get those wonderfully distinct layers and those perfect 24 squares every time. It’s worth the tiny wait!
Storage and Make Ahead Candy Instructions
One of the best things about this kind of simple, rich dessert is that you don’t have to serve it immediately! This fudge is truly the definition of a fantastic Make Ahead Candy. If you’re planning for a potluck or just want a sweet treat ready for when the week gets busy, you’re in luck.
You can bake this entirely ahead of time, which is such a relief when you’re juggling multiple dishes for a holiday gathering. I always aim to have my Homemade Candy finished the day before I need it.
Regarding keeping it fresh, this fudge just loves the cold! Always store your leftover chocolate peanut butter fudge in an airtight container. I’ve found that keeping it in the refrigerator is best for maintaining that firm texture we worked so hard to achieve. Stored properly in the fridge, it stays wonderfully fresh for up to one week. Honestly, it rarely lasts that long at our house, but it’s nice to know it keeps well!
Remember that tip about cutting it cleanly? Well, that applies to serving too. If you plan on eating a square right out of the fridge, it might be rock hard for a second. Don’t worry; just pull out what you plan to eat about 10 to 15 minutes before serving, let it warm slightly on the counter, and it snaps right back to that perfect, creamy consistency.
Frequently Asked Questions About chocolate peanut butter fudge
I get so many wonderful questions whenever folks start making this chocolate peanut butter fudge! It’s funny how just a few simple swaps can make people nervous, especially when dealing with something as delicious as this. I’m happy to share a few pointers based on what y’all ask me the most. Remember, cooking is about making things work for *your* kitchen! This recipe, unlike some of my simpler peanut butter cookie recipes, relies heavily on chilling time, so listening to these tips will help!
Can I make this a Buckeye Fudge Recipe variation?
Oh, I love the Buckeye flavor! That combination is just iconic. If you want to lean into that classic flavor profile, you absolutely can adapt this. The traditional Buckeye candy is a peanut butter center dipped in chocolate, so to mimic that here, you’d want to skip or minimize the swirling step. Instead, completely spread your peanut butter base, top it entirely with the melted chocolate, and then—here’s the trick—instead of swirling, let it set up completely. That gives you a clear, dedicated peanut butter layer underneath a beautiful chocolate cap. It turns it into a fantastic piece of Buckeye Fudge Recipe tribute, giving you that same decadent flavor combination in a simple square!
Is this truly a Two Ingredient Fudge recipe?
That’s a great question! You might see some very simple recipes floating around calling themselves “Two Ingredient Fudge.” While those are usually made with chocolate chips and sweetened condensed milk (and that works okay!), I find they lack the depth of flavor and the perfect texture that makes fudge memorable. My recipe uses about five main components—the milk, the peanut butter, the chocolate, the vanilla, and the salt—and that extra bit of effort is what elevates this from just okay to truly amazing Homemade Candy.
Don’t be scared by the ingredient count! Because none of these require complicated measuring or cooking times, it still fits perfectly under the umbrella of a Simple Fudge Tutorial. You get a much richer, layered Peanut Butter Dessert experience by including that salt and vanilla, which really balances the sweetness so it’s not cloying.
What if I only have crunchy peanut butter?
You know, this is probably the number one question I get regarding the peanut butter layer! My recipe calls for creamy because we are aiming for that ultra-smooth, velvety texture throughout the fudge. If you use crunchy, you’ll end up with little nutty bits throughout both layers, turning it into a totally different experience. If you love it crunchy, go for it! But if you want that classic, soft, Creamy Fudge melt that is so popular, stick to the smooth kind. I find it truly makes a difference in the mouthfeel of these Rich Dessert Squares.
How long does this fudge absolutely need to chill?
I know patience is hard when chocolate is involved! While you *can* technically cut it sharp after an hour and a half if your fridge is super cold, I really advise holding out for the full two hours. The chilling time isn’t just about making it firm enough to cut—though that’s important for those clean slices we talked about—it’s about letting the moisture settle and the flavors meld together. If you rush it, the peanut butter layer might slump a bit when you lift it out. Give it those two solid hours, and you’ll have the most perfect, sliceable No Bake Fudge when you pull it out!
Estimated Nutritional Snapshot for this chocolate peanut butter fudge
When we’re making something this delightfully indulgent, I always like to take a peek at the numbers, even though I often say you shouldn’t worry too much when treating yourself! Remember, this is just an estimate for one square cut from the 24 servings we get from this recipe. Since we aren’t adding complex ingredients, these values are pretty helpful for general planning, but they can shift depending on the exact brands of chocolate chips or peanut butter you use. Always think of this as a guide for your wonderful chocolate peanut butter fudge!
I always encourage folks who are watching their sugar or sodium intake to review these numbers. Knowing what’s in your Homemade Candy is just part of being a thoughtful cook, and I want you to feel good about sharing this simple, rich dessert with everyone you love.
- Serving Size: 1 square
- Calories: Approximately 180
- Sugar: 18g
- Fat: 11g (This includes about 5g of Saturated Fat)
- Sodium: 75mg
- Protein: 5g
See? Not too bad for a true, decadent treat! It’s amazing how much flavor we pack in while keeping the cholesterol low. That’s the beauty of relying on good quality peanut butter and chocolate for these Quick Chocolate Treats.
Share Your Homemade Candy Creations
Well, that’s it! We’ve made it to the end of whipping up the richest, easiest chocolate peanut butter fudge you’ll ever need in your life. I truly hope this recipe brings a little bit of that no-fuss sweetness into your kitchen. Remember, cooking by Carla is all about building community and making memories around the table—or in this case, around the candy dish!
I absolutely love hearing from you all! When y’all try this absolutely wonderful Peanut Butter Dessert, please don’t be shy. Come right back here and let me know how it went. Did you manage to get a perfect swirl, or did you decide to go with a solid layer like the Buckeye variation we talked about? Every single comment helps me serve this community better, and honestly, reading your successes keeps me baking for my next adventure!
Please take a moment to leave a star rating right below the recipe card. It helps other home cooks find this wonderfully simple Homemade Candy recipe, too! And if you snapped any pictures of your beautiful squares—especially those clean, creamy cuts—I would be thrilled if you shared them with me. You can always reach out directly through my contact page if you have a picture you’d like to show off.
Thank you so much for cooking with me today. Go enjoy those decadent, rich squares, knowing they were made simply and with a whole lot of love!
PrintEasy No-Bake Chocolate Peanut Butter Swirl Fudge (Ready in 25 Minutes)
Make this rich chocolate peanut butter fudge quickly. This no-bake dessert features creamy layers that melt in your mouth. You get 24 perfect squares for sharing.
- Prep Time: 15 min
- Cook Time: 0 min
- Total Time: 2 hours 15 min
- Yield: 24 servings 1x
- Category: Dessert
- Method: No Bake
- Cuisine: American
- Diet: Vegetarian
Ingredients
- 1 (14 ounce) can sweetened condensed milk
- 1 cup creamy peanut butter
- 1 teaspoon vanilla extract
- 1/4 teaspoon salt
- 1 1/2 cups semi-sweet chocolate chips
- 1 tablespoon butter or coconut oil
Instructions
- Line an 8×8 inch baking pan with parchment paper, leaving an overhang on the sides for easy removal.
- In a medium microwave-safe bowl, combine the sweetened condensed milk, peanut butter, vanilla extract, and salt. Microwave on high for 60 seconds. Stir well until completely smooth.
- Pour about two-thirds of the peanut butter mixture into the prepared pan and spread evenly. This is your peanut butter layer.
- In a separate small microwave-safe bowl, combine the chocolate chips and butter. Microwave in 30-second intervals, stirring until the chocolate is smooth.
- Pour the melted chocolate over the peanut butter layer in the pan.
- Dollop the remaining one-third of the peanut butter mixture over the chocolate layer.
- Use a knife or skewer to gently swirl the chocolate and peanut butter layers together to create a marble effect. Do not overmix.
- Refrigerate for at least 2 hours, or until the fudge is firm.
- Use the parchment paper overhang to lift the fudge from the pan. Cut into 24 squares.
Notes
- For cleaner cuts, let the fudge sit at room temperature for 10 minutes before slicing.
- You can use milk chocolate or dark chocolate chips instead of semi-sweet.
- Store this homemade candy in an airtight container in the refrigerator for up to one week.
Nutrition
- Serving Size: 1 square
- Calories: 180
- Sugar: 18
- Sodium: 75
- Fat: 11
- Saturated Fat: 5
- Unsaturated Fat: 6
- Trans Fat: 0
- Carbohydrates: 18
- Fiber: 1
- Protein: 5
- Cholesterol: 10