
Oh, my dears, there’s nothing quite like comfort food on a chilly evening, right? But who has time for rolling out fiddly pie dough after a long day? That’s where my spin on the classic comes in! I’ve swapped out that traditional crust entirely for something quicker, fluffier, and just as satisfying: glorious biscuits. We’re making sensational, perfectly portioned chicken pot pie biscuit cups. This recipe is pure Carla philosophy—taking deeply comforting flavors and making them simple and dependable for your everyday table. If you love the classic version, you simply must try this easier approach, especially if you are looking for a dependable chicken pot pie recipe adaptation.
- Why These Chicken Pot Pie Biscuit Cups Are Your New Weeknight Hero (Easy Chicken Pot Pie Cups)
- Gathering Ingredients for Your Chicken Pot Pie Biscuit Cups
- The Creamy Filling: Making the Heart of the Muffin Tin Chicken Pot Pie
- Assembling Your Individual Pot Pie Recipe in Muffin Cups
- Baking the Chicken Pot Pie Biscuit Cups to Golden Perfection
- Tips for Success with Biscuit Topped Pot Pie (Expert Advice)
- Storage and Make Ahead Options for Easy Chicken Pot Pie Cups
- Variations on the Classic Chicken Pot Pie Biscuit Cups
- Frequently Asked Questions About Mini Chicken Pot Pies
Why These Chicken Pot Pie Biscuit Cups Are Your New Weeknight Hero (Easy Chicken Pot Pie Cups)
Honestly, sometimes you just need dinner on the table fast, and this recipe makes that happen! They truly live up to my commitment to dependable, simple home cooking. For more ideas on fast, reliable meals, you can always check out my thoughts on simple weeknight dinners.
- They are perfectly portioned, making them wonderful Single Serving Pot Pies—no slicing required!
- Using refrigerated biscuits cuts down prep time immensely, labeling them as true Quick Weeknight Dinner Cups.
- The fluffy biscuit topping stays tender and steam-cooked, which I find so much easier than dealing with a flaky pie shell.
- Who doesn’t love comfort food that comes in its own adorable little package? They are the perfect size!
Gathering Ingredients for Your Chicken Pot Pie Biscuit Cups
Now, getting organized is the secret to quick cooking, just like when I made menus for my classroom! For these Easy Chicken Pot Pie Cups, we keep the ingredient list short and sweet. Remember, you need the basics for a rich filling and, of course, those marvelous biscuits.
If you’re short on time when cooking dinner, I highly recommend skipping the plain cooked chicken step and grabbing a store-bought rotisserie chicken instead. Pulling that meat off while your filling simmers saves you fifteen minutes right there! For more tips on making rich, homemade sauces without starting from scratch, take a look at my recipe for homemade cream of chicken soup.
- 2 tablespoons butter
- 1/2 cup chopped yellow onion
- 1/2 cup chopped carrots
- 1/2 cup chopped celery
- 1/3 cup all-purpose flour
- 1 3/4 cups chicken broth
- 1/2 cup milk (or heavy cream for extra richness!)
- 1 cup cooked, shredded chicken
- 1/2 cup frozen peas
- 1/2 cup frozen corn
- 1/2 teaspoon dried thyme
- Salt and black pepper to taste
- 1 can (16.3 ounces) refrigerated biscuit dough (This should yield 10 biscuits)
The Creamy Filling: Making the Heart of the Muffin Tin Chicken Pot Pie
This is where the magic happens, sweet friends! Even though these are quick, we never skip building layers of flavor. That’s what separates a good dinner from a memorable one. If you have time, this simple sauce technique is the same one I use for my slow-cooked versions; you can see my detailed guide for the sauce base over at my homemade cream of chicken soup recipe, but we’re speeding it up today!
Building the Flavor Base
We start just like any good Southern recipe: with the trinity! Grab that butter and get it melted over medium heat in a large skillet. Toss in your chopped onion, carrots, and celery right away. You want these veggies to soften up until they start smelling sweet—about five minutes. Don’t rush this, because that gentle cooking releases all the earthy flavor our filling needs.

Thickening the Sauce for Perfect Biscuit Topped Pot Pie
Next up is the roux, which gives our sauce that luscious thickness for these chicken pot pie biscuit cups. Sprinkle your flour directly over those softened vegetables and stir it constantly for a full minute. This cooks out the raw taste of the flour. Now, here’s the trick: always add your liquid slowly! Whisk in the chicken broth first, a little at a time, making sure it incorporates smoothly before adding the milk. Whisk until that sauce is visibly thickening up nicely.
Once it coats the back of a spoon, stir in your cooked chicken, peas, corn, and thyme. Taste it! This is your last chance to adjust that salt and pepper before we seal it up under the biscuits. Make sure it’s seasoned perfectly right now, because once the dough goes on, you can’t go back!
Assembling Your Individual Pot Pie Recipe in Muffin Cups
With that piping hot, creamy filling ready to go, we move onto the fun part—turning this into our charming Mini Chicken Pot Pies! Remember, we want these little nests to cook evenly, so don’t overfill them. Spoon that wonderful chicken mixture into each prepared cup until it’s about two-thirds full. If you pack them too high, you’ll end up with a spillover disaster when the biscuits start puffing up!
Now, for the biscuit—this is the heart of the recipe and where we save so much time. If you’re looking for instructions on making homemade biscuits from scratch, I have a wonderful guide for buttermilk biscuits, but today we are using the can for speed.
Preparing and Placing the Biscuit Dough
You have two lovely choices here, depending on how much you want that delightful biscuit component. For a true Muffin Tin Chicken Pot Pie that has a little crust lining the filling, take each refrigerated biscuit and gently flatten it with your fingers until it’s thin enough to line the base and sides of the muffin cup. It doesn’t have to be perfect; those little tucks make it look homemade! This creates a well for the filling to go into.
If you are in a real hurry or prefer more filling to biscuit, you can simply cut each biscuit into quarters and pop a few pieces right on top of the filling to act as a lid. I usually opt for the full biscuit lid, pressing it down gently. Using just the top biscuit means you ensure the biscuit cooks through perfectly because it’s not trying to fuse with a wet bottom layer, which helps keep things tidy!
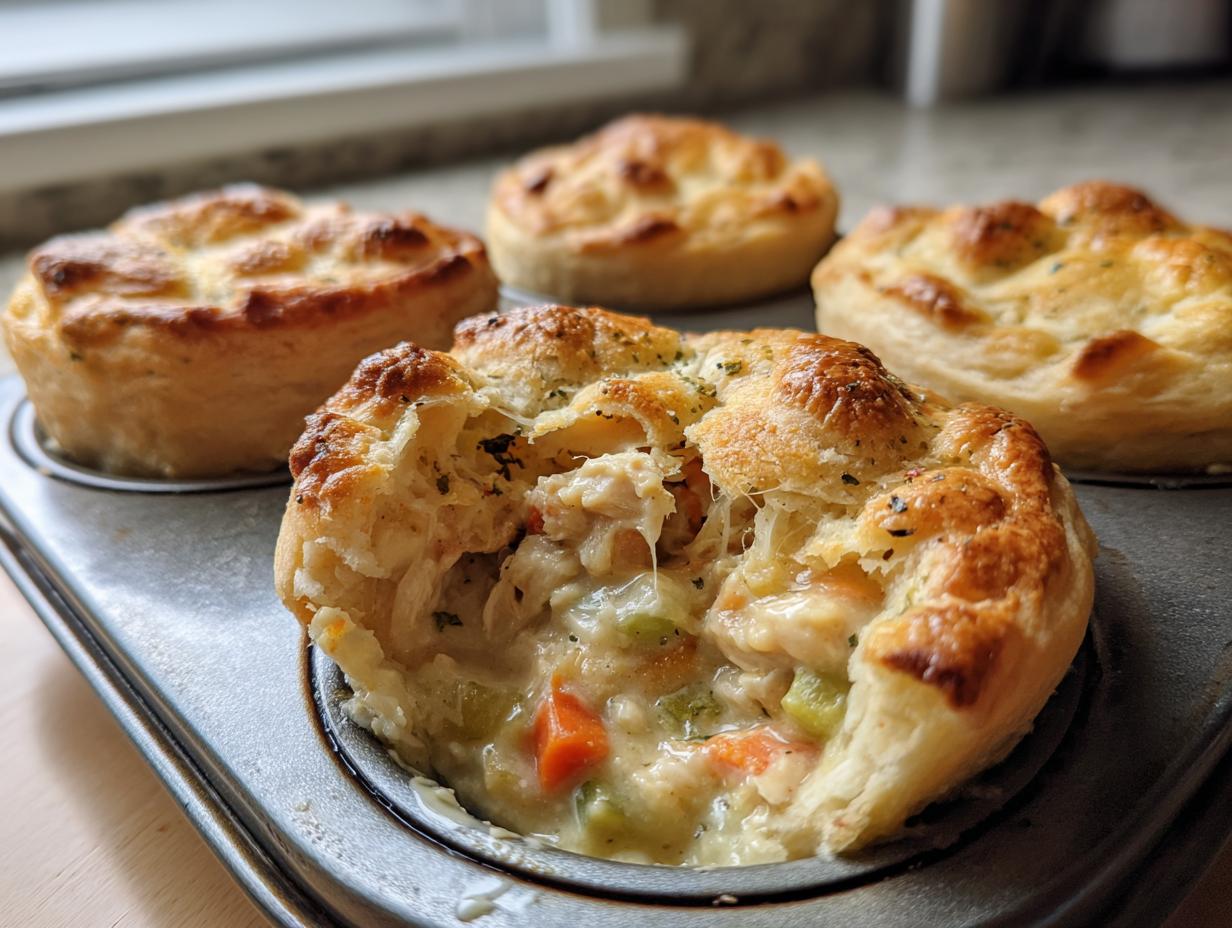
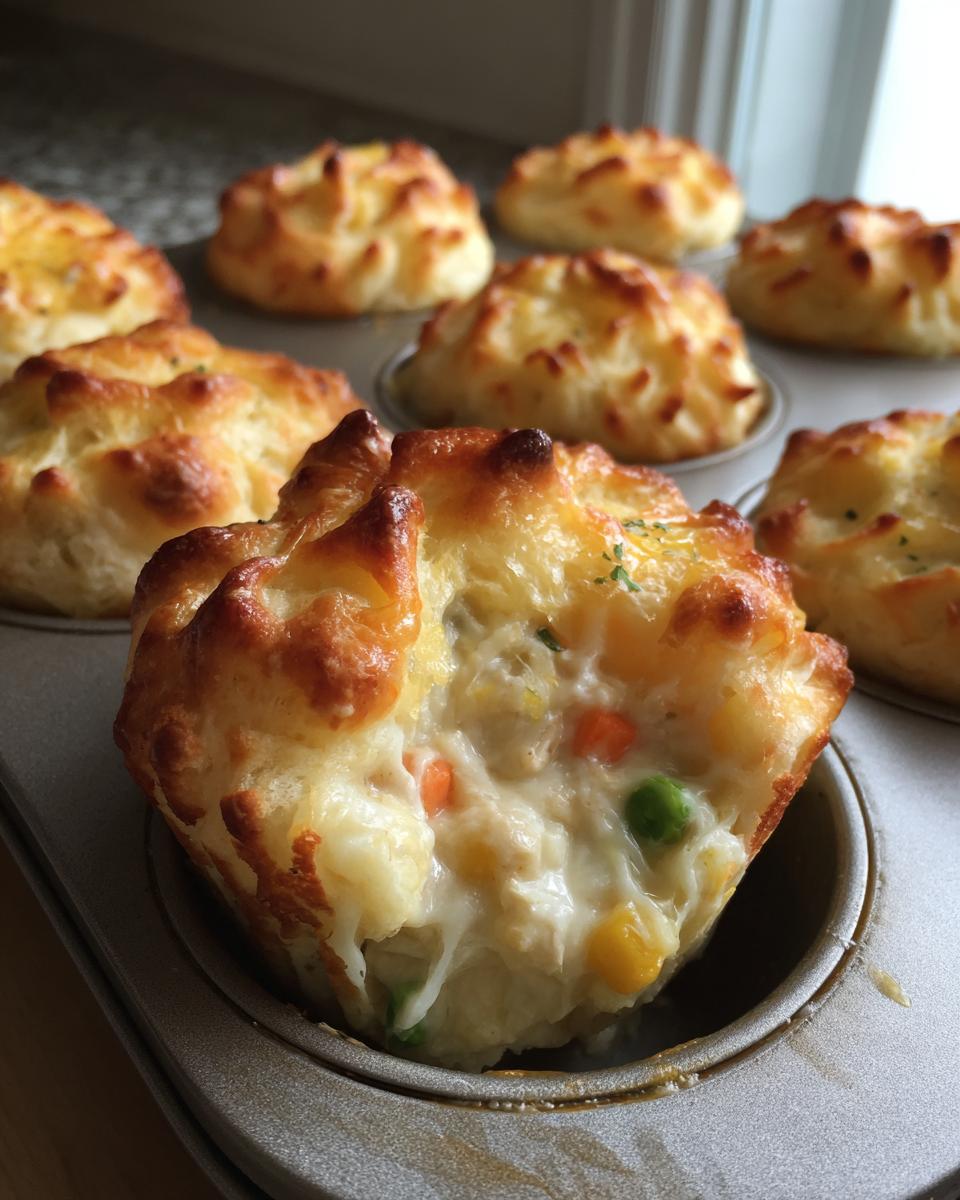
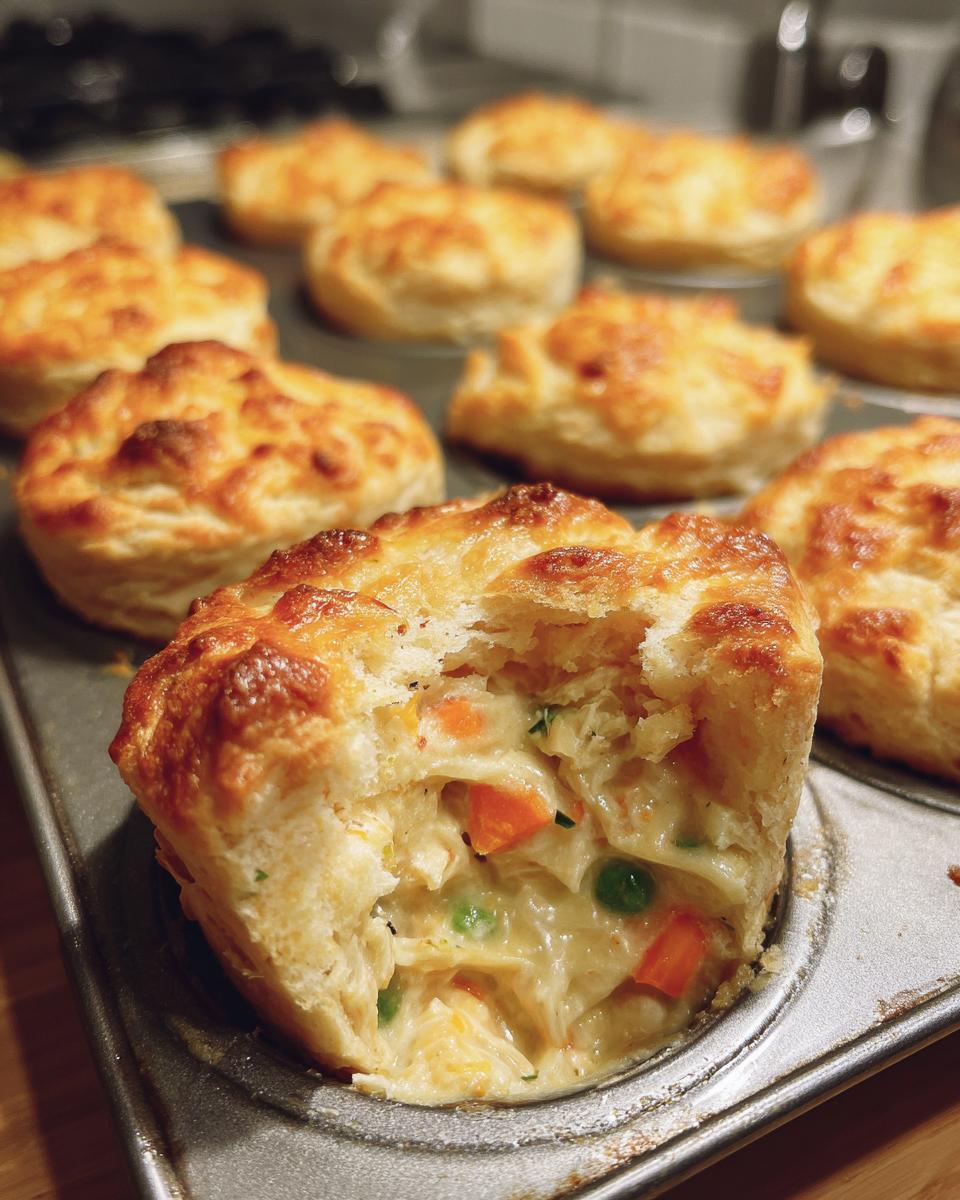
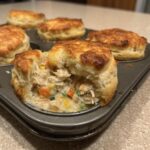
Baking the Chicken Pot Pie Biscuit Cups to Golden Perfection
Alright, the assembly is done, and now it’s time for the oven to do its best work! Preheat your oven to a nice hot 400 degrees Fahrenheit. This high heat is what gives us that beautiful, fluffy biscuit rise we are looking for. Pop those muffin pans right inside and set a timer for about 15 to 18 minutes.
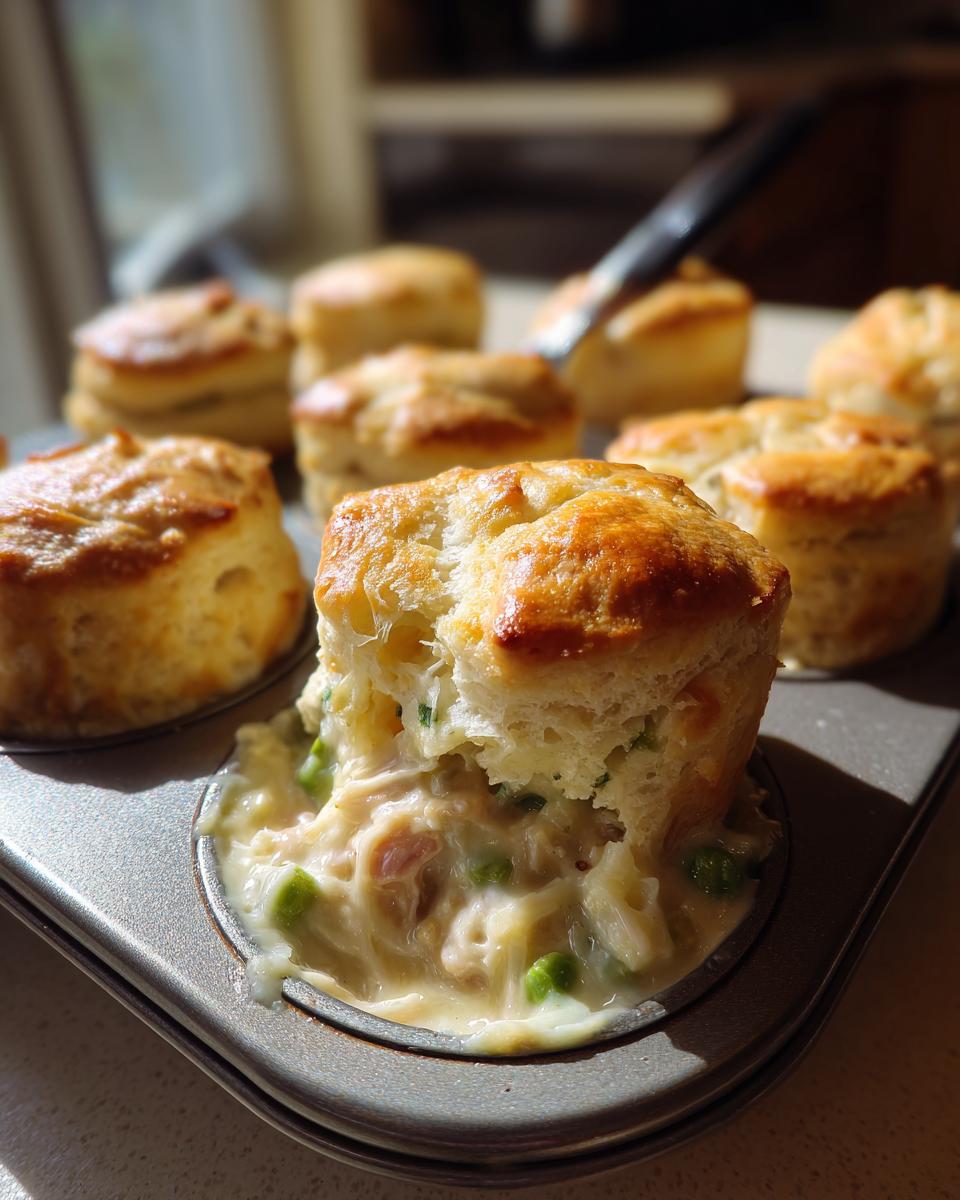
You’ll know they are ready because the biscuit topping will be beautifully golden brown, and you should see the delicious creamy filling bubbling up around the edges. That bubbling means it’s hot all the way through, which is crucial for safety and flavor! When they come out, don’t try to dig them out immediately—trust me on this step! Let them rest right there in the pan for five minutes. This critical cooling time lets the filling settle just enough so they come out clean when you gently slide an offset spatula underneath. These are fantastic served warm alongside a simple salad—check out my favorites for easy appetizers and snacks for simple side pairings!
Tips for Success with Biscuit Topped Pot Pie (Expert Advice)
I’ve made my share of these little treasures, and I’ve learned a few things that help keep them looking perfect. The number one concern with any Pot Pie Recipe without Pie Crust is making sure that bottom biscuit doesn’t turn into a soggy mess. My biggest piece of advice is this: make sure your filling is hot before it touches the dough! If the filling is already steaming, it starts cooking the bottom of the biscuit right away, giving you a better structure.
Also, remember that the canned dough is already relying on steam for its fluffiness. If you cut the biscuits into quarters instead of using a full lid, make sure you don’t press those little pieces down into the filling—let them sit loosely on top so they can puff up tall!
If you find yourself needing a sturdier, more traditional crust later on, I do have a recipe for a flaky crust adaptation, but seriously, for these cups, the biscuit wins every time for speed and texture. Don’t overbake them, or those fluffy biscuits will turn hard!
Storage and Make Ahead Options for Easy Chicken Pot Pie Cups
Since these Easy Chicken Pot Pie Cups are such a fantastic quick meal, I always suggest making a double batch if you’re using your muffin pan, because leftovers are even better the next day! Just like when I make my full-sized casseroles, planning ahead makes life so much simpler.
If you want to prep ahead, the best method is to cook the creamy chicken filling completely, let it cool down a bit, and store it in an airtight container in the refrigerator for up to three days. You can even find my general thoughts on make ahead chicken pot pie strategies on the blog.
When you are ready to eat, just grease your muffin tin, spoon in the cooled filling, and top it with your prepared biscuit dough. You might need to add just a couple of extra minutes to the baking time since the filling is cold! If you have leftovers after serving, these cups freeze beautifully once baked. Let them cool completely, wrap them tightly, and reheat them straight from the freezer in a 350-degree oven until they are bubbly clear through.
Variations on the Classic Chicken Pot Pie Biscuit Cups
One of the best things about making a filling from scratch, even when using a quick biscuit topping, is that you can change it up every time you make it! These Easy Chicken Pot Pie Cups are wonderfully versatile, which is why they stay on our menu rotation so often. If you’ve run out of chicken, don’t fret; you can swap it out for leftover roast turkey just as easily. My nephew swears by adding sliced mushrooms for an earthier flavor profile, which works beautifully with that thyme.
If you want to brighten the whole thing up, try swapping the dried thyme for a half teaspoon of dried rosemary—it gives it a lovely, almost piney scent. Or, if you have some on hand, a pinch of dried sage takes this comfort food right into the holiday season. For the non-chicken eaters, you can easily turn this into a veggie-only version, maybe even adding some cubed sweet potatoes for sweetness and color. If you are looking for a complete guide to using turkey instead, you should check out my recipe for turkey pot pie recipe!
Frequently Asked Questions About Mini Chicken Pot Pies
When I first started making these lovely little dinners, I had so many questions swirling around in my head! It’s good to ask questions—it means you care about getting dinner just right. Here are a few things folks often wonder about when making up their batch of Easy Chicken Pot Pie Cups.
Can I use homemade biscuits instead of the canned dough for these chicken pot pie biscuit cups?
Oh, absolutely, you can! If you have my recipe for fluffy buttermilk biscuits, that dough works like a charm. Just know that homemade biscuits usually contain a bit more structure than the soft canned kind. You might need to slightly increase your baking time by a minute or two, and make sure you cut the homemade dough pieces a tiny bit larger than the canned ones if you are trying to line the cup, otherwise, they might shrink back too much. They end up tasting even better, too!
Can I use puff pastry instead of biscuits for my Individual Pot Pie Recipe?
You certainly can try it! Puff pastry will give you a completely different texture—much flakier and lighter, almost like a traditional pot pie crust, but thinner. If you use puff pastry, just cut it into squares that fit over the top of the filling once it’s in the muffin tin. Because it cooks quickly, you might want to watch the temperature closely so the pastry doesn’t brown before the filling is completely hot. It makes them feel a bit more elegant, like Comfort Food Appetizers!
How do I prevent the bottom biscuit from getting soggy inside these Muffin Tin Chicken Pot Pies?
Preventing that dreaded soggy bottom is my number one concern, too! The best trick I shared earlier is making sure your filling is hot when it goes into the tin; this starts cooking the base dough immediately. Secondly, if you are using the biscuit for a lining instead of just a top, make sure you brush the inside of the dough lining lightly with some melted butter before adding the filling. That little shield of fat helps keep the liquid filling from soaking right into the dough before it has a chance to set. If you are looking for other quick dinner ideas suited for lunchboxes, you can always browse my favorite quick, healthy lunch ideas.
What is the best way to serve these Single Serving Pot Pies?
These are wonderful just on their own because they are a whole meal packed into one cup—protein, veggies, and carbs all there! However, I often serve them alongside something light and fresh. A simple, crisp side salad with a bright vinaigrette cuts through the richness of the creamy filling beautifully. Steamed green beans tossed with toasted almonds are another favorite in our house when we serve these Family Friendly Meals.
PrintEasy Chicken Pot Pie Biscuit Cups
Make comforting, individual chicken pot pies using simple biscuit topping instead of traditional pie crust. These are perfect for quick weeknight dinners or family-friendly meals.
- Prep Time: 15 min
- Cook Time: 20 min
- Total Time: 35 min
- Yield: 10 servings 1x
- Category: Dinner
- Method: Baking
- Cuisine: American
- Diet: Vegetarian
Ingredients
- 2 tablespoons butter
- 1/2 cup chopped yellow onion
- 1/2 cup chopped carrots
- 1/2 cup chopped celery
- 1/3 cup all-purpose flour
- 1 3/4 cups chicken broth
- 1/2 cup milk
- 1 cup cooked, shredded chicken
- 1/2 cup frozen peas
- 1/2 cup frozen corn
- 1/2 teaspoon dried thyme
- Salt and black pepper to taste
- 1 can (16.3 ounces) refrigerated biscuit dough (10 biscuits)
Instructions
- Preheat your oven to 400 degrees Fahrenheit. Lightly grease a standard 12-cup muffin pan.
- Melt butter in a large skillet over medium heat. Add onion, carrots, and celery. Cook until vegetables soften, about 5 minutes.
- Stir in the flour and cook for 1 minute. Gradually whisk in the chicken broth and milk until the mixture thickens into a sauce.
- Stir in the shredded chicken, frozen peas, frozen corn, and thyme. Season with salt and pepper. Cook until heated through.
- Spoon the chicken filling evenly into the 12 prepared muffin cups, filling each about two-thirds full.
- Separate the refrigerated biscuits. Flatten each biscuit slightly with your fingers or a rolling pin until it is thin enough to line the bottom and sides of the muffin cup, creating a small crust well. Alternatively, you can cut the biscuits into quarters and press them into the cups.
- Place a small piece of the remaining biscuit dough on top of the filling in each cup to create a biscuit topping.
- Bake for 15 to 18 minutes, or until the biscuit topping is golden brown and the filling is bubbly.
- Let the cups cool in the pan for 5 minutes before carefully removing them with a small offset spatula or butter knife. Serve warm.
Notes
- For a richer flavor, use heavy cream instead of milk in the sauce.
- If you prefer a full biscuit top, use one whole biscuit per cup and press it down slightly over the filling.
- You can prepare the filling a day ahead and store it in the refrigerator. Assemble and bake just before serving.
Nutrition
- Serving Size: 1 cup
- Calories: 320
- Sugar: 4
- Sodium: 650
- Fat: 16
- Saturated Fat: 5
- Unsaturated Fat: 11
- Trans Fat: 0
- Carbohydrates: 30
- Fiber: 2
- Protein: 15
- Cholesterol: 45