
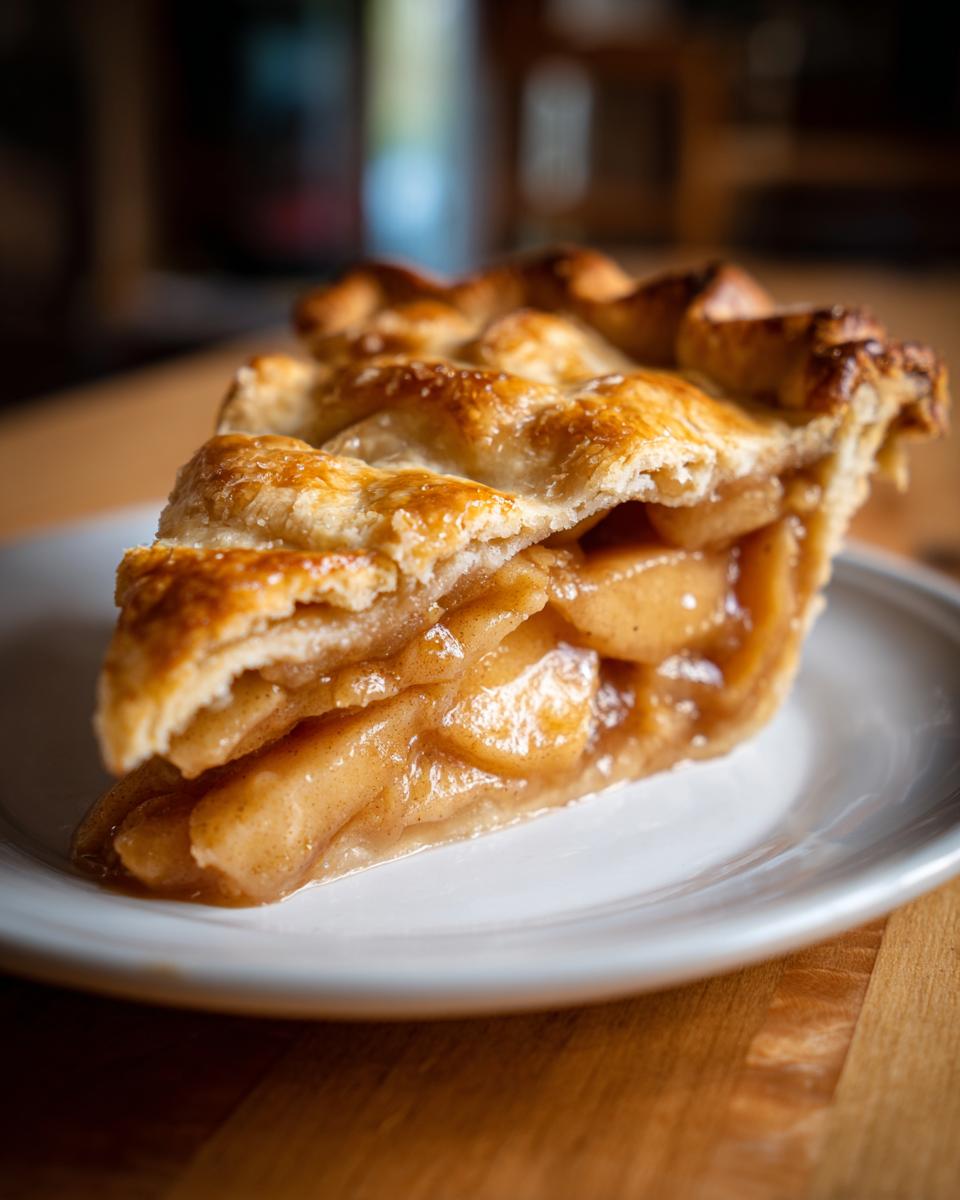
Oh, my dear friends, when the air turns crisp and you start dreaming of fall holidays, nothing quite beats the smell of a freshly baked, classic, homemade apple pie wafting from your oven. This isn’t just any pie, though. I’ve perfected my mother Carla’s recipe over decades—she learned it watching her own mother bake these beauties every autumn. What sets this recipe apart is the absolute guarantee of a flaky, buttery double crust enveloping a filling that is never, ever mushy! We achieve that perfect texture by cooking the apples first, and trust me, that little step changes everything. Get ready to make the best comforting fall dessert you’ve ever tasted.
- Why This Homemade Apple Pie Recipe Stands Out
- Gathering Ingredients for Your Classic Apple Pie Recipe
- Step-by-Step Easy Apple Pie Directions
- Tips for Success with Your Double Crust Apple Pie
- Serving Suggestions for This Comforting Fall Dessert
- Storage and Reheating Instructions for Apple Pie
- Frequently Asked Questions About Making Apple Pie
- Nutritional Estimates for This Classic Apple Pie
- Share Your Homemade Apple Pie Experience
Why This Homemade Apple Pie Recipe Stands Out
I know baking a pie from scratch can feel daunting, but our classic apple pie recipe is designed to give you maximum reward for your effort. We tackle the two biggest pie nightmares head-on: a soggy bottom and a soupy center. When neighbors ask me for my secrets for apple pie for family gatherings, I tell them it’s all about precision in the structure, not just throwing things together. Carla taught me that a great pie structure needs attention, just like her other fruit pies!
I’ve experimented for years, sometimes even looking at recipes online—like that great one from The Food Charlatan—but my preference remains my own, especially when it comes to that filling. So let me walk you through why this specific method works like a charm, every single time.
Achieving the Perfect Flaky Buttery Pie Crust
The crust is the star, honestly! If you want that beautiful, shatteringly flaky buttery pie crust everyone swoons over, you must, must, must keep things cold. I still prefer doing this by hand because I can feel when the butter is exactly the right size—tiny, cold, flattened pieces mixed into the flour. Don’t squish them too much! That trapped butter is what creates those wonderful steam pockets when it hits the hot oven. This is the foundation of the best apple pie crust recipe, hands down.
The Secret to a Non-Mushy Spiced Apple Filling
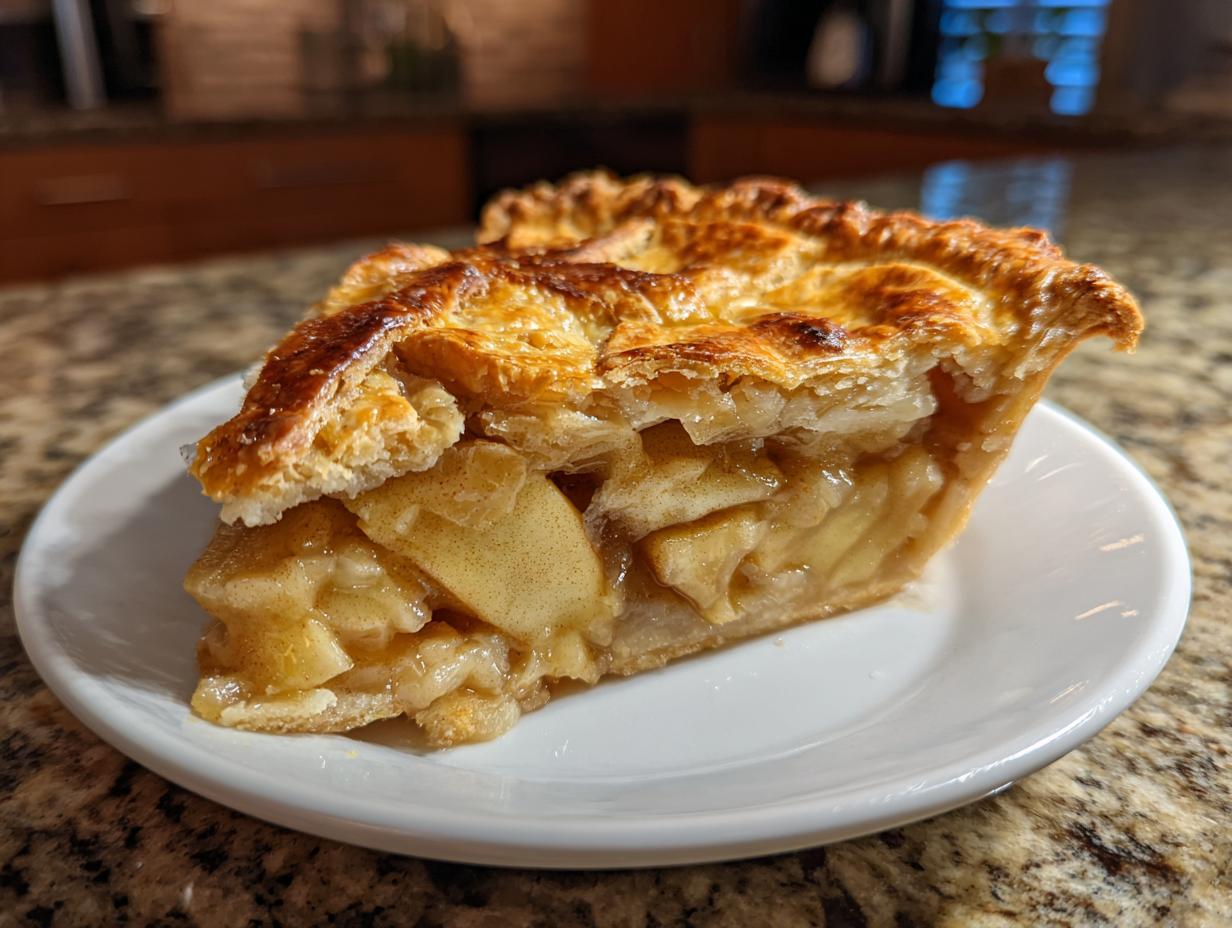
Now for the game-changer: we cook the apples first! Yep, you read that right. Instead of just dumping raw, juicy apples into a raw dough shell, we gently simmer our apples with the sugar and spices until they soften *just a bit* and the liquid thickens up. This pre-cooking ensures the apples shrink perfectly in the oven and prevents that watery mess that ruins so many pies. That controlled thickening means you get a rich, perfectly set spiced apple filling that holds its shape beautifully when you slice into it.
Gathering Ingredients for Your Classic Apple Pie Recipe
Okay, getting ready to tackle this homemade apple pie from scratch? The most important thing, especially when talking about pastry and spice balance, is accuracy. Don’t just eyeball this! A good pie is built on precise measurements, down to the temperature of your butter. Unlike some simpler recipes, this double crust beauty needs focused attention on two distinct groups of ingredients: the dough keepers and the wonderful apple filling that goes inside. If you want that foolproof result, gather everything just like this, and maybe make sure your pastry ingredients are colder than a January morning!
For more tasty apple adventures that ditch the pastry entirely, you can always check out my apple dumpling recipe for something quick!
For the Flaky Double Crust
- 2 1/2 cups all-purpose flour
- 1 teaspoon salt
- 1 cup (2 sticks) cold unsalted butter, cut into cubes
- 1/2 cup ice water, plus more if needed
For the Spiced Apple Filling
We need a mix of apples here for dimension—the tartness of Granny Smith and the softer structure of Macintosh really sing together.
- 6 large Granny Smith apples, peeled, cored, and sliced 1/4 inch thick
- 4 large Macintosh apples, peeled, cored, and sliced 1/4 inch thick
- 3/4 cup granulated sugar
- 1/4 cup packed light brown sugar
- 1/4 cup all-purpose flour (this helps thicken our cooked filling!)
- 1 teaspoon ground cinnamon
- 1/4 teaspoon ground nutmeg
- 1/8 teaspoon ground allspice
- 1 tablespoon lemon juice
- 2 tablespoons unsalted butter, cut into small pieces (for dotting the top)
Step-by-Step Easy Apple Pie Directions
Alright, let’s get this apple pie from scratch masterpiece assembled! We break this down into three main parts because rushing pastry is never smart, but cooking the filling is surprisingly fast. Remember those ingredients we just gathered? Now we put them to work to create a dessert completely unlike those bland store-bought pies. Don’t forget to preheat that oven to 425 degrees F when the time comes!
Making the Flaky Buttery Pie Crust Dough
Grab your biggest bowl! You need to combine 2 1/2 cups of flour and the salt first. Next comes the cold, cubed butter. Use a pastry blender or your fingers to mix it in until it looks like coarse crumbs—you want some pieces of butter the size of little peas still visible. Now, slowly dribble in that ice water, a tablespoon at a time. I usually stop mixing the second it all holds together; we are aiming for barely combined dough. Trust me on this one; overmixing equals tough crust! Divide the dough in two, flatten them into disks, wrap them tight, and hide them in the fridge for a minimum of one hour. They need that rest!
Cooking the Spiced Apple Filling
This is where we skip the soggy bottom! Toss all your sliced apples—remember the mix of Granny Smith and Macintosh—with both sugars, the flour, cinnamon, nutmeg, and allspice right in a large saucepan. Set the heat to medium and stir everything gently for about 8 to 10 minutes. You’ll notice the juices start to bubble and thicken up, and the apples will just begin to soften. That’s our cue to stop! Pull it off the heat, stir in the lemon juice and those last two tablespoons of butter, and then *you must let it cool completely*. If you put hot filling in a cold crust, you’ll have steam city in there later. If you are looking for more easy apple pie directions that keep the process streamlined, checking out advice from folks like Alright With Me can be helpful!
Assembling and Baking Your Apple Pie
Once your dough is chilled and your filling is cool, it’s time for construction. Roll out one disk to about 12 inches on a floured surface and gently ease it into your 9-inch pie plate. Pile in that gorgeous, thick apple filling and dot the top with those reserved tiny butter pieces. Now, roll out the second disk for the top crust. Lay it over, trim the edges, and pinch that top and bottom crust together tightly to seal everything in. Don’t forget those vents right in the top crust—steam has to escape! Brush the whole thing with your egg wash and sprinkle it with coarse sugar for a lovely crunch. Start baking at 425 degrees F for 15 minutes. Then, drop the heat down to 375 degrees F and keep it going for another 40 to 50 minutes until that crust is golden brown and you see bubbly filling peeking out. For another simple dessert idea, these easy French toast recipes are great, but this pie is worth the wait!
Tips for Success with Your Double Crust Apple Pie
We’ve done all the hard work making that gorgeous, flaky apple pie with double crust, so don’t let one little slip-up ruin the magic! Baking is science, and temperature control is your laboratory safety rule number one. Carla used to say, “A nervous baker makes a sticky pie, but an educated one makes a masterpiece.” Here are the tweaks that turn a good pie into your signature Thanksgiving showstopper. For further inspiration on excellent pastry foundations, make sure you check out my recipe for classic butter cookies; the technique principles are similar!
Preventing a Soggy Bottom on Your Apple Pie
This is critical! First, I mentioned it before, but I’ll say it loud: your filling must be completely cool. That residual heat is the enemy of a crisp base. Secondly, always slide that pie onto a preheated baking sheet when it goes into the oven. That initial blast of heat from below helps set that bottom layer of dough fast. Finally, don’t skip that last stretch of baking time until the filling is actively bubbling through those top vents; it ensures all that internal moisture has cooked off completely.
Best Apples for Baking Pie Selection
If you just grab any apple from the bin, you’re going to get inconsistent results in your apple pie. For this recipe’s structure, blending is key! You need the tartness and firmness of Granny Smith apples to hold their shape and cut through the sweetness. Then, we pair them with something softer and sweeter, like Macintosh or Honeycrisp, which break down just enough to become tender background sweetness. Mixing them ensures you get complexity—not just tartness, but a perfectly balanced flavor profile in every slice.
Serving Suggestions for This Comforting Fall Dessert
This classic apple pie recipe sings beautifully on its own, but honestly, what is better than a warm slice of pie with something cold melting right on top? I rarely serve it without a big scoop of vanilla bean ice cream—the contrast in temperature is just heavenly. If you’re feeling extra special, a drizzle of homemade caramel sauce goes wonderfully with that rich, spiced apple filling. For a truly cozy evening, skip the ice cream and pair a slice with a mug of my rich hot chocolate. It’s the definition of comfort!
Storage and Reheating Instructions for Apple Pie
Once you manage to convince everyone to stop cutting slices (which is the hardest part of making this apple pie!), you need to know how to save the leftovers. Since our filling is cooked down perfectly, this pie holds up much better than those super juicy versions people sometimes over-bake in panic!
You can leave your beautifully baked pie right on the counter if your kitchen isn’t too warm. If you promise to eat it within about two days, leaving it covered loosely at room temperature is totally fine. But for longer storage, especially since this is a perfect Thanksgiving apple pie you might want to save for later, pop it into the fridge. It keeps wonderfully well in the refrigerator for almost a week.
Now, reheating a slice of pie is an art form, especially if you want that bottom crust to wake up again! Don’t even *think* about using the microwave unless you enjoy eating warm rubber. The best way to reheat a slice is low and slow. Pop the slice onto a baking sheet—maybe line it with foil so cleanup is a breeze—and warm it up in a 300-degree oven for about 10 to 15 minutes. This gentle heat dries out just the slightest bit of moisture the crust absorbed and crisps it right back up. It tastes almost as good as fresh out of the oven. If you’re serving it warm, this is also the perfect time to make a batch of my easy homemade chocolate pudding for topping!
Frequently Asked Questions About Making Apple Pie
I get so many questions when people try this recipe for the first time! It’s natural when you are trying to master how to make apple pie perfectly. Don’t worry about imperfections; we’re all just learning and sharing the love over butter and apples here. Here are the things folks ask me about most often when they’re making this old fashioned apple pie! If you wanted a quick dinner before all this baking, check out my easy breakfast recipes for inspiration.
Can I use store-bought crust for this apple pie?
Oh, honey, you absolutely can! If you are in a huge rush or maybe this is your first time tackling a pie, using a store-bought crust is a totally valid shortcut. It definitely keeps those easy apple pie directions shorter on time. But I have to warn you: the flaky texture promised in this recipe comes from cubing *cold* butter and working it gently. So, while store-bought crust works in a pinch, it just won’t have that specific buttery snap that my homemade version gives you.
What is the best way to cool the apple pie before slicing?
This might be the most important tip for presentation! You have to let it rest. I know it smells divine coming out of the oven, and you want to dive right in, but resist! The filling is liquid gold when it comes out, and it needs time to set up properly. You truly need a minimum of three hours on a wire rack—if you cut it too soon, you’ll end up with a lovely, slightly soupy mess draining onto your plate. Patience pays off here!
Can I turn this into a Dutch apple pie recipe?
You sure can switch things up! If you prefer a crumbly, crunchy top instead of sealing it with that second layer of pastry, this is very easy to adapt. Just skip rolling out that second disk of dough! Instead, take the ingredients I listed in the notes section for the streusel topping (or just make any simple Dutch apple pie topping) and sprinkle it right over the filling before it goes into the oven. You’ll get that wonderfully textured top instead of the traditional double crust!
Nutritional Estimates for This Classic Apple Pie
Now, let’s talk numbers for a second. I’m not a nutritionist, of course—I’m a cook who loves feeding people! But I know many of you like to keep track, so I pulled together some estimates based on this wonderfully rich apple pie filling and that buttery crust. Please take these figures with a grain of salt, since every apple is different, and how much you sprinkle on that coarse sugar can change things!
These are just helpful guidelines for our classic apple pie recipe, assuming 8 slices:
- Serving Size: 1 slice
- Calories: 450
- Sugar: 35g
- Fat: 25g
- Carbohydrates: 58g
- Protein: 5g
It’s a treat, for sure, but one made with real butter and real fruit! That’s the joy of making a homemade apple pie from scratch—you know exactly what went into making that delicious slice.
Share Your Homemade Apple Pie Experience
I genuinely hope you get to bake this apple pie soon! Honestly, there is nothing better than seeing photos and hearing how much your family enjoyed that flaky crust and the perfectly spiced apple filling. When you bake something this dear to my heart—a recipe passed down from Carla—I really want to know how it turned out for you.
Please, when you finish enjoying that slice (maybe with some vanilla ice cream?), come right back here and leave a rating! Five stars if you loved that non-mushy texture we worked so hard to achieve! Knowing what worked well for you, or if you have any little tweaks you want to try next time, helps our whole community bake better together.
If you have any lingering questions about how to make this old fashioned apple pie work in your oven, don’t hesitate to drop a comment below, or reach out directly via my contact page. I read every note. Happy baking!
PrintThe Best Homemade Apple Pie with Flaky Double Crust
Make this classic apple pie from scratch. This recipe features a flaky, buttery double crust and a perfectly spiced filling made using a cooked method to prevent a mushy texture. It is a dependable, comforting dessert for any gathering.
- Prep Time: 45 min
- Cook Time: 60 min
- Total Time: 105 min
- Yield: 8 servings 1x
- Category: Dessert
- Method: Baking
- Cuisine: American
- Diet: Vegetarian
Ingredients
- 2 1/2 cups all-purpose flour
- 1 teaspoon salt
- 1 cup (2 sticks) cold unsalted butter, cut into cubes
- 1/2 cup ice water, plus more if needed (for crust)
- 6 large Granny Smith apples, peeled, cored, and sliced 1/4 inch thick
- 4 large Macintosh apples, peeled, cored, and sliced 1/4 inch thick
- 3/4 cup granulated sugar
- 1/4 cup packed light brown sugar
- 1/4 cup all-purpose flour
- 1 teaspoon ground cinnamon
- 1/4 teaspoon ground nutmeg
- 1/8 teaspoon ground allspice
- 1 tablespoon lemon juice
- 2 tablespoons unsalted butter, cut into small pieces (for filling)
- 1 large egg, beaten with 1 teaspoon water (for egg wash)
- 1 tablespoon coarse sugar for sprinkling
Instructions
- Prepare the Double Crust: In a large bowl, whisk together 2 1/2 cups flour and 1 teaspoon salt. Cut in the cold butter using a pastry blender or your fingers until the mixture resembles coarse crumbs with some pea-sized pieces of butter remaining. Gradually add the ice water, one tablespoon at a time, mixing until the dough just comes together. Do not overmix. Divide the dough in half, flatten each half into a disk, wrap in plastic, and chill for at least 1 hour.
- Prepare the Apple Filling: In a large saucepan, combine the sliced apples, granulated sugar, brown sugar, 1/4 cup flour, cinnamon, nutmeg, and allspice. Toss gently to coat. Cook over medium heat, stirring occasionally, for 8 to 10 minutes, until the apples begin to soften slightly and the juices thicken. Remove from heat, stir in the lemon juice and 2 tablespoons of butter. Let the filling cool completely. This step prevents a mushy pie.
- Assemble the Pie: Preheat your oven to 425 degrees F (220 degrees C). On a lightly floured surface, roll out one disk of dough into a 12-inch circle. Carefully transfer the dough to a 9-inch pie plate. Trim the edges, leaving a 1-inch overhang. Pour the cooled apple filling into the crust. Dot the top of the filling with the small pieces of butter reserved for the filling.
- Top the Pie: Roll out the second disk of dough. Place it over the filling. Trim the top crust, leaving a 1-inch overhang. Crimp the top and bottom crust edges together to seal. Cut several slits in the top crust to allow steam to escape.
- Bake: Brush the top crust evenly with the egg wash and sprinkle with coarse sugar. Place the pie on a baking sheet to catch any drips. Bake at 425 degrees F (220 degrees C) for 15 minutes. Reduce the oven temperature to 375 degrees F (190 degrees C) and continue baking for another 40 to 50 minutes, or until the crust is golden brown and the filling is bubbly. If the edges brown too quickly, cover them loosely with foil.
- Cool: Let the apple pie cool on a wire rack for at least 3 hours before slicing and serving. This allows the filling to set properly.
Notes
- For the best flaky buttery pie crust, keep all ingredients cold and avoid overworking the dough.
- Use a mix of tart and sweet apples, like Granny Smith and Honeycrisp or Macintosh, for balanced flavor.
- If you prefer a crumble topping instead of a double crust, substitute the top crust ingredients with a simple streusel topping.
Nutrition
- Serving Size: 1 slice
- Calories: 450
- Sugar: 35g
- Sodium: 320mg
- Fat: 25g
- Saturated Fat: 15g
- Unsaturated Fat: 10g
- Trans Fat: 0g
- Carbohydrates: 58g
- Fiber: 4g
- Protein: 5g
- Cholesterol: 60mg