

Oh goodness, are you ready for the holiday cookie marathon? Spending hours rolling, cutting, and baking perfect sugar cookies only to have your icing slide off or stay tacky forever? That is just heartbreaking! Trust me, I know that feeling. That’s why I’m sharing my absolute favorite **sugar cookie icing** recipe. This isn’t some runny glaze; this is robust, bakery-quality icing that hardens perfectly every single time, making it the best for beginners who want showstopper results. After thirty years of teaching kids patience, I promise I’ve worked out every tricky step so you don’t have to struggle!
- Why This Is the Best Sugar Cookie Icing Recipe for Decorating
- Ingredients for Your Hardening Sugar Cookie Icing
- How to Make Sugar Cookie Icing That Hardens Step-by-Step
- Making Your Sugar Cookie Icing Colorful and Ready to Use
- Drying Time: Secrets to Quick Dry Cookie Icing
- Tips for Storing Leftover Sugar Cookie Icing
- Troubleshooting Common Sugar Cookie Icing Issues
- Frequently Asked Questions About Sugar Cookie Icing
- Estimated Nutritional Facts for This Sugar Cookie Icing
- Share Your Decorated Creations
Why This Is the Best Sugar Cookie Icing Recipe for Decorating
If you’ve been searching for the **best sugar cookie icing recipe**, you know the struggle: most thin glazes just soak into the cookie or stay tacky for days. Not this one! Trust me, I know that feeling! We are using meringue powder here, which turns this into a sort of foolproof royal icing that hardens perfectly every single time. This means you can stack your holiday cookies, gift them in cellophane bags, and not wake up to a total sticky mess. It’s the secret to having a professional-looking sugar cookie when you’re just baking in your home kitchen. This recipe is one I turn to again and again.
I’ve tested countless mixtures, and this formula is the one that consistently gives you that beautiful, sturdy finish that experienced decorators rely on. It’s truly the best **icing that dries hard for cookies** you’ll ever need for your decorating projects.
Achieving a Smooth Glossy Sugar Cookie Glaze Finish
The magic behind that smooth, shiny look comes down to two things we include: meringue powder and the optional light corn syrup. Meringue powder stabilizes the whole mixture unlike anything else, acting like a protective shield against dullness. That tiny bit of corn syrup we add just boosts that gloss factor. It’s the difference between matte and mirror-shine perfection when you want that smooth glossy finish!
Expert Tips for **Piping Consistency Cookie Icing**
The best part? This recipe naturally whips up to a wonderful, stiff consistency straight away. As a former teacher, I learned how to explain things clearly, and this icing is perfect for beginners because it’s forgiving. You want it stiff enough to hold a sharp line when you pipe an outline around the edge of your cookie. If it’s not holding those peaks, you just know it’s too thin for detail work, but we fix that easily later on!
Ingredients for Your Hardening Sugar Cookie Icing
Alright, let’s look at what you need to make this brilliant **sugar cookie icing**. Don’t panic if you haven’t used meringue powder before; it’s just a foolproof replacement for raw egg whites, and it makes blending so much easier and safer for everyday baking. I wrote a whole guide on why I prefer it, which you might want to check out later when you have a second—it’s really a game-changer for reliability if you want foolproof results.
For a batch that covers about two dozen 3-inch cookies, here is the simple lineup we are working with:
- Four cups of confectioners’ sugar—and please, sift this! It saves you a lot of heartache later when mixing.
- Three tablespoons of meringue powder. This is our secret weapon for getting that beautiful, hard shell.
- A quarter cup of warm water, though we might grab a touch more if we need to adjust consistency later.
- One teaspoon of pure vanilla extract—never the imitation stuff, please!
- And optionally, that little bit of light corn syrup. Just a quarter teaspoon gives your finish an extra gorgeous, glossy pop.
See? Super simple ingredients for really professional results. Get your sifter ready, because the first step is making sure that powdered sugar is beautifully light and airy before it even sees the mixer!
How to Make Sugar Cookie Icing That Hardens Step-by-Step
Now that we have all our supplies gathered, let’s mix up this fantastic **sugar cookie icing**! Since you’ve got a crowd of powdered sugar waiting, we must start slow. I learned this habit when I was teaching; you always ease into the loud part! Put your sifted confectioners’ sugar and the meringue powder right into your mixing bowl first. Now, add your warm water and vanilla extract. If you are using corn syrup for that extra shine, pop it in now too. I always think about that classic butter cookie base when I’m making icing—you need a good foundation! You can always find my favorite butter cookie guide for when you bake the bases!
This is the part where you need your mixer, preferably a stand mixer if you have one. Start it on the absolute lowest speed. You only want the ingredients to just barely come together. If you blast it right away, your kitchen will look like a snowy winter wonderland, and we don’t want to waste that expensive sugar! Scrape down the sides really thoroughly once it looks combined.
Once everything is incorporated, it’s time to build that structure! Increase your mixer speed to medium-high and let it run for a solid three to five minutes. This time is critical! This process is what incorporates the air needed for that sturdy, **no-fail sugar cookie frosting**. You’re looking for it to become smooth, glossy, and stiff. If you lift the paddle, it should stand up straight—those are stiff peaks, meaning it’s ready for detail work!
Achieving Perfect **Sugar Cookie Icing Consistency Tips**
This is where we separate the outlining icing from the flooding icing, which is key for smooth decorating. What we have right now is perfect piping consistency—it’s thick and holds its shape for those crisp borders and small details. You want to try this test: when you lift the mixer paddle and let some icing drizzle back into the bowl, it should flow off slowly, and the little trail it leaves on the surface should disappear back in after about ten seconds. That’s your ideal flood consistency!
If your icing set up too thick while you were admiring your stiff peaks, don’t worry! Just stir in water, one tiny teaspoon at a time. You want to keep adding until you hit that perfect ribbon test. Every drop counts, so go slow! This simple adjustment ensures you get that **piping consistency cookie icing** for outlines and a slightly thinner version for filling in those areas smoothly. This method works wonderfully, and you can see more great decorating tips over here, too!
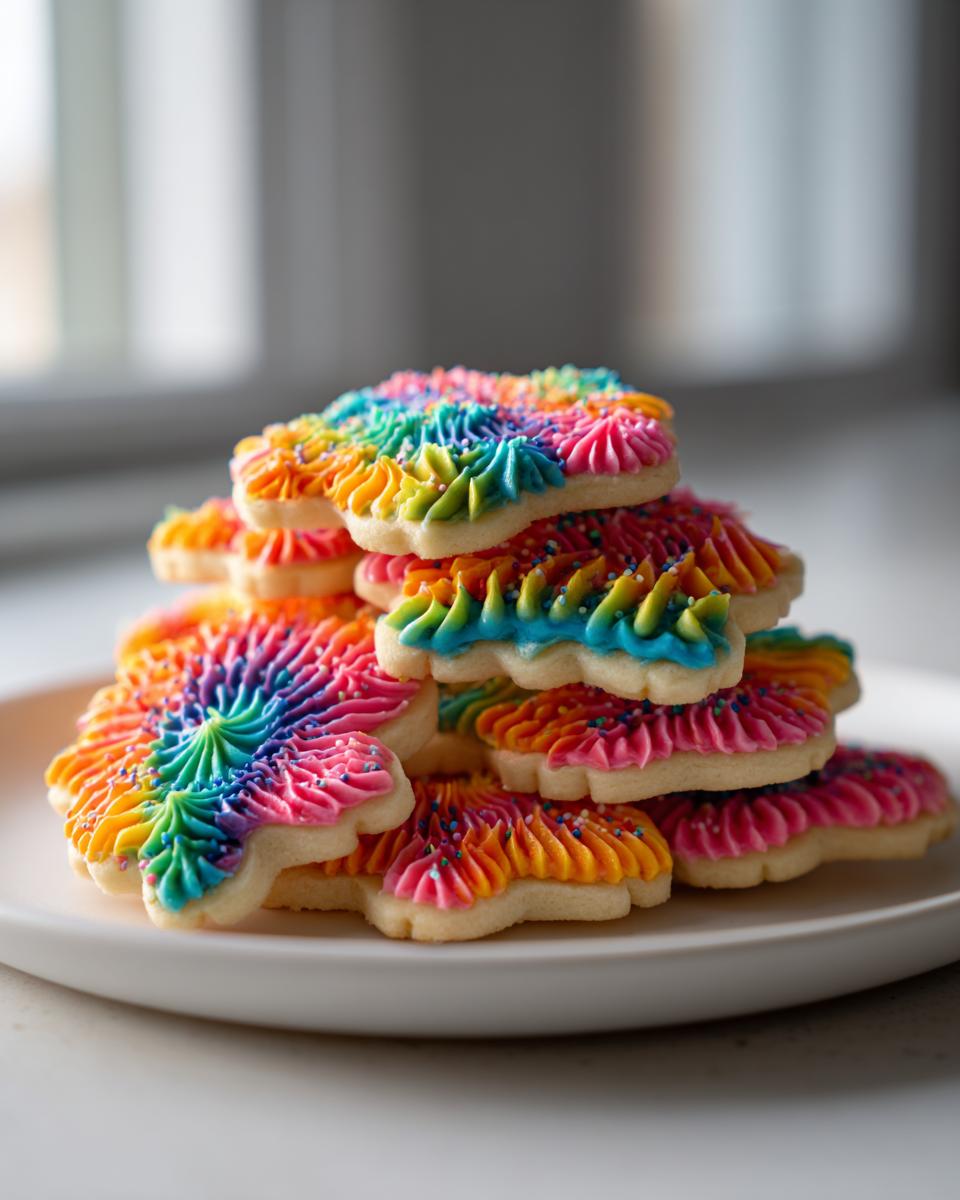
Making Your Sugar Cookie Icing Colorful and Ready to Use
Okay, we have this beautiful, stiff, pure white canvas ready to go! Now, for the fun part: color! Please, please, please use gel food coloring instead of the liquid drops you use for cakes. Liquid coloring has too much water, and adding even a few drops will thin out our perfect piping consistency, leading to that dreaded sticky finish. Remember, we are working hard to achieve an icing that doesn’t get sticky!
Divide your main batch into smaller bowls for each color you need. Remember, you can always add more color, but you can’t take it out! Use a toothpick to dab a tiny bit of gel into the icing and mix gently with a clean spoon until you get that lovely shade. Once colored, use it right away while it’s fresh and workable!

Drying Time: Secrets to Quick Dry Cookie Icing
This is probably the part that makes people the most nervous: waiting! After you’ve done all that beautiful decorating, you need your cookies to dry hard so you can actually stack them up for your cookie tins or gift boxes. For this recipe, you are generally looking at anywhere between four to eight hours for the icing to dry completely hard. If you check in too soon, it’ll smudge, and nobody wants that heartbreak after all that careful piping work!
Humidity is your biggest enemy here, honestly. If it’s pouring rain outside or you live somewhere super damp, it’s going to take longer, sometimes even longer than eight hours. But I’ve got a little trick I learned from my mother, who always did dozens of Christmas cookies every year. If you need that **quick dry cookie icing** effect, place your decorated cookies on a cooling rack and sit them near a low-speed fan, pointed away from the cookies so it’s just circulating the air.
This gently encourages the moisture to leave the surface without blowing any crumbs around. It really boosts the drying process! Just make sure your icing is already set slightly before you use the fan, otherwise, you end up just blowing uncooked icing dust everywhere. We want that hard, smooth shell, and air circulation is the fastest way to get there without using an oven or any fancy gadgets. You can find some other great tips on making your icing harden right here!
Tips for Storing Leftover Sugar Cookie Icing
Don’t worry if you’ve whipped up too much of this amazing icing! This recipe keeps beautifully, which is so handy when you’re decorating over a few days. You need to transfer any unused icing immediately into an airtight container. Keep it right there on the counter at room temperature—no need to chill it, as it can actually get too stiff.
The important thing about storing leftover **sugar cookie icing** is remembering to stir it really well before you try to use it again. It might look sort of solid, but a good vigorous stir usually brings it right back to life, ready for more decorating!
Troubleshooting Common Sugar Cookie Icing Issues
Now, I know I’ve promised you a no-fail recipe, and truly, it’s very close! But even the most experienced bakers sometimes get a batch that doesn’t behave exactly right. That’s life in the home kitchen, right? Don’t let a little texture hiccup derail your cookie decorating marathon. As a teacher, my favorite thing was helping people see that mistakes are just practice steps in disguise, and that’s exactly what we’re doing here with our **sugar cookie icing**.
If you followed the recipe exactly, you should end up with something beautiful that dries hard, which is the goal for **homemade icing that doesn’t get sticky**. But if yours came out too loose, here’s what we do!
If Your Icing Is Too Runny
If you’ve finished mixing and you realize your mixture is pooling too fast—maybe it ran off that spoon in less than five seconds—it means you just didn’t get enough powdered sugar in there to make it sturdy. Don’t panic and don’t add more water! The fix is simple: gradually beat in one extra half-cup of sifted confectioners’ sugar at a time. Keep mixing for about a minute after each addition to let the sugar incorporate fully before you decide if you need more. Stop as soon as it firms up and holds those soft peaks.
If Your Icing Is Too Stiff
This happens too, especially if your kitchen is dry or if you let the icing sit uncovered for a minute too long while you went to answer the door! If it looks crumbly, or if it refuses to move off the paddle attachment, it’s too stiff. This is the easiest fix, though! Just get a small bowl of clean water, and stir in maybe a quarter teaspoon of water at a time. Beat it in slowly until you get back to that lovely ribbon test we talked about earlier. Remember, we are aiming for a consistency that holds shape but is still smooth enough to spread easily over the cookie base.
Why Is My Icing Still Soft in the Middle?
If your cookies look perfectly dry around the edges but still feel slightly soft or tacky in the center after 8 hours, it’s usually one of two things. First, humidity might be high like I mentioned before. Second, the layer of icing might be too thick in that spot. For small areas, just give it another 24 hours at room temperature in front of that gentle fan. If you applied the icing really thickly in a large area, you might need to thin your next batch and use two thinner coats instead of one really heavy coat for the best, most dependable hard dry finish!
Frequently Asked Questions About Sugar Cookie Icing
It’s funny how many questions pop up once you start mastering a new technique. Decorating cookies is where the real fun starts, but it can also be where things go wrong if you don’t have the right formula! Trust me, I know that feeling! Since I’m all about making sure you get a dependable result, let’s tackle some of the most common things folks ask about this **sugar cookie icing**. As a former teacher, I know you need clarity, so I’m keeping these straight and simple.
Can I use egg whites instead of meringue powder for this sugar cookie icing?
That’s the age-old question! You absolutely *can* use fresh egg whites if you want to skip the meringue powder, but please trust me here—I strongly advise sticking with the powder, especially if you’re new to this. Fresh egg whites can be unpredictable; you never know exactly how they’ll whip up, and handling raw eggs requires taking extra food safety precautions in the kitchen. Meringue powder is just dried, pasteurized egg white combined with stabilizers. It gives you peace of mind, ensuring your consistency is spot-on every time you whip up this **royal icing for sugar cookies**. It really takes away the guesswork!
What gives this **royal icing recipe for sugar cookies** its shine?
If you are aiming for that gorgeous, smooth, glossy finish that looks like it came right from a high-end bakery, there are two things working together behind the scenes. First, that high-speed beating process we dedicated those five minutes to is crucial. It forces the air into the mixture just right, creating a very smooth surface tension. Second, that tiny amount of light corn syrup we put in the recipe acts like a magic magnet for shine! It keeps a bit of moisture locked in without letting the icing stay sticky, which is something I obsess over, just like I do with getting my chocolate pudding just right.
It’s this combination that prevents the icing from becoming dull or crackly once it sets on the cookie surface. If you skipped the corn syrup, you might get a very hard icing, but it won’t have that beautiful, soft luster we love for holiday cookies.
Is this icing going to be too thick for detailed work?
Not at all! That’s the real beauty of this specific technique. We intentionally mix it first to a stiff peak consistency, which is actually perfect for your initial outlines and any tiny piping work you want to do—like drawing delicate flowers or lettering. Remember that stiff peak test we discussed? That means it’s thick enough to hold its shape the second you stop piping, which is exactly what you need for crisp edges. This is your piping consistency!
If you need a thinner icing for flooding those large areas, you simply take a small portion of this excellent base and carefully thin it out with water until it passes the 10-second ribbon test. It’s simple management, and you get two versatile consistencies from one batch!
What if I only have powdered sugar and milk? Can I make a simple glaze instead?
Oh, that’s the classic, simple glaze, and it’s totally fine if you just want something thick to spread on the cookie right before you eat it! But if you want that hard, stackable finish that dries completely—because we all want cookies that look good weeks later—milk isn’t going to create that hard shell we are aiming for. Milk keeps the meringue proteins softer. Stick to this meringue powder recipe if you need that special decorative, hard-drying finish; it’s worth it for reliable decorating results! I’ve seen others discuss the use of water versus milk over at this great resource, too!
Estimated Nutritional Facts for This Sugar Cookie Icing
Now, I know most of us are focused on how pretty these cookies look and how they taste (and trust me, they taste amazing!), but I always feel better when we lay out the facts for our baking. Because this is a pure icing recipe and doesn’t include the cookie base, the numbers reflect just the glaze itself. Keep in mind, these figures are just my best estimate based on the standard measurements of confectioners’ sugar and meringue powder we used. Your actual nutrition facts might shift just a tiny bit depending on the exact brands of sugar or corn syrup you decide to use.
For a serving size of about one-quarter cup of this icing, here’s what we are looking at:
- Calories: Roughly 180
- Sugar: 45 grams (Yep, it’s sugar, after all!)
- Sodium: Very low, around 5mg
- Fat: Zero grams—isn’t that great?
- Carbohydrates: 45 grams
- Protein: About 1 gram
It’s basically pure sweetness and structure for our decorating fun! It’s pretty rare that you eat a whole quarter-cup of icing in one sitting when it’s spread thinly over a cookie, but I like to be transparent about what goes into the mixing bowl. Just remember, this is concentrated topping power!
Share Your Decorated Creations
I am so excited for you to try this recipe! Seriously, nothing makes me happier than seeing all of your beautiful, perfectly iced cookies out there. Since this **sugar cookie icing** is so reliable, you can focus completely on the artistry!
Once you’ve had a chance to whip up this batch of **icing that hardens for cookies**, I would just love for you to come back here and leave me a star rating and a quick note. Did you use it for Christmas cookies? A birthday party? Let me know what the occasion was!
And please, snap a picture! Tag me on social media so I can see how beautifully smooth and glossy your finish turned out. It’s so rewarding to see your creations shining! If you’re already planning your next baking adventure after mastering the icing, perhaps you should check out my recipe for the moistest coffee cake!
PrintThe Best Sugar Cookie Icing That Hardens for Decorating

Make smooth, glossy sugar cookie icing that dries hard, perfect for detailed decorating and holiday gifts. This easy recipe uses simple ingredients and achieves a bakery quality finish.
- Prep Time: 10 min
- Cook Time: 0 min
- Total Time: 10 min
- Yield: Covers about 2 dozen 3-inch cookies 1x
- Category: Dessert
- Method: Mixing
- Cuisine: American
- Diet: Vegetarian
Ingredients
- 4 cups confectioners’ sugar, sifted
- 3 tablespoons meringue powder
- 1/4 cup warm water, plus more as needed
- 1 teaspoon vanilla extract
- 1/4 teaspoon light corn syrup (optional, for extra gloss)
Instructions
- In a medium bowl, whisk together the sifted confectioners’ sugar and meringue powder until fully combined.
- Add the warm water and vanilla extract to the dry ingredients.
- Use a hand mixer or stand mixer fitted with a paddle attachment to mix on low speed until the ingredients are just combined. Scrape down the sides of the bowl.
- Increase the speed to medium-high and beat for 3 to 5 minutes until the icing is smooth, glossy, and holds stiff peaks. This is your piping consistency.
- If the icing is too thick for outlining or flooding, add water one teaspoon at a time until you reach the desired consistency. For flooding, you want it to flow slowly off the spoon in a ribbon that disappears back into the bowl after about 10 seconds.
- Divide the icing into separate bowls for coloring, if desired. Add gel food coloring sparingly and mix until uniform.
- Use the icing immediately for decorating cookies. For detailed work, use the thickest consistency. For flooding, use a slightly thinner consistency.
- Allow the decorated cookies to sit at room temperature until the icing dries completely hard, usually 4 to 8 hours depending on humidity.
Notes
- For a very hard, crack-free finish, use light corn syrup in the recipe.
- If the icing becomes too thick while decorating, stir in a few drops of water to restore the consistency.
- Store unused icing in an airtight container at room temperature for up to two days; stir well before reusing.
- To achieve a smooth, glossy sugar cookie glaze, thin the final mixture slightly more than the piping consistency.
Nutrition
- Serving Size: 1/4 cup
- Calories: 180
- Sugar: 45g
- Sodium: 5mg
- Fat: 0g
- Saturated Fat: 0g
- Unsaturated Fat: 0g
- Trans Fat: 0g
- Carbohydrates: 45g
- Fiber: 0g
- Protein: 1g
- Cholesterol: 0mg