
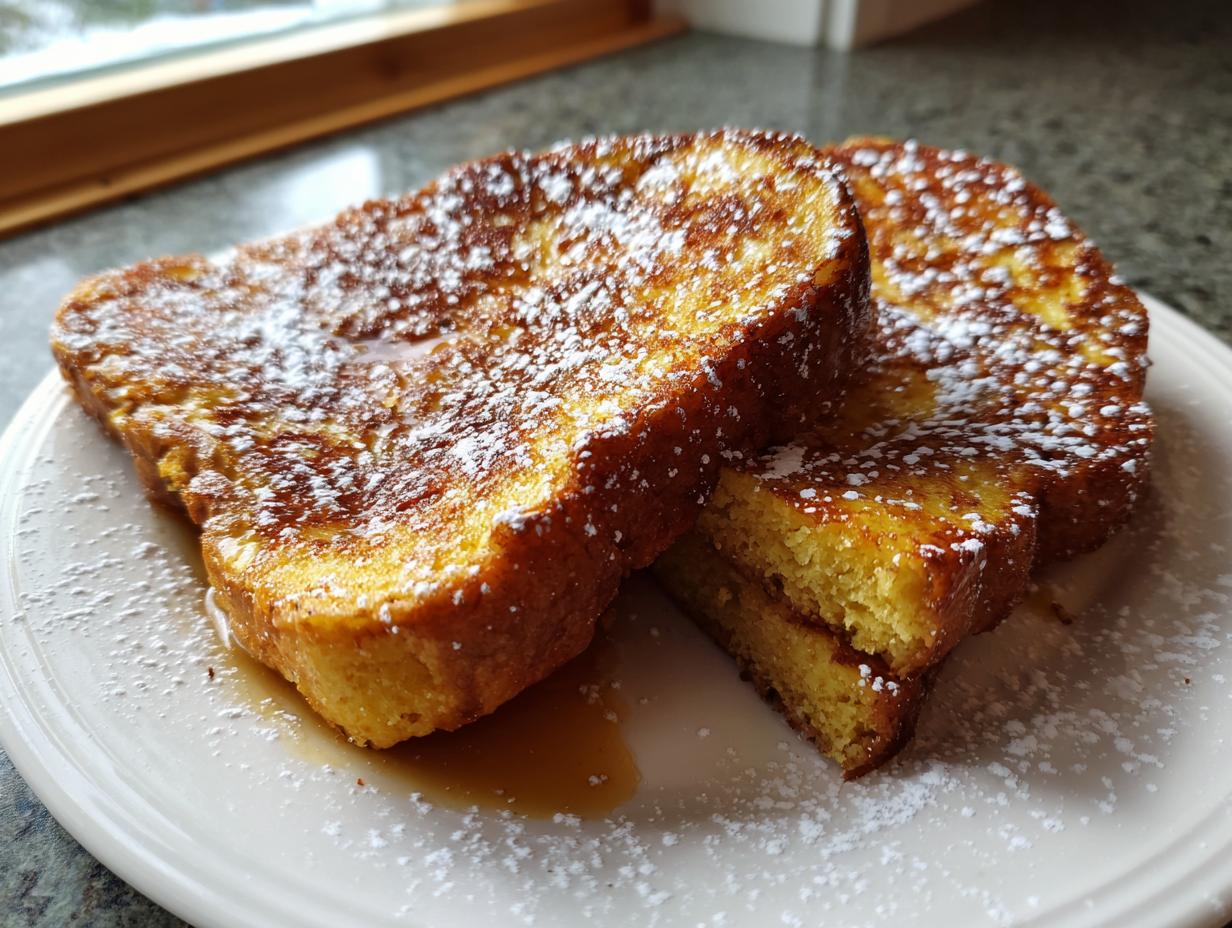
Oh, friends, when it comes to breakfast, nothing spells comfort quite like perfect french toast. I’ve spent years perfecting recipes, much like I spent years teaching children patience in the classroom, and I can assure you, mastering this dish is all about a little clarity in the steps. Forget thin, floppy slices that turn soggy in seconds! This classic french toast recipe is my absolute promise to you: we are achieving those beautifully golden, delightfully crispy edges paired with an unbelievably rich, custardy center every single time.
It sounds fancy, but trust me, it’s simple when you know the tricks. This method takes just a few more minutes than your usual slather-and-fry routine, but the payoff is worth every second. You are going to want to save this one for those special weekend mornings, though it’s so reliable you might start making it on Tuesdays! Learn more about making quick breakfast ideas like this anytime by checking out my guide on < easy french toast.
- Why This Classic French Toast Recipe Works Every Time
- Gathering Your Ingredients for the Best French Toast
- Step-by-Step Instructions for Perfect French Toast
- Expert Tips for Achieving Fluffy French Toast
- Variations on Classic French Toast
- Make Ahead French Toast Casserole Ideas
- Serving Suggestions for Your Homemade French Toast
- Storing and Reheating Leftover French Toast
- Frequently Asked Questions About Perfect French Toast
Why This Classic French Toast Recipe Works Every Time
I’ve taught hundreds of children how to read, and I learned that explaining the ‘why’ behind a process makes it stick. That’s what we’re doing here! So many recipes yield soft, overly sweet bread, but mine ensures you get that sought-after texture balance. We’re aiming for truly fluffy french toast that holds up to hearty syrup.
My thirty years in the classroom taught me patience, and that patience translates directly into achieving those deeply flavorful, custardy french toast centers. We use specific kinds of bread and a richer custard base—it’s not complicated, just deliberate. For more general breakfast excellence, you can see how I approach pancakes < right here, but for this recipe, these key elements are non-negotiable, just like the pros suggest over at < Modern Honey.
Choosing the Right Bread for Perfect French Toast
You simply cannot use fresh, soft white bread here; it will disintegrate before it browns, I promise! We need sturdy bread that can soak up all that delicious egg mixture without giving up the ghost. That is why I always call for thick slices of day-old Challah or Brioche. That slight dryness lets the custard work its magic deep inside, developing the flavor without making the outside a mushy mess. If you’re making brioche french toast, let it sit on the counter for a good four hours, minimum.
Mastering the Custard for Rich French Toast Centers
The richness comes from the eggs and milk, of course, but the ratio is everything. Too much liquid, and you have soggy bread; too little, and you have flavorless bread. For those luxurious custardy french toast centers, we use four eggs for just a half-cup of milk. If you really want to spoil your family, swap that milk out for half-and-half—it cuts the cooking time slightly and adds a marvelous, decadent mouthfeel. It’s worth the extra calories, trust me!
Gathering Your Ingredients for the Best French Toast
Alright, here is the list you’ll need. Keep these items close before you start mixing anything up! Good ingredients are the heart of any wonderful meal, and this classic french toast recipe is no exception. I’ve written down every single thing we need, using the exact measures that give us that perfect balance we talked about.
- 8 thick slices of bread (Challah or Brioche work best, remember what I said about stale bread!)
- 4 large eggs
- 1/2 cup whole milk or half-and-half (Go for the half-and-half if you’re feeling indulgent!)
- 1 teaspoon vanilla extract
- 1/2 teaspoon ground cinnamon
- 1 pinch of salt (Don’t skip the salt; it wakes up all the other flavors!)
- 2 tablespoons unsalted butter, for cooking (We need this for that beautiful golden sear.)
That’s it! No fancy store-bought mixes here. Just simple, clean flavor waiting to happen.
Step-by-Step Instructions for Perfect French Toast
Now that we have our ingredients ready, let’s get cooking! I always find that going step-by-step, just like I taught my students to follow directions for a project, keeps things calm in the kitchen. Remember, this is about getting that rich custard inside and those famous crispy french toast edges outside. If you want to see some other great ways to keep your breakfast sides easy, check out my recipe for < crispy potatoes!
Preparing the Custard and Bread for Your French Toast
First, whisk your eggs, milk, vanilla, cinnamon, and that pinch of salt in a wide, shallow dish—make sure it’s big enough for your bread slices! Next, take your slightly dried-out bread and dip each piece into that mixture. You’ll want to count for a good 15 seconds on each side. That saturation time is key to the final texture, but stop before it gets floppy!
Cooking Techniques for Crispy French Toast Edges
Here’s where we move slow and steady, which is the secret to the best french toast. Set your skillet or griddle to medium-low heat. Add half your butter and wait until it foams up just a little bit. Place your soaked slices down—don’t crowd the pan! Cook these beauties for about 4 to 5 minutes per side. Low and slow ensures the center sets perfectly before the outside burns, giving you those wonderful < crispy french toast edges we are aiming for.
Once they look perfectly golden brown, pull them off the heat immediately. I like to move the cooked slices onto a wire rack set over a baking sheet. This trick keeps the bottoms from steaming while they wait in a warm oven (about 200°F) for the rest of the batch to finish up!
Expert Tips for Achieving Fluffy French Toast
When I was teaching, I always told the parents that paying attention to the little things made the biggest difference in the classroom, and it’s exactly the same in the kitchen! Getting truly fluffy french toast that isn’t heavy or wet takes a couple of extra steps after they leave the pan. These are some of the best french toast tips I’ve gathered over the years—little secrets that elevate breakfast into an easy brunch recipe masterpiece.
It’s not just about the batter; it’s about managing the heat and the moisture after they cook. Follow these final steps, and you’ll never serve a limp slice of toast again! For other simple, sweet ideas, you can always check out my < chocolate pudding recipe.
The Importance of Resting Cooked French Toast
Don’t just stack them straight from the pan! Transferring your finished french toast to a wire rack set over a baking sheet while you finish the batch is crucial. This lets any minor surface condensation escape. While they rest in a a low oven, the exterior firms up just a tiny bit, maintaining that crispness, while the inside stays perfectly warm and custardy. It’s a wonderful trick for consistency!
Variations on Classic French Toast
While this classic french toast recipe is truly perfect on its own—especially with a dusting of sugar—I love changing things up on a slow Saturday morning! Because we nail the technique here, the base recipe lends itself beautifully to richer flavors and fun textures. You can easily boost the spice if you want a stronger cinnamon french toast vibe, just add another quarter teaspoon of cinnamon to the custard mix. Sometimes, the best part of cooking is seeing how far a reliable recipe can stretch! Just like when I make my < sweet cinnamon rolls, adding that extra warmth makes everything feel cozy.
If you want something truly decadent, you can look at turning your toast into dessert for breakfast. You can find some amazing ideas for fusion dishes like < Crème Brûlée French Toast online, showing how creative cooks get with this wonderful breakfast staple.
Making Stuffed French Toast
If you want to turn this into an absolutely show-stopping brunch, stuffing is the way to go! You’ll just need to assemble the sandwich before the soak. Take two slices of bread, spread a thin layer of your favorite filling—cream cheese mixed with a little powdered sugar works wonderfully—on one slice, and top it with the second. Then, dip and cook the whole package together. It takes a little longer to set the center, so keep that heat low!

Make Ahead French Toast Casserole Ideas
Now, while the recipe above is quick enough for a weeknight when you need an easy breakfast idea, I know some weekends call for even less morning fuss. That’s when I turn to the make ahead french toast magic! If you simply soak your thick bread slices (Challah is amazing here) in your custard mixture overnight in the fridge, you’ve essentially created your very own french toast casserole base right in the pan.
The next morning, you just pop it into a preheated oven! It’s the ultimate strategy for handling company or just enjoying a slower start to your Sunday. For a fantastic example of how to bake this up beautifully, you can find a great recipe for a classic < french toast casserole, or if you prefer something savory, I have a great ham and < scalloped potato bake.
Serving Suggestions for Your Homemade French Toast
Once your french toast has those perfect golden edges, the fun part is deciding what to put on top! Drizzling pure maple syrup is classic, but don’t stop there if you want a gourmet breakfast experience. I love a simple dollop of homemade honey butter. For a side that really complements the sweetness, try whipped cream and fresh berries—strawberries and blueberries are my favorites right now. If you’re looking for a great sweet side, check out my recipe for < honey butter skillet corn, though maybe save that for a brunch buffet!
Storing and Reheating Leftover French Toast
If you manage to have any leftover french toast, which is a minor miracle in my house, you’ll want to store it properly so it doesn’t just turn into sad, floppy bread. Store the cooled slices in an airtight container in the refrigerator—they usually stay good for about two or three days. The trick to reheating and bringing back some of that crispy edge is using a dry heat method. Skip the microwave! I suggest popping them right back on a baking sheet in a 350°F oven for about 8 minutes, or a dry skillet over medium heat until they crisp up again. It works like magic! For more practical storage tips on dishes, you might enjoy my < ravioli lasagna casserole instructions.
Frequently Asked Questions About Perfect French Toast
I saved some of your most common questions right here at the end. It is completely normal to have questions when you are trying to achieve that perfect texture, especially since so many recipes out there just give you vague instructions. I learned early on that knowing the ‘why’ helps tremendously, whether we are talking about baking or teaching reading fundamentals. Let’s clear up a few things so you feel totally confident next weekend!
Remember, the foundation of this recipe is reliability, so don’t hesitate to try it out first before a big brunch. You can find more simple morning solutions in my collection of < easy breakfast recipes.
Can I use regular sandwich bread for french toast?
You certainly can, but you will change the entire outcome, so you need to be aware of that! Regular, thin sandwich bread is going to become mushy very fast because it absorbs liquid too quickly. For this method to give you those lovely < fluffy french toast results, you need thick slices of something sturdy like Challah or Brioche. Thicker bread allows you to soak it longer for those custardy interiors without the whole slice dissolving.
How do I make this recipe a quick breakfast idea?
If you need this faster than the recommended 20 seconds of soaking time, here’s the compromise: Make sure your bread is slightly drier than I suggest. Instead of soaking for 15–20 seconds, try 10 seconds per side. You won’t get *quite* the deep custard, but it will still be miles better than standard toast. Alternatively, you can whisk up the custard base the night before, store it tightly covered in the fridge, and save those precious morning minutes!
What is the secret to a rich, custardy french toast centers?
The biggest secret is twofold, and both parts relate back to our slow cooking technique. Firstly, we must use a rich custard ratio—remember that four eggs to only a half-cup of milk? That density matters! Secondly, you must cook low and slow over medium-low heat. If the heat is too high, the outside hardens instantly, locking the liquid inside and leaving you with raw, soupy centers instead of that perfect, rich, custardy french toast centers we want.
PrintThe Absolute Best Classic French Toast Recipe

Follow this foolproof guide to make classic French toast with perfectly crispy edges and a rich, custardy center every time. This recipe is ideal for a special weekend breakfast or easy brunch.
- Prep Time: 10 min
- Cook Time: 15 min
- Total Time: 25 min
- Yield: 4 servings 1x
- Category: Breakfast
- Method: Pan Frying
- Cuisine: American
- Diet: Vegetarian
Ingredients
- 8 thick slices of bread (Challah or Brioche work best)
- 4 large eggs
- 1/2 cup whole milk or half-and-half
- 1 teaspoon vanilla extract
- 1/2 teaspoon ground cinnamon
- 1 pinch of salt
- 2 tablespoons unsalted butter, for cooking
Instructions
- Prepare your custard base: In a shallow dish, whisk together the eggs, milk, vanilla extract, cinnamon, and salt until fully combined.
- Prepare your bread: If your bread is fresh, let the slices sit out for a few hours to dry slightly. Stale bread absorbs the custard better without becoming soggy.
- Soak the bread: Dip each slice of bread into the egg mixture, allowing it to soak for about 15 to 20 seconds per side. You want the bread saturated but not falling apart.
- Heat the pan: Place a large skillet or griddle over medium-low heat. Add half of the butter and let it melt until it foams slightly. Cooking low and slow helps achieve a custardy center.
- Cook the toast: Place the soaked bread slices onto the hot skillet, ensuring they do not overlap. Cook for 4 to 5 minutes per side until golden brown and crisp on the edges.
- Keep warm: Transfer cooked French toast slices to a wire rack set over a baking sheet and keep them warm in a 200°F oven while you cook the remaining slices, adding more butter to the pan as needed.
- Serve immediately with your favorite toppings like maple syrup and powdered sugar.
Notes
- For the best texture, use bread that is one day old. This prevents the center from becoming too mushy.
- If you prefer a richer custard, substitute half-and-half for the milk.
- To achieve the perfect crispy edges, make sure your pan temperature is medium-low. High heat burns the outside before the inside sets.
Nutrition
- Serving Size: 2 slices
- Calories: 350
- Sugar: 12
- Sodium: 350
- Fat: 18
- Saturated Fat: 8
- Unsaturated Fat: 10
- Trans Fat: 0.5
- Carbohydrates: 35
- Fiber: 2
- Protein: 14
- Cholesterol: 180