
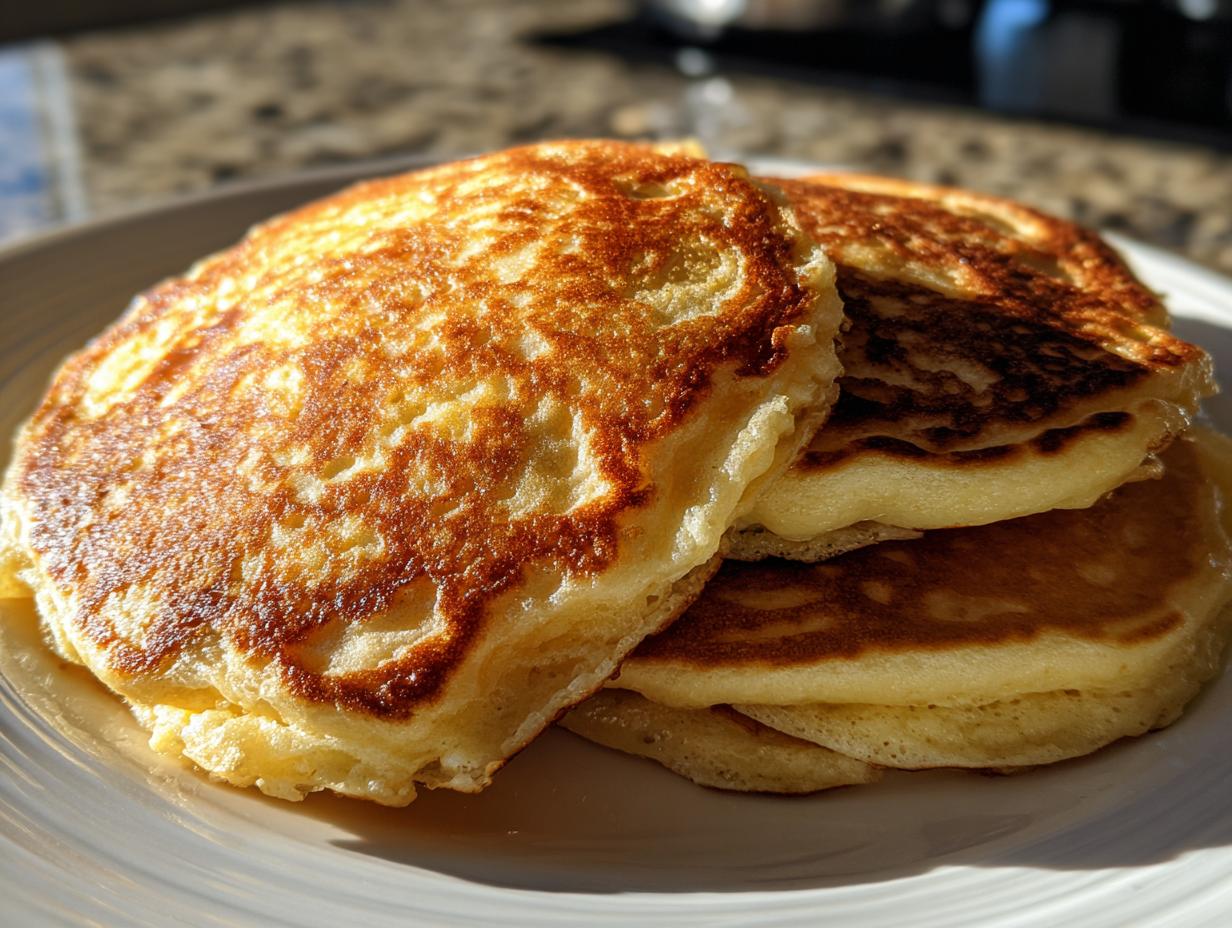
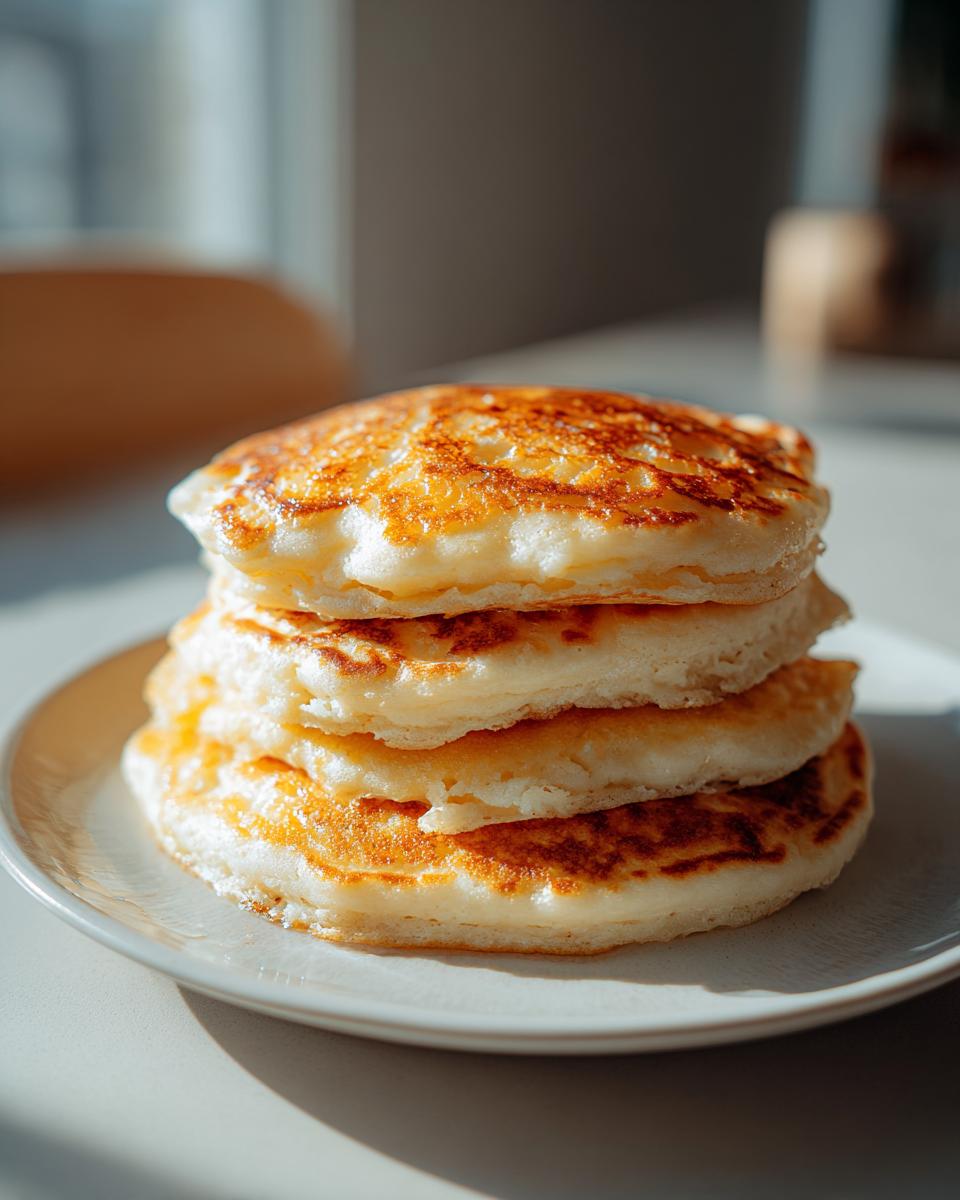
Oh, let’s talk about Saturday mornings! If there’s one thing that instantly makes a morning feel special and cozy, it’s a tall stack of perfect, fluffy pancakes steaming on the table. Forget those dusty boxes of mix; trust me, once you master these buttermilk pancakes made completely from scratch, you’ll never go back. These aren’t just pancakes; they are thick, golden discs of pure comfort that are surprisingly quick to pull together. For me, the aroma of these homemade delights is the smell of my family gathering, and I can assure you, this recipe beats everything out there for guaranteed fluffiness!
- Why This is the Best Buttermilk Pancakes Recipe From Scratch
- Ingredients for Fluffy Buttermilk Pancakes
- How to Make Perfect Buttermilk Pancakes From Scratch
- Tips for Achieving Thick Golden Pancakes
- Buttermilk Pancakes Variations: Vanilla Cinnamon Pancakes
- Serving Suggestions for Fluffy Breakfast Stacks
- Storage and Reheating Buttermilk Pancakes
- Frequently Asked Questions About Buttermilk Pancakes
- Share Your Fluffy Buttermilk Pancakes Creation
Why This is the Best Buttermilk Pancakes Recipe From Scratch
I know everyone promises the ‘best’ recipe, but ours truly stands apart because we understand the science behind the lift! Making **fluffy pancakes recipe** perfection comes down to the buttermilk’s natural acidity reacting perfectly with the baking soda and baking powder. It’s chemistry in action, Carla style! This reaction creates loads of tiny gas bubbles, which is exactly what gives you those beautifully thick, melt-in-your-mouth stacks. We skip the boxed stuff because that just can’t replicate the tender, tangy goodness that real buttermilk brings to the table.
Quick Prep Time for Easy Homemade Pancakes
This recipe wasn’t designed for fancy holiday brunches; it was designed for real life! You only need about 10 minutes of actual mixing time, and then 15 minutes on the griddle. That means breakfast is ready in under 30 minutes total! Seriously, if you want an **Easy Breakfast From Scratch** that tastes gourmet, this is the one you keep taped to the fridge. It’s fast enough for Tuesday mornings, but delicious enough for Sunday.
Ingredients for Tender Buttermilk Pancakes
The secret to these **tender buttermilk pancakes** really is using just simple, good ingredients. We’re not messing around with a dozen strange items here. You just need your basic pantry staples plus that crucial buttermilk. Knowing exactly what goes into the bowl builds such confidence, right? Once you see these measured out, you’ll understand why they puff up so beautifully without any extra fuss.
Ingredients for Fluffy Buttermilk Pancakes
Alright, here are the players in this symphony of fluffiness! I always keep these things stocked because when the pancake craving hits, we need to be ready. You’ll need a substantial one and three-quarter cups of all-purpose flour to give these cakes the structure they need to climb high. For sweetness, we are using two tablespoons of granulated sugar—just enough to taste great but not so much that the pancakes become flimsy.
Now for the lift! This recipe relies on a very specific dry team: two teaspoons of baking powder *and* one whole teaspoon of baking soda. That’s the magic combination that reacts with the buttermilk. Don’t forget the half teaspoon of salt to balance everything out; flavor needs balance, even in breakfast!
On the wet side, we need two full cups of real buttermilk. Yes, you read that right—two cups! That’s what makes them so tender. Then, two large eggs to bind everything together gently. Finally, four tablespoons of unsalted butter, and this is important, it needs to be melted before you add it in at the end. We use extra butter only for greasing that hot griddle!
How to Make Perfect Buttermilk Pancakes From Scratch
Making these amazing fluffy buttermilk pancakes is a super straightforward process. I always tell people that the key to unlocking those **Pancake Batter Secrets** lies in what you do *after* you combine the wet and dry ingredients. It takes just a few minutes, but those minutes are critical if you want that diner-style height we are looking for. Just follow my lead and you’ll have a gorgeous stack ready in no time.
Mixing the Buttermilk Pancake Batter
First things first, we tackle the dry goods separately. Take that flour, sugar, baking powder, baking soda, and salt and just give them a good whisk together in a big bowl. This helps distribute the soda and powder evenly, which is important! Then, in a separate bowl—don’t mix them together yet!—you’ll lightly whisk your buttermilk with those two eggs. When you pour the wet mixture into your dry ingredients, remember this: whisk only until the flour streaks are *just* gone. I mean it, stop mixing! A few lumps are not just fine, they are mandatory for fluffiness. If you mix too long, you develop the gluten and we end up with tough hockey pucks, not tender pancakes.
Once you’ve gotten that batter just barely combined, give it a home. Whisk in the four tablespoons of melted butter really quickly until it disappears. Now, let that batter just rest on the counter for about 5 minutes. This little break lets the baking powder and soda start doing their job before they even hit the heat!
Griddle Preparation and Cooking Classic Diner Style Pancakes
Time to heat things up! Set your griddle or non-stick skillet over medium heat. If it is too hot (and trust me, this is a beginner mistake), you’ll burn the outside before the inside cooks through and you lose that beautiful thickness. How do you know it’s ready? I always toss on just one little drop of water. If it sizzles right away and evaporates quickly, you are good to go. Think of it like getting ready to make my old fashioned pancakes—the surface temperature has to be just right.
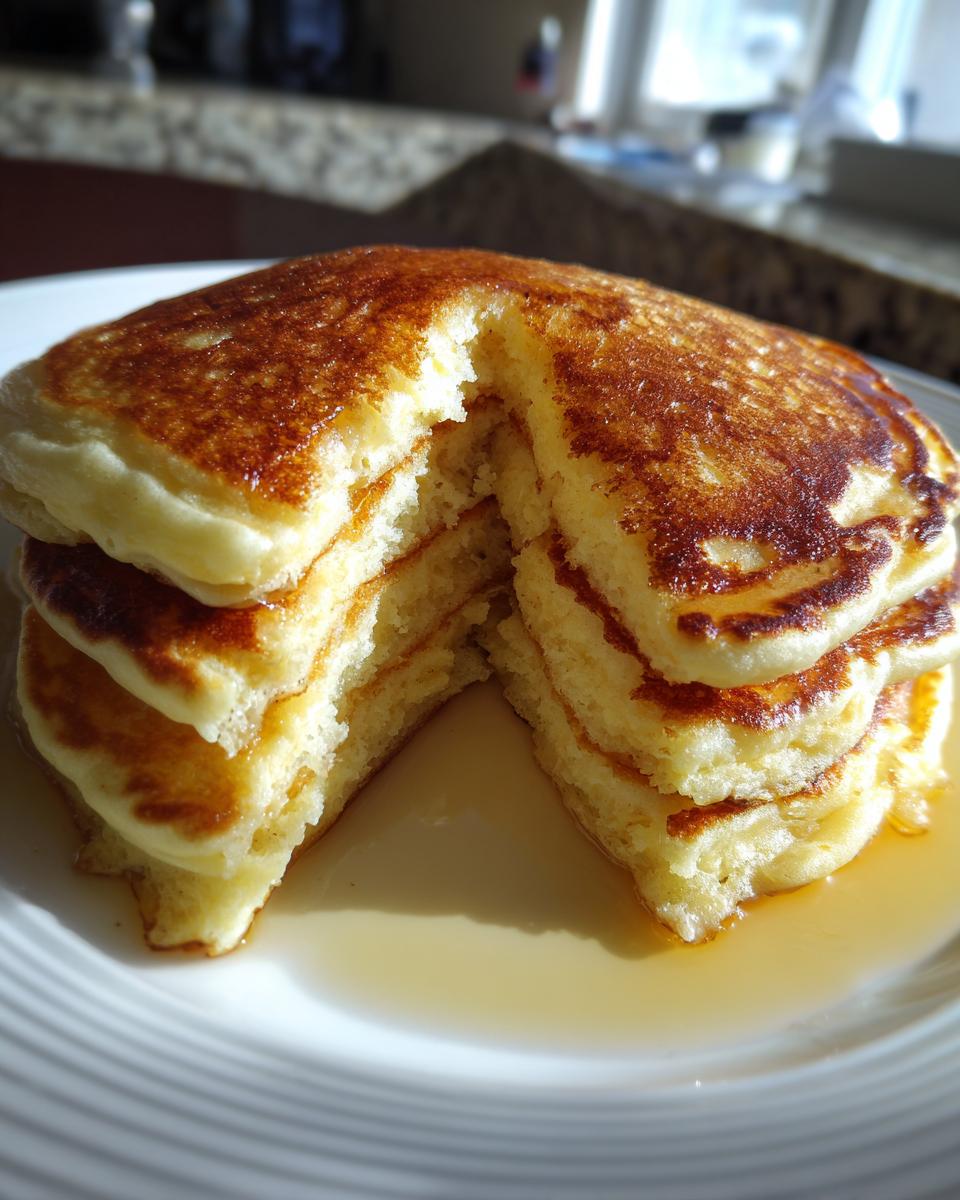
Pour about a quarter cup of batter onto your hot surface for each pancake. Now, watch them closely! You are waiting for those magic visual cues: bubbles need to pop up all over the surface, and the edges of the pancake should start looking set and opaque, like they’ve dried out just a bit. When you see that, carefully slide your spatula underneath and flip! Cook the other side for just another minute or two until it’s that perfect golden brown. Don’t press down on them once they are flipped, or you’ll deflate all that beautiful air we worked so hard to create!
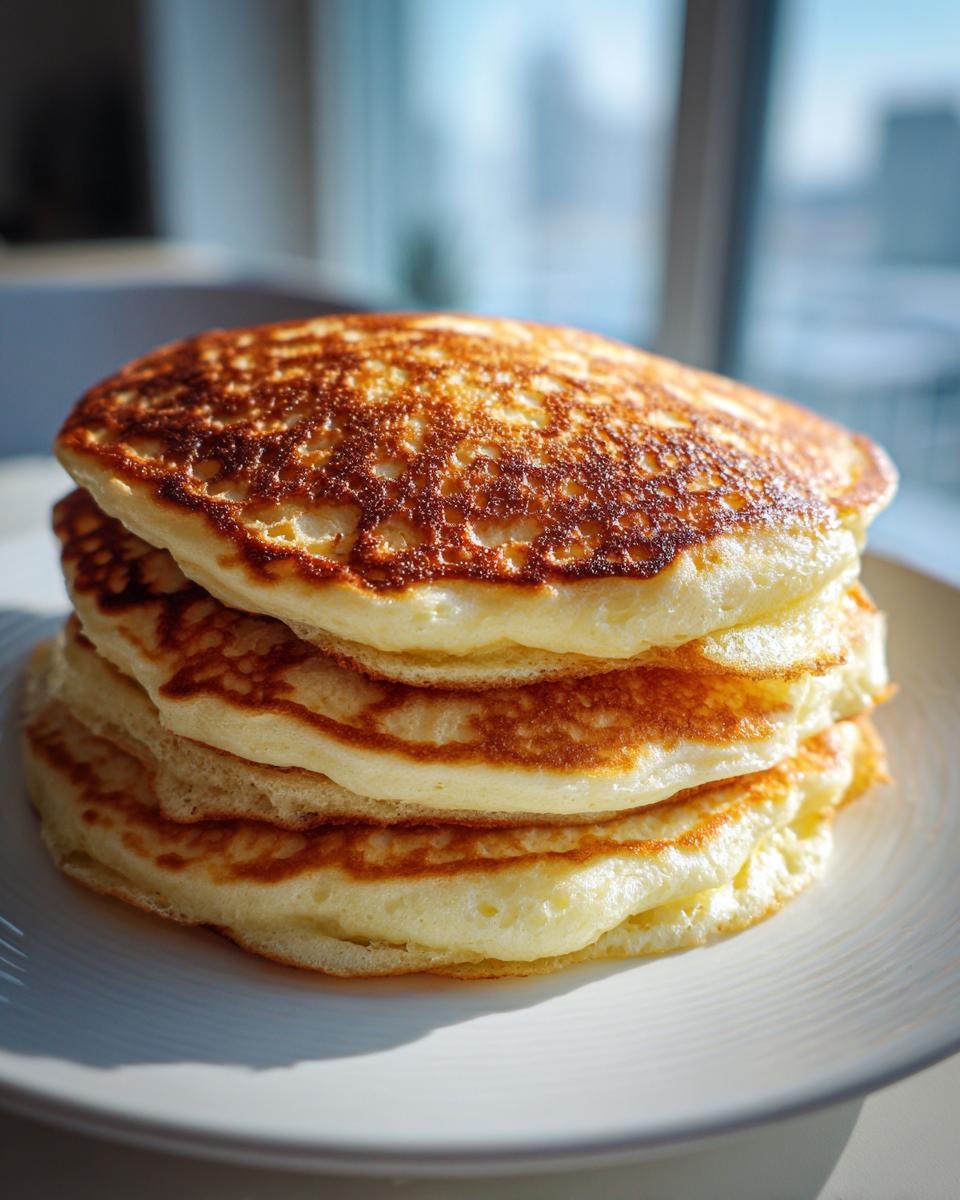
Tips for Achieving Thick Golden Pancakes
We’ve all experienced flat, sad pancakes, haven’t we? It usually comes down to two things: not trusting the buttermilk magic, or messing with the batter too much. Remember, since we’re using *real* **buttermilk cooking**, those acid and base reactions are happening fast. The biggest secret to **Thick Golden Pancakes** is leaving the batter alone immediately after the melted butter is incorporated. Don’t whisk it again, don’t stir it in the bowl while you’re waiting for your griddle—just let it sit during that 5-minute rest. That resting period allows the flour to hydrate properly, which gives you that wonderfully substantial, thick result.
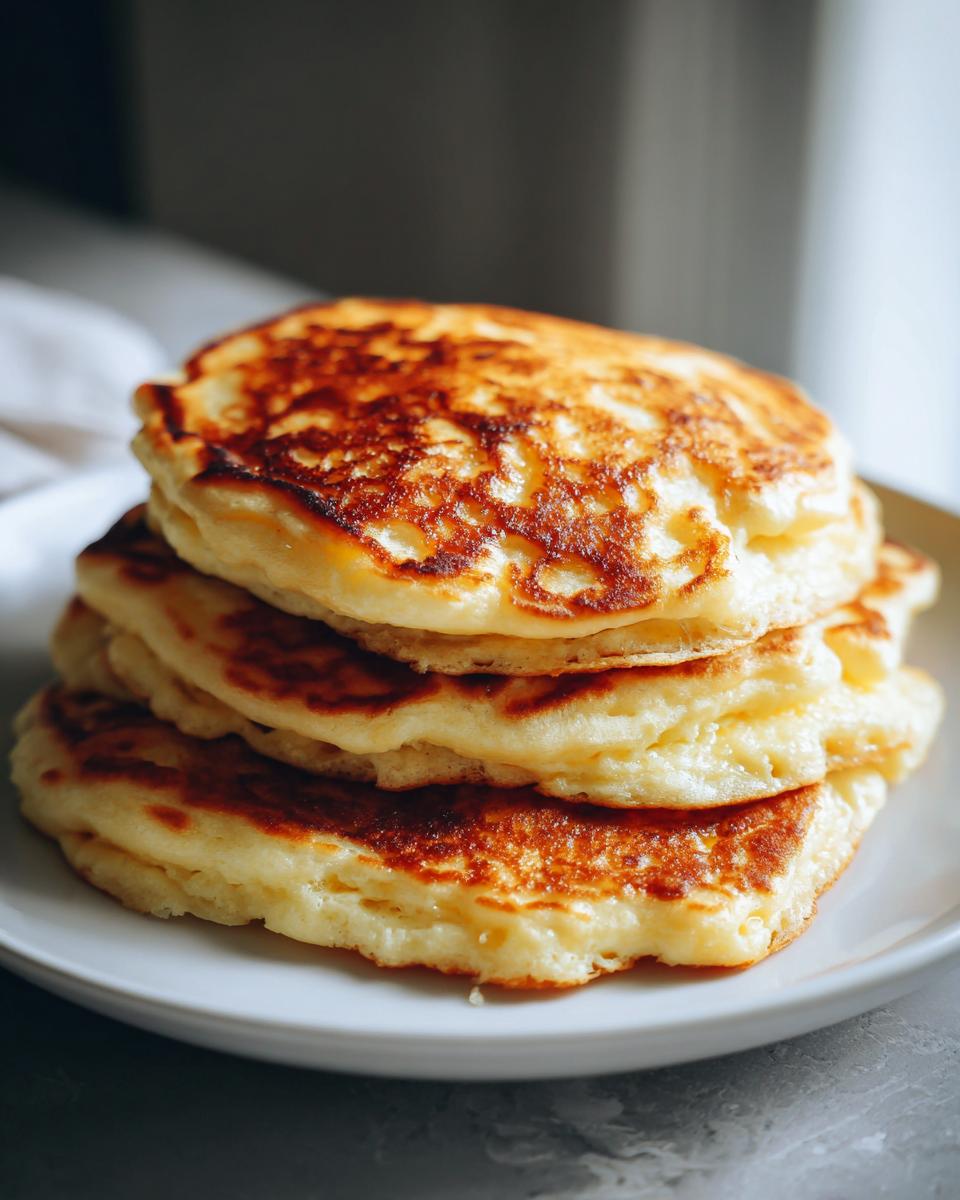
Also, be stingy with the butter on the griddle! That’s counterintuitive, I know, especially since melted butter goes *in* the batter. But if you use too much butter on the cooking surface, it makes the edges spread out thin and prevents that nice, crisp seal from forming, which also means less height. Use just enough to keep things smooth—a thin coating, nothing more. You can always add a tiny pad between batches if you see things sticking. For a great peek at the classics, check out this recipe, but I promise you, the methods here are top-notch for that Diner Style Pancake look! It’s all about controlling that heat environment!
Buttermilk Pancakes Variations: Vanilla Cinnamon Pancakes
Now, while the classic buttermilk pancakes are divine just as they are—perfectly tangy and light—sometimes you need just a little extra special something, right? If you’re craving a warm, cozy vibe, especially on a chilly weekend morning, you absolutely must try turning these into **Cinnamon Vanilla Pancakes**. It’s such an easy step but it completely elevates the whole stack!
To do this, you don’t need a whole separate recipe! You just add two small things to the wet ingredients when you are whisking the buttermilk and eggs together. First, stir in one full teaspoon of good quality vanilla extract—don’t skimp on this; you want that robust flavor. Then, add about half a teaspoon of ground cinnamon.
That little bit of spice blends beautifully with the buttermilk’s tang and makes for the most fragrant **buttermilk pancakes**. It makes the whole kitchen smell incredible, kind of like my banana smoothie, but warmer! You can see a beautiful version of this flavor profile over at this lovely site if you want to check out their finished product, but trust me, adding these two things to our base recipe is all you need!
Serving Suggestions for Fluffy Breakfast Stacks
You’ve made these gorgeous, towering **Fluffy Breakfast Stacks**—now we have to dress them up! While a good maple syrup is non-negotiable, don’t stop there. The best part of homemade pancakes is customizing them right on your plate. My family votes for fresh fruit every time; mixed berries or sliced bananas look so pretty piled high.
If you want to go full decadent for a **Weekend Brunch Idea**, you absolutely must add a big dollop of lightly sweetened whipped cream. And hey, if you are feeling bold, try dusting them with cinnamon sugar—it’s a nice little shortcut to that vanilla cinnamon flavor we talked about earlier! Remember, half the fun of these **Fluffy Pancake Toppings** is mixing textures and flavors!
For something a little different, I love drizzling a little melted chocolate or caramel sauce over the top, especially when serving them alongside my apple cinnamon French toast on holidays. It just makes the whole morning feel like a celebration!
Storage and Reheating Buttermilk Pancakes
Even though these homemade **buttermilk pancakes** disappear fast, sometimes you make too many, and that’s totally okay! They are fantastic for meal prepping, which is a lifesaver on busy weekdays when you need a **Quick Breakfast Recipe**. For the fridge, just let them cool completely, then stack them up with a little piece of parchment paper between each one. This stops them from getting soggy and sticking together. They’ll last about three days refrigerated this way.
If you want them to last much longer, pop them straight into the freezer—pancake stacks freeze beautifully! When you are ready for a batch, skip the microwave if you can. The microwave steams them and they lose that lovely fluffy internal texture. Instead, I pop mine directly into the toaster oven or a dry skillet over medium-low heat. That low heat warms them through gently and crisps the outside just enough. It brings them right back to being almost as good as fresh off the griddle. You can find some other great planning tips for busy mornings when you check out my guide on easy overnight oats, too!
Frequently Asked Questions About Buttermilk Pancakes
It’s only natural to have a few questions when you’re moving away from a box mix! I get them all the time from new cooks learning the ropes. I want you to feel totally confident making these so they turn out fluffy every single time. Here are the main things folks ask about when trying this recipe for the first time, especially when planning a big **Weekend Brunch Idea**!
Can I substitute regular milk for buttermilk in this buttermilk pancakes recipe?
You totally can in a pinch, but it just won’t be the absolute best! Because this relies so heavily on the acid in the buttermilk to activate the baking soda for that big lift, using regular milk means you have to add that acid back in yourself. If you have no buttermilk, mix 2 cups of regular milk with two tablespoons of white vinegar or lemon juice, let it sit for about five minutes until it curdles a little bit, and then use that mixture. But honestly, if you can grab real buttermilk, I highly recommend it for achieving that authentic, tender texture!
What makes these the Best Buttermilk Pancake Recipe?
What sets the **Best Buttermilk Pancake Recipe** apart isn’t just the ingredients, but the handling. The key is the teamwork between the baking soda and the buttermilk creating that incredible chemical reaction for maximum fluffiness. Secondly, it’s all about *not* overmixing the batter. As soon as you stop seeing dry flour streaks, you stop stirring! Those lumps are your air pockets waiting to expand on the griddle. That gentle touch ensures you get that thick, soft center every time!
How do I keep my finished buttermilk pancakes warm while cooking the rest?
This is the eternal breakfast struggle! If you’re cooking for a crowd, you can absolutely keep your first few golden pancakes warm while you finish the batch. Set your oven to a really low temperature—around 200 degrees Fahrenheit is perfect. Place a wire cooling rack on a baking sheet, and set the finished pancakes on that rack in the oven. This keeps them warm without steaming them and turning them soggy. It’s a simple trick, similar to the one I use when I have too many quick healthy lunch ideas to serve all at once!
Share Your Fluffy Buttermilk Pancakes Creation
Now that you’ve mastered the secret to those amazingly **fluffy buttermilk pancakes**, I truly would love to hear all about them! Making food is one thing, but sharing that joy makes it meaningful. Did they turn out tall and golden? Did your family devour the whole stack before you could get syrup on yours? Please, don’t keep the success story to yourself!
Hop down to the comments below and let me know how it went! A simple star rating really helps other home cooks who are nervous about trying a recipe from scratch for the first time. If you snapped a picture of your beautiful breakfast tower, please tag us! Sharing kitchen wins keeps our whole community inspired.
We are all here together in this kitchen adventure, and knowing this recipe brought a little extra happiness to your morning is the best reward I could ask for. Happy cooking, everyone!
PrintThe Best Fluffy Buttermilk Pancakes From Scratch
Make light, thick, and tender buttermilk pancakes at home. This easy recipe delivers classic diner-style results better than any mix, perfect for a quick breakfast or weekend brunch.
- Prep Time: 10 min
- Cook Time: 15 min
- Total Time: 25 min
- Yield: About 10 pancakes 1x
- Category: Breakfast
- Method: Griddling
- Cuisine: American
- Diet: Vegetarian
Ingredients
- 1 3/4 cups all-purpose flour
- 2 tablespoons granulated sugar
- 2 teaspoons baking powder
- 1 teaspoon baking soda
- 1/2 teaspoon salt
- 2 cups buttermilk
- 2 large eggs
- 4 tablespoons unsalted butter, melted, plus more for the griddle
Instructions
- In a large bowl, whisk together the flour, sugar, baking powder, baking soda, and salt.
- In a separate medium bowl, whisk together the buttermilk and eggs until combined.
- Pour the wet ingredients into the dry ingredients. Whisk gently until just combined. Do not overmix; a few lumps are fine.
- Whisk the melted butter into the batter until incorporated. Let the batter rest for 5 minutes.
- Heat a lightly buttered griddle or large non-stick skillet over medium heat. The griddle is ready when a drop of water sizzles immediately.
- Pour 1/4 cup of batter onto the hot griddle for each pancake.
- Cook for 2 to 3 minutes per side. You know the pancake is ready to flip when bubbles appear on the surface and the edges look set.
- Flip the pancakes and cook for another 1 to 2 minutes until golden brown and cooked through.
- Serve immediately with your favorite toppings.
Notes
- For extra fluffy pancakes, do not stir the batter after the initial mix. Overmixing develops gluten, resulting in tough pancakes.
- For a Vanilla Cinnamon variation, add 1 teaspoon of vanilla extract and 1/2 teaspoon of ground cinnamon to the wet ingredients.
- Serve these pancakes with maple syrup, fresh berries, or a dollop of whipped cream for a complete breakfast.
Nutrition
- Serving Size: 1 pancake
- Calories: 180
- Sugar: 4
- Sodium: 350
- Fat: 8
- Saturated Fat: 4
- Unsaturated Fat: 4
- Trans Fat: 0
- Carbohydrates: 23
- Fiber: 1
- Protein: 6
- Cholesterol: 60