
Oh, friends, there’s nothing quite like the smell of a pie baking, especially when the air starts getting crisp and you pull out your cozy sweaters. If you ask me what the ultimate comfort food dessert is, it’s always going to be a stunning Dutch Apple Pie. After thirty years of teaching little ones and raising my own family in the Midwest, I learned that the best homemade apple pie flaky crust recipe is just the beginning. And let me tell you, this dutch apple pie recipe—the one featuring that unbelievably rich and Buttery Crumb Topping—is absolutely the best version I’ve ever perfected. Forget those plain double-crusts; this one sings!
- Why This dutch apple pie recipe is Your New Favorite Fall Dessert Recipes
- Gathering Ingredients for the Best dutch apple pie recipe
- Step-by-Step Instructions for Your dutch apple pie recipe
- Tips for the Best Apple Crisp Pie Success
- Serving Suggestions for Warm Apple Pie
- Storage and Make-Ahead Tips for Your dutch apple pie recipe
- Frequently Asked Questions about this Easy Apple Pie Recipe
- Estimated Nutritional Data for this dutch apple pie recipe
- Share Your Homemade Apple Pie Experience
Why This dutch apple pie recipe is Your New Favorite Fall Dessert Recipes
I’ve made pies for every single holiday and countless family dinners, and this version always wins. It’s exactly what you want when the leaves turn color and you need that warm, spiced hug in dessert form. It’s truly one of the best Fall Dessert Recipes you’ll ever try. If you are looking for a showstopper Thanksgiving Pie that doesn’t require fussy lattice work, you’ve found it here.
Here’s why I know you’ll love this specific dutch apple pie recipe:
- It promises the absolute best texture combination: tender, spiced apples nestled under a crunchy layer of buttery goodness.
- It fits perfectly into your Easy Baking Recipes rotation—the topping comes together faster than rolling out a second crust!
- It’s the definition of a Comfort Food Dessert; the aroma alone will bring everyone running to the kitchen.
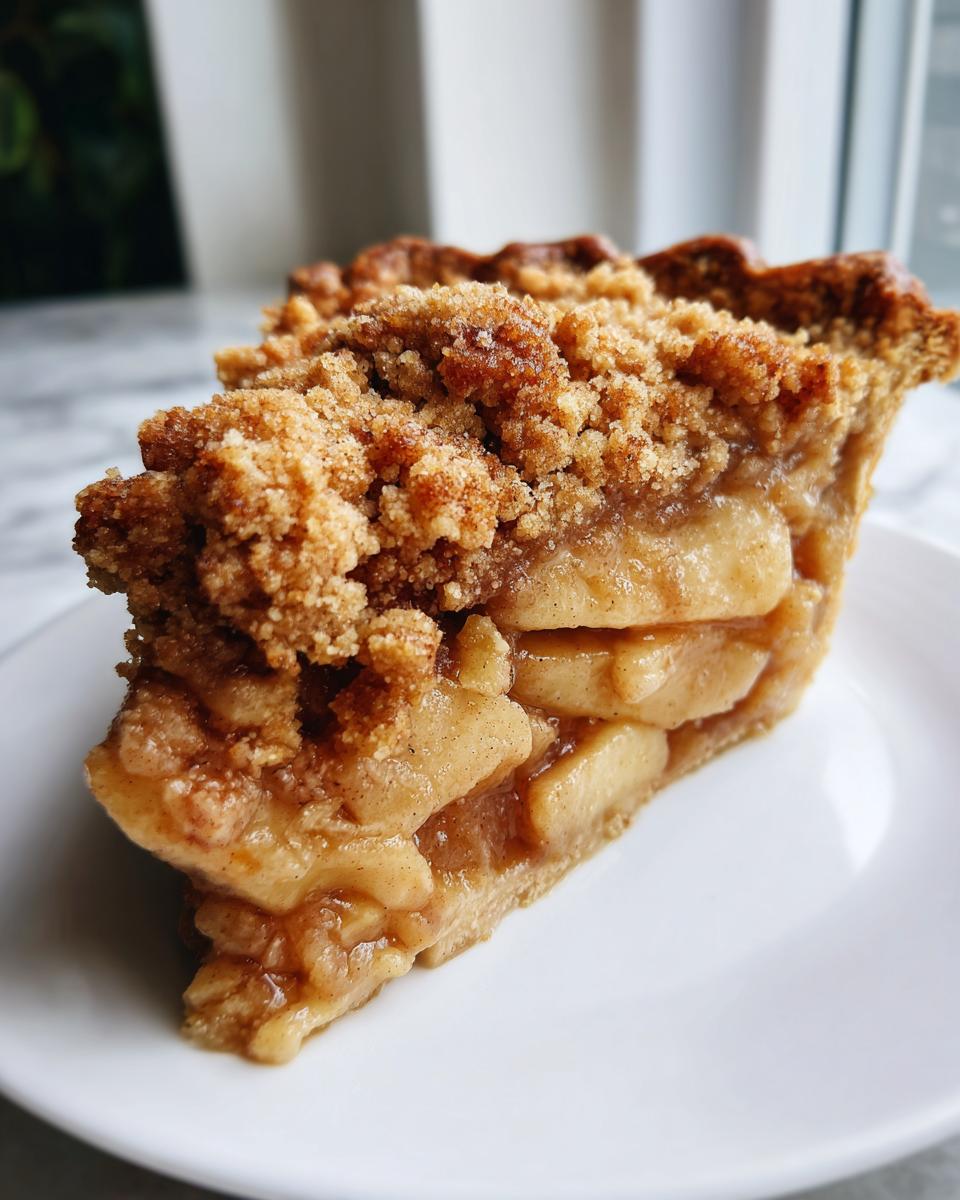
The Perfect Buttery Crumb Topping
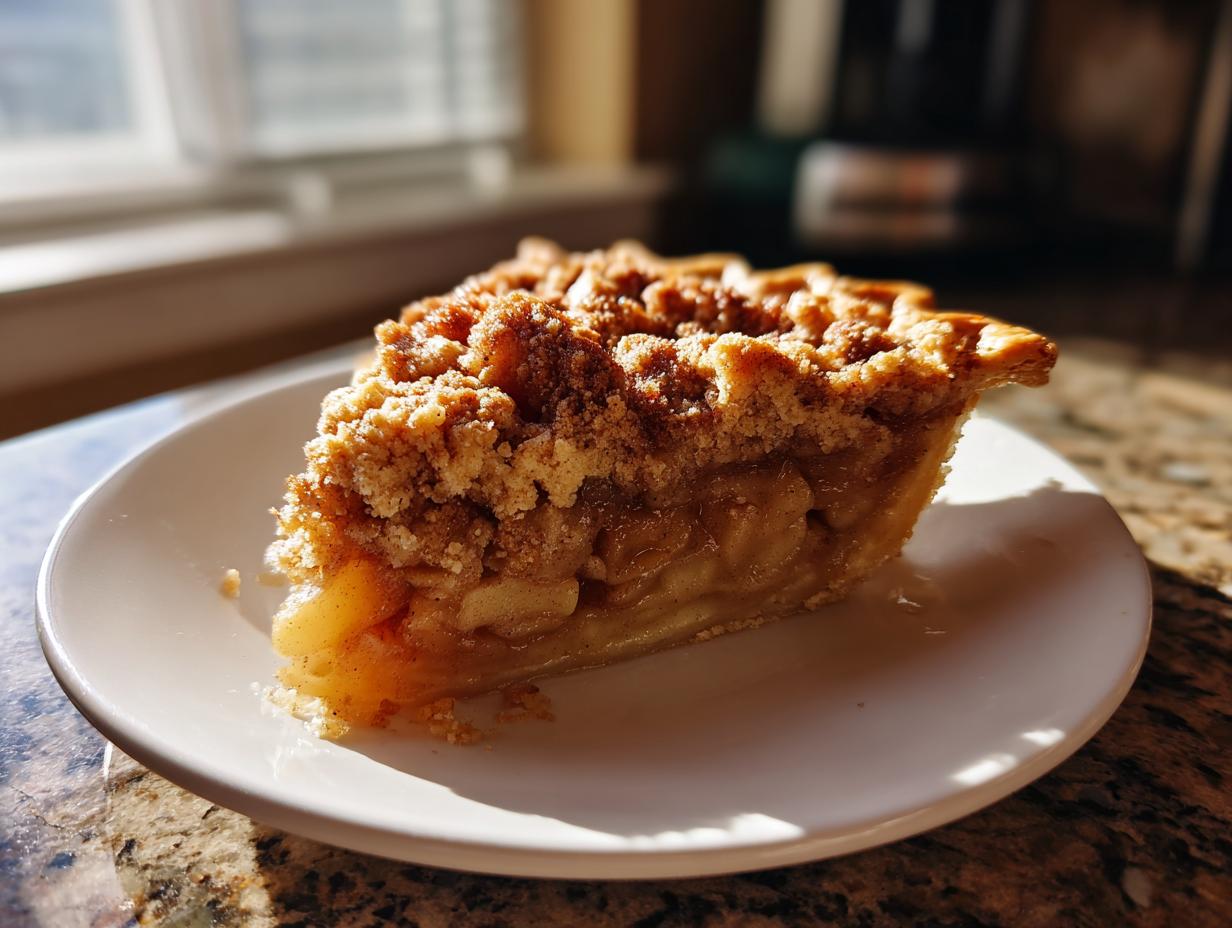
Honestly, the topping is why we call this *Dutch* apple pie. The signature feature is this thick, golden streusel—my version of an Apple Crisp Pie topping. Unlike a standard solid top crust, these buttery crumbles create pockets of crispness and caramelization around the sweet apples. They catch the heat beautifully, giving you incredible flavor contrast in every single bite. It’s what takes this dessert from a nice pie to the absolute best.
Simple Steps for a Homemade Apple Pie
Don’t let the fanciness of that topping fool you! I taught third grade for three decades, and my philosophy for baking is the same as teaching: break things down simply. This is an incredibly approachable Homemade Apple Pie. I’ve laid out every step so clearly that even if you’ve never made pie before, you’ll feel confident assembling this beauty. We are keeping this an Easy Apple Pie Recipe, I promise!
Gathering Ingredients for the Best dutch apple pie recipe
Pulling together the ingredients is half the fun! Baking is so much more rewarding when you know exactly what’s going into your dish. Since this is a showcase pie—I mean, we are aiming for the Best dutch apple pie recipe here—organization is key. I’ve separated everything into three groups so you don’t have anything creeping in where it shouldn’t be, especially when mixing up that star topping. Remember, for the crust, you’ll need enough dough for the bottom *and* the crumb coverage layer, so make sure your flaky pie crust recipe yields a double portion!
For the Flaky Pie Crust
This is the foundation, so treat it nicely! You’ll need the dough ready for two full crusts.
- 1 recipe for your favorite flaky pie crust (enough for a double crust)
For the Spiced Apple Filling
Granny Smith apples are my non-negotiable choice here. They hold their shape beautifully and give us that tartness we need to balance all the sweetness. You want them sliced about 1/4 inch thick—not too thin so they turn to mush, but not too thick that they stay hard!
- 6 large Granny Smith apples, peeled, cored, and sliced 1/4 inch thick
- 1/2 cup granulated sugar
- 1/4 cup packed light brown sugar
- 1 tablespoon all-purpose flour
- 1 teaspoon ground cinnamon
- 1/4 teaspoon ground nutmeg
- 1/8 teaspoon ground allspice
- 1 tablespoon lemon juice
- 1 tablespoon unsalted butter, cut into small pieces
For the Buttery Crumb Topping
This is the part that makes everyone ask for the recipe! The key here is that the butter absolutely must be cold and cubed. We aren’t trying to melt it; we are cutting it in to create those sandy, melt-in-your-mouth crumbs that brown up perfectly in the oven.
- 1 1/2 cups all-purpose flour
- 1 cup packed light brown sugar
- 1/2 cup granulated sugar
- 1/2 teaspoon ground cinnamon
- 1/4 teaspoon salt
- 1/2 cup (1 stick) cold unsalted butter, cut into small cubes
Step-by-Step Instructions for Your dutch apple pie recipe
Now for the fun part! This is where all those carefully chosen ingredients come together into what I truly believe is the ultimate dutch apple pie recipe. Since I like a really crisp bottom crust, I always bake on a sheet pan—that protects your oven from syrupy spills, which, trust me, happen! Remember, the key to an incredible dessert like this is paying attention to the details, like keeping those butter cubes for the topping nice and cold. If you love spiced fruit, you might also adore my easy brown sugar cinnamon pear crisp!
Preparing the Crust and Apple Filling
First things first, get your bottom crust settled perfectly into your 9-inch pie plate. Wrap up that second piece of dough and keep it chilled while we work on the good stuff. In a big bowl—and I mean big, because those apples need room to tumble—combine your sliced apples with both the white and brown sugars, the flour, cinnamon, nutmeg, and allspice. Don’t be shy here; toss everything together until those beautiful apple slices are completely coated in that sweet spice mixture. Finish by drizzling in the lemon juice—that just keeps them looking bright and fresh. Pour that whole glorious mixture into your bottom crust and don’t forget to dot the very top of the fruit with those little cubes of plain butter. They melt down and add lovely richness right under the topping.
Making the Signature Buttery Crumb Topping
Time to make the magic happen! In a separate bowl, just whisk together the dry ingredients for the crumb topping: the flour, both sugars, cinnamon, and salt. Now, grab those cold, cubed butter pieces. This takes a little bit of elbow grease, but it’s worth every second. You are going to use your fingertips—or a pastry blender if you have one—to work that cold butter into the dry mixture. Keep working it until it looks like coarse sand with some pea-sized clumps still visible. See those little chunks? Those are what turn golden and crunchy! If you overwork it, it just turns into paste, and we don’t want paste for our Homemade Dutch Apple Pie!
Baking and Cooling the dutch apple pie recipe
We start strong! Preheat your oven to a surprisingly hot 425 degrees F. Sprinkle that generous crumb topping evenly over your apples. Place the pie on a sturdy baking sheet—this saves cleanup later! Bake it hard at 425°F for just 15 minutes. This initial blast of heat sets the bottom crust nicely. Then, and this is crucial for the best texture, drop the temperature down to 375 degrees F and continue baking for another 40 to 50 minutes. If that lovely streusel starts looking *too* brown before the filling bubbles, just tent the edges loosely with foil. Finally, when it comes out golden and bubbly, you need patience! Let the pie cool on a rack for at least 2 hours. If you skip this, when you slice it? It’ll run right off the plate!
Tips for the Best Apple Crisp Pie Success
Now that you have the full dutch apple pie recipe laid out, let’s talk about those little kitchen victories—and a couple of small hurdles—that make the difference between a good pie and a truly great one. A little bit of insider knowledge goes a long way, especially when dealing with a bottom crust and a big pile of sweet, juicy filling!
Ingredient Notes and Substitutions
Baking is adaptable, but some ingredients play nicer together than others. When it comes to apples, while Granny Smiths are my favorite because they hold their shape and offer that perfect tart counterpoint to the sugar, mixing them up is wonderful! Try using half Granny Smith and half Honeycrisp. Honeycrisp gets wonderfully tender but keeps just enough bite. If you’re tempted to swap out the crumb topping for a full top crust, you certainly can, but you’ll miss out on that classic texture that defines this dessert. For the crust, I always suggest making it from scratch if you can, but if you need a shortcut, grab a high-quality refrigerated pie dough. Just remember, even a store-bought crust benefits hugely from being very cold when it hits the oven.
If you find yourself with leftover baked apples, you know I always say use them up! You can turn any leftovers into my easy homemade applesauce recipe for toast the next morning!
Achieving a Flaky Crust for your dutch apple pie recipe
I cannot stress this enough: cold is your best friend when making pie crust. Whether you’re making a simple bottom crust or planning for a lattice top, warmth is the enemy of flaky layers. If your kitchen is hot, put your flour and butter bowl in the freezer for ten minutes before you start mixing. When cutting in the butter for either the crust or the crumb topping, you want to work quickly. Cold butter creates pockets of steam when it hits the hot oven, and those steam pockets are what push the dough apart, setting those beautiful, airy flakes.
If your bottom crust looks like it’s shrinking while it bakes during that initial high-heat blast, that’s usually a sign the dough wasn’t completely relaxed or was too warm. Keep practicing—I promise, consistency comes with every pie you bake! Check out how others handle their recipes on blogs like Gravy & Flavor for more inspiration on keeping those crusts perfect.
Serving Suggestions for Warm Apple Pie
Once you’ve mastered this dutch apple pie recipe, the next important decision is how to serve it—and please, don’t rush the cooling process just to slather on the toppings too soon! This pie sings brightest when it’s served slightly warm, not scorching hot. That crumb topping needs just a tiny bit of time to gently settle and solidify those sugary clusters.
This is definitely a recipe for the holidays, and it looks absolutely stunning surrounded by other goodies on your Thanksgiving Pie spread. But the way to truly elevate this Comfort Food Dessert is by choosing the right accompaniment. My grandchildren insist there is only one way to eat it:
- A big, generous scoop of high-quality vanilla ice cream is the classic choice. The cold, smooth ice cream melts slightly into the warm, crunchy topping and the soft apples. It’s pure heaven, giving you that hot-and-cold textural contrast every good dessert needs.
- If ice cream isn’t for you, a big dollop of freshly whipped cream is wonderful. If you want to get fancy, you can even use a homemade frosting, though I usually keep it simple. For example, sometimes I whip up a quick batch of vanilla buttercream and just pipe a little swirl on top instead of plain cream!
- For serving right after dinner, just a little dusting of powdered sugar looks lovely, especially if you’ve chosen the two-crust option instead of the streusel topping sometimes. But honestly, with this crumb, you need the topping to shine!
No matter how you serve it, this pie is rich enough to stand on its own, but these little additions just make the whole experience that much cozier. Enjoy every bite!
Storage and Make-Ahead Tips for Your dutch apple pie recipe
We all know that a slice of pie tastes even better the next day, right? It’s proof that this dutch apple pie recipe is a winner! The good news is that this pie keeps beautifully, but we have to treat the crust and that fantastic crumb topping right so they don’t get soggy overnight.
First off, when it comes to storing leftovers, the main culprit for sogginess is moisture, which happens faster at room temperature. For the very best results, and so we can truly enjoy this as one of our favorite easy fall desserts later in the week, you’ll want to cover it loosely with plastic wrap or foil and keep it in the refrigerator. If you plan on eating it within the first day, leaving it on the counter is fine, but avoid areas where it might get too warm.
Reheating for that Fresh-From-the-Oven Taste
If you’ve kept it in the fridge, it’s going to be chilly, and nobody wants cold apple pie, not unless it’s paired with ice cream! Please, friends, avoid the microwave if you can. The microwave heats the apples beautifully but turns that crisp topping into a sad, chewy texture. We worked too hard for that crumb topping!
For the perfect reheat, I always suggest the oven. Preheat your oven to a low 300 degrees F. Place the slice—or the whole pie—on a baking sheet, and warm it gently for about 10 to 15 minutes. This slow, dry heat brings back the warmth to the apples without steeping the crust in steam. You want that topping to snap back to life just a little!
Making Parts Ahead of Time
If you are planning this for a big event, maybe Christmas or a huge potluck, you can absolutely prep components ahead of time. We already talked about keeping the bottom crust ingredients cold, but you can even make your pie dough a day ahead and let it chill completely. That actually makes it easier to handle!
The absolute biggest make-ahead tip for any dutch apple pie recipe involves the crumb topping. Mix all the dry ingredients for the topping together, then cut in the cold butter just until those coarse crumbs form. Spoon that mixture into a zip-top bag or an airtight container and keep it in the fridge for up to three days. When you are ready to bake, sprinkle it right on top of your filled pie. This keeps the butter solid and ensures that when it hits that initial 425-degree blast in the oven, you get maximum crispness!
Frequently Asked Questions about this Easy Apple Pie Recipe
It’s so common to have questions when you’re trying a new recipe, especially one you want to turn into a family tradition! I’ve answered the most common things folks ask me after they try this dutch apple pie recipe for the first time. Making the best Easy Apple Pie Recipe comes down to knowing these little details.
Can I use a lattice top instead of the Buttery Crumb Topping?
Absolutely, you can! If you have leftover dough or perhaps you just prefer the look, rolling out a full top crust or weaving a lattice is perfectly fine. Just remember, when you swap out that wonderful, thick, crunchy Buttery Crumb Topping, you change the fundamental texture of this pie. This pie earns the name *Dutch* because of that buttery streusel layer! If you use a full crust, you won’t get those lovely little pockets of crispness, and the filling might steam a little differently. For the absolute best result, stick to the crumb, but I always say, bake what makes you happy!
What apples are best suited for this Dutch Apple Pie?
For that perfect balance between sweet and tart, you simply can’t beat Granny Smith apples. They are firm, which means they keep their shape nicely as they bake and won’t turn into total mush. However, I love mixing things up! If you want a fantastic Apple Dessert with Streusel, try using half Granny Smith and half a sweeter apple like Honeycrisp or Fuji. The mix of tart and sweet with that cinnamon spice is just heavenly. Just make sure they are sliced evenly—remember, about 1/4 inch thick is the aim for consistent cooking!
How thick should the apples be sliced?
This is a detail that matters! If they are too thin, they break down completely during the long bake time, and your pie filling turns soupy instead of thick and spoonable. If they are too thick, guess what? They’re still hard when the crust is perfectly done! Aim for roughly 1/4-inch thick slices. If you’re using one of those large apples or a very firm variety, maybe lean slightly toward 3/8 inch instead. When you mix them with the sugars and flour, you’ll see the liquid start to form, which tells you they are perfectly prepped.
How far ahead can I assemble this dutch apple pie recipe?
This is such a smart question, especially if you’re hosting! You can definitely make the bottom crust, prepare the spiced apple filling, and even make the crumb topping ahead of time. I usually keep assembling to the final steps right before baking to avoid any lingering moisture issues. You can assemble the bottom crust and pour in the filling the morning of your party—say, about 4 to 6 hours ahead. Keep it covered in the fridge. But here is the golden rule: Never put the crumb topping on until about 30 minutes before you plan to slide that pie into the hot oven. You want that butter rock solid for the best crisp texture!
Estimated Nutritional Data for this dutch apple pie recipe
Now, I want to be wonderfully clear about something right off the bat when we talk about the numbers for this marvelous dutch apple pie recipe. Because I always stress using your favorite, tried-and-true flaky crust—which might involve different amounts of butter or shortening depending on your family method—these figures are just my best estimate.
The nutrition I’ve listed here is based on dividing the recipe into 8 generous slices, assuming a moderate crust recipe. Remember, this is a rich, buttery Comfort Food Dessert, and we celebrate that! We aren’t making diet food; we are making the best pie imaginable.
Here is what you can generally expect per slice:
- Calories: approximately 450
- Sugar: around 35g (Sweetness from the apples and that lovely topping!)
- Fat: about 25g (Thank you, cold butter, for your service!)
- Carbohydrates: roughly 58g
- Protein: around 5g
If you use a lighter crust recipe, or if you skip the ice cream that inevitably accompanies a slice of warm Dutch Apple Pie, those numbers will certainly shift! The important thing is that you enjoy the process and make memories while you do it. That’s far more valuable than any calorie count, in my book!
Share Your Homemade Apple Pie Experience
Honestly, seeing your pictures and hearing about your baking adventures is the highest praise for any recipe I share. My teaching days taught me how much better things taste when they are shared, and that applies right here to this perfect dutch apple pie recipe!
I truly hope you found this straightforward and rewarding. Did the Buttery Crumb Topping come out golden and sandy just like mine did? Did you manage to wait the whole two hours for it to cool before digging in? (I rarely manage it myself!) I’d be thrilled if you’d take a moment to let me know how it turned out right down in the comments below.
- Please leave a star rating! It helps other home cooks know this is a reliable Easy Baking Recipe they can trust.
- Tell me your favorite way to serve it—are you team ice cream or team whipped cream?
- If you snapped a picture of your beautiful Apple Dessert with Streusel fresh from the oven, I would just love to see it! Tag me on social media so I can share your baking success with our whole community here at Cooking by Carla.
Making one of these classic pies is a perfect way to bring people together, just like my own grandmother taught me back in the Midwest. When you try this recipe, you’re not just baking; you’re creating a wonderful memory, and I’m so glad I get to be a small part of your kitchen adventures!
If you’re curious to read more about the philosophy behind why I share these tried-and-true methods, feel free to check out my About Page. Happy baking, dear friends—enjoy every buttery bite!
PrintThe Best Homemade Dutch Apple Pie with Buttery Crumb Topping
This recipe guides you through making a classic Dutch Apple Pie featuring a flaky bottom crust, a thick layer of cinnamon-spiced apples, and the signature buttery, crispy crumb topping. It is a comforting fall dessert perfect for any occasion.
- Prep Time: 30 min
- Cook Time: 65 min
- Total Time: 95 min
- Yield: 8 servings 1x
- Category: Dessert
- Method: Baking
- Cuisine: American
- Diet: Vegetarian
Ingredients
- 1 recipe for your favorite flaky pie crust (enough for a double crust)
- 6 large Granny Smith apples, peeled, cored, and sliced 1/4 inch thick
- 1/2 cup granulated sugar
- 1/4 cup packed light brown sugar
- 1 tablespoon all-purpose flour
- 1 teaspoon ground cinnamon
- 1/4 teaspoon ground nutmeg
- 1/8 teaspoon ground allspice
- 1 tablespoon lemon juice
- 1 tablespoon unsalted butter, cut into small pieces
- For the Buttery Crumb Topping:
- 1 1/2 cups all-purpose flour
- 1 cup packed light brown sugar
- 1/2 cup granulated sugar
- 1/2 teaspoon ground cinnamon
- 1/4 teaspoon salt
- 1/2 cup (1 stick) cold unsalted butter, cut into small cubes
Instructions
- Prepare the pie crust: Line a 9-inch pie plate with one crust. Place the second crust in the refrigerator while you prepare the filling.
- Prepare the apple filling: In a large bowl, combine the sliced apples, granulated sugar, brown sugar, flour, cinnamon, nutmeg, and allspice. Toss gently until the apples are evenly coated. Stir in the lemon juice.
- Fill the pie: Pour the apple mixture into the prepared pie crust. Dot the top of the apples with the small pieces of butter.
- Prepare the crumb topping: In a separate medium bowl, whisk together the flour, brown sugar, granulated sugar, cinnamon, and salt for the topping.
- Cut in the butter: Add the cold, cubed butter to the dry topping ingredients. Use your fingers or a pastry blender to cut the butter into the dry ingredients until the mixture resembles coarse crumbs, with some pea-sized pieces remaining.
- Top the pie: Sprinkle the crumb topping evenly over the apple filling.
- Bake the pie: Preheat your oven to 425 degrees F. Place the pie on a baking sheet to catch any drips. Bake for 15 minutes at 425 degrees F.
- Reduce the heat: Lower the oven temperature to 375 degrees F. Continue baking for an additional 40 to 50 minutes, or until the topping is golden brown and the filling is bubbly. If the topping begins to brown too quickly, loosely cover the edges with aluminum foil.
- Cool: Remove the pie from the oven and let it cool on a wire rack for at least 2 hours before slicing. This allows the filling to set.
- Serve: Serve your warm apple pie with a scoop of vanilla ice cream or whipped cream.
Notes
- For the flakiest crust, keep all your ingredients cold when making the dough.
- If you prefer a deeper dish pie, use a 10-inch pie plate and slightly increase the apple filling ingredients.
- This pie is excellent for Thanksgiving gatherings or as a cozy fall dessert.
Nutrition
- Serving Size: 1 slice
- Calories: 450
- Sugar: 35g
- Sodium: 250mg
- Fat: 25g
- Saturated Fat: 15g
- Unsaturated Fat: 10g
- Trans Fat: 0.5g
- Carbohydrates: 58g
- Fiber: 4g
- Protein: 5g
- Cholesterol: 60mg