
Oh, there’s just nothing that smells better, is there? That warm, buttery scent of fresh Italian baking filling up the house—it’s pure comfort. For years, folks have been asking me for my take on the classic rolled cookie, and I’ve finally settled on the most dependable, wonderfully textured Italian nut roll cookies recipe you can imagine!
I know sometimes you see these gorgeous desserts made by folks like Valerie Bertinelli and think, “I could never get mine to look just like that.” But that’s where I come in! After thirty years of teaching clarity in the classroom, I promise to walk you through every single step, including the tricky rolling part, so your Valerie Bertinelli Italian nut roll cookies turn out perfect. You deserve cookies that taste rustic, look elegant, and are surprisingly straightforward to make from scratch.
These cookies are a family favorite, especially around the holidays, but honestly? They are too good to save just for special occasions. Grab your flour; let’s get baking!
- Why This Italian Nut Roll Cookies Recipe Works So Well
- Gathering Your Ingredients for Valerie Bertinelli Italian Nut Roll Cookies
- Step-by-Step Instructions for the Italian Nut Roll Cookies Recipe
- Tips for Success with Your Homemade Rolled Stuffed Cookies
- Variations on the Traditional Italian Pastries
- Storage and Keeping Your Italian Nut Roll Cookies Fresh
- Frequently Asked Questions About This Nut Roll Cookies Baking Guide
- Estimated Nutritional Data for Valerie Bertinelli Italian Nut Roll Cookies
- Share Your Valerie Bertinelli Italian Nut Roll Cookies Creations
Why This Italian Nut Roll Cookies Recipe Works So Well
When you’re whipping up classic recipes, you don’t want any surprises, do you? Since my teaching days taught me to keep things simple and clear, I focused on making this Italian nut roll cookies recipe totally foolproof.
Here’s why I stand behind this formula:
- It delivers that perfect contrast: tender, almost shortbread-like dough hugging a sticky, rich walnut filling.
- It’s incredibly reliable for getting that iconic rolled shape—no sad, flat cookies here!
- Because it’s steady and dependable, it’s my go-to centerpiece for any holiday spread or a relaxed weekend baking project.
Gathering Your Ingredients for Valerie Bertinelli Italian Nut Roll Cookies
Now, let’s talk about what you need to bring to the party! When we’re aiming for that classic, slightly chewy, melt-in-your-mouth result, the ingredients truly matter. Don’t let this look intimidating; it’s just two distinct components: the dough that holds everything together and that glorious, sweet nut swirl inside.
Precision helps when you’re working with a dough that needs to be rolled thin, so measure everything out before you start mixing. We need that dough soft, but firm enough to handle chilling time, which is coming up soon!
Ingredients for the Rolled Cookie Dough
This is the shell for our cookie, so make sure your butter is properly softened—not melted! We want beautiful air pockets in this part.
- 1 cup unsalted butter, softened
- 1 cup granulated sugar
- 2 large eggs
- 1 teaspoon vanilla extract
- 3 cups all-purpose flour
- 1 teaspoon baking powder
- 1/4 teaspoon salt
Ingredients for the Nut Filling Cookie Recipes
This filling is where all the deep, cozy flavor comes from. I always make sure my walnuts are ground finely, almost like coarse sand, so they don’t poke holes in the delicate dough when I roll them up tight.
- 1 cup finely ground walnuts (for filling)
- 1/2 cup packed brown sugar (for filling)
- 1/4 cup milk (for filling)
- 1 tablespoon melted butter (for filling)
- 1/2 teaspoon ground cinnamon (for filling)
We still need a little finishing touch, which we’ll add after they come out of the oven. Keep that powdered sugar handy for dusting!
Step-by-Step Instructions for the Italian Nut Roll Cookies Recipe
Okay, deep breath! This is the part where the magic happens, and I want you to take your time. I learned over many years teaching that rushing the mixing process is the quickest way to a tough cookie, so let’s keep our approach calm and methodical. Good execution here is key to mastering rolled cookie dough techniques.
Preparing the Cookie Dough Base
First things first, we need that beautiful dough. In a big bowl, cream your softened butter and the sugar until they look truly light and fluffy—that’s step one done right. Next, add those eggs one at a time, making sure each one is fully incorporated before adding the next, followed by the vanilla.
Now, in a separate bowl, whisk your dry items together—flour, baking powder, and salt. Slowly add this dry mix to the wet ingredients. Here’s my biggest piece of advice, channeling all my years as a teacher: stop mixing as soon as the flour disappears! Seriously, don’t overmix! Overmixing develops gluten, and for these delicate rolls, we want a tender crumb, not something tough. Once it just comes together into a soft ball, wrap it up and let it chill for at least an hour. That rest is crucial for easier rolling later!
Making the Walnut Nut Filling Cookie Recipes
While that dough is resting up in the fridge, we tackle the flavor center. Grab a small saucepan and combine your ground walnuts, brown sugar, milk, melted butter, and that hint of cinnamon. We’re cooking this over medium-low heat until it thickens up just a bit, which takes about five to seven minutes.
You must stir this constantly! If you walk away, that brown sugar will scorch on the bottom of the pan, and trust me, you’ll taste it. Once it’s thick enough that it holds its shape briefly on the spoon, pull it right off the heat and let it cool down completely. Soggy filling ruins a good roll, so patience here is key!
Rolling, Assembling, and Baking the Valerie Bertinelli Italian Nut Roll Cookies
Once your dough is chilled and your filling is cool, we assemble! Preheat that oven to 350 degrees Fahrenheit and get your sheets lined with parchment paper—you read about how important that is in my easy nut roll cookies tutorial!
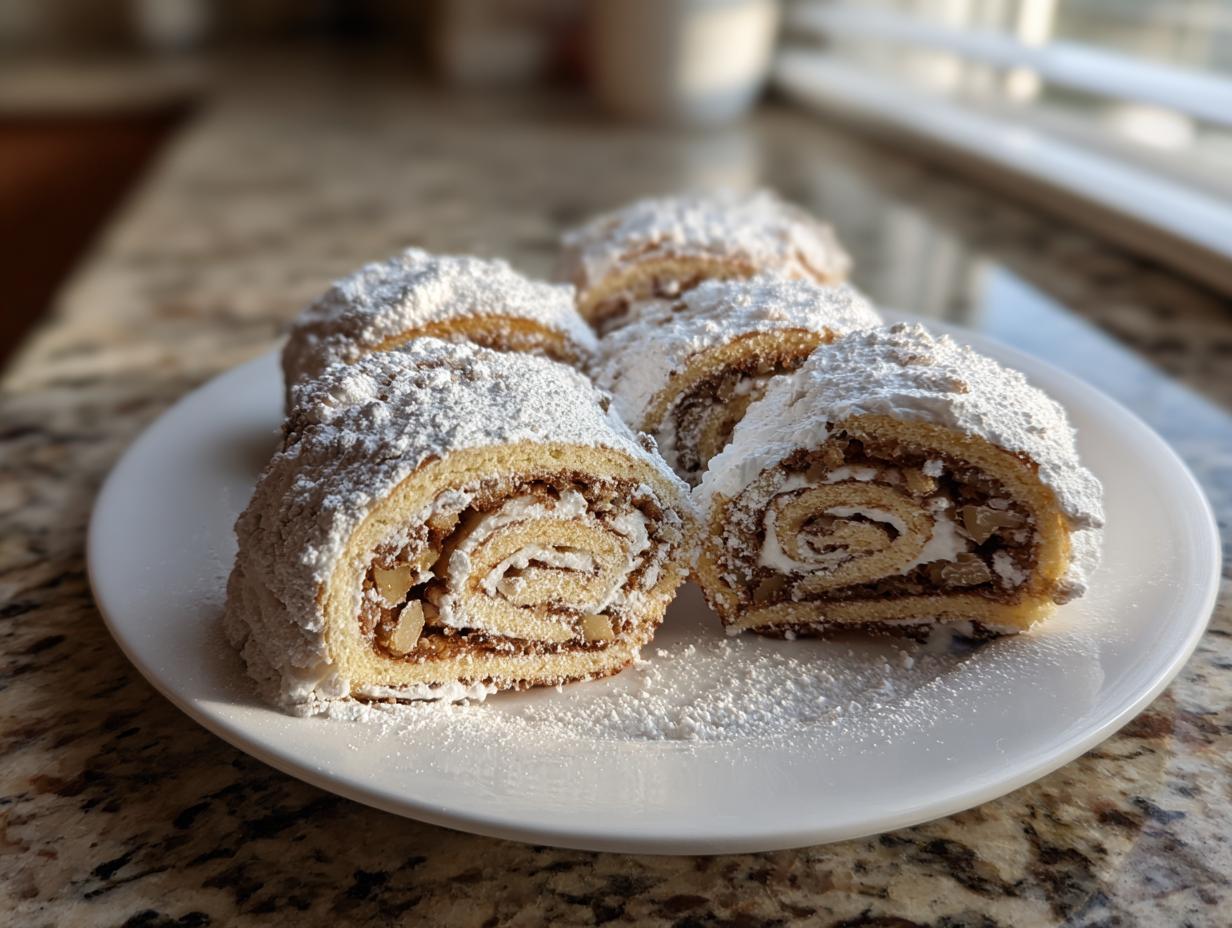
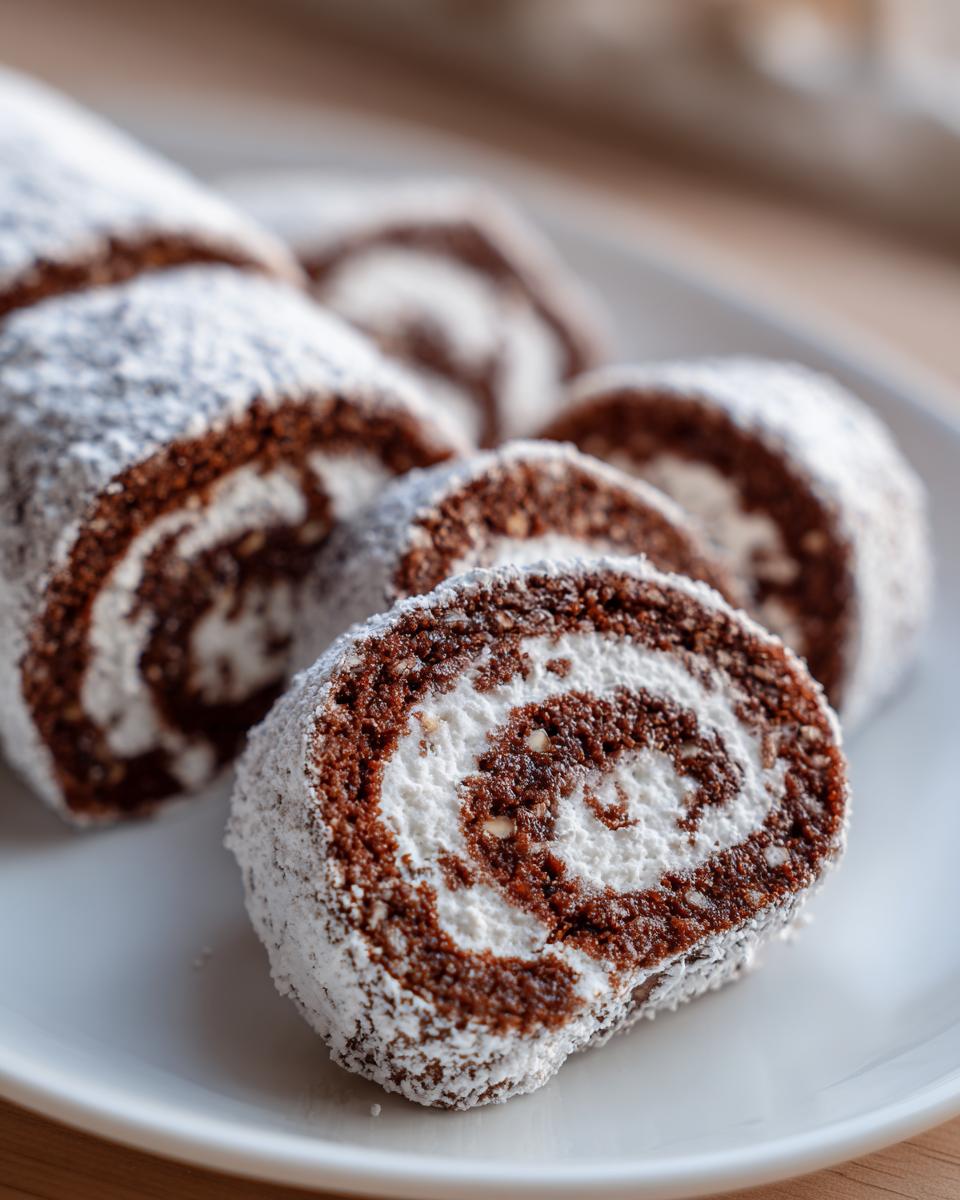
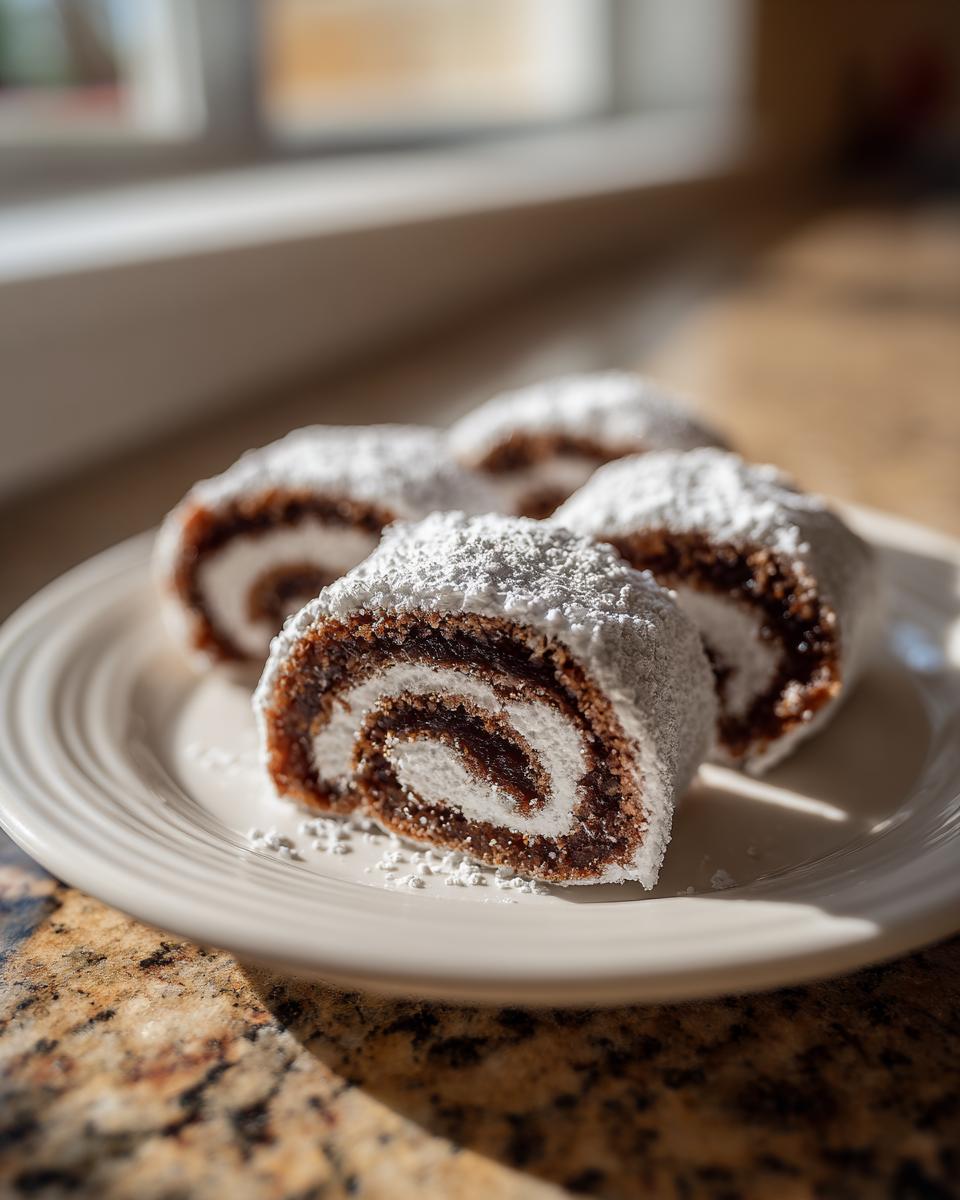
Divide your dough in half. On a lightly floured surface, roll one half out really thin—we’re aiming for about 1/8 inch thick. Spread half of that cooled nut filling smoothly over the dough, leaving a tiny edge clear all around. Now, starting from the longest side, roll it up tightly. Really pinch that seam closed, like you’re sealing a secret! Repeat with the second half. Slice those logs into half-inch cookies and lay them on your prepared baking sheets, giving them about an inch of space to breathe.
Bake them for 12 to 15 minutes. You’re looking for the edges to just kiss the gold color—lightly golden brown is perfect. Let them sit on the hot pan for five minutes before moving them to a rack to cool fully before that final dusting of sugar.

Tips for Success with Your Homemade Rolled Stuffed Cookies
Even with the clearest instructions, sometimes these rolled cookies need a little extra coaching, right? Since I’ve made hundreds of batches perfecting this cookie recipe from scratch, I have a few little tricks I rely on when I’m in the kitchen.
Remember those walnuts we used? If you want a filling that melts beautifully into the dough instead of feeling chunky, pulse them in your food processor until they look like coarse sand. It really makes a difference in the final texture!
Also, be mindful of the temperature. If you pull that dough out and it’s just too soft to handle, don’t force it! Just slip it back into the refrigerator for 15 minutes until it firms up just enough. Warm dough struggles when you try to roll it thin, leading to sticking and tearing, and we certainly don’t want that!
And if walnuts aren’t your favorite, don’t worry; pecans or almonds make wonderful substitutions that keep that traditional Italian flavor profile alive!
Variations on the Traditional Italian Pastries
While this recipe hits that classic, comforting spot—especially when you nail that walnut filling for your Italian nut roll cookies recipe—I always encourage folks to play around a little! Baking is supposed to be fun, and sometimes a small tweak can turn a familiar favorite into something brand new for your table.
The beauty of these traditional Italian pastries is that the dough base is just solid gold. It really handles changes beautifully. When you’re ready to switch things up but still want that wonderful rolled shape, try adjusting the nuts or maybe adding a little something extra to the filling.
As I mentioned before, if walnuts aren’t your thing, pecans bring a slightly sweeter, buttery note when ground up. Almonds work beautifully too, lending a slightly more delicate, marzipan-like flavor. You can find some other lovely ideas for similar treats over in my Italian butter cookies recipe section too, if you’re looking for more inspiration on doughs.
If you want to play with the spices instead of the nuts, try adding a tiny pinch of ground cloves or even a scraping of fresh lemon zest right into the filling mixture along with that cinnamon. It brightens up the whole cookie, especially if you’re serving them on a warm spring afternoon rather than the deep winter holidays!
Storage and Keeping Your Italian Nut Roll Cookies Fresh
These cookies are really sturdy, which is just one reason I love submitting them for holiday cookie platters! Once they have cooled completely, we need to make sure we protect that lovely dusting of powdered sugar.
Store your finished homemade rolled stuffed cookies in an airtight container. Don’t crowd them too much, or the sugar topping might get smudged. They are perfectly happy just sitting on your counter at room temperature for nearly a week. Truly, I think they taste even better on day three after the flavors have settled in. No need to refrigerate these at all!
Frequently Asked Questions About This Nut Roll Cookies Baking Guide
I’ve found that when folks are trying a new pastry for the first time, even the simple steps can bring up new questions. That’s totally normal! Teaching taught me that addressing the little bumps in the road upfront makes for a much happier baking experience for everyone. Here are a few things I hear often about baking classic Italian desserts like this one.
Can I use a different nut besides walnuts in the Italian nut roll cookies recipe?
Oh, absolutely! While walnuts give that perfectly traditional, earthy flavor we associate with traditional Italian pastries, you shouldn’t feel limited. Pecans are a wonderful substitution; they tend to be a little sweeter and richer. Almonds work beautifully too, lending a slightly more delicate, marzipan-like flavor. Just make sure whatever nut you choose is ground up quite finely so it spreads evenly into the dough!
What is the best way to roll the dough tightly for the best nut filling cookie recipes?
This is where you need to be firm but gentle, kind of like herding cats! When you start rolling out your log, begin from the longest edge. As you roll, use your fingers to guide the dough, pressing down just a little bit as you go. This action nudges out any big air pockets trapped between the layer of dough and the nut filling. You want it snug so the cookie holds that beautiful swirl shape when it bakes, but not so tight that the filling bursts out the sides.
How do I prevent my Valerie Bertinelli Italian Nut Roll Cookies from spreading too much?
Spreading usually comes down to two things: temperature or butter content. First, that hour of chilling time I mention for the dough is mandatory—don’t skip it! Cold dough holds its shape much better when it hits the hot oven. Second, are you sure your oven is holding a steady 350°F? I highly recommend keeping an oven thermometer handy because ovens can lie! If your oven is too cool, the butter melts out before the structure sets, causing a slump. Stick to the 350°F and that dough chill time, and you’ll find these are surprisingly manageable for your next weekend baking adventure.

Estimated Nutritional Data for Valerie Bertinelli Italian Nut Roll Cookies
When we talk about enjoying these wonderful cookies, it’s always nice to have a general idea of what’s on the plate, right? Now, remember, since I am making these from scratch in my own kitchen, and we all measure a little differently—I mean, who hasn’t eyeballed the vanilla just once?—these numbers are truly just an estimate.
We are basing this on the standard measurements in the recipe above, divided by about three dozen cookies. This gives you a good guideline for tracking, but the most important number is how many smiles they bring to the table!
Here is a rough breakdown of what you can expect per cookie:
- Serving Size: 1 cookie
- Calories: 180
- Fat: 10g
- Protein: 3g
- Carbohydrates: 21g
- Sugar: 12g
This recipe includes ingredients like nuts and butter, so while they are a treat, they offer a bit more substance than those airy store-bought crackers. Enjoy them knowing they were made with real ingredients, shared from my kitchen to yours.
Share Your Valerie Bertinelli Italian Nut Roll Cookies Creations
Well, that’s it! You’ve done the hard work, you’ve wrestled with the rolling technique, and now you have a plate full of these gorgeous, tender Italian nut roll cookies, smelling sweetly of cinnamon and walnuts.
But the story doesn’t end here! I absolutely adore seeing what you all create in your kitchens. Did yours turn out perfectly swirled? Did the brown sugar make that filling gooey just like you hoped? Please, don’t keep those beautiful results to yourselves!
I really hope you click over and give this recipe a rating—a quick five-star review helps other home cooks know that this classic recipe is a keeper. If you have a minute, leave a comment below telling me how they turned out, or maybe what you served them alongside! And if you snapped a picture, I’d love to see it. You can always reach out to me directly through the contact page if you have specific questions after baking.
Happy baking, friends. I hope these cookies bring as much comfort and joy to your table as they do to mine every single year!
PrintItalian Nut Roll Cookies (Similar to Valerie Bertinelli’s Style)

A straightforward recipe for classic Italian nut roll cookies, featuring a rich walnut filling wrapped in tender dough, perfect for weekend baking or holidays.
- Prep Time: 30 min
- Cook Time: 15 min
- Total Time: 1 hour 45 min
- Yield: About 3 dozen cookies 1x
- Category: Dessert
- Method: Baking
- Cuisine: Italian
- Diet: Vegetarian
Ingredients
- 1 cup unsalted butter, softened
- 1 cup granulated sugar
- 2 large eggs
- 1 teaspoon vanilla extract
- 3 cups all-purpose flour
- 1 teaspoon baking powder
- 1/4 teaspoon salt
- 1 cup finely ground walnuts (for filling)
- 1/2 cup packed brown sugar (for filling)
- 1/4 cup milk (for filling)
- 1 tablespoon melted butter (for filling)
- 1/2 teaspoon ground cinnamon (for filling)
- 1/4 cup powdered sugar (for dusting)
Instructions
- In a large bowl, cream together the softened butter and granulated sugar until light and fluffy.
- Beat in the eggs one at a time, then mix in the vanilla extract.
- In a separate bowl, whisk together the flour, baking powder, and salt. Gradually add the dry ingredients to the wet ingredients, mixing until just combined to form a soft dough. Do not overmix.
- Wrap the dough in plastic wrap and chill in the refrigerator for at least 1 hour.
- While the dough chills, prepare the filling: Combine the ground walnuts, brown sugar, milk, melted butter, and cinnamon in a small saucepan. Cook over medium-low heat, stirring constantly, until the mixture thickens slightly, about 5 to 7 minutes. Remove from heat and let cool completely.
- Preheat your oven to 350 degrees Fahrenheit. Line baking sheets with parchment paper.
- Divide the chilled dough into two equal pieces. On a lightly floured surface, roll one piece of dough out into a thin rectangle, about 1/8 inch thick.
- Spread half of the cooled nut filling evenly over the dough, leaving a small border around the edges.
- Starting from a long edge, tightly roll the dough into a log. Pinch the seam closed firmly. Repeat with the remaining dough and filling.
- Slice each log into 1/2-inch thick cookies. Place the cookies on the prepared baking sheets, leaving about 1 inch between them.
- Bake for 12 to 15 minutes, or until the edges are lightly golden brown.
- Let the cookies cool on the baking sheet for 5 minutes before transferring them to a wire rack to cool completely.
- Once cool, dust generously with powdered sugar.
Notes
- For a finer filling texture, pulse the walnuts in a food processor until they resemble coarse sand.
- If the dough becomes too warm while rolling, return it to the refrigerator for 15 minutes to firm up again.
- You can substitute pecans or almonds for walnuts in the nut filling.
Nutrition
- Serving Size: 1 cookie
- Calories: 180
- Sugar: 12
- Sodium: 45
- Fat: 10
- Saturated Fat: 5
- Unsaturated Fat: 5
- Trans Fat: 0
- Carbohydrates: 21
- Fiber: 1
- Protein: 3
- Cholesterol: 35