
There is just something so right about pulling a tray of deeply comforting, homemade cookies out of the oven, isn’t there? The scent alone takes me right back to my childhood kitchen. I’ve tried plenty of classic desserts over the years, but these italian ricotta cookies—oh, they are special. They aren’t just another cookie; they are my family’s benchmark for all holiday and celebration treats. I’m sharing my absolute best recipe today, promising you the softest, most authentic version you will ever make. They are truly pillowy and tender, and once you master them, they become a staple for us, too. You can peek a bit more about my baking philosophy over on my About page, but for now, let’s get mixing!
- Why These Italian Ricotta Cookies Are Your New Favorite Treat
- Gathering Supplies for Your Italian Ricotta Cookies Recipe
- Step-by-Step Guide to Baking Italian Ricotta Cookies
- Glazing and Decorating Your Pillowy Ricotta Cookies
- Carla's Expert Tips for Perfect Italian Ricotta Cookies
- Storage and Making Ahead for Traditional Ricotta Cookies
- Variations on Homemade Italian Ricotta Treat
- Frequently Asked Questions About Italian Ricotta Cookies
- Sharing Your Italian Ricotta Cookies Creations
Why These Italian Ricotta Cookies Are Your New Favorite Treat
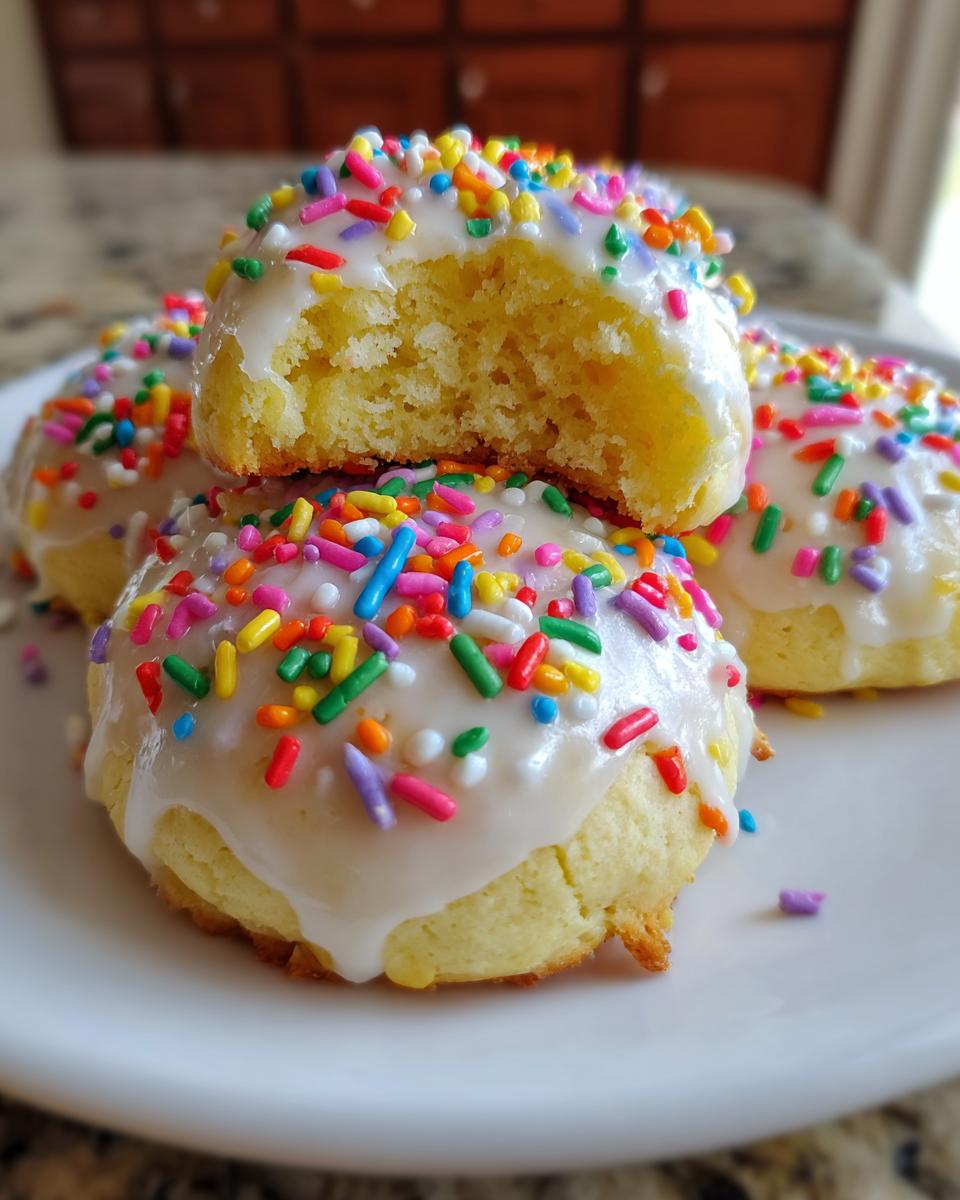
If you are tired of dry, crumbly cookies, then I have found the solution for you! This is the definitive Soft Italian Ricotta Cookies Recipe. What sets these apart, truly, is how they manage to be both sturdy enough for dipping but tender enough to dissolve the moment they hit your tongue. They feel like a cloud!
If you’re looking for a dessert that tastes wonderfully old-world but bakes up faster than most sheet cakes, you’ve found it. I encourage you to look through my other favorite dessert recipes sometime, but nothing beats these for that pure, effortless joy.
Achieving the Signature Melt in Your Mouth Texture
The secret to that beautiful, pillowy texture that makes these Cake Like Ricotta Cookies so famous lies in two spots: the creaming process we do with the butter and sugar, and, most importantly, the cheese itself. You must drain that ricotta, folks. If the cheese is wet, the cookies will spread thin and bake up like crisp crackers instead of the soft mounds we want.
Simple Ingredients for Traditional Ricotta Cookies
You won’t need any fancy gear or obscure ingredients for this one, which makes it perfect for last-minute baking when guests pop over unexpectedly. We rely on simple pantry staples, and the magic comes from just mixing them correctly. These Traditional Ricotta Cookies prove that home baking doesn’t need to be complicated to taste special.
Gathering Supplies for Your Italian Ricotta Cookies Recipe
Now, before we even think about turning on the mixer, we need to talk about prepping our ingredients. Remember how I kept stressing that soft, pillowy texture? Well, it starts right here with draining our ricotta. Don’t skip it, or you’ll undo all the good work we’re about to do! I’ve written down every little detail below so you have a dependable list ready to go. You can always check my policies if you have any concerns about information, but trust me, having this list printed out makes things so easy.
Ingredients for the Fluffy Ricotta Cookies with Glaze
- 1 cup unsalted butter, softened
- 2 large eggs
- 2 cups granulated sugar
- 1 cup whole milk ricotta cheese, drained well
- 2 teaspoons vanilla extract
- 1 teaspoon lemon extract (optional, for flavor)
- 4 cups all-purpose flour
- 2 teaspoons baking powder
- 1 teaspoon baking soda
- 1/4 teaspoon salt
Components for the Lemon Glaze
- 2 cups powdered sugar
- 4 tablespoons milk (or lemon juice for tang)
- 1 teaspoon lemon zest
- Rainbow nonpareils or sprinkles for topping
Step-by-Step Guide to Baking Italian Ricotta Cookies
Alright, are you ready to make some magic? This is my favorite part because once you start mixing, everything moves so quickly! Remember that we want soft, huggable cookies, so patience during the creaming stage is vital. Before you even start, go ahead and preheat that oven to 350°F (175°C). I always line my baking sheets with parchment paper; it saves me a huge headache later, especially when the glaze gets involved!
If you’re looking for something quick to manage while the oven heats up, you can check out my roundup of easy breakfast recipes, but don’t wander too far—these cookies move fast!
Preparing the Dough for Easy Italian Cookies Baking Recipe
We need that beautiful, light base first. Get your softened butter and the sugar into a big bowl and cream them together until they look pale and fluffy—you’re incorporating air here, and that’s what makes them light! Once that looks good, beat in your eggs one at a time. Then, gently fold in that well-drained ricotta, vanilla, and lemon extract (if you’re using it). Now, for the dry stuff: Mix your flour, baking powder, soda, and salt in a separate bowl. Add that dry mixture to the wet ingredients slowly, using a low speed until it just comes together. Seriously, stop mixing when you can’t see the dry flour streaks anymore. Overmixing develops gluten, and gluten means tough cookies, not soft ones!
Baking and Cooling Your Ricotta Cheese Cookie Recipe
Your time has come! Drop rounded tablespoons of that soft dough onto the lined baking sheets, giving them about two inches of space to breathe. Pop them into that hot oven for just 10 to 12 minutes. You are looking for cookies that are set on the edges but still look quite pale on top—they should look a little underdone, trust me! Once they come out, let them sit right on that hot sheet for about five minutes so they firm up just enough. Then, transfer them gently onto a wire rack to cool down completely. This waiting period is critical before we move onto the sweet part!
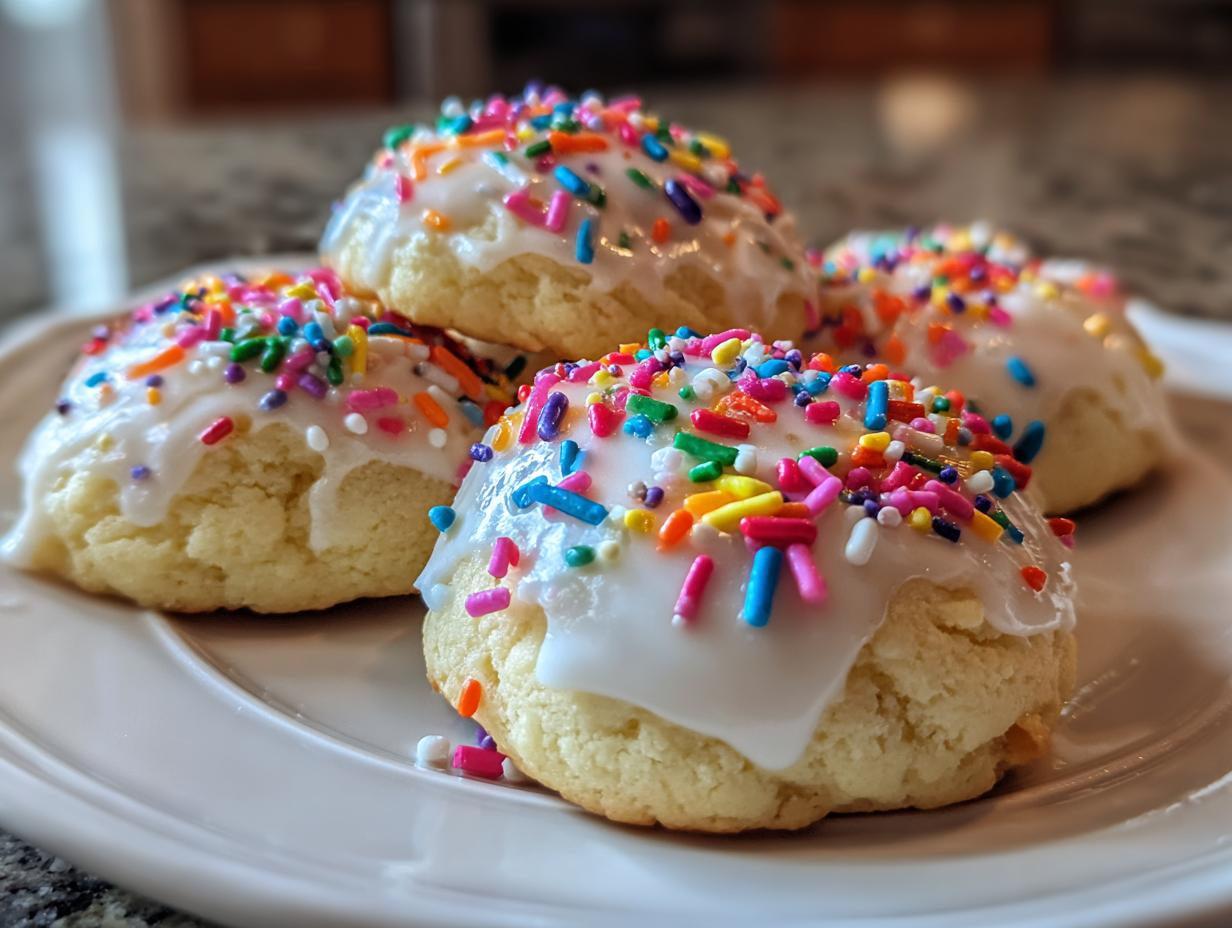
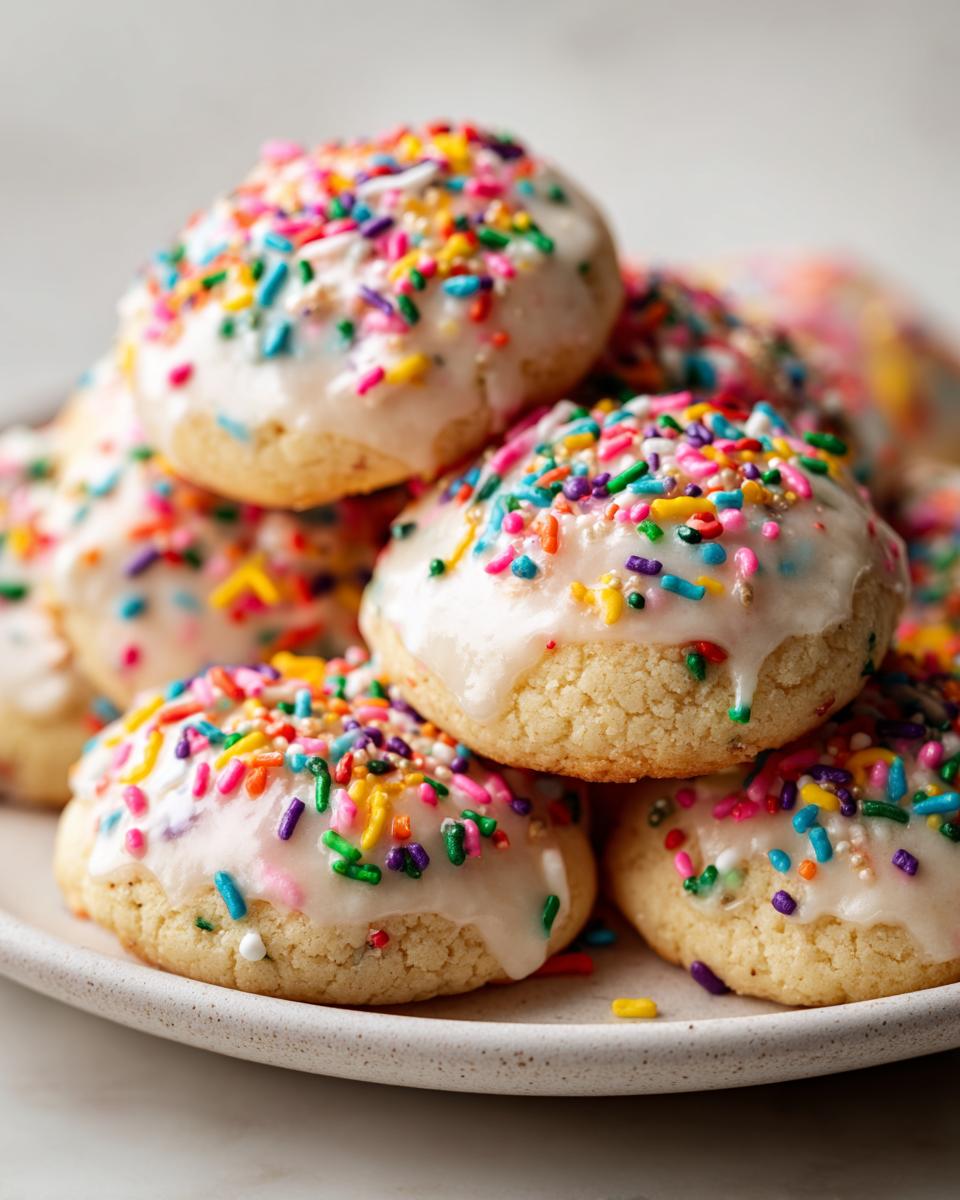
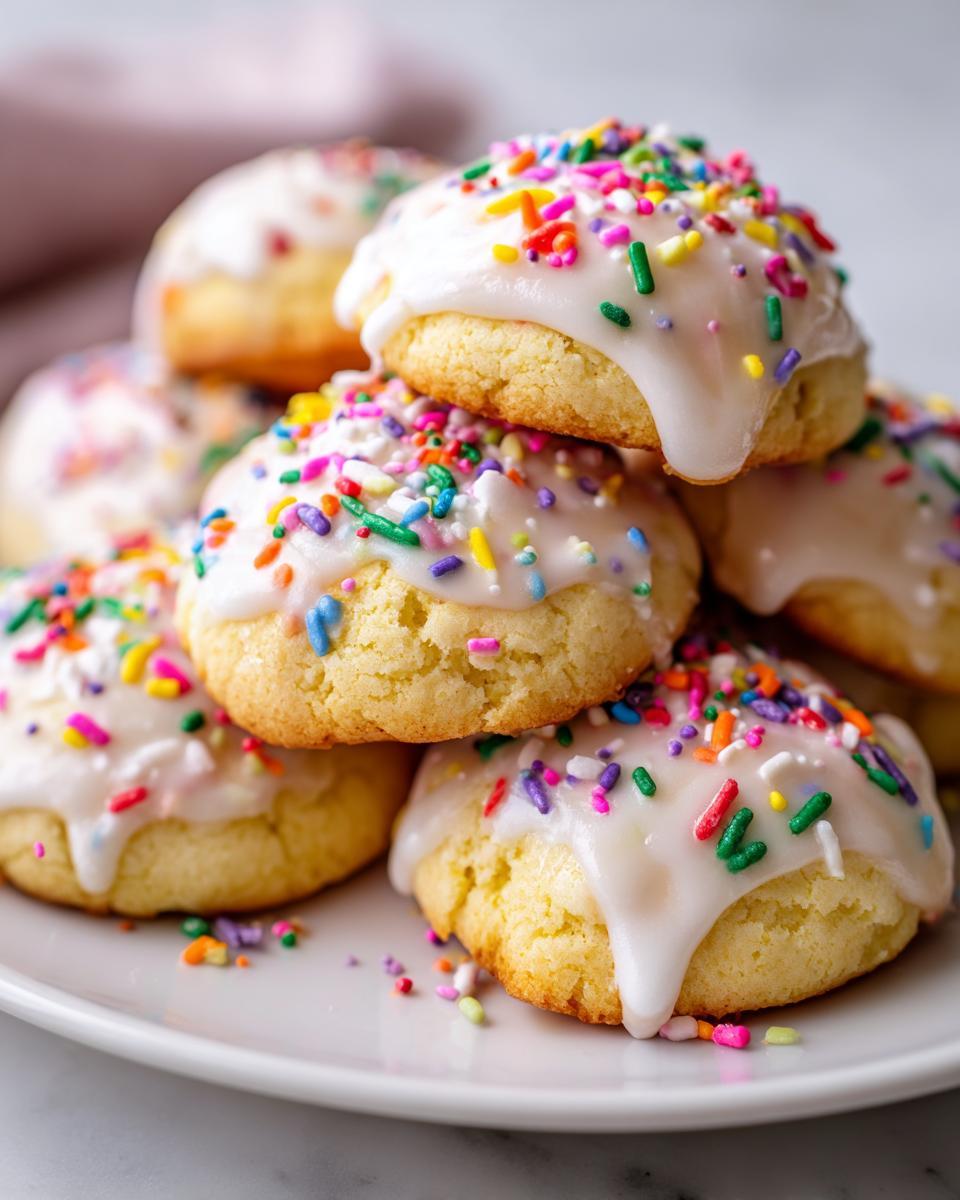
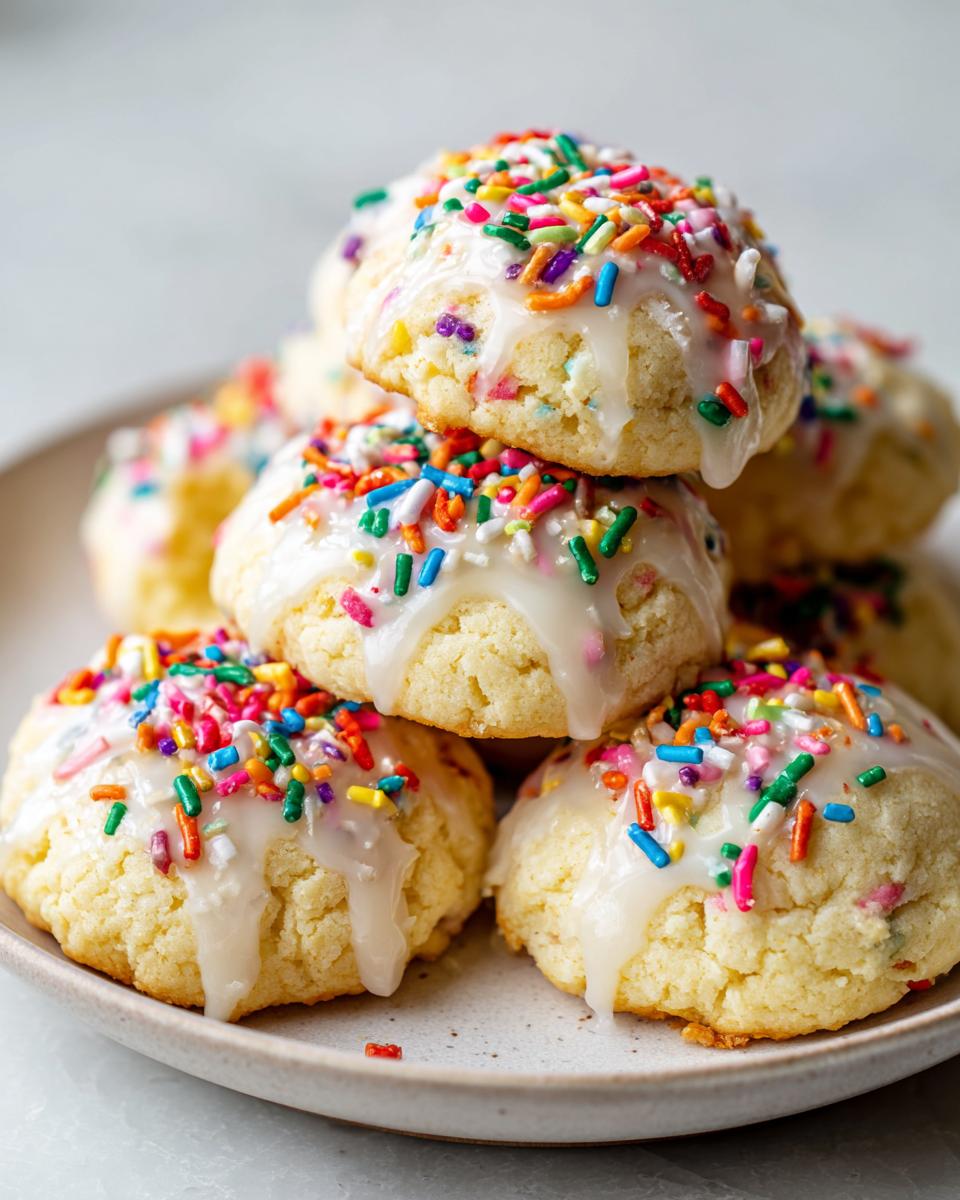
Glazing and Decorating Your Pillowy Ricotta Cookies
Once those cookies have completely cooled down—and I mean totally cool to the touch, not even a little warm—it’s time for the best part! Dipping them in the shiny, sweet glaze is what makes them look instantly celebratory. You want a glaze that drizzles nicely but sets up firm enough to hold those colorful sprinkles in place, which is why we use powdered sugar and just a touch of liquid.
To make it, you just whisk your powdered sugar, the milk (or the lemon juice if you want that extra little tang), and the lemon zest together in a small bowl. Start slow with the liquid! You’re aiming for a thick but pourable consistency. If it looks too runny, just whisk in a bit more powdered sugar until it coats the back of a spoon nicely. When you are ready to dip, hold the cookie carefully by the edges, dip the top surface right into that sweet bath, lift it out, give it a little shake to let the extra drip off, and place it gently onto a clean surface. Work fast because if you wait too long, those pretty rainbow nonpareils won’t stick! For more ideas on fluffy toppings, you might want to look at my fluffy buttercream recipe—though for these, simple sugar glaze wins every time!
Carla’s Expert Tips for Perfect Italian Ricotta Cookies
Baking is all about making adjustments based on your ingredients, and these Italian ricotta cookies really prove that point! Over the years, I’ve learned a couple of tricks that take them from ‘good’ to ‘absolutely can’t-stop-eating-them’ status. If you want that melt-in-your-mouth experience we talked about, you have to be mindful of two main things, and I learned the hard way why these details matter so much!
I remember one year around Christmas when I was rushing—just like we all do—and thought I could skip draining the ricotta because I was low on time. Well, honey, that batch spread out across the entire baking sheet and baked up thin and brittle. It was a disaster! They tasted fine, but they weren’t the pillowy treats everyone expects. Never again! Pay attention to these two secrets, and your cookies will be perfect every single time.
The Ricotta Drainage Secret
This is my number one rule, and honestly, it’s the difference between a great cookie and a sad, flat puddle. Ricotta cheese holds so much water, and if you dump that wet cheese straight into your creamed butter mixture, it throws off the entire balance of the dough. You need a dry, thick ricotta. My favorite method is pressing it gently in a fine-mesh sieve lined with a few layers of cheesecloth or even a clean paper towel for about 30 minutes. You’ll be shocked by how much liquid comes out! Once it’s drained well, then we can proceed, knowing the texture is going to be fantastic.
Measuring Flour for Cake Like Ricotta Cookies
The second thing that can trip you up is the flour. If you use your measuring cup to scoop flour directly out of the bag, you are packing it in way too tightly. That leads to a denser, heavier cookie, and we want that fluffy, cake-like result! For something this delicate, you have to measure it honestly.
Here’s what I do: I always take a large spoon, fluff up the flour right in its container, and gently spoon it into my dry measuring cup until it’s overflowing slightly. Then, I take a flat butter knife and perfectly level off the top. That little bit of extra care ensures you’re adding the right amount of dryness to balance out that creamy ricotta. It’s the secret to keeping them feeling light and airy, just the way they should be. For more of my reliable kitchen insights, feel free to check out what I share on my personal page!
Storage and Making Ahead for Traditional Ricotta Cookies
One of the best things about making a big batch of these cookies, especially when you’re getting ready for big gatherings or holiday baking, is that they keep beautifully! Honestly, they are still so soft and delicious even a few days later, which is saying something for a homemade treat.
The key to keeping these Traditional Ricotta Cookies perfect is making sure they are completely cool and fully glazed before you put them away. If there’s any lingering moisture hiding anywhere, it can make them stick together in a big messy chunk. Once they’re set, I always grab one of my large, sturdy Tupperware containers—you know the ones I mean, the ones with the reliable clasp lids!
Store them at room temperature; they do not need to be refrigerated at all. We want them to stay soft, and sometimes the fridge can actually dry out baked goods faster. They usually last wonderfully for about a week sitting right on the counter. If you’re making them ahead for Christmas or Easter—which I highly recommend because it saves stress—put them in the container and just forget about them until party time. If you happen to have any leftover (unlikely, I know!), you can check out some of my favorite easy appetizers and snacks while you plan your next baking day!
Variations on Homemade Italian Ricotta Treat
While I will always stand by the traditional vanilla and lemon flavor we used in the main recipe—it just tastes like home to me—these Homemade Italian Ricotta Treats are incredibly flexible! That mild, creamy base from the ricotta is just waiting for a little extra personality if you want to explore different flavor profiles. Don’t worry about changing too much; as long as you keep the foundation right (drained ricotta and proper creaming!), you’ll be golden.
I often find myself switching up the extracts, especially when I’m making one batch for Christmas and another for Easter. Sometimes the family wants something a little different, and here are the easiest swaps that give you a whole new cookie without changing the bake time or method one bit.
Swap the Extract for Almond
If you love that classic Italian almond flavor, this is the simplest switch you can make! Just leave out the teaspoon of lemon extract we called for, and substitute it with one full teaspoon of good quality almond extract. It gives the cookie a slightly warmer, nuttier background note that pairs beautifully with the soft, cake-like texture.
For an extra layer of flavor, and this is a personal favorite of mine, make the glaze using fresh orange juice instead of milk or lemon juice. The combination of almond and orange is just divine; it feels fancy but takes zero extra effort. You can find another great recipe that uses almond in my classic butter cookie recipe—different dough, but the flavor pairing is a winner!
Adding Citrus Zest to the Dough
For a brighter taste that shines through, try adding the zest of one whole lemon right into the dough mixture after you incorporate the ricotta and extracts. You can even use a whole orange or a clementine! Just remember that zest is pure flavor, but you don’t want the white bitter pith beneath the skin. I use a microplane grater for this; it just shaves off that colorful top layer perfectly.
If you add zest to the dough, you might want to skip the zest in the glaze entirely, or just use a tiny bit, otherwise, you might find it a little too tart overall. It’s all about finding that balance between the sweet dough and the icing!
Texture Boost with Chopped Nuts
Sometimes my grandson asks me to add something crunchy, just to give his teeth something to work against! If you want to include nuts, make sure they are very, very finely chopped. I love using pistachios, as they give a beautiful pale green fleck throughout the white cookie, or finely chopped almonds work perfectly, too.
The key here, just like with the flour, is not to overdo it. Fold in about a half cup of the finely chopped nuts right at the very end, just before you bake them. If you chop them too coarse, they can interfere with the delicate structure we worked so hard to achieve, so just chop them down small. It’s a great way to turn these simple delights into something a bit more elegant for an afternoon tea!
Frequently Asked Questions About Italian Ricotta Cookies
I get so many wonderful questions whenever I post this recipe! It’s funny how everyone always wants to know the little details that make sure their batch turns out just as soft and tender as mine. Since I want you to have absolute confidence when you head into the kitchen, I gathered some of the questions I hear most often right here. If you can’t find an answer, please feel free to reach out through my contact page!
Can I substitute the butter in this Ricotta Cookies with Lemon Glaze recipe?
When it comes to the star ingredients that give these cookies their texture, I really, really suggest sticking to unsalted butter. That butter is crucial for creaming properly and getting that delicate rise along with the ricotta. If you happen to only have salted butter on hand, go ahead and use it to make these Ricotta Cookies with Lemon Glaze, but remember to leave out that last bit of salt we called for in the dry mixture, or maybe just add half of it to be safe. A major swap, like using oil instead of butter, will completely change the internal structure, giving you something much closer to a cake rather than a cookie, and we lose a lot of that rich flavor!
What is the best way to serve these Melt in Your Mouth Italian Desserts?
Oh, serving them is half the fun! Because these are already so sweet and rich with that lovely glaze, they are perfectly wonderful served simply alongside a hot cup of coffee or espresso. They are the perfect companion for an afternoon treat. They also look stunning on a cookie platter for big celebrations like Easter or Christmas—just put them out next to some fresh berries or lightly dusted nuts. They really don’t need much enhancement because they are already so decadent. These truly are some of the best Melt in Your Mouth Italian Desserts you will ever bake.
Do these Best Ricotta Cookies Ever freeze well?
Yes, they freeze wonderfully, which is fantastic news when you are planning ahead for holiday baking! The absolute key here, though, is that you must freeze them *before* you apply the icing or sprinkles. Once the cookies are fully baked and completely cooled down, lay them out on a cookie sheet and pop them right into the freezer until they are solid. Then, transfer them into a freezer-safe, airtight container with layers of wax paper between them so they don’t stick. When you’re ready to serve them, take out what you need, let them thaw on the counter for an hour or so, and *then* dip them in the glaze. They come out tasting as fresh as the day you baked them!
Sharing Your Italian Ricotta Cookies Creations
Well, that’s the whole process! From draining that tricky ricotta to making sure your glaze is just the right consistency, you now have everything you need to create the softest, most delightful Italian ricotta cookies imaginable. I truly hope you give these a try soon, whether you need a special treat for a Sunday dinner or you’re stocking up for a holiday tray.
Baking is always better when shared, and I absolutely love hearing from you all. If you follow along and bake a batch of these fluffy cookies, please don’t forget to come back and leave a rating for me! Five stars helps other home cooks find reliable recipes, and I value your feedback so much. It lets me know I’m sending you recipes that taste just like home.
And please, if you snap a photo of your finished cookies—especially when they are frosted and sparkling with sprinkles—share it with me! Tag me or mention that you made them. I love seeing how your kitchen traditions begin to include this classic recipe. I always look forward to reading your stories and seeing your beautiful baking come to life. Happy baking, friends! If you want to read more about my philosophy on keeping family favorites alive, you can always visit me over at my personal page.
PrintSoft Italian Ricotta Cookies with Sweet Glaze

Make these traditional Italian Ricotta Cookies for a soft, cake-like treat. They are easy to bake and topped with a simple, sweet lemon glaze and sprinkles.
- Prep Time: 20 min
- Cook Time: 12 min
- Total Time: 32 min
- Yield: About 3 dozen 1x
- Category: Dessert
- Method: Baking
- Cuisine: Italian
- Diet: Vegetarian
Ingredients
- 1 cup unsalted butter, softened
- 2 large eggs
- 2 cups granulated sugar
- 1 cup whole milk ricotta cheese, drained well
- 2 teaspoons vanilla extract
- 1 teaspoon lemon extract (optional, for flavor)
- 4 cups all-purpose flour
- 2 teaspoons baking powder
- 1 teaspoon baking soda
- 1/4 teaspoon salt
- For the Glaze: 2 cups powdered sugar
- 4 tablespoons milk (or lemon juice for tang)
- 1 teaspoon lemon zest
- Rainbow nonpareils or sprinkles for topping
Instructions
- Preheat your oven to 350°F (175°C). Line baking sheets with parchment paper.
- In a large bowl, cream together the softened butter and granulated sugar until light and fluffy. This step helps achieve the soft texture.
- Beat in the eggs one at a time, mixing well after each addition.
- Mix in the drained ricotta cheese, vanilla extract, and lemon extract until just combined.
- In a separate medium bowl, whisk together the flour, baking powder, baking soda, and salt.
- Gradually add the dry ingredients to the wet ingredients, mixing on low speed until a soft dough forms. Do not overmix.
- Drop rounded tablespoons of dough onto the prepared baking sheets, spacing them about 2 inches apart.
- Bake for 10 to 12 minutes, or until the edges are lightly set and the cookies are pale. They should remain soft.
- Let the cookies cool on the baking sheet for 5 minutes before transferring them to a wire rack to cool completely.
- Prepare the glaze: Whisk together the powdered sugar, 4 tablespoons of milk (or lemon juice), and lemon zest until smooth. Add more liquid, one teaspoon at a time, if the glaze is too thick.
- Once cookies are completely cool, dip the top of each cookie into the glaze, allowing excess to drip off.
- Immediately top with rainbow nonpareils or sprinkles before the glaze sets. Let the glaze dry completely before serving or storing.
Notes
- Drain your ricotta cheese thoroughly. Excess moisture prevents the cookies from setting correctly and results in a flat cookie. Press it in a fine-mesh sieve lined with cheesecloth for 30 minutes.
- For the best cake-like texture, measure your flour using the spoon-and-level method, or weigh it. Scooping directly from the bag packs the flour too tightly.
- These cookies store well in an airtight container at room temperature for up to one week.
Nutrition
- Serving Size: 1 cookie
- Calories: 180
- Sugar: 18g
- Sodium: 110mg
- Fat: 8g
- Saturated Fat: 5g
- Unsaturated Fat: 3g
- Trans Fat: 0g
- Carbohydrates: 25g
- Fiber: 0g
- Protein: 3g
- Cholesterol: 35mg