
There’s just nothing that says “home” quite like the smell of warm cinnamon and butter wafting from the oven, especially when we’re celebrating something special, like a big patriotic holiday. For me, that smell instantly takes me back to my childhood in the Midwest, where Mom always had a pie waiting. That’s why I guard this recipe so carefully—it’s my version of the Traditional Dutch apple pie, the one that truly feels like a safe haven in a slice. As a former teacher, I learned that the best things in life are dependable, and this recipe never fails. It’s simple, built on a flaky, buttery crust, and it’s the kind of classic comfort food that connects generations around the table.
- Why This Traditional Dutch Apple Pie is Your New Favorite
- Gathering Ingredients for Your Traditional Dutch Apple Pie
- Step-by-Step Instructions for Traditional Dutch Apple Pie
- Tips for the Perfect Traditional Dutch Apple Pie
- Serving Suggestions for This Patriotic Dessert Idea
- Storage and Reheating Instructions
- Frequently Asked Questions About Apple Pie
- Estimated Nutritional Data
- Share Your Baking Experience
Why This Traditional Dutch Apple Pie is Your New Favorite
I’ve made hundreds of pies over the years, and this one always gets the highest praise. Why? Because it hits every single comfort note you want when you bake something truly special at home. It’s not fancy, but wow, does it taste like love. If you’re looking for that quintessential slice of Americana, this is it.
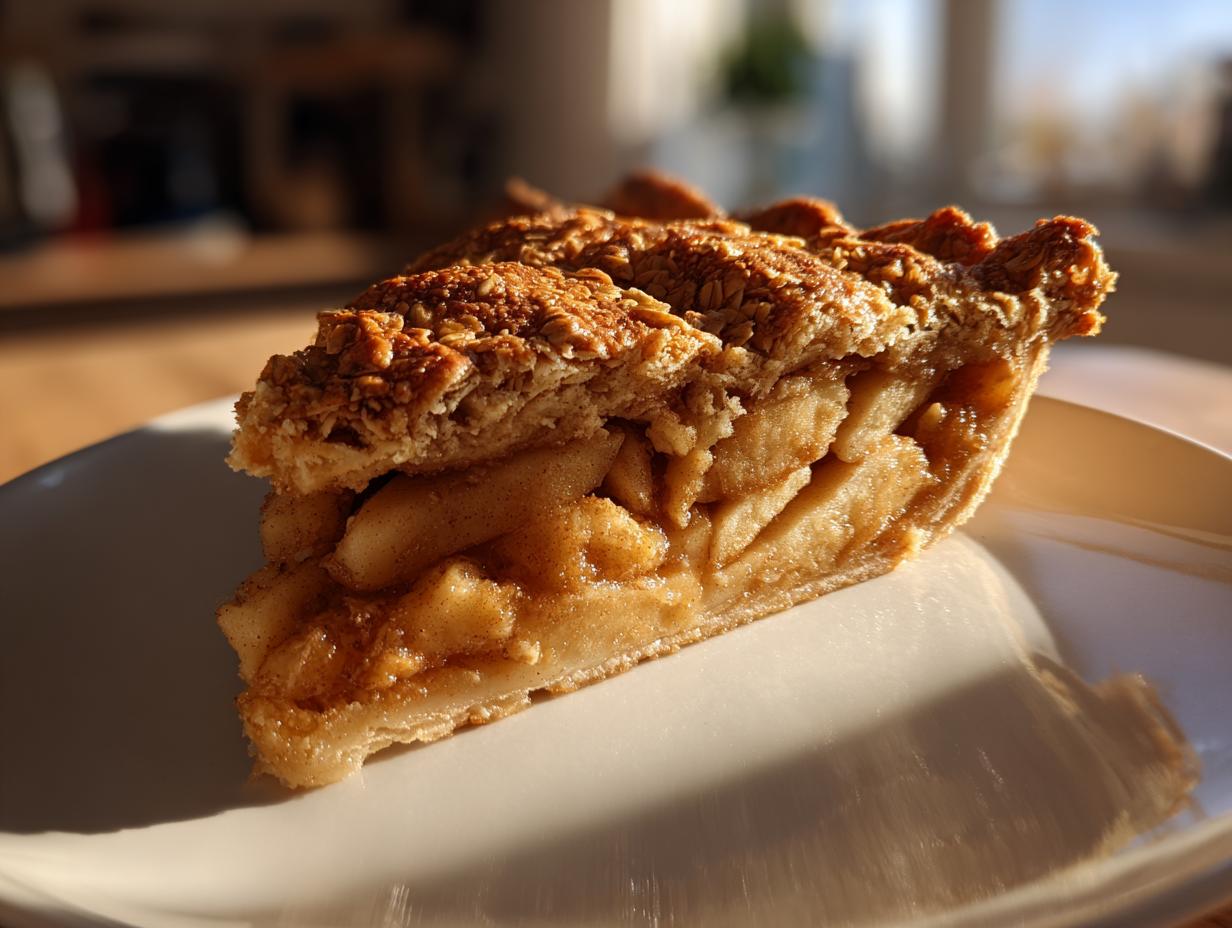
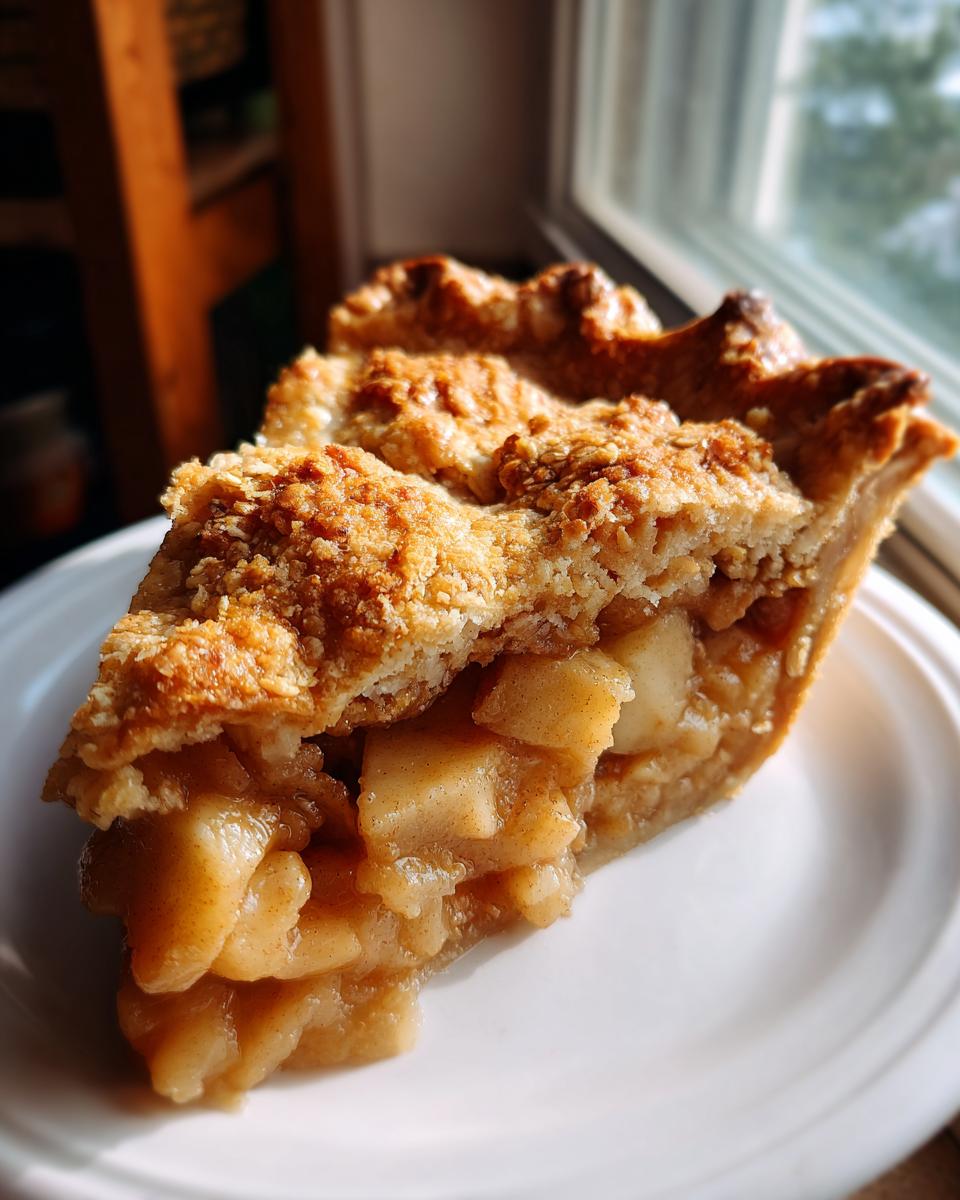
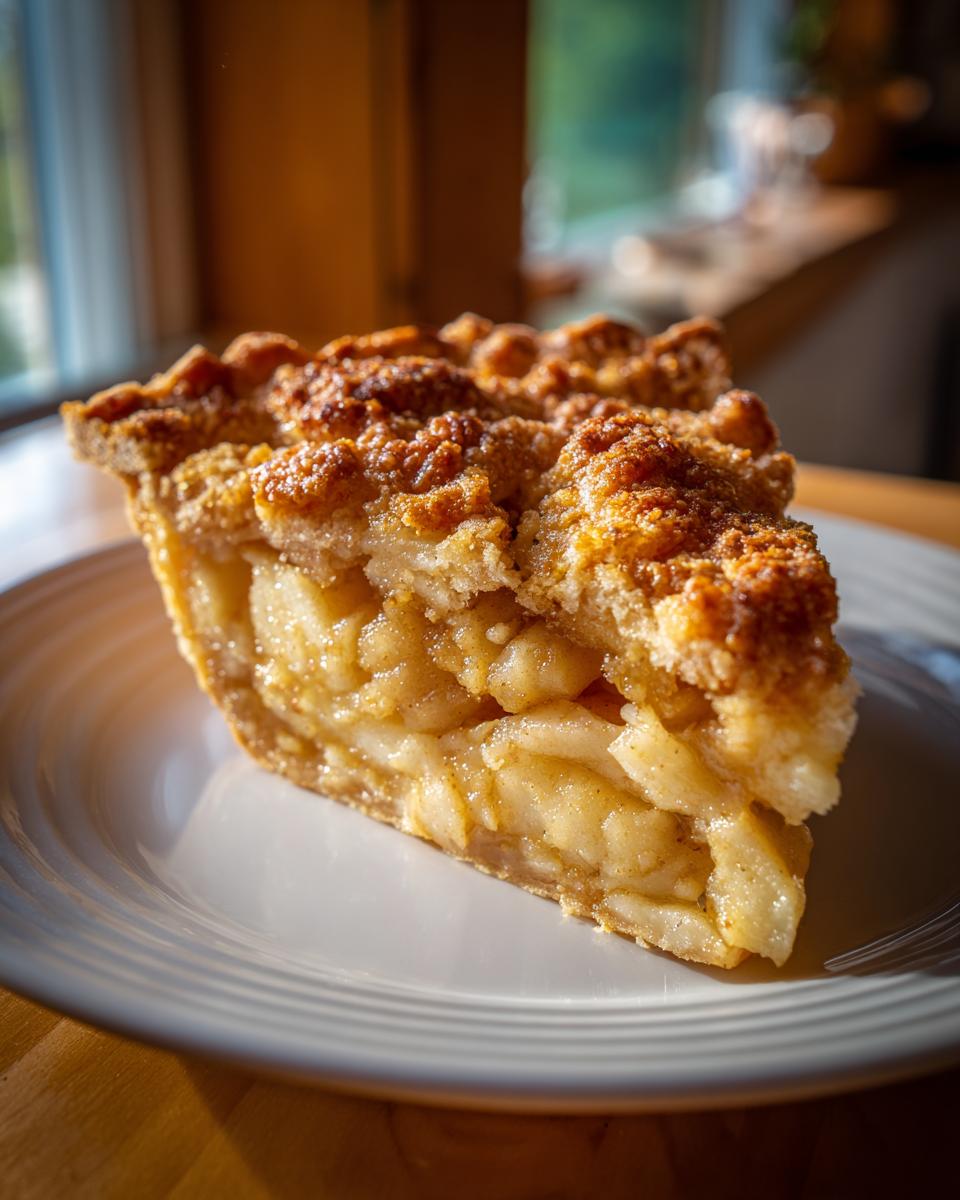
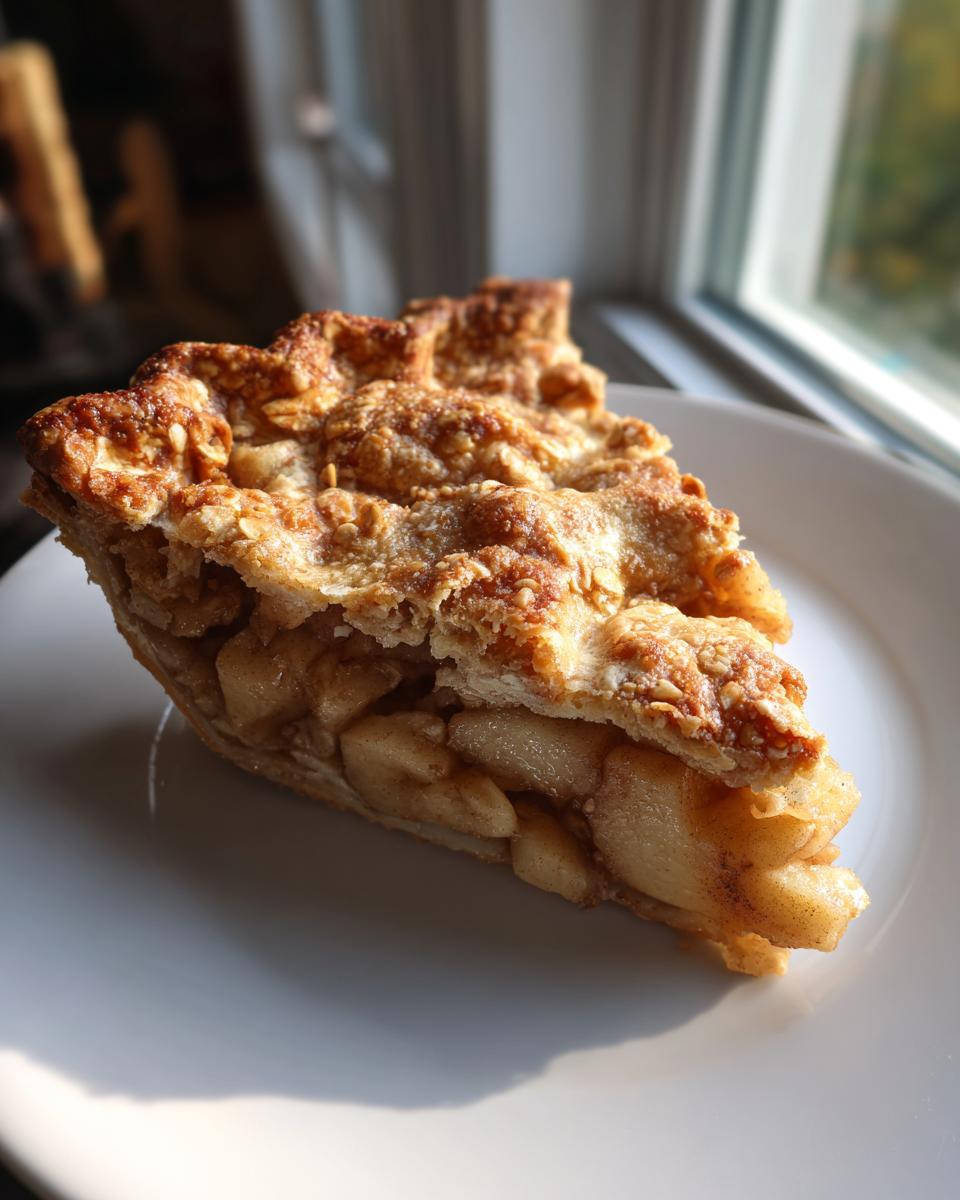
- The crust, oh my goodness! It shatters perfectly. It’s everything you dream of when you think of a homemade pie crust—buttery, flaky, and strong enough to hold all those glorious apples without getting soggy.
- The filling is just heavenly. It’s that perfect combination of sweet and tart, soaking up all that wonderful spice. If you’ve tried my stovetop filling recipe, you know how important that balance is, and this version is even better baked right inside the crust! You can learn more about customizing your apples here: best apple pie filling stovetop brown sugar.
- When you serve this up, it just screams tradition. This Traditional Dutch apple pie is a true classic, making it one of the easiest (and most delicious) patriotic dessert ideas for when you want to anchor your celebration in something familiar and comforting.
The Secret to the Best Apple Pie Recipe: Flaky Butter Crust
You know I preach patience, but when it comes to the crust, the real secret isn’t patience—it’s cold! For the best apple pie recipe you’ve ever made, you absolutely must keep your butter cubes and ice water freezing cold. Seriously, I keep my water bowl sitting in ice until the very second I need it. That sharp temperature difference creates steam pockets as the pie bakes, which is what gives you those glorious, noticeable flakes. Don’t let that butter melt!
Perfectly Spiced Cinnamon Apple Filling
We stick to Granny Smiths here for a reason; they hold their shape beautifully, so your pie isn’t just applesauce at the bottom. The combination of granulated sugar and brown sugar makes for depth, but it’s the spice—cinnamon and nutmeg—that makes your whole house smell like a warm hug. This cinnamon apple filling gets just the right amount of tartness from those tart apples to cut through the sweetness.
A Dependable Traditional Dutch Apple Pie
I taught this recipe to my grandkids, and they nail it every time, which proves how dependable it is! It doesn’t require fussy latticework or complicated techniques. Whether you use the full double crust or you decide to go for a lighter sprinkle on top, this pie is the definition of an American favorite. It’s the kind of pie you can count on when you need something that tastes exactly like Mom used to make, which is why it’s perfect for sharing on any celebratory day.
Gathering Ingredients for Your Traditional Dutch Apple Pie
Okay, now that you’re dreaming about that crisp crust, let’s get our ducks in a row ingredient-wise. Baking success, especially with pastry, depends on having the right things ready to go. I always organize my ingredients before I even touch the flour! Remember, for the best results, we’re making a true homemade pie crust from scratch, so the cold factor is non-negotiable. If you need a good primer on my go-to dough technique, you can review the steps here: pie crust recipe easy flaky butter dough.
For the Homemade Pie Crust
This is where the magic starts! You need everything super cold—I mean, straight from the fridge or freezer cold. That cold butter is the secret handshake in this recipe.
- 2 1/2 cups all-purpose flour
- 1 teaspoon salt
- 1 cup (2 sticks) unsalted butter, and I mean cold, cut into small cubes
- 1/2 cup ice water. Yes, ice water, not just tap water!
For the Cinnamon Apple Filling
For the filling, make sure you use Granny Smiths—about 6 large ones. You’ll want them peeled, cored, and sliced before you toss everything together. Don’t skimp on the spices; they bring the nostalgia!
- 6 large Granny Smith apples, peeled, cored, and sliced
- 1/2 cup granulated sugar
- 1/4 cup packed light brown sugar
- 2 tablespoons all-purpose flour (this helps thicken the juices!)
- 1 teaspoon ground cinnamon
- 1/4 teaspoon ground nutmeg
- 1 tablespoon lemon juice
For the Finishing Touches
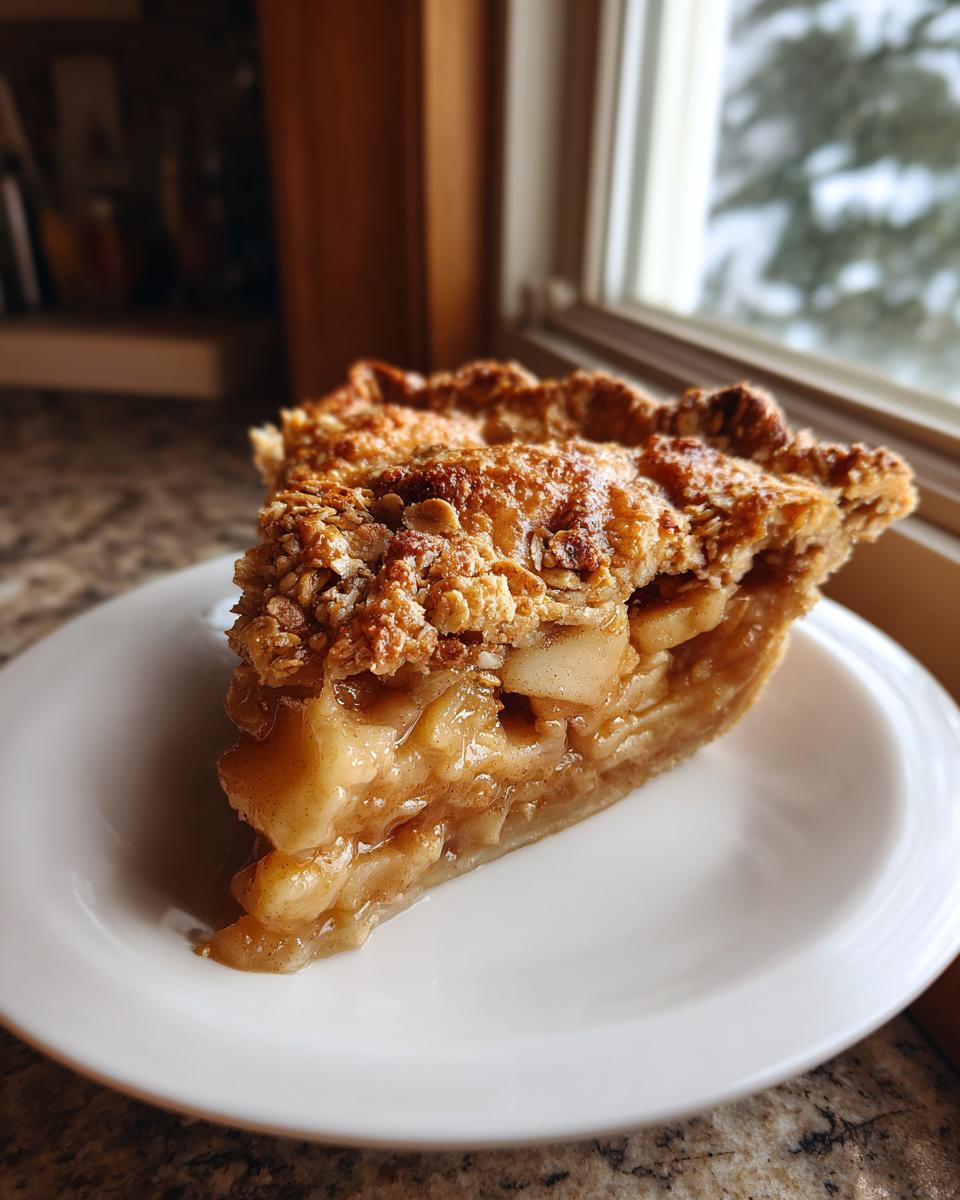
These are the items that guarantee that beautiful golden color and that hint of texture on top. And here’s where you decide: crust or topping! If you want to switch this up and make a dutch apple pie with crumble instead of a full top crust, you can skip rolling out that second disk of dough and instead use a bit of butter, flour, sugar, and oats to make a streusel topping!
- 1 large egg, beaten, mixed with 1 tablespoon milk (for that shiny egg wash)
- 1/4 cup rolled oats (if you’re using the double crust)
Step-by-Step Instructions for Traditional Dutch Apple Pie
Alright, let’s get baking! If you follow these steps exactly—especially the timing on the heat—you’ll have that quintessential, amazing pie. We tackle the crust first since it needs rest time! Remember, you’re making the best apple pie recipe on this planet, so take your time with the pastry.
Making the Flaky Homemade Pie Crust
In a big bowl, we mix that 2 1/2 cups of flour with the salt. Now comes the fun part: cutting in the butter. Use your pastry blender or your fingers—whichever you prefer—and work that cold butter into the flour until it looks like coarse crumbs, but listen to me, you need some pea-sized chunks left hanging out in there! Those chunks are your flakiness tickets. Add that ice water slowly, just a splash at a time, until the dough barely holds together when you squeeze it. Don’t work it more than you have to, or you’ll wake up the gluten and kill the flakiness! Divide that dough in two, wrap those disks tight, and tuck them into the fridge for at least an hour. They need a solid chill.
Mixing the Cinnamon Apple Filling
While the dough is chilling, we get to the good stuff! Grab a very large bowl—you need room for those apples. Gently toss those sliced Granny Smiths with both sugars, the 2 tablespoons of flour (just to help absorb the liquid), the cinnamon, nutmeg, and that little squirt of lemon juice. Toss gently! We want them coated, not bruised. Seriously, don’t mash them! Once that apple bowl is ready, go ahead and preheat your oven to 425 degrees Fahrenheit. Yes, we start high!
Assembling Your Traditional Dutch Apple Pie
Pull out one dough disk. Dust your counter lightly, and roll that dough out to about an 11-inch circle. Carefully drape it into your 9-inch pie plate and trim the edges, leaving about an inch of overhang to work with. Now? Pile that beautiful, spiced apple mixture right into the bottom crust. Take your second dough disk and roll it out. You can cut a few vents in the top, or if you’re feeling rustic, cut strips for a lattice top—either way gets us closer to our destination! Place that top crust over the apples, trim the excess, and then crimp those edges tight to seal everything in. That seal is important! Finally, mix that egg and milk for the wash, brush it lightly over the crust, and sprinkle those oats right on top for a little crunch.
Baking and Setting the Pie
Pop that pie onto a baking sheet—this always catches drips, trust me—and slide it into that 425°F oven for the first 15 minutes. This high heat sets that bottom crust fast, fighting off sogginess! After 15 minutes, turn the temperature down to 375°F. Continue baking for another 40 to 50 minutes. Keep an eye on the edges; if they start looking too dark too soon, just loosely drape a little strip of foil over them to protect them. You know it’s done when the crust is deep golden brown and you can see those juices bubbling happily. Now, this is the hardest part: You must let it cool on a wire rack for a full 3 hours before you cut it. If you slice it hot, all that glorious, thickened cinnamon apple filling will run right out. Be patient; it sets up beautifully when cooled! If you want to see how to use the crumble topping instead, check out my dutch apple pie recipe crumb topping variation!
Tips for the Perfect Traditional Dutch Apple Pie
I always tell folks that following the steps matters, but knowing *why* you’re doing them—that’s what turns a good pie into a legacy recipe. After years in the kitchen, I’ve learned a few tricks that make this pie unbelievably reliable. These little adjustments really help cement this as the best apple pie recipe you’ll ever rely on. Remember, baking should be fun, not frustrating!
Crust Clarity: Keeping it Cold
I know I keep hammering this point home, but I can’t stress it enough: Cold, cold, cold! If you ever wonder why your homemade pie crust seems tough or just… flat, it’s almost always because the butter warmed up too much before it hit the oven. When that cold butter hits the hot oven air, it steams rapidly, creating those layers. If the butter is soft, it just melts into the flour, leaving you with something more like a biscuit than a flaky crust. Keep those few cubes of butter chilling in the freezer while you’re prepping the apples, and use water that’s almost painfully cold!
Making a Dutch apple pie with crumble Variation
When I talk about a Traditional Dutch apple pie, some people picture that beautiful streusel topping instead of a full top crust. You absolutely can make that switch! If you’re craving that dutch apple pie with crumble finish, it’s super easy. Just skip rolling out that second disk of dough entirely. For the topping, you’ll make a simple streusel. I usually mix about 1/2 cup of flour, 1/3 cup of brown sugar, 1/4 cup of white sugar, and maybe 1/4 cup of oats (the oats give it a nice chew!). Cut in about 4 tablespoons of very cold butter using your fingers until it looks like coarse, wet sand. Sprinkle that mixture heavily and evenly over your raw, filled bottom crust before you put it in the oven. It bakes up golden and gorgeous!
Serving Suggestions for This Patriotic Dessert Idea
This pie is truly a showstopper all on its own, especially when celebrating something big! Since we want the crust and the apples to shine, especially on days when we’re feeling especially patriotic, I often keep the toppings simple. A scoop of good vanilla bean ice cream that starts melting into the warm spices? Perfection. If you want to drizzle something a little special, try a homemade caramel sauce—you can check out my favorite version here: caramel apple cookies recipe. It just elevates the whole experience, but honestly, a slice fresh from cooling is heavenly.
Storage and Reheating Instructions
You’re going to want to save some of this pie, trust me! It smells so good that keeping it around is essential for enjoying the leftovers. Now, because this recipe uses a lot of fresh butter in the crust, you have options, but the cooling process is the most important first step. Don’t even think about wrapping it up until it’s cooled completely for those three hours!
Once the pie is fully cooled, you can store it loosely covered on the counter at room temperature for up to two days. This works best if you didn’t use a heavy glaze or if the house isn’t too warm. If you used the egg wash and oats but skipped the heavy cream cheese glaze, it should be fine at room temperature.
If you made it ahead of time, or if you’re planning on keeping those beautiful apple flavors fresh for longer, wrap the pie tightly in plastic wrap or foil and pop it into the refrigerator. It will keep well for about four days that way. The crust might soften a tiny bit, but don’t worry, we can fix that!
When you are ready for a leftover slice, never microwave it—that just makes the crust soggy and sad. Instead, reheat individual slices in a toaster oven or a regular oven set to about 350 degrees Fahrenheit for about 10 to 15 minutes. That gentle heat brings the buttery flavor right back into that flaky crust. It tastes almost as good as when it first came out! It’s so worth the extra few minutes to reheat it properly.
Frequently Asked Questions About Apple Pie
When you’re making a recipe this classic, questions always pop up! I learned over thirty years of teaching that if I can answer your potential doubts right here, you’ll feel more confident walking into the kitchen to tackle this pie. After all, we want this to be the best apple pie recipe you’ve ever attempted!
What are the best apples for this best apple pie recipe?
I heart Granny Smiths for this pie, and I’ll stick to that! They have the perfect tartness to balance the sugars, and most importantly, they hold their shape when baked. They give you that nice chunk in the filling rather than mush. If you absolutely must mix it up, you can swap out maybe two of the Granny Smiths for Honeycrisp or Braeburn. Those are firm apples that generally stand up well to the heat, too. But for true reliability, stick mostly to Granny Smith apples.
Can I make the homemade pie crust ahead of time?
Oh, absolutely, you can prep ahead! That’s what I always do on busy holiday weekends. After you make your two chilled disks for the homemade pie crust, wrap them super tightly in plastic wrap, maybe even pop them in a Ziploc baggie for extra protection, and stick them in the fridge. They are good in the fridge for up to three days. If you need to go longer, the freezer is your friend! They freeze beautifully for up to three months. Just remember to let the dough thaw overnight in the fridge before you try rolling it out—never try to roll frozen dough, or it will crack!
How do I prevent a soggy bottom crust?
This is the number one worry people have, and I have two great tricks for you! First, remember how we started baking at 425 degrees? That initial blast of high heat helps cook the bottom crust before all those apple juices have time to seep down. Make sure you put that pie pan right on the lower-middle rack in your oven. Second, make sure you’re using the correct amount of flour in the filling mixture. I put 2 tablespoons in there specifically to absorb excess liquid. If your apples were especially juicy, tossing them in 1 extra teaspoon of flour before filling the pie will seal the deal and keep that bottom crust wonderfully crisp! If you’re interested in a topping that completely avoids this issue, check out my recipe for a great crumble topping here: best classic buttery apple crumble recipe.
Estimated Nutritional Data
Now, I’m not a nutritionist, so please take these numbers with a grain of salt! Food made with love isn’t meant to be counted strictly, but I know some of you like to keep track of things, especially when serving up something rich like this Traditional Dutch apple pie. These estimates are based on eight generous slices of the pie made exactly as written, including that buttery crust.
You’ll find that the fat content is a little higher, but hey, that’s the price of that incredible, flaky, homemade pie crust made with real butter! We balance that richness with good fiber from all those apples we packed in there.
- Serving Size: 1 slice
- Calories: 410
- Sugar: 35g
- Total Fat: 22g
- Carbohydrates: 52g
- Protein: 4g
Just remember, these numbers shift based on the exact size of your apples and how much butter we each sneak into the dough! If you’re making this for a large crowd, treat this as a general guideline for your patriotic dessert ideas planning.
Share Your Baking Experience
Well, we made it! You tackled the butter, you tamed those apples, and now you have a beautiful, fragrant, completely homemade Traditional Dutch apple pie sitting on your counter. That’s something to be proud of! Honestly, seeing your bakes is the highlight of my week. I love knowing that a recipe born in my Midwest kitchen is making someone else’s holiday or Sunday dinner extra special.
If you followed along and gave this a try, please, please leave a rating right below! Knowing how many stars you give it helps other home cooks feel confident heading into their own kitchens. Did the flaky crust come out perfectly? Did you end up leaning toward the double crust or did you switch over to that great dutch apple pie with crumble topping variation?
I absolutely adore seeing photos! Tag me on social media when you slice into that warm pie, especially if you photographed it alongside some other great ideas for your table. Happy baking, friends, and thank you for letting my family’s recipe become part of yours!
PrintCarla’s Traditional Dutch Apple Pie with Flaky Crust
Make a classic, comforting Dutch apple pie with a buttery, flaky homemade pie crust and a sweet, spiced cinnamon apple filling. This is the best apple pie recipe for a taste of home.
- Prep Time: 45 min
- Cook Time: 65 min
- Total Time: 110 min
- Yield: 8 servings 1x
- Category: Dessert
- Method: Baking
- Cuisine: American
- Diet: Vegetarian
Ingredients
- 2 1/2 cups all-purpose flour
- 1 teaspoon salt
- 1 cup (2 sticks) cold unsalted butter, cut into cubes
- 1/2 cup ice water
- 6 large Granny Smith apples, peeled, cored, and sliced
- 1/2 cup granulated sugar
- 1/4 cup packed light brown sugar
- 2 tablespoons all-purpose flour
- 1 teaspoon ground cinnamon
- 1/4 teaspoon ground nutmeg
- 1 tablespoon lemon juice
- 1 large egg, beaten (for egg wash)
- 1 tablespoon milk (for egg wash)
- 1/4 cup rolled oats (for topping)
Instructions
- Prepare the pie crust: In a large bowl, whisk together the 2 1/2 cups flour and salt. Cut in the cold butter using a pastry blender or your fingers until the mixture resembles coarse crumbs with some pea-sized pieces of butter remaining.
- Gradually add the ice water, one tablespoon at a time, mixing until the dough just comes together. Do not overmix. Divide the dough in half, form each half into a disk, wrap in plastic wrap, and chill for at least 1 hour.
- Prepare the filling: In a large bowl, combine the sliced apples, granulated sugar, brown sugar, 2 tablespoons flour, cinnamon, nutmeg, and lemon juice. Toss gently to coat the apples evenly.
- Preheat your oven to 425 degrees Fahrenheit.
- On a lightly floured surface, roll out one disk of dough to an 11-inch circle. Carefully transfer the dough to a 9-inch pie plate. Trim the edges, leaving a 1-inch overhang.
- Pour the apple mixture into the bottom crust.
- Roll out the second disk of dough for the top crust. You can cut vents or create a lattice top. Place the top crust over the filling. Crimp the edges of the top and bottom crusts together to seal.
- Mix the beaten egg and milk to create an egg wash. Brush the top crust lightly with the wash and sprinkle with rolled oats.
- Place the pie on a baking sheet to catch any drips. Bake for 15 minutes at 425 degrees Fahrenheit.
- Reduce the oven temperature to 375 degrees Fahrenheit and continue baking for another 40 to 50 minutes, or until the crust is golden brown and the filling is bubbly. If the edges brown too quickly, cover them loosely with foil.
- Let the pie cool on a wire rack for at least 3 hours before slicing and serving. This allows the filling to set properly.
Notes
- For the flakiest crust, keep your butter and water as cold as possible when mixing the dough.
- If you prefer a Dutch apple pie with crumble topping instead of a full top crust, skip rolling the second disk of dough and instead prepare a streusel topping using flour, butter, sugar, and oats.
- This pie tastes best when served slightly warm, making it a perfect patriotic dessert idea.
Nutrition
- Serving Size: 1 slice
- Calories: 410
- Sugar: 35g
- Sodium: 250mg
- Fat: 22g
- Saturated Fat: 14g
- Unsaturated Fat: 8g
- Trans Fat: 0.5g
- Carbohydrates: 52g
- Fiber: 4g
- Protein: 4g
- Cholesterol: 55mg