
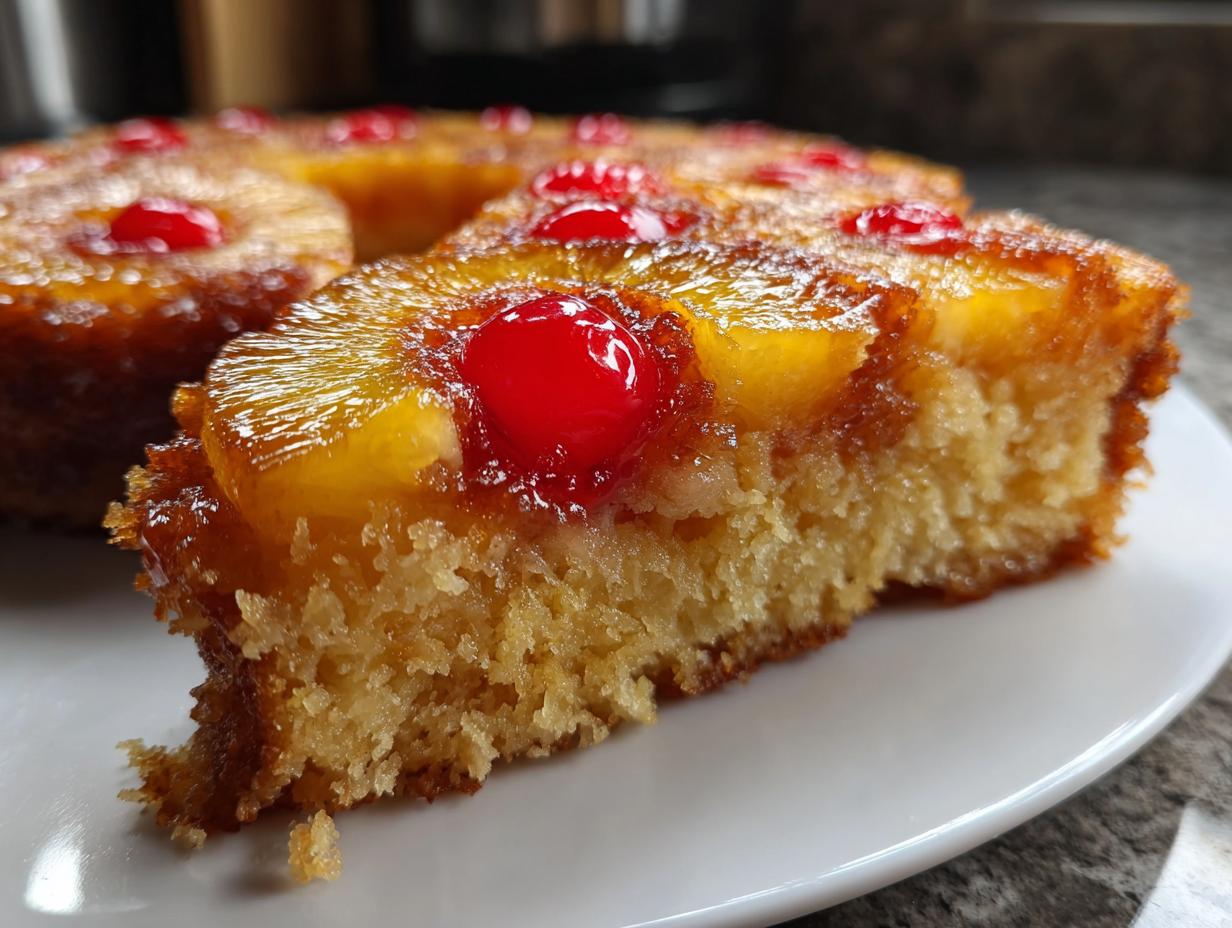
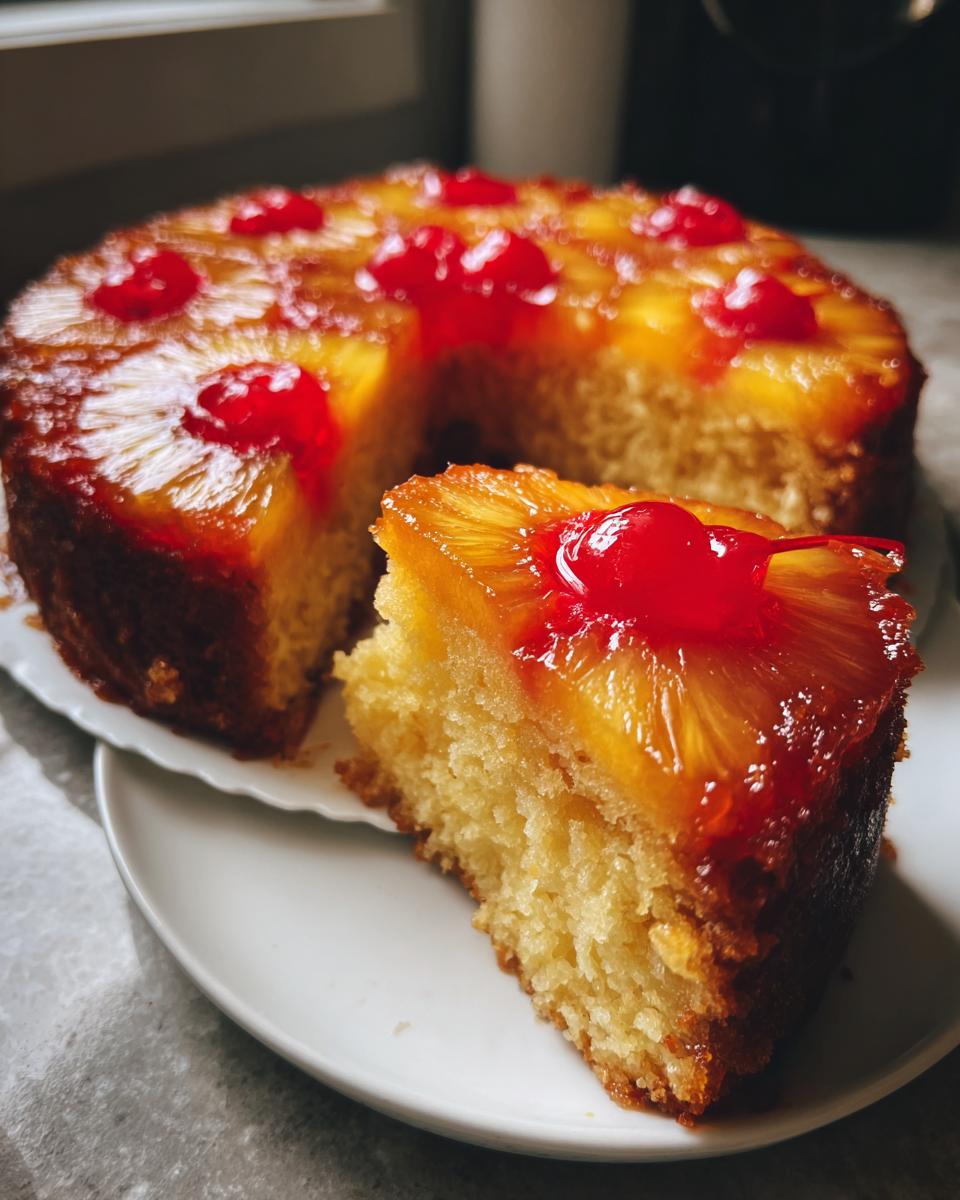
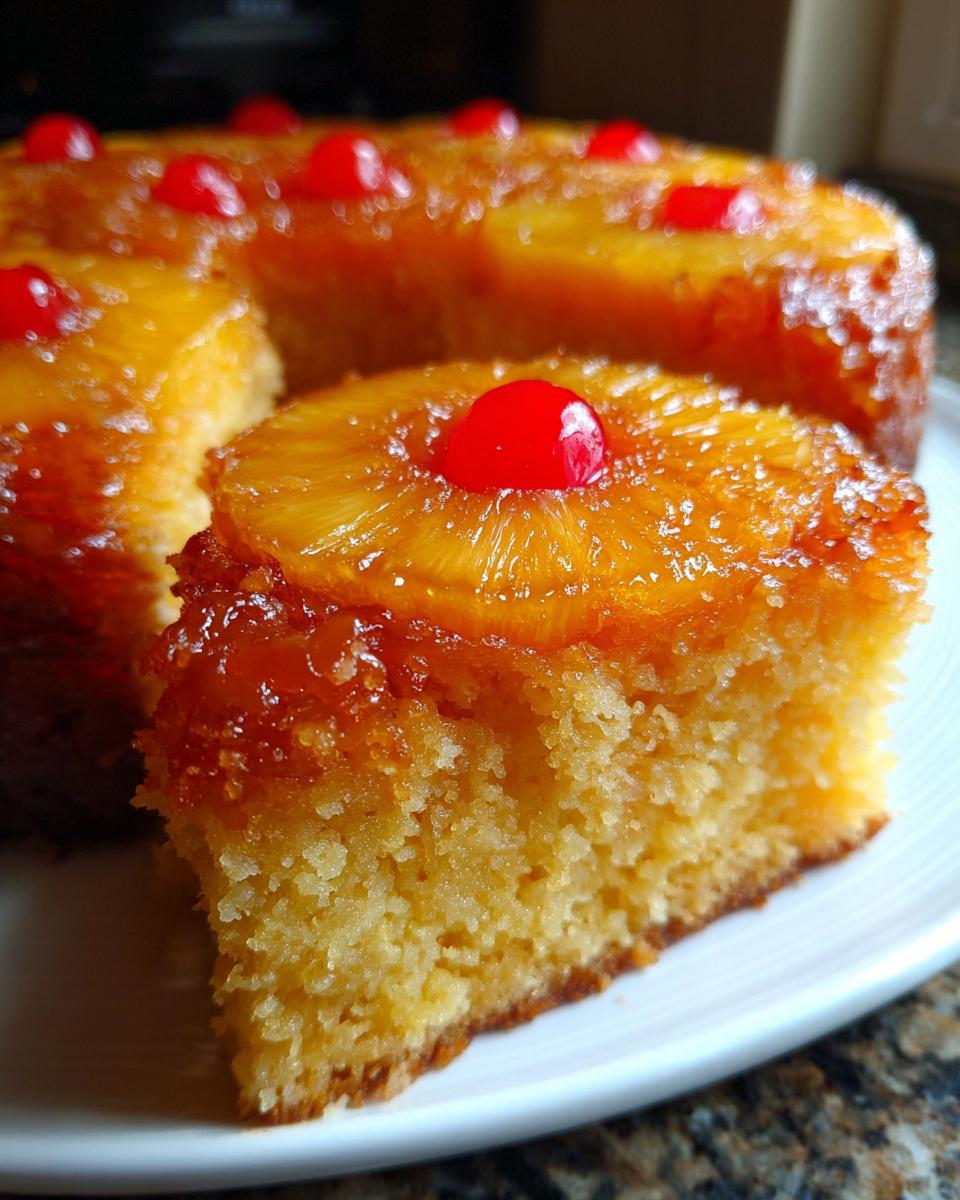
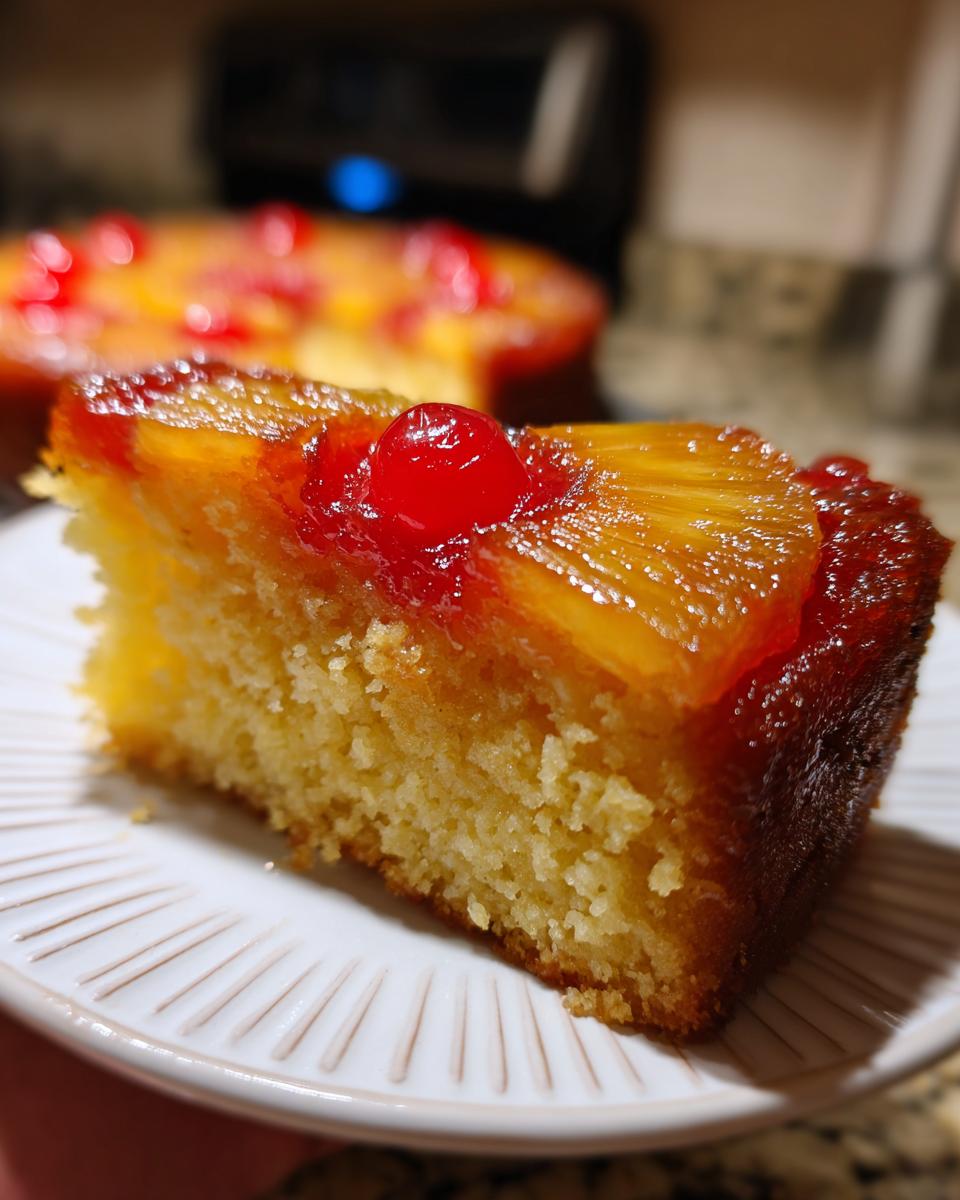
Oh, is there anything more comforting than a dessert that instantly whisks you back to childhood parties and family gatherings? For me, that sweet nostalgia always smells like caramelized sugar and tropical fruit. Today, we are making the absolute king of retro desserts: the Pineapple Upside Down Cake. Forget those overly sweet, flimsy versions you might have tried! This is my genuine, from-scratch recipe, developed right here in my kitchen. My goal, as always, is dependability. If you follow these steps, you’ll get that perfectly moist pineapple cake base paired with a shimmering, gooey layer of caramelized rings. That’s why I know this will become your Best Pineapple Upside Down Cake, too—it’s time-tested reliability from my teaching days transferred straight into your oven.
- Why This Classic Pineapple Upside Down Cake Recipe Works (E-E-A-T)
- Gathering Ingredients for Your Homemade Pineapple Cake
- Step-by-Step Instructions for the Skillet Pineapple Upside Down Cake
- The Crucial Flip: Serving Your Retro Pineapple Dessert
- Tips for the Best Pineapple Upside Down Cake Success
- Variations on the Traditional Pineapple Upside Down Cake Recipe
- Serving Suggestions for This Easy Tropical Cake
- Storage and Reheating Instructions for Pineapple Upside Down Cake
- Frequently Asked Questions About Pineapple Upside Down Cake
Why This Classic Pineapple Upside Down Cake Recipe Works (E-E-A-T)
When I developed this Pineapple Upside Down Cake Recipe, my biggest goal was to make sure the top layer wasn’t just sweet, but truly caramelized. That’s why we are skipping the cake mix shortcut this time! Using the skillet method right on the stovetop—before it even sees the oven—gives us control. This disciplined approach ensures you get that famously rich, Buttery Pineapple Dessert texture that people sigh over. It builds that beautiful golden base layer you just can’t replicate by adding sugar to the batter alone. It’s about respecting the history of this wonderful Retro Pineapple Dessert, just like making my classic butter cookies.
The Secret to Caramelized Pineapple Rings Cake Topping
The real magic happens right at the start. Melting the butter first, then sprinkling the brown sugar right on top to melt into it, creates a rich, sticky syrup. You aren’t just greasing the pan; you are starting the caramel. Arrange those juicy pineapple rings and bright cherries right into that pool of brown sugar goodness. This sets the stage for an incredible, glossy, and intensely flavorful Caramelized Pineapple Dessert when we flip it over. It looks stunning, and trust me, it tastes even better!
Gathering Ingredients for Your Homemade Pineapple Cake
Even for a simple, Homemade Pineapple Cake, setting up your ingredients first is crucial. Since this recipe is based on that initial caramel layer, precision really matters here. I usually separate the topping ingredients from the cake batter ingredients. That way, I grab the soft butter for the batter and the sticks for the melting step without any confusion!
For that gorgeous topping, you need brown sugar—and make sure it’s packed down firmly—plus the melted butter and of course, those lovely canned pineapple slices and the cherries. For the actual cake part, treat your butter gently; it needs to be softened, not melty, when you cream it with the white sugar. Grab your flour, baking powder, salt, eggs, vanilla, and milk. Just like my easy skillet corn recipe, having everything ready makes the process smooth.
Ingredient Notes and Substitutions for Pineapple Upside Down Cake
Listen, you absolutely must drain your pineapple slices well, but don’t toss that juice! That pineapple juice is absolutely wonderful for moisturizing cornbread or even thinning out a smoothie later. For this Pineapple Upside Down Cake Recipe, using rings packed in juice rather than heavy syrup keeps the final cake from getting *too* sweet. And here’s a pro tip from my notes while you are gathering: if you want to kick up the flavor profile and make it taste even more special for company, add one tablespoon of dark rum into that melted butter and brown sugar base. It really deepens that caramelized fruit flavor beautifully!
Step-by-Step Instructions for the Skillet Pineapple Upside Down Cake
Alright, let’s get baking! This is the most rewarding part, and I promise you, following these steps carefully is how you achieve that stunning, professional look for your Pineapple Upside Down Cake. Forget those overly sweet, flimsy versions you might have tried! This is my genuine, from-scratch recipe, developed right here in my kitchen. My goal, as always, is dependability. If you follow these steps, you’ll get that perfectly moist pineapple cake base paired with a shimmering, gooey layer of caramelized rings. That’s why I know this will become your Best Pineapple Upside Down Cake, too—it’s time-tested reliability from my teaching days transferred straight into your oven.
Preparing the Caramel Base and Fruit Arrangement
First thing: Preheat that oven to 350 degrees F. Now, take your 9-inch cake pan—your skillet works best here—and melt that half cup of butter right over low heat on the stove. Once it’s liquid gold, sprinkle that cup of packed brown sugar evenly over the butter. Next, arrange your drained pineapple slices right on top of that melted sugar mix. Tuck one bright maraschino cherry right into the center of every single pineapple ring. Resist the urge to stir anything; we just want that pretty pattern set!

Mixing and Layering the Moist Pineapple Cake Batter
In a separate bowl, whisk your flour, baking powder, and salt together—that’s your dry team. Then, in your big mixing bowl, cream the softened butter and white sugar until it looks light and fluffy, almost like pale clouds. Beat in your eggs one at a time, followed by the vanilla. Now, here is the crucial move for a Moist Pineapple Cake: add the dry ingredients alternating with the milk. Start and end with the flour mixture, just like when I make my fluffy buttermilk pancakes. Mix only until everything is just combined. Seriously, stop mixing the second the streaks disappear. Gently spoon this lovely batter right over your pineapple layer. Be careful not to jostle those perfectly placed fruits underneath.
The Crucial Flip: Serving Your Retro Pineapple Dessert
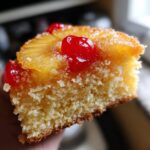
The cake is out of the oven, the kitchen smells like heaven, and now comes the moment that makes or breaks this entire experience! You need to resist the urge to let it cool completely, but you can’t flip it piping hot either. Bake it for about 35 to 40 minutes, or until that wooden pick comes out clean. Here’s the trick for that perfect, glossy presentation of your Classic Pineapple Cake: Let it cool right there on the wire rack for exactly five minutes. No more, no less! If you wait too long, that gorgeous brown sugar caramel hardens and sticks right to the pan.
When those five minutes are up, get your serving plate—make sure it’s big enough! Place the plate upside down firmly over the top of the cake pan. Take a deep breath, hold the plate and the pan together with both hands, and—*WHOOSH!*—flip them over quickly and confidently! You have to be decisive here; hesitation lets the hot caramel ooze everywhere. Let it sit for just a moment, then gently lift the pan off. Ta-da! Your beautifully caramelized, fruity topping is now sitting perfectly on top.
Tips for the Best Pineapple Upside Down Cake Success
You’ve done the hard part, and now you want to enjoy that gorgeous cake. To make sure you get the absolute Best Pineapple Upside Down Cake every single time, let’s talk about the tools and heat. Oven temperature is sneaky! If your oven runs hot, that brown sugar topping can burn before the middle of the cake is done bouncing back. I always keep my trusty oven thermometer handy, just like I do when baking my cinnamon streusel coffee cake.
Pan choice also makes a huge difference, especially for getting that crisp caramel edge. If you have a cast iron skillet, use it! It distributes heat so evenly, which means the butter and sugar melt perfectly across the bottom without scorching. If you are using a standard metal cake pan, just watch that heat carefully and maybe drop the temperature by 15 degrees for the first ten minutes. A well-made, buttery caramelized topping is worth the little bit of extra attention!
Variations on the Traditional Pineapple Upside Down Cake Recipe
While I absolutely adore making this classic in the standard round pan, this recipe is wonderfully versatile! If you are looking for a showstopper for a holiday gathering, turning this into a Pineapple Bundt Cake Recipe is simple. You just pour the batter over the top layer and bake a little longer until it’s golden. That decorative shape makes it instant table décor!
And you know how much I love anything that makes serving easier? For parties, I often convert this into Mini Pineapple Upside Down Cakes Idea using a standard muffin tin. Just line the cups with liners or use a dab of cake goop, then layer the caramel and fruit in the bottom before spooning in the batter. You can find a great guide on making those individual servings right here, which also makes cleanup a breeze.
If you are feeling adventurous, try adding a half cup of shredded coconut to the batter for a little textural lift. Or, if you wanted to lean into a richer taste, you could always fold a teaspoon of ground ginger into your dry ingredients. No matter the change, as long as you start with that buttery, caramelized base, you honor the heart of this incredible Easy Tropical Cake. When I make apple dumplings, I love testing out little spice additions, and it works here too!
Serving Suggestions for This Easy Tropical Cake
This gorgeous cake shines brightest when it’s served warm. That five-minute cooling period before the flip is essential, but you want to get it on plates while that caramel topping is still buttery and soft. It’s a true Potluck Pineapple Favorite for a reason! If you’re serving it right after it cools, a dollop of fresh, lightly sweetened whipped cream just melts right into the fruit beautifully. Honestly though, my favorite way to enjoy this Easy Tropical Cake is actually with a scoop of good quality vanilla bean ice cream. The cold ice cream against the warm, gooey pineapple is just magical. For a richer finish, maybe try a drizzle of homemade chocolate pudding on the plate for contrast.
Storage and Reheating Instructions for Pineapple Upside Down Cake
I know an amazing Pineapple Upside Down Cake rarely lasts long, but if you do have leftovers, storage is super important to keep that topping from getting hard. I always store slices tightly covered at room temperature for up to two days—no need to refrigerate it unless your kitchen is really warm! Because this cake is so buttery, it stays surprisingly moist. When you are ready to enjoy it again, never use the microwave! That ruins the texture instantly.
Reheating should always be done in a conventional oven or even a toaster oven. Just warm a slice for about five minutes at 300 degrees F until it’s just warmed through. This gentle heat coaxes the butter and sugar back into that perfect, gooey state. It tastes almost as good as it did the first time!
Frequently Asked Questions About Pineapple Upside Down Cake
I know how it is when you’re baking something beautiful for company, and you just have one last little question nagging at you. Don’t worry, I’ve pulled together the most common things folks ask me when they are making this Southern Style Pineapple Cake. It’s always better to ask before you bake!
Can I make this Pineapple Upside Down Cake Recipe ahead of time?
You sure can start it ahead, but I strongly advise against flipping it until just before you serve it. Make the cake, let it cool for those critical five minutes, and then instead of inverting it onto your plate, cover the pan tightly with plastic wrap and foil and leave it on the counter overnight. Then, just before serving, warm it slightly (five minutes in a low oven) and flip it right then. That gives you that beautiful, glossy, fresh-off-the-stove look!
What is the best pan to use for a Pineapple Upside Down Cake?
If you want that truly perfect, evenly cooked result for your Pineapple Upside Down Cake Recipe, a 10-inch cast iron skillet is my absolute favorite choice. Cast iron holds heat beautifully and keeps the butter and brown sugar mixture singing along perfectly without burning. However, please don’t worry if you don’t have one! A good quality 9-inch round cake pan works just fine. If you use a standard metal pan, just keep a closer eye on the topping during that last ten minutes of baking so it doesn’t get too dark.
If you ever have trouble after trying these tips, please don’t hesitate to reach out to me over at my contact page!
PrintClassic Pineapple Upside Down Cake
Make this classic, buttery Pineapple Upside Down Cake from scratch. This retro dessert features caramelized pineapple rings and cherries baked over a moist, tender cake base. It is a dependable, crowd-pleasing favorite for any gathering.
- Prep Time: 15 min
- Cook Time: 40 min
- Total Time: 55 min
- Yield: 8 servings 1x
- Category: Dessert
- Method: Baking
- Cuisine: American
- Diet: Vegetarian
Ingredients
- 1/2 cup unsalted butter
- 1 cup packed brown sugar
- 1 (20 ounce) can pineapple slices in juice, undrained
- 10 maraschino cherries
- 1 1/2 cups all-purpose flour
- 1 1/2 teaspoons baking powder
- 1/2 teaspoon salt
- 1/2 cup unsalted butter, softened
- 3/4 cup granulated sugar
- 2 large eggs
- 1 teaspoon vanilla extract
- 1/2 cup milk
Instructions
- Preheat your oven to 350 degrees F (175 degrees C). Do not grease your baking pan yet.
- In a 9-inch round cake pan, melt 1/2 cup of butter over low heat on the stovetop, or in a small saucepan.
- Once melted, sprinkle the brown sugar evenly over the butter.
- Drain the pineapple slices, reserving the juice for another use if desired. Arrange the pineapple slices on top of the brown sugar mixture in the pan. Place one maraschino cherry in the center of each pineapple ring.
- In a medium bowl, whisk together the flour, baking powder, and salt. Set this aside.
- In a large bowl, cream together the 1/2 cup softened butter and granulated sugar until light and fluffy.
- Beat in the eggs one at a time, mixing well after each addition. Stir in the vanilla extract.
- Gradually add the dry ingredients to the wet ingredients, alternating with the milk. Mix until just combined; do not overmix the batter.
- Carefully spoon the cake batter over the pineapple and cherry layer in the pan, spreading it evenly without disturbing the fruit arrangement underneath.
- Bake for 35 to 40 minutes, or until a wooden pick inserted into the center comes out clean.
- Remove the cake from the oven and let it cool in the pan on a wire rack for 5 minutes.
- Place a serving plate upside down over the cake pan. Holding both the plate and the pan firmly together, flip them over quickly. The cake should release onto the plate with the fruit topping facing up.
- Let the cake cool slightly before you serve it warm.
Notes
- For a richer flavor, you can add 1 tablespoon of dark rum to the melted butter and brown sugar mixture before arranging the pineapple.
- If you prefer individual servings, you can use a muffin tin to make mini pineapple upside down cakes. Adjust baking time accordingly.
- This cake tastes best when served warm, perhaps with a scoop of vanilla ice cream.
Nutrition
- Serving Size: 1 slice
- Calories: 350
- Sugar: 35g
- Sodium: 250mg
- Fat: 17g
- Saturated Fat: 10g
- Unsaturated Fat: 7g
- Trans Fat: 0g
- Carbohydrates: 48g
- Fiber: 1g
- Protein: 4g
- Cholesterol: 75mg