
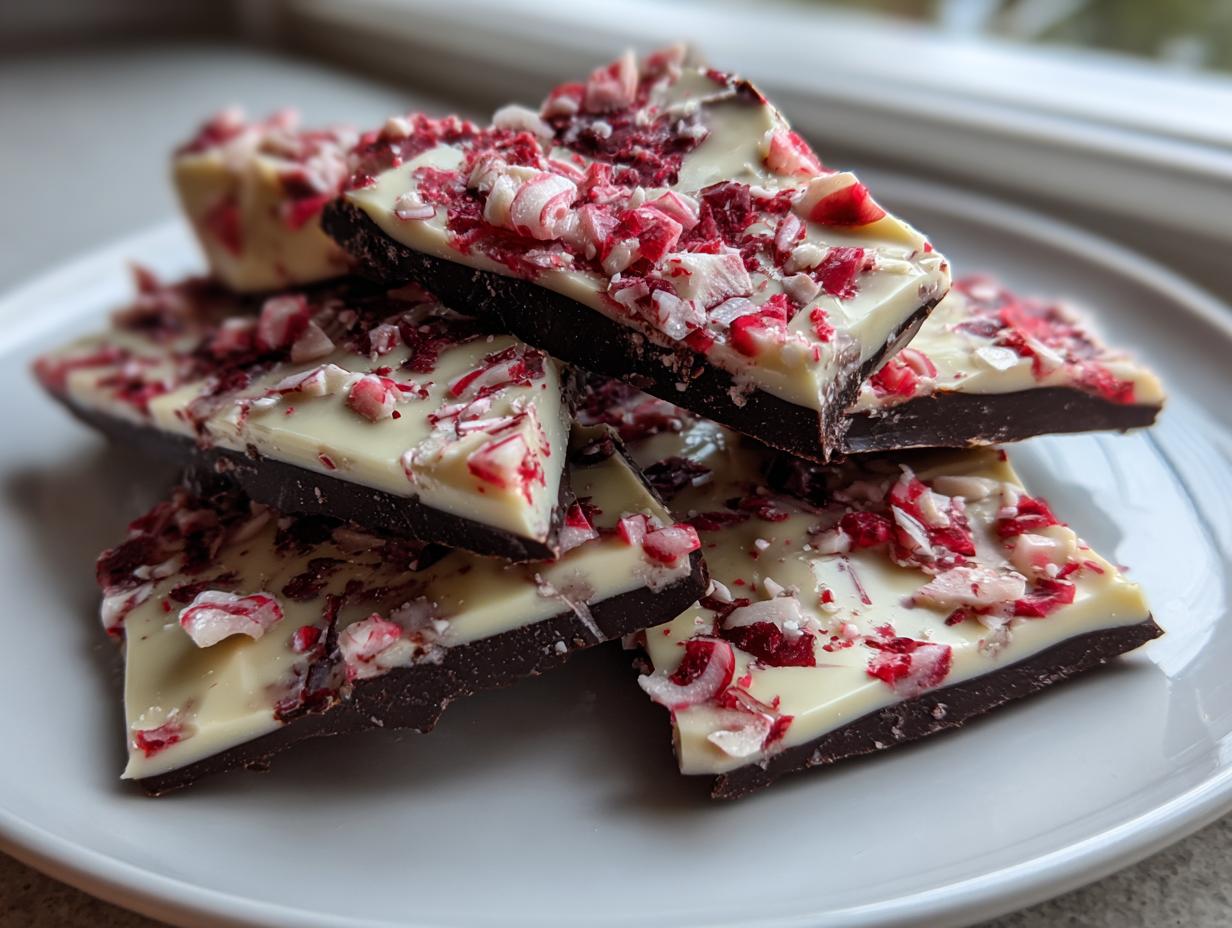
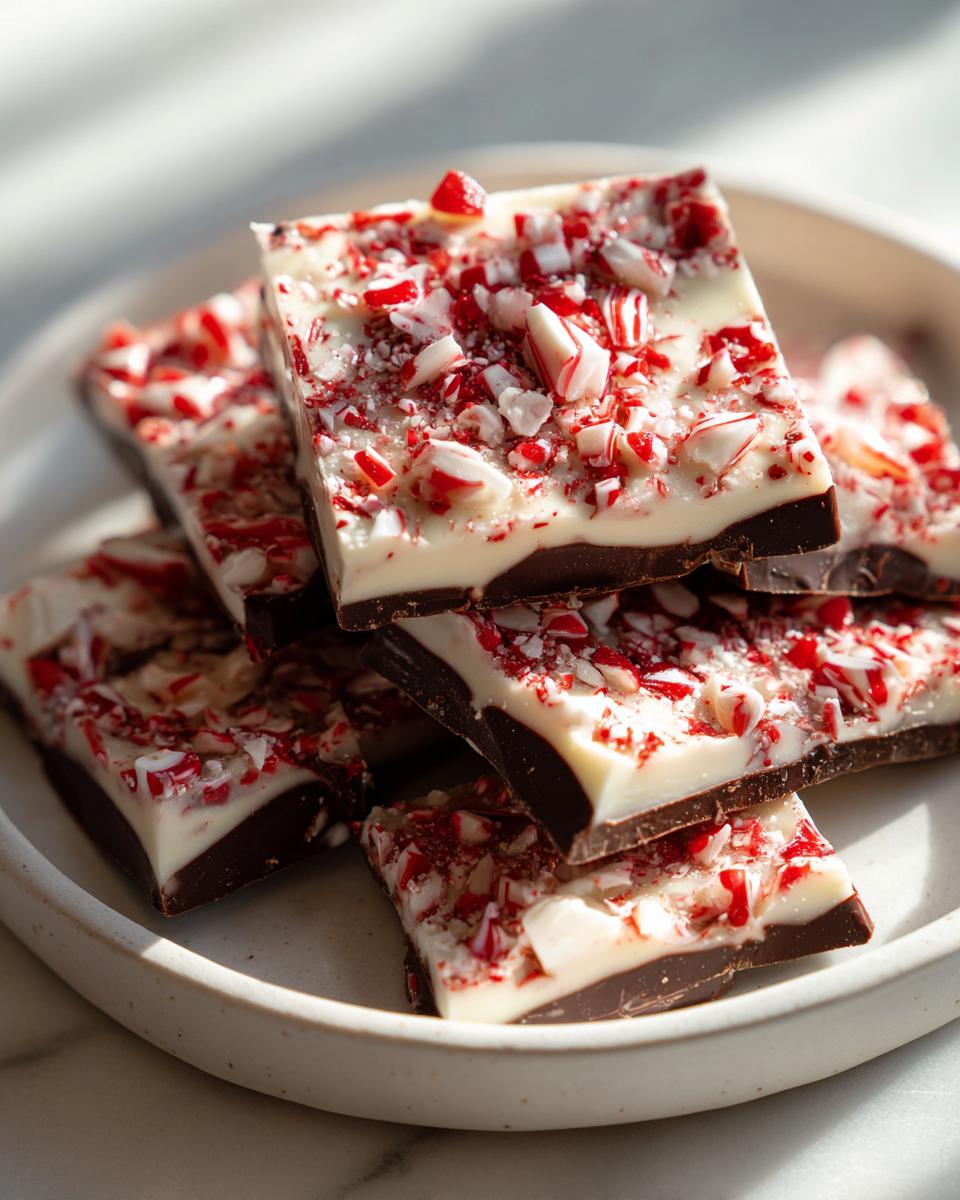
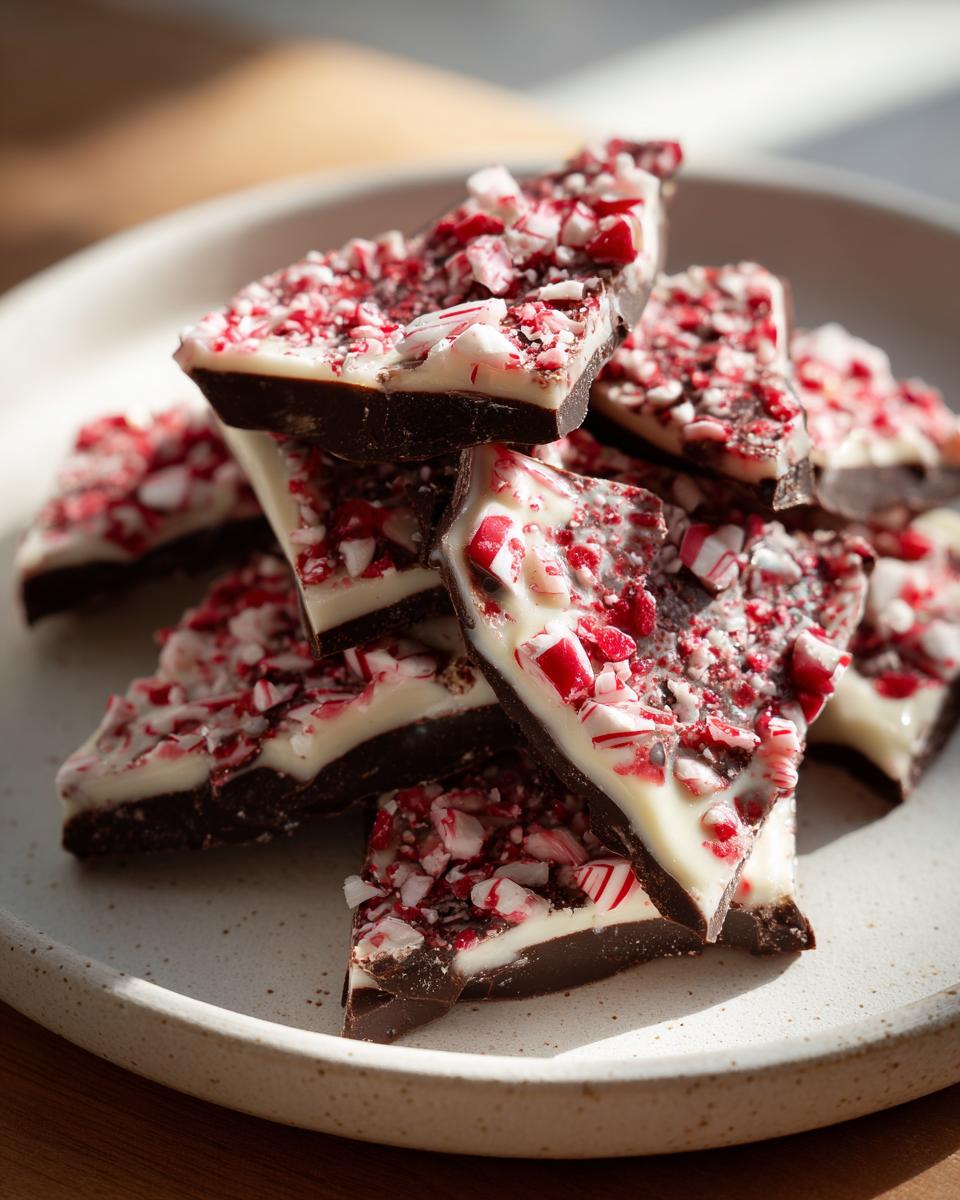
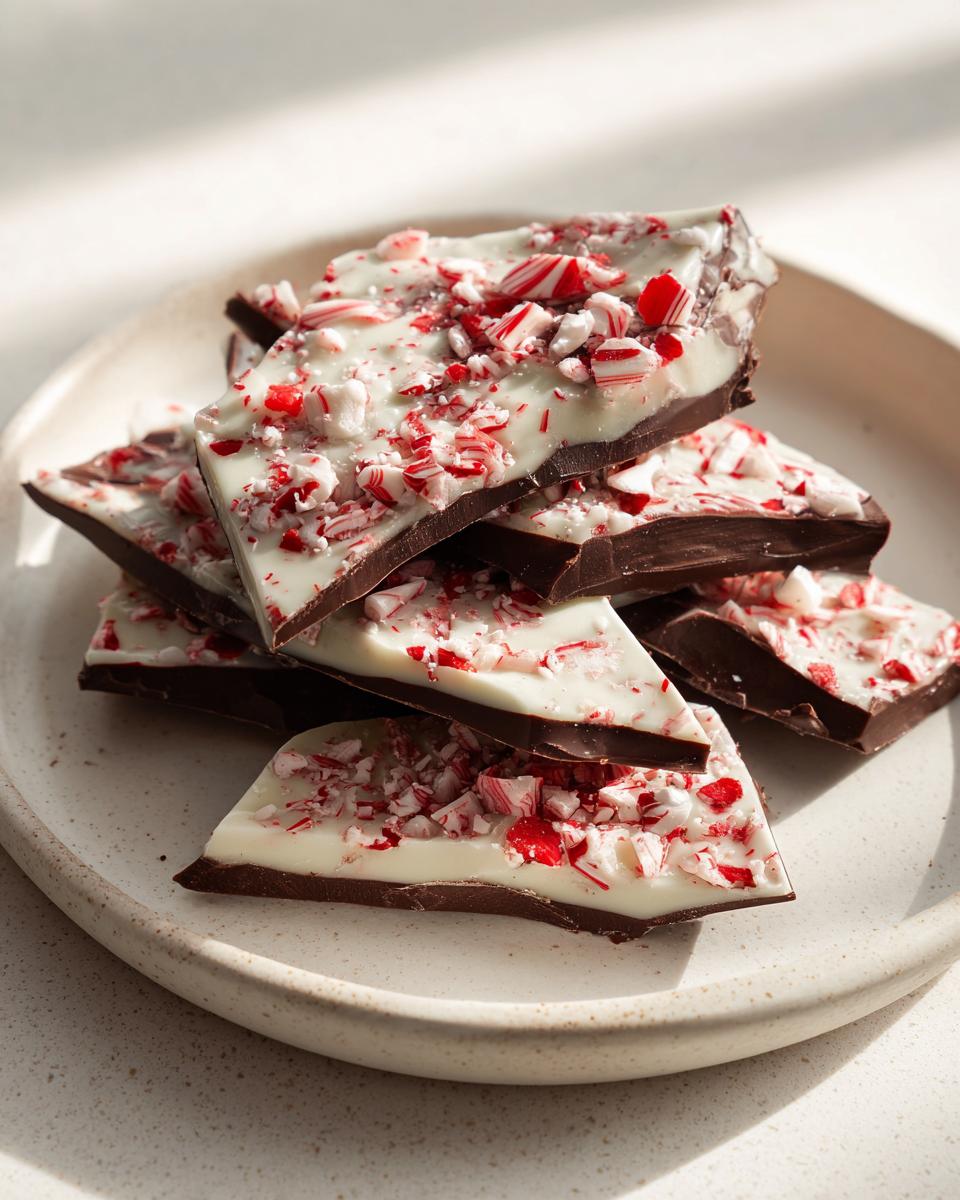
Oh, there’s just nothing that says “The holidays are officially here” quite like that crackle of a candy cane and the cool scent of mint mixed with rich chocolate. If you are looking for the absolute easiest, most charming holiday confection, you’ve found it! We are making my famous 4-ingredient peppermint bark today. Trust me, it’s foolproof, no-bake, and it sets up faster than you can wrap a present. As a former teacher and now a grandmother, I’ve learned that the best recipes are the ones you turn to year after year, and this peanut butter fudge sister is the star of my holiday tray.
- Why This Easy Peppermint Bark Recipe is a Holiday Must-Make
- Gathering Ingredients for Classic Peppermint Bark
- How to Prepare Your Easy Peppermint Bark Recipe
- Tips for Perfect Homemade Peppermint Bark
- Make-Ahead and Storage for Your Festive Holiday Desserts
- Variations on Classic Peppermint Bark
- Frequently Asked Questions About Peppermint Bark
- Serving Suggestions for this Easy Holiday Confectionery
- Sharing Your Peppermint Bark Creations
Why This Easy Peppermint Bark Recipe is a Holiday Must-Make
When December rolls around, time feels like it vanishes! That’s why I count on sweets that come together quickly but look like I spent all day fussing over them. This peppermint bark is my go-to. It requires zero oven time and uses just four things! It truly is one of the best Cool Whip cookies alternatives when you need quick holiday magic.
The Simplest No Bake Christmas Candy
If you need a peanut butter fudge alternative that requires no standing over a hot stove for hours, this is it. You just melt chocolate in the microwave, spread it, add the mint, and chill. It’s the definition of a Simple Christmas Treat, and it’s ready to go before halftime of your favorite holiday movie!
Perfect for Christmas Candy Gifting Ideas
Because it looks so stunning once broken into rustic pieces, this bark is always the first thing people grab from my holiday platter. It also travels beautifully, making it fantastic for cookie exchanges or for creating beautiful Christmas Candy Gifting Ideas. Everyone appreciates something homemade during the season!
Gathering Ingredients for Classic Peppermint Bark
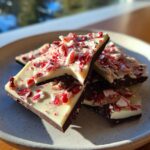
Good food starts with dependable ingredients, and for this peppermint bark, we keep things incredibly simple. We only need four things, which means we can focus our attention on quality! You will need 12 ounces of dark chocolate and 12 ounces of white chocolate. I always chop mine myself rather than using chips because it melts smoother, but whatever makes your life easier is fine by me. Then comes the magic: just one teaspoon of peppermint extract and one full cup of crushed candy canes on top. That’s the whole shopping list for this festive treat.
Ingredient Notes and Substitutions for Peppermint Bark
Now, let’s talk chocolate. If you’re dreaming of that perfect, smooth texture you find in the big warehouse stores, try using good quality melting wafers instead of standard bars for the white chocolate layer. That gives you that true Copycat Costco Peppermint Bark texture. Make sure your candy canes are crushed finely—not powdery, but small enough to stick well to the second layer! Sometimes, adding a small pinch of flaky sea salt along with the candy canes really elevates the flavor, too. That tiny addition makes a huge difference!
How to Prepare Your Easy Peppermint Bark Recipe
This is where the magic happens, and since it’s all no-bake, we don’t even have to worry about preheating an oven! The secret to great layered chocolate bark is patience during the chilling phases. First, line a baking sheet—any standard cookie sheet works fine—with parchment paper. This is the step that saves your cleanup time later, so don’t skip it!
Melting and Layering the Chocolate Peppermint Crunch
We start with the dark chocolate. Put it in a microwave-safe bowl and heat it in 30-second blasts, stirring well after every short burst. You’ll know it’s ready when it’s smooth and shiny. Pour that right onto your paper and use an offset spatula to spread it evenly, about a quarter-inch thick. Now, get that sheet into the refrigerator right away. It only needs about 15 minutes to set, but that time is crucial! We want that bottom layer firm before we introduce the next layer.
Adding the Mint Flavor to Your Holiday Chocolate Bark
Once the dark layer is hard, grab your white chocolate. Melt that the exact same way you did the dark stuff. As soon as it’s liquid smooth, stir in that teaspoon of peppermint extract—smell that? Wonderful! Work quickly here because white chocolate sets up fast. Pour this minty mixture right over the chilled dark chocolate. Spread it quickly and evenly. Before it has a chance to set up, sprinkle those crushed candy canes all over the top. Give them a gentle press so they really grab onto the white chocolate. Back into the fridge it goes for another 30 minutes until it’s completely firm. You are so close to having the best homemade chocolate pudding alternative dessert!
Tips for Perfect Homemade Peppermint Bark
When making this classic treat, a few little tricks can take you from “good” homemade peppermint bark to absolutely show-stopping. My biggest piece of advice for anyone making butter cookies or any chocolate candy is to make sure your chocolate is never exposed to steam. If any water drops get into your white chocolate while melting, it will seize up into a grainy mess on you, and we certainly don’t want that!
Also, when you’re spreading that second white layer, move fast! Chocolate sets up surprisingly quickly, especially if your kitchen is cool. We want one beautiful, clean layer beneath those candies for that perfect Layered Chocolate Bark look.
Achieving the Best White Chocolate Candy Cane Bark Finish
The trick to making sure your candy canes stay perfectly adhered to the white chocolate candy cane bark is a gentle touch. After you sprinkle the crushed candy canes over the wet white chocolate, don’t mash them down hard, or you might crack the layer underneath. Just use the back of a spoon or your clean hands to very lightly press them down until they feel slightly sticky. This keeps them locked in place for the final break, giving you a clean, festive crunch without any pieces flying off when you store it.
Make-Ahead and Storage for Your Festive Holiday Desserts
One of the best things about making peppermint bark is that it truly belongs on the make-ahead list! This means less stress right before the big party or when you’re packaging up those homemade plum jam gifts. Because this candy is almost entirely chocolate, it keeps incredibly well, which is wonderful news for holiday planning!
Once your bark is completely firm—and I mean rock solid—you can break it up. You’ll want to store these festive holiday desserts in an airtight container. I usually line the bottom of the container with a sheet of fresh parchment paper just to make absolutely sure no pieces stick to each other.
Here is my rule of thumb for temperature: If your kitchen is cool—say, below 70 degrees—you can absolutely keep your peppermint bark stored right on the counter. It will stay perfectly fine for about a week at room temperature like this. However, if your house is warm, or if this is weeks before your actual holiday event, pop it into the refrigerator. Chilling it keeps the chocolate firm and stops the peppermint extract from making the white chocolate sweat later on. Either way, it tastes just as lovely when you finally get to enjoy it!
Variations on Classic Peppermint Bark
While this 4-ingredient recipe is perfection to my taste, I know home cooks love to experiment! That’s the fun part about making raspberry thumbprint cookies or any other homemade confection—you can tweak it just for your family. There are so many small adjustments you can make to turn this into your own signature holiday treat, whether you want something savory or just a slight twist on the mint flavor profile.
Making Salted Peppermint Bark
If you like that little pop of savory brightness to cut through the sweetness, you absolutely must try making Salted Peppermint Bark. This is so simple it barely counts as a variation! The key is timing. You must sprinkle your salt *over* the crushed candy canes, right after you press the candy into the white chocolate layer. If you sprinkle it too early or too late, it won’t stick properly, or it might dissolve. I use a nice flaky sea salt, just a tiny pinch scattered evenly over the top. It’s amazing; that little bit of salt balances the rich chocolate perfectly and makes this feel a little more grown-up.
Ideas for Quick Christmas Sweets Variations
If you want to mix up the chocolate base, go right ahead! Instead of using dark chocolate for the bottom layer, you could use milk chocolate if that’s what your sweet tooth prefers. It makes a slightly softer, sweeter base, which is still wonderful. For another layer of texture among your Christmas sweets, try adding something crunchy along with the candy canes. A handful of toasted pecans, or even some mini chocolate chips, mixed in with the peppermint creates a lovely crunch we call Chocolate Peppermint Crunch. Just make sure whatever you add is dry, or it can affect how the chocolate sets!
Frequently Asked Questions About Peppermint Bark
It is so common for folks to have questions when trying a new holiday treat, especially when working with melting chocolate! I’ve gathered the most common questions I get about this recipe, so you can feel confident stepping into the kitchen knowing you’ll end up with fantastic results. We want to make sure this is a stress-free part of your holiday baking routine. For more about my philosophy on simple, reliable cooking, you can always check out my About page!
Can I make this peppermint bark without an oven?
Oh, absolutely! That’s one of the biggest reasons I love this recipe so much. This is truly a No Bake Christmas Candy masterpiece. We use the microwave to gently melt the chocolate layers, and then we rely completely on the refrigerator or freezer to set everything up. No preheating required, and no worrying about burning anything—it just needs cool, steady time!
What is the best way to crush candy canes for the bark?
I know some people just toss them in a food processor, but I worry about those tiny shards getting everywhere and turning my dark chocolate layer into dust! My favorite, most reliable way to crush the candy canes is to place them inside a heavy-duty zip-top bag. Press all the air out, seal it tight, and then place that bag on a sturdy cutting board. Grab a rolling pin—or even the bottom of a small sturdy saucepan—and just gently tap and roll until you have the right consistency. You want chunks, not powder, for that satisfying crunch in your Homemade Peppermint Bark.
How long does this homemade peppermint bark last?
Because this candy is almost entirely chocolate and hard candy, it has a wonderful shelf life! If you store this Homemade Peppermint Bark properly in an airtight container, it should last beautifully for two to three weeks at cool room temperature, providing your kitchen isn’t too hot. If you’ve made a huge batch for gifting way ahead of time, go ahead and store it in the refrigerator. It’s best eaten within six weeks if kept chilled, but honestly, my family has never managed to keep any around past the first week!
Serving Suggestions for this Easy Holiday Confectionery
Now that you’ve made the most wonderful hot chocolate companion—this easy holiday confectionery—how should you serve it up? Presentation is half the fun when you’re entertaining! I love to display these rustic, broken pieces right alongside some festive sugar cookies on a large white platter. It adds that beautiful pop of holiday red and white contrast.

If you’re serving it later in the evening with coffee or hot cocoa, you can even set out a small bowl of the bark so folks can grab a piece as they please. It travels so well, too, making it ideal for taking the main dish to a party—just bring an attractive little tin of bark!
Sharing Your Peppermint Bark Creations
Well, my dear cooks, we’ve made it to the end, and I hope your kitchen smells wonderfully minty right now! When I put together my annual assortment of Simple Christmas Treats, this peppermint bark is always the first thing to disappear. It truly is my very favorite, and I think once you try it, you’ll agree it’s the Best Peppermint Bark Recipe out there!
I truly love hearing from all of you who stop by Cooking by Carla. It means the world to me that my reliable recipes are helping you gather your families around the table, or in this case, around a festive party platter! If you made this simple, no-bake candy, please don’t hesitate to leave a star rating right down below in the comments section. It helps other home cooks know they can trust this recipe, just like I trusted my mom’s recipes when I was starting out.
If you try making this and you have a wonderful twist—maybe you tried the salted variation or added a different chocolate!—tell me all about it! You can always send me a friendly note through my contact page if you have a question too. Happy holidays, and enjoy sharing this beautiful, easy holiday confectionery!
PrintEasy 4-Ingredient Peppermint Bark
Make this classic, no-bake holiday treat with just four simple ingredients. This layered chocolate bark is perfect for gifting or serving at holiday parties.
- Prep Time: 15 min
- Cook Time: 5 min
- Total Time: 50 min
- Yield: About 1 pound 1x
- Category: Dessert
- Method: No Bake
- Cuisine: American
- Diet: Vegetarian
Ingredients
- 12 ounces dark chocolate, chopped
- 12 ounces white chocolate, chopped
- 1 teaspoon peppermint extract
- 1 cup crushed candy canes
Instructions
- Line a baking sheet with parchment paper.
- Melt the dark chocolate in a microwave-safe bowl in 30-second intervals, stirring between each, until smooth.
- Pour the melted dark chocolate onto the prepared baking sheet. Spread it into an even layer, about 1/4 inch thick. Place the sheet in the refrigerator to set for about 15 minutes.
- While the dark chocolate sets, melt the white chocolate using the same method as the dark chocolate.
- Remove the baking sheet from the refrigerator. Stir the peppermint extract into the melted white chocolate.
- Pour the white chocolate mixture over the set dark chocolate layer. Spread it evenly.
- Immediately sprinkle the crushed candy canes over the white chocolate layer. Gently press the candy pieces into the chocolate so they stick.
- Return the baking sheet to the refrigerator and chill for at least 30 minutes, or until the bark is completely firm.
- Once firm, break the peppermint bark into irregular pieces. Store in an airtight container at room temperature or in the refrigerator.
Notes
- For a copycat Costco peppermint bark texture, use high-quality melting wafers instead of standard chocolate bars.
- If you prefer a salted peppermint bark, sprinkle a pinch of flaky sea salt over the crushed candy canes before chilling.
- You can adjust the amount of peppermint extract to your taste preference. Start with less and add more if you want a stronger mint flavor.
Nutrition
- Serving Size: 1 ounce
- Calories: 160
- Sugar: 16
- Sodium: 15
- Fat: 10
- Saturated Fat: 6
- Unsaturated Fat: 4
- Trans Fat: 0
- Carbohydrates: 17
- Fiber: 0
- Protein: 2
- Cholesterol: 5