
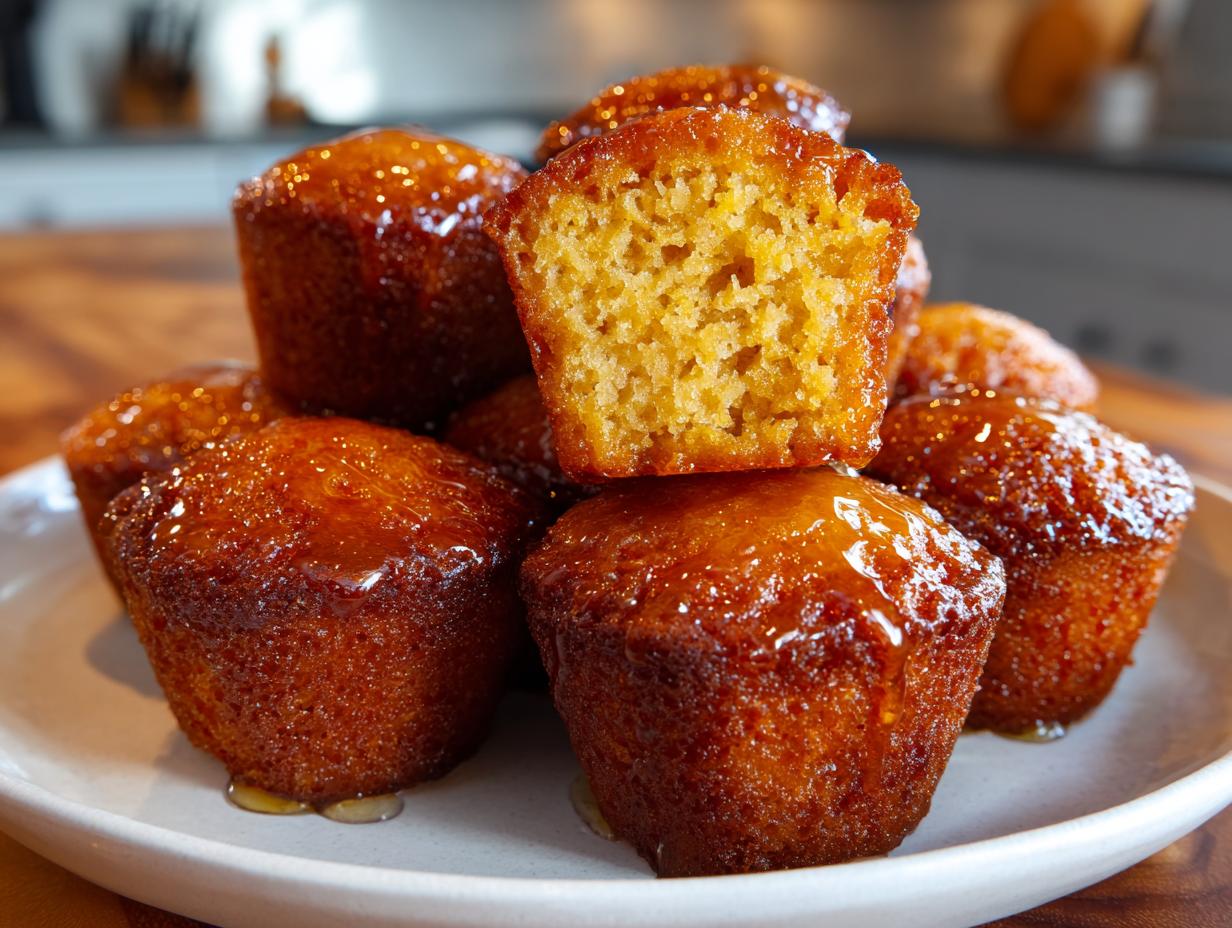
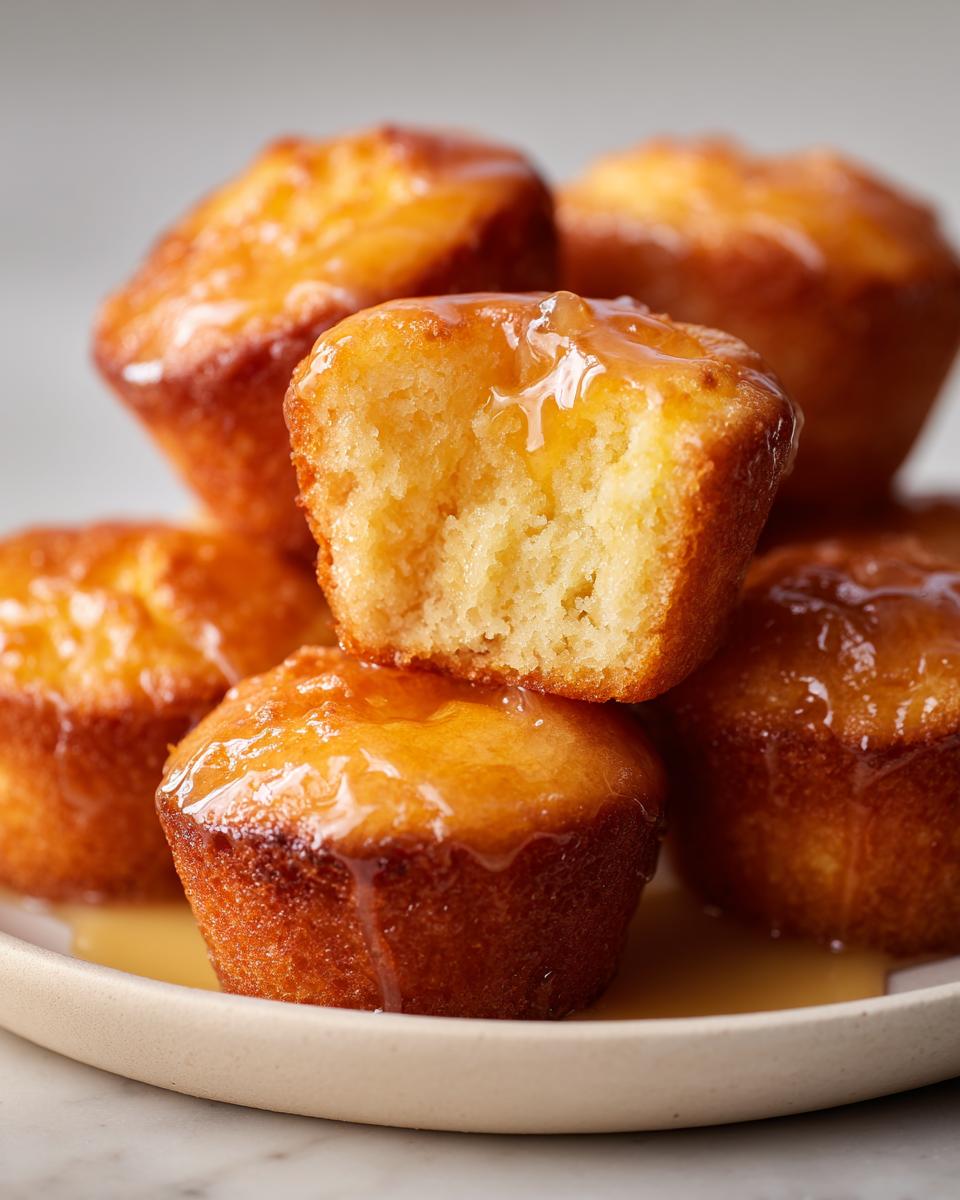
Here at Cooking by Carla, we truly believe that the simplest foods often carry the biggest comfort. My background teaching kids taught me that clear instruction is everything, and that principle shines through in everything I bake. Sometimes, you just need something that’s perfectly sweet, warmly savory, and small enough to eat in one glorious bite! That’s why I’m sharing my favorite treat for game days and weeknight sides alike: these incredible honey butter cornbread poppers. They take our classic, dependable buttermilk cornbread recipe and shrink it down, then coat it in the most irresistible sweet and savory glaze you’ve ever tasted. Trust me, these bite-sized beauties disappear fast!
- Why You Will Love These Honey Butter Cornbread Poppers
- Essential Ingredients for Perfect Honey Butter Cornbread Poppers
- Step-by-Step Instructions for Making Honey Butter Cornbread Poppers
- Tips for Success with Your Honey Butter Cornbread Poppers Recipe
- Variations for Your Easy Cornbread Poppers
- Storage and Reheating: Keeping Honey Butter Cornbread Poppers Fresh
- Serving Suggestions for Party Ready Cornbread
- Frequently Asked Questions About Honey Butter Cornbread Recipe
- Nutritional Snapshot of Honey Butter Cornbread Poppers
Why You Will Love These Honey Butter Cornbread Poppers
When I developed this recipe, I wanted a snack that was as easy for me to pull together on a busy Tuesday as it was impressive for a fall gathering. These little poppers tick every single box. Forget messy slices of cornbread; these are tailor-made for easy serving. Here’s exactly why they’ve earned a permanent spot in my recipe rotation:
- They Bake Up So Fast: Because we use a 24-cup mini muffin tin, the total bake time is ridiculously short—maybe 12 minutes! It’s the ultimate quick side dish or last-minute addition to a potluck.
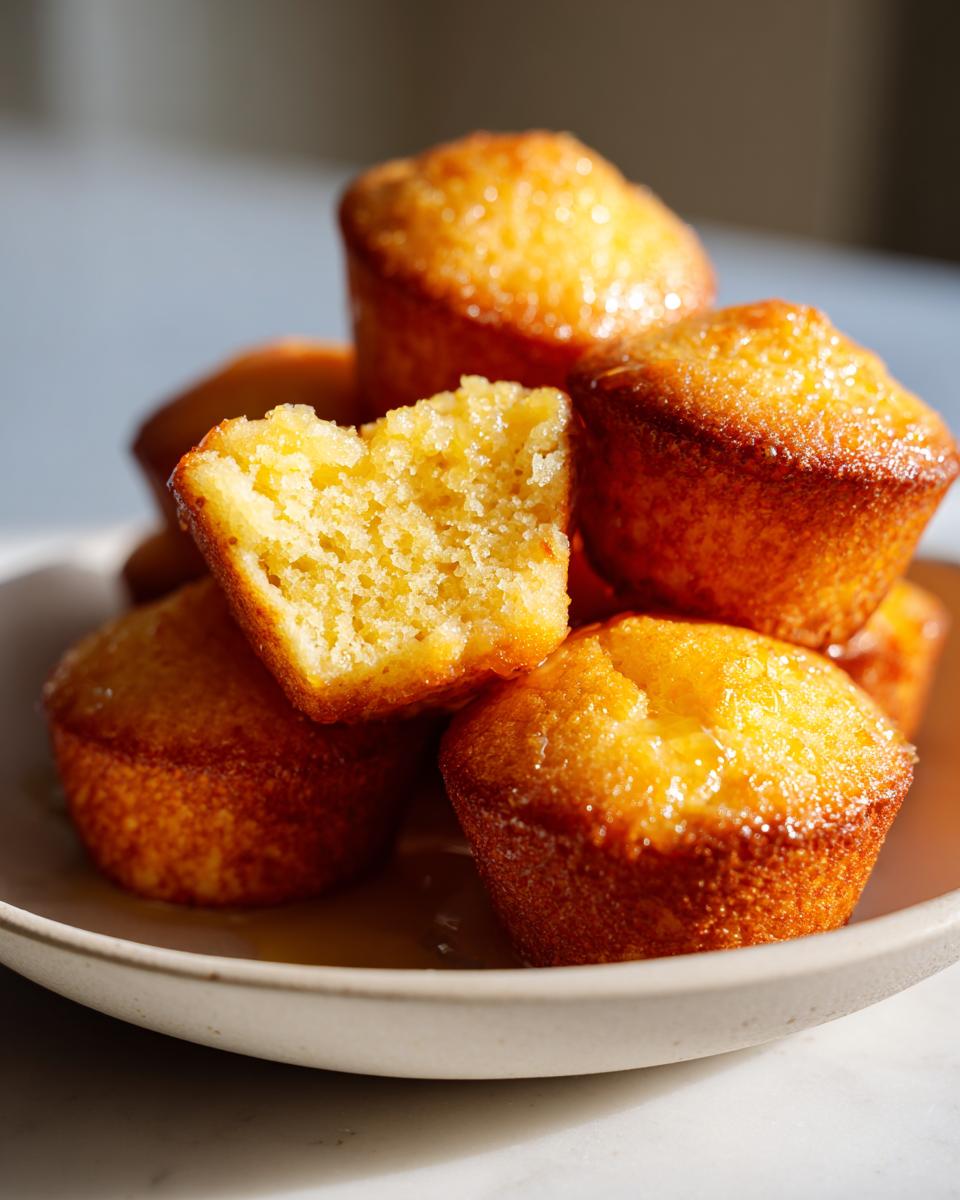
- The Ultimate Sweet Texture: That buttermilk, honey, and butter combination in the batter guarantees a moist, tender interior. They shouldn’t be dense like a cake; they should have that classic, slightly crumbly cornbread feel, just tiny.
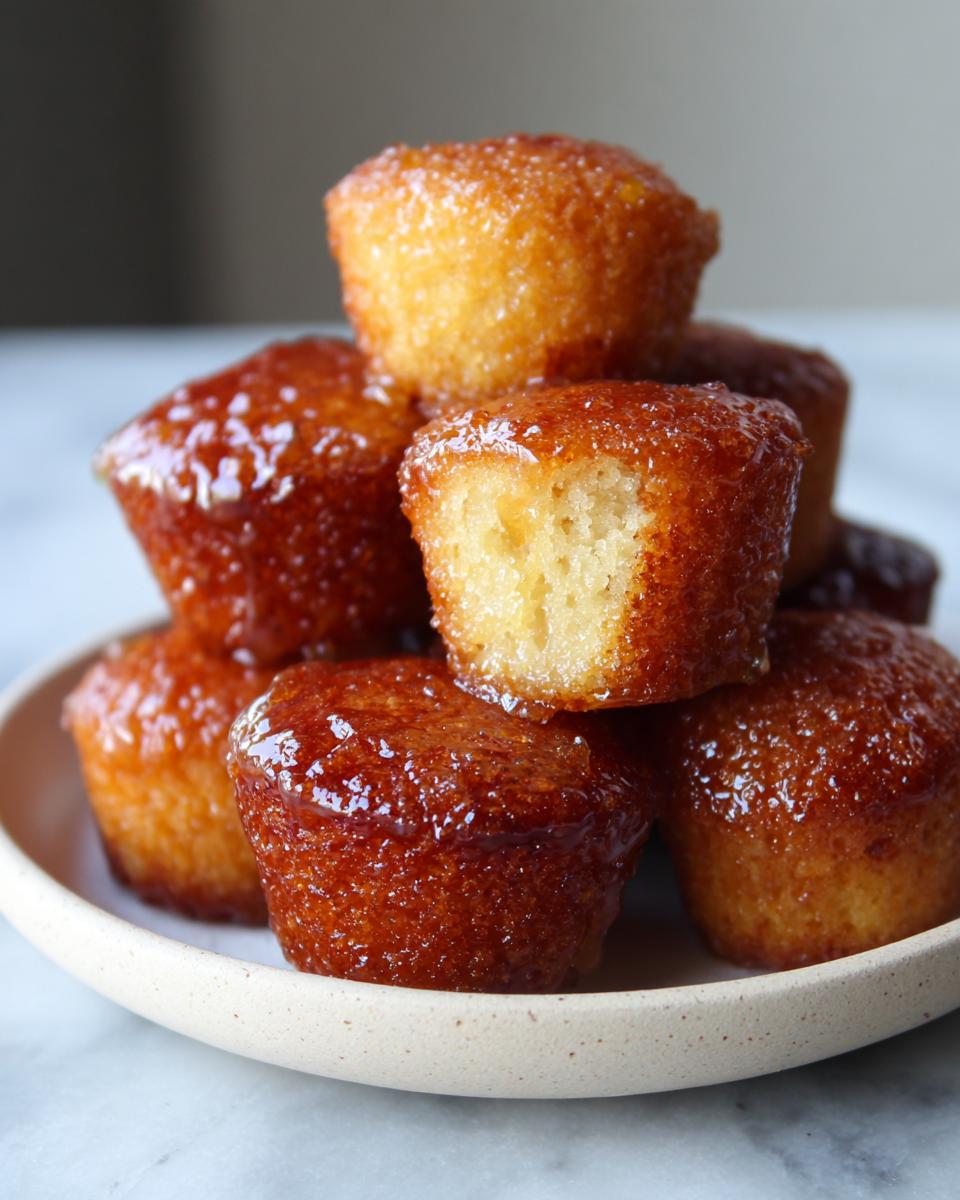
- That Irresistible Glaze: This is the star! The warm honey butter brushed on top right out of the oven creates a shiny, slightly sticky, sweet and savory crust. It’s what moves these from just cornbread to an appetizer people talk about.
- Perfectly Portion Controlled: Nobody can stop at one! They’re the easiest homemade cornbread appetizers because they are ready to grab and go.
- Versatility is Key: Serve these alongside a big pot of chili, use them as a stuffing bread for Thanksgiving turkey, or put them out on their own for snacking. They fit right in anywhere you need a little Southern-inspired baking.
Essential Ingredients for Perfect Honey Butter Cornbread Poppers
Just like the dependable lessons I taught in the third grade, a good recipe starts with mastering the basics. My philosophy on cooking is that you don’t need a mountain of complicated ingredients to make something wonderful, just the right ones, handled with care. For these honey butter cornbread poppers, the list is short, which means the quality of each one really shines through!
You’ll be mixing your dry goods first, then your wet goods, and the key thing to remember is that we are splitting the butter and the honey—some goes into the popper batter, and the rest is reserved for that glorious final coat.
Dry Ingredients for the Cornbread Base
These are whisked together first to make sure the leavening is evenly distributed. We want these little bites to rise nicely, not sink!
- 1 cup yellow cornmeal
- 1 cup all-purpose flour
- 1/4 cup granulated sugar (This is what gives us that sweet cornbread topping flavor right in the batter!)
- 1 tablespoon baking powder
- 1/2 teaspoon salt
Wet Ingredients and the Split Honey Butter
This is where the flavor and moisture really come into play. Pay close attention to the amounts reserved for the glaze!
- 1 cup buttermilk (If you can, use a good quality buttermilk! It reacts with the baking powder to give you a beautifully tender crumb. If you need a refresher, you can check out my notes on making biscuits using buttermilk.)
- 1/2 cup unsalted butter, melted (This is for the batter, remember!)
- 1 large egg
- 1/4 cup honey (This is also mixed directly into the batter.)
Ingredients for the Glaze (The Best Part!)
Make sure you set these aside before you start mixing so you don’t forget them while the poppers are baking!
- 4 tablespoons unsalted butter (reserved for glaze)
- 3 tablespoons honey (reserved for glaze)
Step-by-Step Instructions for Making Honey Butter Cornbread Poppers
Alright, let’s get baking! Because these are honey butter cornbread poppers, speed is important, but so is precision. I always tell my grandkids that rushing the process too much means you miss the magic. Don’t worry, though; these come together faster than you can set the table for dinner. We’ll walk through the mixing, the quick bake, and that all-important final glaze together.
Preparing the Batter and Pans for Honey Butter Cornbread Poppers
The first steps are all about getting ready! If you’re organized now, you’ll have perfect little poppers later.
- First things first: grab your oven (we need it hot!) and set it to 400 degrees Fahrenheit.
- Next, tackle that mini muffin tin. Don’t skip this greasing step, or your little treats will stick something fierce! I spray mine generously, making sure to get into every cup.
- Grab your biggest bowl. Whisk together all the dry ingredients: the cornmeal, flour, sugar, baking powder, and salt. Give it a good minute to ensure everything is evenly mixed up.
- In a separate, medium bowl, start combining the wet ingredients. Whisk together your buttermilk, the 1/2 cup of melted butter (but remember, we saved the other 4 tablespoons!), your egg, and the 1/4 cup of honey. Whisk until it’s smooth and happy looking.
- Now for the mixing—and listen closely, because this is key for tender cornbread! Pour the wet mixture right into the bowl of dry ingredients.
- Stir gently! I mean it. Only stir until everything is just combined. If you see a few lumps of flour floating around? Perfect! Overmixing is the fastest way to tough cornbread, and we want tender poppers.
Baking and Glazing Your Sweet Cornbread Bites
Once the batter is mixed, we move fast to get these baked. You’ll want to start your glaze while they are in the oven so everything is ready right when they come out. These little sweet cornbread bites need that warm glaze!
- Carefully spoon your batter mixture into the prepared mini muffin cups. Fill them about two-thirds full. Don’t overfill them, or they’ll dome right over the edge and create a mess!
- Slide them into that 400-degree oven and bake for 10 to 12 minutes. You know they are done when a toothpick inserted into the center comes out clean—no wet batter hanging on! If you’re looking for more tips on baking cornbread in different ways, check out my recipe for oven-baked casserole styles.
- While those are baking, quickly whip up your glaze. In a small saucepan over low heat, melt those remaining 4 tablespoons of butter. Take it off the heat immediately and stir in the final 3 tablespoons of honey until it becomes a beautiful, smooth syrup.
- When the timer goes off, pull the poppers out! Let them rest *in the pan* for about 5 minutes. This helps them firm up just enough so they don’t crumble when you remove them.
- Once they’ve rested a quick five minutes, use a pastry brush—or even the back of a spoon if you don’t have a brush—to coat the tops of every single warm popper generously with that sweet honey butter glaze.
- Finally, carefully lift them out of the tin and serve them right away while they are warm and glossy! They are heavenly straight from the oven.
Tips for Success with Your Honey Butter Cornbread Poppers Recipe
When I developed this recipe, I wanted to make sure it was foolproof. As a former teacher, my goal is always clarity so you walk away with a perfect result every time, whether you’re a seasoned baker or just starting out. These little honey butter cornbread poppers are very forgiving, but there are three little secrets I learned over years of baking that make all the difference between good and *amazing*.
The Buttermilk Factor
You might see that I specified buttermilk, and I really hope you stick with it! Buttermilk isn’t just about the slight tang; it’s magic chemistry. Its acidity interacts beautifully with the baking powder, creating carbon dioxide bubbles that lift the batter. This reaction is what guarantees that tender, slightly soft texture we want in our mini cornbread muffins. If you absolutely must substitute, you can use regular milk with a teaspoon of white vinegar added in—let it sit for five minutes to curdle slightly—but trust me, the commercial kind works best.
Never Overmix the Batter!
This is the number one cause of tough, chewy baked goods, and it’s something I always stress. When you combine the wet and dry ingredients, you are developing the gluten in the flour. We want minimal gluten development because this isn’t a loaf of bread; it’s a tender side dish! Stir only until you no longer see big streaks of dry flour. If you see little pockets of dry mix still hiding, that’s okay! They’ll merge during baking, and you’ll avoid that chewy texture we want to skip. This is just as important here as it is when I make my famous fluffy buttermilk pancakes.
Glaze While Warm for Maximum Absorption
The honey butter glaze is simple, but the timing is everything. If you wait until the poppers are totally cool before glazing, the butter mixture will just sit on top, and you’ll end up with a sticky mess on the outside rather than a deeply flavored, slightly soaked top layer. You want to brush that glaze on while the poppers are still warm—about five minutes after they leave the oven. The warmth helps the honey melt slightly and soak down into the little nooks and crannies of the sweet cornbread topping.
Variations for Your Easy Cornbread Poppers
These easy cornbread poppers are built on a fantastic, sturdy base, which means they absolutely love additions! I get asked all the time if they can handle a little something extra, and the answer is a resounding yes. While I stand by the classic sweet and savory preparation, sometimes you want to customize for the crowd or just for fun. Feel free to play around—that’s what home cooking is all about!
I always recommend making any additions right when you are mixing the wet and dry ingredients, just before combining them fully. This keeps the mixing time down, which is essential for tender results.
Adding Savory Twists: Cheese and Spice
If you’re serving these alongside something like barbecue or chili, sometimes a savory counterpoint is exactly what you need. Throwing in some cheese doesn’t compete with that honey butter glaze at all; it just makes the experience richer and more complex.
- Shredded Cheese: Fold in about 1/2 cup of sharp cheddar or a Monterey Jack blend right at the end. It melts beautifully into the little pockets of the poppers, creating wonderful swirls of salty goodness against the sweetness.
- A Little Heat: For a nice kick, add one finely minced jalapeño pepper (seeds removed, unless you’re brave!). I find that the cheese and the jalapeño together are fantastic, much like in my recipe for moist Mexican cornbread.
- Herbs are Your Friend: A tablespoon of finely chopped fresh chives or a teaspoon of dried smoked paprika added to the dry mix gives these little nuggets a real depth of flavor.
Sweet Swaps and Flavor Boosters
If you want to lean into the sweetness or change up the depth of the flavor, you have a few easy options that work well with the existing honey in the batter and glaze:
- Different Sweeteners: If you’re out of honey, you can use maple syrup instead! Just substitute 1:1 in both the batter and the glaze. Maple compliments the cornmeal so wonderfully, giving it a richer, almost autumnal flavor.
- A Citrus Zest Pop: Before you combine your wet ingredients, zest one small orange directly into the buttermilk/egg mixture. The bright citrus cuts through the richness of the butter and makes these taste incredibly fresh and vibrant.
- Vanilla Extract: I didn’t include it in the main recipe because the honey stands on its own, but adding one teaspoon of good quality vanilla extract to the wet ingredients deepens the overall baked flavor profile beautifully.
Remember, no matter what you add, keep your mixing time minimal. These easy cornbread poppers deliver big flavor with less fuss!
Storage and Reheating: Keeping Honey Butter Cornbread Poppers Fresh
Making a big batch of these honey butter cornbread poppers is always my first instinct because, honestly, who wants to stop eating them? But if you do manage to have leftovers—or if you wisely baked a double batch for future snacking—storage is key. We need to make sure that tender texture and that gorgeous honey glaze stay just right for later. I learned pretty quickly that these little bites don’t fare well if left uncovered on the counter. The air just steals the moisture right out of them!
Since these are full of butter and honey, they stay fresh longer than plain cornbread, but proper storage is still necessary.
Short-Term Storage (1-3 Days)
If you plan to enjoy the rest within a couple of days, you actually have two choices, depending on how warm your kitchen is. Since these are sweet cornbread bites, the sugar helps preserve them a bit.
- At Room Temperature: If your kitchen is cool, you can keep them in an airtight container on the counter for up to two days. Make sure the container is truly sealed!
- In the Refrigerator: If it’s warm, or if you want them to last a full three days, pop them into the fridge inside that sealed container. I suggest letting them sit on the counter for about 15 minutes before serving cold, just to take the chill off.
Freezing for Later Snacking
This recipe freezes like a dream! I often make a double batch just to freeze half for a busy week when I don’t have time to bake. As the notes mentioned, these freeze beautifully, sometimes even tasting better a little while later. If you follow the steps for freezing, you can enjoy these mini cornbread muffins weeks from now.
- Cool Completely: This is critical! You *must* let the poppers cool down completely after baking and glazing before attempting to freeze them. If you wrap them warm, you’ll end up with a soggy, sweaty mess.
- Flash Freeze: Lay the cooled poppers in a single layer on a baking sheet lined with parchment paper. Pop that sheet into the freezer for about an hour until they are completely solid. This prevents them from sticking together in one big frozen clump!
- Seal Tight: Once they are individually hard, transfer them to a heavy-duty freezer bag or an airtight, freezer-safe container. Squeeze out as much air as you can before sealing. They should last perfectly for up to one month.
Reheating to Restore That Fresh-Baked Glory
When you’re ready to eat them, you want that warm, soft interior and that slightly sweet, gooey glaze back! Reheating is easy, but skip the microwave if you can, as it sometimes makes things chewy.
- Oven or Toaster Oven (Best Method): Preheat your oven to 350 degrees Fahrenheit. Spread the frozen or refrigerated poppers on a baking sheet. Bake for about 5 to 8 minutes. They will warm all the way through, and the glaze will soften up beautifully again.
- Microwave (Quickest Method): If you need them instantly, microwave them in short bursts of 15 seconds on a paper towel. Be careful not to overheat, or they might get tough quickly!
Enjoying these later is almost as fun as making them fresh because you didn’t have to do much work to get that comforting flavor!
Serving Suggestions for Party Ready Cornbread
Honestly, if you’re making these honey butter cornbread poppers, you might as well make a double batch, because people won’t stop taking them! They are truly the perfect little grab-and-go item, which is why I classify them as ultimate party ready cornbread. There’s no fussing with slicing or serving utensils; they just disappear off the platter.
I remember setting these out at my grandson’s high school graduation party last summer. I had a big bowl of pulled pork sliders, a huge pot of my slow cooker chili, and these little poppers right in the middle. People kept commenting that they couldn’t choose between grabbing a messy napkin for the pork or just happily popping one of these glorious little golden bites into their mouths instead! They bridge the gap between sweet baked good and savory side dish perfectly.
If you’re trying to build a full menu around them, here are the ways I find they shine the brightest:
Pairing with Savory Main Dishes
When I think about traditional Southern inspired baking, I think of balancing big, bold flavors with a little bit of sweet comfort. These poppers cut through richness beautifully.
- BBQ Gold: Serve them right alongside pulled pork, smoked brisket, or my favorite sticky BBQ chicken wings. The honey glaze works magic when dipped (or just lightly smeared) into extra BBQ sauce.
- Chili Night Helper: Forget crackers! Little bowls of chili or hearty beef stew are 100% better with these warm cornbread bites floating on top or served alongside for dipping. This is one of my favorite easy appetizer setups for a cool evening.
- Soup Companion: They are wonderful with creamy winter soups, especially tomato or squash soup, offering that necessary crunch and sweetness.
Serving as a Standalone Snack or Dessert
Sometimes, these don’t even make it to the main meal because they disappear so quickly as guests arrive! They are sweet enough to stand in for a light dessert.
- Simple Platter: Arrange them on a tiered tray or a pretty wooden board. You can keep a tiny dish of extra honey butter on the side for people who want to double down on the glaze.
- Fruit Dip Alternative: If you’re serving fruit or cheese, these make a great starchy component. They are less heavy than crackers but offer better texture alongside soft cheeses.
No matter how you serve them, remember that they are best warmed up slightly before serving the crowd, just to wake up that honey butter a little bit!
Frequently Asked Questions About Honey Butter Cornbread Recipe
It’s wonderful seeing how many of you are excited to try making these honey butter cornbread poppers! Baking shouldn’t be confusing, and if you have a question, chances are someone else does too. As a former teacher, I love tackling these common sticking points so you can walk away with confidence and a perfectly tiny, sweet cornbread treat. Here are a few of the questions I get most often about this buttermilk cornbread recipe base.
Can I use regular milk instead of buttermilk?
Oh, that’s the most common substitution question I get! Technically, yes, you absolutely can use regular milk if you’re in a pinch, but I strongly advise against it for the best results. Buttermilk is what gives these poppers their signature moistness and beautiful rise because of its acidity reacting with the baking powder. If you must use regular milk, you need to make your own substitute. Just take one cup of regular milk and stir in one tablespoon of white vinegar or lemon juice. Let that little mixture sit on the counter for about five minutes until it looks slightly curdled. That mimics what buttermilk does, giving you a much better result than plain milk would for these sweet cornbread bites.
Can I bake these in a regular muffin tin instead of mini tins?
You certainly can! If you don’t have a 24-cup mini muffin tin—which is what makes them poppers—just use a standard 12-cup muffin tin. The batter will fill up the cups a little bit more, so you might get 12 nicer, muffin-sized pieces instead of 24 tiny ones. Because the batter depth is greater in a standard tin, you’ll need to increase your baking time. Instead of 10 to 12 minutes, check them around 18 to 20 minutes. You still want that toothpick to come out clean, but the cooking time just takes a little longer for the heat to reach the center.
How do I prevent my poppers from sticking to the mini muffin tin?
This is crucial when making mini cornbread muffins because those little cups are so small! If they stick, they tear apart, and it’s just heartbreaking. My method involves two parts: first, preheat your oven *after* you’ve greased the tin. This lets the shortener or oil get into the metal crevices before the heat seals the batter in. Second, don’t just use cooking spray alone. I highly recommend using a little shortening or softened butter, rubbing it thoroughly into all corners of the cups, and then dusting just a tiny bit of flour into each cup, tilting it around until the whole surface is coated, and tapping out the excess. That flour coating acts like a little jacket for your poppers!
Why do you use both sugar and honey in this recipe?
That’s a great question about the balance in this honey butter cornbread recipe! The granulated sugar provides essential structure and helps with browning during the bake, which is very important when you’re only baking for 12 minutes. The honey, on the other hand, is added both to the batter and the glaze for its distinct floral flavor and superb moisture retention. Think of it this way: the sugar does the heavy lifting for texture, and the honey provides that signature warm, sweet flavor that makes these irresistible homemade cornbread appetizers.
Can I make these less sweet if I prefer a savory side?
I understand that sometimes you want something that leans more toward a savory Southern classic rather than a sweet Southern treat. You can definitely tone down the sweetness! For the batter, reduce the granulated sugar from 1/4 cup down to just 1 tablespoon. Then, for the glaze, skip the honey entirely and just use the 4 tablespoons of melted butter mixed with maybe a pinch of salt and a tiny dash of garlic powder. That warm, savory butter glaze is still absolutely wonderful and makes for a fantastic savory counterpoint to spicy dishes. For more ideas on mastering that buttermilk flavor profile, take a look at my dedicated buttermilk cornbread recipe guide.
Nutritional Snapshot of Honey Butter Cornbread Poppers
As someone who cooked for young, growing minds for three decades, portion control and knowing what’s on the plate matter a great deal to me. While my mission is always comfort and flavor over counting every tiny speck, I know many of you appreciate having an idea of what you’re enjoying! This quick recipe for honey butter cornbread poppers is made using the quantities listed above, yielding 24 little bites.
Please remember that these numbers are always estimates. They can swing a little bit based on the exact size of your egg, the brand of butter you use, and how heavily you brush on that delicious honey glaze! For instance, if you decide to add cheese (which I highly recommend sometimes!), these figures will definitely change. But for the classic, straightforward preparation, here is what you can generally expect per popper:
- Serving Size: 1 popper
- Calories: 120
- Fat: 7g
- Saturated Fat: 4g
- Trans Fat: 0g
- Cholesterol: 25mg
- Sodium: 150mg
- Carbohydrates: 13g
- Fiber: 0g
- Protein: 2g
- Sugar: 7g
It’s a lovely balance, isn’t it? You get a good amount of energy from the carbs and a touch of sweetness, making them perfect for a side dish that satisfies everyone. Enjoy every little bite of these sweet cornbread bites!
PrintHoney Butter Cornbread Poppers (Mini Muffins)
Make these easy, bite-sized cornbread poppers baked in a mini muffin tin and finished with a sweet honey butter glaze. They are perfect for appetizers or a comforting side dish.
- Prep Time: 15 min
- Cook Time: 12 min
- Total Time: 27 min
- Yield: 24 poppers 1x
- Category: Side Dish
- Method: Baking
- Cuisine: American
- Diet: Vegetarian
Ingredients
- 1 cup yellow cornmeal
- 1 cup all-purpose flour
- 1/4 cup granulated sugar
- 1 tablespoon baking powder
- 1/2 teaspoon salt
- 1 cup buttermilk
- 1/2 cup unsalted butter, melted, plus 4 tablespoons for glaze
- 1 large egg
- 1/4 cup honey, plus 3 tablespoons for glaze
Instructions
- Preheat your oven to 400 degrees Fahrenheit. Grease a 24-cup mini muffin tin well.
- In a large bowl, whisk together the cornmeal, flour, sugar, baking powder, and salt.
- In a separate medium bowl, whisk together the buttermilk, 1/2 cup melted butter, egg, and 1/4 cup honey until combined.
- Pour the wet ingredients into the dry ingredients. Stir gently until just combined. Do not overmix; a few lumps are fine.
- Spoon the batter into the prepared mini muffin cups, filling each about two-thirds full.
- Bake for 10 to 12 minutes, or until a toothpick inserted into the center comes out clean.
- While the poppers bake, prepare the glaze. In a small saucepan over low heat, melt the remaining 4 tablespoons of butter. Remove from heat and stir in the remaining 3 tablespoons of honey. Mix until smooth.
- Remove the cornbread poppers from the oven and let them cool in the pan for 5 minutes.
- While still warm, brush the tops of each popper generously with the honey butter glaze.
- Remove the poppers from the tin and serve warm.
Notes
- For a richer flavor, substitute regular milk for buttermilk if needed, but the texture will be slightly different.
- You can use this recipe to make a standard 9×9 inch pan of cornbread; increase the baking time to 20-25 minutes.
- These sweet cornbread bites freeze well after cooling completely. Store them in an airtight container for up to one month.
Nutrition
- Serving Size: 1 popper
- Calories: 120
- Sugar: 7
- Sodium: 150
- Fat: 7
- Saturated Fat: 4
- Unsaturated Fat: 3
- Trans Fat: 0
- Carbohydrates: 13
- Fiber: 0
- Protein: 2
- Cholesterol: 25