
If you ask me what the definition of true comfort is, I’ll tell you it’s a steaming bowl of potatoes. But we aren’t talking about just any potatoes—we are talking about the **best garlic mashed potatoes** you’ll ever make! My goal with this recipe is achieving that unbelievably silky smooth texture, and the secret weapon? Roasting that garlic until it’s sweet and mellow. Trust me, that step is the difference between good and divine. As a grandmother who spent thirty years teaching kids, I know that clear, dependable recipes are key, and this one is foolproof for every holiday feast or cozy weeknight dinner. You can read more about my teaching background and how I approach recipe development over on my About page!
- Why This Recipe Makes the Best garlic mashed potatoes (Your Ultimate Potato Recipe)
- Ingredients for Creamy Roasted garlic mashed potatoes
- How to Prepare Your garlic mashed potatoes: Step-by-Step Instructions
- Tips for Success with Buttery Potato Sides
- Serving Suggestions for your garlic mashed potatoes
- Storage & Reheating Instructions for garlic mashed potatoes
- Frequently Asked Questions about garlic mashed potatoes
- Estimated Nutritional Data for garlic mashed potatoes
- Share Your Comfort Food Potatoes Experience
Why This Recipe Makes the Best garlic mashed potatoes (Your Ultimate Potato Recipe)
I stand by this—this is truly my **ultimate potato recipe**, and I’ve got the creamy texture to prove it! The biggest game-changer here is roasting the garlic first. When you roast it, that harsh bite goes away entirely, leaving behind this deep, sweet, nutty flavor that just sings in the mash. You won’t need much extra seasoning because the garlic oil coats everything beautifully. If you’re tired of grainy or runny potatoes, this method delivers **silky smooth potatoes** every single time, especially when you use the right tubers.
Achieving Silky Smooth Potatoes with Roasted Garlic Flavor
The flavor payoff alone makes roasting the garlic worth the effort. Raw garlic in mashed potatoes? Forget it! It’s too harsh and often too sharp, no matter how finely you chop it. When it roasts, it practically melts, and that soft pulp, when mixed with the butter and cream, creates something truly special. And listen, I highly, highly recommend using Yukon Gold potatoes for this batch. They have a natural, buttery flavor that just loves the roasted garlic, helping you reach that perfect smooth finish faster.
Easy Holiday Sides and Weeknight Side Dishes
Don’t let the roasting scare you off thinking this is only for Thanksgiving. The oven does 90% of the work during that 40-minute roast time! That means while the garlic is turning golden and soft, you can prep your main course or just put your feet up for a minute. That’s why I call this an **easy holiday side** that’s also perfect for a busy Tuesday night. This decadent recipe proves **comfort food potatoes** can be both impressive and ridiculously easy. If you love making potatoes for big dinners, you’ll also want to check out my recipe for Scalloped Potatoes and Ham Casserole when you have leftovers!
Ingredients for Creamy Roasted garlic mashed potatoes
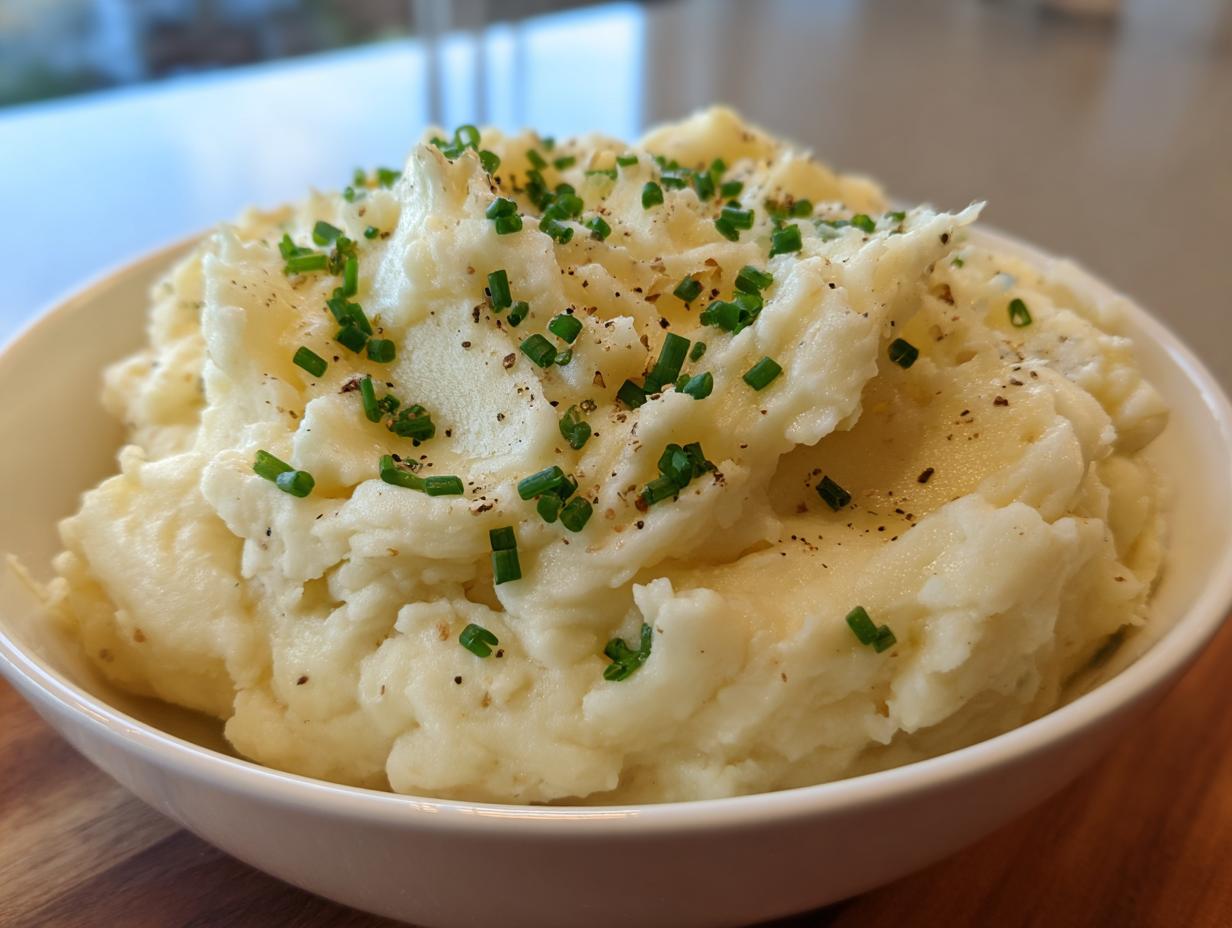
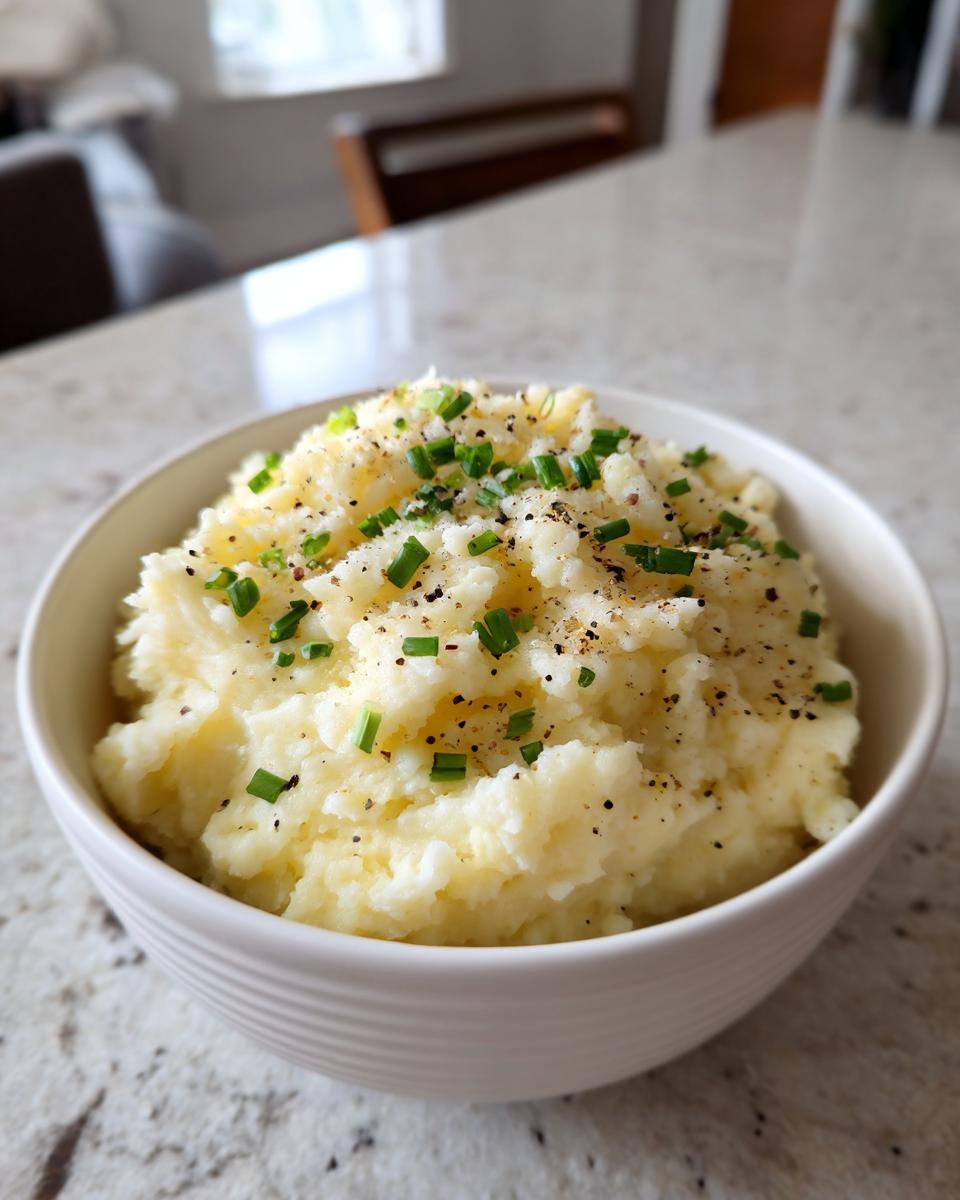
Okay, let’s talk about what you need to gather for these incredible **garlic mashed potatoes**. It’s all about quality here, but don’t panic—the list isn’t huge! You’ll need 3 lbs of Yukon Gold potatoes, peeled and quartered, and two whole heads of garlic for roasting. Don’t forget about 4 tablespoons of olive oil for the roasting process, and your seasonings: 1 teaspoon salt for the roasting stage, and 1 teaspoon salt plus 1/2 teaspoon pepper for the mash. To make them outrageously creamy, grab 1 cup of heavy cream, 1/2 cup of whole milk, and 8 tablespoons of unsalted butter, softened. If you want that little pop of freshness, chop up 2 tablespoons of chives for garnish.
Ingredient Notes and Substitutions for garlic mashed potatoes
I can’t stress this enough: please use Yukon Gold potatoes! They’re naturally starchier and have a buttery flavor even before you add butter, which helps us achieve those **silky smooth potatoes** everyone raves about. If you happen to be out of heavy cream—though I really urge you to try it—you can substitute with an equal amount of half-and-half, but you might want to throw an extra tablespoon of butter in there just to keep that rich coating texture we are aiming for. And remember, that butter absolutely must be softened, not melted! If it’s too cold, it won’t cream into the potatoes properly, and you’ll lose that luxurious mouthfeel.
How to Prepare Your garlic mashed potatoes: Step-by-Step Instructions
Alright, here is the best part—turning those lovely ingredients into what I promise will be the **ultimate potato recipe** for your table! Since I used to teach, I lay this out very clearly, step-by-step, so you can focus on enjoying the process. Just remember that timing is everything, especially with the roast! If you love that oven-roasting flavor, you might also want to check out my recipe for Crispy Oven Roasted Breakfast Potatoes!
Roasting the Garlic for Rich Flavor
First things first, we need that mellow, sweet garlic. Preheat your oven to 400°F (200°C). Take those heads of garlic and carefully slice off the top quarter—just enough so you can see the tops of the cloves peeking out. Lay them on a piece of foil, drizzle generously with olive oil, and sprinkle on that first teaspoon of salt. Wrap that foil up loosely, like a little package, and pop it in the oven. They need 40 to 50 minutes, so don’t peek too soon! You’ll know they are done when they are wonderfully soft and golden brown when you carefully unwrap them. Let them cool down just a bit so you don’t burn your fingers!
Boiling and Drying the Potatoes
Now for the potatoes themselves, remember this trick for the best texture: always start your peeled and quartered Yukon Golds in **cold water**. If you drop them into boiling water, the outside cooks way too fast and turns mushy while the inside stays hard. Bring that pot to a rolling boil and cook them for about 15 to 20 minutes until a fork slides in without any struggle. Once they are fork-tender, drain them completely! And here’s a crucial step for non-watery **garlic mashed potatoes**: put the empty pot back on the burner for just one minute on low heat and let the potatoes sit there. That little bit of time lets the surface moisture evaporate.
Creating the Creamy Mashed Potatoes Texture
While that’s happening, take a quick moment to warm up your dairy—that heavy cream and milk—in a little saucepan until it’s steaming but definitely not boiling. This stops your mash from cooling down too fast! Next, squeeze the soft, roasted garlic pulp right onto your warm, drained potatoes. Add your softened butter and start mashing. Once it’s mostly broken down, start pouring in that warm cream/milk mixture slowly, little by little, while you keep stirring and mashing. Stop adding liquid when it looks exactly how you want your **creamy mashed potatoes** to look. Finally, stir in your remaining salt and pepper, give it a good taste—you might need a little more salt—and get ready to serve! You may want to check out my tips for making Creamy Roasted Garlic Soup if you happen to have extra roasted garlic!
Tips for Success with Buttery Potato Sides
We’ve got the flavor nailed down with that amazing roasted garlic, but achieving that legendary smooth texture—that’s where the little details really matter. I pulled these final secrets right out of the little notes section on the original recipe card. If you want these **buttery potato sides** to feel like they came straight from a fancy restaurant, you need to pay attention to the final mashing technique.
Using a Potato Ricer for the Silkiest Finish
My grandma always used a hand masher, and honestly, it gives a great texture, but if you really want those **gourmet mashed potatoes** that melt in your mouth—the kind that look perfectly uniform—you need a potato ricer. Seriously, this tool is a game-changer! You just load in the cooked potato pieces, squeeze, and out comes this light, fluffy ribbon of potato. It breaks down the starch beautifully without overworking it. Trust me, investing in one will make all your future mashed potato adventures so much easier.
Don’t Skip Seasoning at the Right Time
You’ll notice we add salt two different times: once while roasting the garlic/boiling the potatoes, and again at the end. That initial salt helps season the potato from the inside out as it cooks. But the final seasoning step is vital! Only add the main salt and pepper *after* you have introduced all your liquids—the warmed cream and milk. If you salt them too soon, the potatoes can sometimes tighten up and become dense, and we definitely don’t want that heavy texture! Taste, taste, taste right before serving.
Making Great Sides Ahead of Time
If you are making these for a big spread, like Christmas dinner, you can absolutely make them ahead! Yukon Golds are resilient. Once they are mashed and seasoned, let them cool completely, then store them in an airtight container in the fridge. When you’re ready to serve, reheat them slowly on the stovetop over low heat—and I mean slowly! You must stir in an extra splash of warm milk or cream until they are velvety again. This brings back the moisture you lost during cooling. If you’re looking for another amazing make-ahead side using potatoes, you should definitely bookmark my recipe for Potato Croquettes!

Serving Suggestions for your garlic mashed potatoes
Now that you have the most decadent side dish ready, you must be wondering what this masterpiece should sit next to on the plate! These **garlic mashed potatoes** are so flavorful and rich they upgrade anything you put them next to. They are designed to soak up gravy, which is why they are a wonderful choice for practically any roast.
For your big holiday tables, these are the **perfect side for turkey**, no doubt about it. The creamy texture balances out the dryness of turkey breast beautifully. Honestly, they are just as good with a simple, crispy roast chicken for an elegant weeknight treat. I also highly recommend pairing them with my recipe for Juicy Meatloaf when you want something classic and hearty, or when you’re making a stunning holiday ham.
If you’re serving a pot roast, you simply *must* try them alongside my recipe for Classic Pot Roast so you have plenty of rich beefy drippings to swirl into the mash. Think of these potatoes as the ultimate base layer for any decadent, cozy meal. They really are that versatile!

Storage & Reheating Instructions for garlic mashed potatoes
We’ve all been there—you make a huge batch of **garlic mashed potatoes** for a crowd, and you’re left with an unbelievable amount of leftovers. Don’t you dare throw them out! These creamy beauties store surprisingly well, but you have to handle them right. For the best results, you want to get them into storage quickly.
After they have cooled down *mostly*—we don’t want hot food steaming up the container—transfer those leftovers into a shallow, **airtight container**. This stops them from picking up any funny fridge smells. They should keep nicely for about three to four days in the refrigerator. If you’re planning for the holidays or a big meal prep session, you can even freeze them! Just make sure you chill them thoroughly before placing them in a freezer-safe, airtight package. They keep fresh in the freezer for about a month.
Restoring That Creaminess When Reheating
Reheating is where a lot of people go wrong with **creamy mashed potatoes**, either ending up with paste or watery mush. For the stovetop—which is my preferred method for texture control—you need to go low and slow. Place your refrigerated potatoes in a heavy-bottomed pot over low heat. Now, here’s the magic trick: add a generous splash of **warm milk or heavy cream** before you even start stirring. Stir gently, allowing the residual heat to warm the potatoes through while the added liquid gets absorbed back into the starch. Keep stirring until they are velvety smooth again.
Keeping Them Warm During a Long Holiday Meal
If you’re juggling the oven temperature for the turkey or getting ready for the big dinner announcement, you need a good warming strategy. Once you’ve seasoned and mixed your **buttery potato sides**, transfer them to a slow cooker or a double boiler set on the lowest warm setting. If you use a slow cooker, make sure to give them a gentle stir every 15 minutes or so to prevent the bottom from scorching or turning gummy. The residual heat keeps them perfectly hot and ready for serving without cooking them any further, ensuring they keep that light, **fluffy potatoes** texture right up until dinner is served!
Frequently Asked Questions about garlic mashed potatoes
When you get this close to perfection, questions always pop up! It’s my job to make sure that when you finally bring these **garlic mashed potatoes** to the table, they are exactly what you dreamed of—silky, buttery, and packed with that mellow garlic goodness. Here are the things I get asked most often about texture, timing, and flavor intensity.
Can I make these garlic mashed potatoes ahead of time?
Yes, you absolutely can, and I highly recommend it if you have a busy holiday schedule! You can roast your garlic a day ahead; just keep the pulp covered tightly in the fridge. For the potatoes themselves, the best method is to mash everything together *before* you add the final splash of warm cream and milk. Once cooled, keep the mash sealed tight in the refrigerator. When it comes time to serve, gently reheat the potatoes on the stove with an extra splash of warm milk or cream stirred in over low heat until they are creamy again. This keeps them from getting dense!
How do I make my garlic mashed potatoes fluffier?
This is all about controlling moisture and mixing! To help achieve those light, **fluffy potatoes**, the key is to let the boiled potatoes steam dry in the empty hot pot for that full minute after draining—don’t skip that step! Excess water turns starch gluey, which kills volume. Also, once you start adding the dairy, be gentle. If you beat them vigorously for too long, you break down the starch cells too much, and they turn gummy instead of fluffy. Mash until *just* smooth and stop!
What if I want a stronger garlic flavor in my garlic mashed potatoes?
I love that you are looking to double down on that flavor! If the roasted flavor isn’t quite hitting the mark for you, here are two easy fixes. First, you can simply roast an extra head of garlic and squeeze that pulp right in alongside the first batch—the roasting will keep it sweet. Second, if you happen to have any garlic-infused olive oil hanging around, drizzle a teaspoon or two in right at the very end, just before you serve. That concentrated flavor will really boost the roast notes without making the texture weird. If you want to try something totally different after mastering this, check out my recipe for Easy Homemade Chocolate Pudding!
Estimated Nutritional Data for garlic mashed potatoes
Now, these **garlic mashed potatoes** are pure comfort, and let’s be honest, comfort food means we are loading up on butter and cream, which is totally fine sometimes! Remember, these numbers are just estimates based on using the exact ingredients listed, especially that butter and heavy cream. For a single serving, you’re looking at roughly 380 calories. We’ve got about 26 grams of fat (don’t forget that lovely buttery coating!), 33 grams of carbohydrates, and 6 grams of protein in each helping. This is truly a decadent side dish, but one totally worth the indulgence for your next big meal or cozy night in!
Share Your Comfort Food Potatoes Experience
Well, that’s it! We’ve gone from raw garlic to perfect, **silky smooth potatoes** infused with that wonderful mellow, roasted flavor. I sincerely hope you found this recipe straightforward and that your kitchen smells absolutely divine right now. Carla’s philosophy is all about making delicious, memorable meals, and nothing says memorable like a batch of phenomenal **garlic mashed potatoes**!
Now that you’ve tried them—whether they were alongside a giant roast turkey or just because you needed a heavy dose of **comfort food potatoes** on a Tuesday night—I would absolutely love to hear about it! Please take a moment and click over to leave your rating; five stars are always appreciated, of course! I want to know which meal these buttery sides accompanied.
Tell me in the comments below: Did you use Yukon Golds, and how did you like the roasted garlic flavor? Did you add chives, or maybe a little swirl of extra butter for good measure? Your feedback helps me make these recipes even better for the next person who needs the **ultimate potato recipe**!
If you enjoyed this, don’t forget to share this post with your friends and family—especially those who always ask you how you get your mashed potatoes to be so creamy! It helps my little community grow, and maybe they’ll share their own stories too. If you happen to need a luscious topping for these bad boys next time, you should totally check out my recipe for Easy Creamy Garlic Sauce!
Print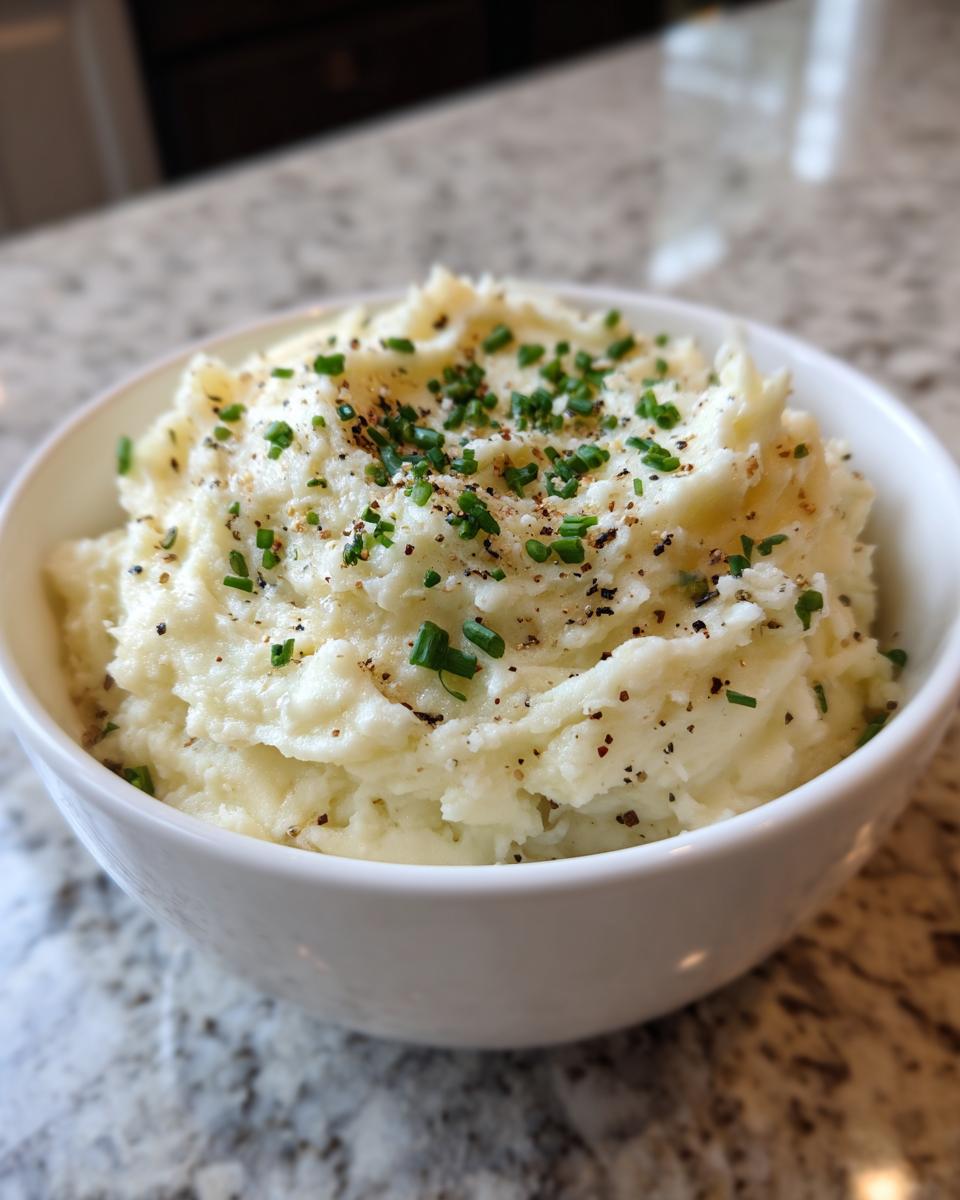
Creamy Roasted Garlic Mashed Potatoes

Make silky smooth, buttery mashed potatoes infused with the mellow flavor of roasted garlic. This recipe yields the ultimate comfort food side dish, perfect for weeknight dinners or holiday feasts.
- Prep Time: 20 min
- Cook Time: 55 min
- Total Time: 75 min
- Yield: 6 servings 1x
- Category: Side Dish
- Method: Boiling and Roasting
- Cuisine: American
- Diet: Vegetarian
Ingredients
- 3 lbs Yukon Gold potatoes, peeled and quartered
- 2 whole heads of garlic
- 4 tablespoons olive oil
- 1 teaspoon salt (for roasting)
- 1 cup heavy cream
- 1/2 cup whole milk
- 8 tablespoons unsalted butter, softened
- 1 teaspoon salt (for mashing)
- 1/2 teaspoon black pepper
- 2 tablespoons fresh chives, chopped (optional garnish)
Instructions
- Preheat your oven to 400°F (200°C). Slice the top quarter off each head of garlic to expose the cloves. Place the heads on a small piece of foil, drizzle with olive oil, and sprinkle with 1 teaspoon of salt. Wrap the foil loosely around the garlic.
- Roast the garlic for 40 to 50 minutes, or until the cloves are soft and golden brown. Let them cool slightly.
- Place the peeled and quartered potatoes in a large pot and cover them with cold, salted water. Bring the water to a boil over high heat. Cook for 15 to 20 minutes, or until the potatoes are fork-tender.
- Drain the potatoes completely. Return them to the hot, empty pot for one minute to let excess moisture evaporate.
- While the potatoes cook, gently squeeze the roasted garlic pulp out of the skins into a small bowl. Mash the pulp with a fork until smooth.
- Warm the heavy cream and milk together in a small saucepan until steaming, but do not boil.
- Add the softened butter and the roasted garlic pulp to the drained potatoes. Begin mashing with a potato masher until mostly smooth.
- Gradually pour the warm cream and milk mixture into the potatoes while continuing to mash until you reach your desired creamy consistency.
- Stir in the remaining 1 teaspoon of salt and the black pepper. Taste and adjust seasoning if needed.
- Serve immediately, garnished with fresh chives if desired.
Notes
- For the silkiest texture, use a potato ricer instead of a masher after the initial rough mash.
- Yukon Gold potatoes provide a naturally buttery flavor and creamy texture that works well for this recipe.
- You can roast the garlic a day ahead of time for faster assembly.
Nutrition
- Serving Size: 1 serving
- Calories: 380
- Sugar: 4
- Sodium: 450
- Fat: 26
- Saturated Fat: 16
- Unsaturated Fat: 10
- Trans Fat: 0.5
- Carbohydrates: 33
- Fiber: 4
- Protein: 6
- Cholesterol: 75