
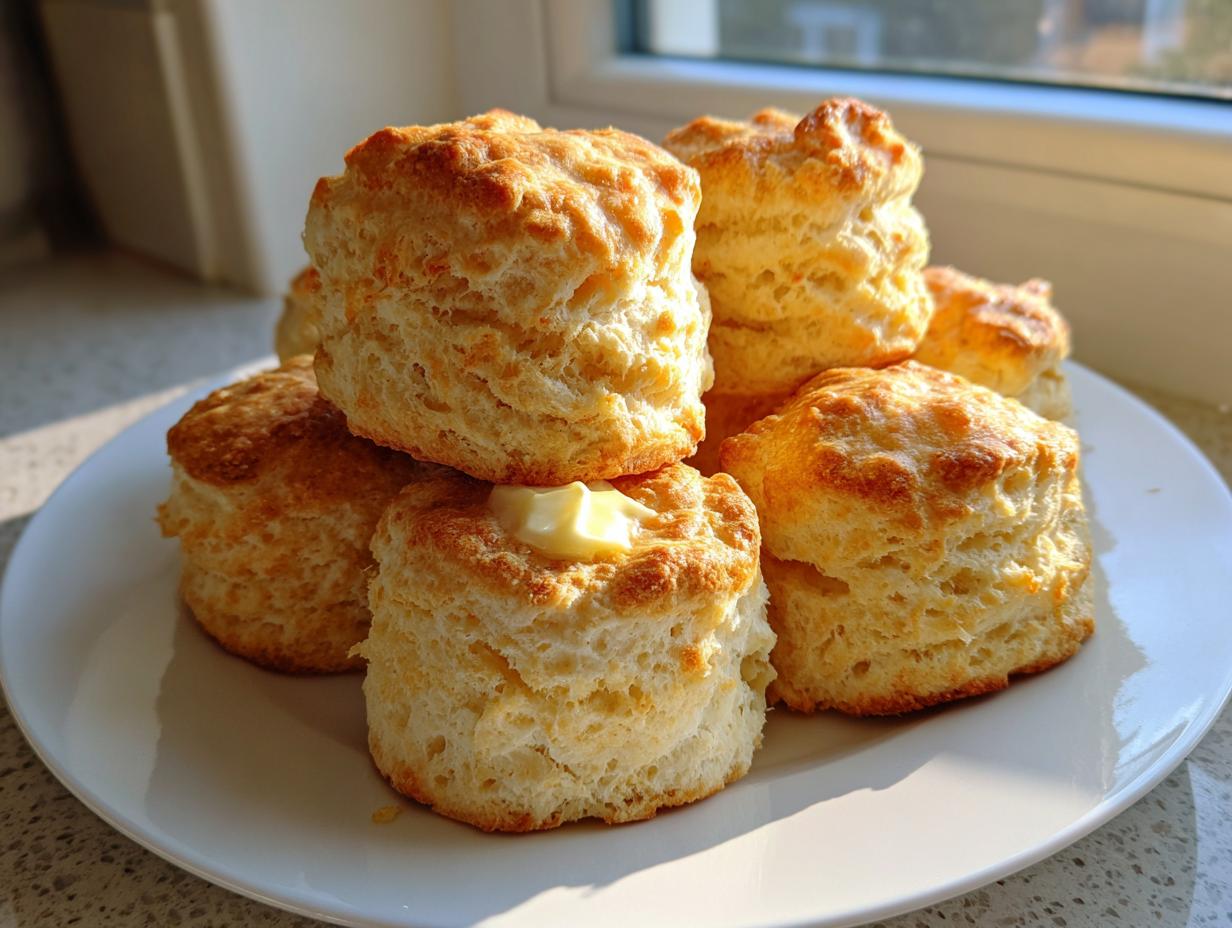
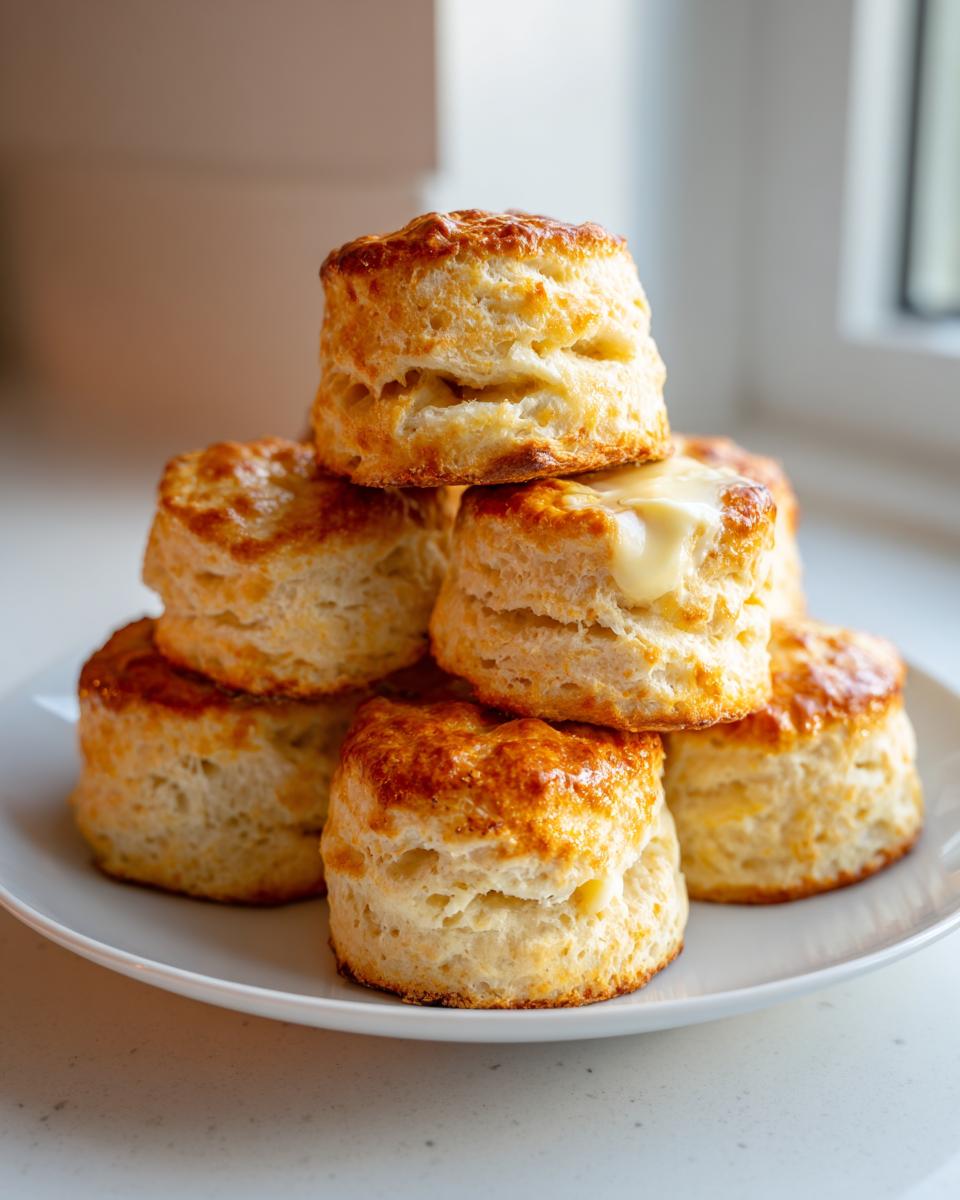
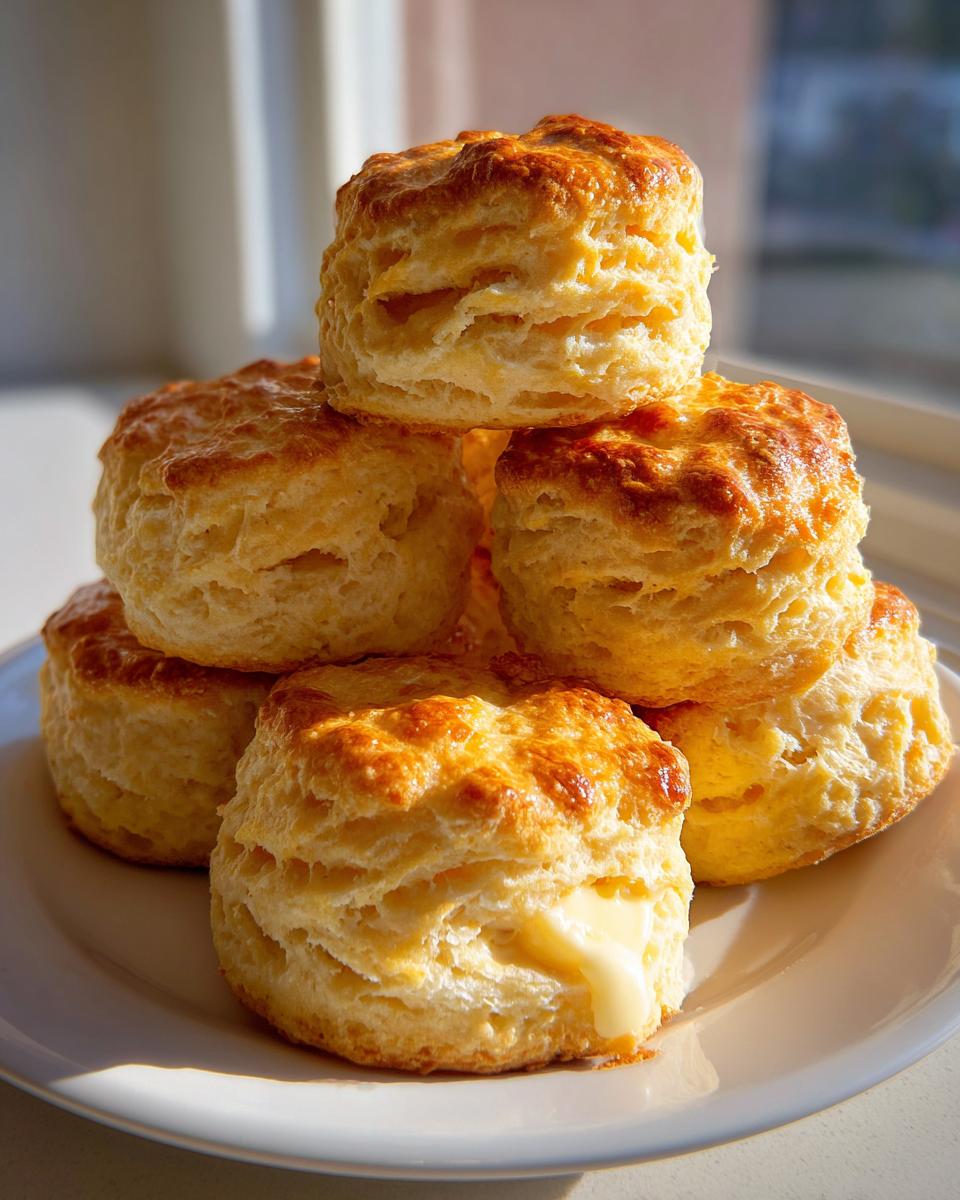
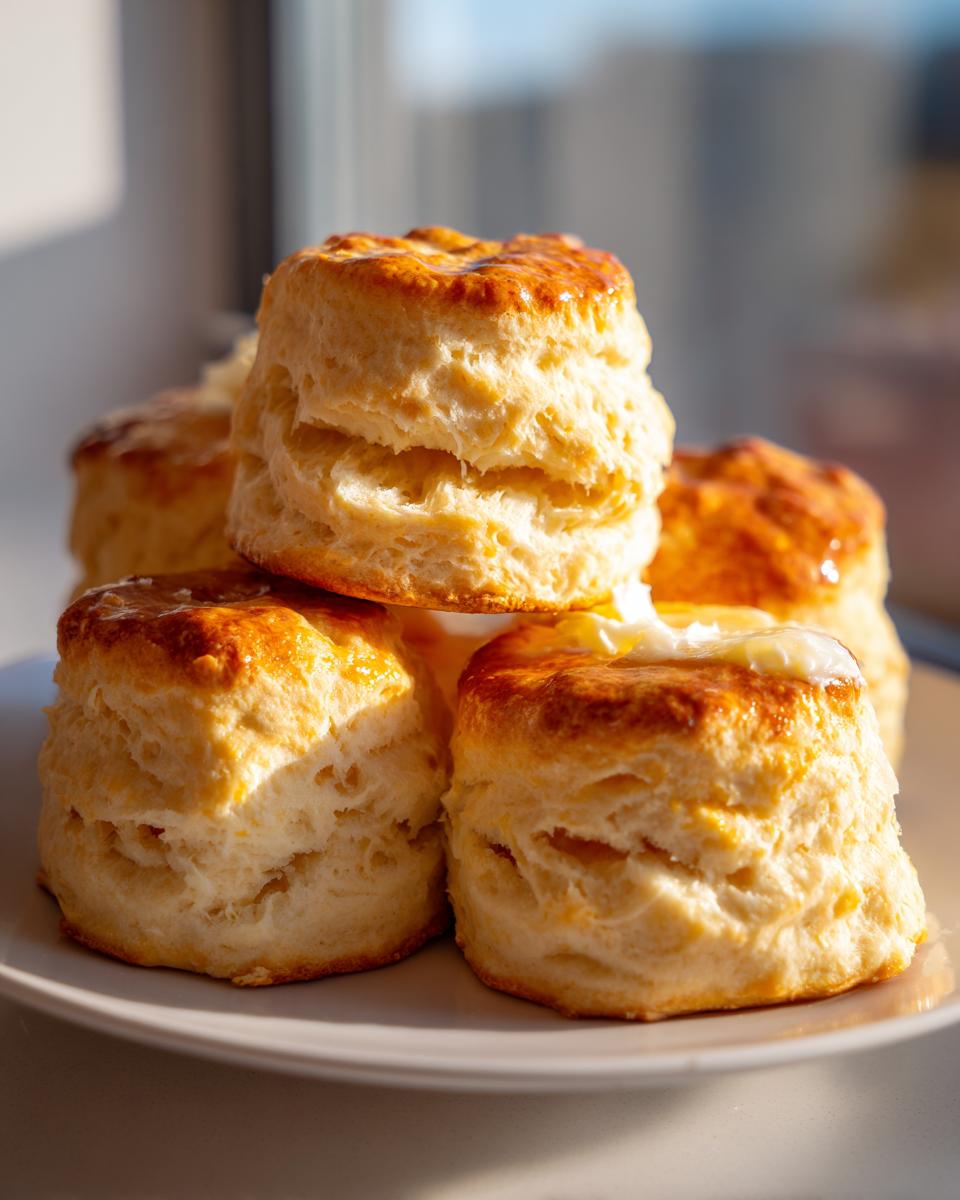
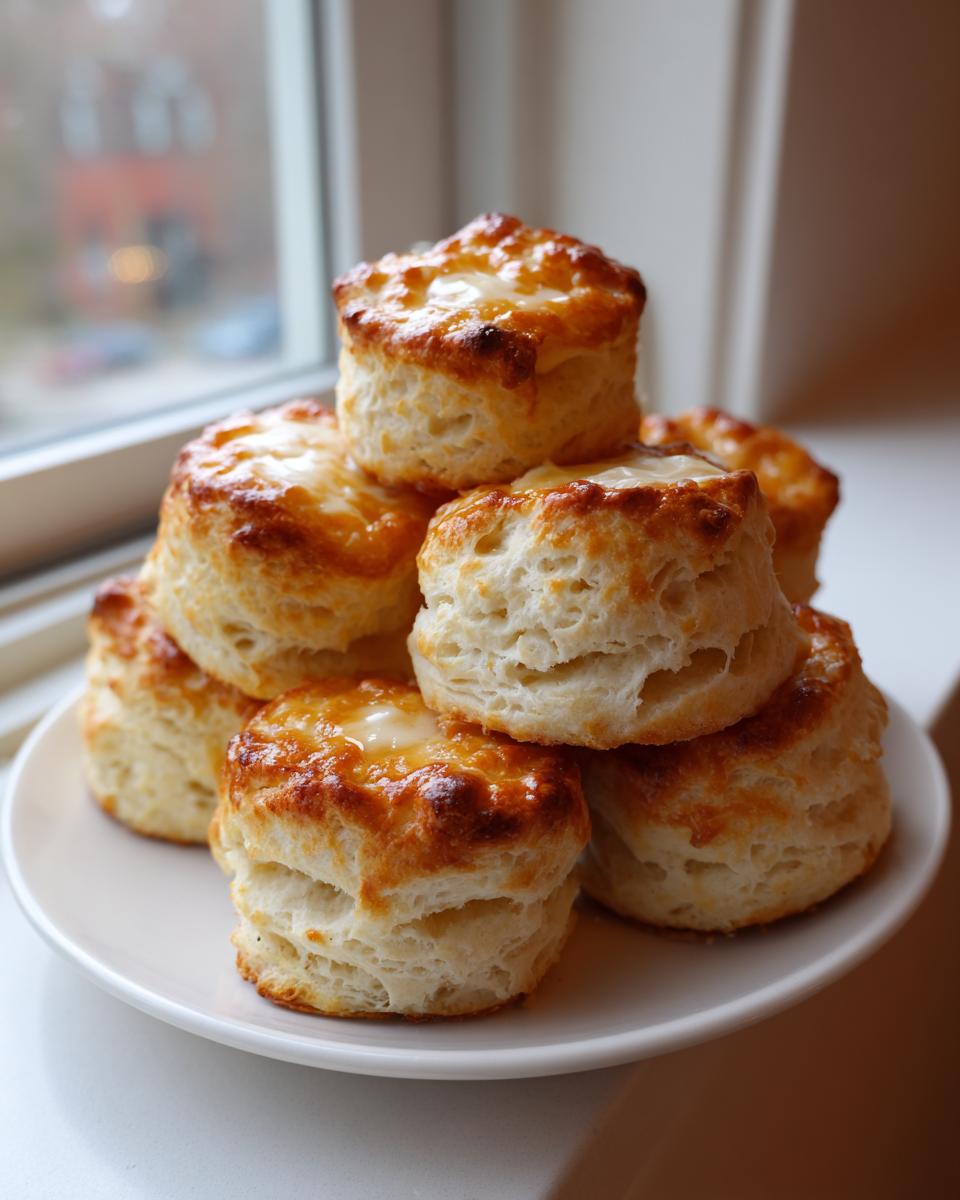
Oh, there is just nothing quite like the smell of something wonderful baking right out of the oven, is there? It fills the entire house with the promise of comfort and joy. If you’ve ever tried making traditional British scones and ended up with something closer to a hockey puck, trust me, you are not alone! That’s why I am so thrilled to share what I consider my absolute best recipe. These buttermilk scones create those famous, tall, flaky layers you usually only find at a charming little bakery. The key, as always in my kitchen, is keeping things simple and reliable, ensuring every batch comes out buttery and wonderfully moist. This recipe is the one I rely on for everything from weekend breakfast to a proper afternoon tea. If you love that tenderness, you should also check out my recipe for fluffy buttermilk biscuits!
- Why Our Buttermilk Scones Recipe Delivers Flaky Perfection
- Gathering Ingredients for Your Buttermilk Scones
- Step-by-Step Instructions for Perfect Scones
- Tips for the Best Blueberry Scones Every Time
- Variations on Classic Tea Scones
- Storage and Reheating Instructions for Your Scones
- Serving Suggestions for Homemade Scones
- Frequently Asked Questions About Making Scones
- Sharing Your Baking Journey with Carla
Why Our Buttermilk Scones Recipe Delivers Flaky Perfection
When people tell me their scones turned out dense or dry, I immediately know where the trouble started. It’s usually in the mixing or the temperature department! My recipe focuses on creating those wonderful air pockets that puff up in the heat, giving you that fantastic height.
- Buttermilk is our secret weapon for keeping things tender in the crumb.
- We treat the dough gently—seriously, no wrestling matches allowed in the kitchen!
- Every ingredient must be ice cold to maximize the lift.
If you want to master this technique, I have a detailed easy scone tutorial that walks through every tricky part.
The Secret to Tall Bakery Style Scones
The real magic behind getting tall bakery style scones happens when you cut them. You must press that biscuit cutter straight down—hard and fast—and then lift it straight up. If you twist that cutter, even just a little bit, you actually seal the edges of your dough layers together. When that edge is sealed, the sides can’t expand upward when they bake. It really frustrates me when people twist them!
Achieving Buttery Homemade Scones Texture
To get those incredible layers that melt in your mouth, the butter has to work hard. We aren’t melting it; we are cutting it into the flour. Those distinct, cold pieces of fat sizzle in the oven, creating little pockets of steam that physically push the layers apart. That’s how you guarantee buttery homemade scones—you need those visible, pea-sized chunks of butter suspended in the flour before you add any liquid at all.
Gathering Ingredients for Your Buttermilk Scones
Let’s make sure we have everything ready before we start mixing. Baking is easiest when you’ve done your prep work ahead of time, especially since this recipe moves pretty quickly once you start combining things. You’ll be amazed at how quickly these come together for a perfect simple breakfast baking treat!
Here’s what you need for 8 gorgeous scones:
- 2 cups all-purpose flour
- 1/4 cup granulated sugar
- 1 tablespoon baking powder (don’t skip this!)
- 1/2 teaspoon salt
- 1/2 cup (one full stick!) of very cold unsalted butter, cut into tiny pieces
- 3/4 cup cold buttermilk—and I mean *cold*!
- 1 large egg, beaten up with 1 tablespoon of milk or cream for the wash on top.
- Optional Treat: 1 cup fresh or frozen blueberries.
Glaze Option for Sweet Scones
If you like a little extra sweetness after they bake, whipping up a quick glaze is simple. You’ll just need about 1 cup of powdered sugar, whisked with maybe 2 tablespoons of milk or fresh lemon juice until it’s smooth enough to drizzle over your cooled scones.
Step-by-Step Instructions for Perfect Scones
Alright, now that you have your arctic-cold ingredients ready, we can move fast! This is the part where you want to be focused, because quick handling is what prevents these from turning into tough hockey pucks. First things first: get that oven up to 400°F (200°C) and line a baking sheet with parchment paper. We don’t want any surprises when they come out beautifully browned!
Next, you’ll combine your dry things—the flour, sugar, baking powder, and salt—in a large bowl. Then comes the butter we talked about. Use a pastry blender or your fingertips; you want that butter to break down into coarse crumbs, definitely leaving some pea-sized shards remaining. If you’re adding those lovely blueberries, toss them in now so they get coated in flour and don’t sink to the bottom later.
Now, for the big moment: the liquid. Pour in the cold buttermilk and mix it with a fork until everything *just* comes together. I mean it—just barely combined! If you see a few dry bits of flour leftover, that is okay! We are making scones, not cake batter. If you want to see this process in action, I talk all about the mixing technique in my easy scone tutorial.
Mixing the Dough: Keeping Scones from Drying Out
This is where we save your texture! Overmixing develops gluten in the flour, and gluten means chewiness, which is the exact opposite of what we want in a tender scone. When you turn the shaggy dough out onto your floured surface, you want to pat it together gently—maybe 3 or 4 quick folds—until it holds a mass. If you work it too much, you are definitely headed down the road to scones without drying out being a distant dream! Remember, shaggy is loving when it comes to these flaky treasures.
Cutting and Baking Your Scones
Pat your dough out to about 3/4 of an inch thick. Remember what I said about the cutter? Press down firmly and straight on your rounds or wedges. You can set them close together on the baking sheet if you like softer, taller sides, or spread them out a bit if you prefer crispier edges all around. Give the tops a light brush of the egg wash—this helps them get that beautiful golden color. Pop them into that hot oven for about 14 to 17 minutes. Keep an eye on them, but honestly, they bake so quickly!
Tips for the Best Blueberry Scones Every Time
Making truly spectacular scones isn’t about luck; it’s about respecting a few core rules, and I want to make sure you have all my secrets for the best blueberry scones! The single most important thing you can do, and I can’t stress this enough, is guaranteeing everything is frigid cold before you start mixing. I mean, I keep my mixing bowl chilling in the freezer for ten minutes before I ever start whisking the dry ingredients.
Remember that butter we cut in? If it starts getting warm, you have to stop and pop the whole bowl back into the fridge for five minutes. Warm butter just melts into the flour instead of creating those steam pockets we need for flaky layers. Also, please heed my warning about twisting the cutter! Pressing straight down gives you that wonderful rise, resulting in those coveted tall scones that look like they came straight from a fancy tea room.
If you’re freezing your blueberries instead of using fresh ones, toss them straight from the freezer into the dry mix. Don’t let them thaw first! If you love exploring blueberry variations, you can find my favorite ways to adapt this recipe over at my guide on the best blueberry scones.
Variations on Classic Tea Scones
While my blueberry version is a staple here, one of the best parts about mastering the base for scones is that you can pivot to almost any flavor you want! This recipe is your perfect starting point for any occasion, whether you need cozy fall flavors or something bright for summer. If you’re hunting for recipes to switch things up, my cranberry orange cookies recipe shows how well citrus works with baked fruit, which translates perfectly here!
If you’re looking for something for a cozy afternoon, you absolutely have to try warming spices. I love adding a teaspoon of cinnamon and a pinch of nutmeg to the dry mix for wonderful cinnamon scones warm. You should definitely check out recipes like the one for Warm Cinnamon Scones for inspiration on spice levels, though our buttermilk base yields a much taller result!
For those looking strictly for a traditional experience, just omit the blueberries altogether to have beautiful, tender classic tea scones ready for jam and cream.
Making Cranberry Orange Scones Glazed
If you’re making my recommendation for cranberry orange scones glazed, you’ll want to slightly adjust that sweet drizzle we made earlier. Once your scones are cool, take that basic powdered sugar glaze and whisk in about a teaspoon of fresh orange zest and maybe a splash of orange juice instead of plain milk. That bright citrus flavor lifts the berries perfectly, making them taste absolutely fresh out of a gourmet bakery!
Storage and Reheating Instructions for Your Scones
I know you’ll want to eat all of these scones right away—and honestly, I encourage it! But if you have any left (which is rare in my house!), storing them correctly is important so they don’t dry out overnight. Keep them in an airtight container at room temperature for up to two days. Don’t put them in the fridge; that’s the quickest way to change the texture!
When you’re ready for a treat later, you must reheat them! Pop the leftover scones on a low baking sheet for just five minutes at 300°F. That gentle warmth brings back the buttery flakiness perfectly. It makes them taste like they just came off the wire rack this morning. For more tips on keeping quick breads wonderfully soft, my note on moist, easy, classic banana bread covers some of the same low-moisture rules!
Serving Suggestions for Homemade Scones
Now that you have these beautiful, tender scones, the only question left is what to serve them with! While a simple smear of good butter is heavenly, these are perfectly suited for setting out for any special occasion. If you’re having an afternoon gathering, you absolutely must offer clotted cream and proper strawberry jam—the traditional route!
For a relaxed Sunday brunch, these make the absolute star of the show! You can set up a little topping bar with lemon curd and perhaps some homemade orange marmalade. If you want to try something a little savory sometime, these also pair wonderfully alongside something bold, like my recipe for Best Homemade Cocktail Sauce if you were to make a cheese scone.
Frequently Asked Questions About Making Scones
I know baking can sometimes bring up a few last-minute head scratches! Don’t worry about a thing, even if you’re new to this, because these scones are very forgiving if you follow our cold-ingredient rule. We’ll tackle the most common questions here so you can feel completely confident before you preheat the oven.
Can I substitute buttermilk in this scones recipe?
You certainly can, but buttermilk is really the key to that soft crumb! If you’re totally out, here’s my quick fix: measure out 3/4 cup of regular milk, and then stir in one tablespoon of white vinegar or fresh lemon juice. Let it sit on the counter for about five minutes until it looks slightly curdled. That acidity is important because it reacts with the baking powder to give our scones their lift, plus it adds flavor!
How do I freeze unbaked scones dough?
This is such a wonderful trick if you want a fresh batch later without mixing everything again! After you cut your rounds but before you brush them with the egg wash, arrange the unbaked scones on a baking sheet. Pop that entire sheet into the freezer for about an hour until they are solid. Then, you can transfer the frozen rounds into a ziploc bag and keep them frozen for up to three months. When you bake them, use the same temperature, but add just 3 to 5 extra minutes to the baking time. It’s a great way to have quick bread recipes ready on demand!
If you have any more deep dives into baking techniques, be sure to check out some of my tips on quick, easy blackened salmon—just kidding! But seriously, if you follow the cold rule, you’ll have the best moist scone recipe outcome every time.
Sharing Your Baking Journey with Carla
Now that you’ve made a batch of these lovely, flaky scones, I would just absolutely love to hear how they turned out for you! Please take a moment to leave a rating right here on the page—it helps other home bakers know this recipe works. And if you decided to try a different flavor, like savory cheese or sweet chocolate chips, tell me all about it in the comments! You can always send me a note directly through my contact page if you prefer.
PrintFlaky Buttermilk Scones: The Best Bakery-Style Recipe

Make tall, flaky, and buttery scones at home that rival your favorite bakery. This straightforward recipe uses buttermilk to keep your scones moist and tender, perfect for breakfast or afternoon tea.
- Prep Time: 15 min
- Cook Time: 17 min
- Total Time: 32 min
- Yield: 8 servings 1x
- Category: Breakfast
- Method: Baking
- Cuisine: American
- Diet: Vegetarian
Ingredients
- 2 cups all-purpose flour
- 1/4 cup granulated sugar
- 1 tablespoon baking powder
- 1/2 teaspoon salt
- 1/2 cup (1 stick) cold unsalted butter, cut into small pieces
- 3/4 cup cold buttermilk
- 1 large egg, beaten (for egg wash)
- 1 tablespoon milk or cream (for egg wash)
- Optional Add-in: 1 cup fresh or frozen blueberries
Instructions
- Preheat your oven to 400°F (200°C). Line a baking sheet with parchment paper.
- In a large bowl, whisk together the flour, sugar, baking powder, and salt.
- Add the cold butter pieces to the dry ingredients. Use a pastry blender or your fingertips to cut the butter into the flour until the mixture resembles coarse crumbs with some pea-sized pieces of butter remaining. This step is key for flaky scones.
- If using blueberries, gently toss them into the flour mixture now.
- Pour the cold buttermilk into the flour and butter mixture. Use a fork to mix until just combined. Do not overmix; the dough will look shaggy.
- Turn the dough out onto a lightly floured surface. Gently knead the dough 3 to 4 times, just enough to bring it together.
- Pat or roll the dough into a 3/4-inch thick circle or rectangle.
- Use a 2-inch round biscuit cutter to cut out the scones. Press the cutter straight down without twisting to help the scones rise tall. Place the cut scones onto the prepared baking sheet, setting them close together for softer sides or farther apart for crispier edges.
- In a small bowl, whisk the beaten egg and milk or cream together to create an egg wash. Brush the tops of the scones lightly with the wash.
- Bake for 14 to 17 minutes, or until the tops are golden brown and the scones are fully risen.
- Transfer the scones to a wire rack to cool slightly before serving warm with butter or jam.
Notes
- Keep all your ingredients, especially the butter and buttermilk, very cold. Cold fat creates steam pockets, resulting in tall, flaky scones.
- For the tallest scones, avoid twisting the biscuit cutter when cutting the shapes; press straight down.
- If you want a glaze, whisk 1 cup powdered sugar with 2 tablespoons of milk or lemon juice until smooth, and drizzle over cooled scones.
- If using frozen blueberries, do not thaw them before adding them to the dry ingredients.
Nutrition
- Serving Size: 1 scone
- Calories: 280
- Sugar: 7
- Sodium: 350
- Fat: 15
- Saturated Fat: 9
- Unsaturated Fat: 6
- Trans Fat: 0
- Carbohydrates: 32
- Fiber: 1
- Protein: 5
- Cholesterol: 55