
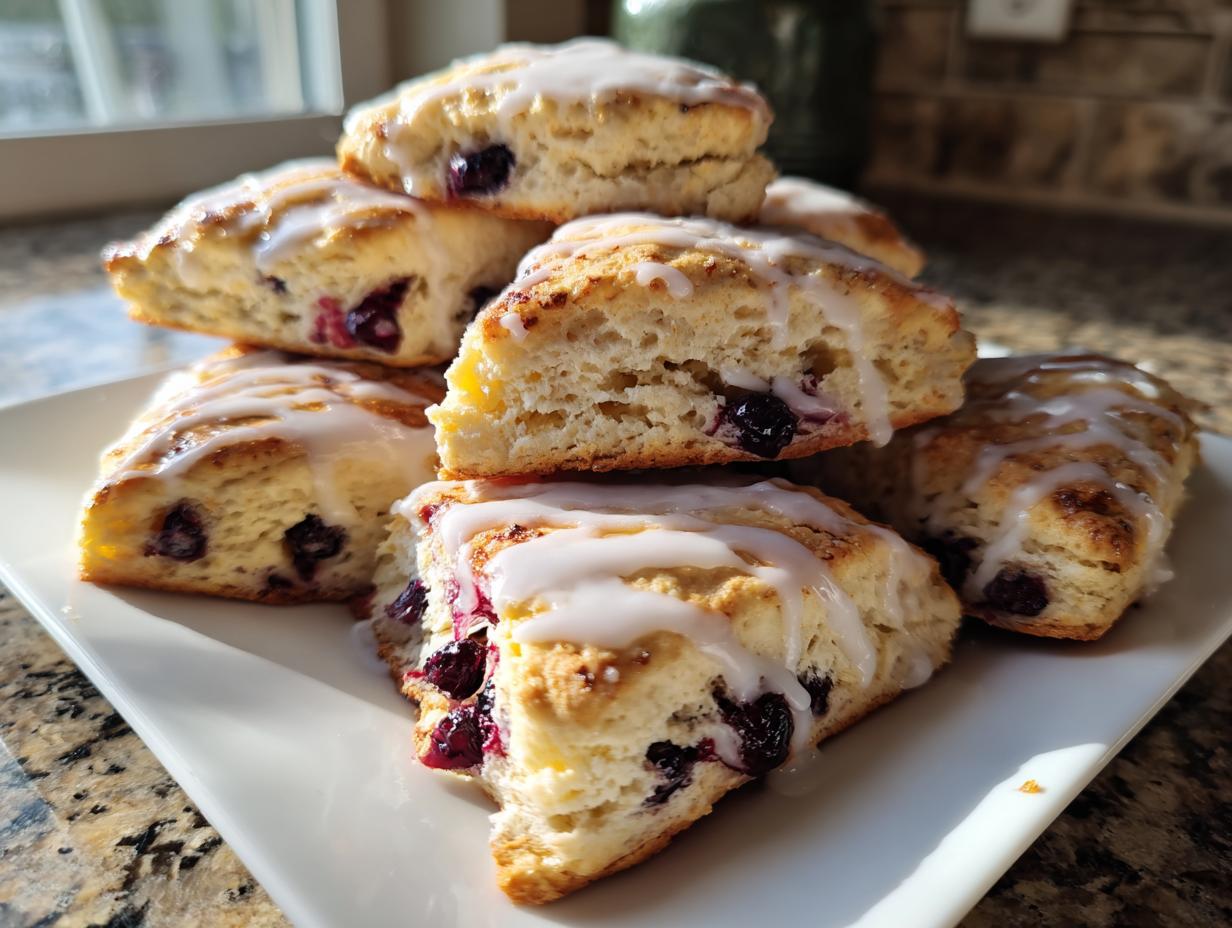
Oh, my dears, let’s talk about scones. Are you tired of those rock-hard pastries that crumble into dust the second you try to spread butter on them? I hear you! For years, trying to make that perfect, tender texture felt like chasing smoke, especially with something delicate like fresh blueberries involved. Well, I promise you, we are putting an end to dry scones right now. This recipe for **blueberry scones** delivers that incredible, flaky, bakery-style result every single time. It all comes down to two simple rules I learned from my mother: keep that butter frigid, and don’t be shy with the buttermilk. Trust me, when you see how flaky these turn out, you’ll never go back to mixing things any other way.
- Why These Are the Best Blueberry Scones You Will Ever Bake
- Gathering Ingredients for Your Tender Scone Recipe
- Simple Scone Baking: Step-by-Step Instructions for Perfect Blueberry Scones
- Finishing Touches: Making the Zesty Glaze for Blueberry Scones
- Tips for Success When Making Moist Blueberry Scones
- Serving Suggestions for Your Breakfast Scones
- Storage & Reheating Instructions for Leftover Blueberry Scones
- Frequently Asked Questions About Making Blueberry Scones
- Estimated Nutritional Data for Glazed Blueberry Scones
Why These Are the Best Blueberry Scones You Will Ever Bake
I developed this recipe because I got so tired of hearing people complain about scones being dry. These aren’t just good; they are consistently perfect. I want you to achieve that tall, beautiful rise you see in the coffee shop windows, but right there on your own kitchen counter. They are fast, too—we get them baked and cooled in practically no time!
- You get genuinely **Moist Blueberry Scones** that stay tender for days.
- The method results in incredibly **Flaky Blueberry Scones**—think distinct layers!
- They have the height and rich flavor profile of true **Bakery Style Scones**.
Achieving Bakery Style Scones Texture
The secret to flakiness isn’t magic; it’s temperature! I insist on using butter straight from the freezer, cut into small pieces. When that icy butter melts quickly in the hot oven, it creates steam pockets. Those steam pockets are what push the dough up, separating the layers and giving you that beautiful, airy crunch on the outside and tenderness inside. Also, please, handle the dough as little as possible. We are mixing just enough to bring it together; any big workout will make them tough. That’s how we get that wonderful **tender scone recipe** result.
The Bright Flavor of Lemon Blueberry Scones with Lemon Glaze
Blueberries are wonderful on their own, but that little bit of brightness from lemon just takes these **blueberry scones** over the top. We mix the zest right into the dough, so you get that lovely citrus aroma in every bite. Then, we finish it with a simple, zesty lemon glaze right before serving. It’s just enough tang to balance the sweetness of the fruit and the richness of the cream. It’s a pairing that just sings!

Gathering Ingredients for Your Tender Scone Recipe
Now, before we even think about touching the mixer, we have to talk about the *actors* in this little drama. The quality of your ingredients matters a great deal when you are aiming for that perfect flaky texture. Remember, because this is an **Easy Blueberry Scone Recipe**, we aren’t hiding anything behind complex steps, so the ingredients have to shine.
I’ve organized what you need below, but please, pay close attention to the temperature requirements. We are building layers here, and sloppy ingredient prep is the enemy of lovely, soft scones!
For the Scones Themselves, you’ll need the standard dry goods—flour, a touch of sugar so they aren’t too plain, and baking powder to help them lift up tall. But the real stars are the cold items. You must have that half cup of unsalted butter cut into small cubes, straight from the fridge, and about three-quarters of a cup of buttermilk, also chilled deeply. Don’t forget your fresh blueberries and a little bit of lemon zest to wake everything up!
If you want to make a quick batch for a surprise brunch, you can check out how I make my quick cornbread sometime; good quick baking is all about handling things just right. In that recipe, I talk a bit about how temperature affects structure, and the same idea applies here!
Key Ingredient Notes and Substitutions for Blueberry Scones
Let’s address the two most important items for that lovely, moist texture in your **blueberry scones**: the buttermilk and the berries.
If you reach into the fridge and realize you’re out of buttermilk, don’t panic and run to the store! You can easily whip up a substitute, and it works just as well for these scones. Grab your regular milk—whole milk is best if you have it—and stir in one teaspoon of white vinegar or fresh lemon juice for every three-quarters of a cup you need. Let that sit on the counter for about five minutes until it looks a little curdled. That acidity reacts beautifully with the baking powder, giving you lift and tenderness.
Regarding the blueberries: I much prefer fresh ones because they hold their shape a bit better during the mixing process. But if you are making these in the dead of winter or just have a bag in the freezer, that’s perfectly fine! Just make sure you toss the frozen blueberries right into the dry ingredients without thawing them first. If they get warm, they’ll bleed all over your dough, and you’ll end up with gray, sad-looking scones instead of beautifully studded, **Moist Blueberry Scones**.
Simple Scone Baking: Step-by-Step Instructions for Perfect Blueberry Scones
Alright, let’s get baking! This process is truly what makes these **blueberry scones** a reliable favorite. I know steps feel fussy, but these small actions are what keep your pastry tender and flaky. Remember, we are moving fast when it comes to mixing, but we are patient when it comes to chilling. Before you start, take a moment to preheat your oven up to 400 degrees F (200 degrees C).
First, we whisk all our dry ingredients—flour, sugar, baking powder, and salt—in a nice big bowl. I always double-check that the baking powder is fresh because that’s our main lift agent!
Next, we move onto the butter. This is the most important part of the whole process for achieving those beautiful layers you’re after.
The Critical Step: Cutting in Cold Butter for Flaky Blueberry Scones
You need that cold butter cut into small cubes. Drop those cold pieces right into your dry mix. Now, grab your pastry blender—or just use your wonderfully quick fingertips, that’s how I always did it!—and work that butter in. You are blending until the mix looks like coarse crumbs. Don’t try to make it smooth like sand; you want visible little bits of butter still there, maybe the size of small peas. These are your future steam pockets that give you those gorgeous layers in your **Flaky Blueberry Scones**. Stop mixing the moment you see those pea-sized chunks.
Once the butter is worked in, gently fold in your blueberries and that lovely lemon zest. Then, pour that cold buttermilk in all at once. Mix it gently with a fork until it just comes together into a shaggy, messy dough. Seriously! Do not knead it on the counter like bread. Just pat it out onto your lightly floured surface until it’s about three-quarters of an inch thick. Cut it into 8 wedges, or use a round cutter if you prefer classic shapes. If you’re looking for tips on making fluffy pancakes, the technique there shows how liquid texture really impacts the final lift.
Chilling and Baking Your Homemade Blueberry Pastry
This part can feel impossible when you’re excited, but you absolutely must chill the cut scones for 15 minutes in the freezer. That little break firms up the butter again, which means the scones hold their beautiful shape when they hit that hot oven instead of just spreading out flat. That’s the trick to getting tall **Homemade Blueberry Pastry**!
While they chill, whisk together one egg with two tablespoons of milk for an egg wash. Once the 15 minutes are up, brush that mixture lightly over the tops of your chilled scones. Then, bake them for 15 to 18 minutes, watching until the tops are beautifully golden brown. You’ll know they are done when they smell absolutely heavenly!
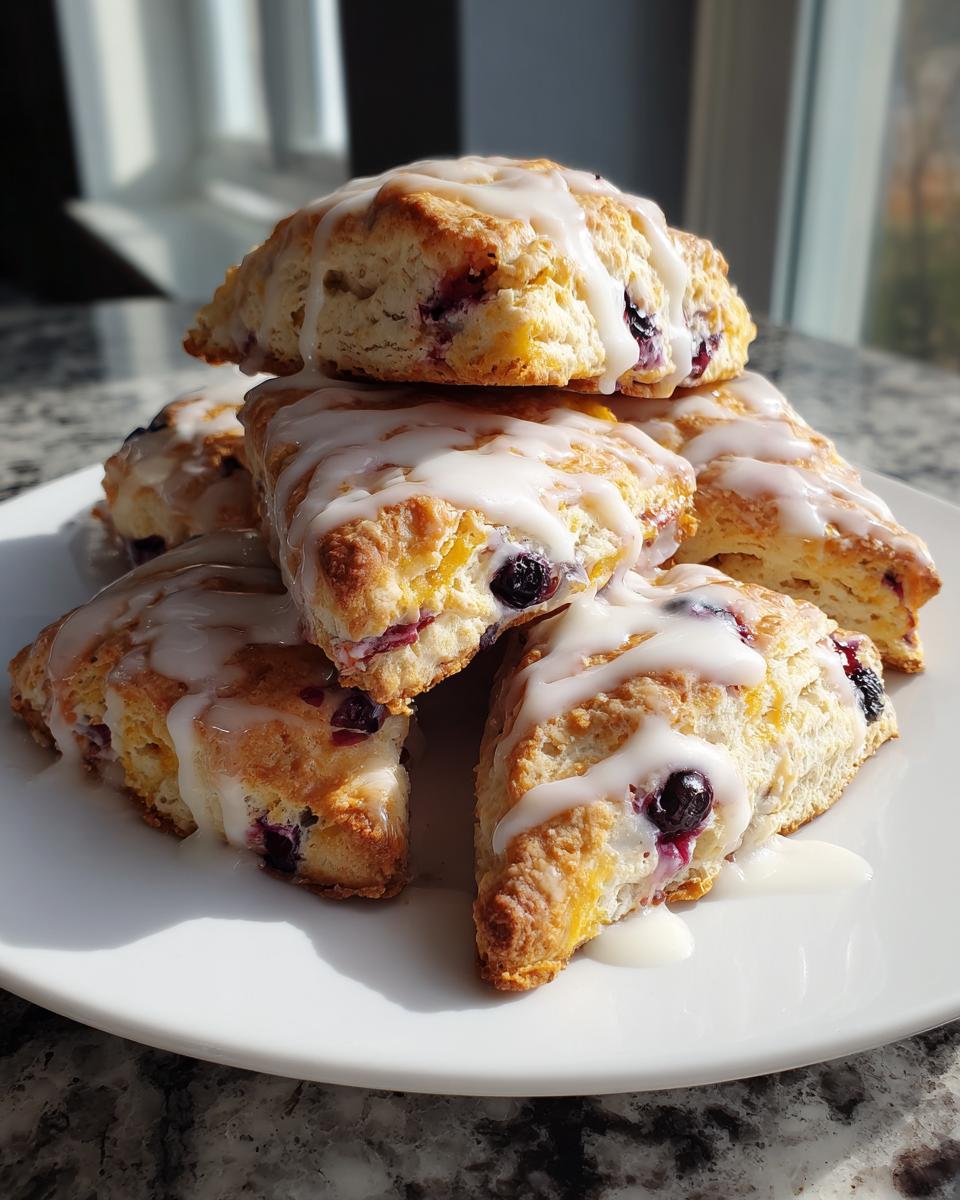
Finishing Touches: Making the Zesty Glaze for Blueberry Scones
We’ve done the hard part—the baking! Now we make the finale: that bright, zesty lemon glaze that really makes these **blueberry scones** sing. Honestly, this glaze is so simple, it feels like cheating. All you need is powdered sugar, a couple of tablespoons of fresh lemon juice, and maybe a tiny pinch more zest if you really love that sharp, fresh flavor.
In a small bowl, I start with the cup of powdered sugar. Then I add the lemon juice, just a teaspoon at a time, whisking constantly. This is where you control the consistency. If you add too much liquid at once, you end up with lemon-flavored water, not a nice drizzly glaze! We want it thick enough to sit on top of the cooled scone but thin enough to drip down the sides just a touch.
If you’re making my very popular lemon pound cake, you’ll recognize this technique. The key is patience while whisking. Once you have that perfect, slow-drizzling consistency, just wait until your scones are completely cool—and I mean completely cool—and drizzle it right over the top. It sets up beautifully and gives you that professional, bakery look. Enjoy that sticky, sweet bite with your first cup of coffee!
Tips for Success When Making Moist Blueberry Scones
We’ve covered the main steps, but since my goal is always to send you home with the **Best Blueberry Scone Recipe**, let me share a few more little secrets I’ve picked up over the years. As a former teacher, my favorite thing is watching someone conquer a tricky recipe and realize, “Wow, I can actually do this!” Avoiding dryness in scones is all about guarding that interior moisture.
Here are my three most important rules to guarantee you get genuinely moist results:
- Keep Your Hands Off (Mostly): I cannot stress this enough. When mixing the buttermilk into the flour and butter mixture, stop as soon as you see the last streak of dry flour disappear. Overmixing develops gluten, and gluten equals toughness, which keeps the scones from being tender. It should look ragged and slightly messy when you turn it onto the board.
- The Power of the Cold Environment: We already talked about cold butter and cold buttermilk, but don’t forget your workspace! If it’s a hot summer day in your kitchen, I honestly recommend doing your initial cutting-in process near an open window or even popping the bowl into the fridge for five minutes before you start folding things together. Cold ingredients are the foundation of these wonderful **Breakfast Scones**.
- Don’t Cut Them Into Rings: You know how some older recipes tell you to pat the dough into a circle and then cut it like a pizza? Skip that method for these specific **Brunch Baked Goods**. When you cut a circle, the inside edges get pressed together, sealing the layers and increasing density. Cutting like wedges (or using a biscuit cutter) keeps those sides open so they can rise tall and flaky. If you want to see a fantastic article explaining flaky texture, this site breaks down the science of layering really well!
Also, if you struggle with knowing how to treat buttermilk, I have a great guide on making fluffy pancakes using buttermilk substitutes. The same reasoning applies here—acidity helps bring out that tenderness!
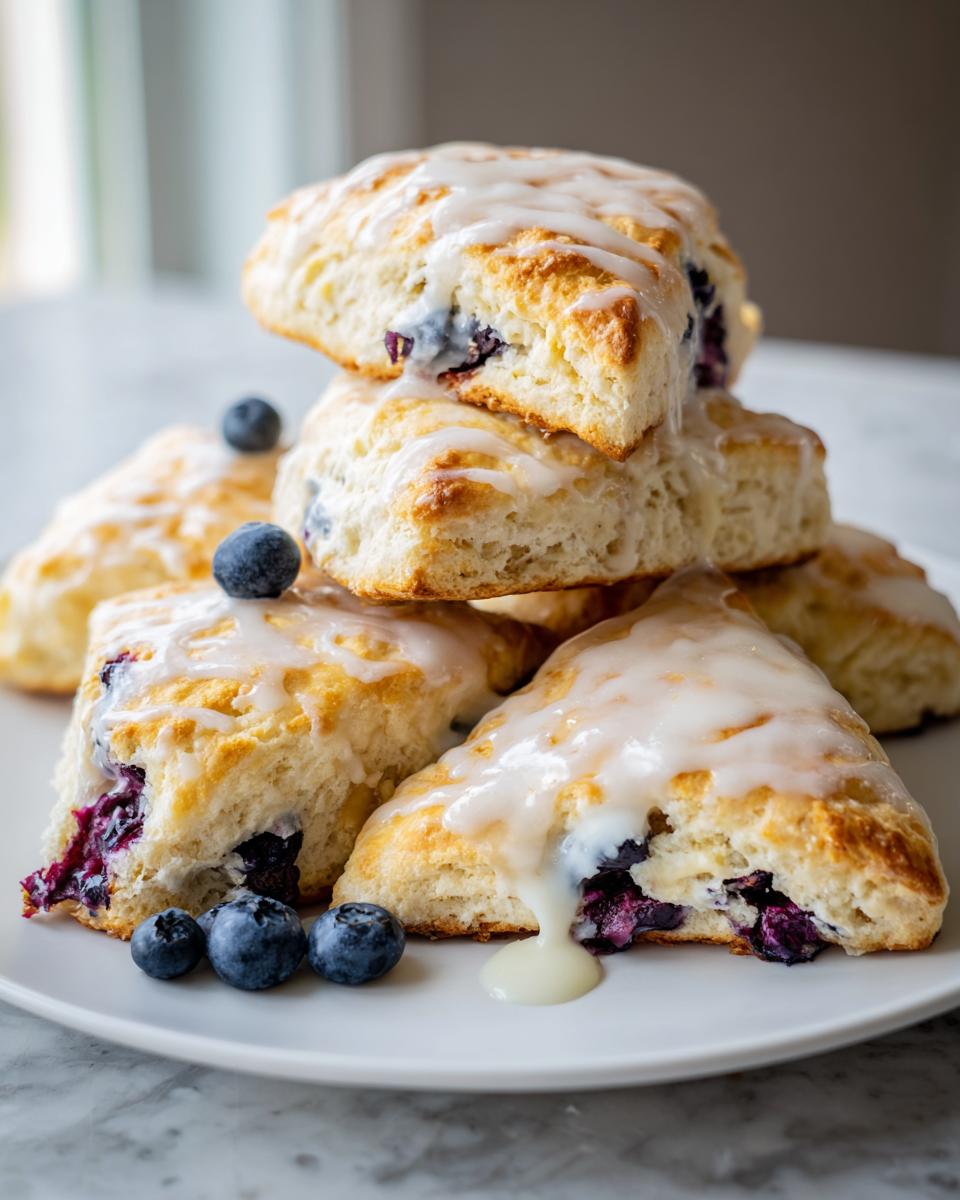
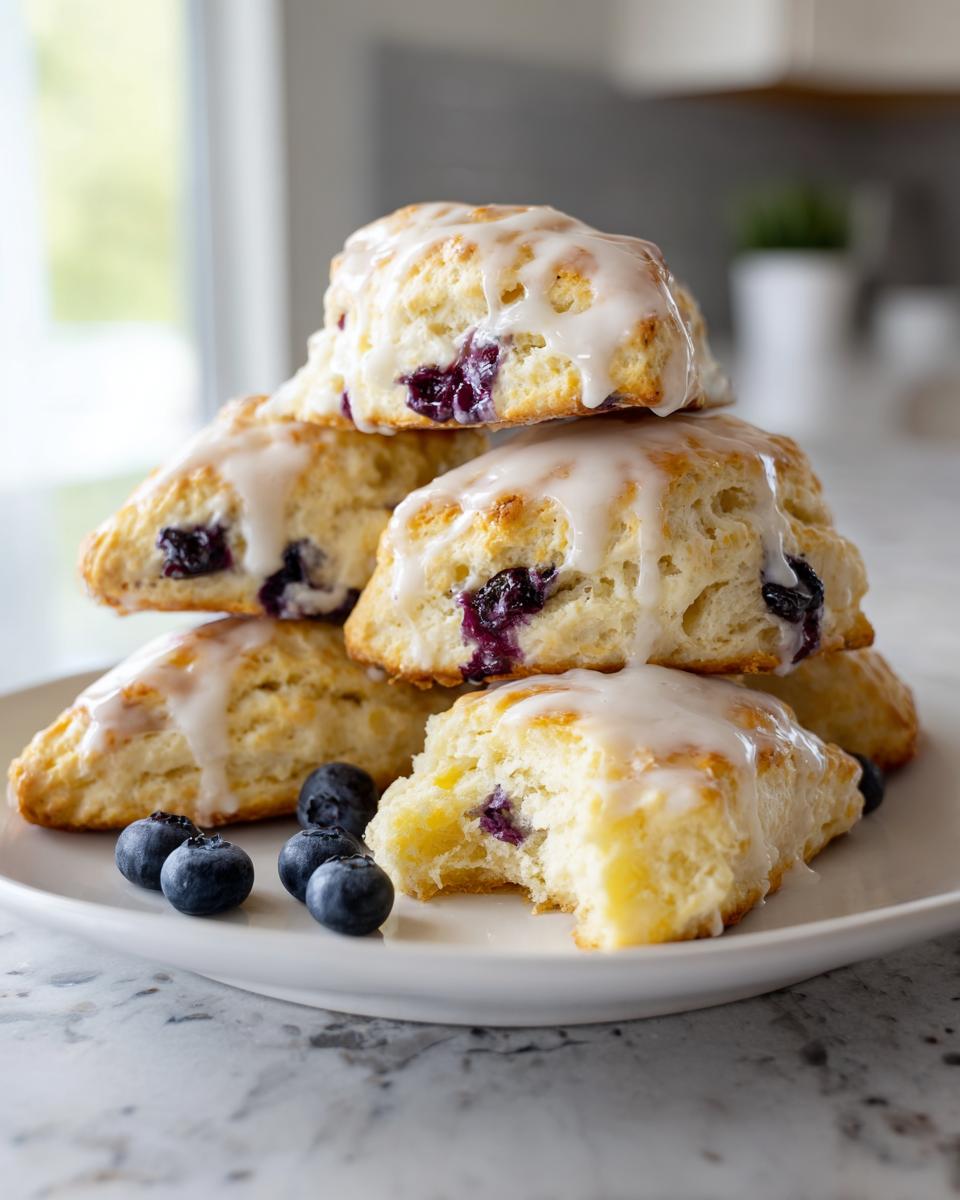
Serving Suggestions for Your Breakfast Scones
Now that you have these beautiful, tender **blueberry scones** cooling, the fun part begins: deciding how to enjoy them! These pastries are so incredibly versatile. While they are perfect as quick **Breakfast Scones** to grab on your way out the door, they truly shine when you slow down and savor them. They are practically required by law for any proper weekend brunch setup or afternoon tea party.
If you are serving them for a lovely spread, try placing them on a tiered stand—it just makes them look so much more special, doesn’t it? You can serve them plain, fresh from cooling with that beautiful lemon glaze shining, or you can offer some simple accompaniments on the side. A little dish of good quality, slightly softened butter is lovely, or perhaps some homemade lemon curd if you’re feeling ambitious!
I know some folks love a richer experience, and if that’s you, try serving them warm with a dollop of clotted cream and maybe a tiny bit of honey. It turns a simple scone into something that feels absolutely decadent. If you want to see how to make a super easy appetizer dough that you can adapt for a savory brunch item sometime, check out my thoughts on using sourdough discard—it’s all about building a good foundation!
No matter how you serve them, these **Brunch Baked Goods** are guaranteed to be the star of the table.
Storage & Reheating Instructions for Leftover Blueberry Scones
It’s a rare day when we have leftover **blueberry scones** in my house, but I know life happens! The good news is that these pastries freeze and store beautifully, as long as you take one small, simple precaution. We want to protect that beautiful, flaky texture we worked so hard to achieve, right?
For short-term storage—say, if you just need to keep them fresh for two or three days—you must use an airtight container. Storing them in a plastic bag left open on the counter is a recipe for stale, ordinary scones. Place them directly into a good quality, latching container. If you’ve already glazed them, they do fine on the counter for about two days before I start worrying about them losing their moisture.
If you want to keep them longer, popping them in the freezer is the way to go. Wrap them individually first! I find a layer of plastic wrap followed by a layer of foil works wonderfully. This double barrier keeps air and freezer burn away from those delicate layers. They can stay frozen perfectly happy for up to three months.
How to Bring Those Scones Back to Life
This is the part people often mess up! If you try to microwave a scone, whatever you do, don’t do it! Microwaving wakes up the moisture in the flour but completely destroys the delicate structure we built with the cold butter, turning them into chewy little hockey pucks. We don’t want that for our **Tender Scone Recipe**!
For quick reheating, my preferred method is the oven or even a toaster oven. Set it to a low-ish temperature, maybe 300 degrees F (150 degrees C). Pop the scone on a baking sheet for just five to seven minutes. This allows the exterior edges to crisp up just a bit and gently heats the interior, making them taste almost freshly baked again. If they were frozen, let them thaw on the counter for about an hour before reheating, or add an extra five minutes to the heating time.
If you plan on glazing them later, store them unglazed in the freezer. Then, reheat them first, let them cool for five minutes, and then drizzle on that bright lemon glaze. It preserves the glaze’s silky texture better that way!
Frequently Asked Questions About Making Blueberry Scones
I always get so many wonderful questions once you all start baking these! It shows me you care about getting the details right, and that’s what home baking is all about. Here are a few things I hear most often about making these **Flaky Blueberry Scones** perfect every time.
Why did my blueberry scones turn out hard instead of tender?
Oh, that’s the heartbreak of baking, isn’t it? If your **Moist Blueberry Scones** came out hard, 99% of the time, it comes down to overmixing. When you mix flour and liquid for too long, gluten develops way too much, and that creates chewiness and toughness instead of that light, flaky crumb we want. Remember what I said about stopping when it *just* comes together? That’s the key! You want the dough to look a little shaggy, not perfectly smooth. For more general advice on quick meals, you might check out my collection of easy breakfast recipes.
Can I use frozen blueberries in blueberry scones?
Yes, absolutely! You truly can use frozen blueberries, especially if fresh ones aren’t in season for baking. The only rule I have is that you must add them straight from the freezer into your dry ingredients. Do not thaw them, or they will weep juice and turn your entire dough purple. Adding them frozen helps keep the overall dough temperature low, which is exactly what we want for that beautiful structure in our **Buttermilk Blueberry Scones**.
How high should my scones rise? I want that bakery look!
That wonderful height comes from two things: making sure your butter is ice-cold, and ensuring you chill the cut dough for those crucial 15 minutes right before baking. When the dough hits the oven, if the butter is still solid, it creates steam that pushes the layers apart vertically. If you skip that chill time, the butter melts too quickly, and the dough just spreads sideways instead of rising tall. Aim high, my dears—that visual sign of a great scone is a tall, defined edge!
Is a lemon glaze essential for this Easy Blueberry Scone Recipe?
It’s essential if you want that signature bright flavor! While the scones themselves are delicious plain, especially on a busy morning, the **Blueberry Scones with Lemon Glaze** brings everything together. The lemon zest in the dough and the sharp glaze on top make the flavor pop. If you are in a rush or just don’t care for glaze, a heavy dusting of coarse sugar sprinkled on top before baking gives a lovely crunch instead!
Estimated Nutritional Data for Glazed Blueberry Scones
As a home cook, I focus more on flavor and making sure everyone leaves the table happy, but I know tracking nutrition is important for many of you! I pulled together the estimates for one serving of these wonderfully rich and **Moist Blueberry Scones** based on the ingredients listed above. Remember, this is just an estimate, and your final count might vary a little depending on the exact brand of butter or sugar you use, especially since we are using that lovely dark brown sugar for extra depth!
If you are watching your sugar intake, remember that a good portion of that sugar comes straight from the fruit and the delicious glaze we drizzle on top. If you’re looking for more general recipe ideas that also keep track of macros, you might enjoy browsing through my collection of easy breakfast recipes.
Here is the general breakdown for one of these beautiful treats:
- Serving Size: 1 scone
- Calories: 320
- Fat: 16g
- Carbohydrates: 40g
- Protein: 6g
- Sugar: 18g
- Sodium: 250mg
These figures reflect the whole package—the rich, flaky dough blended with cold butter and buttermilk, bursting with berries, and topped with that bright lemon sugar glaze. They are truly a treat to be savored!
PrintBakery-Style Flaky Lemon Blueberry Scones with Zesty Glaze

Make tender, moist, and flaky blueberry scones that taste like they came from a bakery. This simple recipe uses cold butter and buttermilk to achieve the best texture, topped with a bright lemon glaze.
- Prep Time: 20 min
- Cook Time: 18 min
- Total Time: 38 min
- Yield: 8 servings 1x
- Category: Breakfast
- Method: Baking
- Cuisine: American
- Diet: Vegetarian
Ingredients
- 2 cups all-purpose flour
- 1/4 cup granulated sugar
- 1 tablespoon baking powder
- 1/2 teaspoon salt
- 1/2 cup (1 stick) cold unsalted butter, cut into small cubes
- 1 cup fresh or frozen blueberries
- 1 teaspoon lemon zest
- 3/4 cup cold buttermilk
- 1 large egg, beaten (for egg wash)
- 2 tablespoons milk (for egg wash)
- For the Glaze:
- 1 cup powdered sugar
- 2 tablespoons fresh lemon juice
- 1/2 teaspoon lemon zest
Instructions
- Prepare your dry ingredients: In a large bowl, whisk together the flour, sugar, baking powder, and salt.
- Cut in the butter: Add the cold butter cubes to the flour mixture. Use a pastry blender or your fingertips to cut the butter into the flour until the mixture resembles coarse crumbs with some pea-sized pieces of butter remaining. This step is key for flaky scones.
- Add blueberries and zest: Gently fold in the blueberries and lemon zest. Do not overmix.
- Add liquid: Pour in the cold buttermilk all at once. Use a fork to mix until just combined. The dough will be shaggy. Do not knead the dough; minimal handling keeps the scones tender.
- Shape the dough: Turn the dough out onto a lightly floured surface. Gently pat the dough into a 3/4-inch thick circle or square.
- Cut the scones: Cut the dough into 8 wedges or use a round cutter. Place the cut scones onto a baking sheet lined with parchment paper, keeping them close together for softer sides.
- Chill: Place the baking sheet in the freezer for 15 minutes. This helps the scones hold their shape and rise better.
- Preheat and wash: Preheat your oven to 400 degrees F (200 degrees C). Whisk the egg and 2 tablespoons of milk together for the egg wash. Brush the tops of the chilled scones with the egg wash.
- Bake: Bake for 15 to 18 minutes, or until the tops are golden brown.
- Cool: Transfer the baked blueberry scones to a wire rack to cool completely.
- Make the glaze: While the scones cool, whisk together the powdered sugar, lemon juice, and lemon zest until smooth.
- Glaze: Drizzle the lemon glaze over the cooled scones before serving.
Notes
- For the flakiest texture, make sure your butter and buttermilk are very cold before starting.
- If using frozen blueberries, do not thaw them; add them directly to the dry ingredients.
- If you do not have buttermilk, you can make a substitute by mixing 3/4 cup of regular milk with 1 teaspoon of white vinegar or lemon juice and letting it sit for 5 minutes before using.
Nutrition
- Serving Size: 1 scone
- Calories: 320
- Sugar: 18
- Sodium: 250
- Fat: 16
- Saturated Fat: 10
- Unsaturated Fat: 6
- Trans Fat: 0
- Carbohydrates: 40
- Fiber: 2
- Protein: 6
- Cholesterol: 55