
Oh, my friends, some nights you just look at the clock and sigh. You need dinner on the table, the family is hungry, and the thought of tackling a sink full of dishes feels just impossible. Believe me, after thirty years of teaching elementary school, I know all about those hectic weeknight scrambles! That’s why I lean so heavily on dishes that take care of themselves, and nothing quite answers the call for easy, comforting food like our Creamy One-Pot Tuna Pasta Skillet. This is the ultimate tuna pasta solution. It’s rich, cheesy, uses simple pantry staples, and the cleanup is almost nonexistent. We’re talking real, satisfying home cooking that’s ready before the kids finish their homework.
- Why This Creamy One-Pot Tuna Pasta Recipe Works for You
- Gathering Ingredients for Your Easy Tuna Pasta
- Step-by-Step Instructions for Skillet Tuna Pasta
- Tips for the Best Creamy Tuna Pasta Every Time
- Ingredient Notes and Substitutions for Tuna Pasta
- Serving Suggestions for Your Quick Tuna Pasta Dinner
- Storing and Reheating Leftover Tuna Pasta
- Frequently Asked Questions About Making Tuna Pasta
- Share Your Experience with This Comfort Food Pasta
Why This Creamy One-Pot Tuna Pasta Recipe Works for You
When dinner needs to be fast, deeply satisfying, and not require me scrubbing pots for an hour, this is the recipe I turn to. It’s become a cornerstone of our pantry staple meals collection because the ingredients keep so well. This dish just feels like a big warm hug after a long day.
The Quickest Tuna Pasta Dinner: Ready in Under 35 Minutes
You read that right! From the moment you chop that onion to the moment you sprinkle that final cheese topping, we are looking at about 35 minutes total. That’s hardly any time at all for a finished meal this comforting. It’s truly a perfect quick tuna pasta dinner solution.
One Pot Tuna Pasta Means Easy Cleanup
This is my favorite part, truly. Because we cook the pasta right in the same skillet we make the creamy sauce in, we only dirty one pot for the bulk of the work. That means less time washing up and more time relaxing with the family. It’s the best kind of one pot tuna pasta magic!
Comfort Food Pasta Made with Budget Friendly Tuna Recipes
We all have those weeks where sticking to the budget is important, and thankfully, canned tuna is always affordable! Combining that flaky fish with cheese and broth makes it hearty enough that you don’t need a lot of extra sides. This is prime comfort food pasta that works wonderfully within any budget friendly tuna recipes planning.
Gathering Ingredients for Your Easy Tuna Pasta
The beauty of this easy tuna pasta recipe is that you likely have half of these items already sitting in your pantry! Since we aren’t making a complicated tuna pasta salad, we are relying on shelf-stable goods and a few fresh touches. Getting your ingredients ready now—what we call *mise en place*—is how we keep this from turning into a chaotic mess later on. Don’t forget to check out my tips for a great healthy tuna salad sometime, too, but for this hot skillet meal, gather these essentials.
Pasta and Aromatics
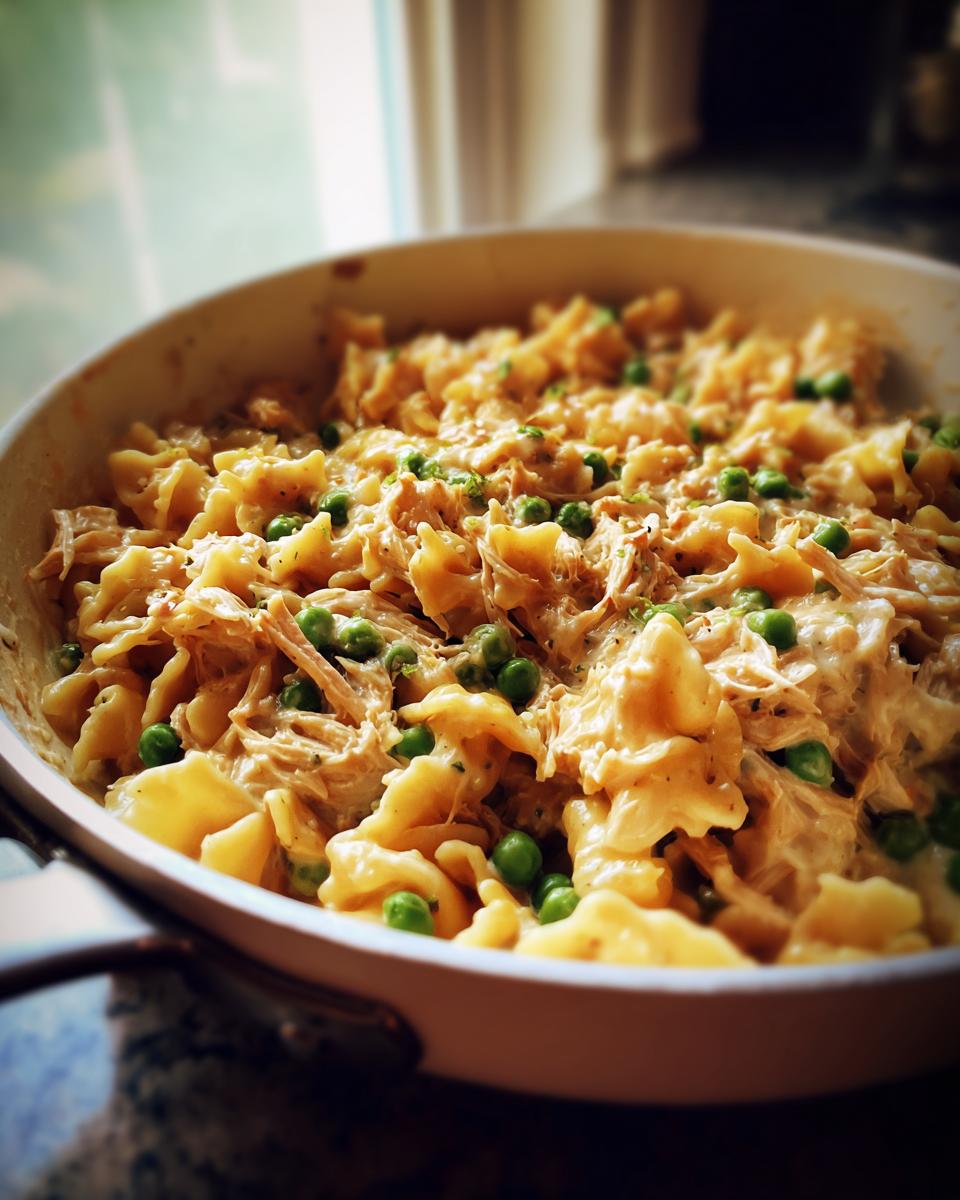
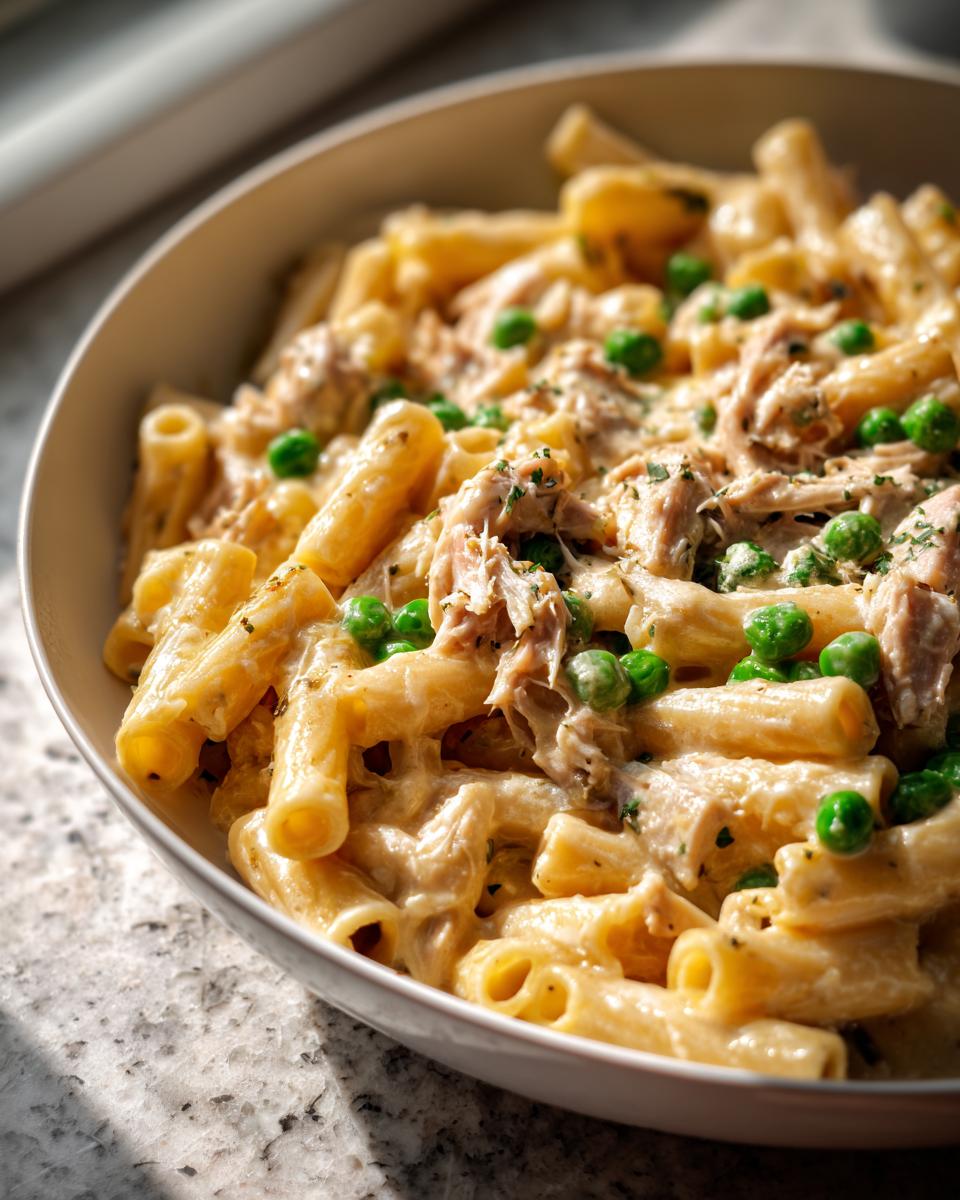
- 12 ounces dried pasta, like those little elbow macaroni or rotini shapes that hold sauce so well.
- 1 tablespoon olive oil, just a small splash to get things going.
- 1 small yellow onion, which you’ll want finely chopped.
- 2 cloves garlic, minced nice and tiny!
Building the Creamy Tuna Pasta Sauce Base
This is where the creamy magic starts! The flour is absolutely key to getting that perfect thickness without needing cream.
- 1/4 cup all-purpose flour.
- 2 cups chicken broth—low sodium is great if you have it.
- 1 cup milk, I use whole milk for the best rich texture, but 2% works fine.
- 1 teaspoon Dijon mustard—don’t skip this, it wakes up the entire dish!
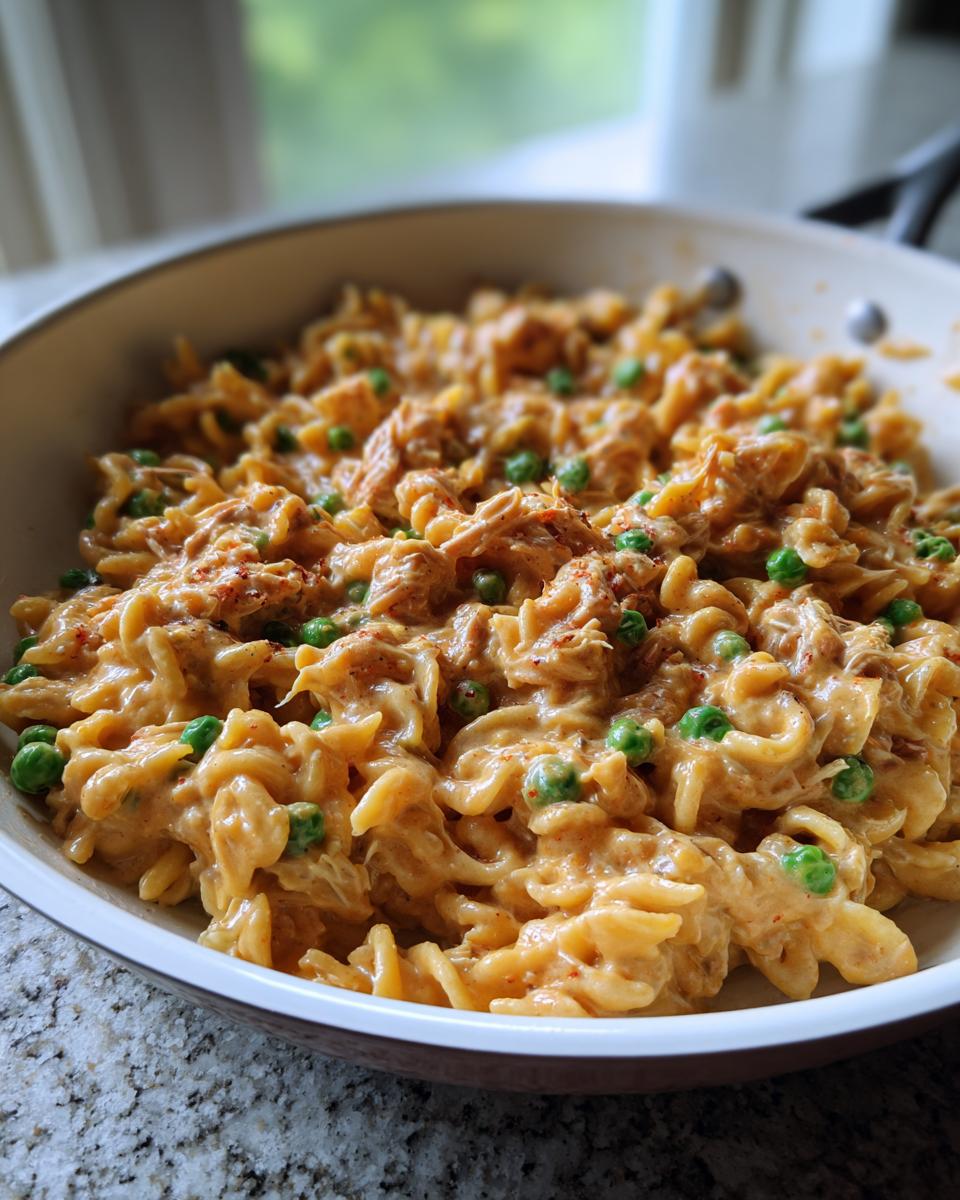
- The seasonings: 1/2 teaspoon salt, 1/4 teaspoon black pepper, and just 1/4 teaspoon paprika.
The Finishing Touches for Cheesy Tuna Pasta
We need our protein and our final cheesy melt to make this the ultimate cheesy tuna pasta experience.
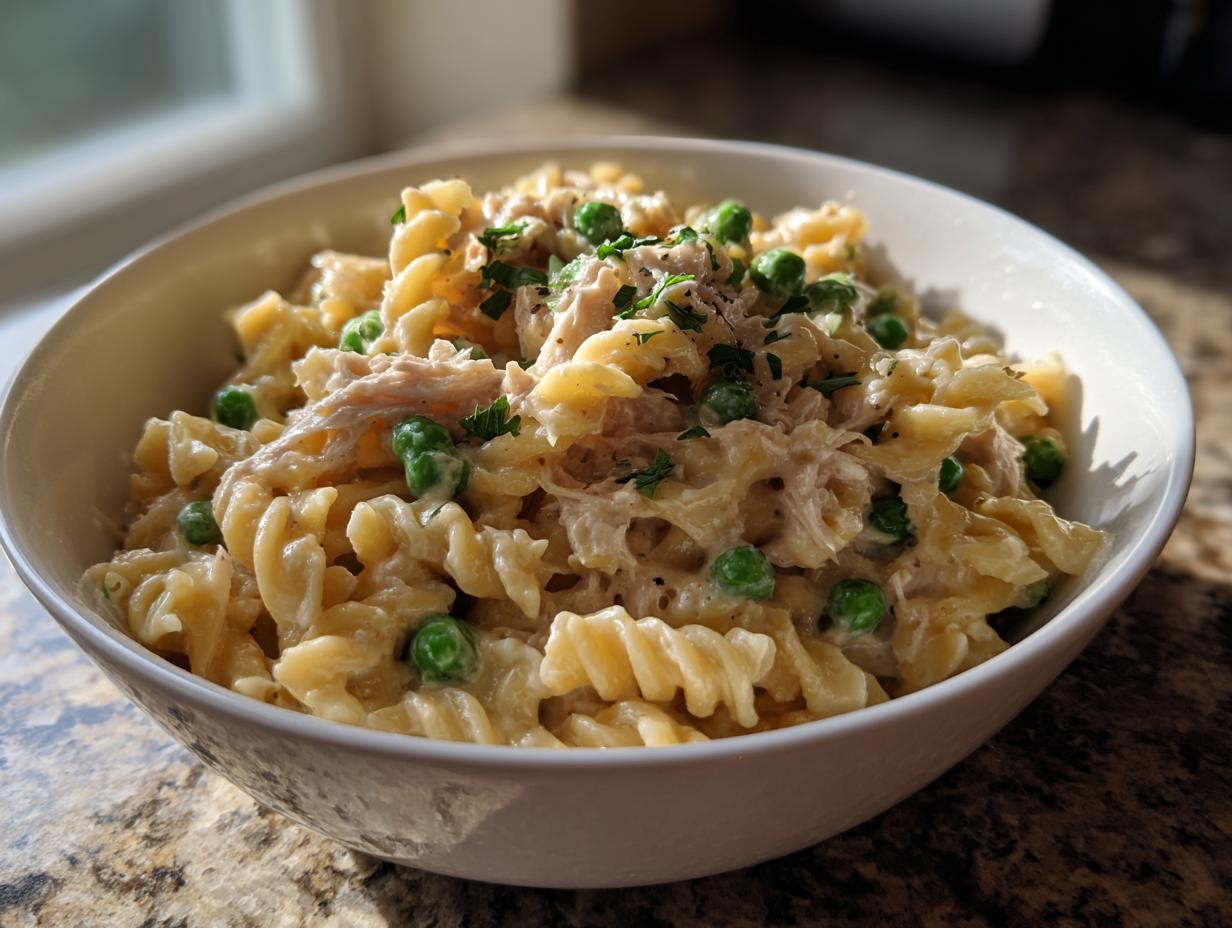
- 2 cans (5 ounces each) of tuna packed in water, make sure they are drained well!
- 1 cup frozen peas—they go in straight from the freezer, don’t worry!
- 1 cup shredded cheddar cheese, full fat melt beautifully.
- 1/4 cup grated Parmesan cheese for that salty bite.
Step-by-Step Instructions for Skillet Tuna Pasta
It’s time to get cooking! Since we are keeping this as a one pot tuna pasta meal, we need to work efficiently in the same skillet. Follow these steps closely, and you’ll have a perfect, creamy dinner before you can even set the table.
Cooking the Pasta and Preparing the Base
First things first, get your pasta cooking according to the directions on the box, but pull it out when it is just shy of done—that’s al dente. Before you drain it, scoop out about half a cup of that starchy cooking water and set it aside; trust me, that water is liquid gold later! Once drained, leave the pasta aside. Now, take the same large skillet, heat your olive oil over medium heat, and toss in that chopped onion. Let it soften up until it looks translucent, about 5 minutes. Then, whisper in that minced garlic and cook until you can really smell it, just about 60 seconds.
Making the Velvety Roux and Sauce for Tuna Pasta
This next part builds our signature creamy sauce! Whisk in your 1/4 cup of flour right over the onions and garlic and cook it for a full minute while stirring constantly—this is called a roux, and it’s what thickens everything up without tasting ‘floury.’ Once cooked, take your time whisking in the chicken broth until it’s totally smooth. Then add the milk, that Dijon mustard, and all your seasonings. Keep that heat at medium and let it simmer gently, stirring frequently, until the sauce is thick enough to coat the back of a spoon nicely. This might take 5 to 7 minutes, but don’t rush the thickening!
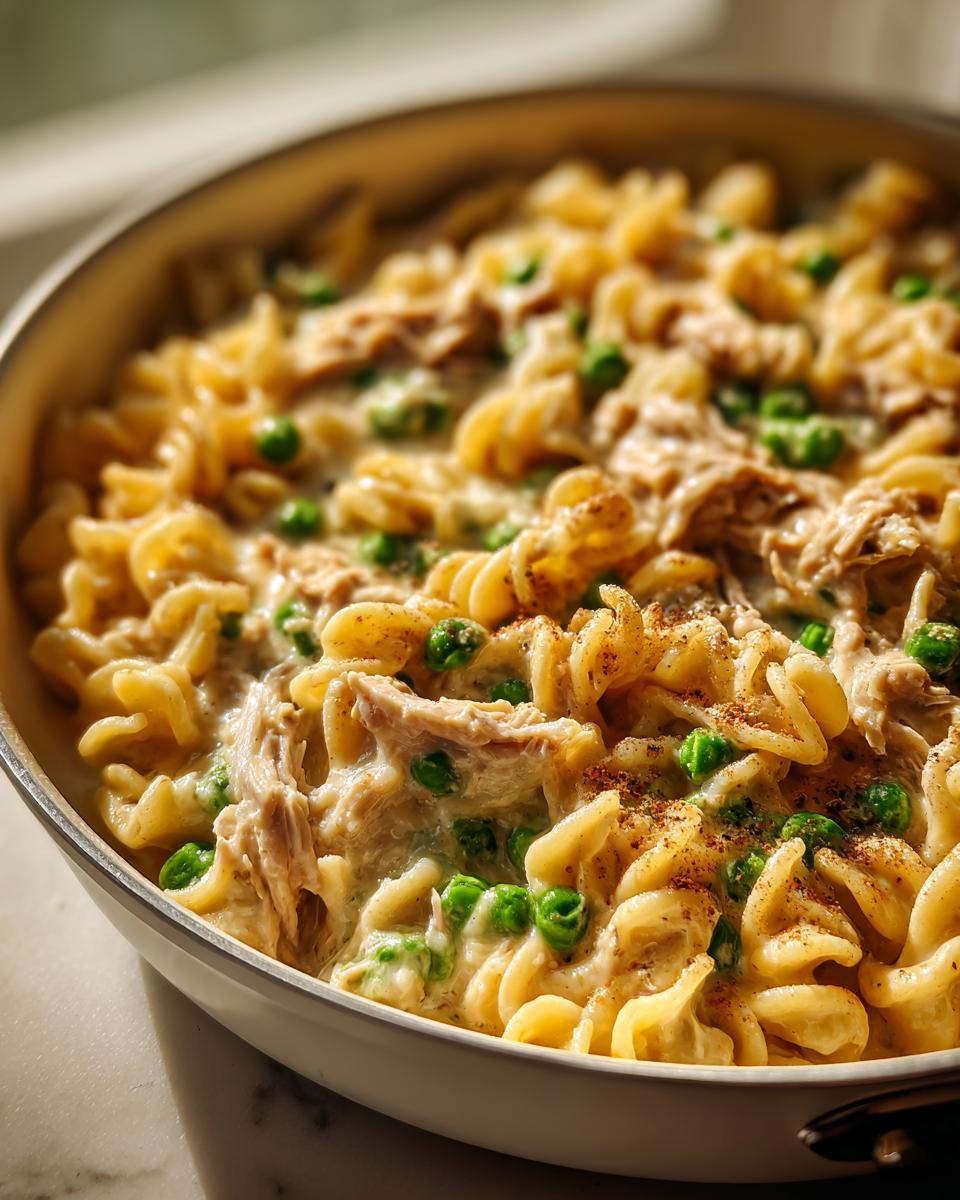
Combining Ingredients for the Final Creamy Tuna Pasta
Once the sauce is velvety, reduce your heat all the way down to low. That’s important for the next step! Stir in your drained tuna, those frozen peas, and all that cooked pasta. Mix it all up until everything is coated and the peas are warmed through. Now, take the skillet right off the burner. This is the trick to avoid grainy cheese! Stir in the cheddar and Parmesan until they are fully melted and the sauce is smooth and dreamy. If it looks a touch too thick for your liking, now’s the time to add a splash of that reserved pasta water until it flows just right.
Tips for the Best Creamy Tuna Pasta Every Time
Even though this is one of my simplest recipes, I’ve learned a couple of little tricks over the years that stop things from going sideways, especially when dealing with sauces that involve dairy and cheese. If you follow these pointers, you’ll get the same velvety texture every time you whip up this creamy tuna pasta.
Achieving Perfect Sauce Consistency in Your Tuna Pasta
Remember that flour we whisked in to make the roux? That’s your insurance policy! Make sure you cook that flour and oil together for a full minute before adding any liquid—that step removes any raw flour taste. When you bring the sauce up to a simmer, keep that heat low and slow. If you boil the milk and broth too vigorously, you risk breaking the sauce, and trust me, nobody wants grainy tuna pasta! Always add the cheese only after you’ve removed the skillet from the heat completely.
Turning This Into a Tuna Pasta Bake Variation
Sometimes you want a little extra chew, or maybe you have leftovers you want to set up for lunch the next day. This skillet dish is wonderful, but it transforms beautifully into a tuna pasta bake with almost zero extra effort. Just take the finished mixture, pour it into a greased baking dish, sprinkle a little more cheddar or some crunchy breadcrumbs right on top, and pop it into a 375°F oven for about 15 minutes. You just want it bubbly and golden, and you have a new dinner entirely!
Ingredient Notes and Substitutions for Tuna Pasta
When you’re relying on pantry staples, sometimes you have to swap things out based on what you have on hand! That’s perfectly fine, but I always want you to know the best way to use what you have while keeping that creamy texture intact. This recipe is so adaptable, which is why it’s perfect for when you need easy canned tuna pasta on a moment’s notice.
Choosing Your Pasta Shape for Tuna Pasta
I usually call for elbow macaroni or rotini because those shapes have little nooks and crannies that just grab hold of the thick cheese sauce when you stir everything together. Honestly, almost any short, sturdy shape will work wonderfully for this tuna pasta recipe. If you use something long, like spaghetti, you’ll end up with sticky knots rather than coated strands.
Flavor Boosts: Brightening Up Your Tuna Pasta
If you’re looking for a way to make this even better, especially if your tuna is packed in water, you absolutely need a squeeze of fresh lemon juice right at the end! It cuts through the richness of the cheese beautifully. If you are leaning into that bright flavor, you get a lovely lemon tuna pasta variant. A tiny pinch of dried oregano or some fresh parsley stirred in with the cheese works wonders, too.
Serving Suggestions for Your Quick Tuna Pasta Dinner
Since we’ve made this creamy tuna pasta skillet so rich and satisfying, you don’t need a ton of heavy sides! We just want something crisp and fresh to balance out that delicious cheese sauce. My go-to is almost always a simple, crisp green salad tossed lightly with vinaigrette—something bright to cut through the creaminess. If you’re feeding kids, they might prefer something warmer, like some simple steamed broccoli or maybe my recipe for roasted baby carrots if you have an extra ten minutes. Either way, keep the sides easy!
Storing and Reheating Leftover Tuna Pasta
One of the best things about making a big batch of creamy tuna pasta is having leftovers for lunch the next day! Store any extras promptly in an airtight container in the refrigerator. I find it keeps well for about three days, but the flavor is best within the first 48 hours. When it comes time to reheat, you have to be a little gentle because of that lovely cheese sauce.
The microwave works in a pinch, but stir in a splash of extra milk every minute or so to keep it from getting too stiff and dry. If you have a few extra minutes, reheating it slowly on the stovetop over low heat is the ticket. Just stir constantly until it’s warmed through. Be prepared for the sauce to look a little looser at first; that’s just the dairy separating a bit, but stirring it back together usually fixes it right up!
Frequently Asked Questions About Making Tuna Pasta
I know when you’re looking for a tuna pasta recipe, you want assurance that it’s going to work the first time! These are the questions I hear most often from new cooks who are trying this for the first time. Don’t stress; we’ll cover the texture, timing, and how this dish compares to those beloved boxed meals.
Can I make this creamy tuna pasta ahead of time?
Oh, that’s a great question, especially if you are meal prepping for the week! With dairy-based sauces like this one, things can get a little tricky upon reheating. My advice is to cook the pasta and make the sauce totally separately, storing them in airtight containers in the fridge. Then, when you’re ready to eat, gently reheat the sauce and toss in your drained tuna and peas first. Add the cooked pasta last. If the sauce seems tight, that splash of milk or reserved pasta water will loosen it right up! You can also check out some ideas for lazy dinners where make-ahead elements are key.
How do I prevent the sauce from getting grainy in this tuna pasta recipe?
This is the #1 rule for any creamy, cheesy sauce, whether it’s for this dish or a mac and cheese! The moment you add dairy and cheese is critical. Once you stir in the cheddar and Parmesan, make absolutely certain the skillet is completely off the heat. If the sauce is simmering or boiling when the cheese hits it, the proteins seize up and you get that grainy, separated texture rather than that smooth melt we want. Take it off the burner, stir gently, and let the residual heat melt those cheeses perfectly.
Is this recipe similar to a homemade tuna helper?
It absolutely scratches that same itch! If you’re looking for a homemade tuna helper experience but using fresh ingredients instead of processed powder packets, you’ve found the right place. This recipe relies on making a proper roux with flour and broth for a true, rich sauce base, which gives it way more depth than the boxed kind. It delivers all that nostalgic comfort food feeling but tastes so much fresher and brighter!
Share Your Experience with This Comfort Food Pasta
Now that you’ve got a rich, cheesy bowl of comfort food pasta sitting in front of you, I sure hope you love it as much as my family does! Recipes are only truly complete when they’ve made it onto your table, created memories, and hopefully, saved you from ordering takeout on a busy Tuesday night. I pour my heart into making sure these instructions are clear, reliable, and taste just like home.
I would absolutely love to hear what you think! Did you try making it into a tuna pasta bake variation, or did you stick to the skillet? Are there any secret additions—maybe a pinch of hot sauce or a dash of Worcestershire—that you added to your quick tuna pasta dinner? Please take a moment to leave a rating right here on the page so others know how it turned out for you. And if you snap a photo, send it over using the contact page—I always enjoy seeing my recipes come to life in your kitchens!
PrintOne-Pan Creamy Tuna Pasta Skillet
Make this easy, creamy tuna pasta skillet for a comforting weeknight dinner. It uses simple pantry staples and requires minimal cleanup.
- Prep Time: 10 min
- Cook Time: 25 min
- Total Time: 35 min
- Yield: 4 servings 1x
- Category: Dinner
- Method: Skillet Cooking
- Cuisine: American
- Diet: Vegetarian
Ingredients
- 12 ounces dried pasta (like elbow macaroni or rotini)
- 1 tablespoon olive oil
- 1 small yellow onion, chopped
- 2 cloves garlic, minced
- 1/4 cup all-purpose flour
- 2 cups chicken broth
- 1 cup milk (whole or 2%)
- 1 teaspoon Dijon mustard
- 1/2 teaspoon salt
- 1/4 teaspoon black pepper
- 1/4 teaspoon paprika
- 2 (5 ounce) cans tuna in water, drained well
- 1 cup frozen peas
- 1 cup shredded cheddar cheese
- 1/4 cup grated Parmesan cheese
Instructions
- Cook the pasta according to package directions until al dente. Drain the pasta, reserving about 1/2 cup of the cooking water. Set the cooked pasta aside.
- In the same large skillet or pot used to cook the pasta, heat the olive oil over medium heat. Add the chopped onion and cook until soft, about 5 minutes.
- Add the minced garlic and cook for 1 minute until fragrant.
- Whisk in the flour and cook for 1 minute, stirring constantly. This creates a roux.
- Slowly whisk in the chicken broth until smooth. Then, whisk in the milk, Dijon mustard, salt, pepper, and paprika.
- Bring the sauce to a simmer, stirring often, until it thickens enough to coat the back of a spoon, about 5 to 7 minutes.
- Reduce the heat to low. Stir in the drained tuna, frozen peas, and the cooked pasta. Mix until everything is combined and the peas are heated through.
- Remove the skillet from the heat. Stir in the cheddar cheese and Parmesan cheese until the sauce is smooth and creamy. If the sauce seems too thick, add a splash of the reserved pasta water until you reach your desired consistency.
- Serve the creamy tuna pasta immediately in bowls.
Notes
- For a richer flavor, substitute half of the chicken broth with tuna juice from the cans if you prefer not to drain them completely.
- You can easily turn this into a tuna pasta bake by transferring the mixture to a baking dish, topping with extra breadcrumbs or cheese, and baking at 375°F (190°C) for 15 minutes until bubbly.
- Add a squeeze of fresh lemon juice at the end for brightness, which pairs well with canned tuna meals.
Nutrition
- Serving Size: 1 serving
- Calories: 550
- Sugar: 5
- Sodium: 650
- Fat: 18
- Saturated Fat: 9
- Unsaturated Fat: 9
- Trans Fat: 0
- Carbohydrates: 65
- Fiber: 4
- Protein: 35
- Cholesterol: 45