
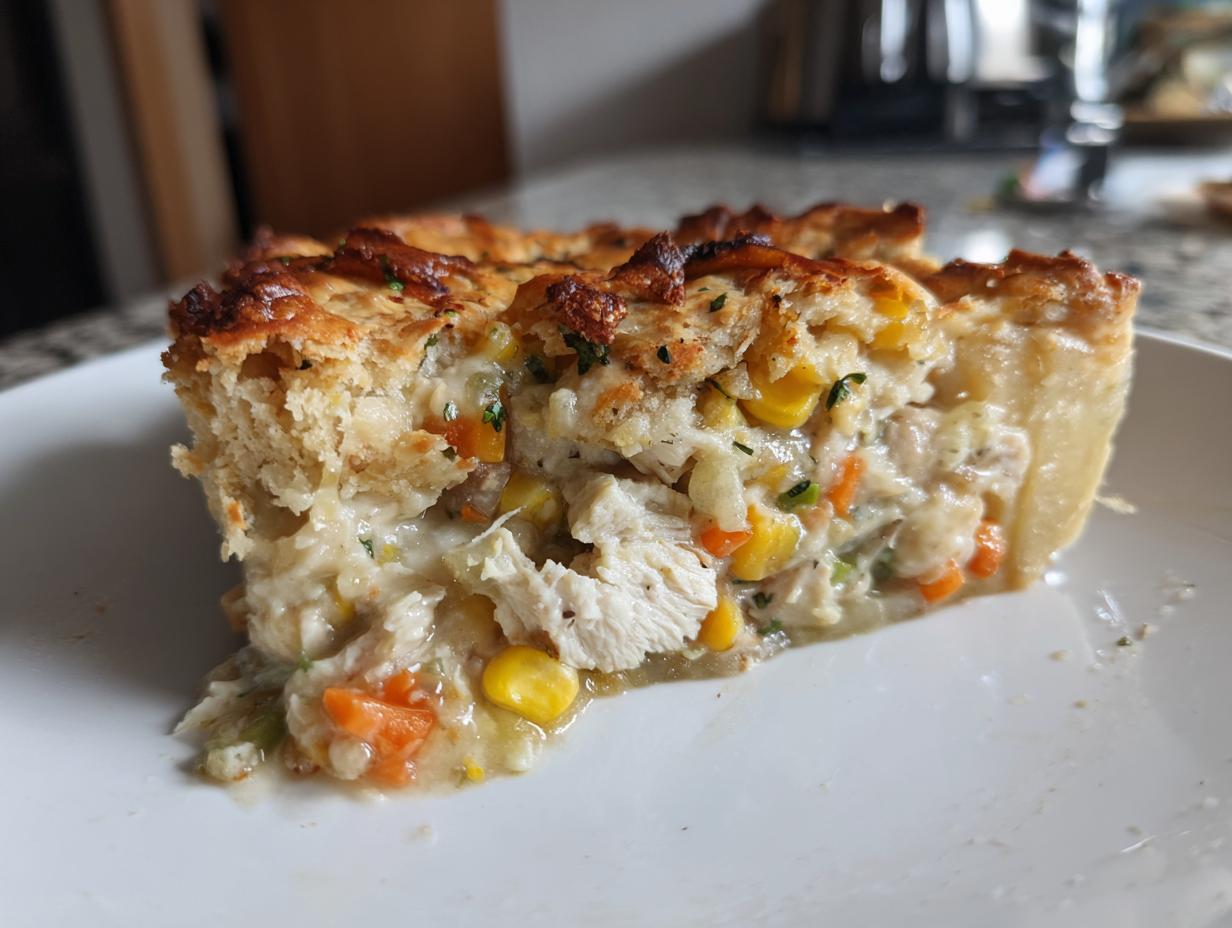
Oh, there’s simply nothing that wraps you up in a warm hug quite like the perfect slice of chicken pot pie. When I think of comfort food, I instantly flash back to my Midwestern roots where a hearty, bubbling dish like this meant everyone put down their chores and gathered at the table. Forget spending hours slaving over the stove, though! My favorite version, the Easy Homemade Chicken Pot Pie with Flaky Crust, uses a little secret—rotisserie chicken—to get that tender flavor base ready in a flash. It brings all those slow-cooked feelings to your dinner plate on a busy weeknight. It truly tastes like home.
- Why This Easy Homemade chicken pot pie Recipe Tastes Like Home
- Ingredients for the Best chicken pot pie with Flaky Crust
- Step-by-Step Instructions for Your Homemade chicken pot pie Recipe
- Tips for the Perfect Flaky Crust Pie Ideas
- Making Your chicken pot pie a Hearty Chicken Meal
- Storage and Reheating Your Leftover chicken pot pie
- Frequently Asked Questions About chicken pot pie
- Nutritional Estimates for this chicken pot pie
- Share Your Classic American Comfort Food Creations
- Nutritional Estimates for this chicken pot pie
- Share Your Classic American Comfort Food Creations
Why This Easy Homemade chicken pot pie Recipe Tastes Like Home
When I create a meal for my family, I want it to be reliable, delicious, and comforting—that’s the heart of all my best Comfort Food Dinner Recipes. This chicken pot pie hits every single mark, and that’s why I keep coming back to it year after year. It’s not fancy, but it’s wonderfully satisfying.
Here is what makes this specific version my go-to:
- Speed Built Right In: We get to skip the long poaching and shredding step by using a store-bought rotisserie chicken. That cuts out so much fuss!
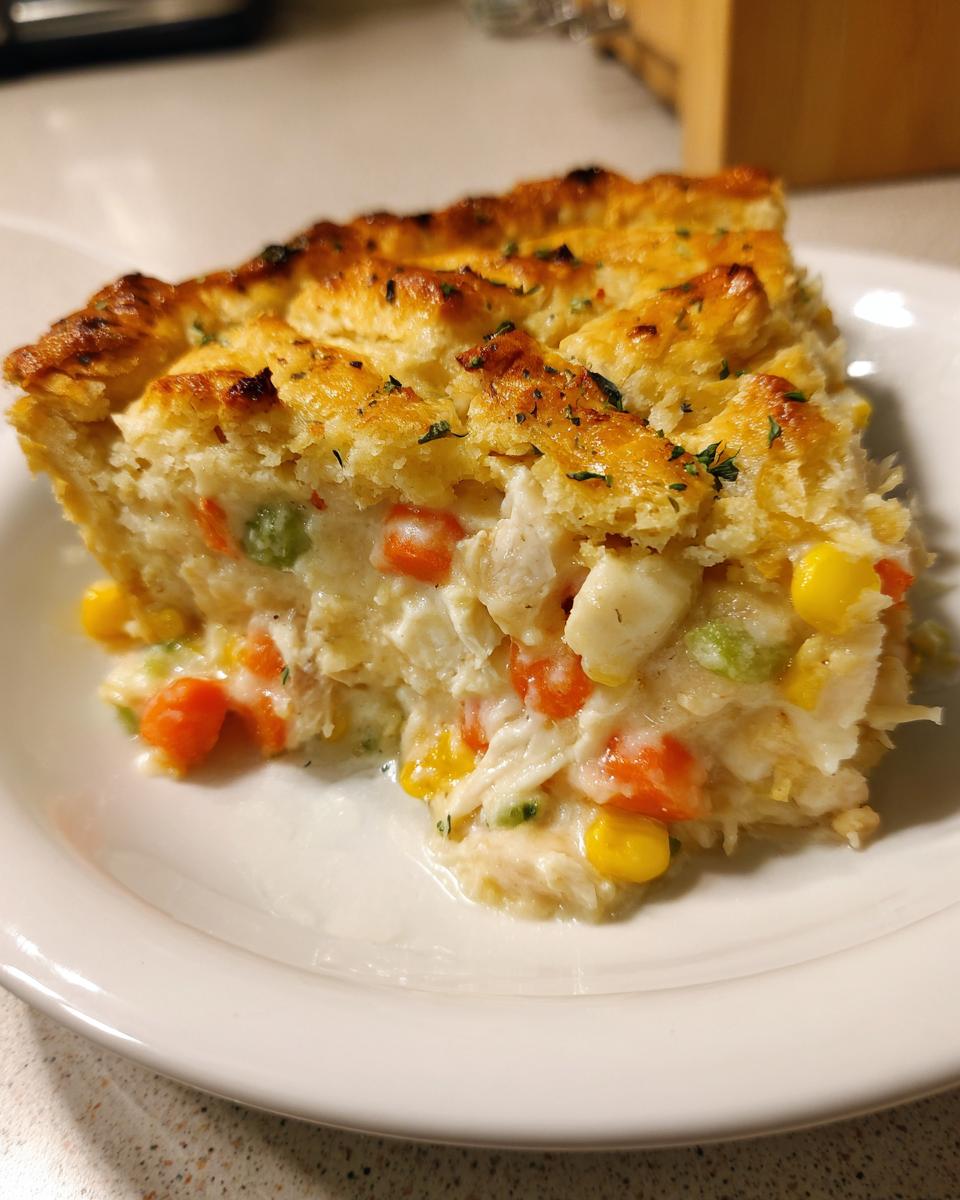
- That Perfect Texture: The filling is creamy, rich with vegetables, and bound together beautifully. No watery soup here!
- A Truly Flaky Crust: Since we are using ready-made dough, we can focus all our energy on making sure that top crust gets golden brown and wonderfully flaky.
Speed and Simplicity for Quick Weeknight Chicken Meals
I totally understand that after a long day teaching—or today, just running errands!—the last thing you want is a complicated stovetop chore. That’s why I consider this recipe one of my best Easy Chicken Dinner Ideas. The secret is truly in the pre-cooked chicken. You still get that home-cooked flavor because you develop that rich roux and thick sauce from scratch, but you save 30 minutes right off the top! This means you can have a steaming, hearty meal on the table faster than delivery, making it a true Quick Weeknight Chicken Meal win.
If you’re looking for other ways to use up cooked chicken fast, you might want to check out my chicken lettuce wraps—they’re a totally different flavor profile but just as snappy!
Ingredients for the Best chicken pot pie with Flaky Crust
Now we get down to business! The beauty of this Homemade Pot Pie Recipe is that the ingredient list is straightforward. You likely have half of this stuff in your pantry already. But listen closely, because the little details matter when you are aiming for that perfect, creamy texture. Don’t eyeball the measurements here, especially the flour, because that throws off the whole thickening process!
We are using store-bought crusts to save time, which is perfectly fine, but we have to treat that filling right.
Here is exactly what you need:
- 2 tablespoons unsalted butter (Make sure it’s real butter—it makes a difference in flavor!)
- 1 medium yellow onion, chopped
- 2 carrots, peeled and diced
- 2 celery stalks, diced
- 1/2 cup frozen peas
- 1/2 cup frozen corn
- 1/3 cup all-purpose flour (This is our thickener, so measure it well.)
- 1 3/4 cups chicken broth
- 1/2 cup heavy cream (This is what gives us that luxurious mouthfeel.)
- 2 cups cooked, shredded chicken (If you’re like me, this comes right off a rotisserie chicken!)
- 1 teaspoon dried thyme
- 1/2 teaspoon salt
- 1/4 teaspoon black pepper
- 1 box (14.1 ounces) refrigerated pie crusts (You need both crusts total for the top and bottom.)
- 1 large egg, beaten (This is for the beautiful golden wash on top.)
If you find yourself wanting to practice making sauces separately, you should definitely look at my recipe for homemade brown gravy. Making a good roux, like we do here, is just the first step to any great sauce!
Step-by-Step Instructions for Your Homemade chicken pot pie Recipe
You’ve got your ingredients ready, now let’s get this wonderful chicken pot pie into the oven! The key to success here, especially if you aren’t used to making a thick sauce, is patience during the mixing stages. We want that creamy filling—no lumps allowed! And since a bubbly filling is the best sign of doneness, we really need to pay attention to the cooking times. If you ever worry about timing, remember that checking for that bubbling center is the best secret tip for knowing when it’s truly done! You can always check out some nifty timing guides out there, like this one on how long to cook chicken pot pie recipe, just to be sure.
Preparing the Creamy Chicken Filling Recipes
First things first, get that oven warmed up to 400 degrees Fahrenheit. If you have a glass 9-inch pie dish, pull out one of your crusts now so it can relax on the counter while you work. Trust me, cold dough cracks easily!
Grab a big skillet and melt that butter over medium heat. Toss in your onions, carrots, and celery. Let them get nice and soft—about 5 to 7 minutes. This softens them up so they aren’t crunchy surprises in the final bite. Now, this next step is important for a thick sauce, so pay attention! Sprinkle in the flour and stir it constantly for one full minute. We are cooking out that raw starch taste—it’s critical!
Next, slowly whisk in that chicken broth. You must do this gradually! If you dump it all in at once, you’ll end up with a lumpy mess instead of one of those beautiful Creamy Chicken Filling Recipes. Keep whisking until it’s smooth, then let it simmer for about 3 to 5 minutes until it starts to look like gravy instead of soup. Finally, take it off the heat and stir in the cream, your cooked chicken, the frozen peas and corn, and all your seasonings. Give it a good mix until everything is coated.
Assembling and Baking the chicken pot pie
Time for the magic! Lay your first pie crust gently into the bottom of your dish. Pour that gorgeous, warm filling right in on top. Now, lay that second crust over the filling. This is what gives us that wonderful top layer.
Use a sharp knife to trim off the extra dough hanging over the edges, then pinch the top and bottom crusts together all the way around to seal it up tight—this helps create that great seal for the steam. The most important part for a golden finish? Cut a few slits right in the center of the top crust. This lets the steam escape so your flaky crust doesn’t explode or end up soggy underneath. Brush that top crust lightly with your beaten egg wash. Bake it for 30 to 35 minutes. If the edges look like they are getting too dark too fast, just sneak a little ring of aluminum foil around them. Once it comes out golden brown and bubbling, let it sit for 15 minutes before slicing—that rest time is crucial so the filling sets up nicely!
For other fun ways to make creamy chicken dishes, you might enjoy my easy creamy chicken enchiladas!
Tips for the Perfect Flaky Crust Pie Ideas
Getting that top crust golden and truly flaky is half the battle when making a great chicken pot pie. You don’t want sad, limp pastry—you want defined layers that shatter just a little when you cut into them! Since we are using store-bought dough here, we rely completely on baking technique to make it shine. It’s all about managing moisture and heat, which is something I learned over many, many years testing oven temperatures for pies.
I always make sure that filling is piping hot when it goes into the shell, but the *crust dough* itself should still be cool from the fridge. That temperature shock helps the fat in the pastry steam up and lift those layers beautifully. And remember that little trick I mentioned in the instructions? If you see those edges turning dark brown early on—and they often do because they are thinner—don’t panic! Just take a small ring of aluminum foil and loosely place it over the rim of the pie dish. That buys you time for the center to catch up without scorching the edges.
If you love learning about pastry techniques, you might enjoy my tips on achieving flaky results even when making flaky buttermilk scones, because the science is quite similar!
Alternative Toppings: Biscuits vs. Puff Pastry
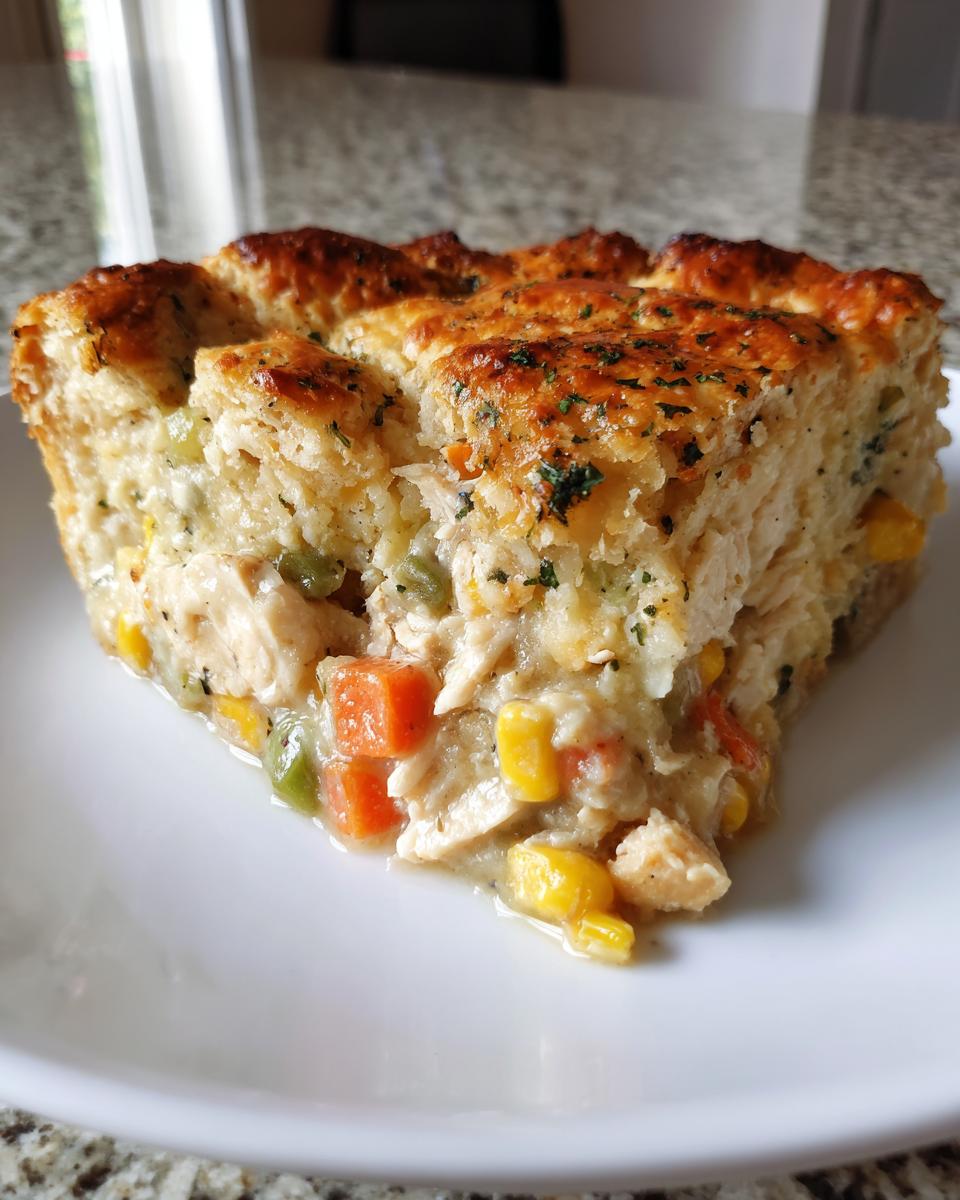
While this recipe is absolutely designed for that classic double-crust look, sometimes I need an even easier solution, or maybe the biscuits are calling my name! You absolutely do not have to stick to the pie dough for the topping. If you keep a can of refrigerated biscuits handy, you can skip the second pie crust entirely. Just take the biscuit dough and slice it into thirds or quarters, then arrange those dollops over your hot, creamy filling. It bakes up beautifully—this variation is perfect for when you want a Chicken Pot Pie with Biscuits topping.
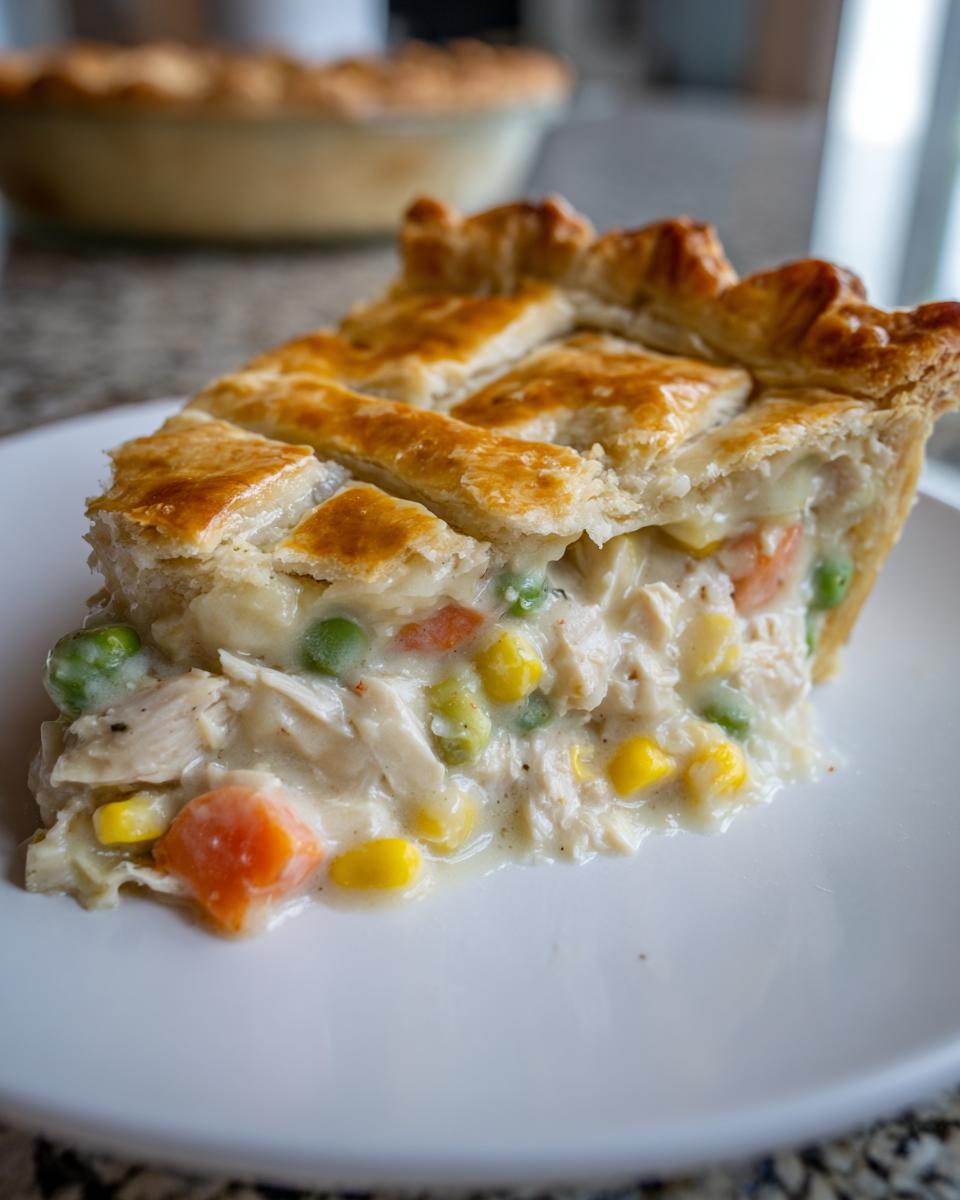
Another fun pivot, which makes it feel a little fancier, is using puff pastry. It’s the ultimate upgrade for texture, giving you that airy, shattering crunch. You just need to cut the puff pastry to overlap the edges of your pie dish slightly. The instructions note mentioned this too: just make sure the pastry is cold when it goes onto the hot filling for the best lift!
Making Your chicken pot pie a Hearty Chicken Meal
Well, we’ve got this incredible, rich, bubbling chicken pot pie that is practically a whole meal in one dish. It’s certainly filling enough to be called a Hearty Chicken Meal, brimming with chicken, vegetables, and that thick, creamy sauce. Because it already contains your starch (the crust) and your protein and veggies, the key to serving it beautifully is balancing that richness with something light and fresh on the side.
I rarely serve this standing alone! It just begs for a little something green to cut through all that creamy goodness. My number one recommendation—and what we often have during the colder months when this dish shines—is a wonderfully simple green salad dressed with a bright vinaigrette. Not a heavy, creamy dressing, mind you, but something lemony or vinegary to wake up your palate between bites of filling.
If you’re serving this on a night when you need more substance, maybe because everyone’s been outside working hard, then roasted vegetables are the way to go. They bring a nice sweetness and char that complements the savory crust so well. I love tossing broccoli or Brussels sprouts with a bit of garlic and olive oil. If you want a foolproof guide for some flavorful sides, you should check out my recipe for garlic herb roasted veggies—they take almost no active time, and you can roast them right while the pot pie is cooling down!
It’s all about creating balance on that plate. That comforting weight from the pie needs something sharp to lift it up!
Storage and Reheating Your Leftover chicken pot pie
Oh, leftovers! If you’re like my family, sometimes one giant, steaming chicken pot pie makes more than one meal, and that’s a wonderful thing! This dish holds up beautifully, which is why it fits perfectly into my collection of Use Up Leftover Chicken Recipes. You’ve already cooked the chicken once, and now you get to enjoy this warm comfort again the next day.
The biggest challenge with leftovers is always the crust. Nobody wants a soggy bottom crust when they reheat their favorite savory pie! That’s why I always recommend the oven over the microwave if you can manage it. The microwave heats things up fast, but it steams that beautiful pastry, turning it soft and limp. We worked too hard for a flaky crust to see it defeated by a quick zap!
Here is my routine for making sure day-two pot pie tastes almost as good as the first time:
- Cool Down First: Let any extra pot pie sit on the counter for about an hour after dinner until it’s room temperature. Don’t put piping hot food directly into the fridge; it affects the fridge temperature and can cause condensation problems.
- Cover Well: Store your leftovers in an airtight container. If you only have a quarter of a pie left, wrapping the cut side TIGHTLY in plastic wrap before putting it in a container helps keep that exposed filling from drying out during cold storage. It keeps well in the refrigerator for about three to four days.
The Best Way to Reheat for Crust Preservation
When you are ready to bring it back to life, pull the slice out about 30 minutes ahead of time to take the chill off slightly. Preheat your oven to a lower temperature than when you originally baked it—about 350 degrees Fahrenheit is perfect. Place your individual slice on a small baking sheet lined with foil or parchment paper. This helps insulate the bottom crust a little!
Bake it for about 15 to 20 minutes, or until the filling is steaming hot all the way through and the crust is warmed up and crisp again. You will be amazed at how much the crust snaps back! If you are truly in a rush and have to use the microwave, only heat it in short 30-second bursts and then perhaps finish it in a toaster oven for 3 minutes just to crisp the top up a little bit. It’s not as good as the oven, but it’s better than cold pie!
Speaking of using up leftovers in creative ways, even when I have leftover ham, I still turn to simple recipes like my classic ham salad to utilize it quickly!
Frequently Asked Questions About chicken pot pie
It’s completely normal to have questions when you are diving into a new Homemade Pot Pie Recipe, especially when you want to make sure it turns out perfectly golden and creamy. This recipe is very flexible, but a few little tweaks can make all the difference between a good pie and a truly great one. Ask away—I’m happy to clarify anything!
Can I use fresh chicken instead of rotisserie for this chicken pot pie?
Oh, absolutely, you can use fresh chicken! It’s great to have options for when you just don’t have a rotisserie bird handy. If you go this route, you’ll just need about one pound of boneless, skinless chicken breast or thighs. You need to cook it first, of course. I usually just simmer it gently in a little salted water until it’s cooked through, maybe 15 minutes. Then you shred it up! The time you add it to the recipe is right after you finish sauteing your broth and thickening the sauce—you add the shredded fresh chicken in with the peas and corn so it heats up completely in the oven with the rest of the filling. It works just as well and makes for a fantastic Classic American Comfort Food dinner!
If I don’t want to use a double crust, can I make this chicken pot pie casserole style?
You know, sometimes the cutting and sealing of a double crust feels like too much fuss, and that’s when I turn to a casserole approach! This mixture is fantastic as a no-fuss Chicken Casserole Recipe. To do this, skip step 6 and 7 entirely. Instead of lining a pie dish, just pour the entire creamy chicken filling into a standard 9×13 baking dish. Then, you can top it with a layer of buttery crackers, or even drop spoonfuls of biscuit dough over the top (that’s a little variation I mentioned before!). It bakes up just as delicious and comforting, and I happen to have a whole guide on making a classic chicken pot pie casserole if you want step-by-step visuals for that method!
How long should I bake a chicken pot pie if I use a deep dish pan?
That’s a really good question, because deeper dishes mean the heat takes longer to reach the very center, and we certainly don’t want a half-cooked center filling! If you swap out your standard 9-inch pie plate for something much deeper—say, a large stoneware dish—you will definitely need to add some extra time. I’d start by adding 5 to maybe 10 more minutes to the total bake time. The crust color will still be your first clue, but the truly important indicator is that bubbling filling. If you stick a skewer or the tip of a small knife into the very center and pull it out, the liquid coming off should be steaming hot. If it’s just warm or barely moving, give it another 5 minutes!
Can I make this chicken pot pie in a slow cooker?
Oh, the slow cooker is fantastic for making this rich filling, though you usually have to adjust the crust significantly since you can’t bake traditional pastry in a crockpot very well! If you want to use the slow cooker, you’ll want to cook the vegetables and make your roux (the butter and flour) right on the stovetop first, just like steps 2 through 4 in the recipe. Then, you transfer that mixture to your crockpot, add the chicken and frozen items, and cook on low for 3 to 4 hours. For the topping, you’d want to make either a biscuit topping (dropped on top to steam/bake for the last 30 minutes) or serve it right in a bowl, topped with crackers or croutons. It’s a lovely modification for a true Crockpot Chicken Pot Pie experience!
Nutritional Estimates for this chicken pot pie
As a teacher moving into recipe writing, I always try to be as transparent as possible with what goes into our meals! Since we are using savory ingredients like butter, cream, and prepared crusts, this dish is definitely one of those lovely, hearty meals you save for special cozy nights rather than an everyday lunch. These numbers are just estimates based on the ingredients listed and assuming 8 equal slices, so please remember they are guidelines!
- Calories: Around 450
- Fat: About 25g (Don’t forget that wonderful flaky crust!)
- Protein: A healthy 25g, thanks to all that chicken.
- Carbohydrates: Roughly 35g
This is pure, unadulterated Classic American Comfort Food, meant to be enjoyed fully!
Share Your Classic American Comfort Food Creations
I truly hope this recipe brings as much warmth to your kitchen as it does to mine. There is something so deeply satisfying about pulling a golden, piping hot chicken pot pie out of the oven. It’s simple cooking, but it’s done with love, and that’s what really counts when we talk about Classic American Comfort Food.
When you give this recipe a try, I would simply adore it if you came back here and let me know how it went! Leave a rating—did your family prefer the biscuit topping or the double crust? Did it become a favorite addition to your collection of Easy Chicken Dinner Ideas? Your feedback helps every other home cook who visits this page, and I read every single comment.
If you’re looking for another guaranteed crowd-pleaser that feels festive but is secretly simple, you’ve got to see my easy Christmas poke cake recipe. Happy baking!
PrintEasy Homemade Chicken Pot Pie with Flaky Crust

This recipe delivers the classic comfort of homemade chicken pot pie using rotisserie chicken for speed. You get a creamy filling and a golden, flaky crust, making it a perfect, hearty meal for any weeknight.
- Prep Time: 20 min
- Cook Time: 35 min
- Total Time: 55 min
- Yield: 8 servings 1x
- Category: Dinner
- Method: Baking
- Cuisine: American
- Diet: Vegetarian
Ingredients
- 2 tablespoons unsalted butter
- 1 medium yellow onion, chopped
- 2 carrots, peeled and diced
- 2 celery stalks, diced
- 1/2 cup frozen peas
- 1/2 cup frozen corn
- 1/3 cup all-purpose flour
- 1 3/4 cups chicken broth
- 1/2 cup heavy cream
- 2 cups cooked, shredded chicken (use rotisserie chicken for ease)
- 1 teaspoon dried thyme
- 1/2 teaspoon salt
- 1/4 teaspoon black pepper
- 1 box (14.1 ounces) refrigerated pie crusts (2 crusts total)
- 1 large egg, beaten (for egg wash)
Instructions
- Preheat your oven to 400 degrees Fahrenheit. If you are using a 9-inch pie dish, let one pie crust sit at room temperature while you prepare the filling.
- In a large skillet over medium heat, melt the butter. Add the chopped onion, carrots, and celery. Cook until the vegetables soften, about 5 to 7 minutes.
- Stir in the flour, mixing constantly for 1 minute to cook out the raw flour taste.
- Gradually whisk in the chicken broth until the mixture is smooth. Bring the mixture to a simmer and cook until it thickens slightly, about 3 to 5 minutes.
- Stir in the heavy cream, cooked chicken, frozen peas, frozen corn, thyme, salt, and pepper. Mix well to combine the creamy chicken filling. Remove the skillet from the heat.
- Place one pie crust into the bottom of your pie dish. Pour the chicken filling evenly into the crust.
- Place the second pie crust over the filling. Trim the edges of both crusts and crimp them together to seal. Cut several slits in the top crust to allow steam to escape during baking.
- Brush the top crust lightly with the beaten egg wash.
- Bake for 30 to 35 minutes, or until the crust is golden brown and the filling is bubbly. If the edges start to brown too quickly, cover them loosely with foil.
- Let the chicken pot pie cool on a wire rack for at least 15 minutes before slicing and serving. This helps the filling set.
Notes
- For a richer flavor, substitute half of the chicken broth with dry white wine and let it cook down before adding the flour.
- If you prefer a biscuit topping instead of a double crust, skip the second crust and drop spoonfuls of biscuit dough over the filling before baking.
- Baking time may vary slightly if you use a glass dish versus a metal pie plate. Check for bubbling filling as your primary indicator.
Nutrition
- Serving Size: 1 slice
- Calories: 450
- Sugar: 4
- Sodium: 550
- Fat: 25
- Saturated Fat: 12
- Unsaturated Fat: 13
- Trans Fat: 0.5
- Carbohydrates: 35
- Fiber: 3
- Protein: 25
- Cholesterol: 85