
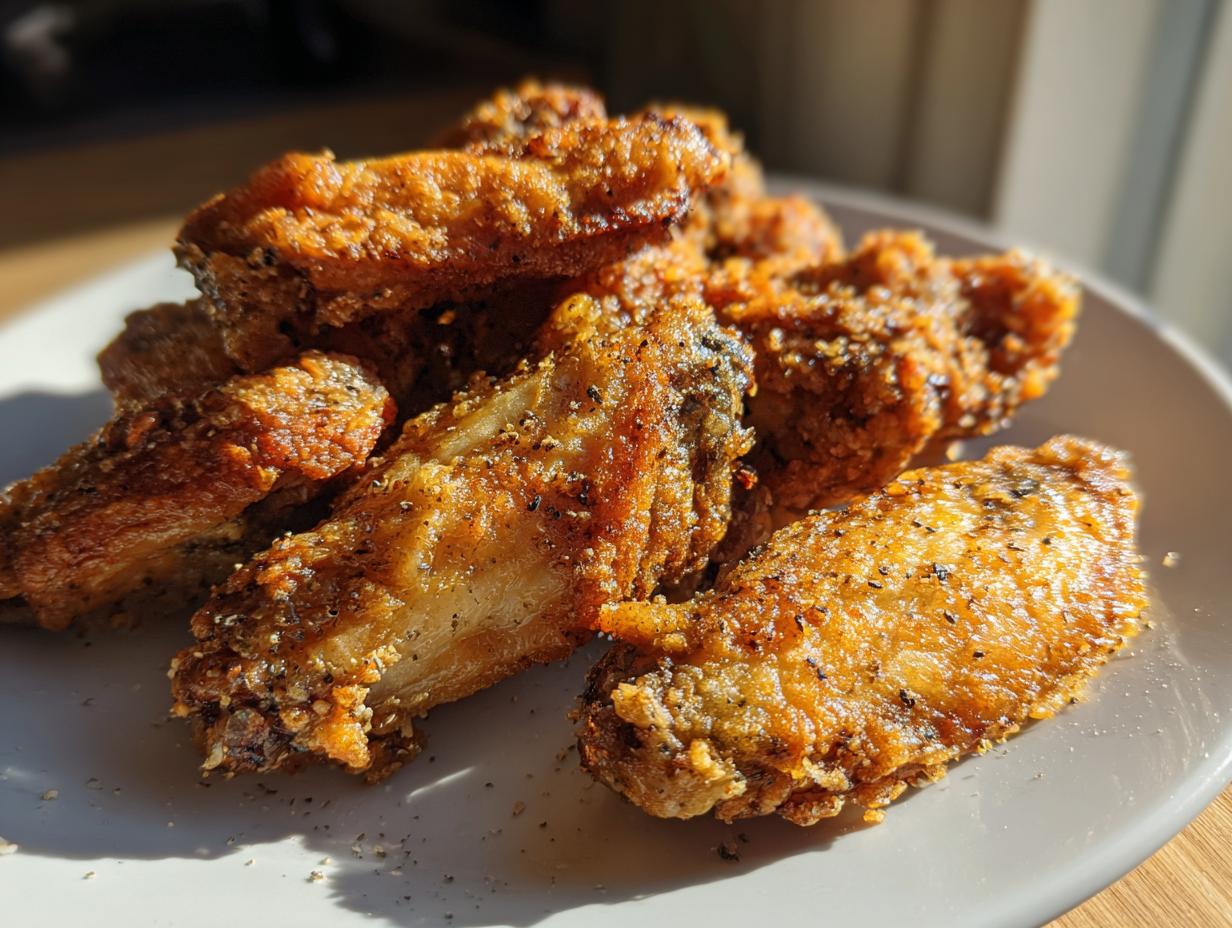
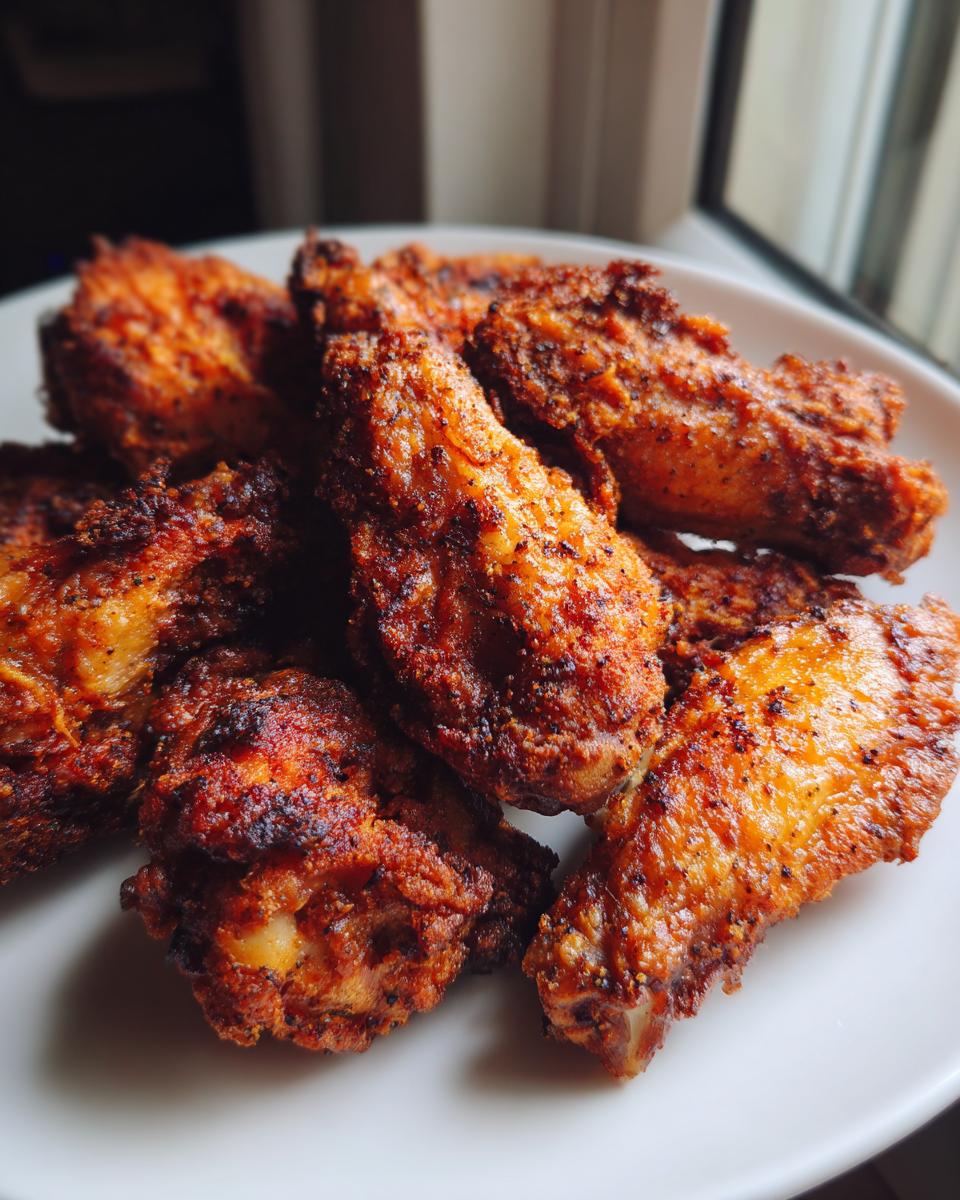
Oh, the disappointment! You pull those chicken wings out of the oven, expecting that satisfying shatter of crispy skin, only to find… a sad, rubbery shell. It happens to the best of us, especially when we try to skip the fryer. But let me stop you right there! I’ve got the absolute secret that turns your oven into a crunch machine. This recipe delivers truly crispy baked chicken wings without ever needing a vat of hot oil, thanks to a little trick involving baking powder. Trust me, this method is straightforward—I learned it after thirty years of teaching kids patience, and I bring that same clarity to the kitchen. You’re going to get the perfect texture, juicy inside and completely crunchy outside, every single time we tackle these oven baked wings no fry.
- Why This Recipe Guarantees Crispy Baked Chicken Wings Every Time (The Science)
- Gathering Ingredients for Oven Baked Wings No Fry
- Step-by-Step: How To Make Crunchy Baked Wings
- Finishing Your Crispy Baked Chicken Wings with Sauce
- Tips for the Best Crispy Baked Chicken Wings
- Serving Suggestions for Your Party Appetizer Chicken Wings
- Storage and Reheating Crispy Baked Chicken Wings
- Frequently Asked Questions About Crispy Baked Chicken Wings
- Share Your **Game Day Chicken Wing Ideas**
Why This Recipe Guarantees Crispy Baked Chicken Wings Every Time (The Science)
I know you’ve probably tried baking wings before and ended up with something closer to rubber than crunch. That’s usually because the moisture gets trapped, making the skin steam instead of crisping up! The real secret to crispy baked wings isn’t about magic; it’s just a bit of simple chemistry that I discovered works wonders. We focus on three things: getting them dry, using our special coating, and giving them room to breathe. When you follow these steps, you get that deeply browned, shatter-like exterior we all dream about when making crispy baked chicken wings at home.
The Baking Powder Chicken Wings Trick Explained
Okay, this is the game-changer, and no, the wings won’t taste like soap! We use aluminum-free baking powder—just a tiny bit mixed with your salt and spices. What it does is raise the pH level on the chicken skin. Think of it like this: chemistry makes the skin dry out and encourages browning way faster in the oven. This process helps release fat from under the skin, which is what gives you a crunchy coating almost identical to frying. It’s a truly effective technique, and it’s what makes these wings different from anything else you’ve tried. You can learn more about how professional kitchens achieve this effect here: this article breaks down the science beautifully, too.
Why a Wire Rack is Essential for Crispy Baked Chicken Wings
This is almost as important as the baking powder. You absolutely must place your coated wings on a wire rack set over a baking sheet. If you lay them directly on the foil, the bottoms sit in their own melted fat and juices. That moisture turns into steam, and steam melts your crispiness away! When the air can circulate underneath, you get even cooking on all sides. Just make sure you leave a little space between each wing—don’t pile them up! That’s why this rack step is a true wing recipe rack essential for guaranteed crunch from top to bottom.
Gathering Ingredients for Oven Baked Wings No Fry
Getting your components ready is super simple because this recipe doesn’t need a pantry full of fancy stuff. I designed this setup to be quick, which is great when you need some easy appetizers fast. Remember, the beauty here is in the technique, not in complicated sourcing. We need great wings, a few spices, and the magic ingredient that we just talked about!
Here is what you’ll need waiting on your counter before you start prepping anything:
- 2 lbs chicken wings (Make sure you separate the drumettes and the flats! It helps them cook evenly.)
- 1 tablespoon baking powder (I always grab the aluminum-free kind, but regular works in a pinch, too!)
- 1 teaspoon salt
- 1/2 teaspoon black pepper
- 1/2 teaspoon garlic powder
- 1/4 teaspoon paprika
- Optional: About 1/4 cup of your favorite Buffalo or BBQ sauce if you plan to toss them after baking.
Ingredient Notes and Substitutions
Since I taught third grade for so long, clarity on ingredients is my specialty! If you are looking for a **gluten free crispy wings** option, you’re in luck—this base seasoning is naturally gluten free! The baking powder is the real hero here, but let me be clear: always opt for aluminum-free if you can find it. It has a cleaner flavor, though don’t stress if you grab the standard container; the crunch factor will still be there.
If you are planning to sauce them up later, any good quality store-bought sauce works wonderfully. Just remember that you toss them *after* they come out piping hot from the oven. If you skip the sauce entirely, you’ve got a brilliant dry rub wing that’s perfect for dipping right away. Keep it simple, folks! That’s the Carla way.
Step-by-Step: How To Make Crunchy Baked Wings
Now that we have our special seasoning mix ready, it’s time for execution! If you’ve been seeking that perfect texture that rivals deep-frying, this is where we achieve it. Forget those days of wrestling with sticky batter; these wings come out delightfully golden and crunchy, making them look almost like easy oven fried wings, but with none of the mess or extra oil. The key here is process and timing. Follow me closely, and we’ll have the best batch of crispy baked chicken wings you’ve ever made.
Preparation and Coating for Crispy Baked Chicken Wings
First and most importantly: the wings must be dry. I mean bone-dry! Moisture is the enemy of crispiness. Take your separated drumettes and flats and literally pat them down with paper towels until they feel almost rough. If you want my top tip—and I learned this from teaching little hands how to wash lettuce—use a salad spinner for about 30 seconds; it shakes off so much surface water! Once they are dry, pour the spice and baking powder mixture over them. Toss them around in that big bowl until every single piece has an even, pale coating. You want that baking powder touching every millimeter of skin.
Baking Times and Temperature Adjustments
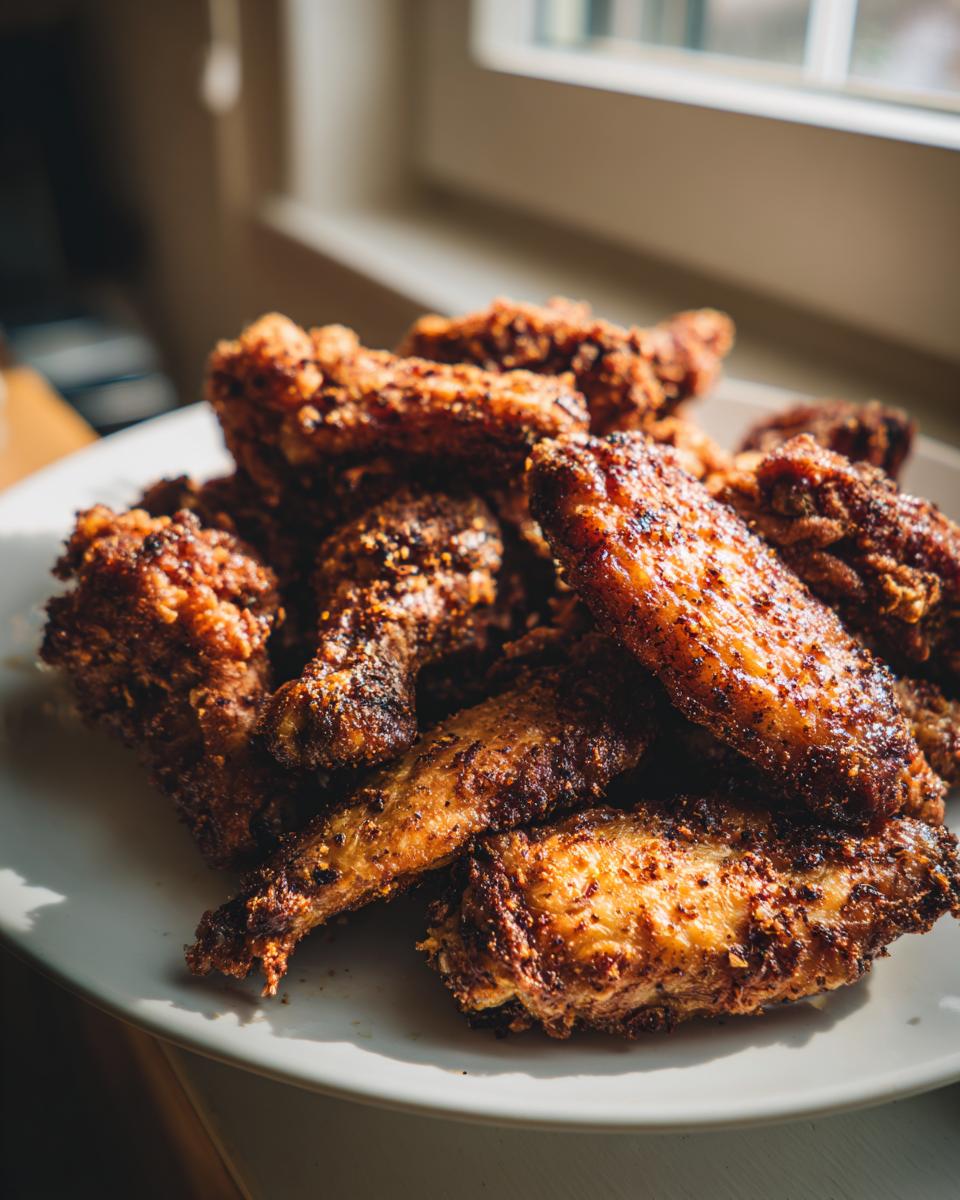
We use a two-stage heating process here, which is crucial. Start by cranking your oven up high to 425°F (220°C). Arrange those coated wings on that wire rack we discussed, ensuring they aren’t touching. Bake them hot for 20 minutes. This initial blast dries out the skin rapidly. Then comes the big temperature drop—reduce that heat down to 400°F (200°C) and bake them for another 20 to 25 minutes. Before that final bake time, you have to flip them! Flipping ensures both sides get that beautiful golden-brown color. If you want more ideas on simple, flavorful coatings, check out how I approach my favorite simple batter coatings; the principles of external crunch are very similar!
Finishing Your Crispy Baked Chicken Wings with Sauce
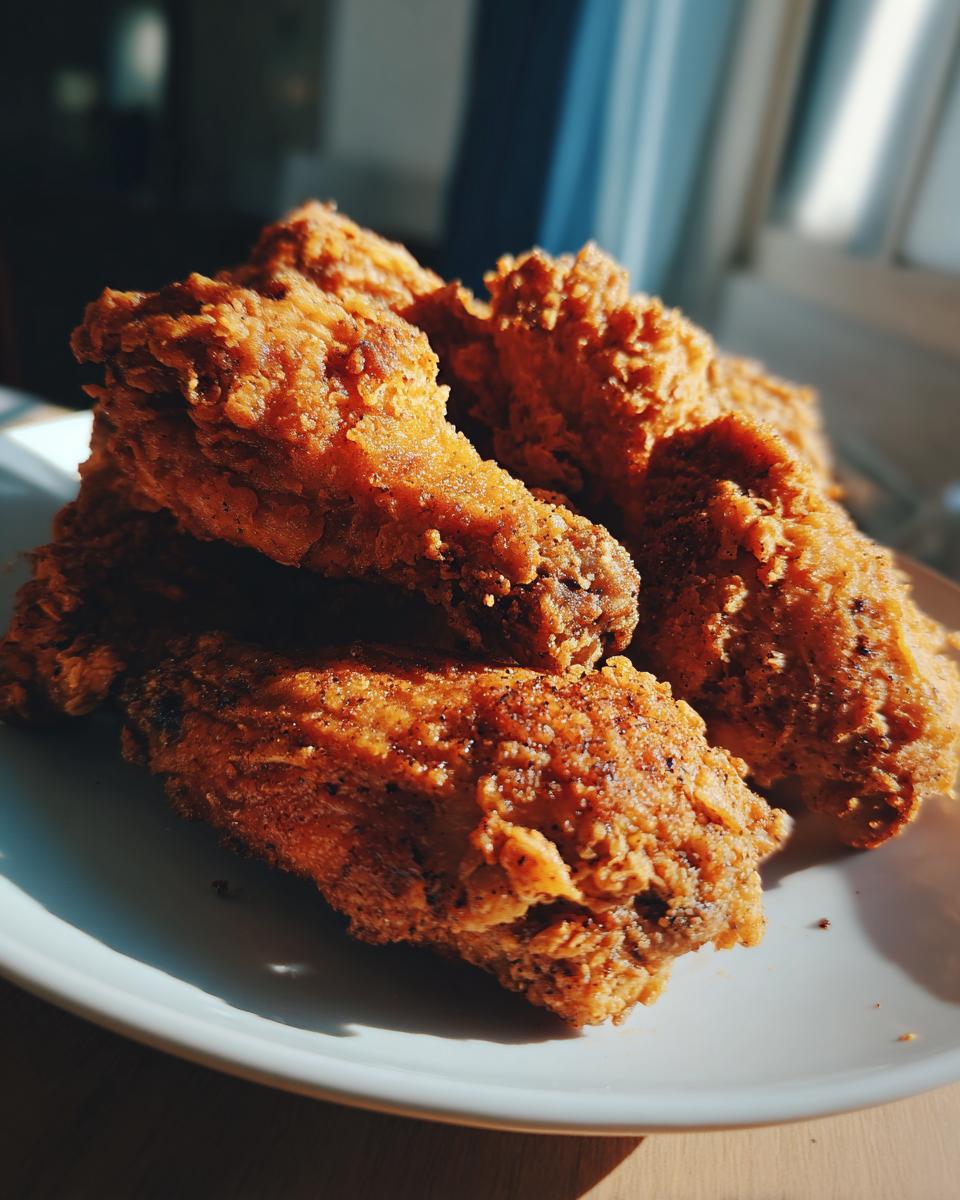
This is where so many cooks mess up their perfectly prepared, crunchy wings! The big question is always: do you toss them in sauce before baking or after? My advice, learned through much trial and error at family cookouts, is simple: Sauce them *after* they come out of the oven. If you put that wet sauce on them while they are still baking, even with the baking powder coating, the moisture creeps back in, and you ruin that glorious crunch you worked 45 minutes to achieve!
We want those Juicy Inside Crispy Outside Wings, right? So, take them out when they look perfectly golden brown and firm—that means the fat has rendered and the skin is tight. Immediately drop those hot wings into a big, clean bowl. Add just enough sauce to coat them lightly, and toss quickly. The heat of the wings melts the sauce just enough to adhere without making the exterior soggy.
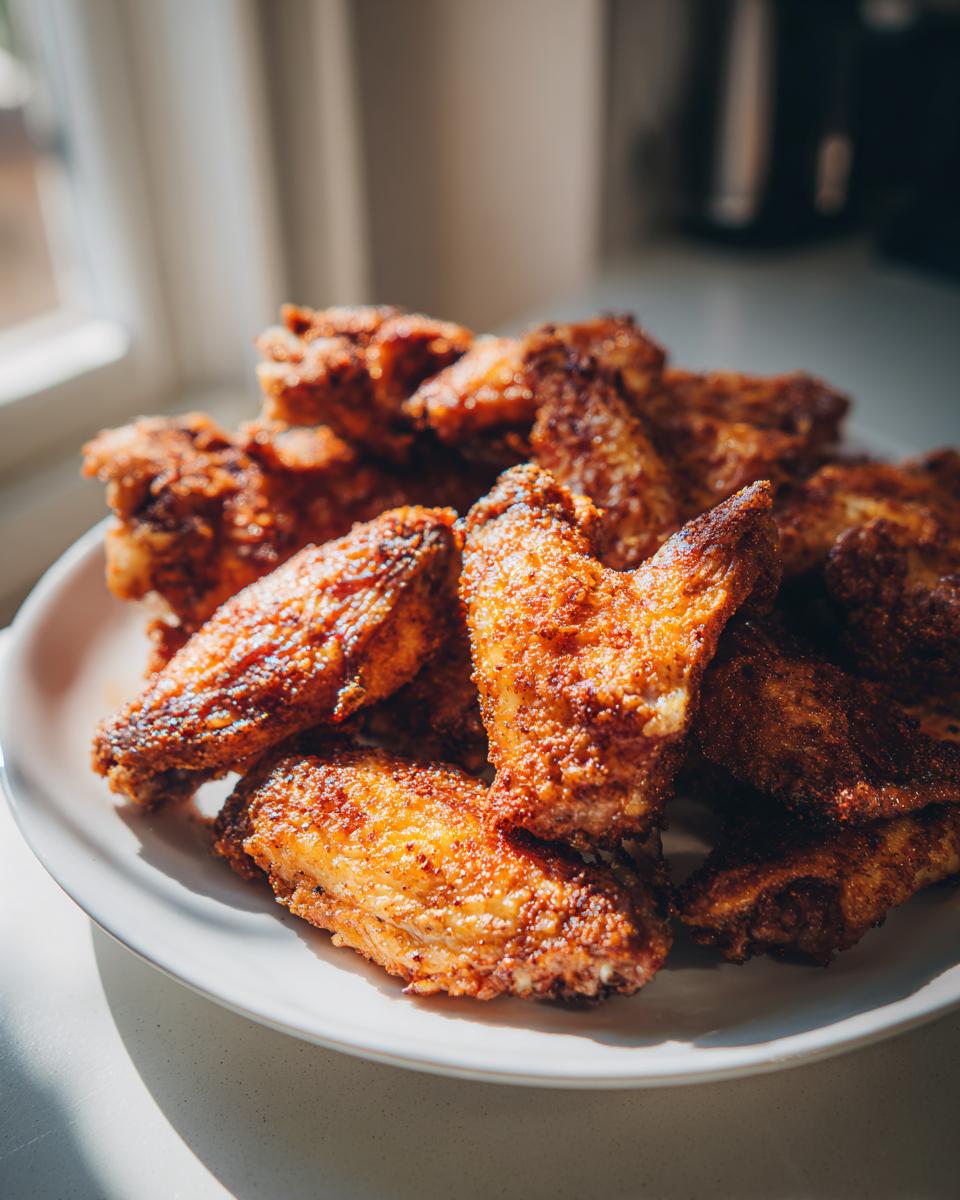
If you want that beautiful, bubbly, restaurant-style finish, you can put them back onto the wire rack for a quick trip under the broiler. I mean *quick*—seriously, watch them like a hawk! One to two minutes is usually all it takes to get the sauce caramelized and sticky without burning the whole thing down. It really takes them over the top!
**Wing Sauce Ideas Baked Wings**
Since the base seasoning mix is so versatile, you can go in so many directions after the wings are cooked. Buffalo is classic, of course. If you’re a huge fan of spice and tang, check out my recipe for easy creamy garlic sauce—it’s amazing drizzled over these wings! Or, go for a smoky BBQ flavor, or even a simple garlic Parmesan toss using melted butter, grated Parmesan, and garlic powder.
But don’t forget the dry rub option! If you skip the sauce entirely, immediately after they come out of the oven, toss them with just a little extra salt and maybe some smoked paprika or a pre-made dry rub. These dry-rubbed wings stay supremely crispy the longest, which is perfect if you’re making them for a party ahead of time. For great Buffalo-style sauce inspiration, this recipe site has a fantastic take on the classic Buffalo style baked chicken wings you might want to investigate.
Tips for the Best Crispy Baked Chicken Wings
Because I spent so many years teaching kids how to get their coloring inside the lines, I know patience and precision matter! If you’re struggling with wings that aren’t quite pulling through, let’s troubleshoot that texture issue right now. The most common mistake people make is overcrowding that wire rack. If those wings are touching, they are going to steam each other, and we are back to that sad, floppy skin. Give them elbow room!
My other big tip, which ties into getting juicy meat, is not to pierce the meat or cut off all the fat beforehand. We need that fat to render out beneath the skin to help make it crispy. If you want to explore other great ways to handle poultry, my recipe for grilled chicken marinade shows how simple seasoning can elevate meat quickly.
Remember the temperature shift! That high heat blast followed by a slightly lower temperature bake is what seals the deal for deep color and crunch. Stick to the times, and you’ll have the best crispy baked chicken wings on the block.
Serving Suggestions for Your Party Appetizer Chicken Wings
These crispy baked chicken wings are basically the star quarterback of any gathering. They disappear so fast, whether it’s a huge Super Bowl party or just an easy weeknight meal when the kids are demanding something fun. Because the wings provide all the texture and flavor punch, you don’t need sides that are overly complicated or creamy, especially if you’re worried about keeping them hot!
My main goal when serving wings is to make sure everything on the plate *adds* to the crispiness or acts as a cooling counterpoint, not something that will make the bottom of the wing soggy. Keep it simple! If you’re having a big spread of appetizers, these wings will shine all on their own.
For dipping, you can never go wrong with classic cool ranch or blue cheese dressing—I always put those out in small bowls so people can dip without swimming the whole wing in sauce. The celery and carrot sticks are non-negotiable; they give everyone a nice, refreshing crunch between bites of chicken.
If you need something a little more substantial than just veggies, I highly recommend a sturdy, vinegar-based side. Something bright and cold works best. You absolutely have to check out my recipe for creamy ranch avocado pasta salad! It’s delicious, but you might want to serve that on a separate table so rogue dressing doesn’t accidentally splash onto your perfectly baked wings. You can also check out some great ideas on other sides that pair perfectly with baked wings over at this great site for appetizer pairing. Keep the sides cool, crunchy, and separated, and your guests will be raving about your party appetizer chicken wings all night long!
Storage and Reheating Crispy Baked Chicken Wings
It’s rare that we have leftovers of those crispy baked chicken wings, honestly, because everyone devours them! But just in case you manage to save a few pieces, how you store and reheat them is absolutely critical if you want to keep that wonderful crunch we worked so hard to achieve. Microwaving is your enemy here; it turns beautiful chicken skin instantly flabby. Don’t even think about it!
For storage, let the wings cool completely first. If you put them in an airtight container while they are still warm, condensation forms inside, and that’s instant sogginess insurance. Once cooled, pop them into a container—any container with a lid—and stick them in the fridge. They should be great for about three days. Any longer than that, and I really can’t vouch for the texture.
Now, for the magic of bringing them back to life! The goal is drying the skin out again while reheating the meat. My favorite tool for this, especially for smaller batches, is the toaster oven. You set it to about 375°F (190°C) and toast them for about 5 to 7 minutes. If you don’t have a toaster oven, use your regular oven. Pop them back on that clean wire rack and bake them at 400°F (200°C) for about 8 to 10 minutes. They heat evenly, and you’ll hear that skin crisp right back up as they warm through. Give them a quick internal temperature check—you want them back up to 165°F (74°C) to feel safe and taste hot!
Frequently Asked Questions About Crispy Baked Chicken Wings
Can I use this method for a Healthy Crispy Wings Recipe?
Oh, absolutely! That’s one of the main reasons I love this recipe so much. When we talk about making wings that are truly crispy baked chicken wings without frying, we are automatically cutting out the massive amount of unnecessary oil you absorb when you deep fry. Since this entire recipe happens right in the oven, relying on the baking powder mix to do the heavy lifting, it’s inherently a much more healthy crispy wings recipe compared to the standard fried bar food. You get all the crunch and flavor, but with far less fat added during cooking. It’s a win-win for game day!
How long do I need to bake wings to ensure they are Juicy Inside Crispy Outside Wings?
We don’t want dry, sad wings, we want the full experience! For this method, we’re looking at roughly 40 to 45 minutes total cook time, depending on how big your wings are. However, time is just a suggestion, friends! The real marker for safety and perfection is internal temperature. You are going for 165°F (74°C) in the thickest part of the meat. If you are using one of those instant-read thermometers—which I highly recommend for any meat recipe—you know exactly when those wings are safe, perfectly cooked, and achieving that juicy inside crispy outside wings balance we are aiming for. Don’t pull them out until they hit that temp!
What if I don’t have a wire rack? Can I still make crispy baked chicken wings?
I always say, we make do with what we have in an honest home kitchen! While that wire rack is truly the superstar for ensuring all-around crispiness because it lets air move underneath, you can try an alternative in a pinch. You can line your baking sheet with a thin layer—and I mean thin—of baking soda or even use a little cornstarch mixed onto the foil. The idea is that you are trying to create a dry layer between the wing and the hot metal pan to prevent sticking and steaming. However, I need to be honest, the bottoms might still be a little softer than the tops because you lose that critical air circulation that the rack provides. If you can run to the store for a cheap rack, it’s worth it, but if not, try the thin dry layer and make sure you flip them diligently!
Share Your **Game Day Chicken Wing Ideas**
Well, there you have it! We’ve unlocked the secret to gloriously crispy baked chicken wings that truly deliver crunch without the fuss of deep frying. Now that you have this reliable method in your back pocket, I want to hear all about your wing adventures! This community thrives when we share our successes and even those little learning moments we all encounter.
Did you try a wild spice blend with the baking powder mix? Maybe you discovered the perfect homemade sauce that you paired with these wings? Or perhaps you served them up for a huge event? Don’t just keep that deliciousness to yourself!
Head down to the comments below and let me know how these turned out for you. Leave a star rating so other cooks know this recipe is a winner. If you’re looking for even more straightforward ideas that are crowd-pleasers—especially for parties or game days—you might want to sneak a peek at my list of easy appetizers and snacks.
Happy cooking, everyone! I can’t wait to see your perfectly crunchy masterpieces heading out to the table!
PrintUltra Crispy Baked Chicken Wings Using Baking Powder Trick

Make truly crispy baked chicken wings in your oven without deep frying. This simple method yields juicy meat with a crunchy exterior, perfect for game day or appetizers.
- Prep Time: 10 min
- Cook Time: 45 min
- Total Time: 55 min
- Yield: 4 servings 1x
- Category: Appetizer
- Method: Baking
- Cuisine: American
- Diet: Gluten Free
Ingredients
- 2 lbs chicken wings (drumettes and flats separated)
- 1 tablespoon baking powder (aluminum-free recommended)
- 1 teaspoon salt
- 1/2 teaspoon black pepper
- 1/2 teaspoon garlic powder
- 1/4 teaspoon paprika
- Optional: 1/4 cup Buffalo sauce or BBQ sauce for tossing after baking
Instructions
- Preheat your oven to 425°F (220°C). Line a large baking sheet with foil for easy cleanup, then place a wire cooling rack on top of the sheet.
- Pat the chicken wings completely dry using paper towels. This step is crucial for crispiness.
- In a large bowl, combine the baking powder, salt, pepper, garlic powder, and paprika.
- Add the dried chicken wings to the bowl and toss thoroughly until every piece is evenly coated with the dry mixture.
- Arrange the coated wings in a single layer on the wire rack, ensuring there is space between each piece for air circulation. Do not overcrowd the rack.
- Bake for 20 minutes.
- Flip the wings over. Reduce the oven temperature to 400°F (200°C) and bake for another 20 to 25 minutes, or until the skin is deeply golden brown and very crisp.
- Remove the wings from the oven. If you wish to sauce them, place the hot wings in a clean bowl, add your desired sauce, and toss to coat.
- For extra crispiness after saucing, return the wings to the rack and broil for 1 to 2 minutes, watching closely to prevent burning.
- Serve immediately.
Notes
- Using a wire rack allows air to circulate underneath the wings, which prevents the bottoms from steaming and becoming soggy.
- Baking powder raises the pH level of the chicken skin, helping it brown faster and render fat for maximum crunch.
- For the juiciest inside, make sure you pat the wings very dry before seasoning.
- If you prefer a dry rub finish, skip the sauce step and toss with extra seasoning immediately after they come out of the oven.
Nutrition
- Serving Size: 4 wings
- Calories: 280
- Sugar: 0.5
- Sodium: 350
- Fat: 18
- Saturated Fat: 5
- Unsaturated Fat: 13
- Trans Fat: 0
- Carbohydrates: 1
- Fiber: 0
- Protein: 26
- Cholesterol: 90