

Oh, those nights when you just crave that warm basket of soft, buttery goodness from your favorite Italian place, but you don’t want to drive across town? I know that feeling so well! That’s exactly why I worked on this recipe in my kitchen until it was perfect. Friends, this is my Copycat Olive Garden Breadsticks Recipe, and let me tell you, they are even better than the restaurant version. They come out unbelievably soft, coated in that signature garlic butter, and they are truly simple to make. You will be pulling these perfect breadsticks right out of the oven faster than you can decide on a movie!
- Why You Will Love These Soft Buttery Breadsticks
- Gathering Ingredients for Your Copycat Olive Garden Breadsticks
- Step-by-Step Guide to Making Homemade Breadsticks
- Tips for Perfect Soft Buttery Breadsticks Every Time
- Variations: Making Cheesy Breadsticks or Other Breadsticks
- Serving Suggestions for Your Appetizer Breadsticks
- Storage and Reheating Instructions for Leftover Breadsticks
- Frequently Asked Questions About Homemade Breadsticks
- Estimated Nutritional Data for These Breadsticks
- Share Your Best Homemade Breadsticks Experience
- Estimated Nutritional Data for These Breadsticks
- Share Your Best Homemade Breadsticks Experience
Why You Will Love These Soft Buttery Breadsticks
We all love a good copycat recipe, and this one truly delivers that comforting taste you remember. I promise you won’t need a trip out to feel satisfied.
- They are incredibly fast—we’re talking about a recipe that moves along quickly once the dough proofs.
- We achieve those famous Soft Buttery Breadsticks using a simple, generous coating of garlic butter right out of the oven.
- The texture is spot on: fluffy on the inside and golden brown on the outside. These are truly Easy Breadsticks for any weeknight.

Gathering Ingredients for Your Copycat Olive Garden Breadsticks
As a teacher for so many years, I always believed that seeing the necessary items laid out clearly helps everyone feel more confident before they even start mixing. Baking is chemistry, so precision matters, especially when we are dealing with yeast. Don’t skip or change these first steps if you want that perfect, fluffy rise we are aiming for!
Ingredients for the Fluffy Breadsticks Dough
For the dough itself, the water temperature is key. If it’s too cold, the yeast won’t wake up to do its job. If it’s too hot, well, you kill the poor little guys! We need that perfect sweet spot for activation. You’ll need:
- 1 1/2 cups warm water (and this needs to be right around 110°F—a reliable thermometer helps here!)
- 2 1/4 teaspoons active dry yeast
- 2 tablespoons granulated sugar (this feeds the yeast)
- 4 cups all-purpose flour
- 1 teaspoon salt
- 2 tablespoons vegetable oil
The Essential Garlic Butter Topping for Perfect Breadsticks
Now, this topping is what makes these breadsticks taste exactly like the restaurant favorite. Don’t skimp on the butter! This rich coating sinks right into the warm bread, giving you those flavorful, Garlic Butter Topping discs of heaven. For this part, make sure you have:
- 1/2 cup (1 full stick) unsalted butter, melted
- 1 teaspoon garlic powder
- 1/2 teaspoon dried parsley
- 1/4 teaspoon salt (for sprinkling)
Step-by-Step Guide to Making Homemade Breadsticks
Making these breadsticks right at home is really straightforward once you know the rhythm of the dough. My biggest piece of advice, which I learned while teaching my own children to bake, is not to rush the rising. That time gives the yarn its lovely flavor and that fluffy structure. We’re using active dry yeast here, so we need to give it a little encouragement to get going!
Activating the Yeast and Mixing the Breadsticks Dough
The very first step is making sure that yeast is alive and kicking! In a good, large bowl, mix your warm water, the yeast, and the sugar together. Now, you just wait about five to ten minutes. If you see frothiness or foam forming on top, that’s a wonderful sign! It means your yeast is happy and ready to lift our dough. If it stays flat, well, we start over with fresh yeast—it happens to the best of us!
Once foamy, stir in your flour, the teaspoon of salt, and the vegetable oil. Just mix it until you have a messy, shaggy ball of dough forming up in the bowl. Don’t worry about it looking perfect yet; we fix that next.
Kneading and Rising Your Fluffy Breadsticks
Now it’s time for a bit of gentle exercise. Turn that shaggy mass out onto your countertop—make sure you dust it lightly with flour so it doesn’t stick! Knead that dough patiently for five to seven minutes. You are looking for it to transform from sticky and rough into something smooth and wonderfully elastic. I always tell my grandkids, “Knead until it feels like a soft earlobe!”
Transfer the dough to a bowl you’ve oiled lightly, turning the dough over so it gets coated everywhere. Cover it up tight—a nice, snug tea towel works perfectly—and let it rest in a warm spot. I often turn off the oven light and place it there. It needs a good hour, maybe an hour and a half, until it’s truly doubled up in size. Patience here pays off for the fluffiness of these breadsticks!
Shaping and Baking Your Homemade Breadsticks
Once that dough has puffed up nicely, give it a gentle punch down to release the air. Now, divide that dough into twelve equal parts. Roll each bit out gently into a long, thin stick—think about eight to ten inches long. Lay them out on a baking sheet lined with parchment paper. Please leave a little elbow room between your raw breadsticks so they don’t fuse together while baking.
Get your oven hot, 400°F is what we need. They don’t take long at all—only about ten to twelve minutes. You want them lightly golden brown; remember, we are adding more richness right after they come out!
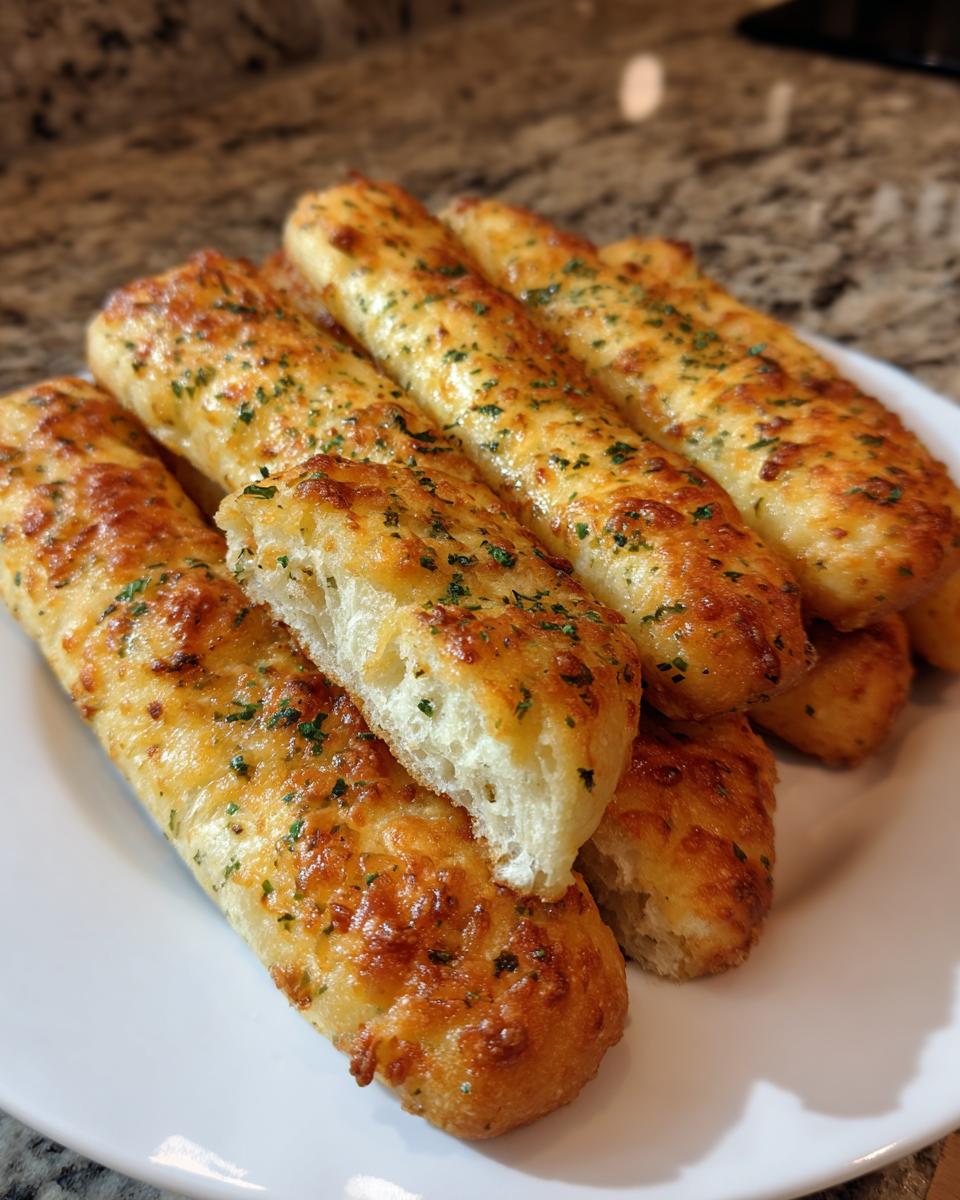
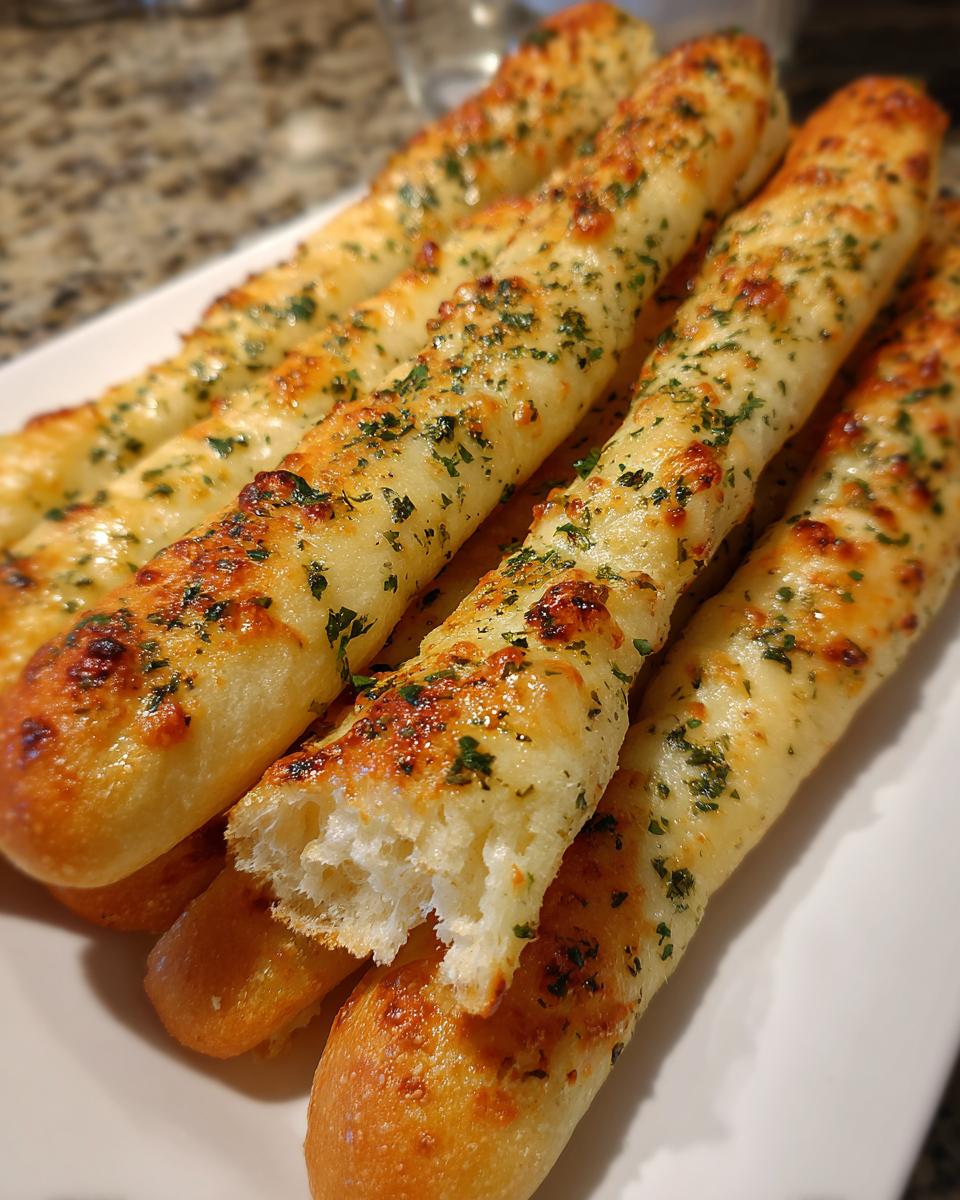
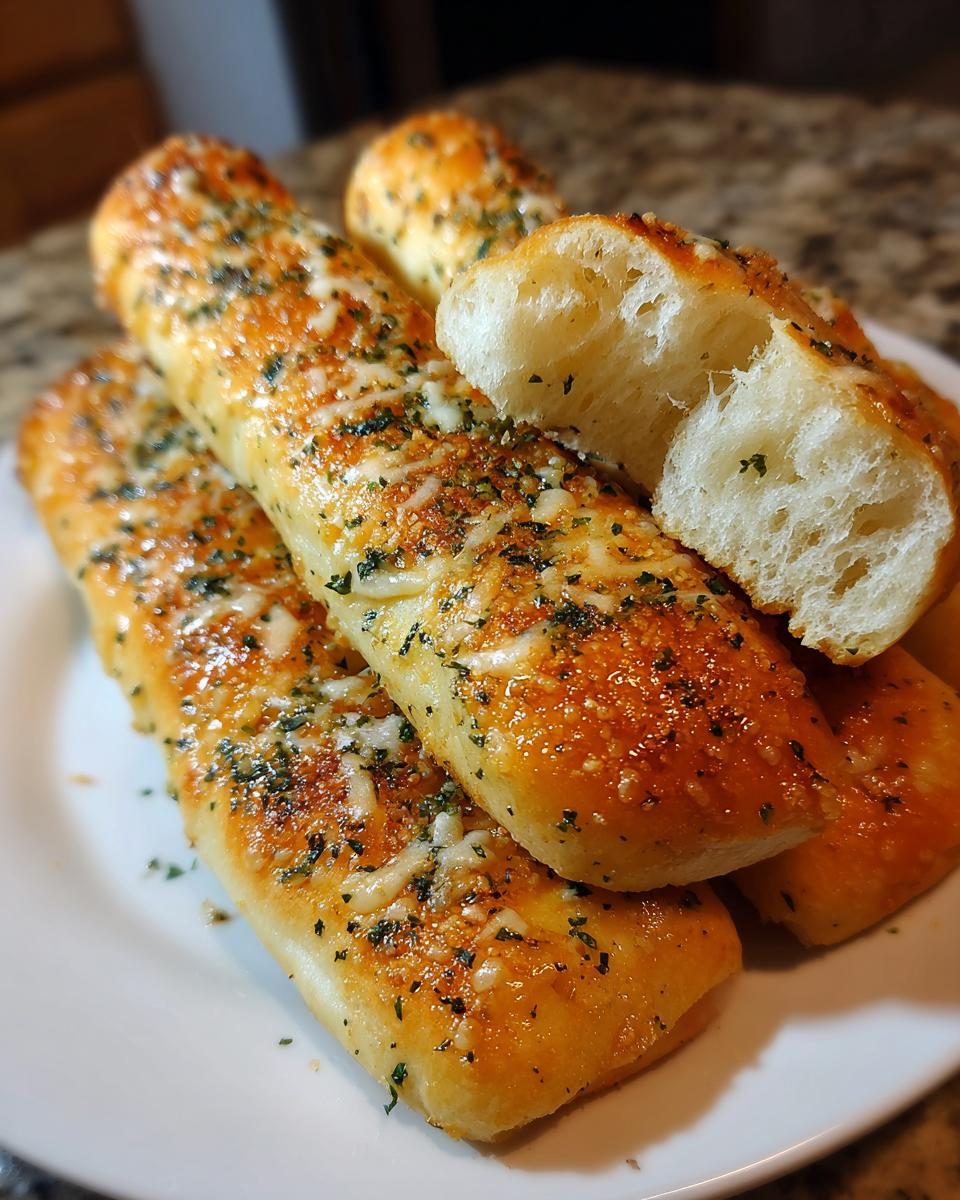
Applying the Signature Garlic Butter Topping to the Breadsticks
While those sticks are baking, melt that stick of butter and whisk in your garlic powder, parsley, and final sprinkle of salt for that salty kick. The key to perfect flavor? Act fast! As soon as those beautiful, hot breadsticks come off the baking sheet, grab a pastry brush and paint every single surface of them with that fragrant garlic butter. That heat locks in all that savory flavor, giving you the best copycat breadsticks possible.
For more tips on achieving wonderful dough texture, you can check out my thoughts on my soft, buttery rolls recipe, or see how others are making their amazing garlic toppings over at this site!
Tips for Perfect Soft Buttery Breadsticks Every Time
Even when the measurements are right, sometimes the technique can make or break that wonderfully soft texture we are chasing. These tips come straight from my years of baking for my family, and they really ensure you get those famously Soft Buttery Breadsticks that just melt in your mouth.
First, remember what I said about that water temperature when activating the yeast? That’s vital for the lift! If you aren’t sure about your water, use a kitchen thermometer. You want it cozy warm—around 110°F is the sweet spot. Too hot, and the yeast dies, leaving you with dense dough.
Also, don’t rush the rise time in Step 4. I know we love quick results, but yeast needs that full hour to an hour and a half in a reasonably warm spot to develop the necessary air pockets for fluffiness. If you’re in a hurry, you could try using instant yeast instead, mixing it right into your dry ingredients, which skips the initial proofing step, as noted in the recipe, but you might lose just a tiny bit of flavor depth.
Finally, when it comes to the toppings, be generous! Brushing that melted garlic butter immediately after they leave the oven guarantees that the bread absorbs all that wonderful flavor and stays soft for hours. For more advice on making yeast breads tender, take a peek at my thoughts on making easy homemade chocolate pudding recipe batches, because tender yeast doughs usually share similar secrets.
If you want to see how another wonderful baker approaches this, check out this recipe which promises results often hailed as better than the originals!
Variations: Making Cheesy Breadsticks or Other Breadsticks
I always encourage folks to make a recipe their own! While the classic garlic version of these breadsticks is near perfect as is, sometimes you need a little something extra, especially if you are serving picky eaters.
If you are craving that salty, sharp flavor, making Cheesy Breadsticks is incredibly simple. Remember the wonderful garlic butter topping we brush on right after they come out of the oven? Just take that melted butter mixture and immediately sprinkle a generous amount of finely grated Parmesan cheese over the top. The residual heat melts it slightly, and oh my goodness, it is spectacular!
For another twist, try mixing a teaspoon of dried Italian seasoning right into that melted butter along with the garlic powder. It gives the breadsticks a lovely, herby note that pairs perfectly with spaghetti night. You can find another fun take on cheesy versions over at Emily’s Plate. Sometimes, I even make a small batch of honey butter to dip these in after trying my easy honey butter skillet corn recipe—it sounds wild, but it works!
Serving Suggestions for Your Appetizer Breadsticks
Honestly, what’s better than dipping something warm and garlicky into a comforting bowl of soup? These homemade breadsticks are designed to be the perfect companion to heartier meals.
They shine as absolute show-stopping Appetizer Breadsticks when you have company over, but my favorite place for them is right next to a big bowl of my chicken gnocchi soup recipe. They soak up all that creamy broth so beautifully!
They also serve perfectly as fantastic Dinner Side Breadsticks alongside any saucy pasta dish, like my simple one-pot creamy garlic parmesan pasta. Just make sure you have extras, because they disappear quickly!
Storage and Reheating Instructions for Leftover Breadsticks
Now, good luck having any leftovers—my family usually devours the whole batch! But if you are lucky enough to save a few of these delicious breadsticks, storing them properly keeps them soft. Keep any extras in an airtight container at room temperature. Don’t put them in the fridge, please; cold air just makes bread get stiff!
To bring back that fresh-from-the-oven softness, just pop them back into a 350°F oven for about 5 minutes. That little bit of gentle heat warms them through and restores that perfect chewiness we worked so hard to achieve.
Frequently Asked Questions About Homemade Breadsticks
I always get so many wonderful questions after people try making these copycat breadsticks for the first time! It’s just part of learning any new recipe, and I’m happy to clear up any confusion. Here are some of the things I hear most often from bakers trying to achieve that restaurant-quality result at home.
Can I skip the rising time to make these quicker breadsticks?
You certainly can speed things up a bit! If you use instant yeast instead of active dry yeast, you can mix it right in with your flour and skip that first 10-minute foaming step. However, you absolutely cannot skip the full rise time, which is about an hour to an hour and a half. That resting time builds the air pockets that make these breadsticks soft. If you’re really in a hurry, check out this recipe which focuses on an ultra-quick turnaround, though I find full rising makes them fluffier.
Why did my breadsticks turn out too hard instead of soft and fluffy?
That usually comes down to two things, dear one. First, did you perhaps knead the dough too long, which develops too much gluten? Or second, did you let the dough rise in a spot that was too cold? Yeast needs warmth to create happy lift! When the dough doesn’t rise enough, the resulting breadsticks will be denser and harder, even with all that butter on top.
I don’t have active dry yeast; can I use active dry yeast instead?
Oh, wait, I think you mean if you can use *another* type! Yes, you can use instant yeast, as I mentioned above. If you are using traditional active dry yeast, you must proof it as directed in Step 1. If you use instant yeast, you can skip the initial proofing and mix the two and 1/4 teaspoons directly into your dry ingredients before adding the wet ones. It’s a great little shortcut!
Do I have to use that much garlic powder in the topping?
If you are sensitive to strong garlic flavor, you can certainly dial it back. I start with about half the amount and taste it before brushing it on. But for that true copycat experience, you need a good amount to cut through the richness of the butter! Remember, the wonderful flavor of these breadsticks really comes from that salty, garlicky finish.
If you’re looking for more ways to make simple meals exciting, you might enjoy recipes like my easy breakfast recipes for those mornings when dinner just seems too far away!
Estimated Nutritional Data for These Breadsticks
When we talk about recipes coming from a comfort food place, we aren’t usually focused on the charts, but I think it’s good to know generally what we’re serving! Based on the recipe yielding 12 pieces, here is a rough estimate for one of these buttery beauties:
- Calories: Around 180
- Fat: About 6g
- Carbohydrates: Approximately 28g
- Protein: About 5g
Please remember that this is just an estimate, especially since the garlic butter topping can vary depending on how generous you are with that final brush stroke!
Share Your Best Homemade Breadsticks Experience
I sincerely hope you enjoyed the process of making these fluffy, comforting breadsticks as much as I enjoy sharing them. They truly bring such joy to the table, just like the best home-cooked meals should! If you tried this recipe or have a favorite way you like dipping them, please come on down to the comments below and let me know. I read every single note, and you can always reach out through my contact page if you have questions!
PrintCopycat Olive Garden Breadsticks Recipe
Make soft, buttery, garlic breadsticks at home that taste just like the restaurant favorite. This easy recipe yields fluffy breadsticks perfect as an appetizer or dinner side.
- Prep Time: 20 min
- Cook Time: 12 min
- Total Time: 92 min
- Yield: 12 breadsticks 1x
- Category: Appetizer
- Method: Baking
- Cuisine: American
- Diet: Vegetarian
Ingredients
- 1 1/2 cups warm water (110°F)
- 2 1/4 teaspoons active dry yeast
- 2 tablespoons granulated sugar
- 4 cups all-purpose flour
- 1 teaspoon salt
- 2 tablespoons vegetable oil
- 1/2 cup (1 stick) unsalted butter, melted
- 1 teaspoon garlic powder
- 1/2 teaspoon dried parsley
- 1/4 teaspoon salt (for topping)
Instructions
- Combine the warm water, yeast, and sugar in a large bowl. Let this mixture sit for 5 to 10 minutes until it becomes foamy. This shows the yeast is active.
- Stir in the flour, 1 teaspoon of salt, and vegetable oil into the yeast mixture. Mix until a shaggy dough forms.
- Turn the dough out onto a lightly floured surface. Knead for about 5 to 7 minutes until the dough is smooth and elastic.
- Place the dough in a lightly oiled bowl, turning it once to coat. Cover the bowl with plastic wrap or a clean kitchen towel and let it rise in a warm place for 1 to 1.5 hours, or until doubled in size.
- Preheat your oven to 400°F (200°C). Line a large baking sheet with parchment paper.
- Punch down the risen dough gently. Divide the dough into 12 equal pieces. Roll each piece into a long, thin breadstick shape, about 8 to 10 inches long. Place the breadsticks on the prepared baking sheet, leaving a little space between them.
- Bake for 10 to 12 minutes, or until the breadsticks are lightly golden brown.
- While the breadsticks bake, prepare the topping: Melt the butter in a small bowl. Stir in the garlic powder, dried parsley, and the remaining 1/4 teaspoon of salt.
- As soon as the breadsticks come out of the oven, brush the tops generously with the garlic butter mixture. Serve warm.
Notes
- For the softest breadsticks, make sure your water is warm, not hot, to avoid killing the yeast.
- If you want cheesy breadsticks, sprinkle grated Parmesan cheese over the butter topping immediately after brushing it on.
- You can use instant yeast if you prefer; skip the proofing step and mix it directly with the dry ingredients.
Nutrition
- Serving Size: 1 breadstick
- Calories: 180
- Sugar: 1
- Sodium: 250
- Fat: 6
- Saturated Fat: 3
- Unsaturated Fat: 3
- Trans Fat: 0
- Carbohydrates: 28
- Fiber: 1
- Protein: 5
- Cholesterol: 15