
There is just something about food shaped into a perfect little ball that instantly makes it comforting, isn’t there? Maybe it’s the nostalgia, or maybe it’s just that delightful burst of flavor when you bite into something warm and self-contained. After years of teaching and raising my own family, I’ve learned that crowd-pleasing appetizers are essential, and nothing beats our Classic Cheesy Arancini Rice Balls. These homemade Italian rice balls are my go-to for every holiday, potluck, and quiet Sunday dinner. Forget anything you’ve tried before; these fried rice balls are perfectly crispy on the outside and gloriously gooey inside. I promise these will become your new favorite comfort food balls!
- Why You Will Make These Cheesy Rice Balls Again and Again
- Essential Ingredients for Perfect Homemade Rice Balls
- How to Make Authentic Arancini Rice Balls: Step-by-Step
- Tips for the Best Rice Balls Ever
- Make Ahead & Freezer Tips for Your Rice Balls
- Serving Suggestions for Appetizer Rice Balls
- Storing and Reheating Leftover Rice Balls
- Frequently Asked Questions About Making Rice Balls
- Estimated Nutritional Data for Cheesy Rice Balls
Why You Will Make These Cheesy Rice Balls Again and Again
I know you’re busy, so I get straight to the point: these aren’t just any rice balls. They are total showstoppers that happen to use up leftovers, which is a win-win in my book! These crispy rice balls deliver on texture and flavor every single time. Here’s why I swear by this recipe:
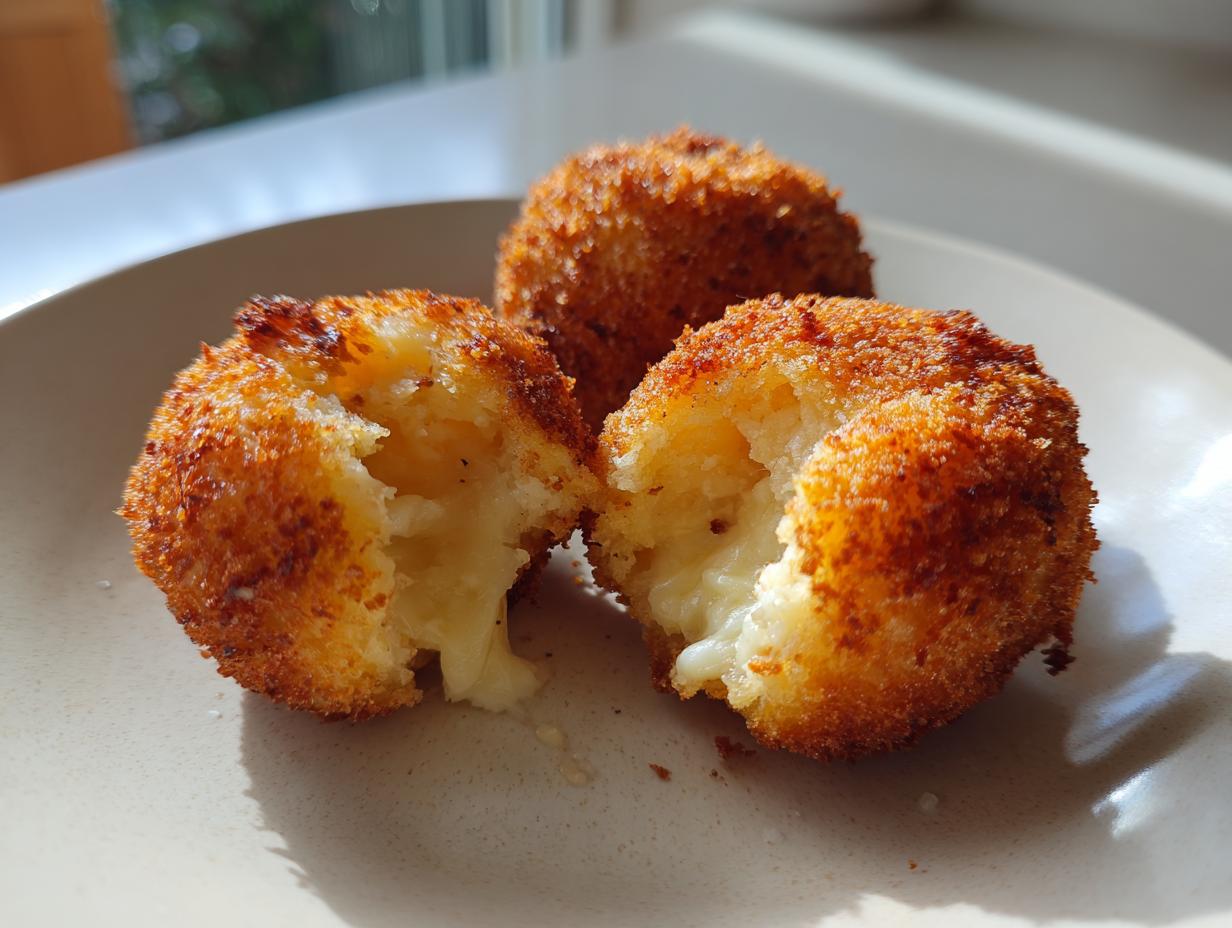
- The Ultimate Texture Contrast: We achieve that perfect exterior crust—crispy, golden brown, and satisfying—that immediately gives way to a warm, creamy center.
- Gooey Mozzarella Pull: Seriously, the cheese stretch you get when you break one open is worth the effort alone. They are truly the best cheesy rice balls I’ve ever made!
- Leftover Rice Hero: This recipe shines when you use leftover Arborio or any slightly sticky rice. It saves you time and shows that yesterday’s dinner can be tomorrow’s star appetizer.
- Party Food Perfect: They hold their heat well and are sturdy enough to manage on little appetizer plates. They disappear fast at any gathering, trust me!
- Freezer Friendly: You can bread them, freeze them, and then fry them straight from frozen when company unexpectedly drops by. That’s real homemaking peace of mind. You can find more easy appetizers and snacks on my site!
Essential Ingredients for Perfect Homemade Rice Balls
Whenever I develop a recipe, especially one that needs to be dependable like these Italian rice balls, I lean on precision. You can’t just eyeball this binder base! Getting the ingredients right ensures that your balls stay together when they hit the hot oil, which is the absolute key to success. This recipe is built heavily around texture, so don’t try to skimp on the binders or skips the cooling time. Here is what you need to gather before you even turn on the stove.
For about 12 delightful servings of these savory rice bites, you’ll want:
- 3 cups cooked Arborio rice (it just has the right starch level!)
- 1 tablespoon unsalted butter (the real stuff, please!)
- 1/2 cup grated Parmesan cheese
- 1 large egg, lightly beaten
- 1/2 teaspoon salt
- 1/4 teaspoon black pepper
- 1 cup shredded low-moisture mozzarella cheese (this is the gooey secret weapon)
- 1/2 cup all-purpose flour (for the first dredge)
- 2 large eggs, beaten (for the egg wash)
- 1 1/2 cups plain breadcrumbs (Panko recommended for crispiness)
- Vegetable oil, for frying (you’ll need enough for about 2 inches in the pot)
Ingredient Notes and Substitutions for Your Rice Balls
Let’s talk rice for a moment, because it matters! I insist on Arborio rice because its high starch content creates that creamy stickiness needed to hold these delicious rice balls together without needing a ton of heavy binder. However, if you have leftover risotto—even better! Just make sure it’s chilled completely. If you use standard short-grain white rice, ensure it’s cooked a little firmer than usual.
That breading is where the magic happens! While regular breadcrumbs work, if you want those incredible, shatteringly crisp rice balls texture that you see in pictures, you absolutely must use Panko. They absorb less oil, giving you that lovely golden brown finish instead of a heavy, greasy coating. Don’t skip the flour and the second egg wash; that trinity of flour-egg-Panko sequence is how we keep our mozzarella centers safely tucked inside!
How to Make Authentic Arancini Rice Balls: Step-by-Step
Making these gorgeous Italian rice balls is much easier than you might think, even if you’ve never fried anything before! The secret lies in working in stages and making sure everything is completely cool before you start shaping those little pockets of joy. We’re going to move slowly through the shaping, the coating, and finally, the frying. Take your time, especially when stuffing them; this is the absolute difference between a cozy arancini recipe and a messy one!
Preparing the Rice Mixture for Stuffed Rice Balls
The first thing you must do? Cool that rice! I mean it—completely cool. Warm rice is sticky and mushy, and trying to handle it will just lead to frustration. Once your Arborio rice is cold (even better if it’s been chilling overnight), combine it gently in a large bowl with the butter, Parmesan cheese, the single lightly beaten egg, salt, and pepper. You want to mix this with your hands until it’s just combined. Don’t overwork it, or the rice will break down too much. We are aiming for a firm but slightly pliable base for our stuffed rice balls.
The Breading Station for Crispy Rice Balls
Now, set up your station just like you would for breading chicken cutlets. You need three shallow dishes lined up ready to go: one with flour, one with the two remaining beaten eggs (the egg wash), and one packed with your Panko breadcrumbs. Take about a quarter cup of that chilled rice mixture and flatten it in your palm. Press about a teaspoon of that shredded mozzarella right into the middle—don’t use too much, or it will squeeze out later! Gently fold the rice around the cheese, making sure you seal the seams completely. Now, gently roll it into a tight ball, about an inch and a half wide. My tip here is to press firmly as you shape it; the tighter you pack it, the less likely it is to crack open in the oil.
Once formed, we dredge! Roll the ball completely in the flour, shake off the extra, dip it straight into the egg wash, let the excess drip off briefly, and then roll it thoroughly through the Panko. You must press the breadcrumbs onto the ball gently with your fingertips to create a thick, even coat. This firm Panko layer is what gives us those stunning golden brown rice balls.

Frying Your Delicious Rice Balls to Perfection
Temperature control is non-negotiable here. You need your vegetable oil heated to exactly 350 degrees Fahrenheit in a deep pot. If you don’t have a thermometer, you’ll just have to guess, and guess wrong, so please use one if you can! Fry only three or maybe four of these homemade rice balls at a time. If you add too many, the cold temperature of the balls will send the oil temperature plummeting, and they’ll soak up grease instead of getting crisp. They only take about three to four minutes. Turn them gently with tongs until every side is a rich, even golden brown. Scoop them out immediately with a slotted spoon and let them drain on a wire rack! They are ready to serve piping hot.

Tips for the Best Rice Balls Ever
We’ve made it through the hard parts—shaping and frying! Now, let’s talk about making sure everything goes perfectly so you get that famous crispy rice balls exterior and that wonderful, melty cheese pull every single time. A little foresight goes a long way when you are working with something as tender as seasoned rice.
The number one reason these homemade rice balls fail is usually inadequate chilling time for the rice base. If your rice mixture is warm or even room temperature, it simply won’t hold the shape during the high heat of frying. You need that rice base to be rock solid right before it goes into the oil. If you’re worried about structure, especially if you are filling them with something heavier, try adding just one extra teaspoon of Parmesan cheese to the rice mix—it helps bind things together beautifully.
And for achieving that *gourmet rice balls* look? Make sure your oil stays at 350°F. If the oil is too cool, they soak the oil instead of crisping up. If they start splitting in the fryer, quickly remove them, let them cool slightly, and re-dredge just the split area in the breadcrumbs before putting them back in for just a minute or two. See my tips for similar fried foods like these croquettes; the fundamentals are the same!
If you are looking for more inspiration on perfect appetizers, this site has some fantastic ideas for serving these little savory rice bites!
Make Ahead & Freezer Tips for Your Rice Balls
I am a huge believer that a good home cook is always prepared when opportunity strikes—or when unexpected company shows up! These arancini rice balls are fantastic for making ahead of time, which means you can have appetizers ready to go in minutes when game night pops up or when you realize you need something delicious fast. The process is so simple, and honestly, freezing them actually helps them hold their shape even better when you finally fry them.
Here’s the simple method for batch preparation. After you’ve mixed your rice base and before you put the mozzarella stuffing in, stop! That is the perfect point to pause. You can stop, put everything away, and come back later. If you’ve already formed them but haven’t breaded them yet, that’s great groundwork for your future self. If you’ve breaded them entirely, even better!
For the best look, I prefer freezing the breaded rice balls. Line a sturdy baking sheet with parchment paper—never skip the paper, or they will stick together in one giant mass! Arrange your perfectly breaded balls on the sheet so they aren’t touching. Pop that sheet right into the freezer until those little rice balls are frozen solid, which usually takes about an hour or two depending on your freezer. Once they are hard as rocks, you can scoop them into a heavy-duty freezer bag. They keep beautifully for up to three months.
Now, when you are ready to cook them straight from the freezer? Don’t thaw them! You fry them exactly as they are. Just remember this one crucial adjustment: add about one to two minutes extra to the frying time since they are starting out frozen. You need to make sure that cheese center has time to melt perfectly and that the entire ball heats through. You’ll still aim to keep that oil around 350 degrees Fahrenheit for that ideal crispy exterior. Having that freezer stash of appetizer rice balls ready to deploy is a secret weapon every cook needs!
Serving Suggestions for Appetizer Rice Balls
You’ve done the work, you’ve got your perfect, golden, crispy rice balls—now, how do we present them? These are wonderful party food rice balls because they are easy to manage off a platter, but presentation really makes them special. You certainly don’t need anything complicated; my style is always to keep focus on flavor and ease of eating!
The essential partner for any savory, fried Italian bite is, without a doubt, a beautiful dipping sauce. For me, nothing beats a simple, warm marinara sauce. It cuts right through the richness of the fried coating and complements that cheesy center perfectly. I always make a big batch of my favorite homemade marinara when I know I am frying these because store-bought just doesn’t offer the same bright flavor.
However, if you want to get a little creative or if you are serving a crowd with varied tastes, here are a few dips that pair wonderfully with these cheesy rice balls:
- Classic Marinara: Simmered low and slow with good quality tomatoes. It’s the Italian authenticity we crave.
- Garlic Aioli: A creamy, tangy mayonnaise-based dip spiked heavily with fresh garlic. This is a favorite with my bridge club friends!
- Pesto Drizzle: If you have some homemade pesto lying around, thin it out just slightly with a little olive oil so it drizzles nicely across a serving tray. It adds a lovely herbaceous note.
- Alfredo Dip: Sometimes, if I’m feeling extra decadent, I’ll whip up a small batch of creamy Alfredo sauce. It makes eating these cheesy rice balls feel incredibly luxurious!

When serving them as appetizers, place them on a simple white platter near the sauces. If you’re making them for a family lunch, you can serve one or two alongside a fresh, crisp green salad to balance out the delight of deep-fried goodness. They are hearty enough they can honestly stand alone, but a touch of sauce just highlights that gooey center perfectly.
Storing and Reheating Leftover Rice Balls
Oh, the dreaded leftover situation! If by some miracle you have any of these incredible, cheesy rice balls left over—maybe two or three that nobody claimed—don’t worry one bit. We don’t want those crispy gems getting sad and soggy in the bottom of the fridge. The key to reheating any fried food, and especially these savory rice bites, is getting that heat to penetrate the center without turning the crust into mush!
For refrigerator storage, you need to move fast. Once the leftover rice balls have cooled completely after frying, place them in a shallow, airtight container. Make sure you line the bottom with a paper towel first! This helps absorb any lingering moisture. They will keep well in the fridge for about three days. Any longer than that, and I find the texture really starts to suffer, so try to enjoy them within that window, or better yet, freeze them!
The Best Way to Bring Back That Crispness
Now, if you try to microwave these, you’ll cry. Microwaves = steam = mushy coating, and we just can’t have that for our beautiful homemade rice balls. The absolute best method to restore the original crunch is by using dry, consistent heat, which means the oven or, what I prefer these days, the air fryer.
If you are using the oven, preheat it to 375 degrees Fahrenheit. Lay your cold rice balls out in a single layer on a baking sheet that has a wire rack placed over it. Placing them on a rack allows the heat to circulate all the way around the ball, crisping the bottom just as well as the top. Bake them for about 8 to 10 minutes. You just want them piping hot all the way through and for that crust to sound crisp when you tap it gently.
If you have an air fryer—and I’ve found they are wonderful for reheating things where texture matters—they work even faster. Set your air fryer to 350 degrees Fahrenheit. Cook the leftover rice balls in a single layer for just 4 to 6 minutes, shaking the basket once halfway through. This is my favorite trick for reheating anything crispy, like these oven-roasted potatoes I make on Sundays; it’s quick and reliable!

Serve them hot with a little side of extra marinara sauce, and honestly, nobody will ever know they weren’t just pulled out of the fryer moments ago. It’s a great way to enjoy this comfort food again without any fuss!
Frequently Asked Questions About Making Rice Balls
I always get so many thoughtful questions after people try making these Italian rice balls, and I just love hearing how they turn out! It’s wonderful that so many of you are trying your hand at these satisfying savory rice bites at home. Whether you’re tweaking the recipe for a quick lunch or planning a big spread of party food rice balls, chances are someone else has wondered the same thing. I’ve gathered a few of the most common queries right here to make sure you have total confidence!
Can I use regular white rice instead of Arborio for these rice balls?
That is a very fair question! In a perfect world, Arborio rice is what I recommend because of that high starch content. It breaks down just enough to give you that creamy, sticky binder we need to hold everything together beautifully, especially around that gooey mozzarella filling. However, I know not everyone keeps Arborio on hand! You absolutely can use regular medium or short-grain white rice, but know that the final texture of the rice mixture will be a little less creamy and a bit more defined.
If you use standard white rice, you might need to slightly adjust the binder. If your mixture feels too crumbly when you try to shape the balls, add just a tiny splash more of that beaten egg or maybe half a teaspoon more Parmesan cheese. Just mix it in gently until it feels pliable enough to form a tight ball. Remember, rice balls that don’t hold together upfront will definitely try to fall apart when frying!
What is the best way to keep my rice balls from falling apart while frying?
This is the million-dollar question! Seeing your beautiful balls disintegrate into a greasy mess in the hot oil is truly heartbreaking. I find that the failure almost always comes down to two things we’ve covered, but they are worth repeating because they are that important for crispy rice balls.
First, TIGHT PACKING! When you are folding that rice around the mozzarella cube, use your palms to mold it firmly. You want a dense sphere, not a loose ball of loosely packed grains. If it feels like it might crumble when you pick it up, pack it tighter. Seal up any cracks or seams you see—this is where the oil tries to sneak in and cause trouble.
Second, the dredging technique must be perfect. Each ball must be coated evenly and thoroughly three times: flour, egg, and Panko. Don’t let any patches of rice show! The egg wash must be thick enough to act like glue for the breadcrumbs. Take your time coating them well and pressing that Panko on firmly. If you follow that standard breading station process perfectly, your delicious rice balls will come out golden brown, perfectly intact, and ready for dipping! If you’re looking for more simple meal ideas, check out my easy weeknight dinners collection.
Estimated Nutritional Data for Cheesy Rice Balls
Now, I know those of us who cook from scratch aren’t usually counting every single calorie, but it’s just good practice to have a general idea of what we’re serving up, especially when we’ve introduced deep frying into the equation! These numbers are estimates based on the ingredients I listed, and they certainly can change depending on the exact brand of cheese or the oil absorption during frying.
This data is calculated for a serving size of two of these wonderful Italian rice balls:
- Serving Size: 2 balls
- Calories: 350
- Fat: 18g
- Saturated Fat: 8g
- Carbohydrates: 35g
- Protein: 14g
- Sodium: 450mg
- Cholesterol: 75mg
Please remember this is just an estimation to give you a baseline. If you bake them instead of frying, those numbers will certainly shift to be a bit lighter! But truly, these cheesy rice balls are the kind of comfort food that deserves to be enjoyed without too much worrying. The love put into making them is the most important nutrient, in my humble opinion!
PrintClassic Cheesy Arancini Rice Balls

Make homemade Italian rice balls that are crispy outside and filled with gooey mozzarella cheese. This recipe guides you through creating authentic, comforting arancini perfect for appetizers or snacks.
- Prep Time: 20 min
- Cook Time: 15 min
- Total Time: 35 min
- Yield: About 12 rice balls 1x
- Category: Appetizer
- Method: Frying
- Cuisine: Italian
- Diet: Vegetarian
Ingredients
- 3 cups cooked Arborio rice (cooled)
- 1 tablespoon unsalted butter
- 1/2 cup grated Parmesan cheese
- 1 large egg, lightly beaten
- 1/2 teaspoon salt
- 1/4 teaspoon black pepper
- 1 cup shredded low-moisture mozzarella cheese
- 1/2 cup all-purpose flour (for dredging)
- 2 large eggs, beaten (for egg wash)
- 1 1/2 cups plain breadcrumbs (Panko recommended for crispiness)
- Vegetable oil, for frying
Instructions
- In a large bowl, combine the cooled Arborio rice, butter, Parmesan cheese, 1 lightly beaten egg, salt, and pepper. Mix until everything is well combined.
- Place the shredded mozzarella cheese in a small bowl.
- Take about 1/4 cup of the rice mixture and flatten it in your palm. Place about 1 teaspoon of mozzarella cheese in the center. Gently fold the rice around the cheese, shaping it into a tight ball, about 1.5 inches in diameter. Repeat until all the rice mixture is used.
- Set up a standard breading station: place flour in one shallow dish, the 2 beaten eggs in a second dish, and the breadcrumbs in a third dish.
- Dredge each rice ball first in the flour, shaking off excess. Then dip it completely into the beaten eggs, letting excess drip off. Finally, roll it thoroughly in the breadcrumbs, pressing lightly to adhere.
- Heat about 2 inches of vegetable oil in a deep, heavy-bottomed pot or Dutch oven to 350 degrees Fahrenheit. Use a thermometer to check the temperature.
- Carefully place 3 or 4 rice balls into the hot oil, ensuring you do not overcrowd the pot. Fry for 3 to 4 minutes, turning occasionally, until they are deep golden brown and crispy.
- Remove the fried rice balls with a slotted spoon and place them on a wire rack lined with paper towels to drain excess oil.
- Serve your crispy rice balls immediately with marinara sauce for dipping.
Notes
- Use leftover risotto if you have it; this recipe works best with slightly sticky rice.
- For a make-ahead option, form the balls and place them on a baking sheet. Freeze them until solid, then transfer to a freezer bag. Fry directly from frozen, adding 1-2 minutes to the cooking time.
- If you prefer baking over frying, lightly spray the breaded balls with cooking spray and bake at 400 degrees Fahrenheit for 15-20 minutes, turning halfway, until golden.
Nutrition
- Serving Size: 2 balls
- Calories: 350
- Sugar: 2
- Sodium: 450
- Fat: 18
- Saturated Fat: 8
- Unsaturated Fat: 10
- Trans Fat: 0
- Carbohydrates: 35
- Fiber: 1
- Protein: 14
- Cholesterol: 75