
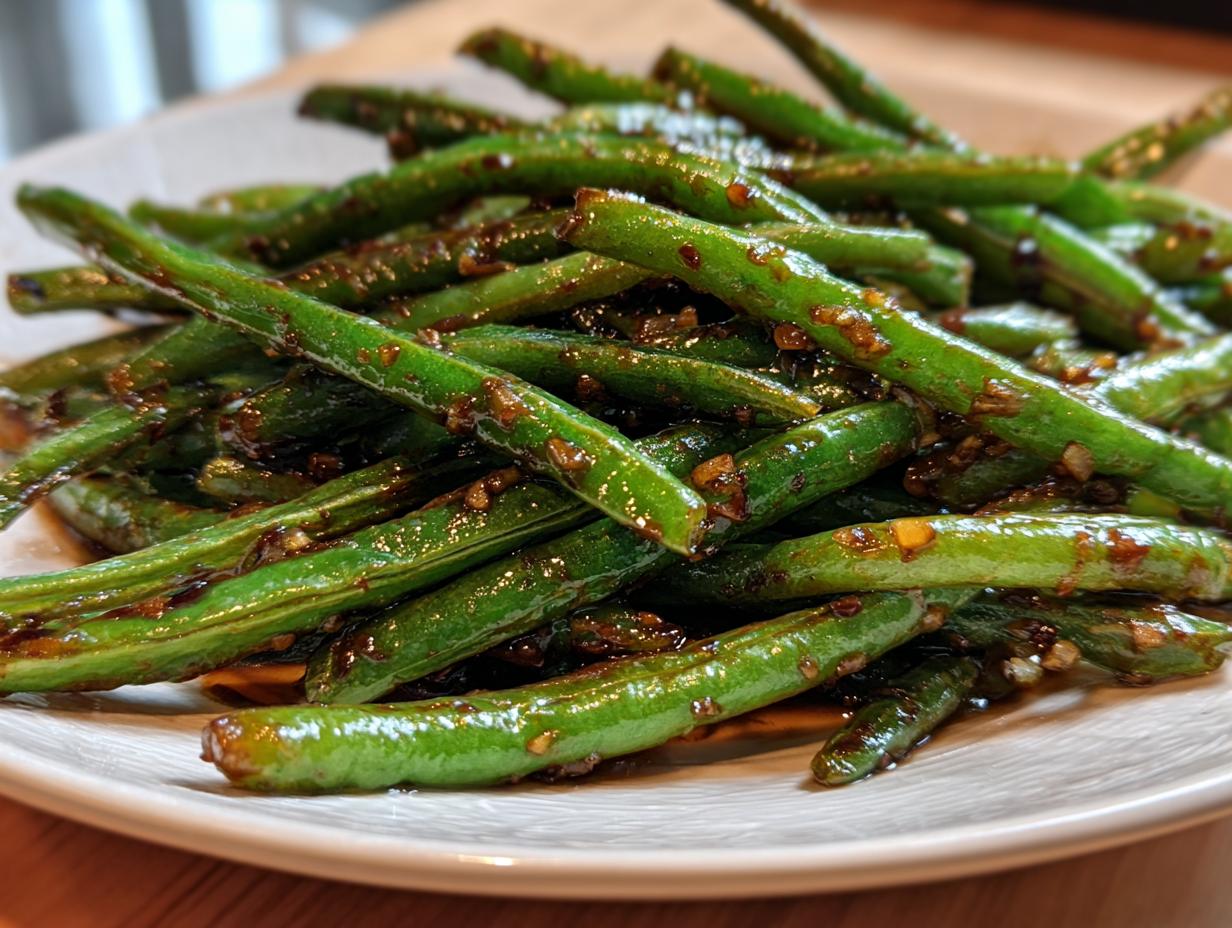
Oh my gosh, if you are tired of floppy, sad green beans drowning in sauce, you are in the right place! Seriously, getting that perfect restaurant-style char at home felt like a total culinary mystery for ages. I tried stewing them, I tried blanching first—nothing worked! But I finally cracked the code to making incredible Chinese green beans with garlic sauce that are blistered, punchy, and done in literally 20 minutes. This recipe nails the ‘dry fried’ style you see at amazing Szechuan places. Trust me, once you master that high-heat technique, you will never go back. These are about to become your favorite quick Chinese side dishes!
- Why This Chinese Green Beans with Garlic Sauce Recipe Works (EEAT)
- Essential Ingredients for Authentic Chinese Green Beans with Garlic Sauce
- Step-by-Step Instructions for Wok Fried Green Beans
- Tips for Perfect Chinese Green Beans with Garlic Sauce Every Time
- Serving Suggestions for Your Garlic Green Beans
- Storage and Reheating Instructions for Blistered Green Beans
- Frequently Asked Questions About Vegan Chinese Sides
- Estimated Nutritional Information for Chinese Green Beans with Garlic Sauce
- Share Your Experience Making This Recipe
Why This Chinese Green Beans with Garlic Sauce Recipe Works (EEAT)
The real magic here isn’t the sauce—it’s the heat! To get those fantastic, slightly wrinkled, savory blistered green beans without them getting soggy, we have to mimic the intense heat of a professional wok. That high, dry heat is what caramelizes the natural sugars in the beans and evaporates surface moisture, which is the secret to authentic dry fried green beans. If you use medium heat, you’re just steaming them, and that’s a tragedy!
Achieving the Perfect Blistered Green Beans Texture
We cook the beans completely naked first—no oil, no garlic, definitely no sauce! You need your pan screaming hot, whether that’s a proper wok or just the biggest, heaviest skillet you own. We let them sit undisturbed for a couple of minutes so they can actually develop those charred spots. This initial high-heat cooking is non-negotiable if you want that signature crisp-tender snap in your final garlic green beans.
Essential Ingredients for Authentic Chinese Green Beans with Garlic Sauce
Okay, grab your cutting board! Even though this is fast, the ingredients need to shine, especially since we aren’t drowning them in sauce later—this is where those wok fried green beans get their flavor depth. You’ll start with a full pound of fresh green beans; make sure you trim off those tough ends first. The aromatics are simple but potent: we need about four cloves of garlic—please, please mince that super fine so it fries quickly—and a teaspoon of fresh ginger, grated right off the knob. For the actual sauce base, we use two tablespoons of soy sauce, a tablespoon of rice vinegar for that necessary tang, and just a tiny teaspoon of sugar to balance everything out. And instead of plain old water to build the sauce volume, I highly recommend using about a quarter cup of vegetable broth if you have it. It just makes the whole dish taste heartier!
Ingredient Notes and Smart Substitutions
If you follow a gluten-free diet, don’t sweat it! You can swap the traditional soy sauce directly with tamari; it works perfectly and keeps these as wonderful vegan chinese sides. Now, about that liquid—I mentioned vegetable broth, but if you want a tiny flavor boost that’s still totally vegan, use a mild broth instead of water. It really perks up the final coating. And for my adventurous friends who want that real tingle, go ahead and lightly toast a few Sichuan peppercorns in the oil for about 20 seconds right before you add the ginger and garlic. That little secret takes these garlic green beans straight to next-level territory!
Step-by-Step Instructions for Wok Fried Green Beans
Alright, let’s get cooking! This whole process flies by, so make sure everything is trimmed and measured out before you turn the heat on—I learned that lesson the hard way when my garlic burned instantly! You want your wok or your heaviest skillet absolutely smoking hot before the oil goes in. Seriously, wait until you see a tiny wisp of smoke. Toss in your trimmed beans; try not to overcrowd them because that kills the charring process we worked so hard for in the previous section. Let them sit there for two to three minutes without touching them. That’s where the magic happens—they start getting those gorgeous dark blisters. Stir them around and keep going for about five more minutes until they are tender-crisp. Then, quickly pull those perfect beans out and set them aside.
Preparing the Flavorful Garlic Sauce Mixture
While those beans are doing their thing, take a sec to mix your sauce components in a little bowl. I always whisk together the soy sauce, the rice vinegar, that tiny bit of sugar, and your water or broth. You want this fully combined—no grainy sugar clumps allowed! Having this ready means when the aromatics hit the pan, you are ready to pour immediately. Don’t forget that pinch of red pepper flakes if you like a little kick; throw them in the sauce bowl too.
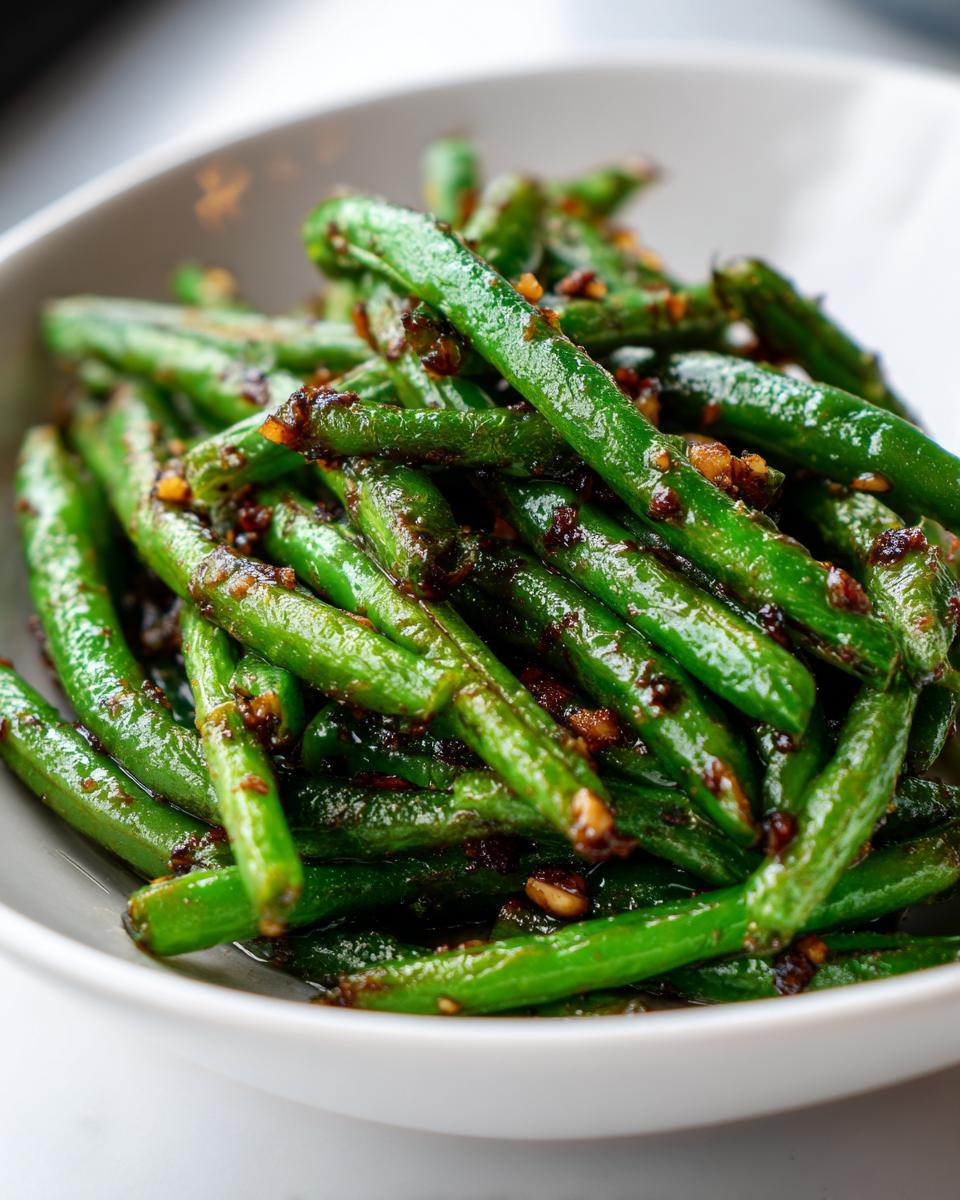
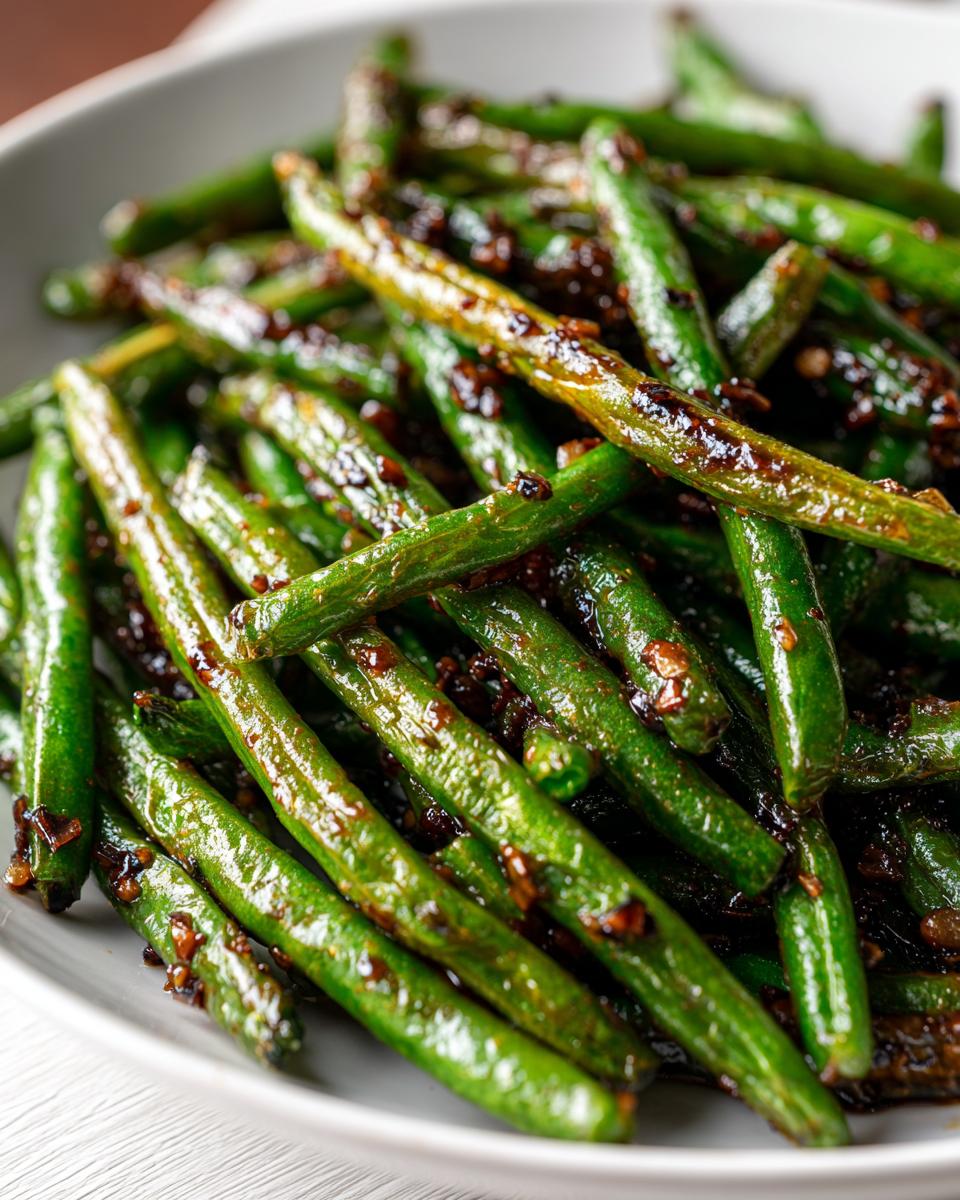
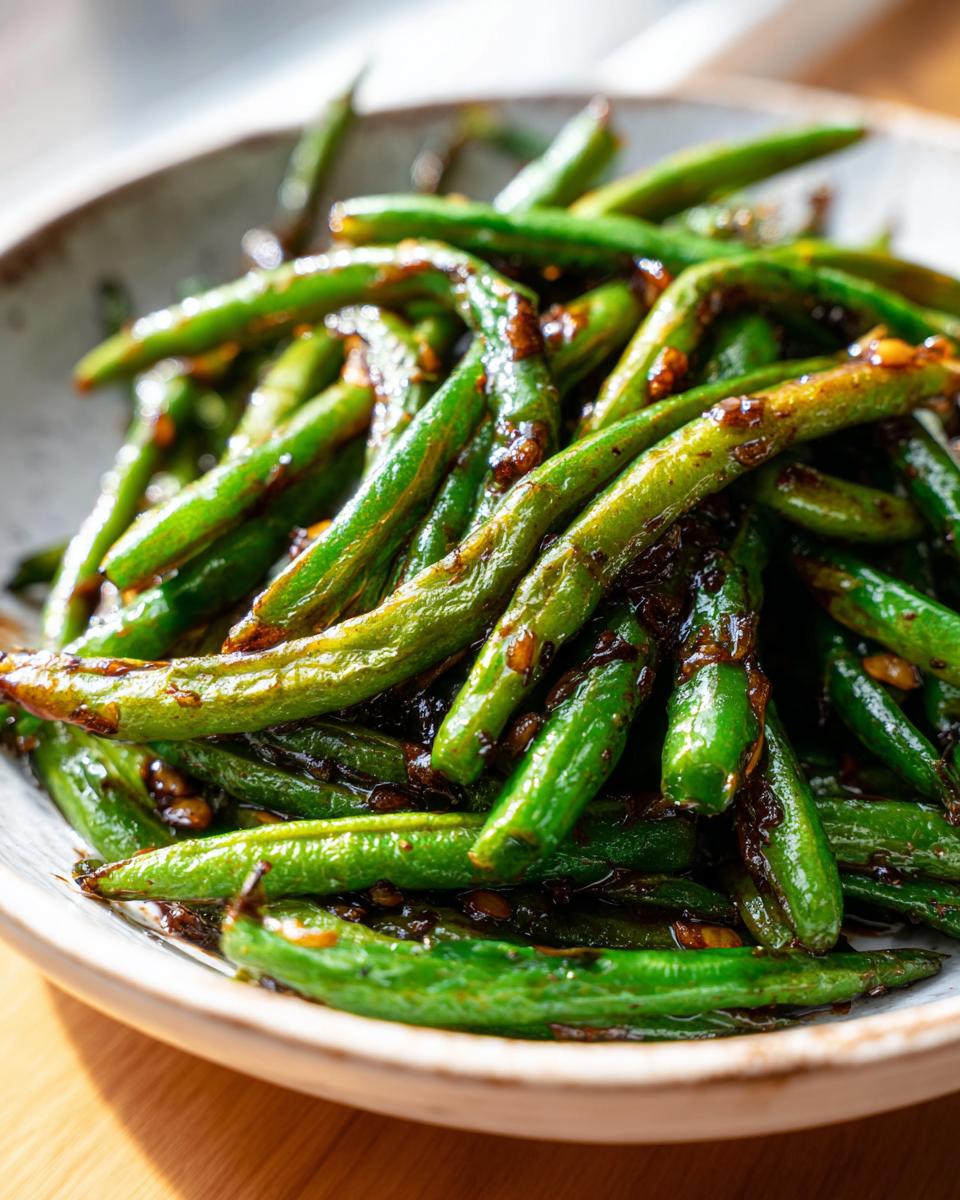
The Final Toss: Coating the Chinese Green Beans with Garlic Sauce
Now you drop the heat a bit to medium. Don’t let the pan get cold! Toss in your minced garlic and grated ginger. You have maybe 30 seconds here—just until you can REALLY smell that amazing aroma. DO NOT let the garlic turn brown, or it’ll taste bitter! Next, pour in your pre-mixed sauce. Let it bubble up for just a minute until it thickens a touch, and then, BAM! Return your perfectly blistered beans to the pan. Toss everything together super fast to make sure every single piece of vegetable is coated in that fantastic savory garlic sauce. Serve these Chinese green beans with garlic sauce right away while they still have that wok heat!
Tips for Perfect Chinese Green Beans with Garlic Sauce Every Time
I’ve totally butchered this recipe before, so let me save you the trouble! The absolute biggest thing you need to remember is heat management. I know I keep saying it, but I can’t stress enough: overcrowd the pan and you end up steaming those beautiful green beans instead of charring them. If you are using a standard kitchen skillet instead of a wok, you might need to work in two batches. It pains me to do it sometimes, but getting those dark, blistered spots is worth splitting the beans up!
Also, when you finally add the garlic and ginger, you must be ready to move fast. That little bit of residual oil heats up incredibly quickly. You’re looking for fragrant—that intense, happy smell that promises flavor—but if you see the edges of the garlic starting to turn golden brown, pull the pan off the heat *immediately*. Burnt garlic tastes bitter and will ruin the delicate balance of your garlic green beans. If your skillet isn’t super heavy-duty, you might want to turn the heat down just slightly before the aromatics go in. It’s all about paying attention to what the pan is telling you!
Serving Suggestions for Your Garlic Green Beans
These garlic green beans are so punchy, they demand an equally satisfying main dish! Since these are such flavorful chinese side dishes, I usually opt for something simple on the plate so the beans can truly sing. They are fantastic next to a big bowl of slightly sticky white rice.

Also, think about pairing them with a drier main, like simple pan-seared tofu or a quick honey-garlic chicken. If you’re doing a full noodle night, skip the extra saucy noodles and let these take the spotlight for flavor contrast. They even cut through the richness of homemade crab rangoon if you are feeling indulgent. Honestly, they go with almost anything Asian-inspired!
Storage and Reheating Instructions for Blistered Green Beans
Now, I know you’ll want to eat all of these fantastic blistered green beans in one sitting, but if you do have leftovers—which is rare in my house!—you need to treat them right. Pop them into a completely airtight container and stick them right into the fridge. They will definitely soften a bit once they cool down overnight; that’s just the nature of sauced vegetables, so don’t panic!
When you want to eat them again, the microwave isn’t your friend here; it just makes them mushy again. The best trick is a super-quick reheat. Throw them back into that hot skillet or even your air fryer for just two minutes. You want to revive that original snap and char. Don’t add extra sauce, just high, dry heat to wake them up!
Frequently Asked Questions About Vegan Chinese Sides
I always get questions once people try this recipe because it’s just so different from standard steamed vegetables! Since these are totally compliant with vegan chinese sides standards (no fish sauce or oyster sauce lurking anywhere, I promise!), they are perfect for everyone at the table. People always ask me about keeping that crunchy texture, especially when serving a crowd.
Can I make these chinese green beans ahead of time?
Honestly, the absolute best experience is when you serve them right after you toss them together. That’s when they are perfectly crisp and hot from the wok. If you cook them completely and let them sit for hours before serving, they will soften up a lot because they are sitting in that delicious sauce. If you have to prep? Trim your beans and mix your sauce ahead of time! Then, when it’s dinner time, you shock the beans in the high heat, add the sauce for 30 seconds, and serve. That saves you a ton of time!
How do I make this recipe spicier (Sichuan Green Beans style)?
If you want to turn these into true, mouth-numbing Sichuan green beans, you have a few options, and they all involve heat! The red pepper flakes I mentioned give you a nice baseline warmth. For more authentic Szechuan spice and aroma, you really need those toasted Sichuan peppercorns I talked about earlier; use about a half teaspoon and toast them lightly with the garlic. If you prefer pure burning heat, toss in a few teaspoons of dried red chilies into the hot oil right before the garlic. That will definitely raise the fire level!
If you want to check out our site policies while you’re here, you can always read through the Privacy Policy to see how we handle your information.
Estimated Nutritional Information for Chinese Green Beans with Garlic Sauce
Now, I have to give you the standard disclaimer here: I’m a cook, not a certified nutritionist! This information is strictly based on the ingredients measured in the recipe, assuming a yield of four equal servings, so treat these numbers as a close estimate. Since this is one of our favorite light and fluffy vegan chinese sides categories, you’ll be happy to see the numbers are pretty reasonable!
For one serving of these Chinese green beans with garlic sauce, you’re looking at roughly 110 calories. Most of the fat content comes purely from the vegetable oil we use for that crucial blistering step, coming in around 7 grams total. Since we aren’t packing this with heavy starches, the carbs clock in low, around 10 grams total, with 4 of those being nice dietary fiber from the beans themselves. It’s a great, light addition to any meal!
Share Your Experience Making This Recipe
I truly hope these tips help you finally master that perfect char! Cooking is all about practice, and I bet you did an amazing job on your first batch of Chinese green beans with garlic sauce. Now, I’m dying to know how it went!
Did you manage to get that signature blister, or did you have to work in batches? Don’t be shy—head down to the comments section below and let me know! Seriously, give this recipe a rating out of five stars so other home cooks know what you thought. If you made any cool swaps—maybe you used lime juice instead of vinegar, or perhaps you tried adding some toasted sesame oil at the end—tell us about it!
If you snapped a picture of your beautiful, garlicky creation, please tag me on social media! Seeing my recipes come to life in your kitchens is seriously the best part of my day. Happy cooking, and don’t forget to reach out if you have any questions or want to chat more about how to get even better at making fantastic vegan chinese sides!
PrintGarlic Sauce Green Beans (Dry Fried Style)
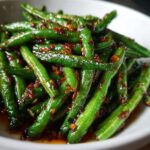
Cook green beans quickly in a hot pan until blistered, then toss them in a savory garlic and soy sauce.
- Prep Time: 10 min
- Cook Time: 10 min
- Total Time: 20 min
- Yield: 4 servings 1x
- Category: Side Dish
- Method: Stir-Frying
- Cuisine: Chinese
- Diet: Vegan
Ingredients
- 1 pound fresh green beans, trimmed
- 2 tablespoons vegetable oil
- 4 cloves garlic, minced
- 1 teaspoon fresh ginger, grated
- 2 tablespoons soy sauce (or tamari for gluten-free)
- 1 tablespoon rice vinegar
- 1 teaspoon sugar
- 1/4 cup water or vegetable broth
- Pinch of red pepper flakes (optional)
Instructions
- Heat a wok or large skillet over high heat until very hot. Add the vegetable oil.
- Add the trimmed green beans to the hot pan in a single layer if possible. Cook without stirring for 2-3 minutes to allow them to char slightly.
- Stir the beans and continue cooking for another 3-5 minutes until they are tender-crisp and blistered. Remove the beans from the pan and set aside.
- Reduce the heat to medium. Add the minced garlic and grated ginger to the same pan. Cook for about 30 seconds until fragrant, being careful not to burn the garlic.
- In a small bowl, whisk together the soy sauce, rice vinegar, sugar, and water or broth.
- Pour the sauce mixture into the pan. Bring it to a simmer and let it cook for 1 minute until it thickens slightly.
- Return the green beans to the pan. Toss everything together quickly to coat the beans evenly with the sauce.
- Stir in the red pepper flakes, if using. Serve immediately.
Notes
- For a more intense flavor, you can use Sichuan peppercorns briefly toasted with the garlic.
- If you do not have a wok, use the largest, heaviest skillet you own and keep the heat high.
- Serve these beans alongside fried rice or a simple stir-fried tofu dish.
Nutrition
- Serving Size: 1/4 of recipe
- Calories: 110
- Sugar: 5
- Sodium: 450
- Fat: 7
- Saturated Fat: 1
- Unsaturated Fat: 6
- Trans Fat: 0
- Carbohydrates: 10
- Fiber: 4
- Protein: 3
- Cholesterol: 0