
There is just nothing better than the smell of pancakes filling the kitchen on a Saturday morning, is there? Forget those thin, rubbery things you get sometimes; I’m talking about true, genuine, mile-high old fashioned pancakes that taste like they came straight off a Midwest diner griddle. Because they almost did! These are the dependable, classic recipes I developed while growing up, meant to give you that guaranteed fluffy pancake every single time. This recipe uses simple pantry staples for the perfect weekend breakfast.
- Why You Will Make These Old Fashioned Pancakes Every Weekend
- Essential Ingredients for Perfect Old Fashioned Pancakes
- How to Mix Easy Pancake Batter for Fluffy Pancake Recipe Results
- Step-by-Step Instructions for Cooking Classic Pancakes
- Tips for Success When Making Homemade Pancakes
- Storage and Reheating Instructions for Your Old Fashioned Pancakes
- Frequently Asked Questions About Old Fashioned Pancakes
- Serving Suggestions for Classic Pancakes
- Share Your Fluffy Pancake Recipe Experience
Why You Will Make These Old Fashioned Pancakes Every Weekend
I want you to clear out your mental pantry of every fussy pancake recipe you’ve ever tried. These aren’t those! When I make these at home, I know I’m going to get a perfect stack without needing any fancy equipment or weird ingredients. They just work, every time. This is why these old fashioned pancakes are going to become your new favorite weekend breakfast staple:
- Guaranteed Fluffiness: Thanks to that precise amount of baking powder, these rise beautifully right before your eyes. No sinking allowed!
- Simple Pantry Staples: Seriously, you likely have everything needed already. No frantic last-minute grocery runs required for this classic.
- Quick Assembly: The easy pancake batter comes together in about five minutes total. You’ll be eating before the coffee is even done brewing.
- Perfect Texture: They have that wonderful slight chew around the edges but are tender and light inside—the hallmark of truly great homemade pancakes.
- Freezer Friendly: Make a giant batch! These freeze like a dream, meaning you skip the early morning work on busy weekdays.
- Just Like Home: These are the quintessential American breakfast. They taste like comfort and simplicity, which is what a good weekend breakfast should always deliver.
Essential Ingredients for Perfect Old Fashioned Pancakes
When we talk about making true, delicious diner style pancakes that taste just like they should, you have to start with the right foundation. The magic here is that we aren’t buying special mixes; we’re using what’s already in your cupboard almost every day. Trust me, measuring these out correctly is half the battle won. Don’t worry about substitutions—we cover those below—but for the very best results, stick to the list!
Here is what you’ll need for about 8 servings:
- 1 1/2 cups all-purpose flour (the standard kind works beautifully)
- 3 1/2 teaspoons baking powder (make sure it’s fresh so they puff up!)
- 1 teaspoon salt
- 1 tablespoon white sugar (just enough to tenderize and add a hint of sweetness)
- 1 1/4 cups milk (or your buttermilk substitute—more on that in a minute)
- 1 large egg (room temperature is always a bonus, but not essential)
- 3 tablespoons butter, melted (and slightly cooled so it doesn’t cook the egg!)
Ingredient Notes and Buttermilk Substitutions for Old Fashioned Pancakes
I get asked all the time if you absolutely need buttermilk for these, and the answer is no! If you don’t have buttermilk on hand, you can easily whip up a substitute right here at home. This is perfect for those mornings when you’re craving *no buttermilk pancakes* but haven’t stocked up.
To make your substitute: Take that 1 1/4 cups of regular milk and stir in 1 tablespoon of white vinegar or fresh lemon juice. Just give it a quick whisk, then let it sit on the counter for about five minutes. It will thicken up slightly and curdle a bit—that’s how you know it’s working! I really prefer using whole milk if I can, even in the substitute, because that extra fat helps keep things rich and tender.
Also, don’t skip the baking powder! It’s the powerhouse behind our fluffy pancake recipe. If yours has been sitting in the cupboard for two years, go grab a fresh can. Nothing ruins a stack faster than flat pancakes, and that’s usually old leavening agents to blame.
How to Mix Easy Pancake Batter for Fluffy Pancake Recipe Results
This is where so many people go wrong when trying to make homemade pancakes! They get nervous seeing the dry and wet ingredients, and they start mixing like they are trying to whip cream into hard peaks. Stop right there! We are not looking for silky smooth perfection here; we are aiming for fluffy clouds, and that requires fighting the urge to over-mix your easy pancake batter.
First, always combine your dry ingredients thoroughly in a big bowl—the flour, baking powder, salt, and sugar. Whisk them for a good minute. This is important because it distributes the baking powder evenly so you don’t get one huge bubble in the middle of your pancake. Then, in a separate bowl, gently whisk your wet things: the milk, egg, and melted butter. You don’t need to beat the egg into oblivion, just break up the yolk.
Now comes the critical part—the marriage of wet and dry. Pour all the liquid into the dry pile and fold it together with a big spatula. I mean fold, not stir! As soon as you see those wet patches disappear, stop mixing! Seriously, stop! If you see lumps, that’s a *good* sign. Those lumps mean you haven’t developed the gluten in the flour yet. Gluten is what makes bread chewy, and it turns our potential fluffy pancake recipe into flat, tough hockey pucks. A few streaks of flour remaining means success! Don’t worry, they’ll smooth out on the hot griddle.
Step-by-Step Instructions for Cooking Classic Pancakes
Okay, the batter is mixed—lumpy and wonderful—and now it’s time for the fun part: the cooking! Making these classic pancakes feel like a real ritual, and getting the heat right is the secret to never having a burned exterior with raw centers. We are cooking for tenderness, not speed here, so keep the heat reasonable. This is where those light, old fashioned pancakes finally come to life.
First things first, we need to check that griddle or your favorite large non-stick skillet. Don’t rush this pre-heating step! You’re looking for that sweet spot heating that only medium heat can give you. A practical test I always use? Take a tiny drop of water and flick it onto the surface. If it sizzles right away and dances around before evaporating, you are good to go! If it just sits there, it’s too cold. If it disappears instantly in a puff of steam, it’s too hot, so turn it down!
Once the surface is ready, pour out your batter—I usually aim for about a 1/4 cup measure per pancake to keep them uniform. Let those cook patiently. It usually takes about 2 to 3 minutes on that first side. You’ll know it’s time for the flip when you see those distinct bubbles popping up all over the surface, and the edges of the batter look set and slightly dull, not shiny wet anymore. That is your signal!

Griddle Temperature and Flipping Secrets for Old Fashioned Pancakes
I always set my dial to medium, maybe even medium-low if my stovetop runs hot. If you try to rush it on high heat, you will end up with burnt pancakes that are still raw inside, and nobody wants that tragedy on a Sunday morning! We want golden brown, people.
The first side should cook for a solid 2 to 3 minutes. Look for those bubbles; they tell you the trapped steam is doing its job! When you slide that spatula underneath, a good flip should reveal a beautiful, even golden color. Cook the second side briefly—it usually takes less time than the first—until it matches that beautiful color. If you are making large batches, keep the finished stacks on a baking sheet in a very low oven (around 200°F) to keep them perfectly warm while you finish the rest of the batter.
Tips for Success When Making Homemade Pancakes
Now that you have your lumpy, perfect batter, let’s talk about making sure these homemade pancakes are truly exceptional. Part of making a dependable recipe is knowing the little tricks that elevate the final product. Believe me, when these come off the griddle, you’ll want them to stay restaurant-perfect until everyone sits down at the table!
First, remember that baking powder I mentioned? If you want that seriously impressive rise that makes this a real fluffy pancake recipe success story, make sure that ingredient is fresh. If your baking powder is older than a year, those bubbles just won’t form as aggressively, and your pancakes will be sad and flat. Test it out first: drop a teaspoon into some hot water; if it fizzes excitedly, you’re good to go!
And here’s the trick for keeping that entire batch warm while you finish up the last platefuls. Don’t stack them wet; that makes them steam and turn soggy! Instead, set your oven to a really low temperature—like 200 degrees Fahrenheit—and lay the cooked pancakes in a single layer on a baking sheet. They stay perfectly warm and ready for syrup without overcooking!
Storage and Reheating Instructions for Your Old Fashioned Pancakes
One of the best things about mastering a great recipe for old fashioned pancakes is knowing you can stretch that morning magic across the week! Seriously, making a big stack on Sunday and having them ready for a quick Tuesday morning is the key to an easy weekend breakfast streak. Don’t let those leftovers go to waste; storing and reheating these is incredibly straightforward.
If you have any delicious, fluffy pancakes left over, you need to let them cool down completely first. Do not stack them while they are still warm! That trapped heat turns the lovely tender surface soft and gummy. Once they are totally cool, the trick is simple layering. Grab some wax paper or parchment paper—parchment is my favorite because it never sticks—and cut squares slightly wider than your pancakes.
Stack them up: pancake, parchment, pancake, parchment. This little barrier ensures that when you go to pull one out later, they don’t all fuse into one giant, inedible pancake-brick. Slide that whole stack into a sturdy freezer bag and label it with the date. They stay perfect for up to a month this way, ready whenever the craving hits!
When it’s time to eat them again, you have a couple of foolproof reheating methods. For that closest-to-fresh taste, toss them right into the toaster! Yes, the toaster works wonders for warming them through evenly. If you’re in a real rush, the microwave does the trick, but just do them in short 15-second bursts. Nobody wants a warm-on-the-edges, frozen-in-the-middle pancake, so listen for that little zap and check them often!
Frequently Asked Questions About Old Fashioned Pancakes
I know sometimes questions pop up once you start mixing, especially when you’re trying to nail that perfect texture. Don’t panic! We made this recipe so dependable, but here are some common things folks ask me when they are aiming for that top-tier, true *fluffy pancake recipe* experience.
Can I use self-rising flour in this old fashioned pancakes recipe?
Oh, you absolutely can! If you are in a pinch and only have self-rising flour, it makes things even simpler, but you have to remember what that flour already contains. Self-rising flour comes pre-loaded with salt and baking powder already mixed in.
So, if you decide to swap, just take out the 3 1/2 teaspoons of baking powder we called for, and leave out the 1 teaspoon of regular salt listed in the main ingredients. Use the same amount of self-rising flour listed for the all-purpose flour. That’s it! It’s a great way to ensure you have the right leavening, even if you are trying to make *no buttermilk pancakes* and are substituting your milk!
Why are my classic pancakes flat even though I didn’t overmix?
If you followed my advice and folded gently, but they still didn’t get much height, nine times out of ten, your baking powder simply isn’t working anymore. It gasps its last breath after about a year on the shelf, so if yours is old, that’s the culprit for flat pancakes.
Another thing that can sometimes deflate them is pouring cold milk right into the melted warm butter. It can shock the egg a little, though this is less common. But stick to fresh rising agents, and you’ll get beautiful height!
Are these really the best diner style pancakes you can make at home?
In my humble opinion, yes! The secret to that *diner style pancakes* taste isn’t the fancy flour; it’s the balance of fat (butter) and a touch of sugar, combined with letting the batter rest for just a minute or two before hitting the griddle. They aren’t overly sweet, which lets the syrup shine, and they hold their shape perfectly.
How long should the batter rest before I start cooking?
I always let my batter hang out for about five minutes. You don’t want to let it sit for an hour, because then the baking powder will start to lose its kick before it even hits the heat! But giving it just five minutes allows the flour to fully hydrate, which helps everyone get those wonderfully fluffy results. You can check our privacy policy here, but trust me, that short rest time is worth every second.
Serving Suggestions for Classic Pancakes
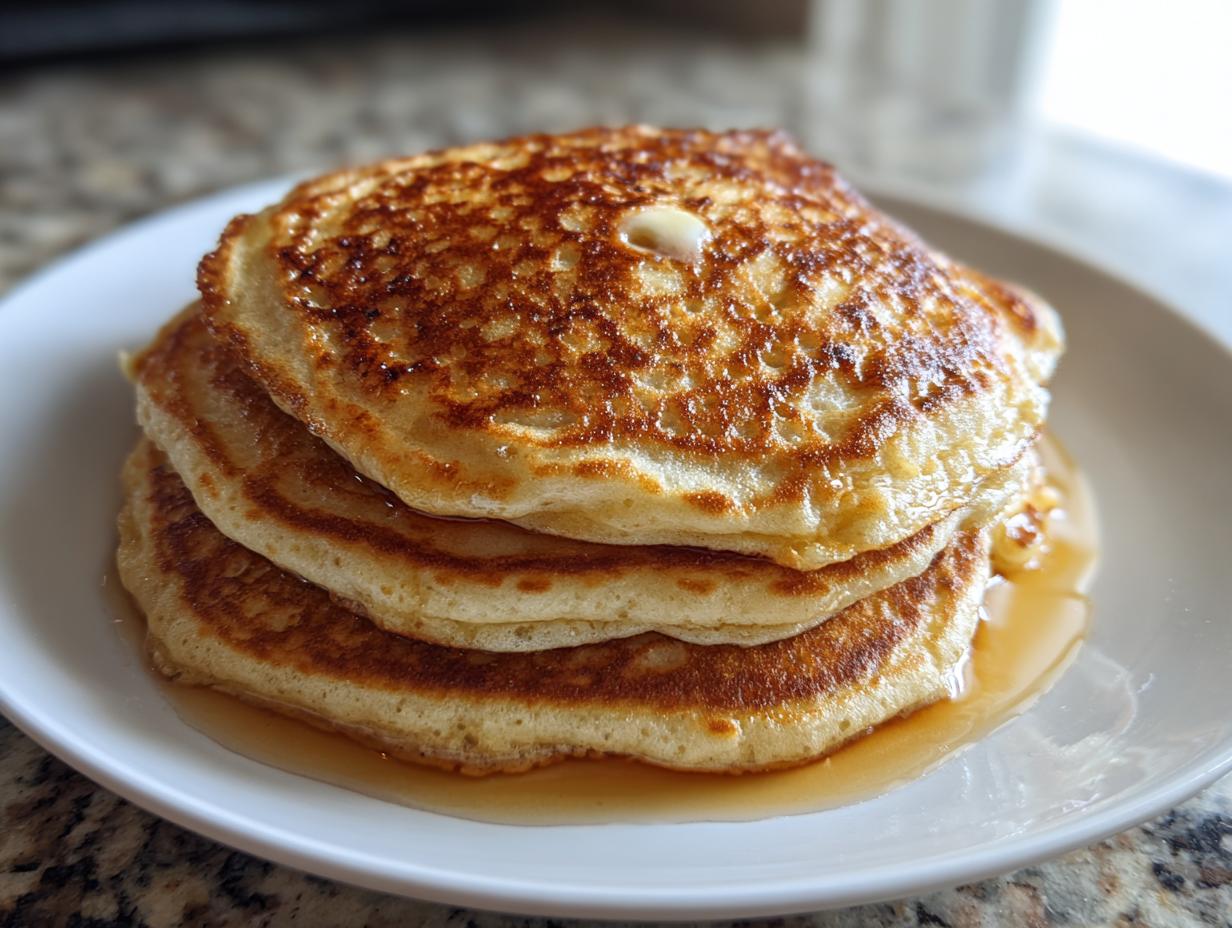
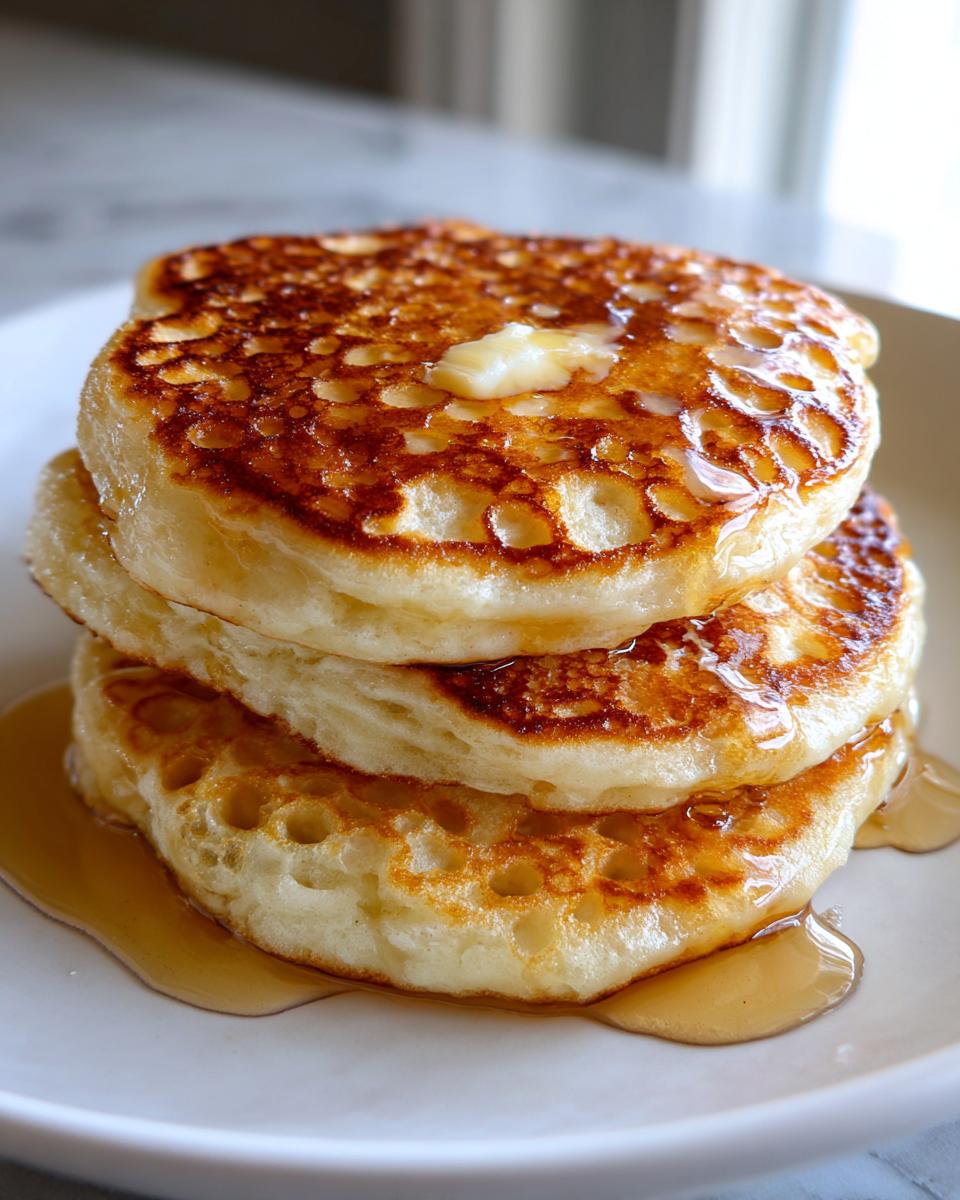
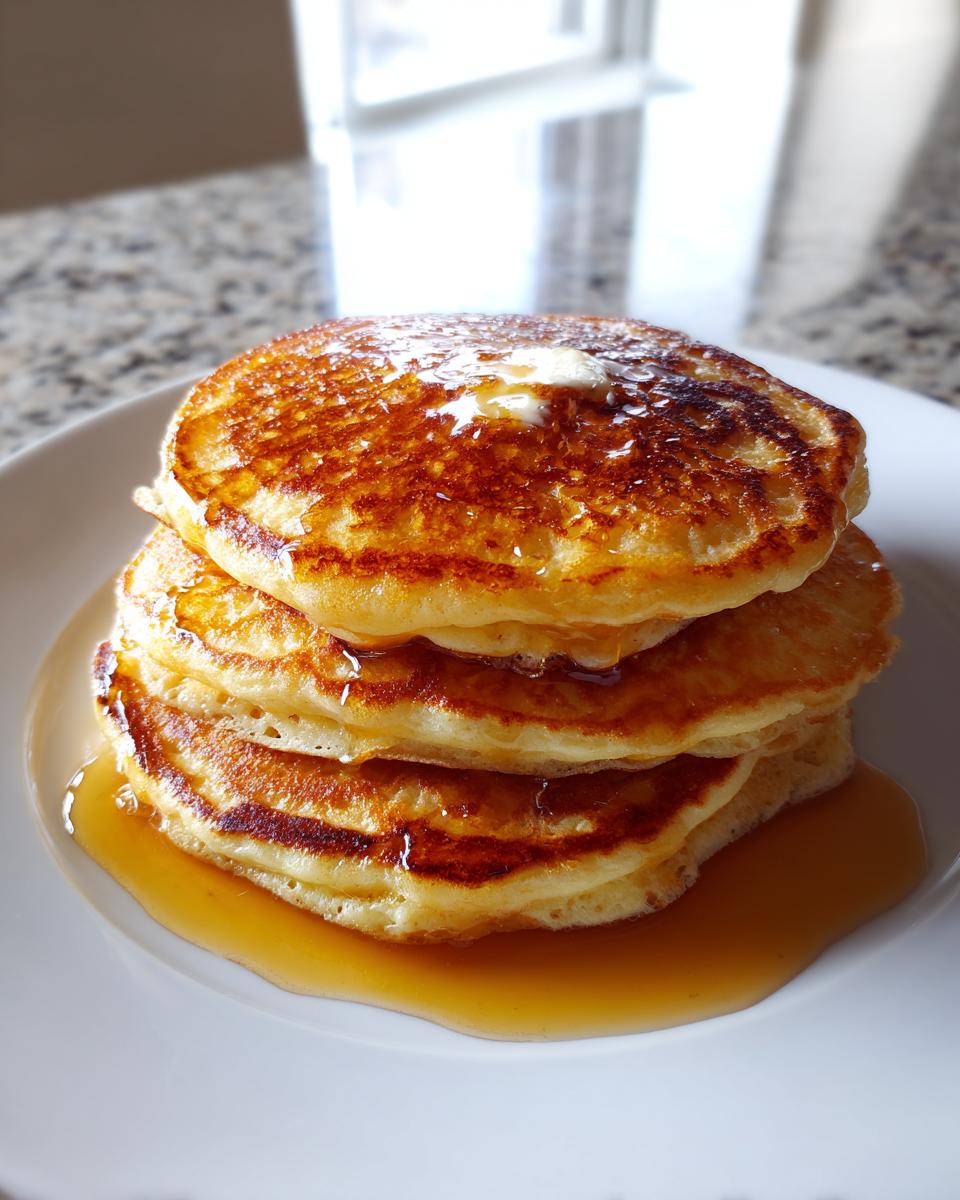
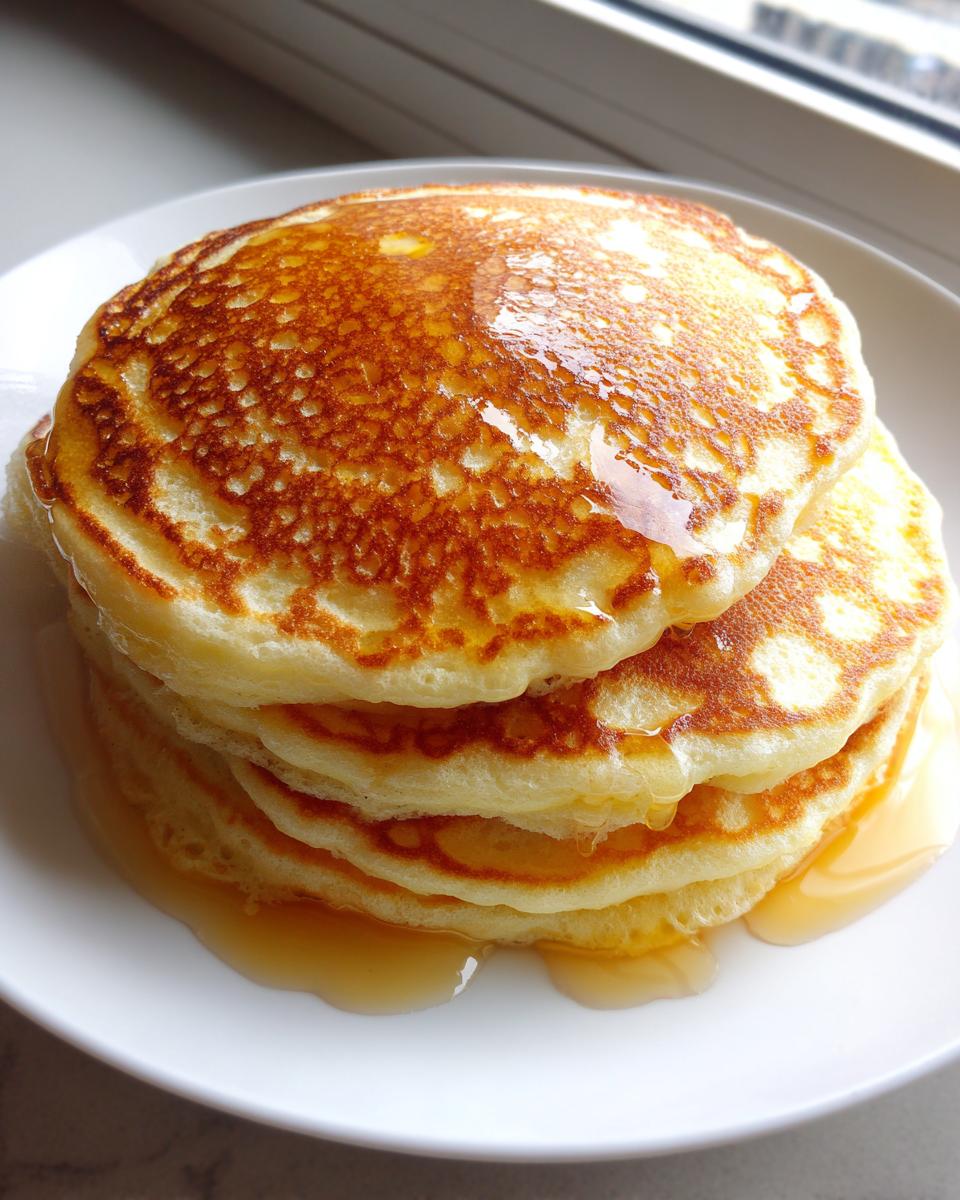
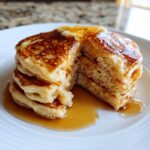
The best part about these old fashioned pancakes—once they are golden brown and stacked high—is what you decide to do with them! Since we worked hard to make sure the pancake itself is perfectly seasoned and tender, you don’t need much fuss. My cooking philosophy centers around delicious, simple American home cooking, and that means letting the quality of the actual pancake shine through.
You absolutely cannot go wrong with the basics. A generous pat of real butter right on top is non-negotiable; watch it melt slowly down the sides—it’s pure joy. Then, drench it all with proper maple syrup. I know folks try all sorts of syrups, but for these classic pancakes, you need that rich, real maple flavor to balance that slight tang from a good batter mix.
If you want to dress them up just a touch, think fresh, simple fruits. A handful of fresh berries—strawberries sliced thin or some bright blueberries—adds a wonderful pop of color and freshness that cuts through the richness. A quick dusting of powdered sugar is a nice touch, too, especially if you’re serving them to company. It looks fancy but takes two seconds. Honestly, though, a warm stack and good butter is the ultimate way to enjoy these homemade pancakes!
Share Your Fluffy Pancake Recipe Experience
I truly hope that making this batch of old fashioned pancakes brought that wonderful, comforting smell of real breakfast into your home. Carla believes the best memories are made when we share food, so I’d just love to hear how they turned out for you! Did they live up to the fluffy hype?
If you loved these homemade pancakes, please do me a huge favor and leave a quick 5-star rating right here on the recipe card. It helps other folks find this dependable recipe when they are looking for that perfect breakfast!
More importantly, I want to chat with you in the comments below. Did you stick with the regular milk, or did you try that simple trick to make yourself a buttermilk substitute? And what’s your go-to topping? I’m always looking for new ideas, even if I usually stick to butter and maple syrup myself!
Don’t forget, you can always reach out if you have questions using my contact page. Happy cooking, and share those stacks with your family—that’s what it’s all about!
PrintOld Fashioned Fluffy Pancakes
Make classic, fluffy pancakes using simple pantry ingredients for a satisfying weekend breakfast.
- Prep Time: 10 min
- Cook Time: 15 min
- Total Time: 25 min
- Yield: 8 servings 1x
- Category: Breakfast
- Method: Griddle Cooking
- Cuisine: American
- Diet: Vegetarian
Ingredients
- 1 1/2 cups all-purpose flour
- 3 1/2 teaspoons baking powder
- 1 teaspoon salt
- 1 tablespoon white sugar
- 1 1/4 cups milk (or buttermilk substitute)
- 1 egg
- 3 tablespoons butter, melted
Instructions
- Combine the flour, baking powder, salt, and sugar in a large bowl. Whisk these dry ingredients together.
- In a separate bowl, whisk together the milk, egg, and melted butter.
- Pour the wet ingredients into the dry ingredients. Mix gently until just combined. Do not overmix; a few lumps are fine.
- Heat a lightly oiled griddle or large non-stick skillet over medium heat. The griddle is ready when a drop of water sizzles immediately.
- Pour 1/4 cup of batter onto the hot griddle for each pancake.
- Cook for 2 to 3 minutes per side. Flip when bubbles appear on the surface and the edges look set.
- Cook the second side until golden brown. Serve immediately.
Notes
- For buttermilk pancakes, substitute 1 1/4 cups of milk mixed with 1 tablespoon of white vinegar or lemon juice. Let stand for 5 minutes before using.
- Do not overmix the batter; this develops gluten and results in tough pancakes. A lumpy batter makes for fluffier pancakes.
- To keep pancakes warm while you cook the rest, place them in a single layer on a baking sheet in a 200 degree Fahrenheit oven.
- These pancakes freeze well. Cool completely, then stack with parchment paper between each one. Place in a freezer bag for up to one month. Reheat in a toaster or microwave.
Nutrition
- Serving Size: 2 pancakes
- Calories: 220
- Sugar: 5
- Sodium: 350
- Fat: 7
- Saturated Fat: 4
- Unsaturated Fat: 3
- Trans Fat: 0
- Carbohydrates: 35
- Fiber: 1
- Protein: 7
- Cholesterol: 45