
The holidays simply aren’t complete, are they? That wonderful aroma drifting from the oven, the sound of family settling around the table—it all hinges on getting the side dishes just right. For me, that means never, ever settling for the stuff in a box. This truly is the Best Stuffing Recipe Ever, and it’s the one I bring to the table every single year. My years as a patient teacher, combined with decades of home cooking for my own family, went into making this homemade stuffing dependable. Trust me, this classic recipe delivers that craveable, moist interior with a beautiful, crisp, savory herb top. You’re going to love how easy this foolproof recipe is!
- Why This Homemade Stuffing Recipe is the Best Stuffing Ever
- Gathering Ingredients for Traditional Holiday Stuffing
- Step-by-Step Instructions for Perfect Stuffing
- Tips for Making Ahead Stuffing
- Variations on Classic Stuffing
- Serving Suggestions for This Holiday Side Dish
- Storage and Reheating Instructions for Leftover Stuffing
- Estimated Nutritional Data for This Stuffing
- Your Questions Answered About Making Great Stuffing
Why This Homemade Stuffing Recipe is the Best Stuffing Ever
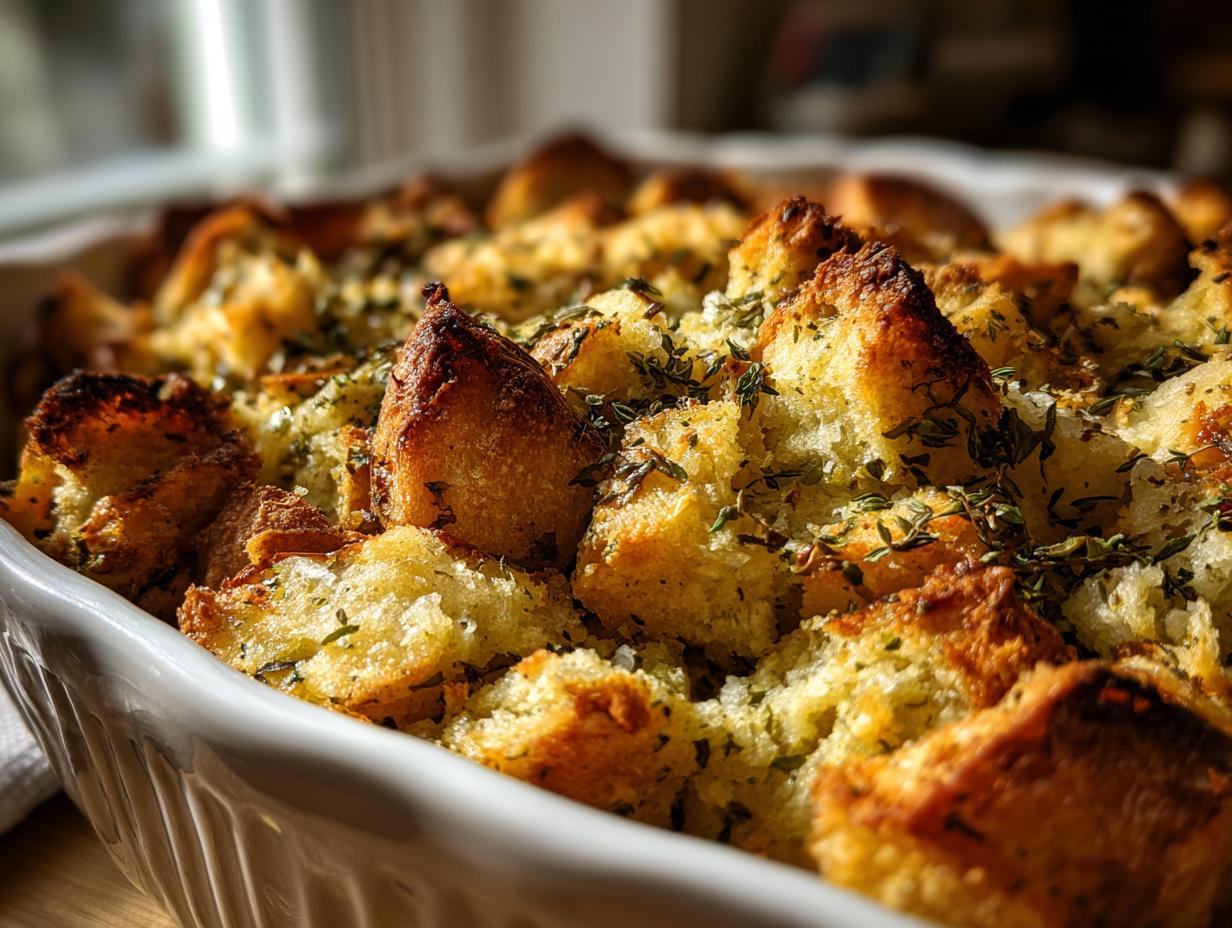
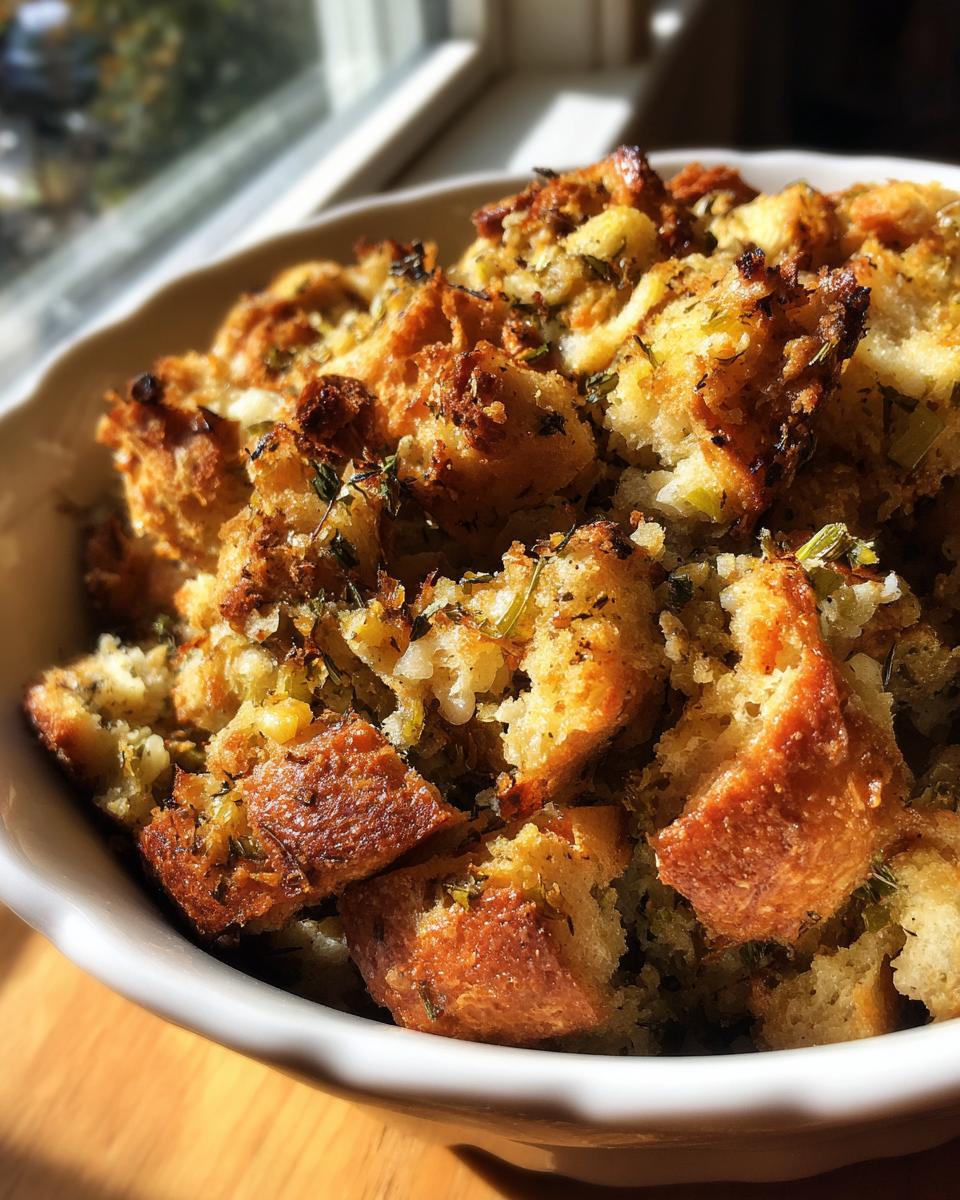
If you are like me, the memory of dry, crumbly stuffing from a bag just won’t do. My goal with this Classic Thanksgiving Side Dish is perfection: every forkful should be soft and saturated with savory broth on the inside, while the top layer turns beautifully golden and crisp on the outside. That is the hallmark of great homemade stuffing.
- We skip the box mixes entirely. That means real butter and fresh herbs make all the difference in flavor!
- This method guarantees that wonderful Moist and Crispy Stuffing texture you are dreaming of.
- It’s a dependable recipe. After years of teaching, I promise this technique is completely straightforward.
If you enjoy perfectly textured sides like my sweet potato casserole, then you know the detail matters. We focus on building layers of flavor from the very first step.
Achieving Foolproof Stuffing Technique
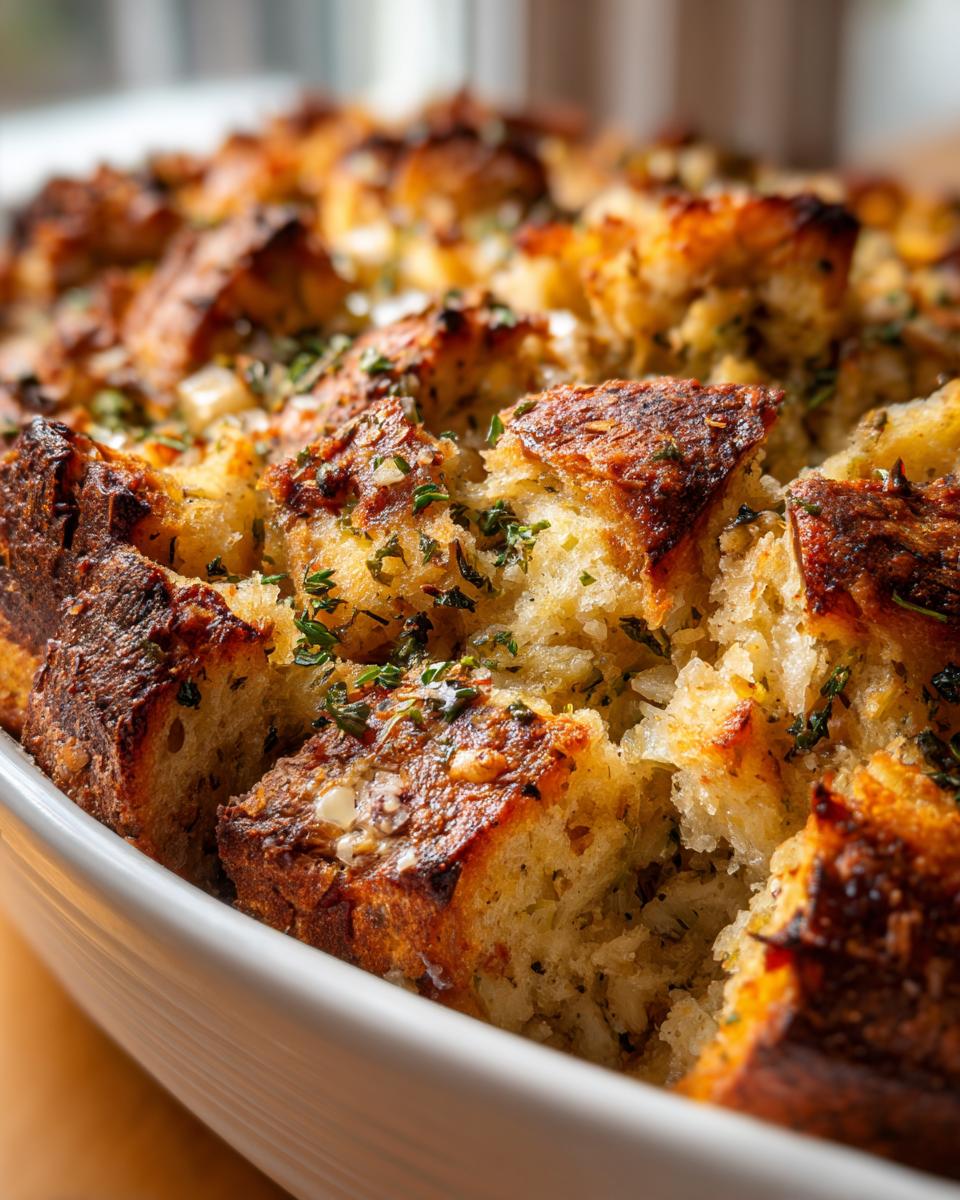
The secret to avoiding mushy stuffing starts before you ever mix in the broth! You need day-old bread—it should be sturdy, not soft and fresh. We toast the cubes first on a baking sheet until they are just dry. This step is crucial for absorption. If the bread is too fresh, it gets soggy instantly. Drying it out slightly means it eagerly soaks up all that lovely butter and broth later on.
Gathering Ingredients for Traditional Holiday Stuffing
Now that we know the technique for that perfect texture, let’s look at what we need to gather. Cooking by Carla relies on solid, recognizable ingredients—nothing fancy, just the best quality we can manage for our Traditional Holiday Stuffing. Trust me, every measurement matters when you are aiming for the best stuffing ever!
Here is exactly what you need for 8 servings of this amazing side dish. Keep these items ready before you start cooking because speed is important once we get the vegetables sautéing.
- 1 pound day-old bread, cut into 1-inch cubes
- 1 cup (2 sticks) unsalted butter
- 2 cups chopped celery
- 2 cups chopped yellow onion
- 1 tablespoon fresh sage, chopped
- 1 tablespoon fresh thyme leaves
- 1 teaspoon dried rosemary, crushed
- 1 teaspoon salt
- 1/2 teaspoon black pepper
- 2 large eggs, lightly beaten
- 2 to 3 cups chicken broth
Using real, unsalted butter is non-negotiable here; it’s the foundation of this savory, rich flavor profile. And remember, we are using fresh herbs for that authentic taste!
Step-by-Step Instructions for Perfect Stuffing
It’s time to bring everything together to create that wonderful final product. Remember those dried bread cubes we prepared? They are ready to soak up all our flavor bases. We are aiming for a mix that is thoroughly coated but definitely not swimming. I know it seems intuitive, but over-moistening is the number one way people accidentally ruin their stuffing!
Make sure your oven is fully preheated to 350°F (175°C) and you have your 9×13 inch dish generously buttered. We need a clean start!
- First, take those dried bread cubes and spread them out on a large, rimmed baking sheet. Pop them into the 350°F oven for about 10 to 15 minutes until they feel dry to the touch but aren’t browning yet. Set them aside to cool just a little bit.
- Next, grab a big skillet and melt that full stick of butter over medium heat. Toss in your chopped celery and onions—these are the backbone of our flavor. Let them cook down until they are soft; this usually takes about 8 minutes.
- Now for the good stuff! Stir in your fresh sage, thyme, crushed rosemary, salt, and pepper. Let that cook for just 1 minute until you can really smell the herbs waking up.
- Take the skillet completely off the heat—this prevents us from curdling the eggs later. Add all your dried bread cubes to the skillet and very gently toss them so everything gets coated in that lovely buttery herb mixture.
- In a separate small bowl, whisk your two eggs lightly, then pour in 2 cups of the chicken broth. Pour this liquid over the bread mixture and toss carefully until everything looks evenly moistened. Honestly, if it seems stiff, add just a tiny splash more broth, a quarter cup at a time. Stop when it’s moist, not soupy!
- Scoop your mixture into your prepared baking dish. Cover that dish tightly with aluminum foil so it can steam slightly and the insides get tender. Bake it covered for 30 minutes.
If you need a reminder on making crispy potatoes, my recipe for crispy oven-roasted breakfast potatoes uses a similar initial dry-out step to achieve the crust!
Sautéing Aromatics for Savory Herb Stuffing Flavor
When you are cooking the celery and onions, you want them truly softened—don’t rush this! Aim for a good 8 minutes until they are translucent and sweet. That little extra minute after adding the fresh sage, thyme, and rosemary (about 1 minute) is key. We call this ‘blooming’ the herbs; it releases their essential oils right into the butter before they go onto the bread. That’s how we guarantee a true Savory Herb Stuffing!
Baking the Stuffing: Covered vs. Uncovered Time
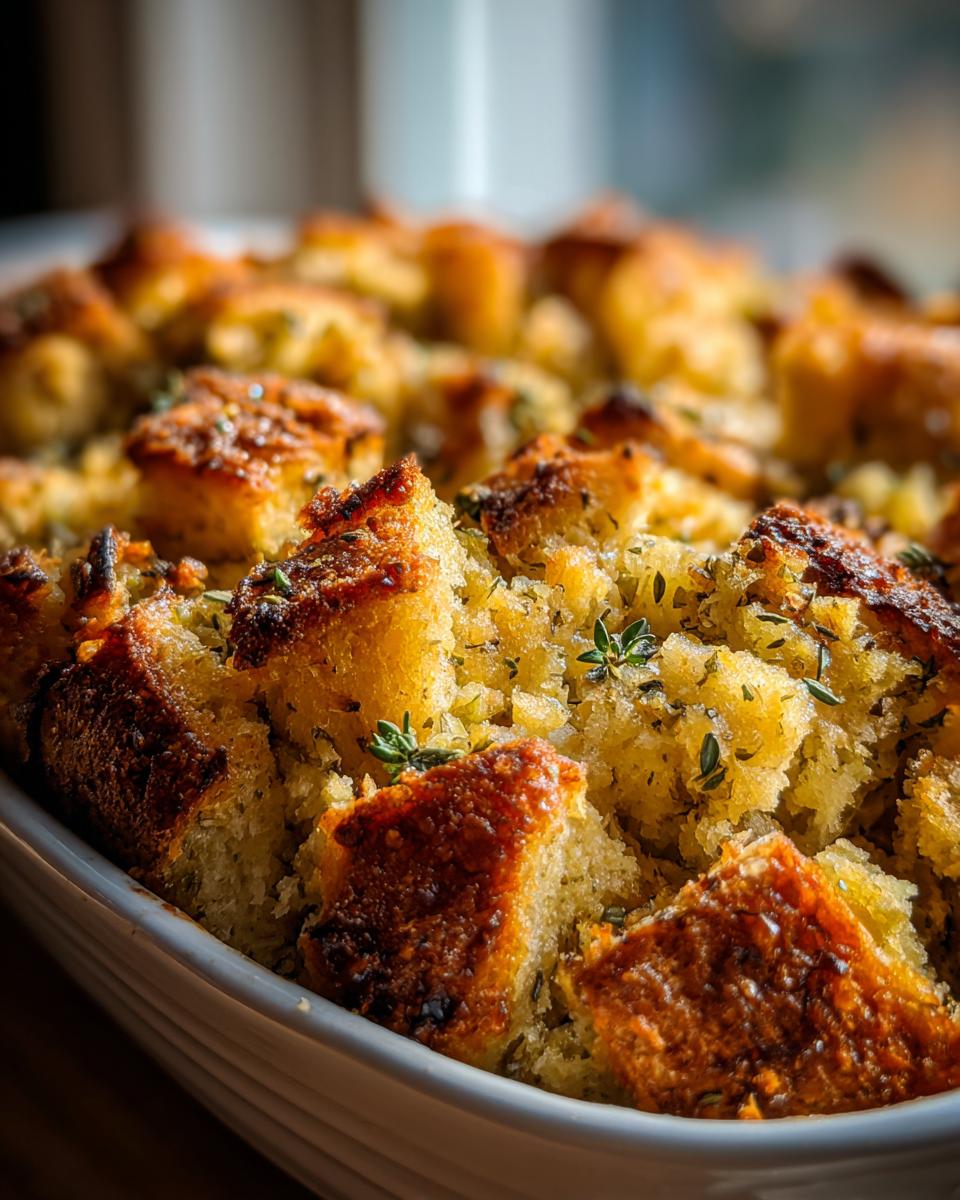
This two-stage baking is how we nail the Moist and Crispy Stuffing texture. After the first 30 minutes covered, take that foil completely off. The heat hits the top layer, and that’s where the magic happens—it starts to brown up nicely! Let it bake uncovered for another 15 to 20 minutes until the top is golden brown all over. Don’t forget to let it rest for 10 minutes off the heat before scooping; it lets the liquids settle perfectly!
Tips for Making Ahead Stuffing
The worst thing about big holiday meals is starting everything at 7 AM! I rely heavily on making components ahead of time, and this stuffing is fantastic for prepping early. You can complete everything right up to step 5—mixing the sautéed vegetables with the dried bread cubes. Then, just mix in your egg and broth mixture, and stop right there. Don’t worry if it seems a little liquidy; it just means the bread is ready to absorb it all overnight.
Cover that dish tightly with plastic wrap and tuck it into the refrigerator. When it comes time to bake on the big day, take it out about 30 minutes beforehand just to let it warm up a touch on the counter. Then, bake it covered for 40 minutes instead of 30, and finish it uncovered for those lovely crispy edges. It saves my nerves every Thanksgiving! It’s just like planning out my chocolate pudding prep!
Variations on Classic Stuffing
While this basic savory herb stuffing is perfect just the way it is, sometimes you want to shake things up a little bit for the holiday table or maybe you just have extra ingredients lying around! I always encourage cooks to make the recipe their own, especially when aiming for that crowd-pleasing homemade stuffing flavor.
For a richer, heartier dish, you can easily make a Sausage Stuffing. Instead of using the full cup of butter in our original recipe, I substitute about half of that butter with a half-pound of crumbled, cooked breakfast sausage when I sauté the onions and celery. The sausage grease adds incredible depth, and you still get that wonderful buttery base. You can find my dedicated recipe for great sausage stuffing if you want guidance there!
Another wonderful twist is adding fruit for a little brightness. If you want to try a Cranberry Apple Stuffing, just fold in about one cup of finely diced tart apples and a half-cup of fresh or frozen cranberries when you toss the bread mixture with the vegetables. The fruit softens beautifully and cuts through the richness of the butter—it’s fantastic!
Creating Stuffing Balls Recipe
If you are worried about baking time or just need something fun for appetizers, making stuffing balls is the way to go! Once your mixture is assembled (right before you add the broth if you are making them ahead), use slightly damp hands and pack the mixture firmly into golf-ball-sized shapes. Place them on a parchment-lined baking sheet. You’ll want to bake these a little hotter—about 375°F (190°C)—for just 20 to 25 minutes until they are golden brown all over. They always disappear first!
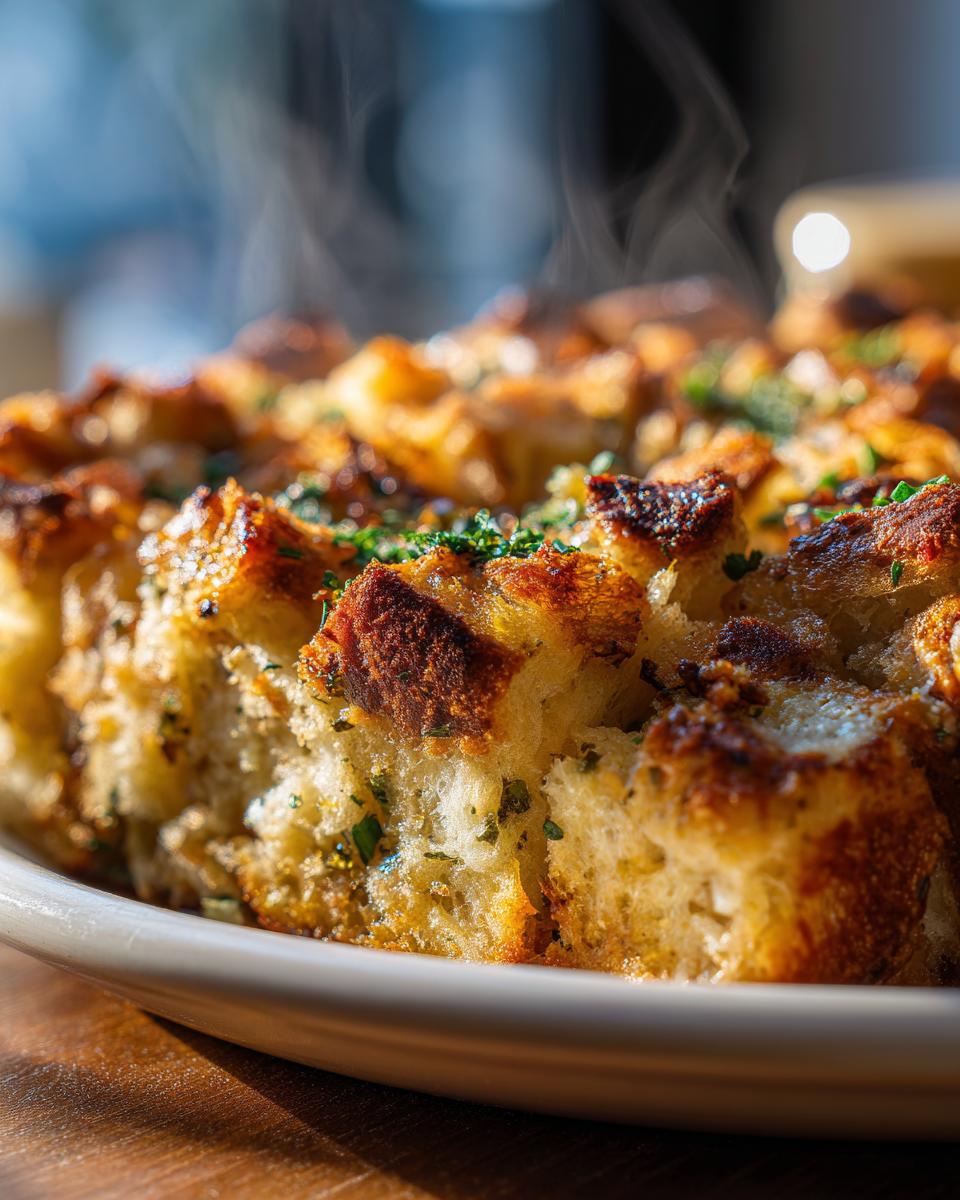
Serving Suggestions for This Holiday Side Dish
This stuffing is truly the best when paired with hearty, traditional fare. Because we focused so strongly on the fresh herbs and butter, it complements rich meats beautifully. Naturally, it’s spectacular alongside a perfectly roasted turkey for your big Thanksgiving dinner or as one of your main Christmas Dinner Sides.
However, don’t limit it! This Traditional Holiday Stuffing is amazing spooned over a thick slice of honey-baked ham, too. If you are making that lovely spatchcocked chicken I shared, this stuffing is the perfect counterpoint to its crispy skin and bright lemon flavor. It’s pure comfort food heaven!
Storage and Reheating Instructions for Leftover Stuffing
After the big feast, if we have any of this amazing stuffing left over, I’m always careful to store it properly so it tastes just as good the next day!
If you have leftovers, get them into an airtight container and into the refrigerator within two hours of taking them out of the oven. Since this is a deeply moist stuffing, it needs to be kept properly sealed. It will stay good for about three to four days in the fridge. I find that leftovers reheat beautifully!
When you reheat, put the stuffing back into a casserole dish, add just a tiny splash of extra chicken broth—maybe a tablespoon—and cover it tightly with foil. Bake it at 350°F until it’s hot all the way through. If you want that crispy top back, take the foil off for the last five minutes. It reminds me a bit of reheating my green bean casserole; you need the moisture back, but you still want that nice browned bits!
Estimated Nutritional Data for This Stuffing
Trying to keep track of what’s in your holiday plate? I completely understand! Since this recipe is made completely from scratch, the numbers can vary slightly based on the exact brands of butter or broth you use. But I wanted to give you a good idea of where we land with this delicious, homemade side.
These figures are based on one cup of this classic stuffing:
- Calories: 320
- Fat: 18g (with 10g Saturated Fat)
- Carbohydrates: 35g
- Protein: 6g
- Sodium: 550mg
- Sugar: 3g
Just remember, these numbers are estimates based on the specific ingredients listed in the recipe, so think of them as a helpful guide!
Your Questions Answered About Making Great Stuffing
Whenever I share this recipe, I get such wonderful questions, which tells me you all are serious about making the best stuffing! It shows me that you want real results for your holiday table, and I’m happy to share every detail. Don’t worry about getting it perfect the first time; once you learn the fundamentals, it becomes second nature.
Let’s clear up a few common things people ask about when aiming for that perfect, foolproof stuffing technique.
Can I use fresh bread right out of the bag? Oh, bless your heart, no! Remember what I said about drying the bread cubes first? Fresh bread acts like a sponge that soaks up too much liquid too quickly and turns to mush. You absolutely must dry it out until it’s stale or gently toast it first. It makes all the difference between a good side dish and truly great homemade stuffing.
What if I don’t have chicken broth? If you’re facing a shortage, vegetable broth works perfectly fine! It keeps this recipe as a wonderful Classic Thanksgiving Side Dish that everyone can enjoy. If you want a richer flavor profile for your Traditional Holiday Stuffing without chicken, you could use a high-quality turkey broth if that’s what you have on hand. Just avoid using plain water, as that gives you zero flavor!
What is the best type of bread for this stuffing? I usually use sturdy white bread, like a country loaf, or even Texas toast if I’m short on time—though store-bought mixes certainly aren’t required. Avoid anything too soft like brioche, or the structure won’t hold up. If you’re looking for some fun bread ideas, you might check out how I use sturdy bread when making French toast!
If you want to see another lovely take on the classics, check out this great recipe for traditional stuffing that emphasizes freshness, just like ours!
PrintGrandma’s Classic Homemade Stuffing: Moist Inside, Crispy Outside

This is the best stuffing recipe ever for your holiday table. You will make a traditional, savory herb stuffing that is perfectly moist inside and beautifully crispy on top, avoiding dry boxed mixes.
- Prep Time: 20 min
- Cook Time: 50 min
- Total Time: 70 min
- Yield: 8 servings 1x
- Category: Side Dish
- Method: Baking
- Cuisine: American
- Diet: Vegetarian
Ingredients
- 1 pound day-old bread, cut into 1-inch cubes
- 1 cup (2 sticks) unsalted butter
- 2 cups chopped celery
- 2 cups chopped yellow onion
- 1 tablespoon fresh sage, chopped
- 1 tablespoon fresh thyme leaves
- 1 teaspoon dried rosemary, crushed
- 1 teaspoon salt
- 1/2 teaspoon black pepper
- 2 large eggs, lightly beaten
- 2 to 3 cups chicken broth
Instructions
- Preheat your oven to 350°F (175°C). Lightly butter a 9×13 inch baking dish.
- Spread the bread cubes in a single layer on a large baking sheet. Bake for 10 to 15 minutes until the cubes are lightly dried out but not browned. Set aside.
- In a large skillet over medium heat, melt the butter. Add the chopped celery and onion. Cook until softened, about 8 minutes.
- Stir in the fresh sage, thyme, rosemary, salt, and pepper. Cook for 1 minute until fragrant.
- Remove the skillet from the heat. Add the dried bread cubes to the vegetable mixture and toss gently to coat everything evenly.
- In a small bowl, whisk the eggs with 2 cups of the chicken broth. Pour this mixture over the bread mixture. Toss gently until the bread is evenly moistened. Add more broth, a quarter cup at a time, if the stuffing seems too dry. You want it moist, not soggy.
- Transfer the stuffing mixture to the prepared baking dish. Cover the dish tightly with aluminum foil.
- Bake covered for 30 minutes.
- Remove the foil and bake for an additional 15 to 20 minutes, or until the top is golden brown and crispy.
- Let the stuffing rest for 10 minutes before serving this classic Thanksgiving side dish.
Notes
- For make-ahead stuffing tips, you can prepare the entire mixture (up to step 5) a day ahead. Cover and refrigerate. When ready to bake, add the broth mixture, let it sit at room temperature for 30 minutes, then proceed with baking as directed, adding 10 minutes to the covered baking time.
- If you want a richer flavor, substitute half the butter with 1/2 pound of cooked, crumbled sausage when sautéing the vegetables.
- To make stuffing balls, lightly pack the mixture into small balls and bake on a sheet pan at 375°F (190°C) for 20-25 minutes until golden.
Nutrition
- Serving Size: 1 cup
- Calories: 320
- Sugar: 3
- Sodium: 550
- Fat: 18
- Saturated Fat: 10
- Unsaturated Fat: 8
- Trans Fat: 0.5
- Carbohydrates: 35
- Fiber: 2
- Protein: 6
- Cholesterol: 75