
Isn’t there just something so incredibly appealing about a dessert that looks like it’s flirting with disaster? That deep, dark, almost scary-looking caramelization on top of a cheesecake is magic, I promise you. That’s why I am so excited to share what I think is the definitive, easy method for making the Basque burnt cheesecake. Forget fussy water baths and fragile crusts; this Spanish dessert delivers an unbelievably creamy interior that melts like mousse. After thirty years of teaching kids how to understand tricky concepts, I’ve distilled this recipe down to its simplest, most reliable form. You don’t need to be a fancy baker to nail this truly impressive dessert. If you love indulgent treats, be sure to check out all my absolute favorite recipes in my dessert collection over at my favorite baked goods page!
- Why This is the Best Basque Burnt Cheesecake Recipe
- Ingredients for Your Easy Basque Burnt Cheesecake
- How to Make Basque Burnt Cheesecake Step-by-Step
- Tips for Success with Your Basque Burnt Cheesecake
- Serving Temperature for the Ultimate Basque Burnt Cheesecake Experience
- Variations on the Classic Basque Burnt Cheesecake
- Storing and Reheating Your Decadent Dessert
- Frequently Asked Questions About Basque Burnt Cheesecake
- Sharing Your Basque Burnt Cheesecake Creation
Why This is the Best Basque Burnt Cheesecake Recipe
I spent months testing this to make sure it works every single time I pull it from the oven. You won’t find a more dependable version of this no crust cheesecake. It’s simple, it’s rustically beautiful, and it tastes like you spent all day on it, even though you didn’t!
- It delivers a truly mousse-like texture, not dense or heavy.
- The prep is wonderfully quick—fifteen minutes tops!
- It needs no fussy water bath or tricky techniques.
If you want to check out my famous crack-free cheesecake guide for comparison, you can peek at my article on homemade cheesecake.
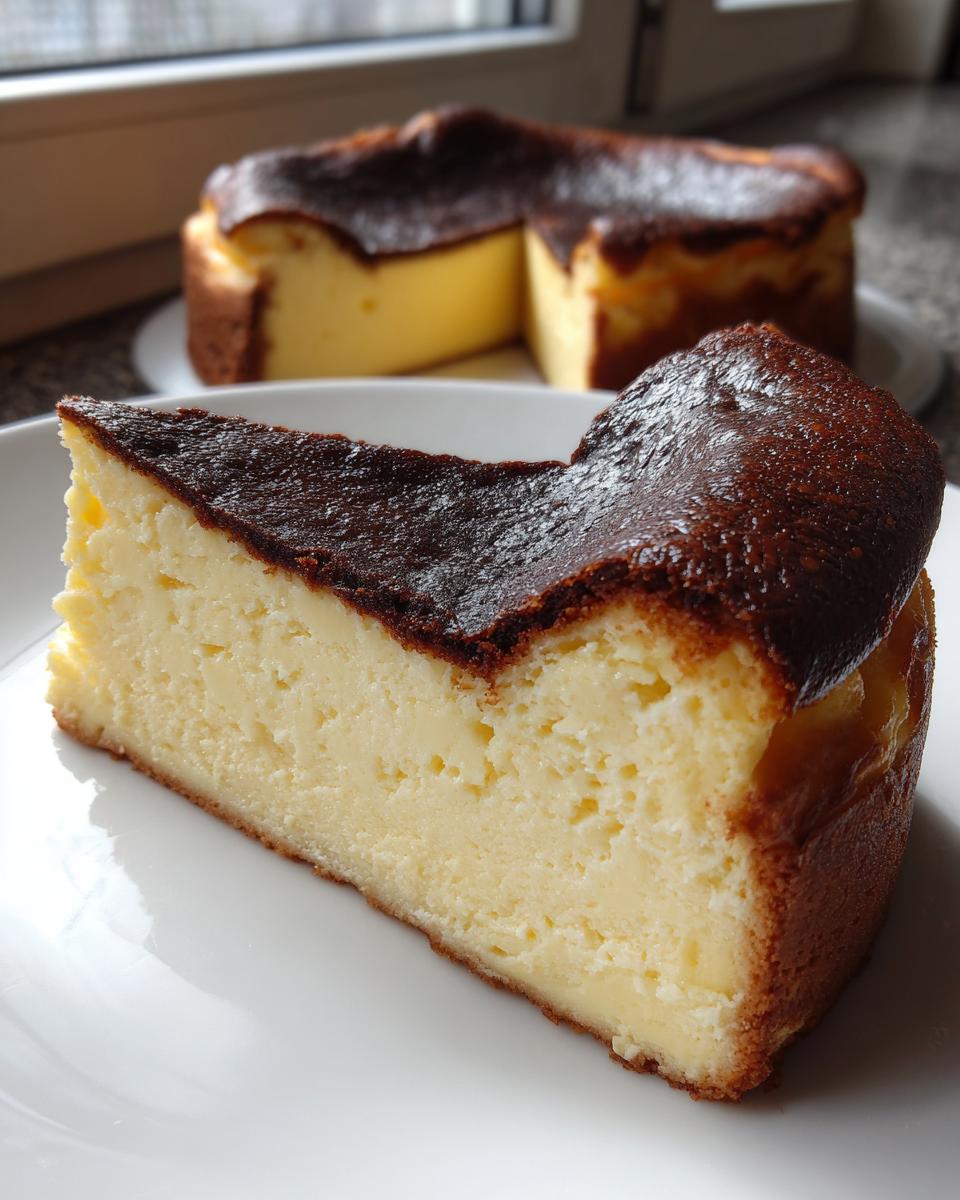
Achieving the Signature Creamy Cheesecake Texture
The secret here isn’t just the cream cheese—though that’s important! It’s the balance. Using room-temperature cream cheese *and* mascarpone, plus those extra egg yolks, creates an unbelievably smooth batter. My recipe leans a little heavier on the heavy cream than some others, which is what guarantees that rich, velvety, almost custard-like center when it sets up.
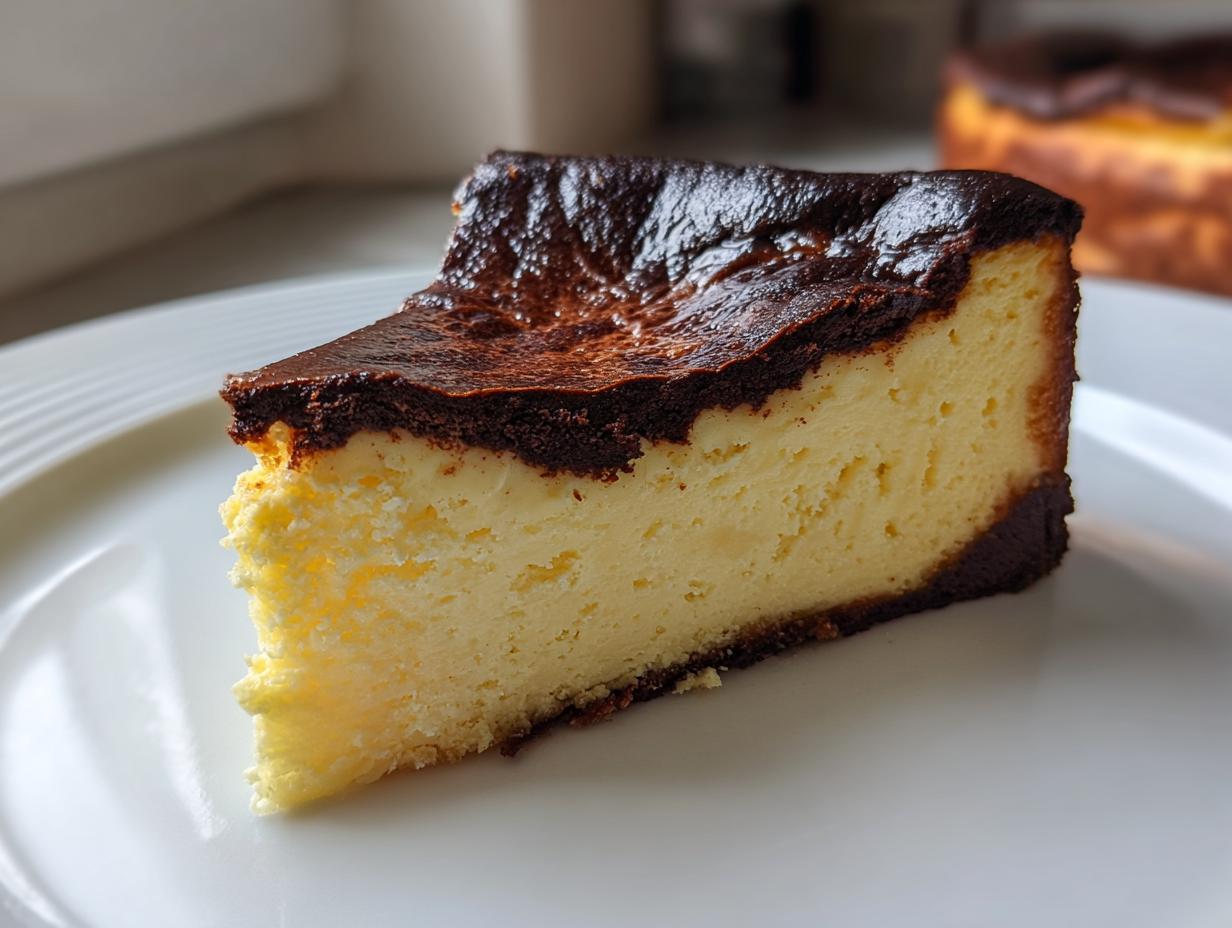
Secrets to the Perfect Caramelized Top Dessert
That dark, nearly black top is what everyone talks about, and it’s crucial! We use a high oven temperature to shock the top layer of sugar and milk solids. This caramelization isn’t meant to taste bitter, though; it creates a wonderful, complex, slightly roasted flavor that just perfectly cuts through the sweetness of the rich filling underneath. You absolutely have to let it get dark for the full flavor experience.
Ingredients for Your Easy Basque Burnt Cheesecake
It truly warms my heart that such a gourmet-looking treat comes from such simple components—I love these easy dessert recipes that don’t require a massive shopping list! For Carla’s definitive version, make sure everything, especially the cheese and eggs, has at least two hours on the counter. Room temperature is non-negotiable for that lump-free batter we need.
- 1.5 lbs full-fat cream cheese (that’s three 8 oz blocks!), softened nicely
- 8 oz mascarpone cheese, softened too
- 1 1/4 cups granulated sugar
- 4 large eggs, at room temperature
- 2 large egg yolks, also room temperature
- 1 3/4 cups plus 1 tablespoon heavy cream
- 1 tablespoon all-purpose flour
- A small pinch of fine sea salt
That’s it! Not one extra fussy item needed to make this rustic cheesecake truly shine.
How to Make Basque Burnt Cheesecake Step-by-Step
Now for the fun part! Baking this dessert isn’t like making a delicate New York style cake; we embrace the messiness here, which is wonderful for beginners. Remember, this Basque burnt cheesecake does not use a water bath, so don’t even think about setting your pan in a larger dish of water. We want that high, direct heat to give us that beautiful scorched crust!
Preparing the Pan and Oven for the Basque Burnt Cheesecake
First things first, pull out your 9-inch springform pan because we need to get it ready for its close-up. Take two big sheets of parchment paper and line the pan so they cross over each other. You want the paper sticking up way past the rim—maybe three or four inches over the sides. Don’t try to make it smooth! Push it down to create deep wrinkles. That rumpled paper gives this rustic cheesecake its signature look. Once that’s done, get your oven preheating to 400°F (200°C).
Mixing the Creamy Cheesecake Batter
We start by beating that room-temperature cream cheese until it has zero lumps—a smooth canvas is key for a creamy cheesecake. Next, gently mix in the sugar until it just disappears. Then, add in the mascarpone. After that, it’s time for eggs and yolks, one by one, mixing on low speed after each addition. Right at the end, we whisk the heavy cream, flour, and salt together separately, and then fold that right into the batter. Stop mixing the second it looks uniform; over-mixing adds too much air, and we want density!
Baking Time and Visual Cues for Your Burnt Cheesecake
Pour your smooth batter into that prepared pan and slide it into the 400°F oven. It needs about 50 to 60 minutes to bake. When it’s done, the top should look seriously dark, almost black in spots—that’s what we are aiming for! But here’s the real test: the center needs to have a very noticeable, significant wobble when you gently shake the pan. Trust me, it will firm up as it cools down from being a hot, decadent dessert.
If you’re looking for more tips on this straightforward baking method, I talk all about it here at my Burnt Cheesecake guide.
Tips for Success with Your Basque Burnt Cheesecake
As a former teacher, my number one goal is making sure you feel confident grabbing your apron for this recipe! When people ask me how to make the Best Basque Burnt Cheesecake, I always point back to temperature control. If your cream cheese is cold, your batter will have lumps, no matter how long you mix. It really compromises that beautiful texture we are aiming for.
Also, don’t panic about the color! That dark, spotty top is flavor, not failure. If you are nervous about your oven running too hot—which can sometimes dry out the edges—start checking right around the 45-minute mark. If the center is wobbling nicely but the top seems light, you can always turn the broiler on for just thirty seconds, but watch it like a hawk! You are looking for commitment from that sugar layer.
Remember all the key details, especially using good quality ingredients, and you’ll have a rich creamy dessert that tastes like it came straight from San Sebastian. More great tips for guaranteed success are available over in my cheesecake success guide.
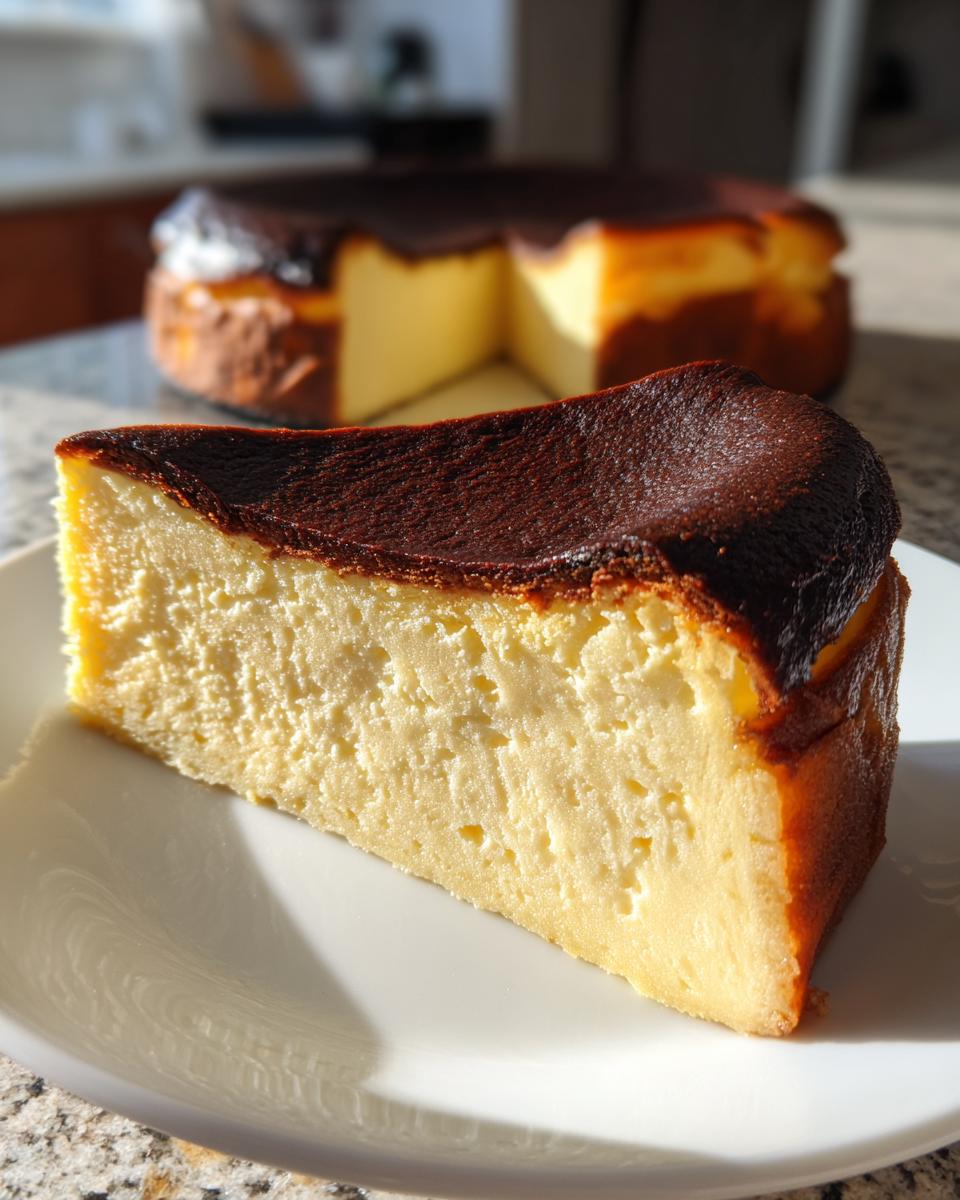
Serving Temperature for the Ultimate Basque Burnt Cheesecake Experience
This is one of those crucial moments in baking where patience pays off big time! Once your Basque burnt cheesecake is out of the oven, it’s still very delicate. We have to let it settle down first. I like to let it cool completely on the counter for at least two full hours. It will deflate quite a bit during this time—please, please don’t freak out! That sinking center is normal; it’s just transforming from that jiggly bake into the dense, decadent dream we want.
After it’s slightly cooled, we move it to the refrigerator for at least six hours, but honestly, overnight is where it truly shines. This chilling time is essential for setting up that luscious, smooth texture.

But here’s where you get to choose your own adventure for this rich creamy dessert! If you want that incredible, melt-in-your-mouth, almost soufflé-like texture that some people rave about, pull it out about 30 minutes before serving. Allowing it to come close to room temperature really softens that interior. If you prefer a firmer slice—more like a traditional, dense cheesecake consistency—you can serve it straight from the fridge. Both ways are delicious, but that little bit of warmth really wakes up the flavor of the caramelized top.
If you’re interested in other delicious, chilled treats, you might enjoy my recipe for no-bake cheesecake jars!
Variations on the Classic Basque Burnt Cheesecake
While the traditional round pan gives you that iconic look, sometimes you just don’t have one or you want to try something different! I saw so many of you bakers posting photos of your incredible creations baked in loaf pans—isn’t that neat? It’s such a great way to scale down the recipe slightly or give yourself a more giftable shape. If you try baking this crustless dessert in a loaf pan, just remember that the cooking time will likely be longer because the center is deeper. Keep testing it with that gentle wobble check!
Another thing you can do if you’re feeling adventurous is to sneak in some gentle flavor enhancers to complement the richness. I’m not talking about adding fruit or chocolate chips—we want to keep the star texture intact—but a teaspoon of good quality vanilla extract mixed in with your heavy cream, or even a tiny splash of almond or citrus zest, can brighten the whole thing up beautifully. It keeps the spirit of this Spanish dessert recipe while giving it a little personal spin. For more ideas on adding bright flavors to desserts, you should definitely look at my zesty lemon cake recipe!
The main thing to keep in mind with any variation, whether it’s a loaf pan or a smaller round, is that the high heat is what creates that beautiful contrast between the burnt exterior and the creamy interior. Don’t be afraid of the color!
Storing and Reheating Your Decadent Dessert
Oh, the wonderful problem you have now—leftovers of your decadent dessert! Since this Basque burnt cheesecake is so rich with cream cheese and heavy cream, we need to treat it right in the fridge. The best way to store it is in an airtight container or tightly wrapped in plastic wrap directly in the refrigerator. It keeps beautifully for about four or five days. The texture will firm up quite a bit after being chilled that long, which I know some of you prefer!
Now, about reheating—and this is important! Because this cheesecake is meant to be served either chilled or right around room temperature, you definitely don’t want to stick a slice in the microwave. Microwaving that beautiful, delicate custard center just turns it rubbery and warm in an unpleasant way. If you took a slice out of the fridge and want it softer, just set it on a small plate and let it sit on the counter for about 20 to 30 minutes. That small amount of time lets the fats soften just enough to release that incredible, melt-in-your-mouth consistency again.
Honestly, though, I rarely have to worry about reheating leftovers because my grandchildren usually raid the pan! But just in case you manage to keep some safe, treat it gently, and resist the urge to blast it with heat. For other make-ahead treats that store like a dream, you might want to check out my recipe for homemade chocolate pudding!
Frequently Asked Questions About Basque Burnt Cheesecake
I always get so many wonderful questions when folks first try making this recipe, and that’s perfectly normal when dealing with a dessert that looks a little rebellious! Don’t you worry one bit if you have questions about that dark top or the jiggly center. Teaching means I love explaining the ‘why’ behind the steps. Here are a few things I hear most often when people are baking their first Basque burnt cheesecake.
Why is my cheesecake sinking so much after baking?
Oh, this is the most common concern for new bakers of this style! When you pull the cheesecake out, the center should have a significant wobble, like thick pudding. As it cools and chills, it deflates dramatically. That sinking is exactly what you want! It means you’ve achieved the perfect ratio for that creamy cheesecake interior. If you try to overbake it to prevent sinking, you’ll end up with a dry cake instead of a rich, velvety one. Just trust the process and let it cool down!
Can I use something other than granulated sugar?
For the ultimate success in achieving that signature caramelized top dessert, no, I really recommend sticking to the standard granulated sugar listed in the recipe. This cheesecake relies on the purity of that sugar caramelizing at high heat to create the burnt layer. Brown sugar has molasses, which burns too fast and unevenly. If you are looking for a lower-sugar option overall, perhaps try my general low-carb cheesecake guide, but for this specific Spanish style, white sugar is the way to go.
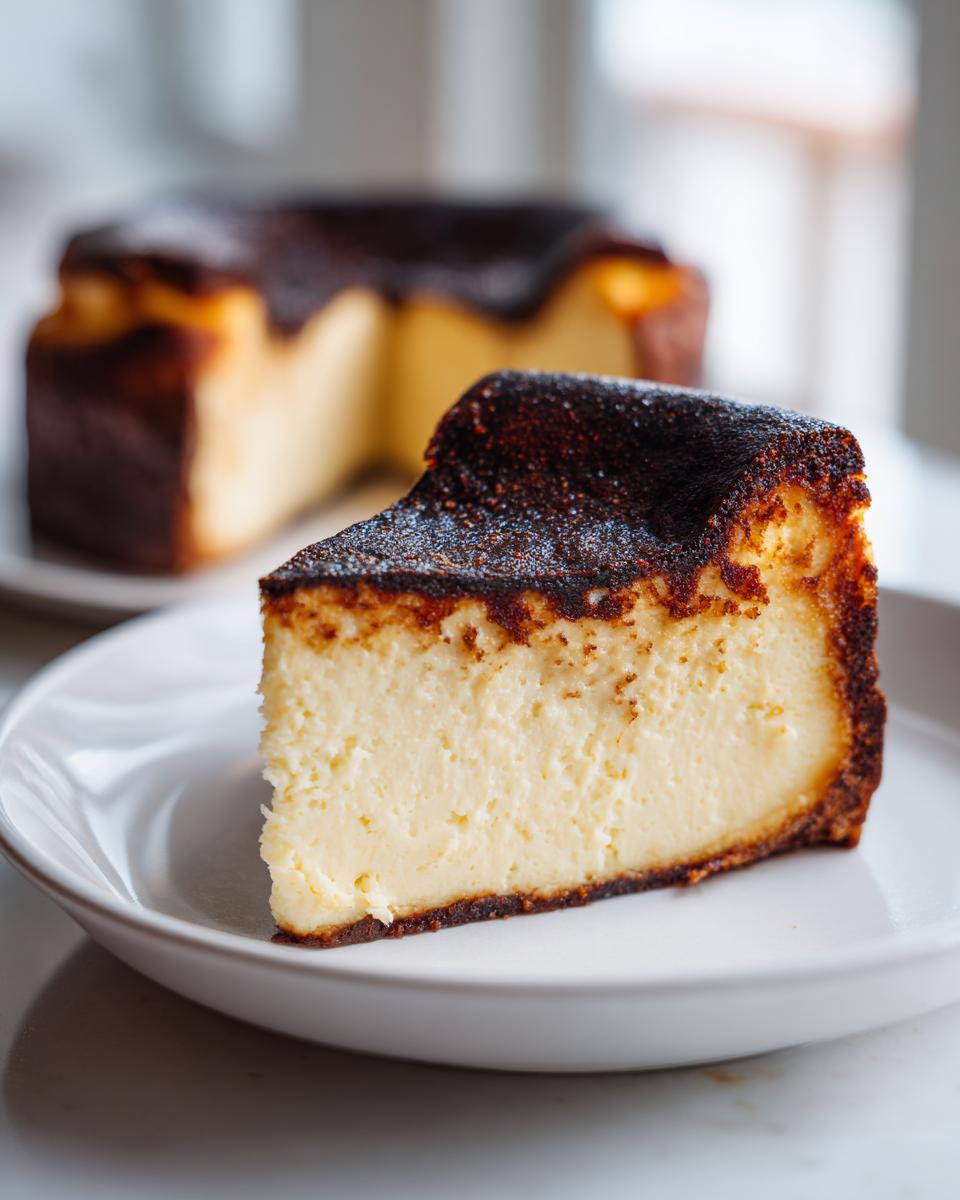
What is the main difference between this and a New York cheesecake?
That’s a great comparison! The New York style relies on a low, slow bake, often in a water bath, and it always has a pre-made graham cracker crust. The result is dense, smooth, and uniform from top to bottom. Our Basque burnt cheesecake is the total opposite! We bake it hot and fast, it’s completely crustless dessert, and we welcome the dramatic contrast between the deeply charred top and the molten, mousse-like center. It’s rustic elegance versus polished precision, if you ask me!
Can I make this ahead of time?
Absolutely! In fact, making this a day ahead really enhances the texture. It needs that minimum six-hour chill time to fully set up the custard. If you’re worried about the color or moisture, you can even bake it fully, let it cool completely on the counter, wrap it tightly, and chill it. You can certainly bake this for a party the day before, which is why I love it for entertaining. For more make-ahead treats, you might want to check out my sugar cookie cheesecake alternative!
Sharing Your Basque Burnt Cheesecake Creation
Well, my friend, you’ve done it! You’ve conquered the heat and brought that stunning, rustic Spanish dessert right into your own kitchen. I truly hope you enjoyed watching that batter transform into what looks like a masterpiece. Now that you’ve had a taste of your very own stunning creation, I’d love to hear all about it!
If you made Carla’s Easy Basque Burnt Cheesecake Recipe, please take a moment to leave a rating right here on the page. A star rating helps other home cooks feel confident trying new, exciting bakes like this one. Your feedback tells me exactly what worked well! If you didn’t mind sharing, I’m especially curious about the color you achieved—did you go for deeply dark, or did you pull it back just a touch? Every single one is perfect because it’s homemade!
If you snapped a photo of your velvety center and beautifully caramelized top, feel free to share it with me! Tagging me on social media is wonderful, but even just knowing you succeeded is reward enough for me. I’m always so proud to see what you create in your kitchens. If you want to read a little more about my philosophy for straightforward, joyful home cooking, you can always visit my About Me page!
PrintCarla’s Easy Basque Burnt Cheesecake Recipe
Make this impressive, crustless Basque Burnt Cheesecake. It features a perfectly caramelized top and a rich, creamy, mousse-like interior. This straightforward recipe delivers decadent Spanish flavor with minimal effort.
- Prep Time: 15 min
- Cook Time: 60 min
- Total Time: 7 hours 15 min
- Yield: 10 servings 1x
- Category: Dessert
- Method: Baking
- Cuisine: Spanish
- Diet: Vegetarian
Ingredients
- 1.5 lbs (three 8 oz blocks) full-fat cream cheese, room temperature
- 8 oz mascarpone cheese, room temperature
- 1 1/4 cups granulated sugar
- 4 large eggs, room temperature
- 2 large egg yolks, room temperature
- 1 3/4 cups plus 1 tablespoon heavy cream
- 1 tablespoon all-purpose flour
- Pinch of fine sea salt
Instructions
- Line a 9-inch springform pan with two large sheets of parchment paper, overlapping them and allowing the paper to extend high above the rim of the pan. Press the paper into the pan to create deep wrinkles; this rustic look is part of the charm.
- Preheat your oven to 400°F (200°C).
- In a large bowl, use an electric mixer on medium speed to beat the room-temperature cream cheese until it is completely smooth and no lumps remain. Scrape down the sides of the bowl.
- Add the sugar and beat until just combined and smooth. Do not overmix at this stage.
- Add the mascarpone cheese and mix until incorporated.
- Add the eggs one at a time, mixing on low speed after each addition until just combined. Mix in the egg yolks.
- In a separate small bowl, whisk together the heavy cream, flour, and salt until the flour is dissolved.
- Pour the cream mixture into the batter and mix on low speed until everything is smooth. Stop mixing as soon as it is uniform.
- Pour the batter into the prepared pan.
- Bake at 400°F (200°C) for 50 to 60 minutes. The top should be deeply caramelized, almost black in spots, and the center should still have a significant wobble.
- Remove the cheesecake from the oven. The center will deflate as it cools, which is normal for this rich, creamy dessert.
- Let the cheesecake cool completely on a wire rack at room temperature for at least 2 hours.
- Chill the cheesecake in the refrigerator for a minimum of 6 hours, or preferably overnight, before serving. For the best texture, let it sit at room temperature for 30 minutes before slicing.
Notes
- Use room-temperature ingredients; this is key for a smooth, lump-free batter.
- Do not use a water bath; this cheesecake relies on high heat for its signature burnt top.
- For a soufflé-like texture, serve slightly warmer (closer to room temperature). For a denser, more traditional cheesecake texture, serve chilled.
- If your oven runs hot, start checking at 45 minutes. The dark top is essential for flavor.
Nutrition
- Serving Size: 1 slice
- Calories: 450
- Sugar: 35g
- Sodium: 150mg
- Fat: 32g
- Saturated Fat: 20g
- Unsaturated Fat: 12g
- Trans Fat: 0g
- Carbohydrates: 30g
- Fiber: 0g
- Protein: 7g
- Cholesterol: 180mg