
Oh, fall baking! It’s such a glorious time, isn’t it? The air gets crisp, and suddenly all we crave are spices like cinnamon and nutmeg wrapped up in something warm. If you, like me, sometimes want that deep, comforting pumpkin flavor but you just don’t have hours to spare, I have something truly special for you. Meet the pumpkin dump cake. This recipe is the hallmark of simple, reliable home cooking—the kind that warms my heart because it requires almost zero fuss but delivers huge flavor. It bridges the gap between a classic pumpkin pie and a rich, buttery cobbler, proving you don’t need complicated steps to create something truly memorable for your table.
- Why This Easy Pumpkin Dump Cake Recipe is Your New Fall Favorite
- Gathering Ingredients for Your Best Pumpkin Dump Cake
- How to Prepare the Ultimate Easy Pumpkin Dump Cake Recipe
- Baking Your Perfect Pumpkin Dump Cake
- Tips for Success with Any Pumpkin Dump Cake
- Serving Suggestions for Your Thanksgiving Dump Cake
- Storage and Make-Ahead Options for this Simple Pumpkin Dessert
- Frequently Asked Questions About the Pumpkin Dump Cake
- Share Your Autumn Comfort Dessert Experience
Why This Easy Pumpkin Dump Cake Recipe is Your New Fall Favorite
When I look at what people truly need in their busy home lives, it’s dependable, delicious recipes that don’t demand equal time. This pumpkin dump cake is exactly that champion! It’s made for weeknights when you need a quick fall dessert or for those big holiday gatherings when every minute counts. Trust me, this is about as close to magic as you can get with just a mixing bowl and a baking dish.
- It’s a genuine dump and bake cake experience. Seriously, just pour and bake!
- It handles like a dream, making it perfect for taking to potlucks or large family meals.
- It’s incredibly forgiving. If you’re new to baking, this recipe will make you feel like a seasoned pro! If you ever need another simple recipe for a crowd, check out my tips for an easy Christmas poke cake, too.
Minimal Prep Time for a Quick Fall Dessert
This is where this dessert really swoops in to save the day. We are talking just 10 minutes of actual prep time here. Ten minutes! You can literally mix up the layers while the oven preheats. It cuts down on cleanup, too, because we’re not using seven different bowls!
The Perfect Pumpkin Pie Cobbler Hybrid Texture
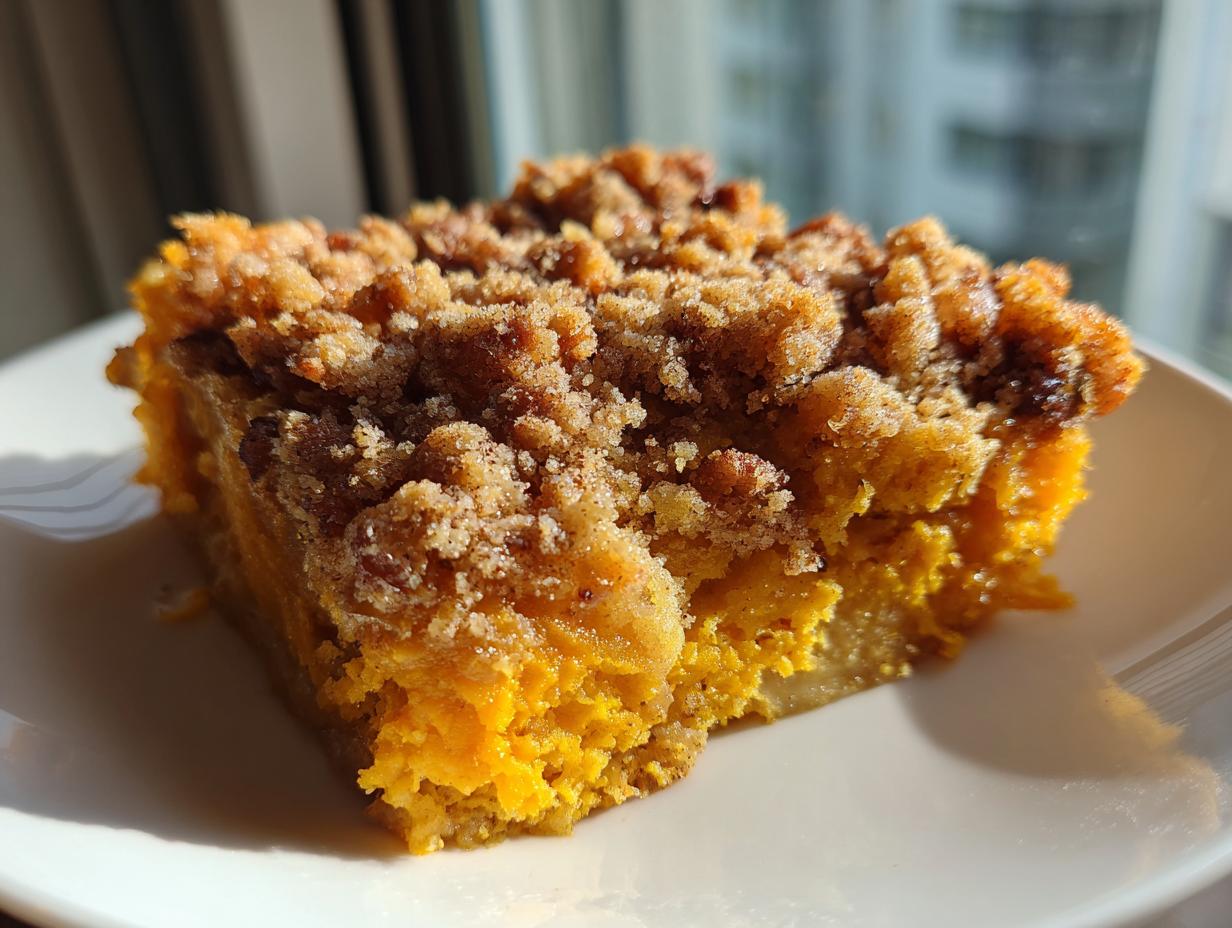
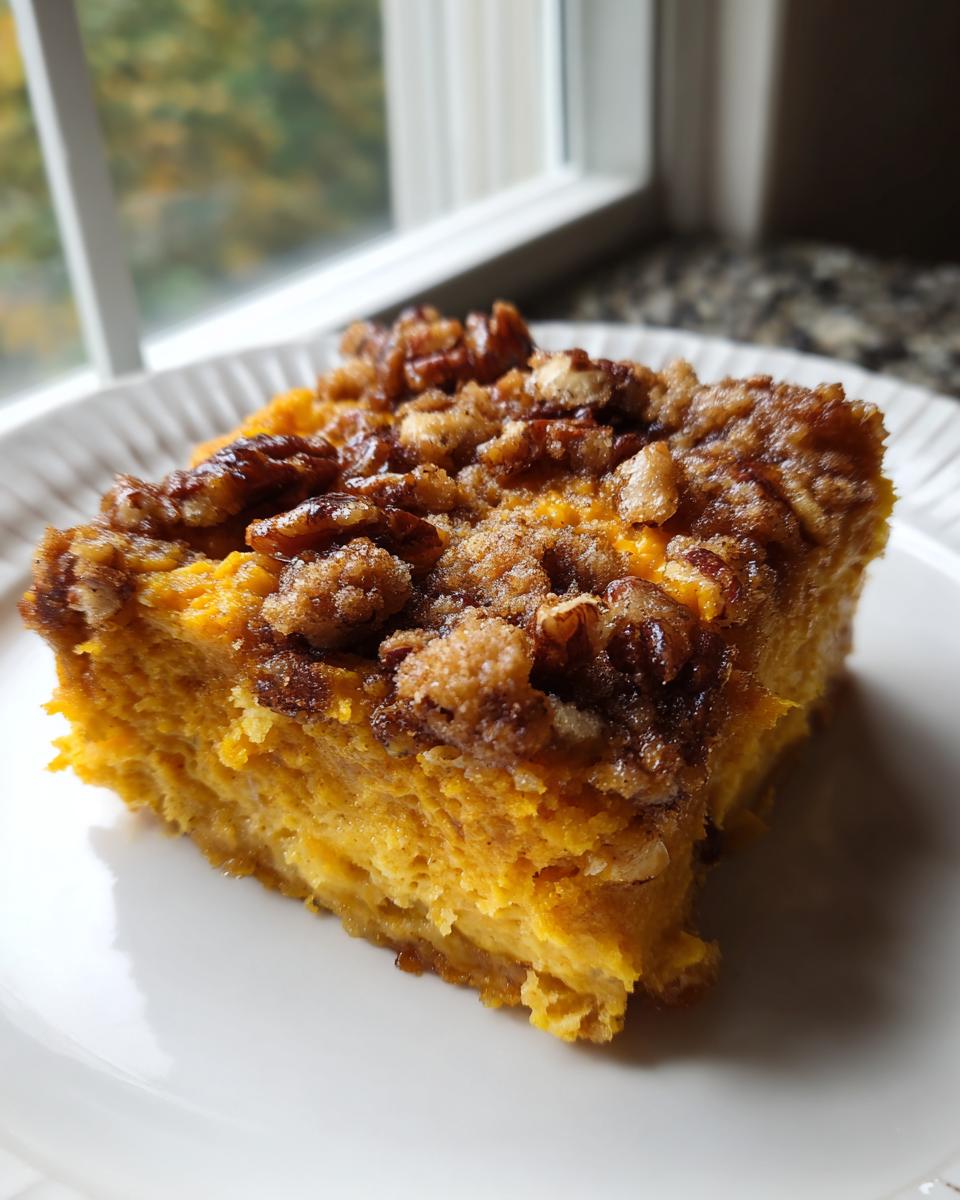
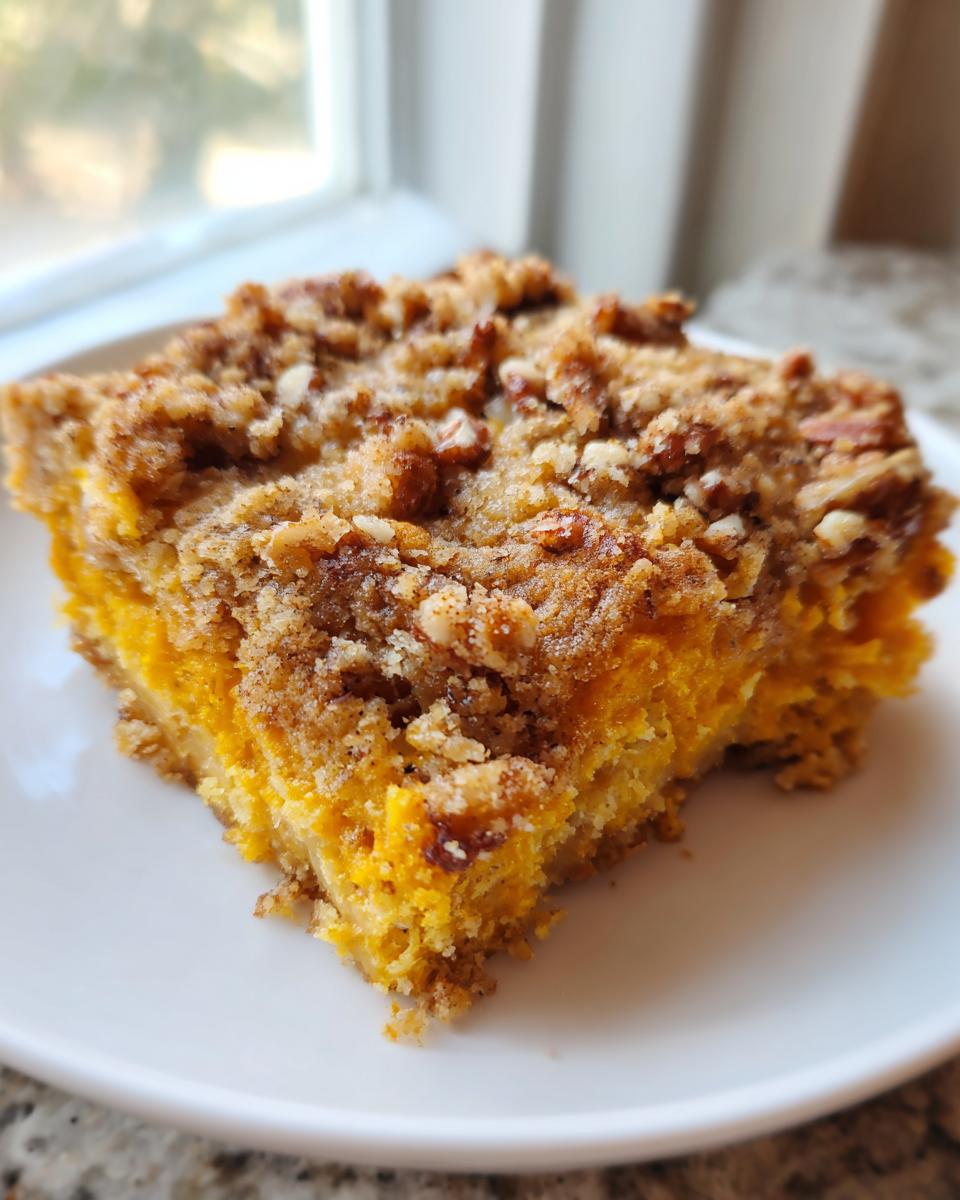
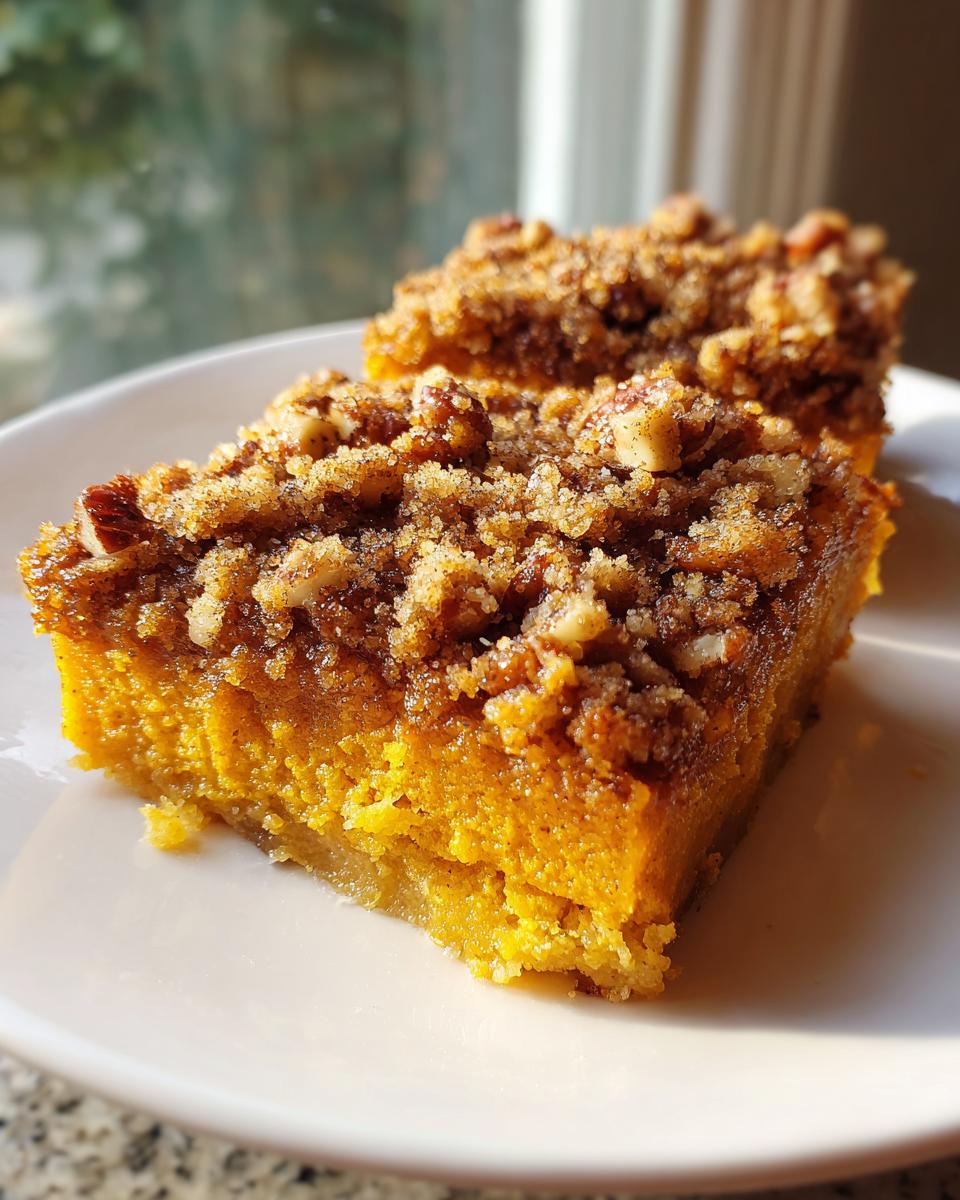
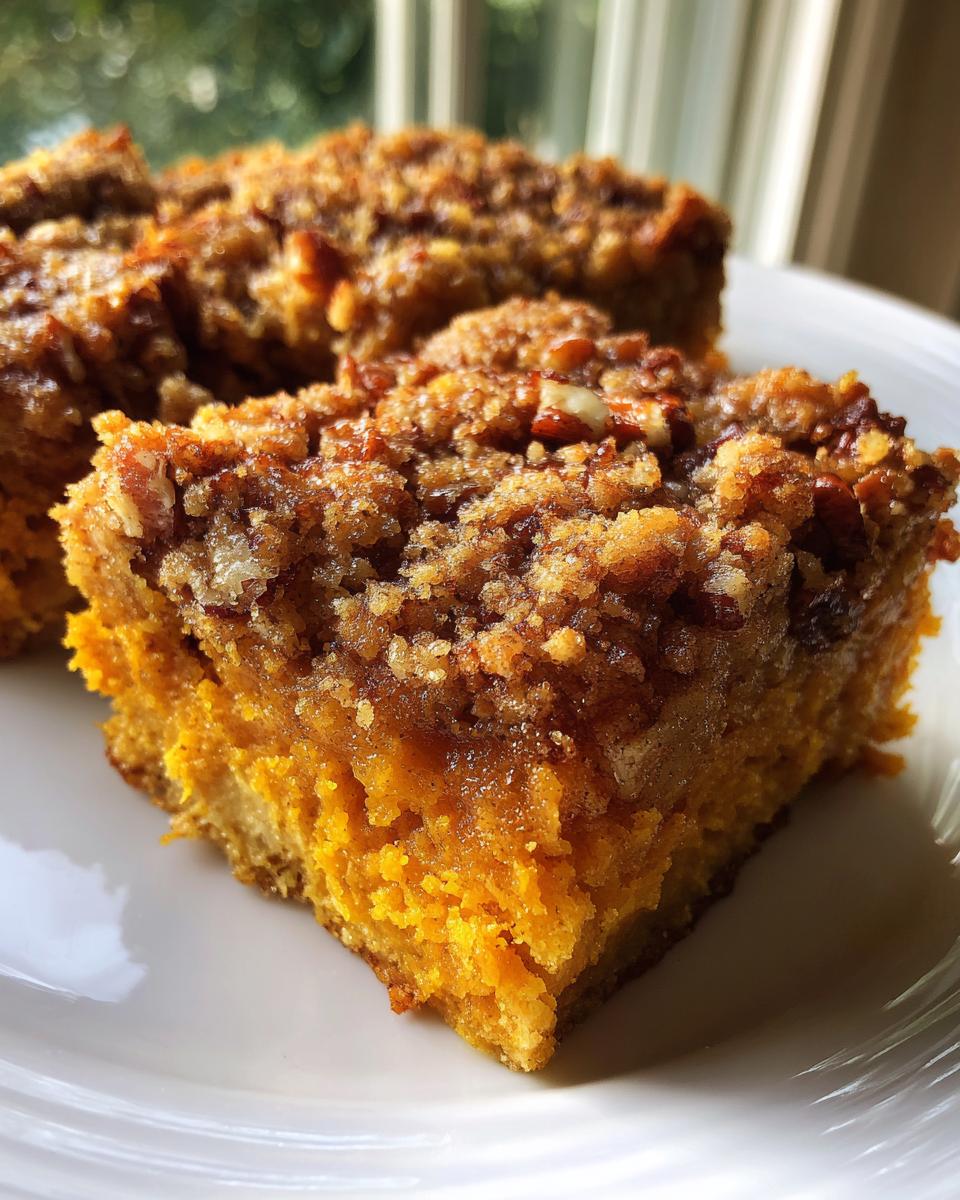
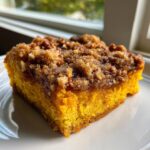
What people love most, and what I think makes this recipe so famous, is the texture contrast. You get that lush, spiced, creamy pumpkin layer recipe down on the bottom, almost like a smooth pie filling. Then, magically, the dry cake mix and melted butter bake up into a golden, slightly crunchy crust. It ends up being that wonderful pumpkin pie cobbler hybrid everyone dreams about.
Gathering Ingredients for Your Best Pumpkin Dump Cake
When I say this is easy, I truly mean it. Look at this ingredient list for our pumpkin dump cake—it’s short, sweet, and uses mostly pantry staples! This is the joy of a dump cake; most of what you need is probably sitting right here in the cupboard already. You don’t need fancy equipment or a long shopping trip to make this rich, comforting fall treat.
We use just six main items, plus a little melted butter. That’s it! Even better, the butter gets drizzled elegantly over the top, which ensures that lovely crunch we talked about earlier. Fewer ingredients mean less fuss for you, which is always Carla’s goal.
Ingredient Notes and Simple Substitutions
Even with a simple recipe, a few details make all the difference, especially if you’re aiming for that perfect texture. My experience has taught me to be very specific about a couple of things:
- Pumpkin Puree: You must use pure pumpkin puree, not the pre-mixed pumpkin pie filling! The filling already has spices and sweeteners added, which throws off the balance of this recipe entirely. We are controlling all the spice ourselves.
- Cake Mix Swap: While the recipe calls for yellow cake mix, feel free to substitute that with spice cake mix if you want an extra punch of flavor. Since you’re using a different mix, you might skip adding extra spice to the pumpkin layer, or just reduce it slightly. This is an easy way to create an easy pumpkin spice dessert variation!
- Nuts are Important: I love pecans here; they toast up beautifully. But if you have a nut allergy or simply don’t like them, you can substitute them with half a cup of toffee bits or even skip them entirely and add a little instant vanilla pudding mix to the dry cake layer instead.
How to Prepare the Ultimate Easy Pumpkin Dump Cake Recipe
Now for the fun part! This is truly where that 10-minute prep time comes in handy. For the best results with this easy pumpkin dump cake recipe, you need to get organized quickly, but remember, we are layering—not mixing everything into one giant, beautiful, or maybe slightly muddy bowl! You’ll want your oven set to 350 degrees F first and make sure you grease that 9×13 dish well. A little grease goes a long way in preventing sticking later on. If you ever need tips for making smaller, non-dessert items efficiently—like my easy sheet pan mini meatloaf muffins—organization is key, and that rule applies here, too!
Creating the Creamy Pumpkin Layer Recipe
In a medium bowl—and this is the only bowl you really need, besides the baking dish—we combine the heart of this dessert. Take your can of pumpkin puree, pour in the whole can of sweetened condensed milk, and then stir in that teaspoon of pumpkin pie spice. You’ll mix this until it’s just smooth and gloriously orange. Don’t over-beat it; we just want everything incorporated into one rich layer to set the stage for everything that comes next.
The ‘Dump and Bake Cake’ Layering Technique
This is the make-or-break step for any dump cake! Take that creamy pumpkin mixture and spread it evenly right across the bottom of your prepared dish. Next, open that box of yellow cake mix—and I mean do not stir it! Just sprinkle the dry mix straight over the pumpkin layer. Then, scatter those pecans right over that dry layer. The final touch to create that wonderful, signature buttery cake topping dessert is to melt your butter and slowly drizzle every last drop evenly over the top of the dry ingredients. Resist the urge to mix anything after this point—it’s going straight into the oven!
Baking Your Perfect Pumpkin Dump Cake
Alright, that beautiful layered dish filled with pumpkin, dry cake mix, and butter is ready for the heat! This is genuinely the best part of any pumpkin dump cake—the waiting while your kitchen starts smelling like the coziest autumn hug imaginable. Since we’ve done all the work layering already, this part is truly no fuss pumpkin baking. You don’t need to babysit this cake at all; it just needs a steady, moderate bake.
Make sure your oven is fully preheated to 350 degrees F before you slide that dish in. We are looking for about 45 to 55 minutes of baking time. Now, oven temperatures can lie, can’t they? So, always watch the edges! You’ll know it’s getting close when you see those edges bubbling up nicely. That creamy pumpkin underneath is working hard to set up.
The final visual cue is critical for the topping: you want that cake mix layer to turn a gorgeous, even golden brown. If you see some spots getting dark faster than others, that just means your butter drizzle wasn’t perfectly even, but don’t worry! A little unevenness just adds character. If the top seems done but the center is still jiggly, give it another 5 to 10 minutes. If you’re worried about the nuts burning, you can always carefully tent the dish with foil halfway through. See? Easy. For more great advice on easy baking, you can check out this guide on how to make a pumpkin dump cake.
One last thing before you pull it out: let it rest! I know the smell will tempt you, but give your cake at least 15 minutes on the counter before you even think about serving. This allows that creamy bottom layer to firm up just enough so it holds its shape when you scoop it out. Otherwise, you’ll end up with a wonderful puddle, and while a puddle is delicious, we want neat slices!
Tips for Success with Any Pumpkin Dump Cake
Even though this recipe is famous for being nearly foolproof, every seasoned cook—and believe me, I’ve made enough of these to know the quirks!—has a few insider tricks. Sharing these little bits of knowledge is how we build trust in the kitchen, ensuring your pumpkin dump cake experience is perfect every single time, not just the first time.
The main enemy in a dump cake is often moisture management. We want the bottom layer rich and creamy, but we certainly don’t want a soupy mess or a soggy cake topping. Patience is key when dealing with that bottom layer, especially since it’s so pumpkin-heavy.
Here are the things I always check for before I even think about pulling that dish out of the oven:
- The Golden Brown Rule: If the edges are bubbly and the center looks set, but the top just isn’t getting that lovely golden-brown color you want, don’t panic. You don’t need to crank the heat! Just quickly cover the dish loosely with aluminum foil before the edges burn, and give it another 5 to 10 minutes. This protects the pecans and cake mix while allowing the bottom to finish baking through.
- Dealing with the Bottom: If you’re worried about the bottom layer not setting because you stirred the ingredients a little too vigorously the first time, try this: once the cake is out of the oven (after the initial rest!), cover it loosely with foil and let it sit on the counter for a full 30 minutes instead of just 15. This trapped steam helps finish setting the custard-like pumpkin layer perfectly.
- Don’t Skip the Rest! I know I mentioned it before, but I’m saying it again because it’s that important! That 15-minute rest period is crucial for structural integrity. If you cut into it while it’s piping hot, you’ll lose that beautiful definition between the layers. Think of the rest time as part of the cooking process. If you want to make even more complicated desserts that hold their shape better, you might enjoy my instructions on making cream cheese frosting that holds its shape, as stiffness is often key!
When the cake has rested and firmed up, it’s ready to serve warm. That glorious warmth meets the cool topping—perfection!
Serving Suggestions for Your Thanksgiving Dump Cake
The beauty of a great Thanksgiving dump cake is that it tastes wonderful simply scooped right out of the dish. But friends, why settle for wonderful when you can have *spectacular*? A simple topping can take this easy dessert from cozy weeknight treat to the star of your holiday dessert table. After all that minimal effort on your part, you deserve a little flourish!
When I serve this, I always encourage folks to grab whatever they fancy. It’s so rich and warm that it pairs beautifully with something cool, creamy, or slightly tangy. This is how you elevate your dessert game without adding any more stress to your day!
Here are the must-haves I keep on hand when it’s time to serve up this best pumpkin dump cake:
- Vanilla Ice Cream: This is non-negotiable in my house. The contrast between the warm, spicy cake and that cold, creamy vanilla scoop is pure heaven. It makes the entire experience feel richer.
- Whipped Cream: Whether you use the pressurized can (no judgment here!) or you whip up heavy cream yourself with a touch of powdered sugar, a big dollop melts beautifully over the top. It adds necessary lightness.
- Drizzle It: If you made the version without pecans, or you just love extra flavor, a drizzle of caramel sauce or even a thin vanilla glaze over the top turns this into a restaurant-worthy dish. It pairs so nicely with the pumpkin spice.
If you sometimes find yourself needing an impressive, yet easy, beverage companion for your holiday spread, make sure you check out my recipe for the best holiday sangria recipe—it’s another crowd-pleaser that seems complicated but isn’t!
Remember, this cake is served best when it’s still warm from the oven, even after that 15-minute rest. The melt from the ice cream soaks right into that buttery pecan topping, and honestly, that’s the best bite you’ll ever have.
Storage and Make-Ahead Options for this Simple Pumpkin Dessert
Planning ahead is the secret sauce for stress-free entertaining, especially when the holidays roll around! One of the great things about this simple pumpkin dessert is that it is extremely resilient. It travels well, stores easily, and honestly, I think the flavor even deepens a bit by the second day. That’s a win in my book!
Since this has that rich, almost custard-like pumpkin bottom layer, we do need to treat it slightly differently than a standard dry cake when it comes to storage. We want to keep that creamy layer safe and sound, which means refrigeration becomes your best friend after the first day.
If you are cooking for a big group, you can absolutely make this ahead of time. In fact, prepping it the day before Thanksgiving or Christmas means you just have to focus on reheating or serving it warm right before company arrives. For making big batches ahead, I always recommend checking out my recipe for overnight French toast casserole; the make-ahead principle is very similar there!
Here is my straightforward guidance on how long this delightful cake lasts and how to keep it tasting fresh:
- Cover It Tight: Once the cake has cooled completely—and I mean totally cooled, not even warm in the center—cover the entire baking dish tightly with plastic wrap or foil.
- Room Temperature Window: You can safely leave this cake on the counter at room temperature for about a day, covered. Because of the high sugar content, it holds up well for short periods, especially if your kitchen isn’t overly warm.
- Refrigeration is Best: To keep it tasting its absolute freshest for up to 4 days, store it in the refrigerator. The creamy layer stays perfectly set. When you want to serve it, I still prefer it slightly warm, so I usually take it out about an hour before serving to let it take the chill off, or you can pop individual slices in the microwave for about 15 seconds.
- Freezing It: If you have leftovers after a major holiday, yes, you can freeze it! Cut it into individual serving squares, wrap each one tightly in plastic wrap, and then place them all into a freezer-safe container or bag. It lasts beautifully for up to three months, meaning you can enjoy a taste of autumn even in the dead of winter!
Frequently Asked Questions About the Pumpkin Dump Cake
It’s always wonderful to hear from you all, and I know sometimes when a recipe seems this simple, you have questions popping up! That’s perfectly fine; that’s how we learn together. I’ve gathered some of the most common things folks ask me about this fantastic **pumpkin dump cake** recipe. If you have a leftover question after reading these, feel free to send me a note on my contact page! Remember, making an easy pumpkin dump cake recipe should be fun, not stressful.
Can I make a Crockpot Pumpkin Dump Cake?
Oh, absolutely! This recipe is so flexible, which is why I think it’s an ideal quick fall dessert for so many different situations. If you prefer to keep your oven free, especially on Thanksgiving when it’s packed baking pies, the slow cooker is your friend. You just layer everything exactly as described in the recipe—pumpkin layer first, then dry cake mix, pecans, and finally that melted butter drizzled over everything. You do *not* stir the layers, even in the slow cooker!
The times are a little different, of course. For the slow cooker, set it to low and let it cook for about 3 to 4 hours, or if you’re in a real rush, you can try the high setting for about 1.5 to 2 hours. Just keep an eye on the edges to make sure they look bubbly and set. This turns into a wonderful, soft, warm dessert perfect for serving right out of the crockpot.
What is the difference between this and a regular pumpkin cake?
That is a fantastic question, and it gets right to the heart of why we call it a dump cake! A regular pumpkin cake works like any other cake: you mix the wet and dry ingredients until you have a uniform batter, and then you bake it. You rely on baking soda or powder for lift.
With this, we aren’t making a traditional cake batter at all; we are making a layered dessert. The bottom layer is essentially a pumpkin pudding/custard made from the puree and condensed milk. The top layer is the dry yellow cake mix sprinkled on top, which absorbs the butter drizzled over it. When it bakes, the dry mix doesn’t turn into a uniform cake crumb. Instead, those dry pockets bake into a delicious, slightly crisp, sandy crust—that’s the dump and bake cake magic! It’s much denser on the bottom and crumbly on top, which is why some people call it a pumpkin pie cobbler hybrid.
If you love the idea of simple layering, you might also adore my other layered favorite, the pumpkin poke cake, although that one is fully mixed batter first, which is a whole different kind of delicious!
Share Your Autumn Comfort Dessert Experience
Now that you have the details for making this ultra-easy pumpkin dump cake, I truly hope you’ll gather your family around the table to enjoy the warmth and spice of this wonderful dessert.
The heart of Cooking by Carla is connecting over these simple, reliable meals, and that includes sharing what works for you! I put a lot of care into developing recipes like this one—the true spirit of no fuss pumpkin baking—and I absolutely love hearing back from you wonderful home cooks.
Did you use the spice cake mix substitution? Did you serve it with a fancy homemade whipped cream or just plain vanilla ice cream? Please, don’t keep those victories to yourself!
Take a moment to leave a rating and a comment right here on the recipe page. Your feedback helps other cooks who are looking for that perfect, comforting fall treat feel confident trying it out. If you snapped a picture of your golden, bubbly casserole, I would be thrilled if you shared it! You can always reach out to me directly through my contact page as well; I read every single message that comes through.
Creating this easy pumpkin dump cake is about making memories, one scoop at a time. Happy baking, friends!
PrintThe Ultimate Easy Pumpkin Dump Cake with Buttery Pecan Topping
Make this simple pumpkin dump cake for a comforting fall dessert. It combines a creamy pumpkin spice layer with a buttery cake mix and pecan topping, tasting like a mix between pumpkin pie and cobbler.
- Prep Time: 10 min
- Cook Time: 50 min
- Total Time: 60 min
- Yield: 10 servings 1x
- Category: Dessert
- Method: Baking
- Cuisine: American
- Diet: Vegetarian
Ingredients
- 1 (15 ounce) can pure pumpkin puree
- 1 (14 ounce) can sweetened condensed milk
- 1 teaspoon pumpkin pie spice
- 1 (15.25 ounce) box yellow cake mix
- 1 cup chopped pecans
- 1 cup (2 sticks) unsalted butter, melted
Instructions
- Preheat your oven to 350 degrees F. Lightly grease a 9×13 inch baking dish.
- In a medium bowl, stir together the pumpkin puree, sweetened condensed milk, and pumpkin pie spice until fully combined. This is your creamy pumpkin layer.
- Spread the pumpkin mixture evenly into the bottom of the prepared baking dish.
- Sprinkle the dry yellow cake mix evenly over the pumpkin layer. Do not mix it in.
- Scatter the chopped pecans over the cake mix layer.
- Slowly drizzle the melted butter evenly over the top of the cake mix and pecans. You want to moisten the dry mix as much as possible.
- Bake for 45 to 55 minutes, or until the topping is golden brown and the edges are bubbly.
- Let the dump cake cool for at least 15 minutes before serving.
Notes
- Serve this dessert warm with a scoop of vanilla ice cream or a dollop of whipped cream for the best experience.
- For a slight variation, you can substitute the yellow cake mix with spice cake mix for extra flavor.
- If you prefer a crockpot method, layer the ingredients as directed in a greased slow cooker and cook on low for 3 to 4 hours or on high for 1.5 to 2 hours.
Nutrition
- Serving Size: 1 slice
- Calories: 420
- Sugar: 45
- Sodium: 350
- Fat: 24
- Saturated Fat: 12
- Unsaturated Fat: 8
- Trans Fat: 0.5
- Carbohydrates: 50
- Fiber: 2
- Protein: 5
- Cholesterol: 35