

Oh, my dears, let’s have a little heart-to-heart about chicken breast. Are you tired of pulling dry, crumbly white meat out of the oven? I certainly was when I was teaching full-time and needed a reliable weeknight chicken breast that didn’t taste like cardboard. That sad, shrunken piece of poultry? That’s a thing of the past! After thirty years in the classroom, I brought my patience home and perfected the absolute best way to make a baked chicken breast that stays incredibly tender. This method is straightforward, uses just a few pantry spices, and is the one recipe I trust completely when I need a healthy protein that tastes like I worked all afternoon on it.
If you want to know more about my philosophy on simple, trustworthy home cooking, you can read all about my background right here on my About page. Trust me, this foolproof technique will change how you look at dinner forever.
- Why This is the Best Baked Chicken Breast Recipe You Will Ever Need
- Ingredients for Your Juicy Baked Chicken Breast Recipe
- How to Prepare Perfectly Cooked Chicken Breast in the Oven
- Tips for the Most Flavorful Baked Chicken
- Storage and Make Ahead Chicken Dinner Planning
- Serving Suggestions for Your Baked Chicken Breast
- Frequently Asked Questions About Oven Baked Chicken Breast
- Nutritional Estimate for This Healthy Baked Chicken
- Share Your Perfect Baked Chicken Breast Experience
Why This is the Best Baked Chicken Breast Recipe You Will Ever Need
When folks search for a juicy chicken breast recipe, they are really just asking for a promise: that the chicken won’t disappoint after forty minutes in the oven. This is the definition of a foolproof baked chicken! You know, when I was teaching third grade, I needed dinners that wouldn’t fail me after a long day of managing twenty-two energetic kids. Bland? Dry? Absolutely not an option! This particular method for baked chicken breast relies on a few small tricks that make a world of difference between mediocre and marvelous.
I’ve spent years making sure this recipe delivers moist results, whether it’s for a quick lunch or a big family gathering. It’s simple enough for brand-new cooks but dependable enough for a busy Saturday night. For more ideas on quick, reliable meals, swing by my section on simple weeknight dinners.
Key Elements for Tender Baked Chicken
We aren’t using fancy marinades here, just smart technique. There are three non-negotiables for success. First, you must make sure those breasts are the same thickness. Get out that meat mallet—yes, you have to pound them gently! Uneven pieces mean some parts are done while others are totally overcooked.
Second, our simple dry rub does the heavy lifting for flavor. It goes on right after the oil so it sticks beautifully and creates a perfect outside crust.
Finally, and this one trips up so many people: you have to let it rest! Five to ten minutes uncut is mandatory. That resting period lets all those lovely juices redistribute back into the meat fibers. If you skip it, all that moisture just runs right out onto your cutting board, and we certainly don’t want that!
Ingredients for Your Juicy Baked Chicken Breast Recipe
For the very best baked chicken breast, you want quality basic ingredients. We keep this list short so you can get cooking fast! You’ll need four pieces, about six ounces each, which is a perfect size for meal time. Don’t skimp on the fresh olive oil; it helps the seasoning cling on beautifully.
- 4 (6 ounce) boneless, skinless chicken breasts
- 1 tablespoon olive oil
- 1 teaspoon salt
- 1 teaspoon black pepper
- 1 teaspoon paprika
- 1 teaspoon garlic powder
- 1/2 teaspoon onion powder
- 1/2 teaspoon dried oregano
That mix right there is our famous simple chicken breast seasoning. It’s easy, flavorful, and works like magic every single time!
How to Prepare Perfectly Cooked Chicken Breast in the Oven
Alright, now that we have our ingredients ready, let’s get these beauties into the oven! This isn’t just any method; this is how you nail a baked chicken breast every single time, resulting in that fast, flavorful meal we all need on a busy day. We’re aiming for quick oven chicken that doesn’t sacrifice texture for speed. If you find you have amazing drippings after the resting period, you can whisk up a quick sauce using my recipe for easy chicken gravy without drippings, but honestly, resting it is half the magic!
Step 1: Oven Prep and Chicken Uniformity
First things first, crank that oven up to 400 degrees Fahrenheit. Get your baking dish ready—I like to use parchment paper because clean-up is my favorite activity, honestly! Now, look at your chicken breasts. If one end is plump and the other is thin, you’re setting yourself up for failure. Use the flat side of a meat mallet or even a heavy rolling pin and gently pound the thicker parts until the whole breast is roughly the same thickness. This makes sure everything finishes cooking at the same time! Nobody wants to be picking through overdone edges.
Step 2: Creating the Simple Dry Rub
Grab a tiny bowl and mix up all those dry spices we listed: salt, pepper, paprika, garlic powder, onion powder, and oregano. Stir it really well with a teaspoon until everything is nicely combined into your simple dry rub. You want all those flavors marrying together before they hit that chicken. This small step prevents you from ending up with a patch of just salty chicken or just dusty paprika chicken later on.
Step 3: Seasoning and Baking the Baked Chicken Breast
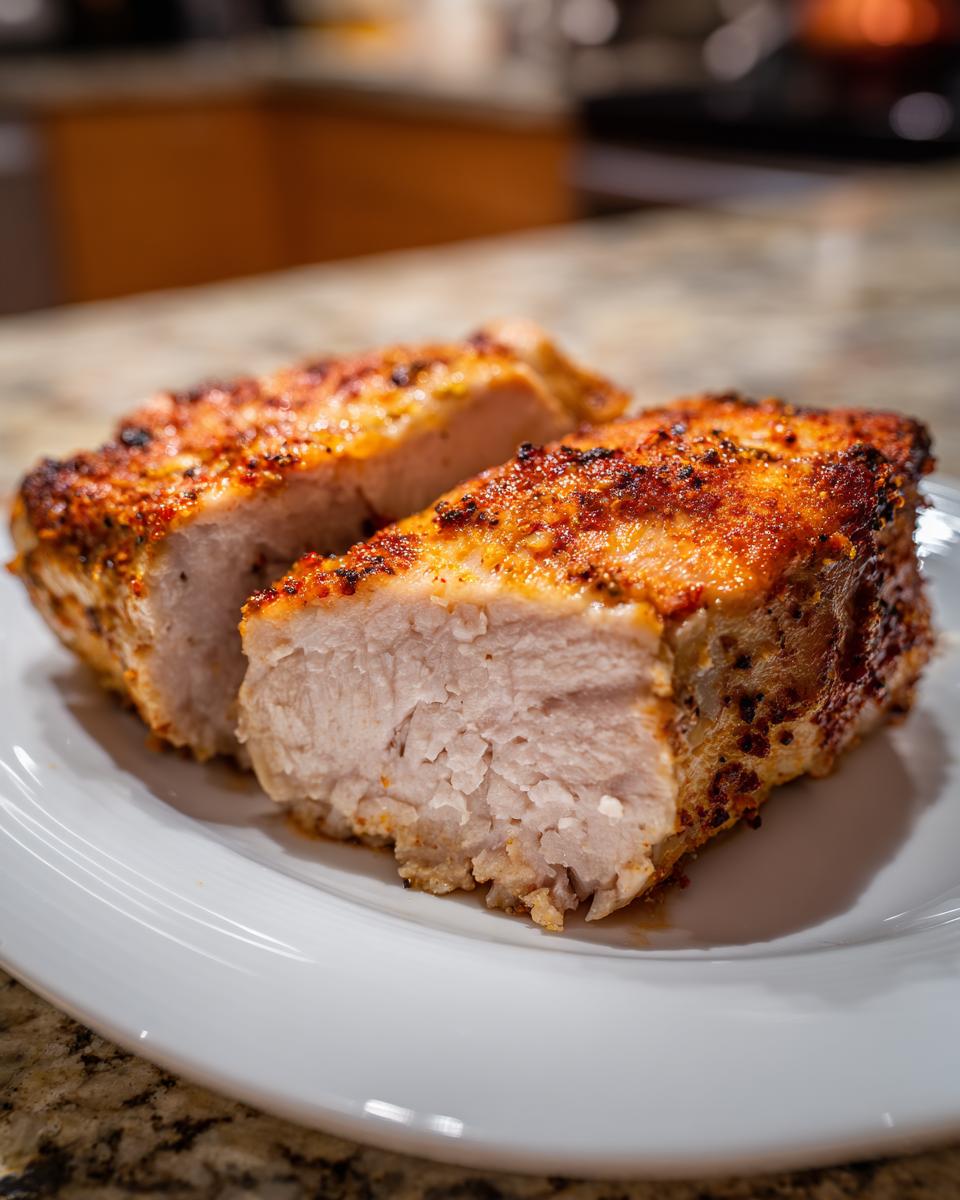
Take your boneless, skinless beauties and lightly drizzle that olive oil all over them. Rub it in gently so the whole surface is coated. Now, sprinkle that dry rub mixture generously and evenly over every side of that baked chicken breast. Place them in your prepared dish, giving them a little breathing room if you can. They go into the 400-degree oven for 20 to 25 minutes. Don’t stray far—we want to keep this on the quick side!

Step 4: Checking Temperature and Resting
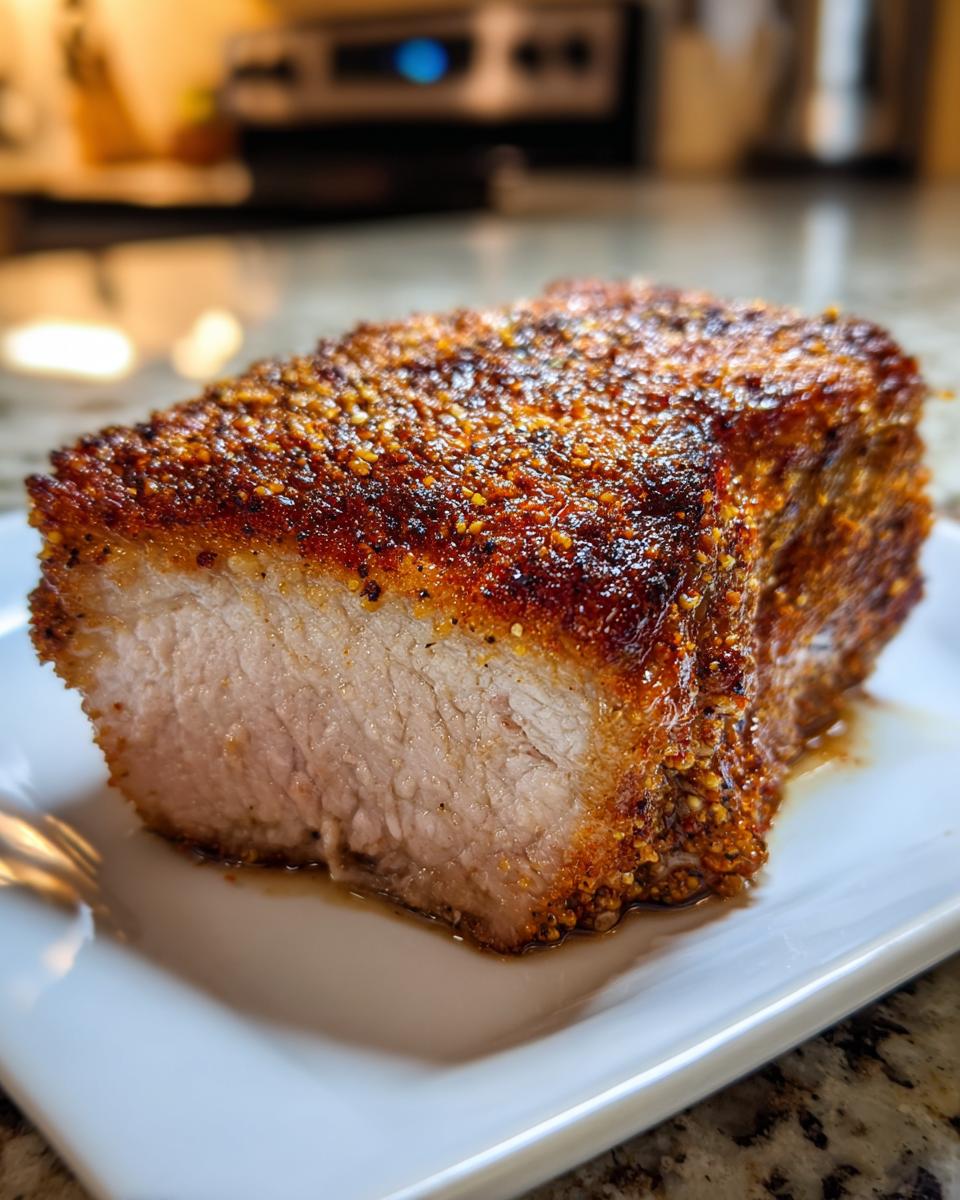
This is where we separate the pros from the nervously guessing cooks! You must use a meat thermometer. Stick it right into the thickest part; we are looking for exactly 165 degrees Fahrenheit. Pull them out *immediately* when they hit that number. Then comes the hardest part: you have to let them sit! Tent them loosely with foil and let them rest for a solid 5 to 10 minutes. This resting period is what locks in the juices, giving you that perfect, sought-after moist chicken breast in oven result. If you skip it, all that wonderful moisture runs away!
Tips for the Most Flavorful Baked Chicken
You’ve got the basic method down, which is fantastic for a reliable healthy baked chicken! But maybe you want to take this baked chicken breast up a notch, or perhaps you need to switch things up for your Tuesday night meal rotation. I never make the same thing twice unless I absolutely have to, so here are a few ways I tweak my **weeknight chicken breast** recipe to keep things exciting without losing that essential tenderness.
Moisture Boost Options: Brining or Butter
If you have just 30 minutes extra, a quick brine makes a huge difference. Just dissolve about a tablespoon of salt into a cup of cool water, give your chicken a quick 30-minute soak, rinse it off, and pat it super dry before seasoning. That short bath relaxes the fibers and holds moisture deep inside!
Alternatively, if you’re leaning toward a richer flavor, try my garlic butter trick. About halfway through the baking time—say, when you peek in at the 12-minute mark—brush a little melted butter mixed with some fresh minced garlic right onto the tops. That brings you close to a lovely restaurant flavor profile, just like some of those tasty ones you see online, such as this oven-baked chicken breast idea.
Adapting the Simple Chicken Breast Seasoning
The dry rub is robust, but you can absolutely play with it! If you like a tiny bit of heat—and I mean just a whisper—add a pinch of cayenne pepper to the mix. It adds great warmth without making things spicy.
Another simple swap is rotating the herbs. If you used oregano last time, try swapping it out for dried thyme or even a little dried rosemary the next time you make this dish. The salt, pepper, and garlic powder are your anchors, but those last little additions keep mealtime interesting. If you want more reliable flavorful ideas, check out my notes on easy baked ranch chicken for a creamy twist!
Storage and Make Ahead Chicken Dinner Planning
One of the things I love most about this very simple protein is how perfectly it transitions into leftovers. As a teacher, planning ahead for lunches was critical, and this turns into excellent meal prep chicken breast that requires almost zero effort later in the week. This is truly a low-effort, high-reward situation!
The most important rule here is patience. You cannot put hot chicken into an airtight container, or you’ll end up with steam cooking itself and getting rubbery—we want tender, not sad!
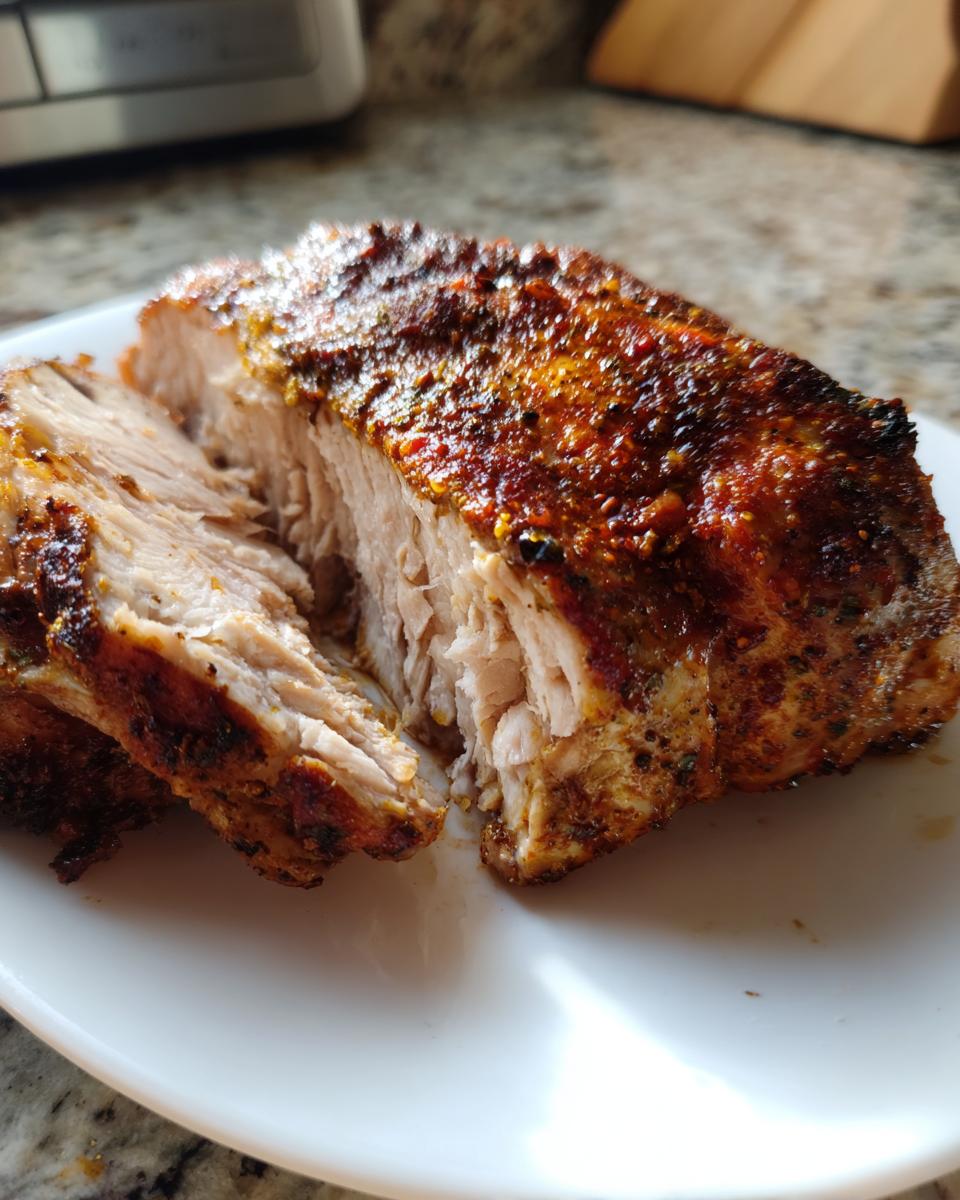
Once your chicken has finished that crucial resting period (remember, 5 to 10 minutes!), let it cool completely on the counter, maybe ten minutes more after resting. Once it’s cooled down to room temperature, go ahead and slice it up. I like to slice mine against the grain; it makes it easier to eat and chewier texture-wise.
Store all that sliced chicken in a good quality, airtight container in the refrigerator. It holds up beautifully for up to four days. This makes grabbing a healthy, protein-packed lunch super fast! If you’re looking for more ideas for quick, healthy fuel that doesn’t take up your whole evening, take a peek at my collection of quick, healthy lunch ideas.
Serving Suggestions for Your Baked Chicken Breast
Now that you’ve mastered the baked chicken breast, the fun part is building a complete and delicious meal around it! Since this chicken is so versatile and beautifully seasoned, it pairs well with almost anything. For a true easy chicken breast dinner that fills everyone up, I always reach for simple sides.
Try it alongside some roasted vegetables. My roasted sweet potatoes are sweet and savory and contrast wonderfully with the savory rub. Or, for something super quick, just steam some broccoli or green beans and drizzle them with a tiny bit of olive oil and lemon. If you’re looking for inspiration on how others serve this chicken, check out this tender chicken idea!
Frequently Asked Questions About Oven Baked Chicken Breast
I know sometimes baking can feel a bit mysterious, and that’s okay! When you’re looking for a baked chicken breast that turns out perfectly moist every time, questions are bound to pop up. I’ve gathered the few things folks ask me most often about this recipe. Let’s clear those up so you can bake with confidence!
What temperature should I bake chicken breast at for the juiciest results?
To get that beautiful exterior sear and seal in the juices right away, we start hot! I always preheat my oven to 400 degrees Fahrenheit. That high heat gets the cooking process going quickly. However, please remember that the final temperature is the real secret to juiciness—you must pull that baked chicken breast out of the oven when the thickest part reads exactly 165 degrees Fahrenheit internally. Pulling it even just five degrees too late can dry things out!
Can I use this recipe for frozen chicken breast?
Oh, sweetie, no, I strongly advise against baking chicken breasts straight from the freezer using this specific method. Because we need that high heat start and because the breasts need to be uniform in thickness, trying to bake a frozen piece just means the outside will burn and dry out before the center ever thaws and cooks properly. If you are in true panic mode and need quick oven chicken, you absolutely must thaw them first. I usually just run them under cool water in a sealed bag until they are pliable.
How long can I safely store leftover baked chicken breast?
This recipe is fantastic for leftovers, but we have to be smart about food safety! Once the chicken has cooled completely after resting, store any leftover baked chicken breast in a shallow, airtight container in the refrigerator. If you keep it sealed up tight, it stays perfectly good—and delicious for topping salads or mixing into wraps—for up to four days. Any longer than that, and I start to get nervous about the texture and safety.
Nutritional Estimate for This Healthy Baked Chicken
I always include this information because I know so many of you rely on these numbers for weekly planning. Because my meals are designed to be healthy baked chicken options that fit into busy lives, it’s good to know what you’re working with!
Remember, these figures are just estimates based on the ingredients listed above—your specific brand of paprika or how much salt you used will change things slightly. But this gives you a wonderful baseline for planning your plate!
- Serving Size: 1 breast
- Calories: 220
- Protein: 40 grams
- Fat: 5 grams (Very little saturated fat!)
- Carbohydrates: 0 grams
- Sugar: 0 grams
- Sodium: Approximately 450 mg (This goes up or down depending on the salt in your rub!)
Isn’t that great? Forty grams of protein for only 220 calories. That’s why this is such a staple in my kitchen after all these years. It just works!
Share Your Perfect Baked Chicken Breast Experience
Now that you have my absolute top-tier, foolproof method for a truly baked chicken breast, I hope you’ll give it a try this week! When you bake this up, please come back and leave me a star rating or tell me in the comments about any seasoning twists you tried. I love hearing from you and seeing how you bring your family’s flair to my recipes. If you ever need to reach out with a question, you can find my contact page right here. Happy cooking, dear ones!
PrintFoolproof Juicy Baked Chicken Breast: The Only Tender Recipe You’ll Ever Need
This is the foundational recipe for perfectly baked chicken breast that stays moist and tender every time. Use this simple dry rub method for a delicious, healthy protein perfect for weeknight dinners or meal prep.
- Prep Time: 10 min
- Cook Time: 25 min
- Total Time: 35 min
- Yield: 4 servings 1x
- Category: Dinner
- Method: Baking
- Cuisine: American
- Diet: Low Fat
Ingredients
- 4 (6 ounce) boneless, skinless chicken breasts
- 1 tablespoon olive oil
- 1 teaspoon salt
- 1 teaspoon black pepper
- 1 teaspoon paprika
- 1 teaspoon garlic powder
- 1/2 teaspoon onion powder
- 1/2 teaspoon dried oregano
Instructions
- Preheat your oven to 400 degrees Fahrenheit (200 degrees Celsius). Lightly grease a baking dish or line it with parchment paper.
- Prepare the chicken: If your chicken breasts are uneven, gently pound the thicker ends with a meat mallet until they are uniform in thickness. This helps them cook evenly.
- In a small bowl, mix together the salt, pepper, paprika, garlic powder, onion powder, and oregano to create your simple dry rub.
- Rub the olive oil over all surfaces of the chicken breasts. Then, evenly coat each piece with the dry rub mixture.
- Place the seasoned chicken breasts in the prepared baking dish.
- Bake for 20 to 25 minutes. Cooking time depends on the thickness of the breast.
- Check the internal temperature with a meat thermometer. The chicken is done when it reaches 165 degrees Fahrenheit (74 degrees Celsius) in the thickest part.
- Remove the chicken from the oven and let it rest on a cutting board for 5 to 10 minutes before slicing. This resting period is crucial for keeping the chicken juicy.
Notes
- For extra moisture, you can lightly brine the chicken in salt water for 30 minutes before seasoning and baking.
- If you prefer a garlic butter flavor, melt 2 tablespoons of butter and mix with 1 teaspoon of minced garlic. Brush this mixture over the chicken halfway through the baking time.
- This recipe is excellent for meal prep. Store cooled, sliced chicken in an airtight container in the refrigerator for up to 4 days.
Nutrition
- Serving Size: 1 breast
- Calories: 220
- Sugar: 0
- Sodium: 450
- Fat: 5
- Saturated Fat: 1
- Unsaturated Fat: 4
- Trans Fat: 0
- Carbohydrates: 0
- Fiber: 0
- Protein: 40
- Cholesterol: 110